
The same makeup looks light at the bathroom sink but heavy in the mirror in your room. One cheek seems darker, and you feel like layering on more color. When that happens, before adding more cosmetics, try reviewing where your mirror is placed and the light falling on your face.
This article introduces steps for setting up the place where you start your makeup. There are five stages: steady the mirror, check the shadows on the left and right, tell details apart from the whole, check your line of sight around your hands, and return to the place where you check the finish. We don't set a distance or lighting brightness that applies to everyone; adjust it to your own posture and the mirror you have.
1. Before moving the mirror, check where you sit and whether the surface is stable

First, set out your cosmetics and sit in the posture you usually do makeup in. Without pushing your face forward or hunching your shoulders, start from a position where you can face the front comfortably. From there, adjust the height and angle of the mirror so that your face is reflected. You don't need to bend only your neck deeply every time to match a mirror on a low desk.
Place the base of a tabletop mirror on a flat, stable surface. If the angle at which to open the stand or how to assemble it is specified, follow those instructions. Rather than propping up a wobbly mirror with a cosmetics box or an unsteady pile of books, start by thinking about changing the surface you use or the position of your chair.
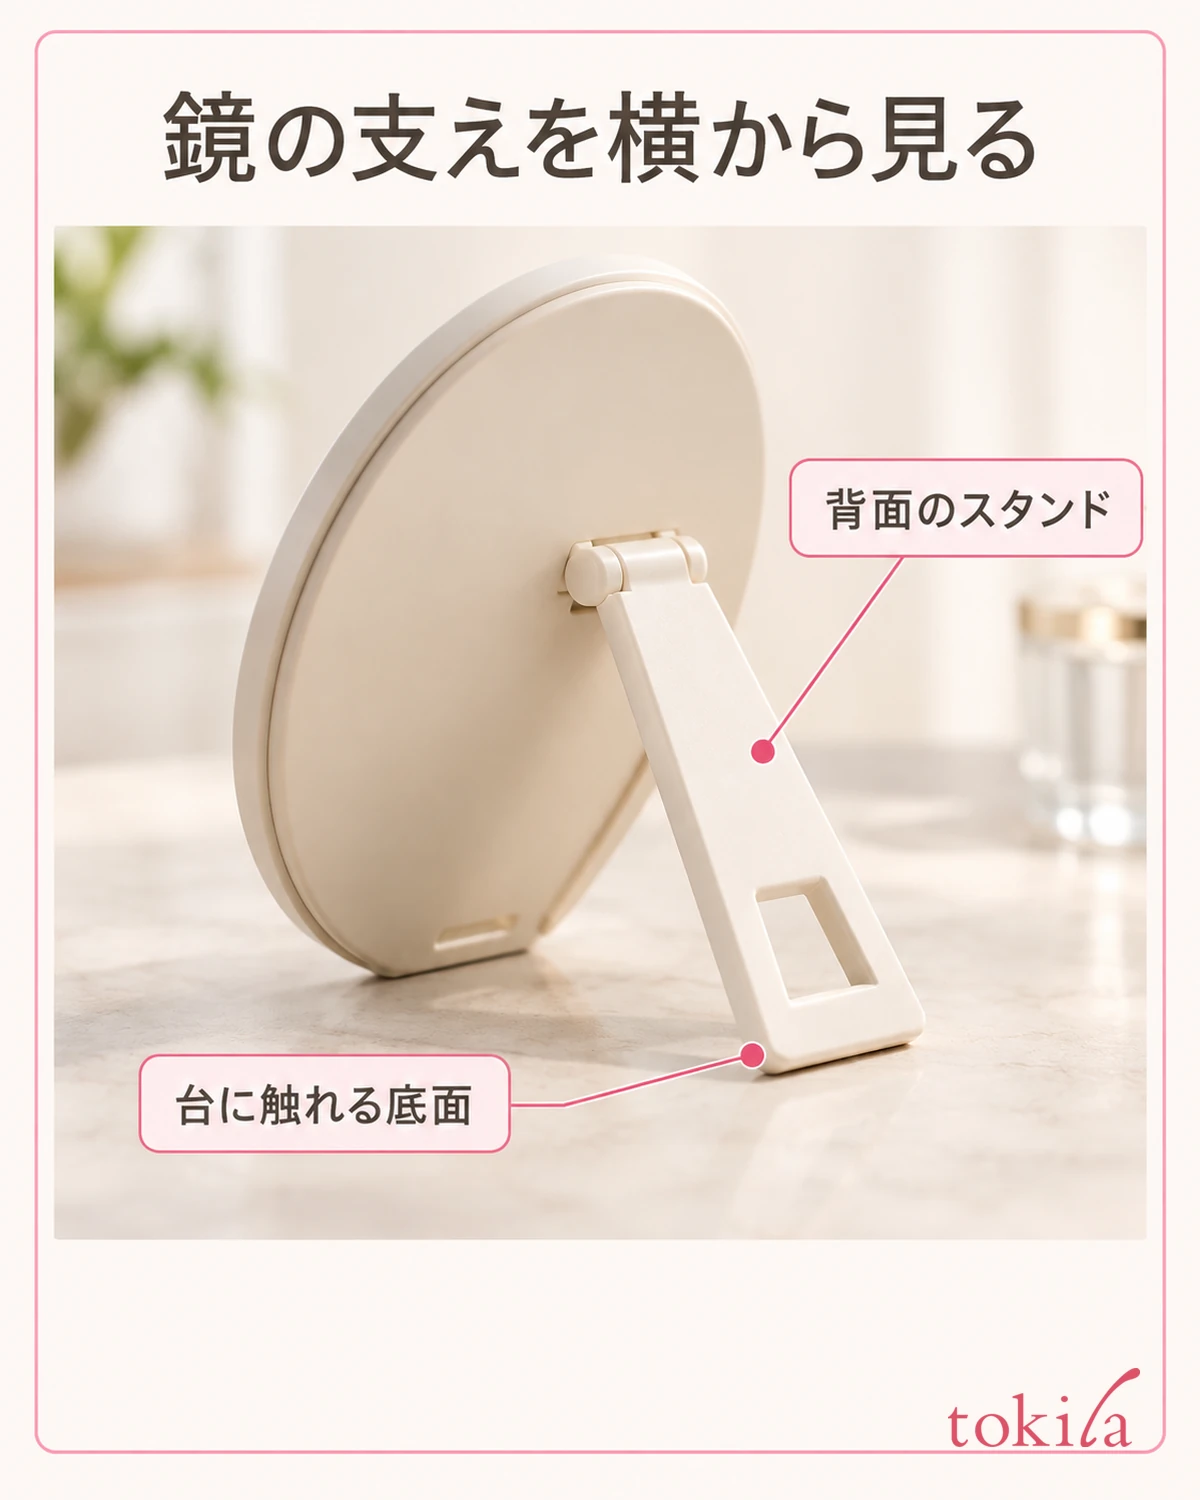
Also check that you won't bump into the mirror when you reach for tools. Don't set it right at the edge of the desk, and move tall bottles lined up in front of the mirror off to the side. For a mirror with a power cord, check that the cord is routed so it won't catch on your arm or chair, and check where the mirror is specified to be used.
If fingerprints or powder on the mirror surface cloud your view, clean it before deciding to add more color. Handling differs for lighted mirrors and anti-fog coated mirrors, so follow the cleaning method for the mirror you have. Don't handle the power part at a wet sink, and don't wipe everything with the same cleaner.
If you can't move a wall mirror, make small changes to where you stand or which way your body faces. If you use a hand mirror as a helper, limit it to checks you can do comfortably even with one hand occupied. For tasks that use both hands, you may choose as the step requires, such as going back to a stable standing mirror. Before buying a new mirror, this is the stage for checking whether you can hold your posture in the place you already have.
Once you've decided where to sit, look in the mirror without applying anything and check that you can move your eyes without rounding your back. If your chin is cut off by the mirror frame, or the surface shakes each time you reach out, adjust the placement instead of starting in that state in a hurry. Clearing the place you use in the morning in advance is also a way to shorten preparation.
2. Without adding cosmetics, look at the light falling on both sides of your face

Without holding any tools, look at both sides of your face at the same time, facing forward. Check where the shadows are: only one cheek is dark, there is a deep shadow beside the nose, it is hard to see under the chin, and so on. Rather than blaming all differences between the left and right of your face on the lighting, see whether any parts change depending on the light.
If a window is on one side, change the direction you sit a little and look for a position where light reaches both sides of your face. When only the window behind you is bright and the face reflected in the mirror is dark, that is also a candidate for reviewing the direction of your body and the mirror. Don't make the goal keeping direct sunlight on your face; check in a place without glare.
If only overhead lighting leaves shadows under your eyes or chin, see whether you can supplement it with light from the face side, using hand lighting suited to where you use it or the mirror's light. Adding equipment doesn't always make the light even. Each time you move a light, turn your face back to the front and check how the shadows change.
Here we do not add blush or concealer to the cheeks. If you combine changing the light with adding cosmetics, it is easy to lose track of why the darkness decreased. If you squint because it is too bright, adjust the position or settings rather than making the light stronger. You don't need to stare at the light itself to compare brightness.
If you finish while facing only the bright side, it is easy to overlook the condition of the other side. Decide a front-facing posture relative to the mirror, and confirm that in that posture you can see both cheeks and both eyes. Differences in color or lines that remain even after you adjust the light are treated separately afterward as makeup issues.
Rather than switching two lights at the same time, try one at a time: only the direction you sit, then only the setting of the mirror's light. Making it brighter can make the unevenness of the skin seem to disappear, so don't aim to make everything invisible with light. Look for conditions in which you can calmly observe the boundaries of colors.
3. Separate the full-size check of the whole from the magnifying mirror check of details

At first, find a distance in a 1x mirror where your whole face fits in. Check that you can see from your forehead to your chin and both cheeks at once. If you move so close that only part of your face is reflected, you tend to fixate on a small spot right in front of you and may find it hard to judge the amount you need.
When checking fine boundaries or the tip of a tool, you can move closer to the area you want to see or switch to the magnifying side. However, the distance at which it is easy to see differs by type of magnifying mirror. Check the instructions for your mirror, and don't keep working at a position where the image is blurry or looks upside down.
Even if you find a small patch of uneven color on the magnifying side, you don't need to darken the whole face for that alone. Move the tool away, go back to your whole face at 1x, and see whether it still bothers you at your usual distance. The point is not to give the mirror for details and the mirror for deciding the finish the same role.
For example, after looking at one part of your eyeliner, open your eyes naturally and check both sides. For how to support your hand and adjust when drawing the line, see steps for when eyeliner turns out jagged. Here, we first prepare a place to check from which you can return to your whole face.
With a mirror that has 1x on one side and magnification on the other, put down your tool before turning it and check that the surface is stable. Don't turn the mirror with one hand while holding a thin-tipped tool near your eyes. Even with a mirror without a magnifying side, you can make time during the work to move your tools away and look at the whole. Using a higher magnification is not itself a condition for a good finish.
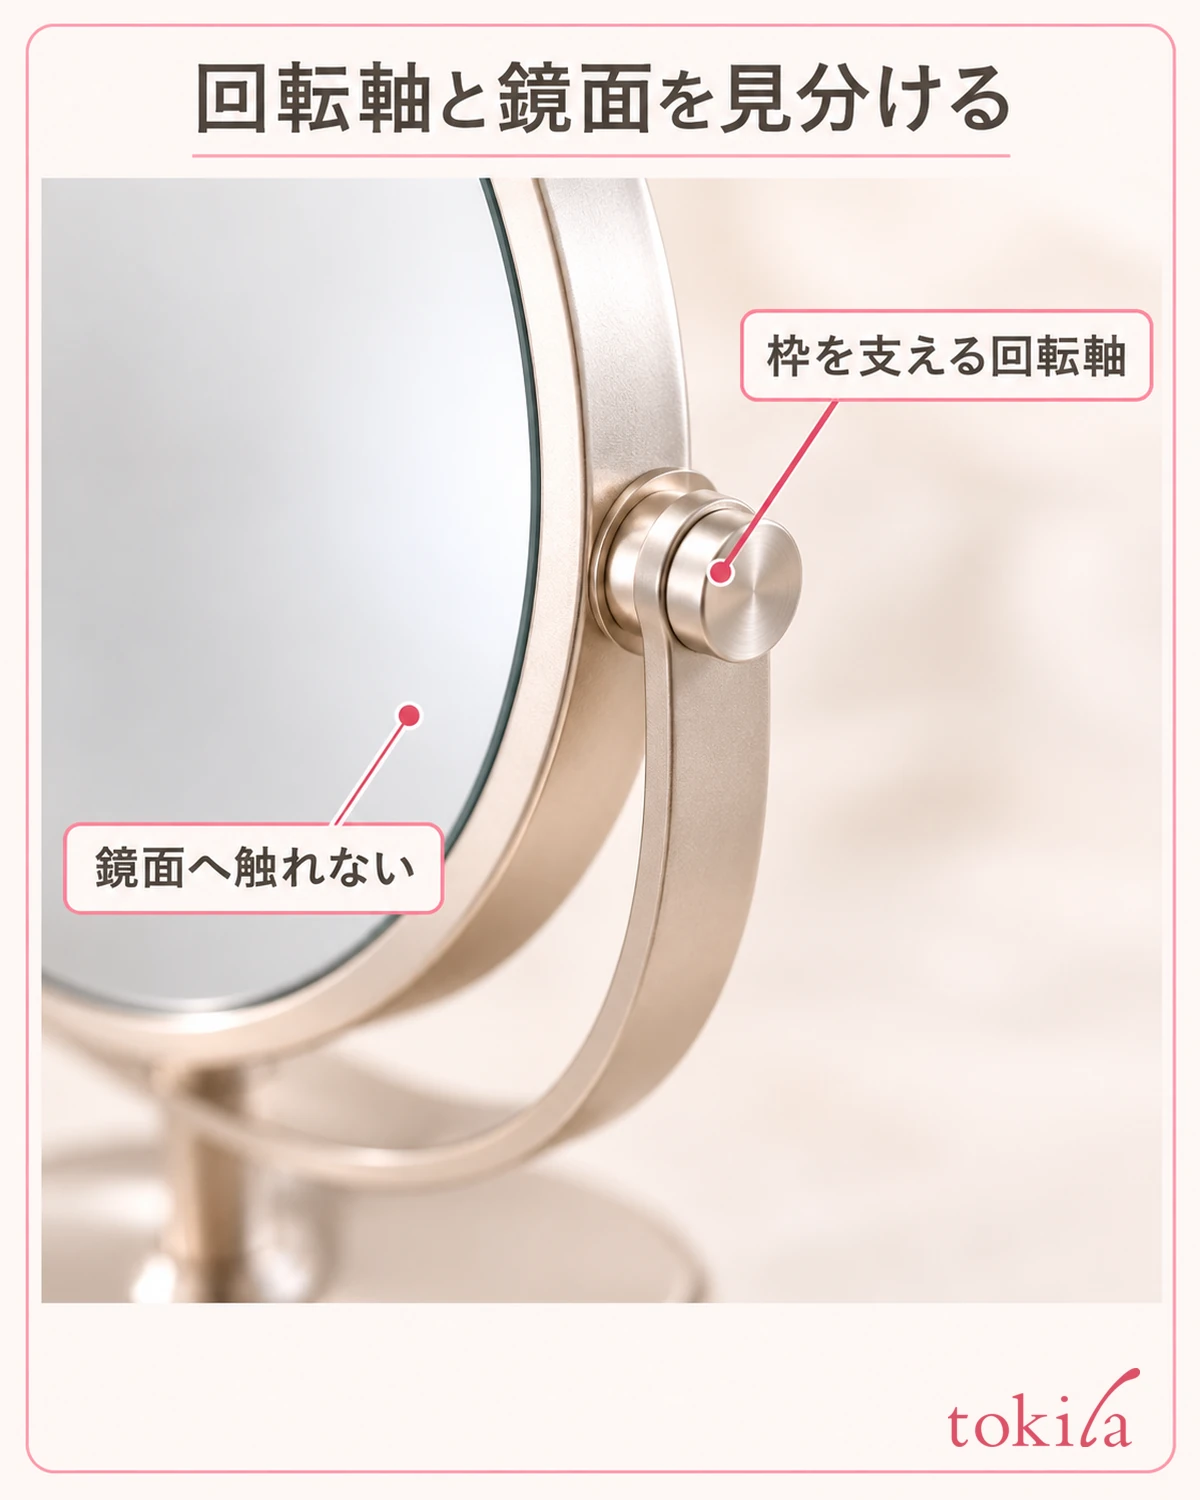
On days when you only have a small hand mirror, look at your forehead, cheeks and mouth in order at the same distance and under the same light, then find a position where both eyes and cheeks fit. If you keep using a mirror that doesn't show the whole face, you may also choose to check only the finish in a wall mirror. You don't need to change how heavy your makeup is again and again between a small mirror and a large one.
4. When you hold a tool, check that your hand and the handle don't block your view

Even if it is comfortable when you are only looking at the mirror, once you hold a brush, the handle or the shadow of your hand can hide the area you want to see. First hold the tip away from your face and look at where in the mirror the hand you actually use blocks the view. Next, adjust the height and angle slightly, and check your view before bringing the tool close.
If you can see the right side but your hand overlaps on the left side, rather than tilting the mirror far back and peering in, try first changing the direction of your body or the mirror a little. Rather than reproducing exactly the same wrist angle on both sides, give priority to being able to see the tip and the area you are working on.
If you have a desk where you can lightly support your elbow or forearm, move your chair to a position where you can use it without tensing your shoulders. However, don't rely on a surface that moves when you put your weight on it or one that is wet and slippery. If you lean your body forward to reach a far mirror, put down your tools and review where you sit.
With thin tools for the eye area, don't search for the position by touching the skin without seeing the tip. If a shadow from your hand remains even when you add brightness, change the positional relationship between your hand and the mirror. On days when it is hard to judge depth from the image in the mirror alone, deciding to stop fine work is also important.
The area you want to see changes depending on the step. You may change the angle of the mirror between looking at your upper eyelid and comparing both naturally open eyes. Rather than trying to finish every step at the same angle, adjust before you apply, and when you check, turn your face back to the front.
Also separate the tool you are using from the place where you put used cotton swabs and tissues. This is to reduce situations where you search the desk while holding a tool near your face. When you move the mirror partway through, first put the tool down with its tip away from your face. If you decide on this order, you can readjust your posture without strain.
5. At the end, put the tools down and check your whole face under a different light too

When you finish your makeup, step away from the magnifying side or the close mirror and look at your whole face at 1x. Move your gaze not just to your forehead and cheeks but also to your jawline, neck and mouth. Instead of staying in a posture facing only one side, check in turn facing the front and turning slightly to the left and right.
The color of the lighting differs between your room in the morning and where you go out, and the look of color and shine changes too. If your mirror lets you adjust the light tone, switch the light as its instructions say; if not, you can check in another bright place. Do not make layering cosmetics until the color looks completely the same under every light the condition for being finished.
When you look near a window as well, avoid glare and direct sunlight and check both sides of your face. For mirrors and magnifying mirrors, read the instructions down to where to store them after use, and don't leave them by a window. Think of the place you chose for looking at light and your everyday storage place separately.
If only the blush looks strong under a different light, don't immediately add to the opposite cheek; go back to your usual mirror and choose one difference that bothers you. If you want to compare the intensity of your mouth and cheeks, you can also check matching lip and cheek colors. Photos may have automatic color correction, so don't decide how heavy your makeup is from an edited photo alone.
For next time, briefly note the changes that made things easier to see this time, such as "turn the chair slightly toward the window" or "move the bottle next to the mirror." Rather than changing the mirror, lighting and cosmetics all at once, trying the one related to the situation that troubled you is easier to reproduce. If you take a state in which the mirror and light are set up as your starting point, it also becomes easier to choose any makeup adjustments you need.
What you want to check is whether anything bothers you given today's plans and your own preferences. If the color only looked slightly different under unusual lighting, it is fine to simply note it as how it looks rather than fix it, and finish there. Checking the whole before putting things away also creates a point at which to stop chasing details and layering on more.



