
You fastened your hair with a hair clip, but before you know it, it has slipped down. Every time you re-fasten it, you twist harder, and then it pulls on your scalp. When that happens, before adding force, look separately at whether the whole clip is moving or only the hair is slipping out. It may be that the amount of hair does not suit the shape of the tool, or that you want to check where you are clamping.
Here we go over how to check when fastening a half-up style, focusing on claw clips, whose left and right teeth open when you pinch the handle. They work differently from barrettes and banana clips. Instructions given for the item you own take priority, and we do not treat any fastening method that never falls out on any hair, or any fixed size, as the one right answer.
1. Separate the whole clip shifting from only the hair slipping out

In a mirror, check the position of the clip body right after fastening and the shape of the hair gathered from the left and right. When you notice something after a while, look from the same direction before pushing it back up. If the body has moved down, it is a shift of the whole clip; if the position is the same but the hair at the side has fallen, it is hair slipping out of the section. Separating them makes it easier to choose what to fix next.
You cannot tell the state at the back just from the side of your face reflected in the front mirror. Use a second mirror or similar to create a position from which the clip body is visible, and check without twisting your neck hard. If you keep photos, a note to check the position from the same direction each time is enough. Rather than deciding by hair type or head shape alone, review the relationship between the tool and the section of hair.
Next, see whether the body has tilted, or whether the left and right teeth are floating open. Treat a tilt to one side separately from a section so thick that it does not fit. How far the teeth close differs by product, so we do not judge it a failure just because the tips on both sides do not touch. Compare the usual construction with the state when it is holding hair.
If only a few short wisps are sticking out, that is a different matter from how the body holds. Trying to push all the hair into one clip can break down even the section you first gathered. Decide whether the hair is bothersome falling over your face or is a wisp you want to leave, and do not widen the area you clip any more than necessary.
If there is pain or a strong pulling sensation, take it off instead of continuing to check for shifting. Support the section of hair in a state where it can be removed safely, and operate the designated handle. If it is caught and hard to remove, check the steps separately from the shifting during wear, using what to check before removing a hair clip.
2. Check the space for the hair and the shape of the teeth

Take it off once and look at the clip without any hair in it. Check not only the outer length but also the length and curve of the teeth, the space inside, and how easy the handle is to hold. Even at about the same length, a different shape changes how the hair sits. It is important not to decide that something suits the way you gather your hair now from words like "for long hair" or "small" alone.
When you look inside, distinguish the thickness of the decoration from the space that actually holds hair. Even with a large decoration, the part that can take hair is not necessarily wide. If you are comparing two clips you own, do not just overlay their outsides; line up the teeth and the inside in the same orientation and see where they differ.
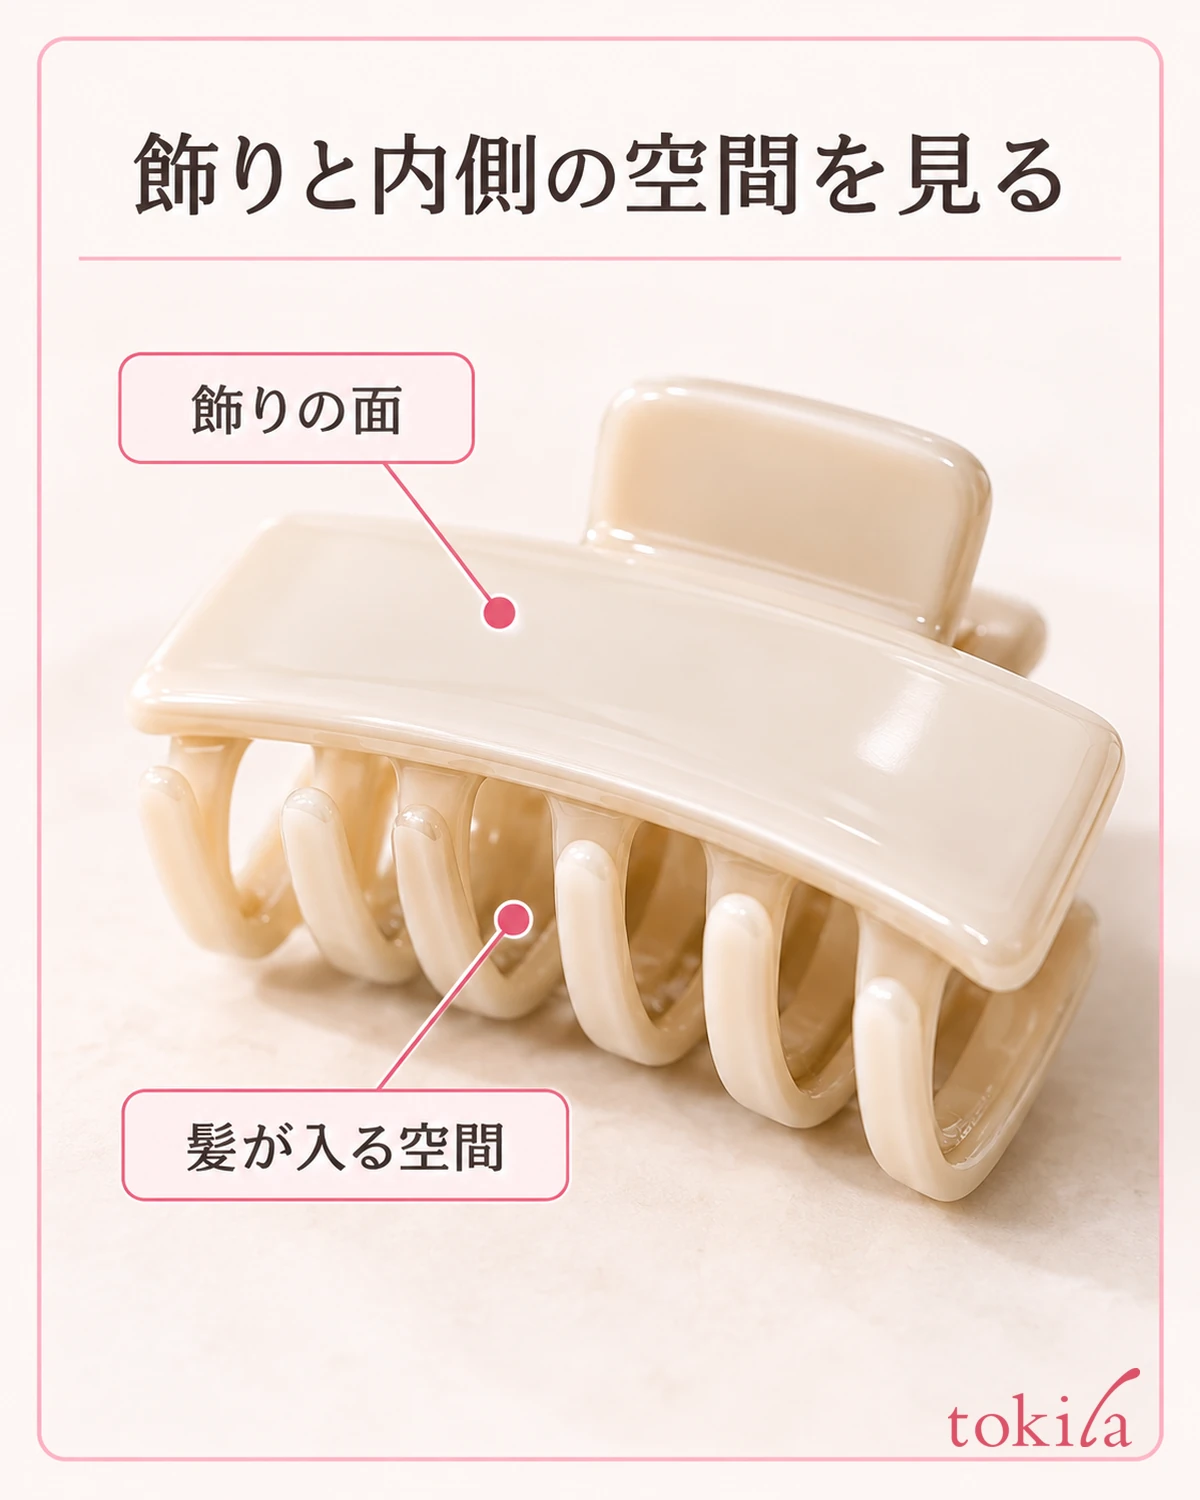
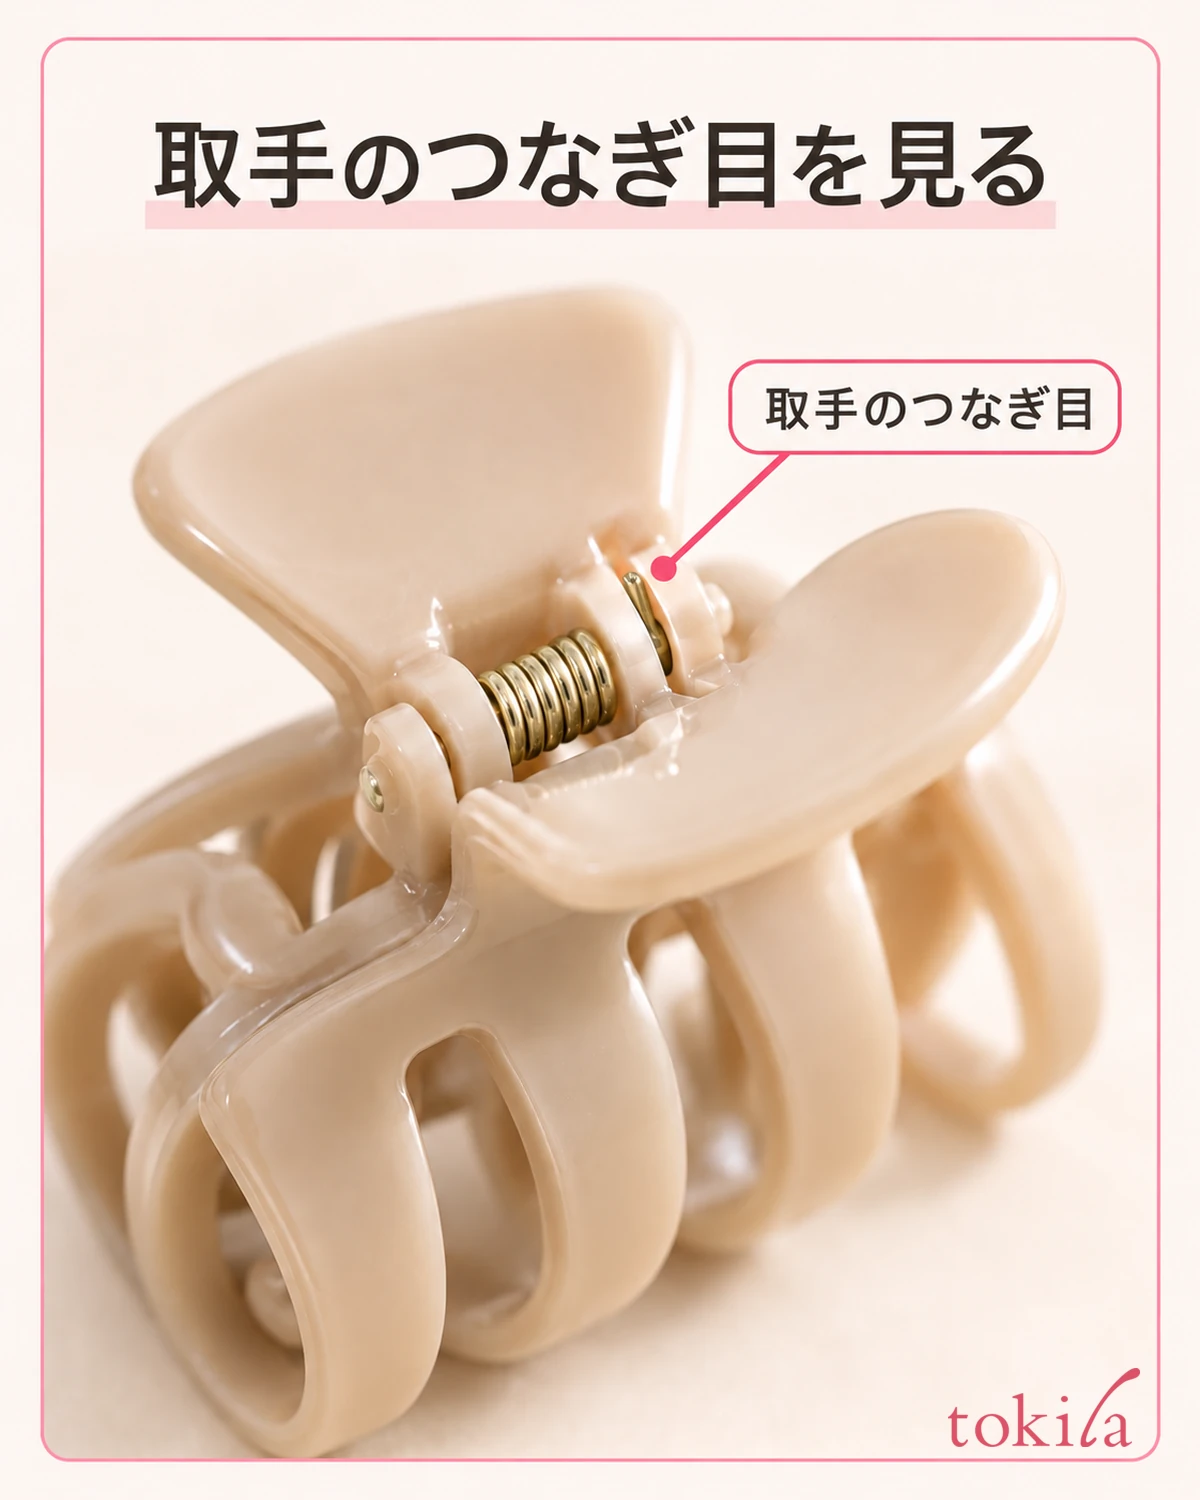
Hold the handle at the place the instructions indicate and move it without strain. There is no need to practice opening it to the maximum. Check for chipped teeth, cracks, wobbling at the joint, or an unnatural misalignment of the left and right, and do not use it if there is any abnormality. Even if you are concerned about the closing force, do not keep using it after bending the spring or reinforcing it with adhesive.
Some have a non-slip surface inside, and some do not. Differences in shape and material can be candidates for choosing a tool, but a non-slip surface does not mean it will never fall. If a part attached to your clip is peeling or lifting, do not press it into your hair as it is; check the appropriate action for that product.
If hair or styling product is stuck on it, clean it according to the care label before using it. Even if it looks like resin, metal or decorations may be combined, so do not wash it with water or wipe it with alcohol across the board. Setting aside anything that needs care and checking the fastening with a tool in usable condition keeps dirt and positioning problems from getting mixed up.
3. For a half-up style, arrange the gathered hair and where you clamp

When fastening all of your hair does not sit well, a half-up style that gathers only the upper hair is also an option. First gather the hair on the left and right toward the back by hand, and separate it from the hair you leave down. The height you take does not have to be strictly fixed at the position of your ears. Match it to your hair length and the area around your face that you want to fasten, and gather hair that reaches the back without strain.
Check that you have not gathered more thickly on one side only, or pulled shorter hair to make it reach. Lightly support the gathered part with one hand and arrange it without pulling the hair taut. If you use a twist, gather within the range of the styling instructions for your item. We do not make it a rule that more twists hold better.
Pinch the handle with your other hand and position the clip near the base of the gathered hair. Do not clip only the ends; check the position where the gathered section and the surrounding hair fit between the left and right teeth without strain, and then close it. This is not an operation of pushing the teeth into the scalp or clamping the scalp to hold it. Do not press hard when you cannot see the back.
If the length of the hair gathered from the left and right differs, the short ends on one side only may stick out beyond the teeth. Do not pull the shorter side further to even them out; either narrow the range you gather at first a little, or change to a form that clips only the hair that reaches. It is an adjustment of deciding again which hair to fasten, before you move the body.
Before you take your fingers off the handle, check that the body is not tilted. Once it is closed, slowly release the hand that was supporting the section. If it slides down right away, rather than pushing it back up as it is, take it off once and check where you clamped. Before clamping the same place hard again and again, review whether the teeth were catching only the ends.
Even if the amount of hair fits, extra hair getting into the handle or the joint becomes a burden the next time you take it off. Before you pull out wisps to finish the style, check around the teeth and the moving parts. Treat styling that loosens the shape a little and pulling out the hair needed for holding as separate things.
4. For hair that does not fit, choose the amount or the tool again

When the body stays wide open and floats once it holds the hair, springs back when you let go, or needs a lot of force on the handle, check by reducing the hair you try to fasten at once. There are ways to change the range you gather, such as switching from a full updo to a half-up. Do not add force to close it, which strains both your hair and the tool.
Conversely, there are also cases where a large clip is attached to a very small section and the whole body slides down. However, adding a lot of hair in this situation is not the first rule. Think about whether you can try another tool whose inner space and tooth shape fit, while keeping the hairstyle you want. If the aim is to fasten a small amount, a smaller shape suited to that use is also a candidate.
Also avoid choosing by material alone, such as "bigger is stronger" or "metal does not slip." Look together at the outer size, the inner shape, the weight of the body and the amount of hair you clamp, and check whether it suits how you normally use it. When comparing shapes in a store, looking at the part that actually clamps the hair, not just the impression of the decoration, makes choosing easier.
Because it slips, there is no need to add oil to your hair, or to apply spray or adhesive to the inside of the clip. If you use a styling product, follow that product's directions and amount. If you pile on types before looking at how the section holds together and where the tool sits, it becomes hard to tell what to change.
If you cannot fasten it without strain with what you have, you may change how you style that day, such as wearing your hair down or switching to another hair accessory. Do not prioritize pulling tightly just to stop the shifting. If tangles remain in the brush you use on your hair, also check how to remove hair stuck in a hairbrush, and tidy the tools you use for preparation first.
5. Check with everyday movements, and pick one thing to change next

After re-fastening, look at the front and back while standing, and then check the state with small everyday movements, such as slowly turning your face to the side or looking slightly down. There is no need to shake your head hard to test whether it comes off. Look not only at whether the body moves but also at places where the scalp is pulled and spots where it presses against your collar.
If it shifts only when you move, look at the position right afterward, take it off, and narrow down to one thing to adjust, such as changing only where you clamp next time. If you change the amount of hair, the way you twist and the size of the tool all at once, it becomes hard to tell why it got easier to use or why it pulled.
If you keep a note, write briefly what you saw, such as "only the hair on the right slipped out," "the whole body slid down," or "it closed without strain when I reduced the section." Do not apply that day's check result as it is to another day or another tool. If your hair length or the range you gather is different that day, check again even with the same tool as last time.
There are also moments when the body hits the things around it, such as when you sit and lean against the back of a chair. If it hits in your usual posture, change the position or the way you gather, and do not put up with being pushed. When removing it, support the section, and take the body away after the teeth have separated. It is also important not to pull it out while closed to keep the hairstyle.
Start the problem of slipping not by looking for a way to fasten it tightly, but by identifying where it moves. Is it the whole clip, or only the hair that came out? Does the section fit, and does the clamping position suit? Check in order, and choose a combination you can use without pain. Do not make up for a damaged tool or excessive tightening with fastening tricks.



