
You put your bar soap back after washing your face, and water has collected at the bottom of the dish. By the next morning the underside has gone soft and is hard to lift off the dish. Before buying a new soap, check three things in order: the surface it sits on, where the water drains out, and where you keep it.
This article covers how to store facial bar soap after use. It is not about how to build a lather or how often to wash, but about the preparation between finishing your wash and your next use. Based on the labels on your soap and dish, it sorts out the roles of the place where you dry it at home and the container you carry it in.
1. Check the soap's storage instructions and the role of the dish
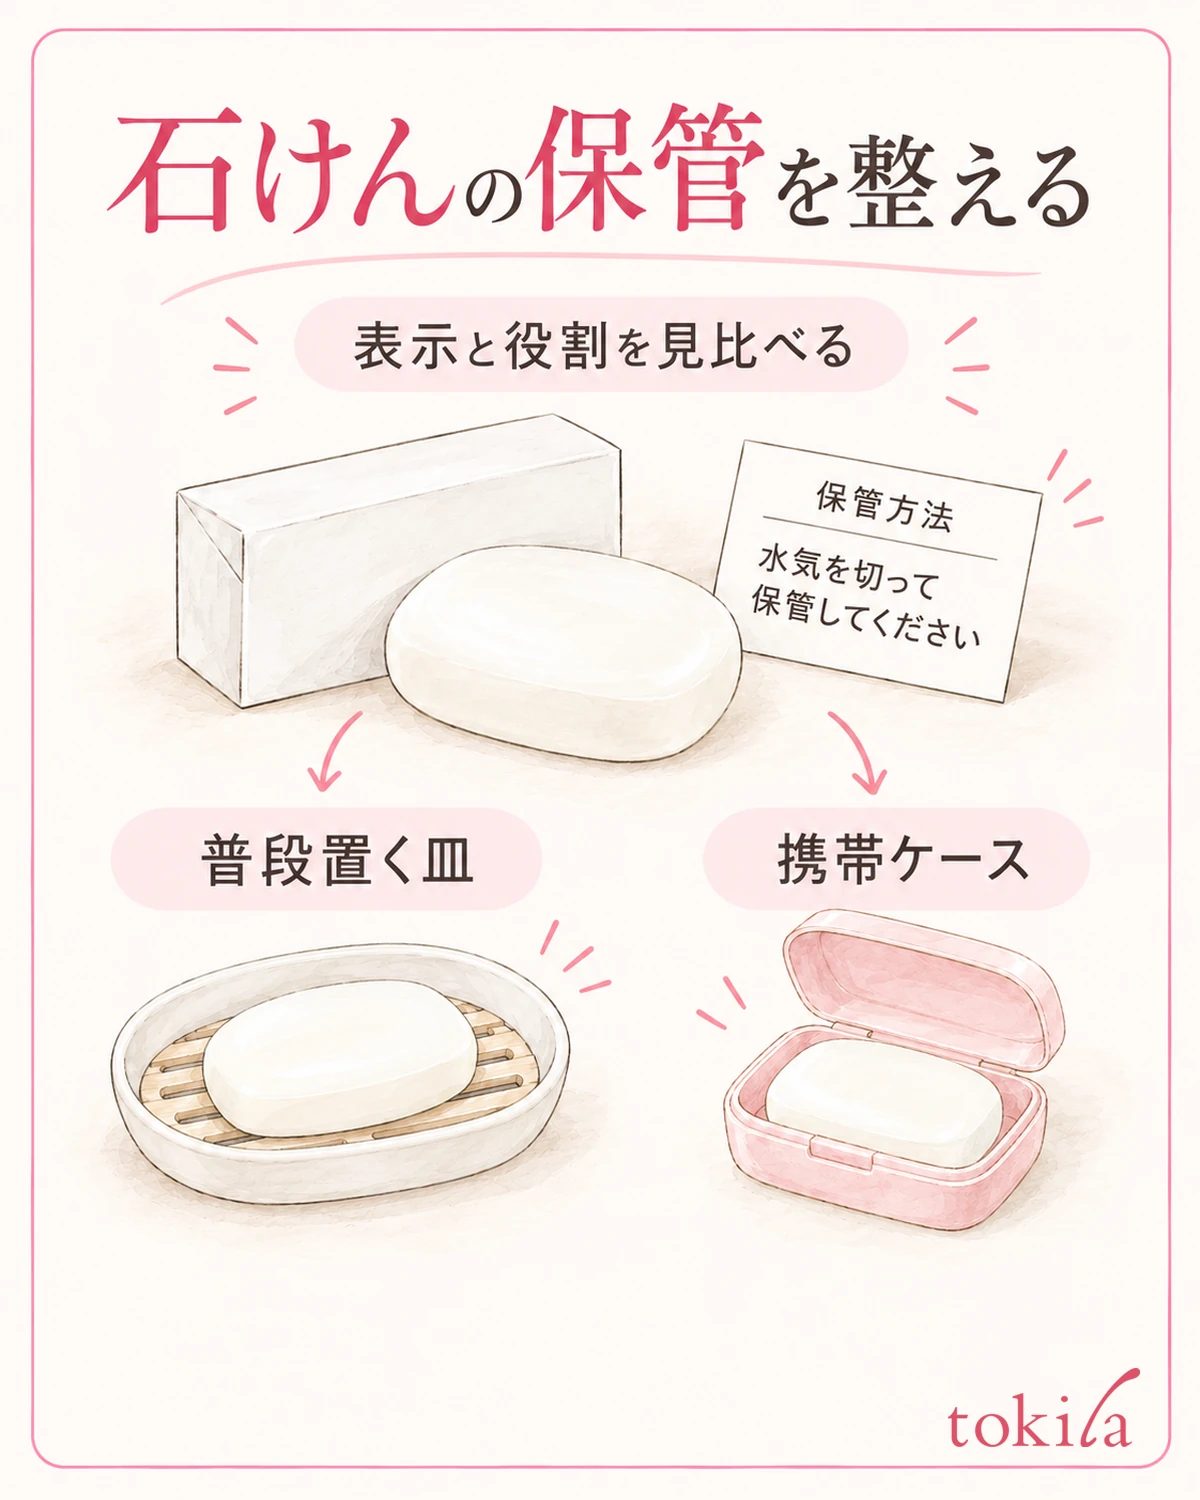
First, read the storage precautions on the soap's packaging or instructions. Check the conditions for your product, such as draining off water and avoiding direct sunlight and high heat and humidity. Do not swap facial soap with laundry or kitchen bar cleansers as if they had the same use, and keep them distinguishable by their original packaging.
Next, look at the dish. What you check depends on whether it is a dish for setting the soap down to dry, or a case with a lid for carrying it. Some travel cases have no drain holes. Do not judge a case suitable for leaving a wet soap for a long time just because the soap fits inside.
If it has a two-part structure, check the upper part that holds the soap and the lower part that catches the water separately. Check the instructions to see whether it comes apart, and do not force any fixed parts. Even if the upper part has holes, water can remain as is if it collects in the lower dish.
When choosing, compare the size of the soap with the width of the surface it sits on. If it rides up over the rim, tilts, or leaves no room for your fingers to pick it up, reconsider how well the shapes match. Fitting when new is not the same as still being supported after it has worn down with use, so also watch for the soap dropping into a dish with wide gaps.
If you put the packaging away, note the product name and storage method together so you can refer to them next time. If you have several soaps, keep each one's instructions matched to it. Do not assume they are the same product just because the scent or color is similar; first set up each soap you use together with its storage place.
Before buying more, also look at how much space you have where you use it. Even if there is room to set the dish down, if there is no space to open the lid or pull out the lower dish, you will have to move things around every time you clean it. Imagining even the spot where you hold it to pour out the water, not only the surface the soap sits on, makes it easier to narrow down the tools you will keep using.
2. Pour out the water in the dish, and check the holes and the space under the soap
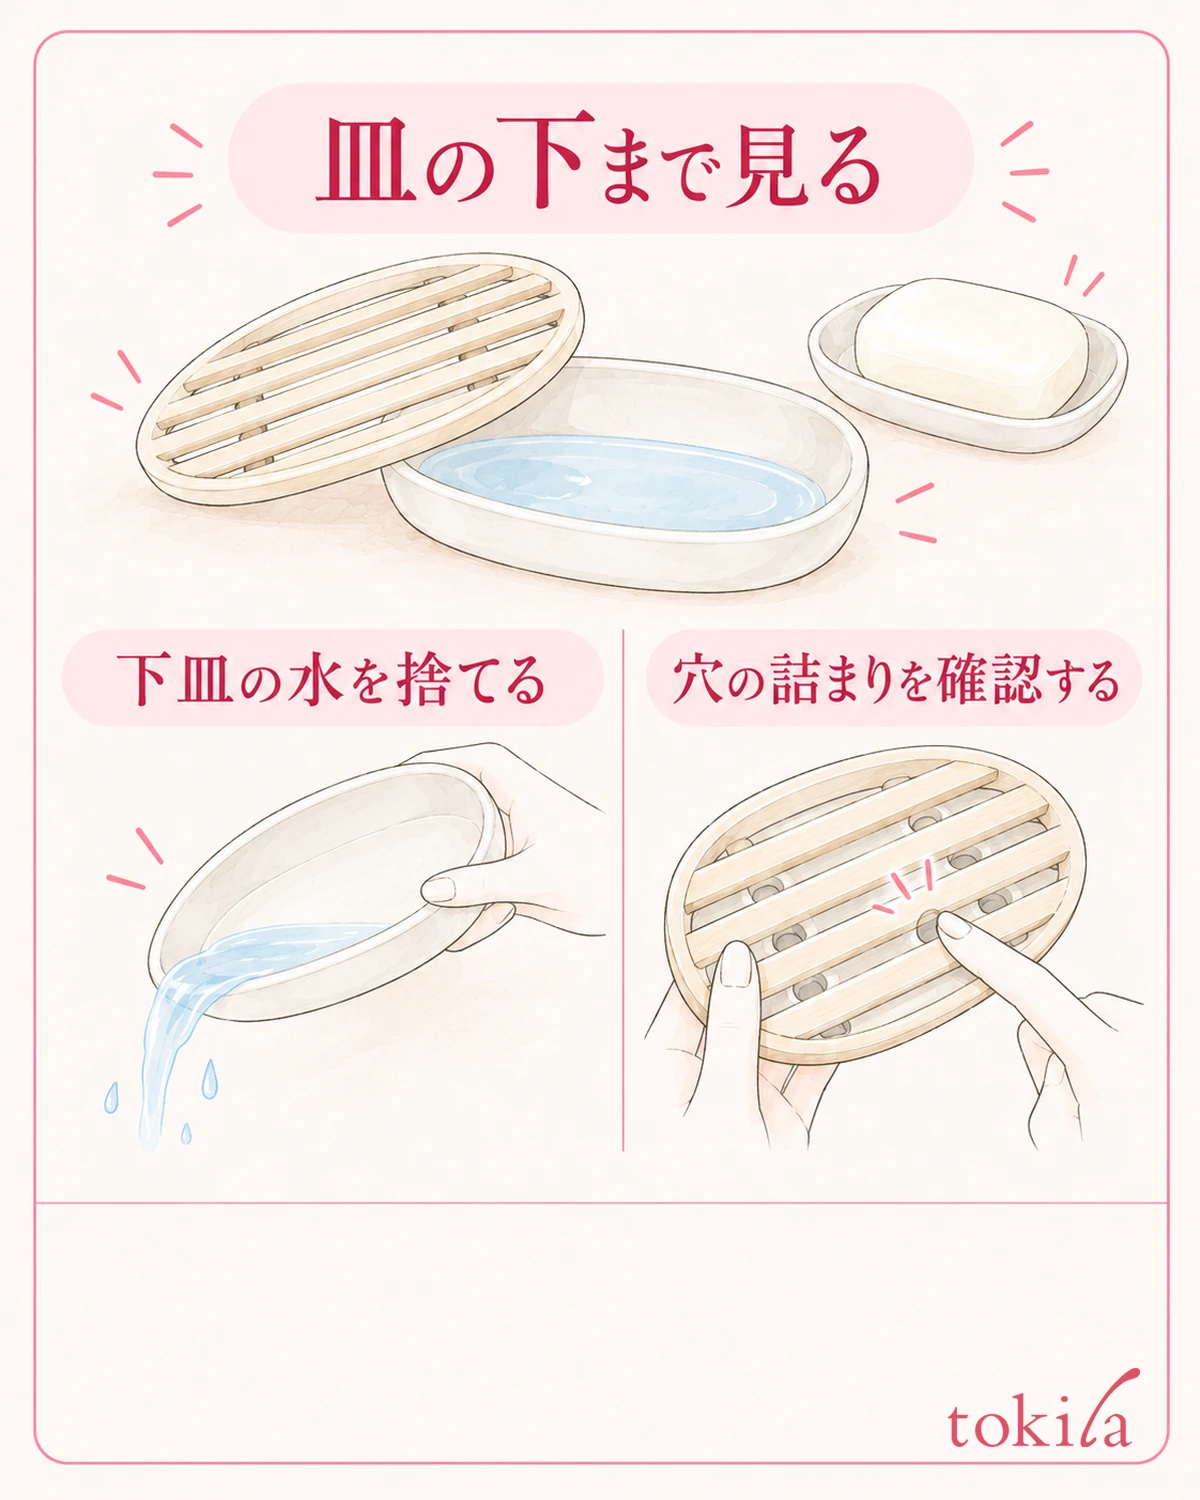
Before putting the soap back, pour out the water that has collected in the dish. If the soap is already on it, move it aside once, following the handling instructions so you do not drop it, and check only the dish. Looking at the lower dish before setting the soap down lets you see where water remains, better than putting the soap back while water is still visible.
For dishes with drain holes or grooves, check whether leftover soap is blocking the outlet. If there are white lumps around the holes, wash and rinse them in a way that suits the dish's material. Do not modify it, such as widening the holes with a needle or scraping with something hard; keep the original structure as it is.
Looking from the side also lets you check whether there is space between the part the soap sits on and the bottom. The gaps in a slatted rest or wire frame are a clue to how the water drains. Some dishes look flat but have a drainage mechanism inside, so do not rank dishes by material or shape alone; compare the instructions with the actual outlet.
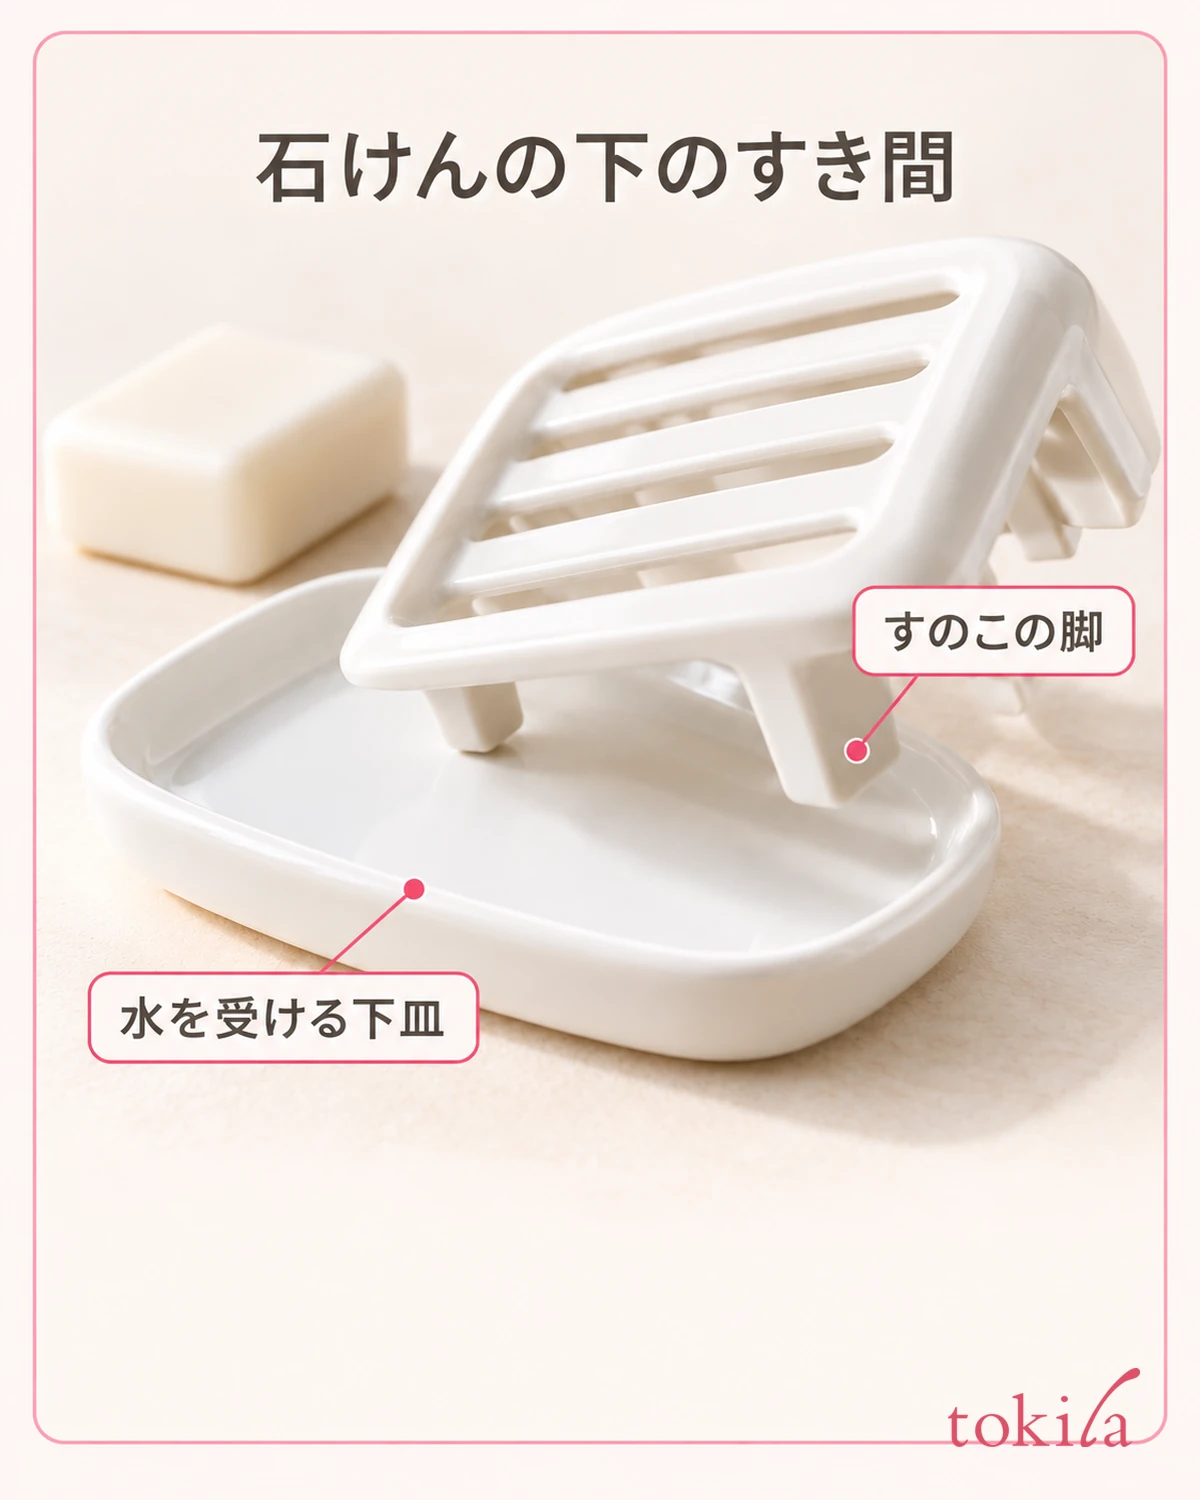
With a two-part dish, put the parts back as they were after pouring out the water below. Do not change to an unstable arrangement, such as turning the upper rest upside down or combining it with parts from another dish. Before setting the soap down, touch the dish lightly to check that it does not wobble and sits in the place you chose.
If you use a sponge or an absorbent rest, check the instructions for how to wash it, dry it, and when to replace it. Do not assume it is dry all the way through just because the surface looks smooth. Whatever the type, it is important to look not only at the soap's moisture but also at the condition of the tool that catches it.
Follow the dish's instructions for when to clean it, and if you find dirt or standing water, do not stack the soap on it and keep using it. For parts that come off, dry off the water after washing and check which way they attach. Rather than taking things apart in a busy morning, decide on a routine: pour out the water when you finish washing your face, and tidy up the tools at a calmer time when you can wash them properly.
3. After use, drain the water and place it where water is less likely to reach
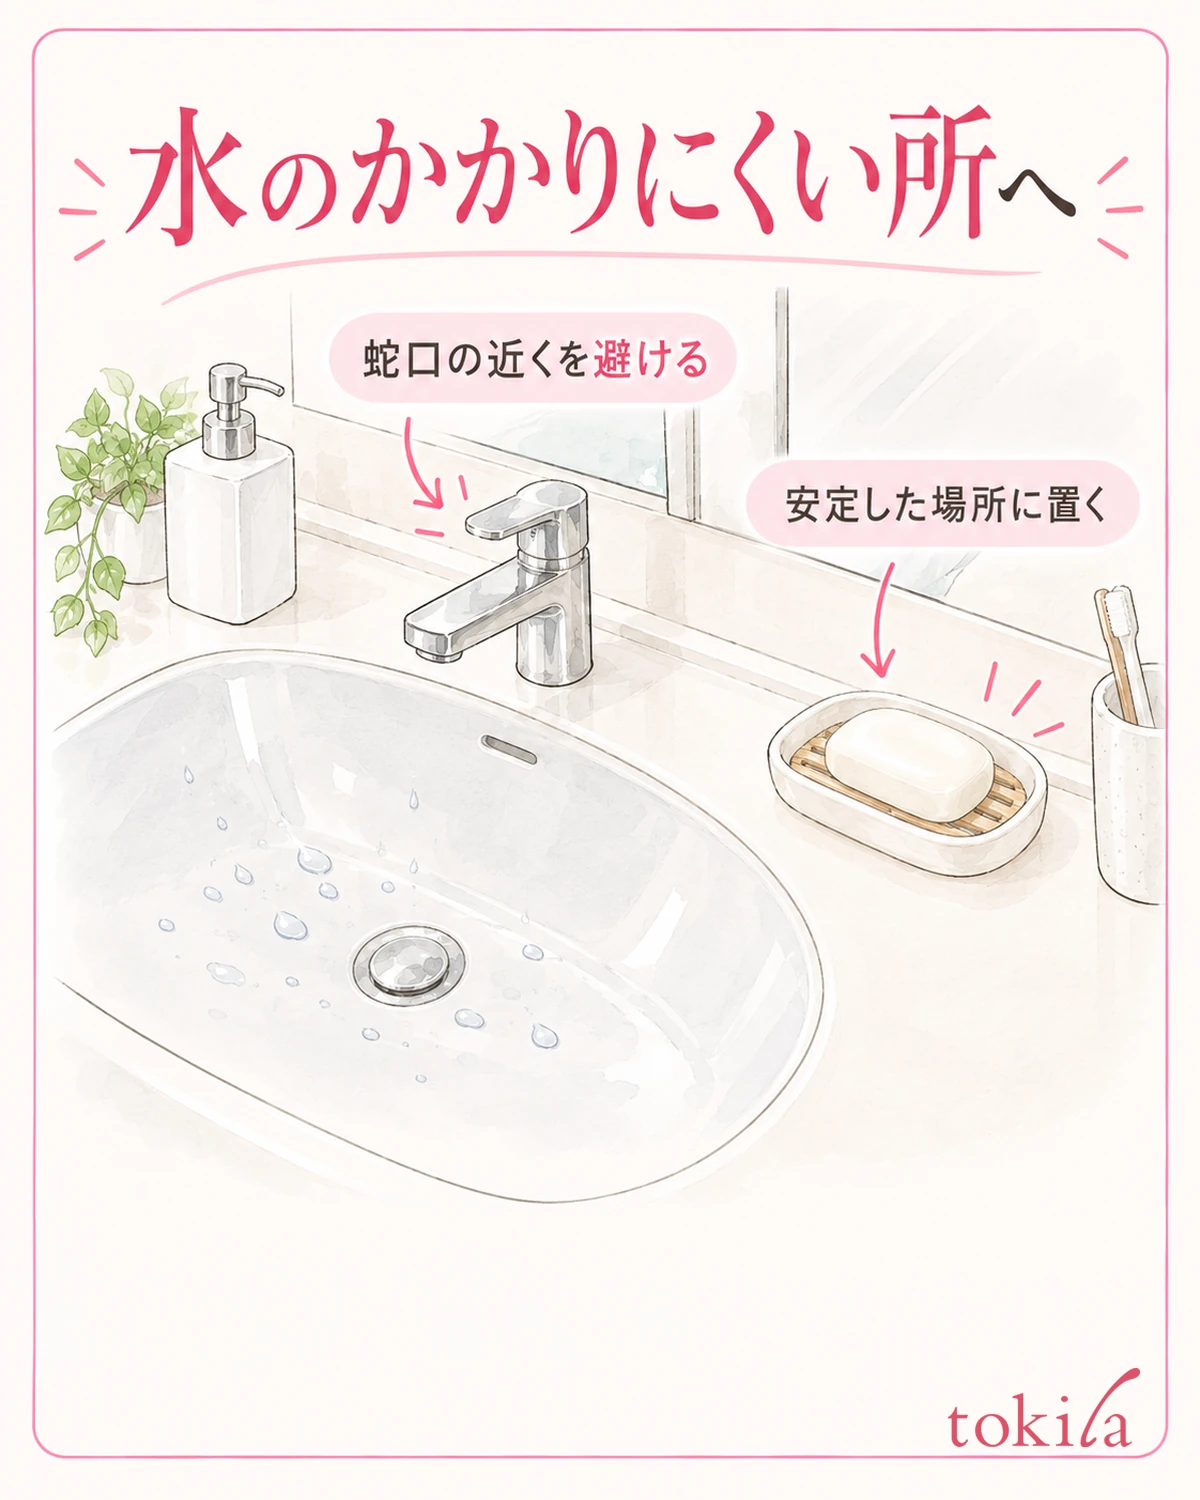
When you finish washing your face, drain the surface water well according to the soap's instructions and return it to the prepared dish. Do not set it down so that it sits in water at the bottom; support it on the surface the dish designates. Do not shake it hard to throw off the water or press the soft surface to squeeze it out; do it only as far as you can handle it steadily.
Choose a place that is well ventilated and where water from the faucet or shower is unlikely to hit it directly. At a bathroom sink, look at whether the spot is within reach of splashes when you normally use water. Rather than setting a uniform distance from the faucet, it is more practical to check how water lands according to your own sink and the way your hands move.
If you use it in the bathroom, consider whether it is easy to ventilate after bathing and whether you can move it outside the bathroom. If you move it, preparing a spot where you can carry the whole dish, which can handle dripping water, keeps the routine tidy. There is no need to avoid water by putting it somewhere likely to fall, such as the edge of a high, unstable shelf.
Also check that bottles and towels nearby are not covering the soap or dish. When deciding on a place, also check that the hand that takes the soap and the hand that returns it can reach without strain. Choose an arrangement that lets you use the dish without knocking it over at your next wash, not just one that looks nice.
Do not switch to drying methods such as blowing a hair dryer or heater directly on it, or leaving it in the sun. Drying time varies with the environment and the soap, so no common number of minutes can be given. Start by following the product's storage conditions and reducing the time it stays wet.
If your family shares the sink, also think about occasions other than your own face washing when water reaches it. Choose a spot where it will not get mixed up with hand soap or cleaning tools, and decide where to put it back after use. Do not stack bar cleansers for other purposes on the same dish; keep both the distinction between what you use and the draining of water.
4. If it is soft or sticking, look at the condition and the tools separately
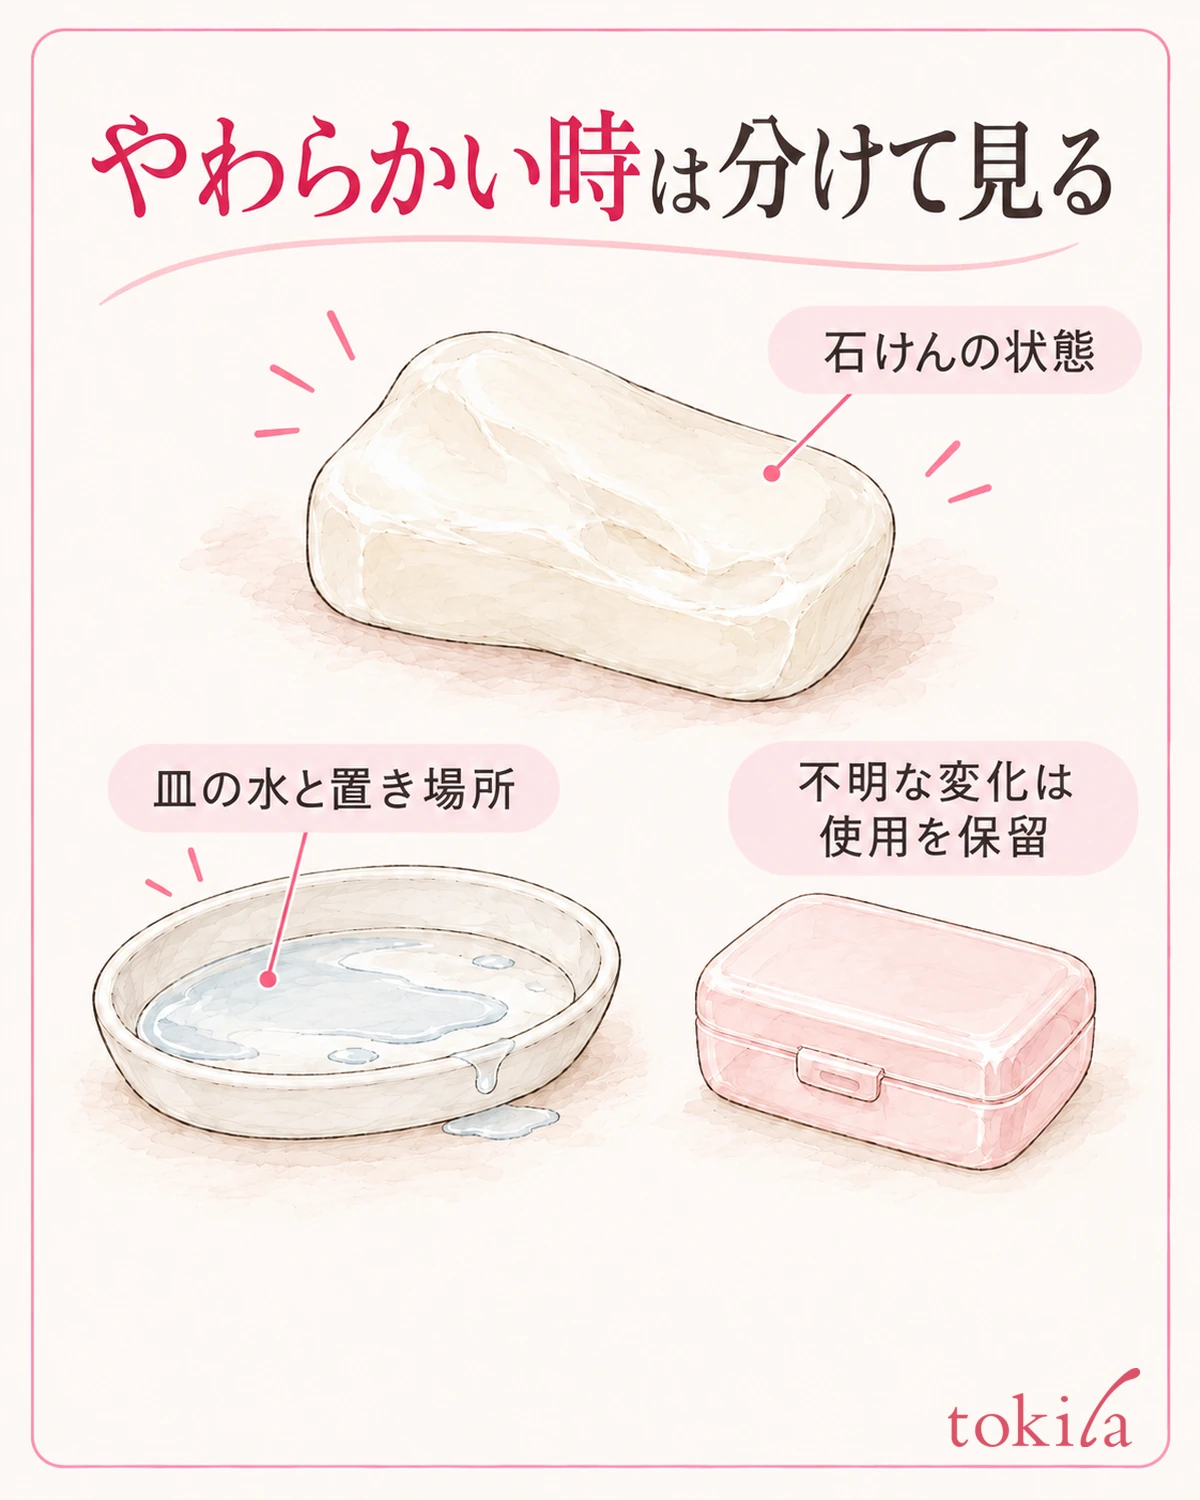
The underside is soft, the surface feels slimy, or it is stuck to the dish. In such cases, check the soap's condition and the moisture in the dish separately. Soap can go soft from moisture or humidity, but do not decide the cause or quality from appearance alone; look back at since when and where you had been keeping it.
Forcing off a stuck soap can make it lose its shape. Before inserting a nail or blade to scrape it off, check how to handle the soap and the dish. If you cannot get it out, do not keep pulling hard; record how you placed it and how the water remained so that you can describe the condition to the product's inquiry desk.
Melted parts do not necessarily return to the shape or quality of a new soap once dried. Do not treat pressing the remainder together, heating it to reshape it, or sticking it onto another soap as standard fixes for storage. If there is a change you cannot tell whether it is safe to keep using, hold off on the next use for now.
If the same placement keeps causing the problem, check the water in the lower dish, clogged holes, water landing directly on it, and how the lid is closed, one at a time. Rather than changing the dish and the location at once, noting what you changed lets you review your own way of using it. This is a record of preparation, not a verification comparing the soap's performance.
If there is an unusual smell, a foreign object, or a change you cannot judge from the instructions, do not use it to test on your skin. Even if you feel an abnormality such as irritation, do not prioritize continuing to use it while adjusting storage. Separate whether it is a problem that adjusting moisture can handle or one where you should stop using it and check.
5. When traveling, check moisture and the lid, and return it to its place at home
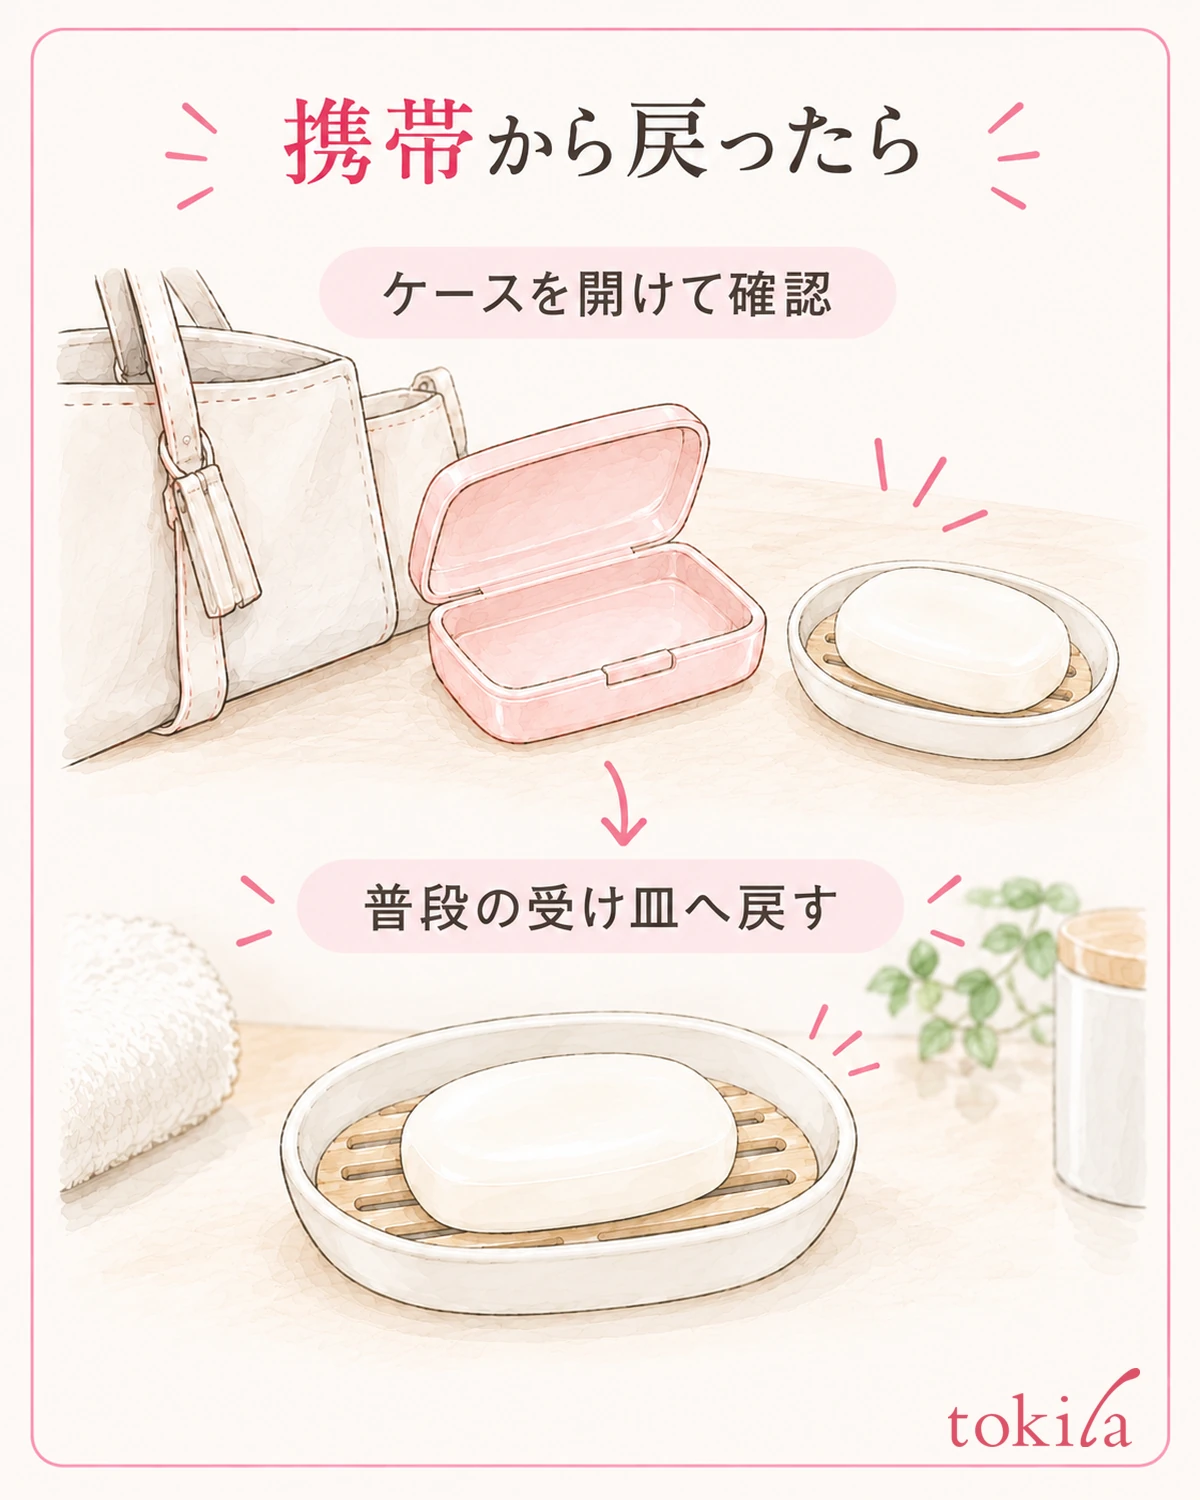
If you take it on a trip or to the gym, check how to carry it for both the soap and the travel case. Look at the inner width and height of the case and check whether the soap fits without being pressed hard against the lid. Do not choose by outside size alone; judge by the inner shape, including dividers and the insole.
When putting it away after use, drain the soap's moisture well as instructed. Having a lid is not the same as being able to store it for a long time with moisture left on it. For a case with no drain holes, also check that no water remains at the bottom, and get the conditions right before storing.
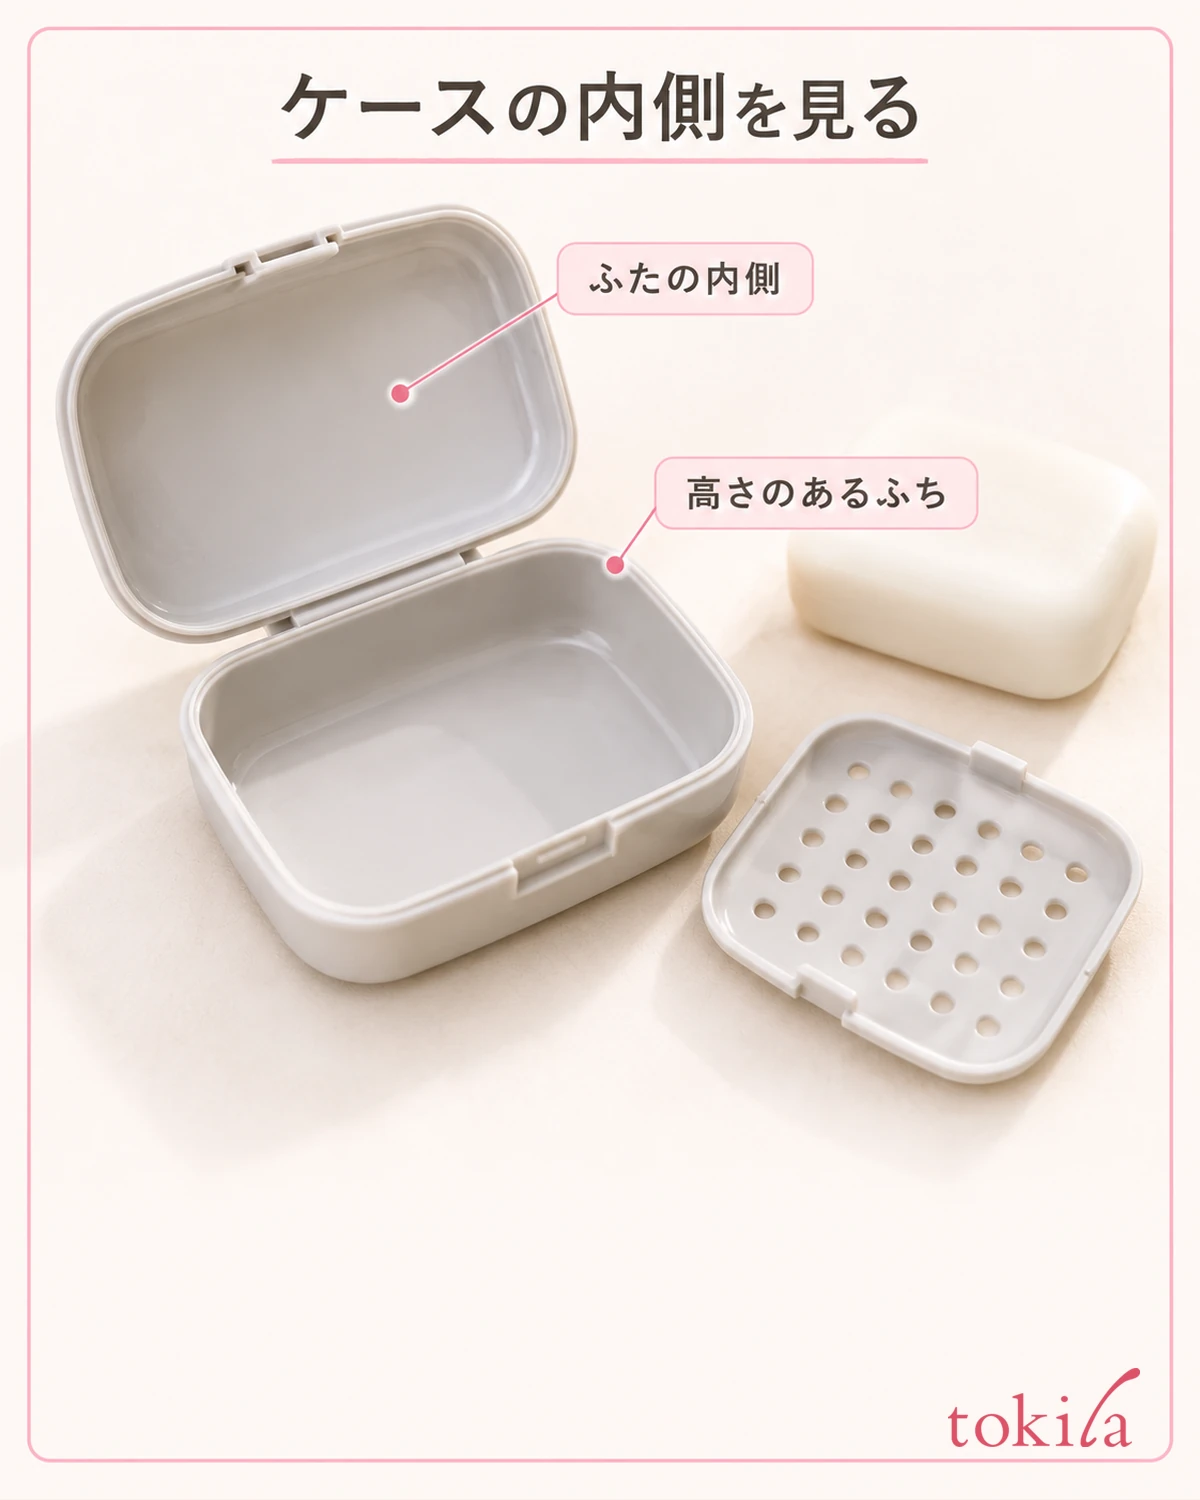
If there is a dedicated insole or pad, use the matching one as instructed. It is not necessarily fine to lay paper or cloth in any case. Depending on the material, it may stick to the soap or leave moisture behind, so check the container's instructions before filling the space with your own padding.
When you finish traveling, do not leave the closed case in your bag; check the condition of the contents and the container. Return the soap to a place that meets its storage conditions, and care for the case and insole as instructed. Treating the step of returning it to its usual dish as part of the same set when you unpack from a trip will help you prepare for next time.
Before your next use, quickly review the surface of the soap, the water in the dish, and where it is placed. If you are unsure about lathering, go on to checks for lathering facial cleanser by hand, and keep storage problems separate from preparation before washing. From searching for a dish that fits the soap, to a way of placing it that leaves less water after use: the starting point is choosing one set that fits your daily routine.
Before you leave, it is easier to line up the soap, the case, and any necessary instructions on a table. Decide not only whether the lid closes but also where you will drain the water after using it on your trip and where you will put it back when you get home. If it will not fit in a dedicated container, instead of forcing it in, you could also reconsider the choice of cleanser you use while traveling.



