
You would like to fasten the front of a buttonless cardigan just a little. A cardigan clip is an accessory that connects the fabric on each side with metal clips. Choosing it only for the decoration, however, may leave it sitting awkwardly on the clothes you own. Start by comparing the fasteners on the back with the thickness of the fabric you want to clip.
This guide focuses on styles with a clip at each end, covering preparation, placement, adjustments while wearing, removal, and storage. Styles that hold fabric through a ring or use a pin work differently. Follow the instructions for your own accessory on opening it and suitable materials, and try it without forcing it closed or pulling on it. For misalignment on clothes with buttons, seerefastening cardigan buttonsfor a separate explanation.
1. Look behind the decoration and check how the clips open
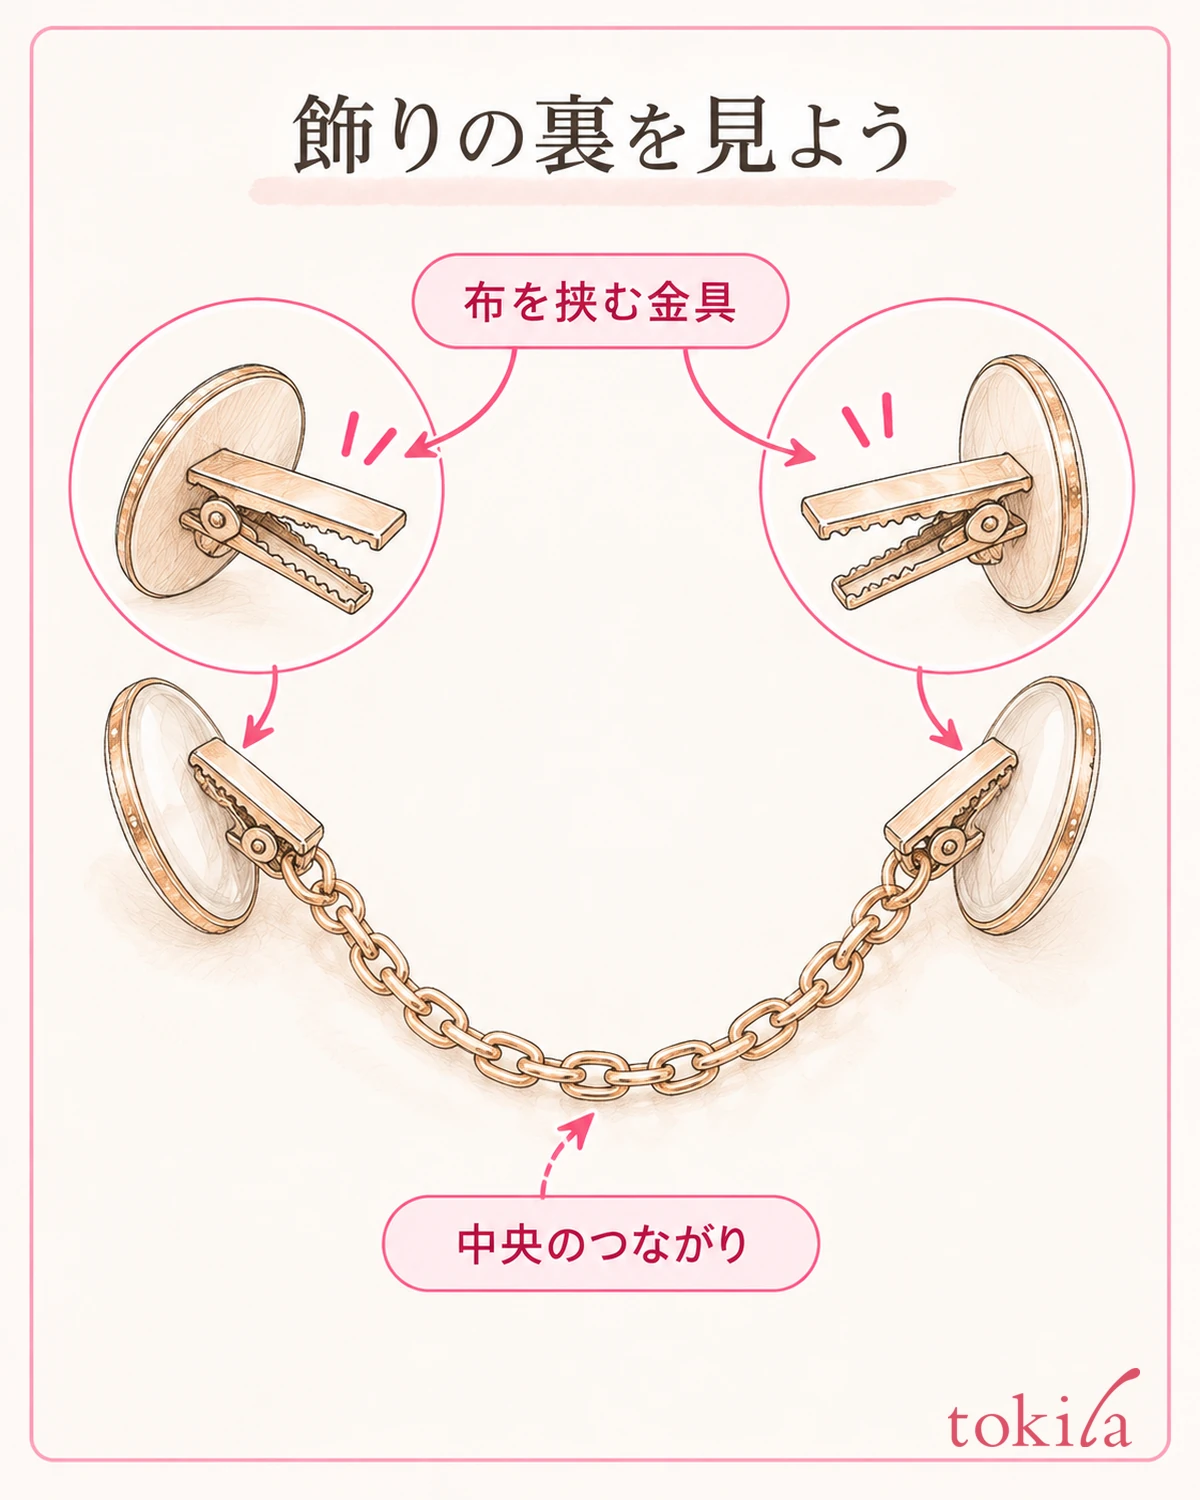
First, inspect the front and back of the accessory away from your clothes. Check whether there is a fabric-gripping fastener on each side, whether a chain runs through the middle, and whether a hook connects the decorations. Similar-looking styles may hold fabric through a ring or secure it with a pin. Begin by avoiding the assumption that instructions for clips at both ends apply to a different structure.
On the back, distinguish the part you move with your fingers from the part that touches the fabric. Open and close it once using the movement described in the instructions, such as lifting a lever, and check where the fabric enters. There is no need to pull the decorations apart or force a fingernail into the gap to find out how it opens. If it will not move, inspect its shape again and stop using it if you suspect damage.
Also check the gripping surfaces for small ridges or protective material. Protective material does not guarantee that every fabric can be fastened without damage. If you find a loose component or bent fastener, check the care or repair instructions instead of forcibly bending it back and attaching it to your clothes.
Some products with a hook in the middle let you undo only the center while leaving the clips attached to the garment. Other styles have a chain that cannot be detached. Do not assume that every visible connection opens; operate only parts explicitly described as detachable. Thinking separately about the fabric-gripping fasteners and the connection used to open the front also helps clarify what to do after putting it on.
Prepare in a well-lit place with the accessory on a flat surface. Position it so that you can see both fasteners and the central connection at once to help avoid attaching it while twisted. Instead of holding a small decoration continuously between your fingertips, inspect it on a work surface where it is less likely to fall.
2. Inspect each piece of fabric and account for thickness and layers
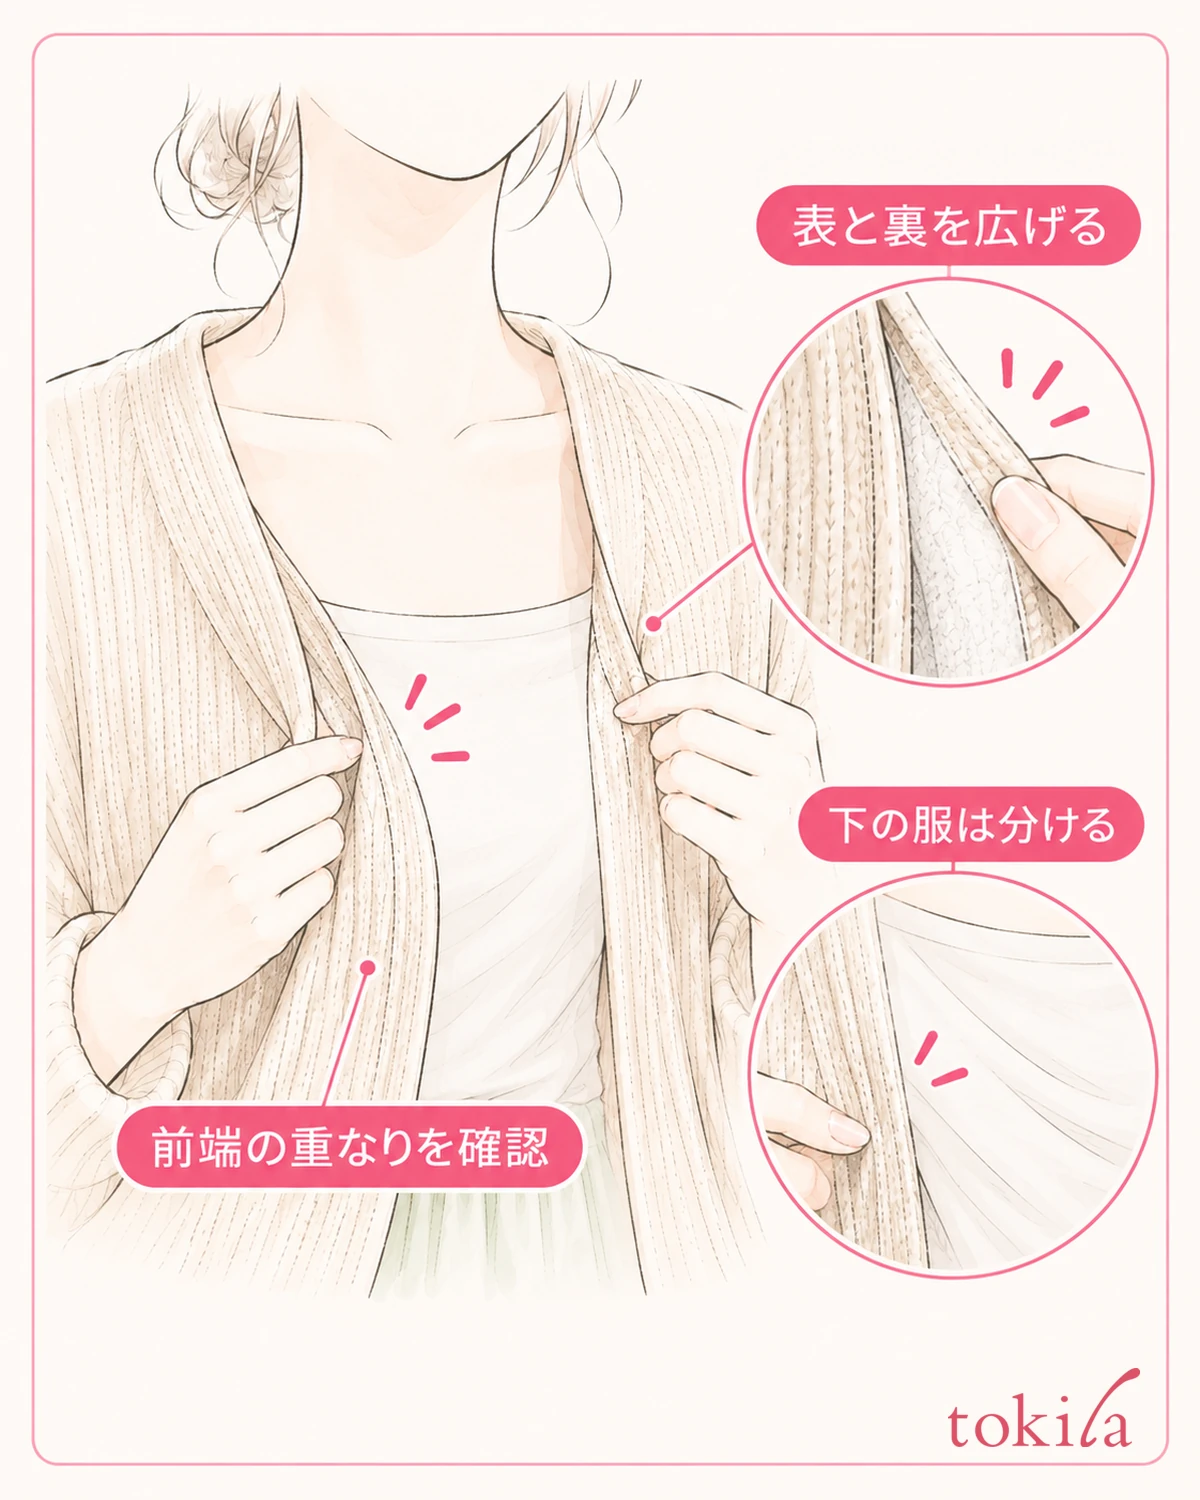
Next, inspect the cardigan's front edges where you want to attach it. A placket, a curling edge, or an open knit changes the surface the fastener will touch. A single thin layer and a folded edge do not have the same thickness. Open out the reverse as well as looking at the front, and check what will overlap in the section you intend to clip.
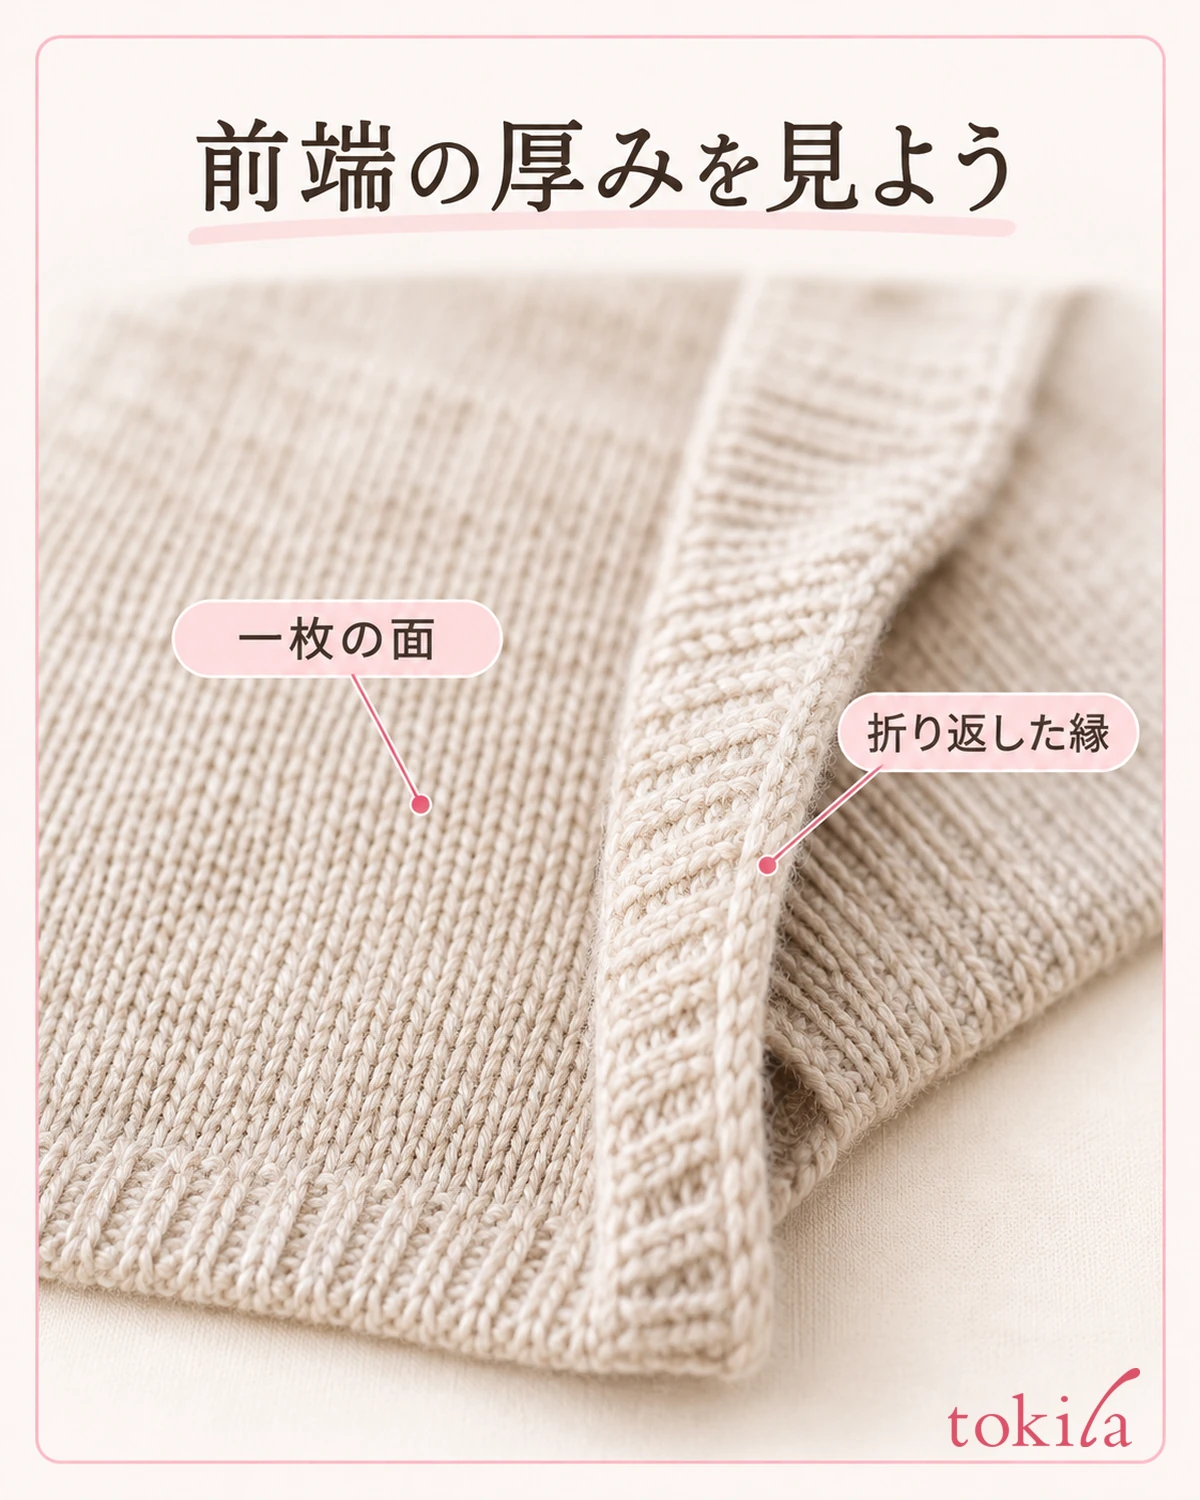
Compatible fabric thickness varies by product. A large-looking fastener is not necessarily intended for thick fabric, and a small decoration can have a long clip behind it. Read the suitable materials and usage instructions for your accessory and compare them with the garment's thickness. Avoid crushing a clip that will not close or repeatedly folding thin fabric to pack it into the gap.
Some fabrics, such as fine mesh, delicate lace, or surfaces with a long pile, make it difficult to identify where the fastener should sit. You cannot simply decide that a particular material will always be suitable. If compatibility is unclear, one option is to set that combination aside and choose a garment with buttons or another way of draping it.
If the combination is suitable for trying, clip it briefly in an inconspicuous spot, open the fastener, remove it, and inspect the fabric. Look at both sides for pulled threads, pressure marks, or changes to the surface that concern you. One trial without visible changes does not guarantee suitability for prolonged use; remove it if anything feels wrong while wearing it.
When clipping both sides, check that one side has not caught the lining or another garment. Keep the top underneath separate and insert only the fabric you intend to fasten. The front edges may differ in thickness, so do not use the feel of one successfully fastened side as the sole test for the other; check each separately.
3. Put on the cardigan, let the front edges sit naturally, and clip one side at a time
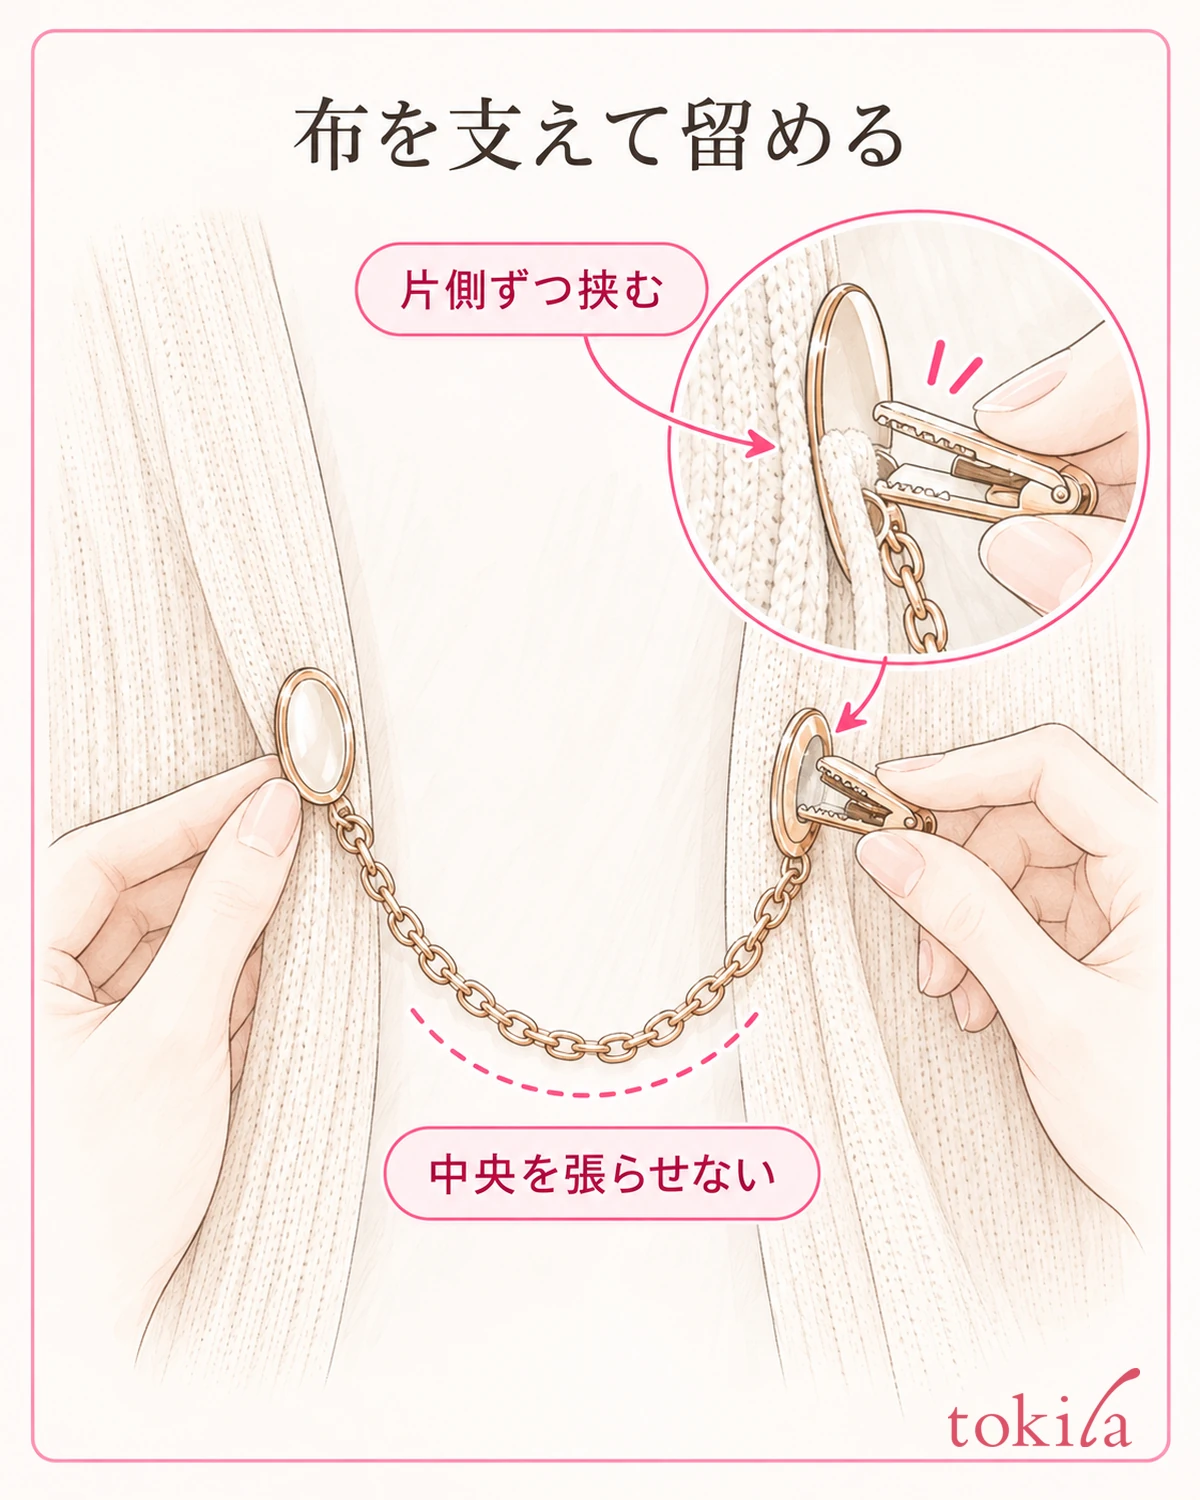
Put on the garment, adjust the shoulders and sleeves, and bring the front edges into position in your usual posture. First check where the garment naturally falls instead of shaping it by pulling both sides together with the clip. Choose one aim for the day—bringing the neckline closer together, slightly reducing the chest opening, or adding decoration—to help decide the placement.
There is no single fastening height for everyone. It varies with the garment's shape, the clip's length, the clothes underneath, and how open you want the front. While watching the edges in a mirror, support the fabric with one hand and insert it into the open fastener with the other. Close it as instructed, then check that the fabric has not slipped out and that no unwanted folds have formed.
Before fastening the other side, let the chain or central connection hang naturally. Avoid forcing the fabric edges closer together because a twist is making the connection look shorter. Support the first side as you bring over the opposite edge and find a position that does not stretch the center taut. If it will not reach, stop trying to stretch the fabric into place, remove it, and reconsider the combination.
When checking the heights, include the garment's front edges and neckline in the mirror instead of looking only at the decorations. Gripping more fabric on one side can lift that edge or create diagonal wrinkles. Do not slide a closed clip to reposition it; support the fabric, open the fastener, and clip it again.
Check the direction of the decorations last. The two sides are not necessarily identical, so follow the example placement or the accessory's instructions. Rather than forcing a symmetrical arrangement, distinguish the intended design from tilting caused by pulling on the fabric to narrow down what needs adjustment.
4. Recheck tension, wrinkles, and ease of movement from the front and side
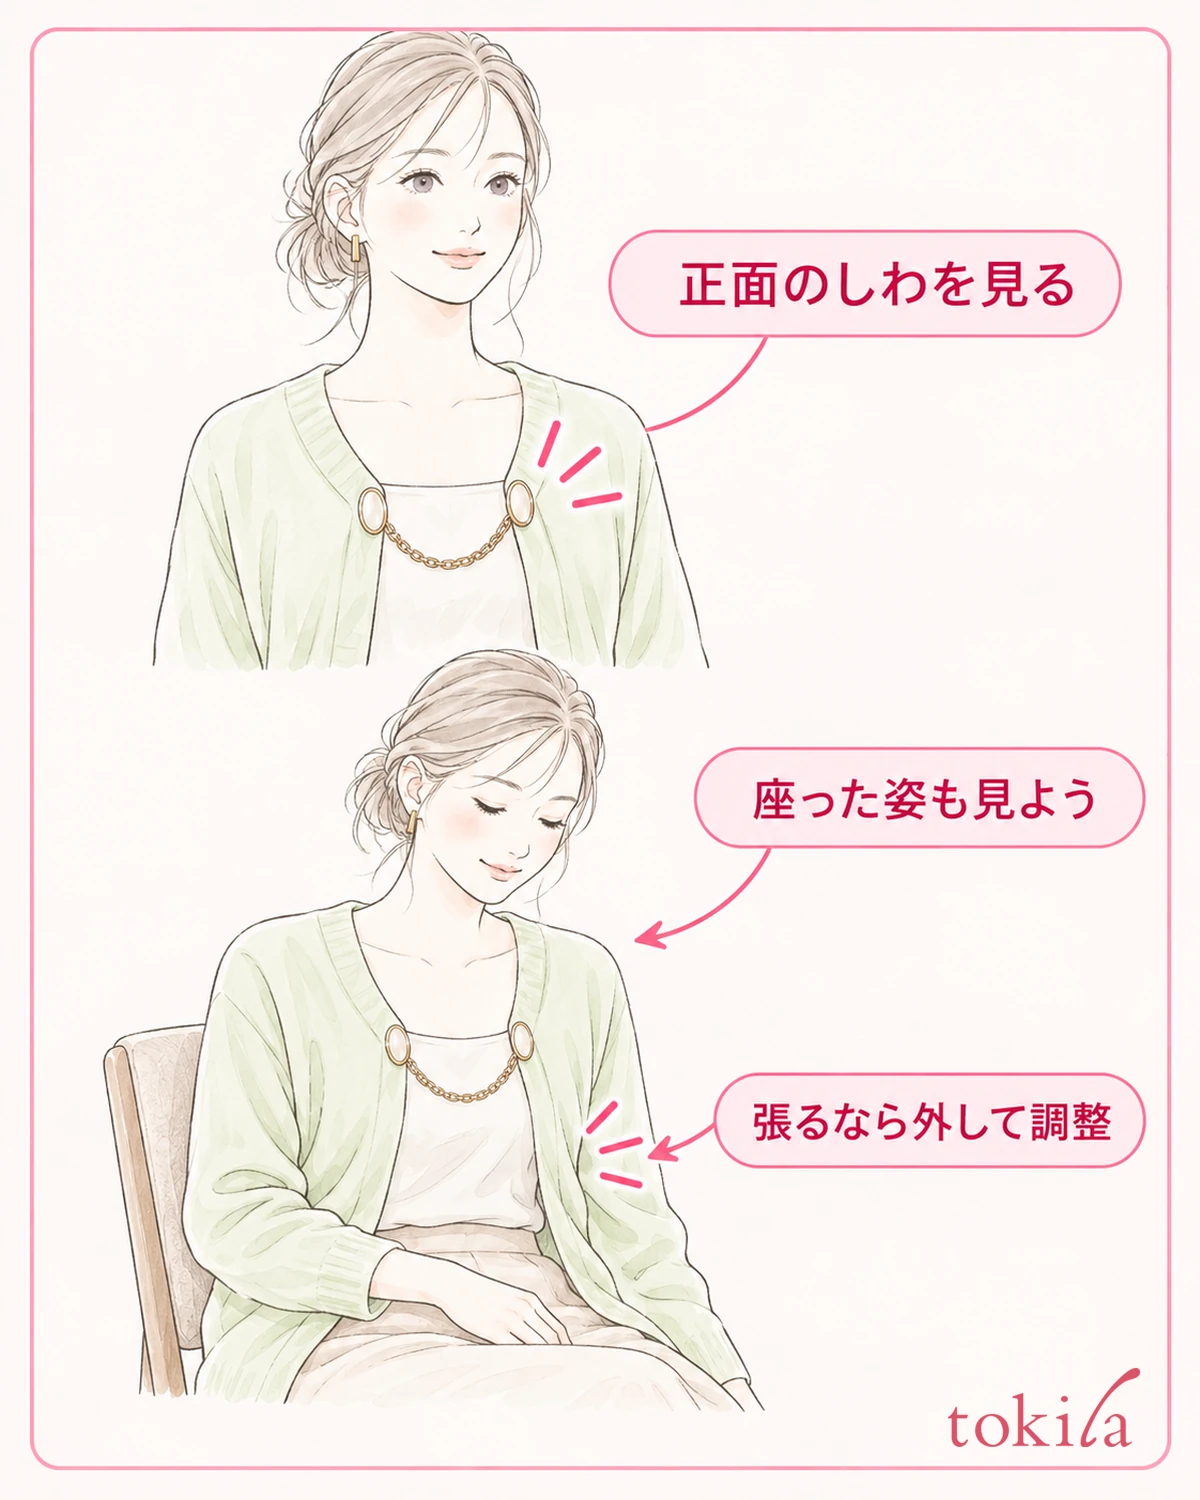
After fastening, let go and step a little back from the mirror to view your upper body. Check the appearance of the decoration separately from whether the fabric is under strain. Look for pronounced wrinkles stretching from the front edges toward the fasteners, one side of the garment lifting, or the chain being pulled into a straight, taut line.
Even if it sits neatly from the front, turning sideways may reveal folds at the edges or the fasteners behind them. Turn your body slightly as well as your face to see the layers and how the decoration sits. If the lining has been pulled to the outside, open the fastener and put it back. Adjust the fabric itself instead of simply hiding it with the decoration.
Next, move your arms forward as you normally would and try sitting in a chair. Check for fabric pulling, a fastener pressing against your body, or a connection that feels likely to come undone. You do not need to pull hard to test its strength. If tension appears when seated, reconsider the position or combination instead of fitting it only to your standing posture.
If changing the height, open the clip once before reattaching it. Changing only the height first and then checking how much fabric is gripped on each side helps make the differences easier to notice. If repeated clipping changes the fabric, stop adjusting at that spot and remove it.
If you may want to open the front widely while out, check how to undo it while wearing it. Use the designated connection on styles that let you release only the central hook; otherwise open the clips. Avoid getting into the habit of pulling the chain to open it, and choose a combination that is manageable throughout the day and after returning home.
5. Support the fabric to remove the clip, and store it separately from the garment
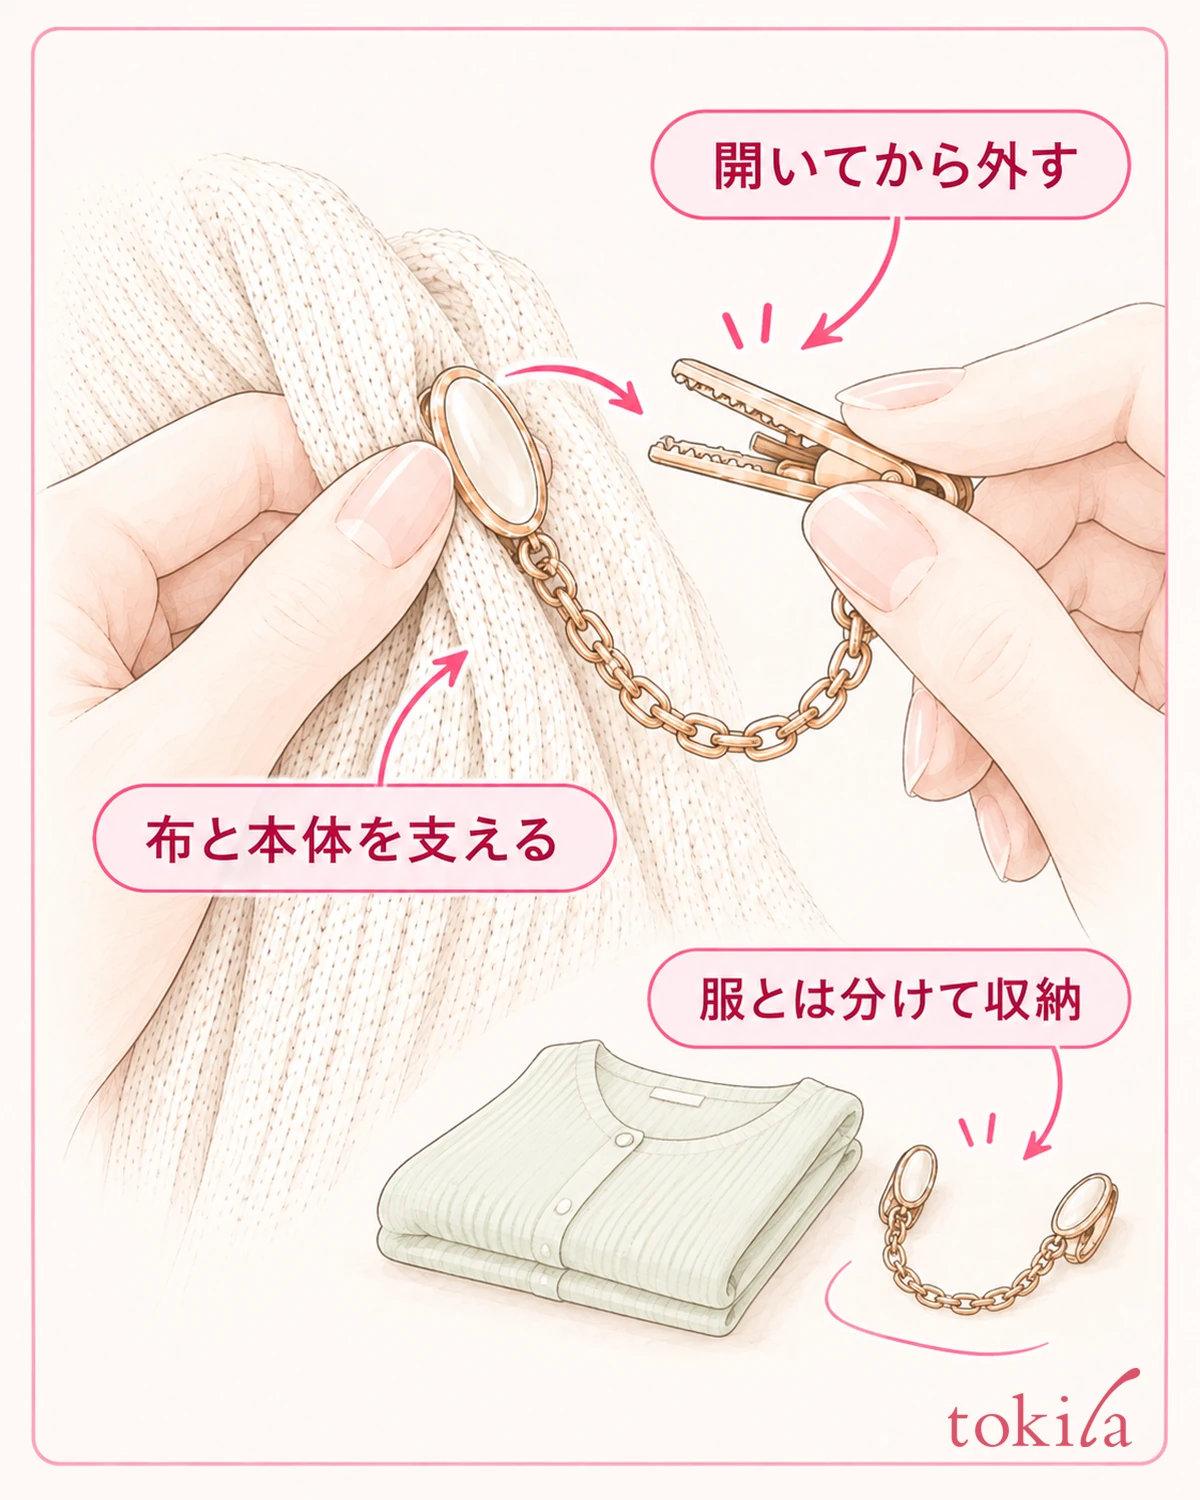
To remove it, support the fabric and accessory with one hand, open the fastener as instructed, and then release the fabric. Pulling a closed fastener off the front edge puts unnecessary force on the fabric and fastening. After removing one side, do not pull with the accessory hanging; move your hand near the other side and support it as you release it.
Inspect both sides of the fabric where the clips were attached for snags or marks that concern you. If a thread is sticking out, do not try to repair it by pressing it with the same fastener or rubbing it hard. Choose care appropriate to the garment's label and condition, and use what you observe to decide whether to use that combination again.
Follow the material instructions to care for the clip. Metal, decoration, and glued components may be combined in one piece, so do not wash it with the garment or routinely soak it in water or alcohol. If dirt concerns you, first check which care method is suitable. Make a habit of removing it before laundry. For accessories with pins,steps for releasing a brooch fastenermay also be helpful.
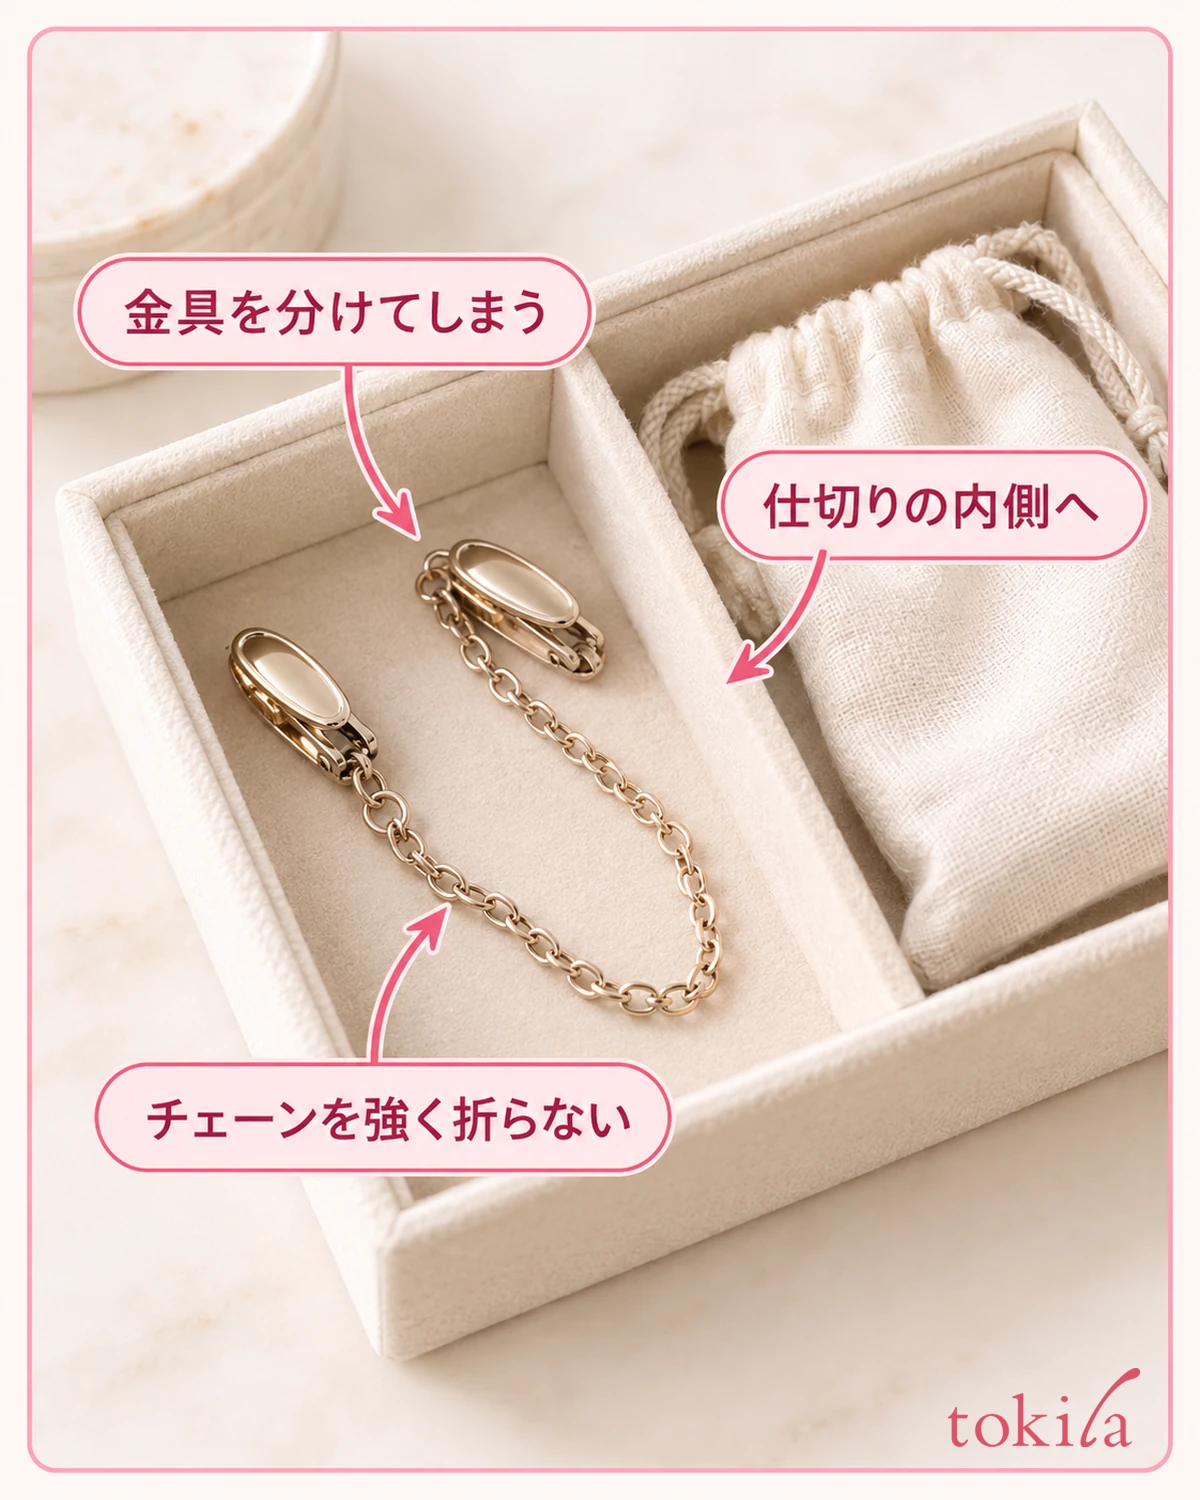
For storage, position the fasteners so that they do not catch on other clothes or accessories. Even when using the supplied pouch or a small compartment, allow the whole accessory to sit naturally instead of tightly folding the chain or packing it under heavy objects. When taking it out, support the body rather than lifting it by one length of chain.
Next time, you can begin by recalling which garment and height you used and one thing you noticed while seated. Looking at each garment and accessory as a pair is more practical than deciding on a universal fastening position. Include wearing it unfastened among your options, and check both the fabric's natural fall and the look you prefer.



