You want to try colored mascara, but coloring every lash may seem too bold. Can you layer it over black, and what should you do when the color stays hard to see after several coats? Before choosing a shade name, deciding which lashes will carry the color can help you work through these questions.
Here, we consider colored eye mascara for all-over and partial application. Follow each product’s directions while choosing between making color the main feature and adding just a small accent.
1. Choose all-over or partial application before choosing the color

First, look in the mirror and decide where you want color today: all upper and lower lashes, upper lashes only, only the outer upper lashes, or lower lashes only. These options change where the color appears; they do not all aim for the same finish.
If you want to retain more of your usual black-lash look, consider partial application. For example, leave the upper lashes black and color only the lower lashes, or layer color only on the outer upper lashes. This makes your morning routine easier to plan than coloring everything and trying to remove some later because it looks too bold.
Some people find short lower lashes difficult to coat. Rather than making “always start with the lower lashes” a rule for beginners, choose an area you can safely reach with your brush. If the brush is too large for the small area you want to color, do not force its tip toward your eye.
Choose a color you like and consider the eyeshadow and lipstick you plan to wear. Even reddish purples, blues, and greens vary in brightness and transparency by product. Instead of assuming a shade suits everyone or always makes skin look brighter, first describe where you want to enjoy the color.
Before buying, check whether the brush shape suits your intended area and whether the product is used alone or can be layered with primer or black mascara. Adding a color and adding steps are separate choices. On a day you use one mascara alone, you do not have to put black underneath.
Two products with the same shade name can look different if one gives translucent color and the other appears to cover the lash color. Look at both the finish description and intended application area. Consider how much you want to add to your current makeup, as well as which color you want. Checking its role when choosing makes its use clearer than trying to compensate with quantity after purchase.
2. Distinguish using color alone from layering it over black

Before starting, read the order of application on the container or outer packaging. A standalone mascara, a product that can serve as primer, and a finishing layer have different roles. Being colored does not mean every product can be used at the same stage.
To enjoy one color on its own, prepare as directed and apply it to the lashes you have chosen. Do not regard the absence of a black base as a mistake or assume a white primer is essential to show the color. If your product specifies using a primer with it, follow those conditions.
When layering color over black, check both products’ directions. One option is to finish the upper lashes with black and add color only at the outer corners, but not every formula has the same layering instructions. Read whether drying is required before layering and whether the product is intended as a top coat.
Do not invent a drying time in seconds for all products or repeatedly pinch your lashes with your fingers to check. If unsure, return to the instructions before adding a layer. Set out the two products and their order before starting rather than looking for the color after applying black; this helps prevent mixing products up midway.
Using primer, black, color, and top coat together is not the default. More layers do not necessarily produce more beautiful color, so choose the steps needed for today’s application area. Return each brush to its original container after use, and avoid inserting it into another container to mix colors.
If you use several products, arranging them on the table in application order is one option. Keep the primer separate in your mind from the product used to finish the color, and follow the same steps on each eye. Comparing color alone becomes confusing if the right side is layered over black and the left side is used alone.
3. Decide where to apply and follow the lashes
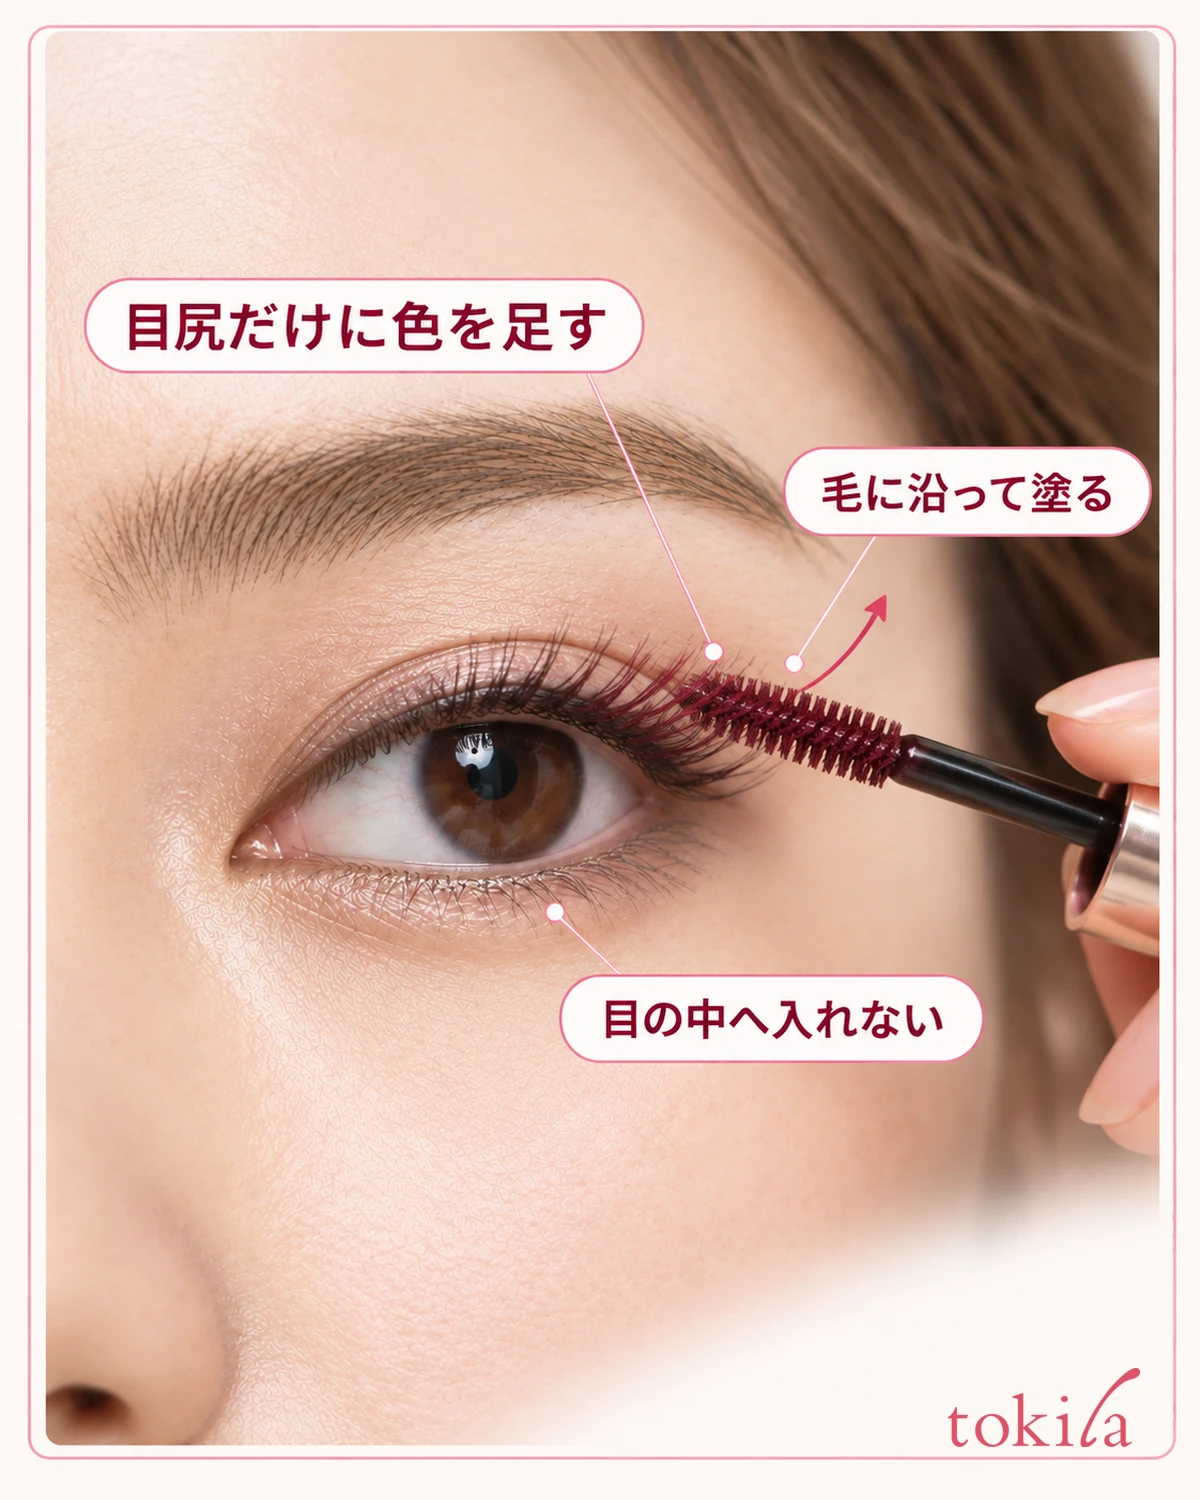
Work where your mirror and hands are steady. Avoid situations that make the brush hard to control, such as walking or riding in a moving vehicle. Check the intended application area first, then bring the brush toward it at an angle that keeps it away from your eye and eyelid.
For partial application to the outer upper lashes, follow the hairs and add color where needed. “Outer corner” does not mean inside the eye or on the mucous membrane. Work from outside the lashes, without thrusting the brush tip toward the eyeball or probing for roots and pressing it against the skin.
Also check for a blob of mascara at the brush tip. Product on the bristles along the side and a large deposit at the tip transfer differently on contact. If your product instructs you to adjust excess, follow that method rather than pressing a blob directly onto short lashes.
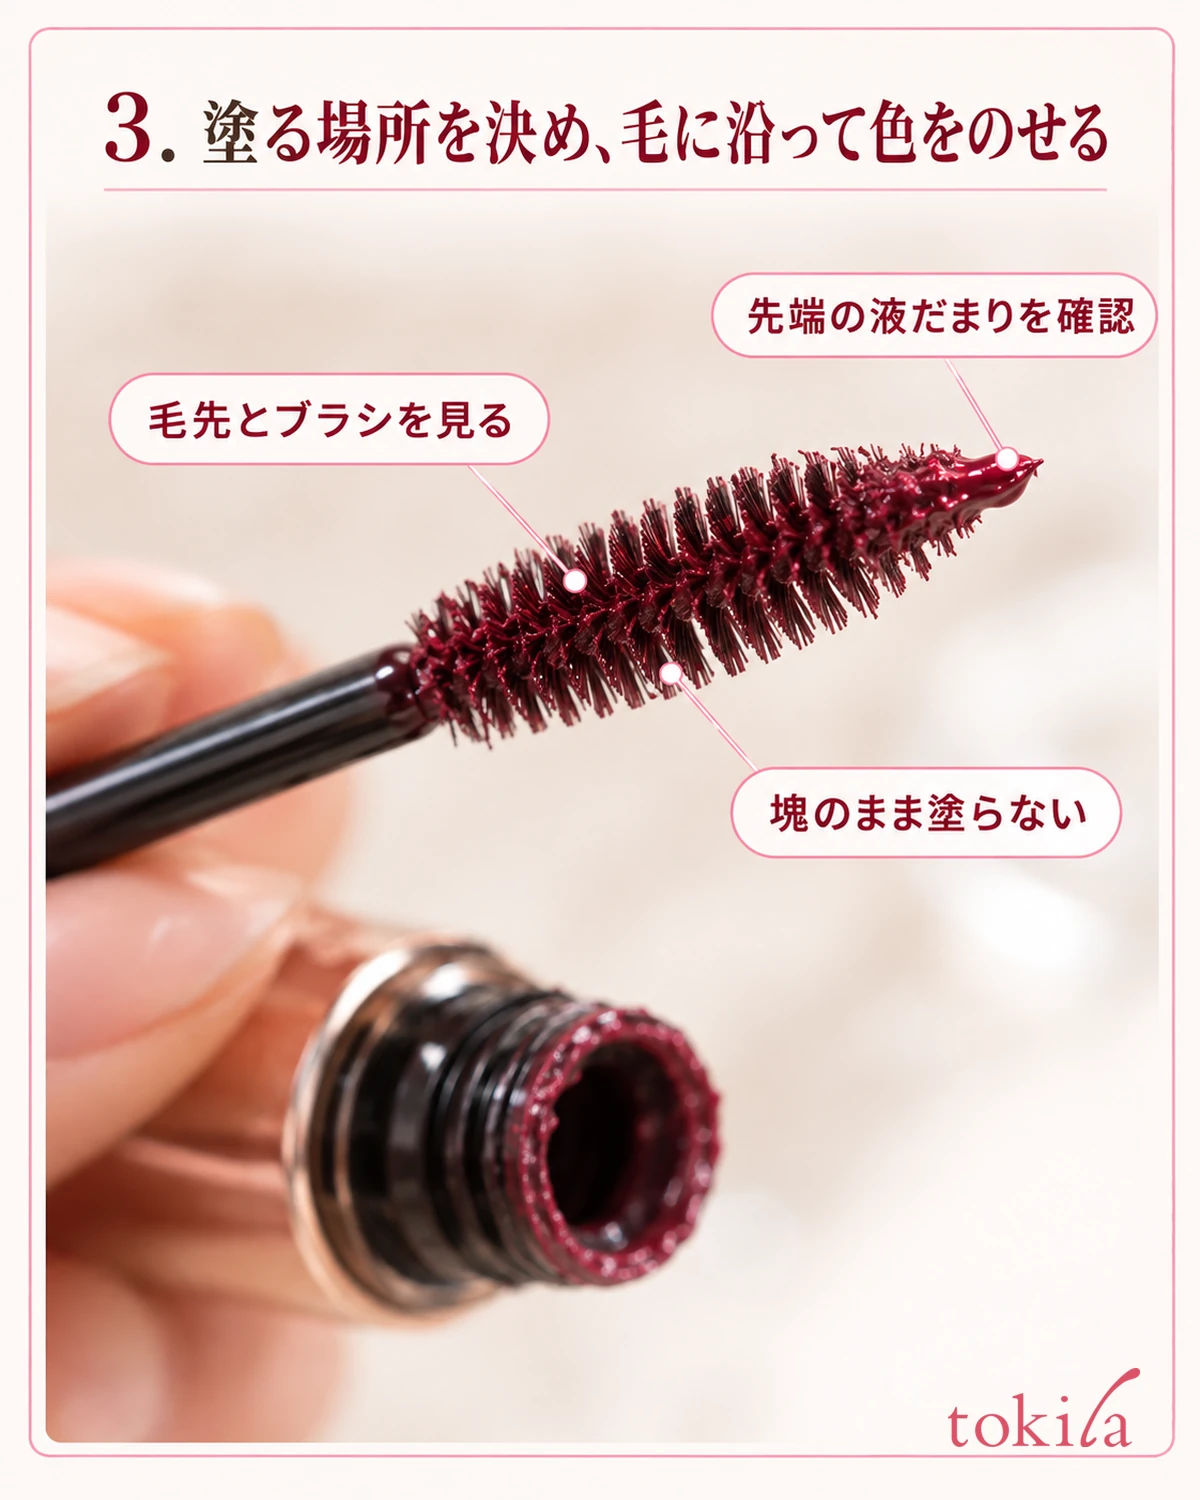
After one application, move the brush away from your face and check the area. Has color spread toward the middle when you intended only the outer edge? Is the colored width very different between the two eyes? Before adding more and more to one side to correct it, face forward and compare.
For lower lashes, match the brush angle to its shape and instructions too. Holding every brush vertically is not always correct. Rather than pulling on the eyelid and rushing, work within the visible area you can comfortably reach. If you feel pain, irritation, or discomfort, stop and follow the product’s precautions.
If moving your hand becomes difficult, move the brush away from your eyes rather than pushing through. Adjust the mirror height and your face angle before resuming. You do not need to keep your eyes wide open to apply neatly. Prioritize unhurried movements that let you move the brush away when you need to blink.
4. Do not chase hard-to-see color by adding quantity alone

When color looks faint, make the viewing conditions consistent before returning the brush to your face. The same color can look different at a dim mirror and beside a window. Compare both sides under the same light and angle, then check from a distance that shows your whole face. Comparison is harder if one side remains in shadow.
Color layered over black and color applied alone are not the same conditions. If color looks subdued over a dark base, repeatedly thickening only that area can make joined lashes and clumps more noticeable than the color. Review each product’s instructions and the layering method you chose today.
If lashes form large bundles or blobs appear at the tips, pause before covering them with more color. Do not pull apart dried clumps with your nails or a pointed tool. For adjusting the amount and starting again, you can also consultHow to Apply Mascara Without Clumps.
If the intensity differs from what you expected, you do not have to repeatedly redo today’s makeup to test the product’s limits. Next time, return to one variable: change where you layer over black, or use the color alone. Within the amount and method specified, you can also choose to finish at a subtle intensity you like.
When checking color in smartphone photos, remember that image adjustments and screen brightness affect its appearance. Rely mainly on the mirror rather than adding mascara to match a photo. A different intensity from someone else’s post does not necessarily mean your application is wrong.
If the sides look different, consider colored width and intensity separately. If width is the reason, adding quantity alone to the faint side may increase clumps without changing the area. Check how far inward from the outer corner you used color, then decide whether to start again or finish as it is today.
5. Consider the surrounding makeup and removal together

Finally, move from a close-up of your eyes to your whole face. When you want colored lashes to be the main feature, consider how much eyeshadow and lipstick intensity you want to keep. This is a choice about where to draw attention, rather than a rule to make everything light.
You can coordinate similar colors or add a small amount of a different one. Looking at both colored area and intensity helps more than mechanically reducing the number of colors. If you want to keep a favorite lipstick, you can return to partial lash application to preserve that main feature.
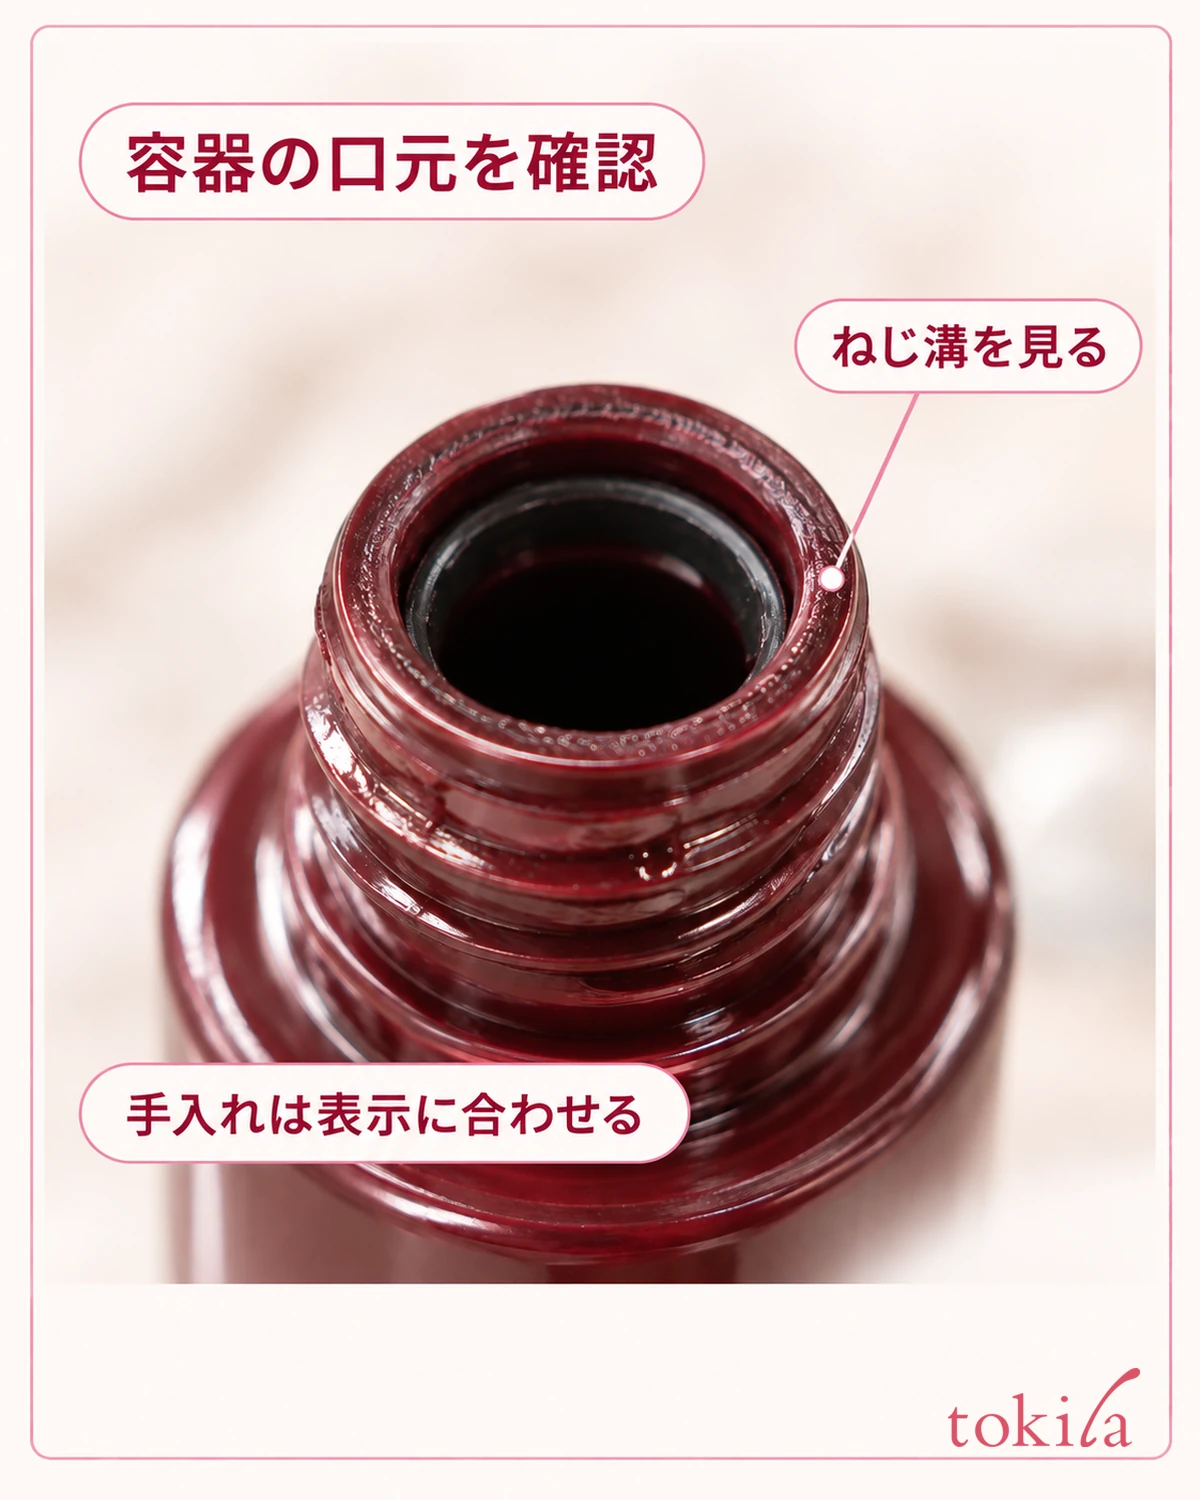
When putting things away, check each container together with its capped brush. Return black and colored brushes to the correct containers, and clean container openings according to each product’s directions. Do not add water or toner to dried mascara to adjust color dilution.
For nighttime removal, check the products underneath as well as the colored mascara. Even if the top product says it rinses off with warm water, the entire combination may not. Read which remover and order are needed before preparing them, rather than rubbing harder when makeup remains.
For next time, briefly note the area and combination, such as “lower lashes only,” “outer upper lashes only,” or “over black,” as well as the shade name. Colored mascara is not only for dramatically changing the whole look. Enjoy choosing where to place color alongside today’s clothes and lip makeup.
On days you layer black and color, keeping the names of the products identifiable until evening helps when rereading removal instructions. Avoid layering several products and remembering only the last one. If you change the combination next time, check again rather than assuming the same removal method applies.