
You want to add a single thin metallic line, but the tape is too long and has leftover length, the ends lift, and the more you try to fix its direction on the nail, the more it wrinkles. With line tape, deciding in advance the surface to apply it to and the position of the line makes it easier to sort out what to adjust.
Here we introduce the preparation and application of thin adhesive tape that is applied and left on as nail decoration. The process differs from guide tape that is removed after painting separate areas, and from transfer foil that moves only a pattern. Check the specifications of the product you have first, together with whether it is for nail polish or gel and the finishing materials you will use.
1. Check whether it is tape that stays on, together with the materials you will use
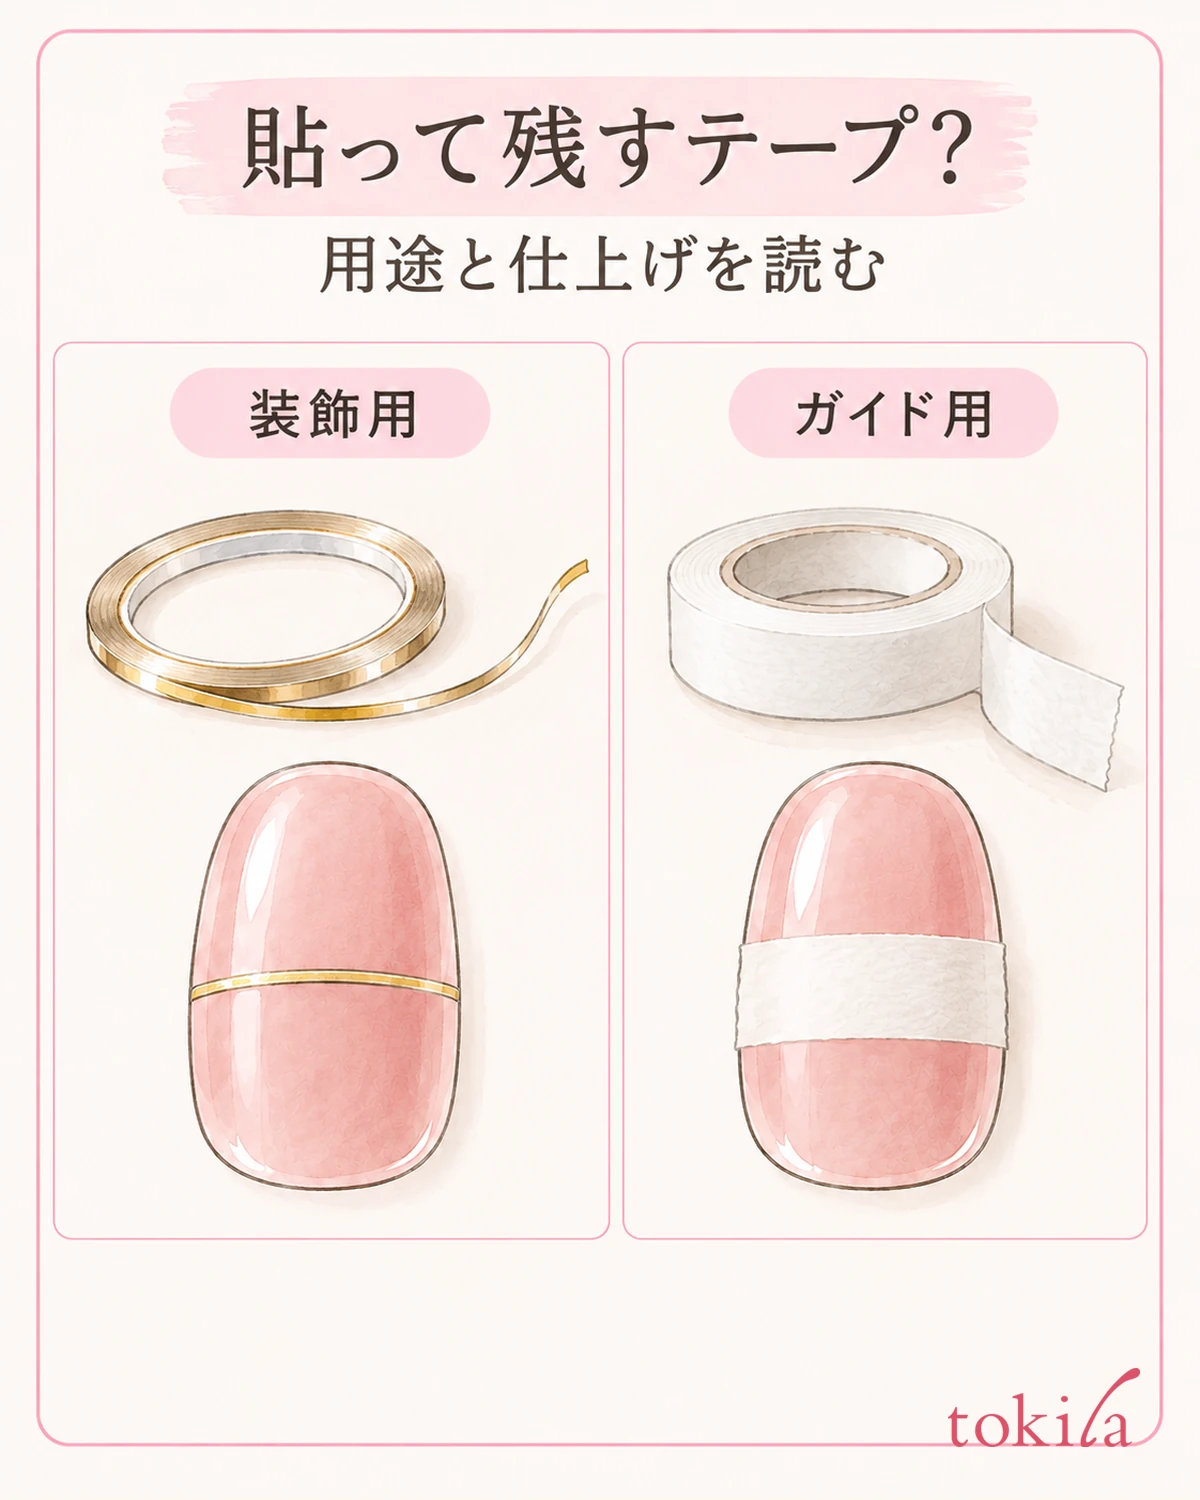
First look at the packaging and separate whether the thin strip itself is decorative and stays on the nail, or is a guide that is removed after painting separate colors. Both look like thin tape, but the finish changes depending on whether it stays to the end. The starting point is not to decide it is the same method just from the line in the finished photo.
If it is for decoration, read which material it is applied over and what covers it at the end. The curing described for gel and the drying of nail polish are different processes. Rather than preparing only the tape and then choosing a clear liquid you happen to have, check the compatible base, color, and finish as a set.
Also check the width and color on the packaging. The area needed differs between making a boundary with one thin line and making a wide strip the main feature. Before buying more of what looked thin in a photo, look at the width of the tape you have and think about whether it suits the line you want to make this time.
Gather on your desk the tools in the instructions, such as small scissors and tweezers. Use the scissors to handle the tape, and do not use them to slip a blade in along the edge of your nail or the surrounding skin. At first, checking the flow from cutting to finishing on a practice tip fixed to a stand lets you think about how to move both hands.
You do not need to make the same pattern on every nail. If it is your first time, start by deciding where to place one line. Rather than adding the handling of a thin strip and the work of aligning the spacing and crossings of several lines all at once, aim first to get one edge in place.
When you take out a roll, keep the packaging instructions first. The look of a thin gold line alone does not tell you whether it is adhesive or what materials to use. If you have put other materials in the same bag, return them to a state where you can identify the one you are using now before you continue.
2. Prepare the surface, and decide the direction and end of the line first
After applying the color, prepare to the stage that the material specifies. How you wait differs between something that dries and something cured under a light. Do not press your finger on the surface again and again to check; follow the conditions of the material you are using before moving on to the tape.
For some gels, there are combinations that specify wiping off the layer left on the surface after curing. On the other hand, not every gel should be wiped in the same way. When the tape does not stick, rather than adding nail polish remover in your own way, compare the instructions for the tape and the gel and check the surface condition that is needed.
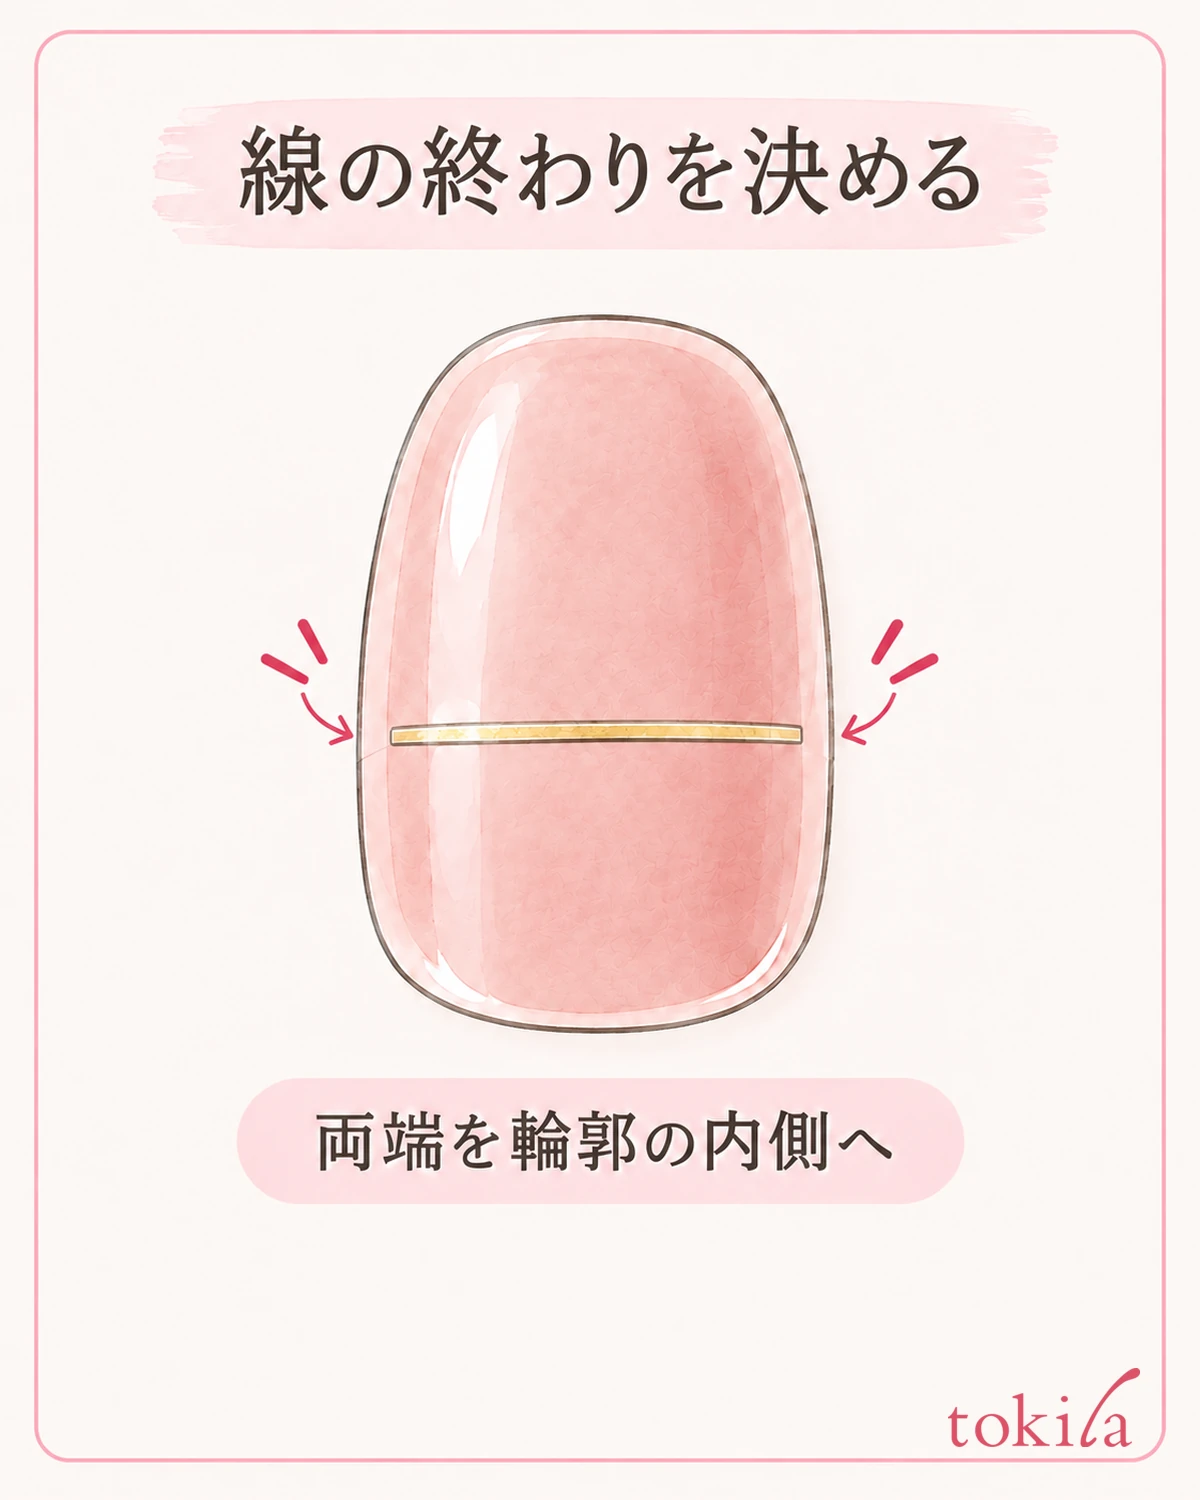
Before applying, look at the tip from the front and decide where the line starts and ends. Choose between horizontal, diagonal, and vertical, and imagine a position where the end does not go outside the nail. Rather than stretching it to somehow reach the edge of the curved surface, think of a line that fits comfortably at its present length and direction.
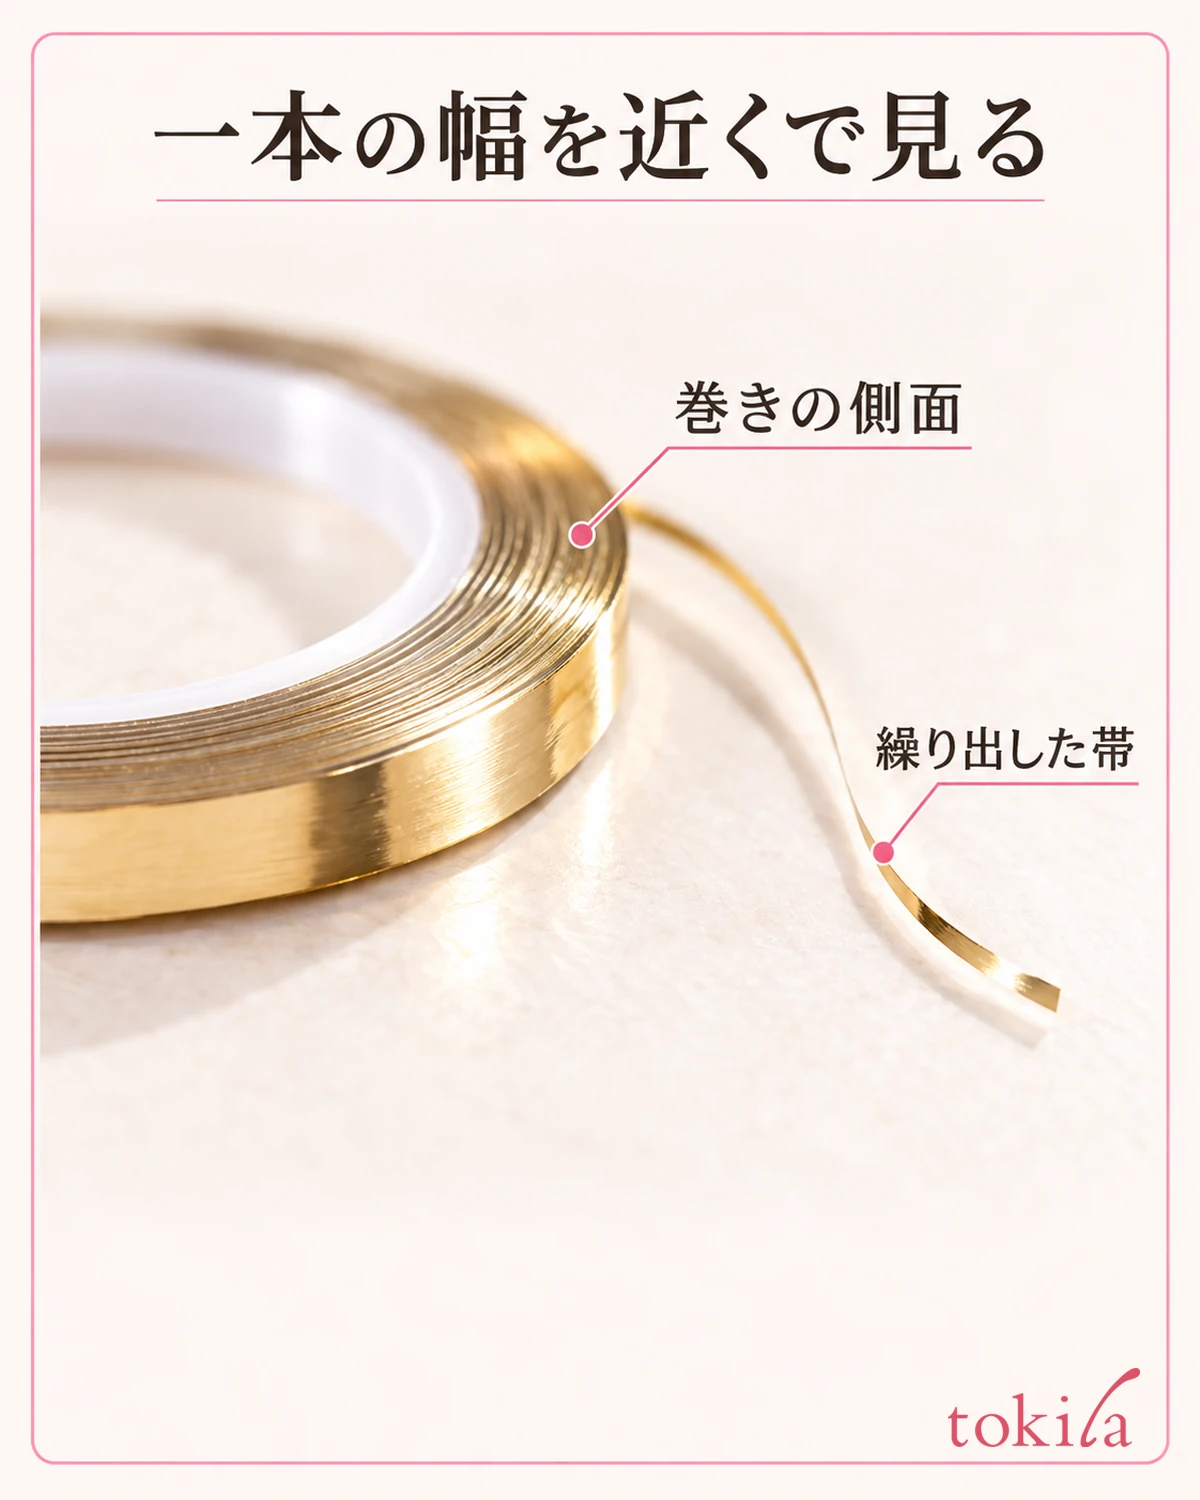
If you pull out a short portion from the outside of the winding, you can see the width of the thin strip and its reflective surface. Take care not to mistake the thickness of the side of the roll for the width of a single line. If the color shines and the outline is hard to see, looking at it in a position where you can distinguish it from the background makes it easier to follow where the edge is.
When you use two or more, decide the position of the first one first. For crossing lines, look at where the overlap will form, and check against the instructions whether it is a way of using them that the finishing material can cover. Do not think that more lines are better; leave room to look at the whole once you have placed one.
3. Cut the length you need and place it so the ends do not go outside
For products whose instructions say to cut first and then place it, cut the tape to the planned length of the line and handle it with tweezers. Do the work on the desk away from your fingers, and keep it in a state where you know where the cut-off pieces are. Follow the way your product is handled so that it does not become too small to hold.
Even with a product that specifies cutting while applying, it is important not to force the blade in around the nail. If you cannot do fine cutting safely, stop and either check the steps on a practice tip or choose a product with a method you can handle. Do not change the operation to cutting the nail or skin in order to make it look neat.
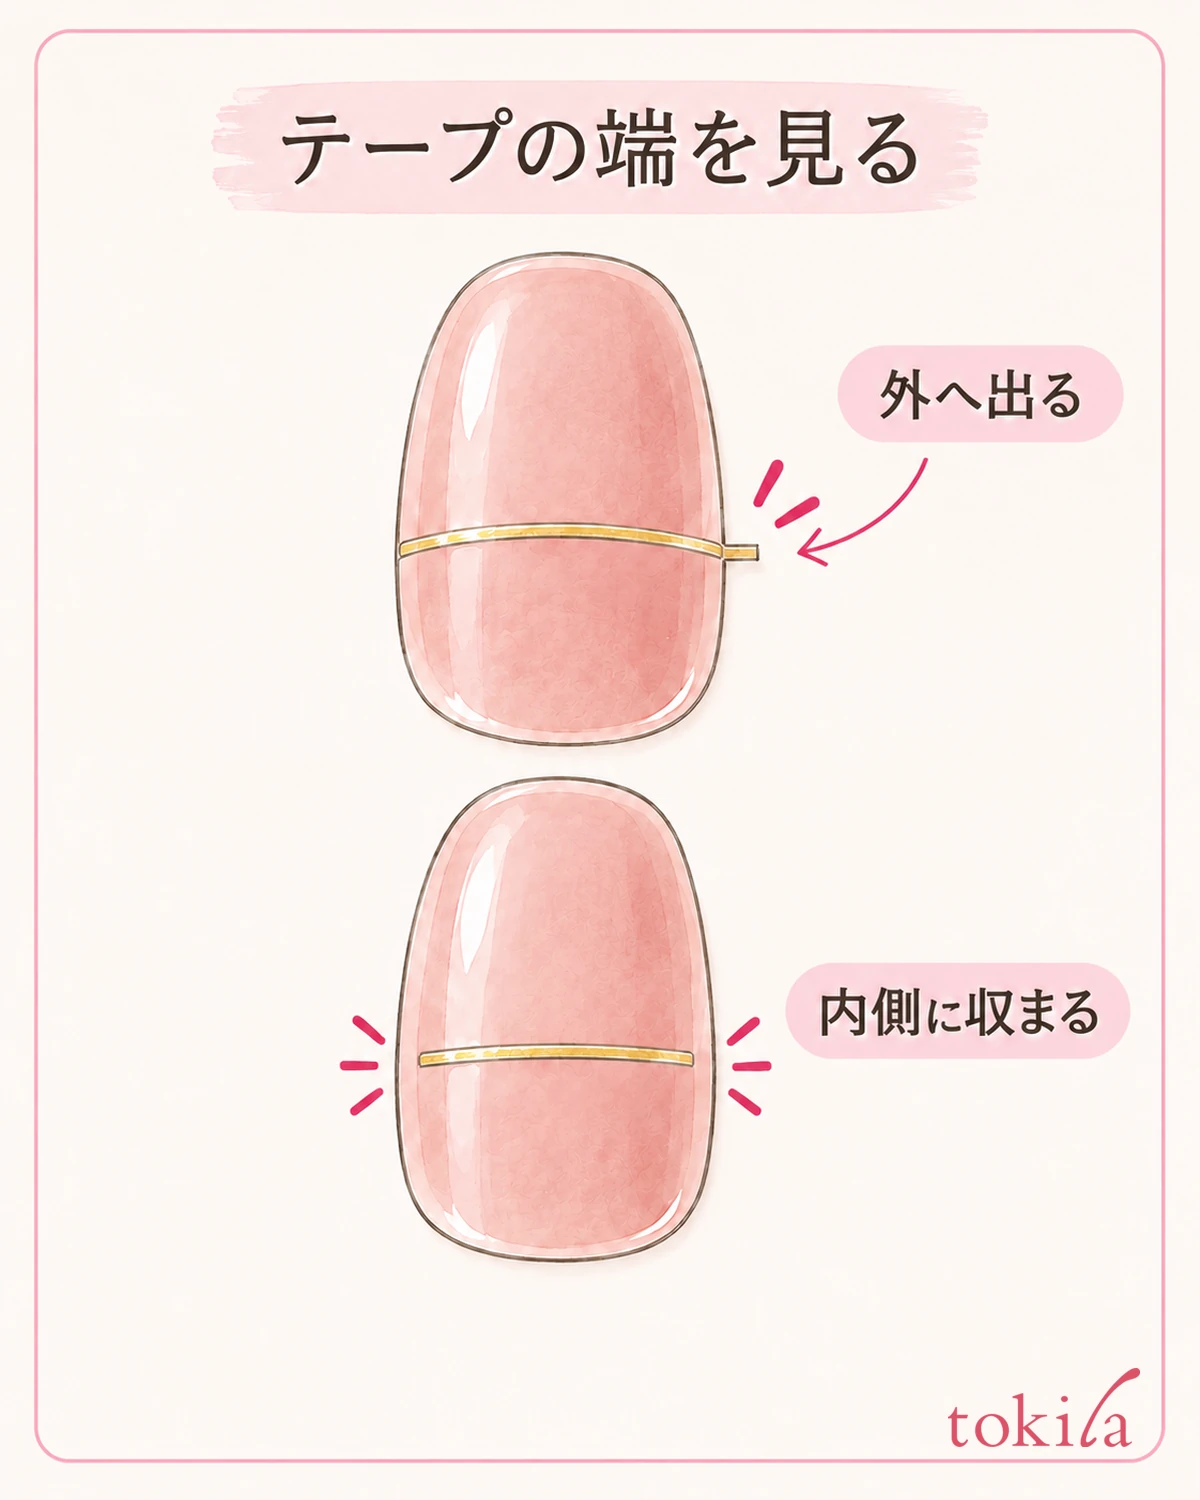
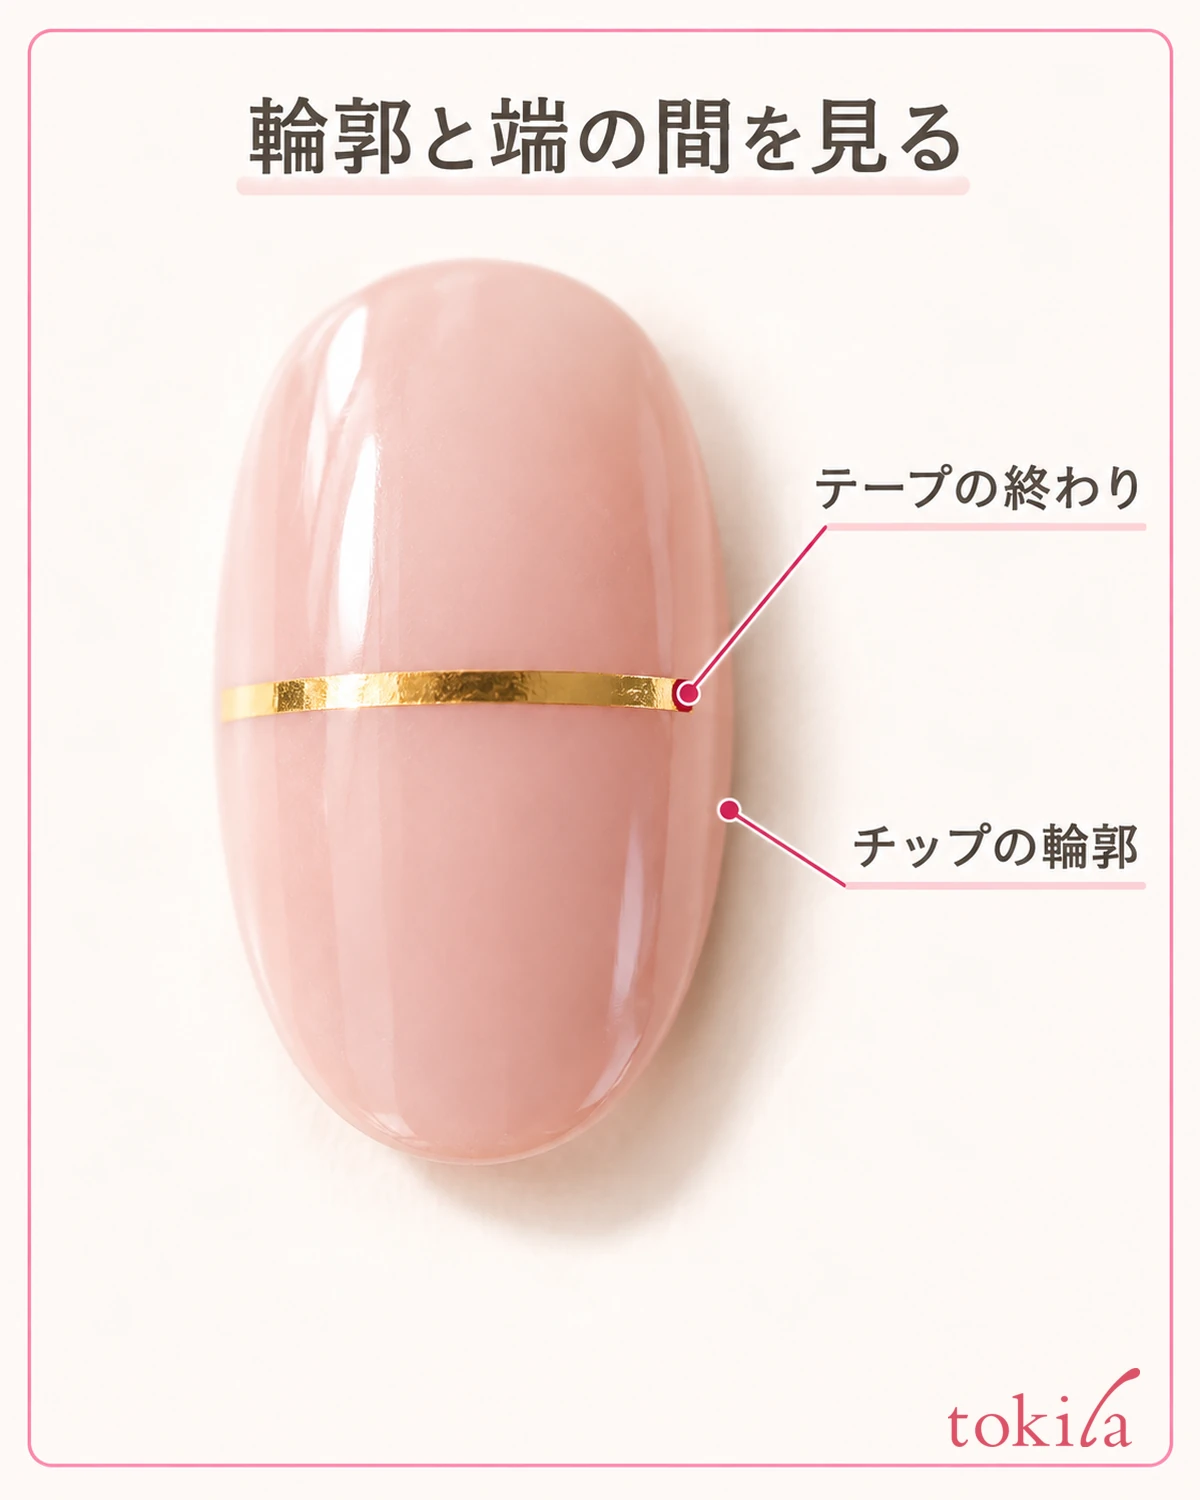
Once you have placed the tape, look at both ends, not only the center of the line. Check from the front and from a slightly tilted angle whether the strip goes beyond the outline of the nail or touches the skin. For how far to tuck the ends inward, follow the product's specification; we do not set a fine measurement in millimeters here that applies to all nails.
If you have cut it shorter than needed, before adding a small piece into the gap to make it look like one line, check whether you can place a new single piece instead. Adding joins or overlaps changes the conditions at the ends compared with the single line you first decided on. Switching to a design that makes use of a short line is also an option.
Avoid touching the adhesive side with your fingers repeatedly, or pulling hard to get more length. If the tape is twisted, folded, or has picked up dust, do not press it down to hide it; check against the instructions whether it is still usable. If you go beyond the range in which re-applying is allowed, return to using a new section.
If you look at the planned line together with the orientation of the tip before cutting, you can follow the start and end even after you change your grip. Rather than deciding the length by looking only at the tape, set the tip on a stand, compare it with the outline, and prepare only the one piece you will use. You don't need to cut ten pieces to the same length all at once.
4. Separate lifting from positional shift, and review before finishing
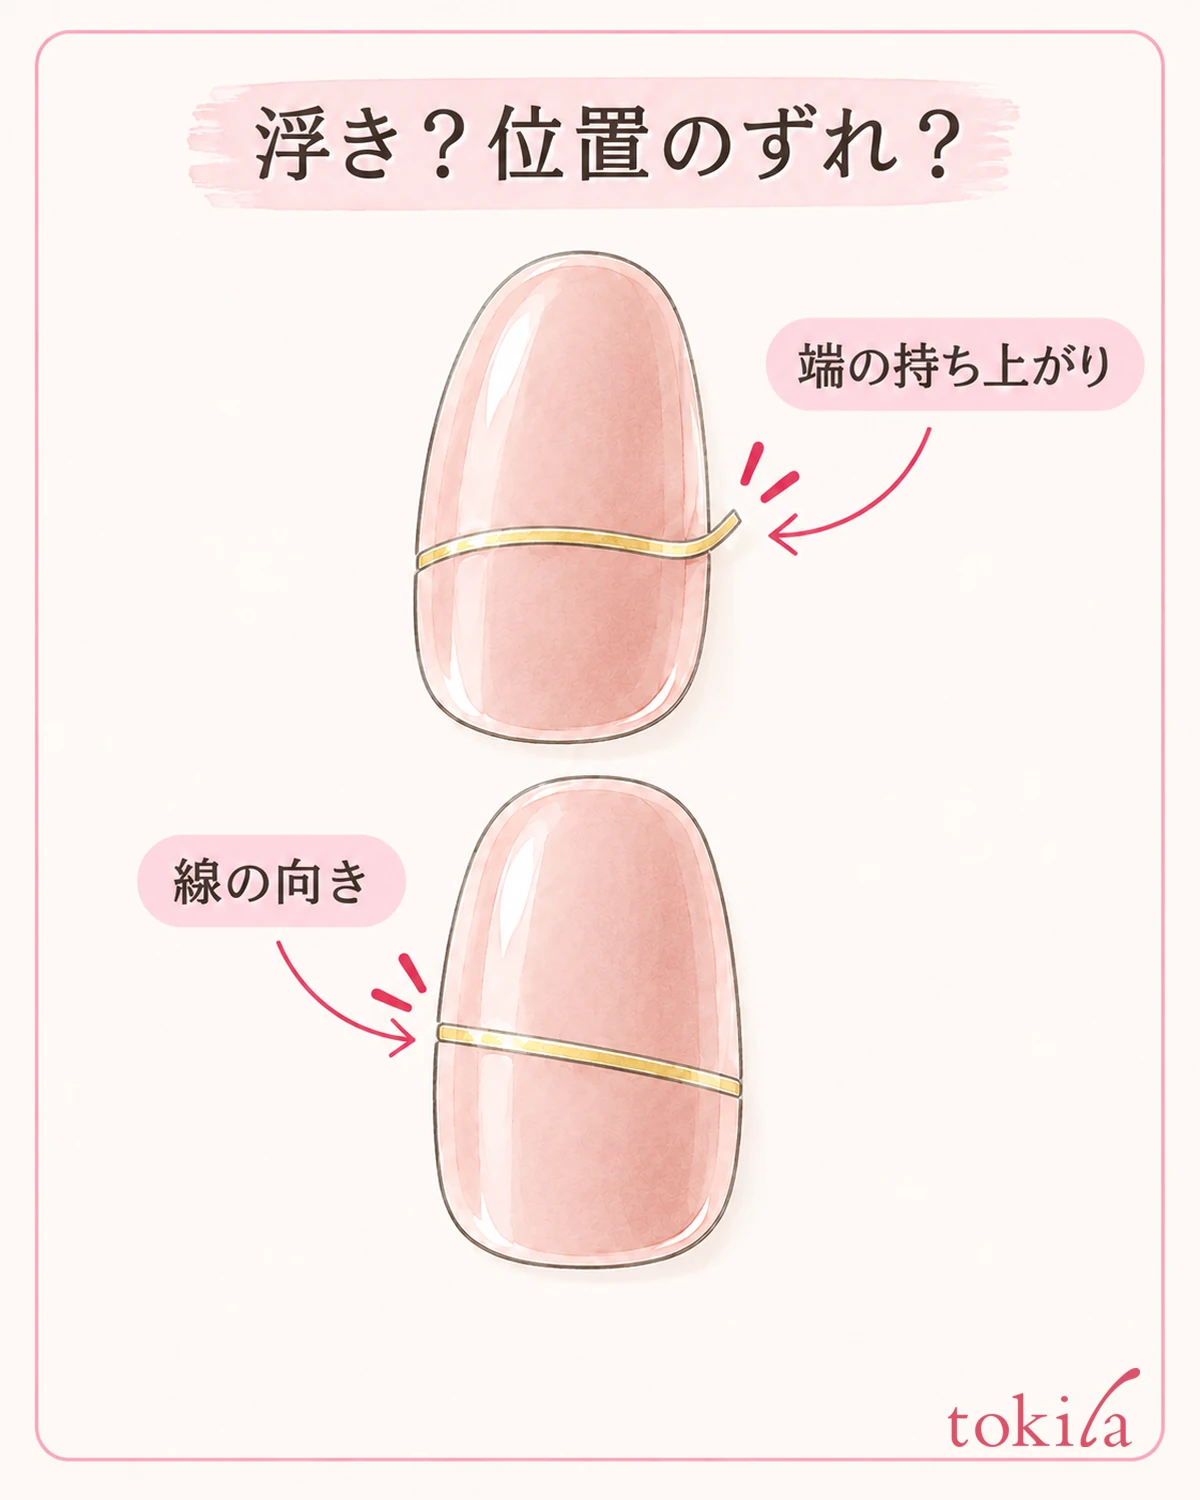
Press the placed tape down with the tool and method specified in the instructions. Do not poke it hard with a pointed tool or rub it all the way to the surrounding skin. If you are concerned about the direction of the line, and if only an end is lifting, do not assume the same way of pressing will solve both; look at where they differ.
When an end looks lifted, first check whether the strip goes outside the nail, whether there is a crease, and whether the preparation of the surface was as specified. Do not decide it is lifting from a white glare of gloss alone; change the angle a little and see whether the strip is actually raised.
If the position has shifted diagonally, check whether re-applying is possible before painting the finish over it to hide it. Pulling the tape hard sideways to change its direction also changes its length and the position of its ends. If you are at a stage where it can be corrected, take it off once; if that is difficult, check from a single strip on a new practice surface.
Also look separately at which end is lifting. If only one side, review whether that end sticks out or is creased; if overall, review the match of materials and the preparation of the surface. However, do not conclude the cause from appearance alone. Do not change the pressing force, the materials, and the drying or curing conditions all at once; return to the instructions and choose what to check.
If you set the practice tip in an orientation where both the end of the tape and the outline of the tip are visible, you can look back at how it fits. Observe not only how the center of the line shines but also whether the surface left between the end and the outline is visible. This is for checking position and should not be treated as the result of verifying how well it actually lasts.
5. Finish with compatible materials, and store the rest together with the instructions
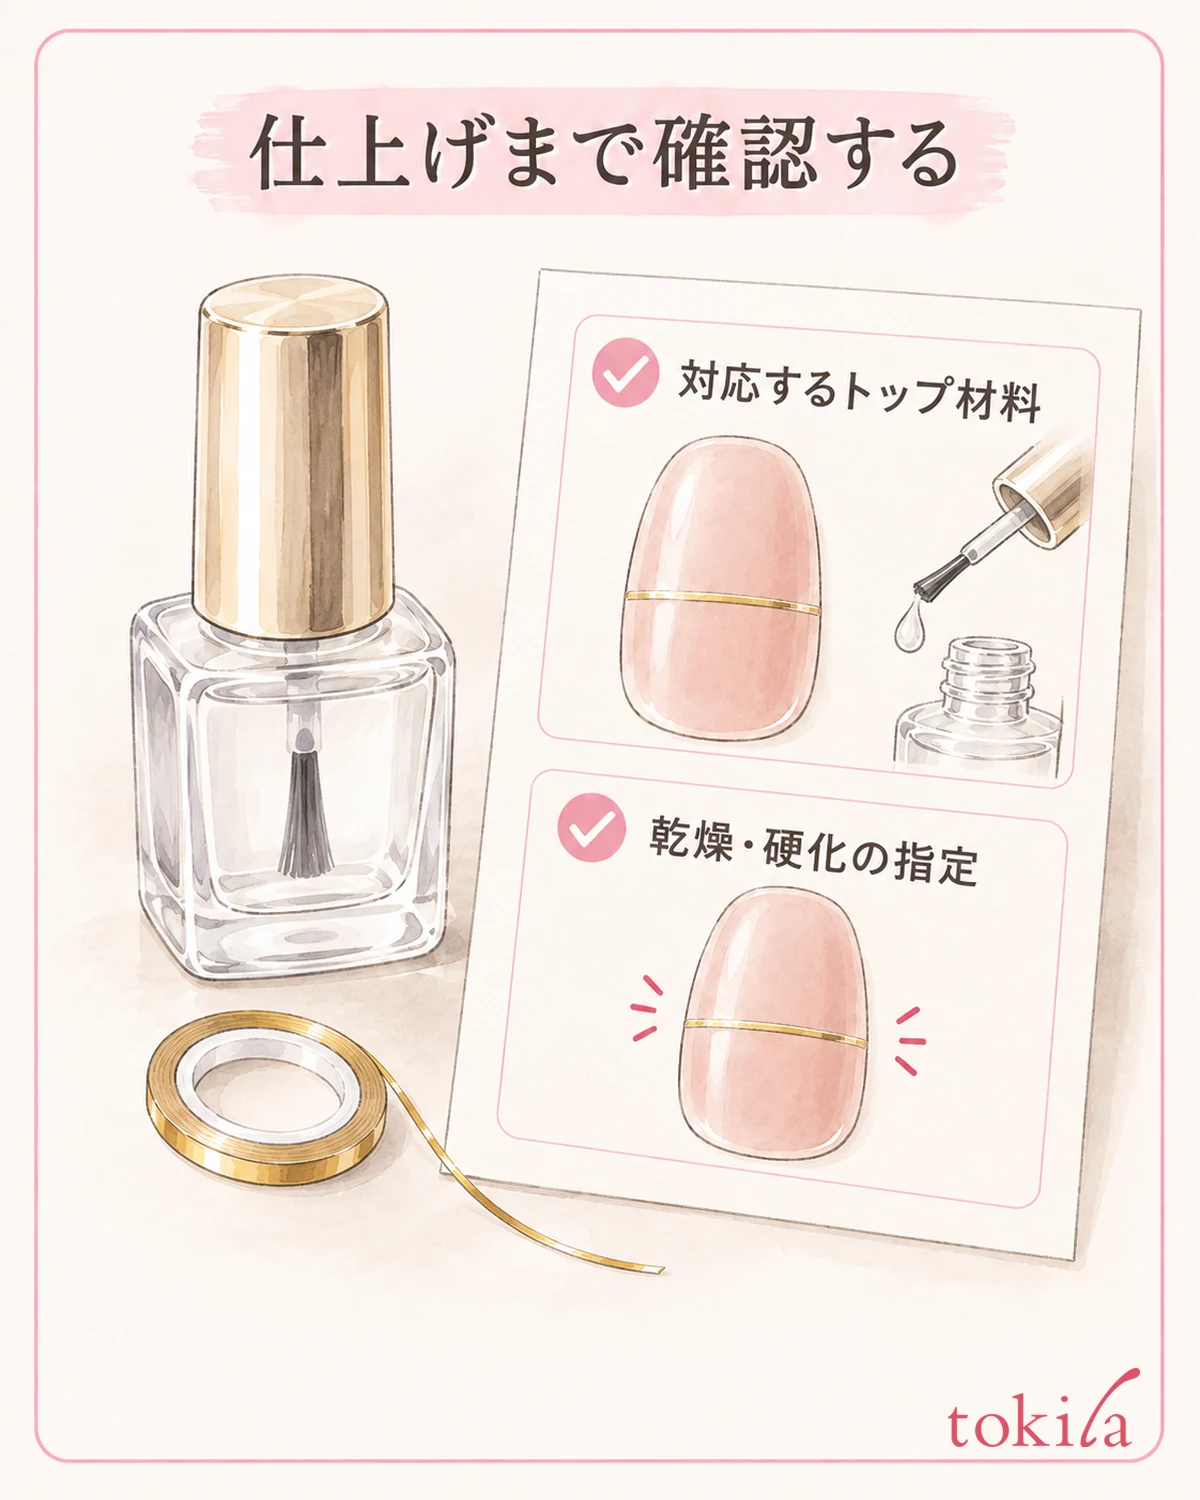
Once you have checked how it fits, finish with the compatible top material as specified. Even if the instructions say to cover to the edge, follow the conditions of the products you have for the amount, the way of applying, and curing or drying. Do not add anything in your own way, such as piling the material thickly only where the tape is, or applying extra light.
After finishing, check not only the position of the line but also whether the ends stick out and whether the material has gotten on the skin. Do not decide whether the process is finished only from how the surface feels to the touch. Check any necessary wiping or drying as part of the series of specifications for the materials you used.
For leftovers, distinguish cut-off pieces from the roll, and return them by the method the product specifies, in a state where the original instructions can be identified. Even with a similar metallic color, do not mix it into the same bag as guide or transfer materials. Next time, storage in which you can immediately check the use and compatible materials will help more than trying to recall it from looks alone.
After looking at the ends up close, check the finished line once more from a little farther away, as a whole. Before you keep layering other lines because small shifts bother you, see whether the impression of the single line you first aimed for remains. If you add lines next time, one method is to sketch the layout on paper first and then begin.
If you keep a record, note the positions you actually saw and what you did, such as "the end of the diagonal line fit" or "I cut it too long and the right end stuck out." Writing separately what you confirmed this time on a practice tip and the combination of materials you used also prevents you from carrying the same procedure over to different materials by assumption.
If you are unsure about the width of a sticker that covers the whole nail, see checking before matching the width of a nail sticker. A transfer type that moves only the pattern onto another surface and the decoration this time, which leaves the thin strip itself, differ in both materials and process. Look at the use of what you have, and choose the preparation for the one you need.
With line tape, first decide the start and end with a single strip, and think about connecting a length that does not go outside with the specified finish. When it doesn't go well, rather than adding force, try choosing which to go back to: the use, the surface you apply it to, or the position of the ends.



