
You've taken out a nail paper palette, but are you unsure how many sheets to use at a time, or whether you can put color on the pad as it is? First check whether it is a disposable product and which side it says to use, then get ready to keep the used sides separate from the unused paper.
This article covers disposable paper palettes used to set out nail art paint temporarily. They are a different tool from stickers you put on your nails or from glass and metal plates that you wash and reuse. Before getting to how to mix colors, it explains the flow of taking out, setting down and putting away, using 5 diagrams and 2 photos.
1. Check what the paper palette is for and which side to use
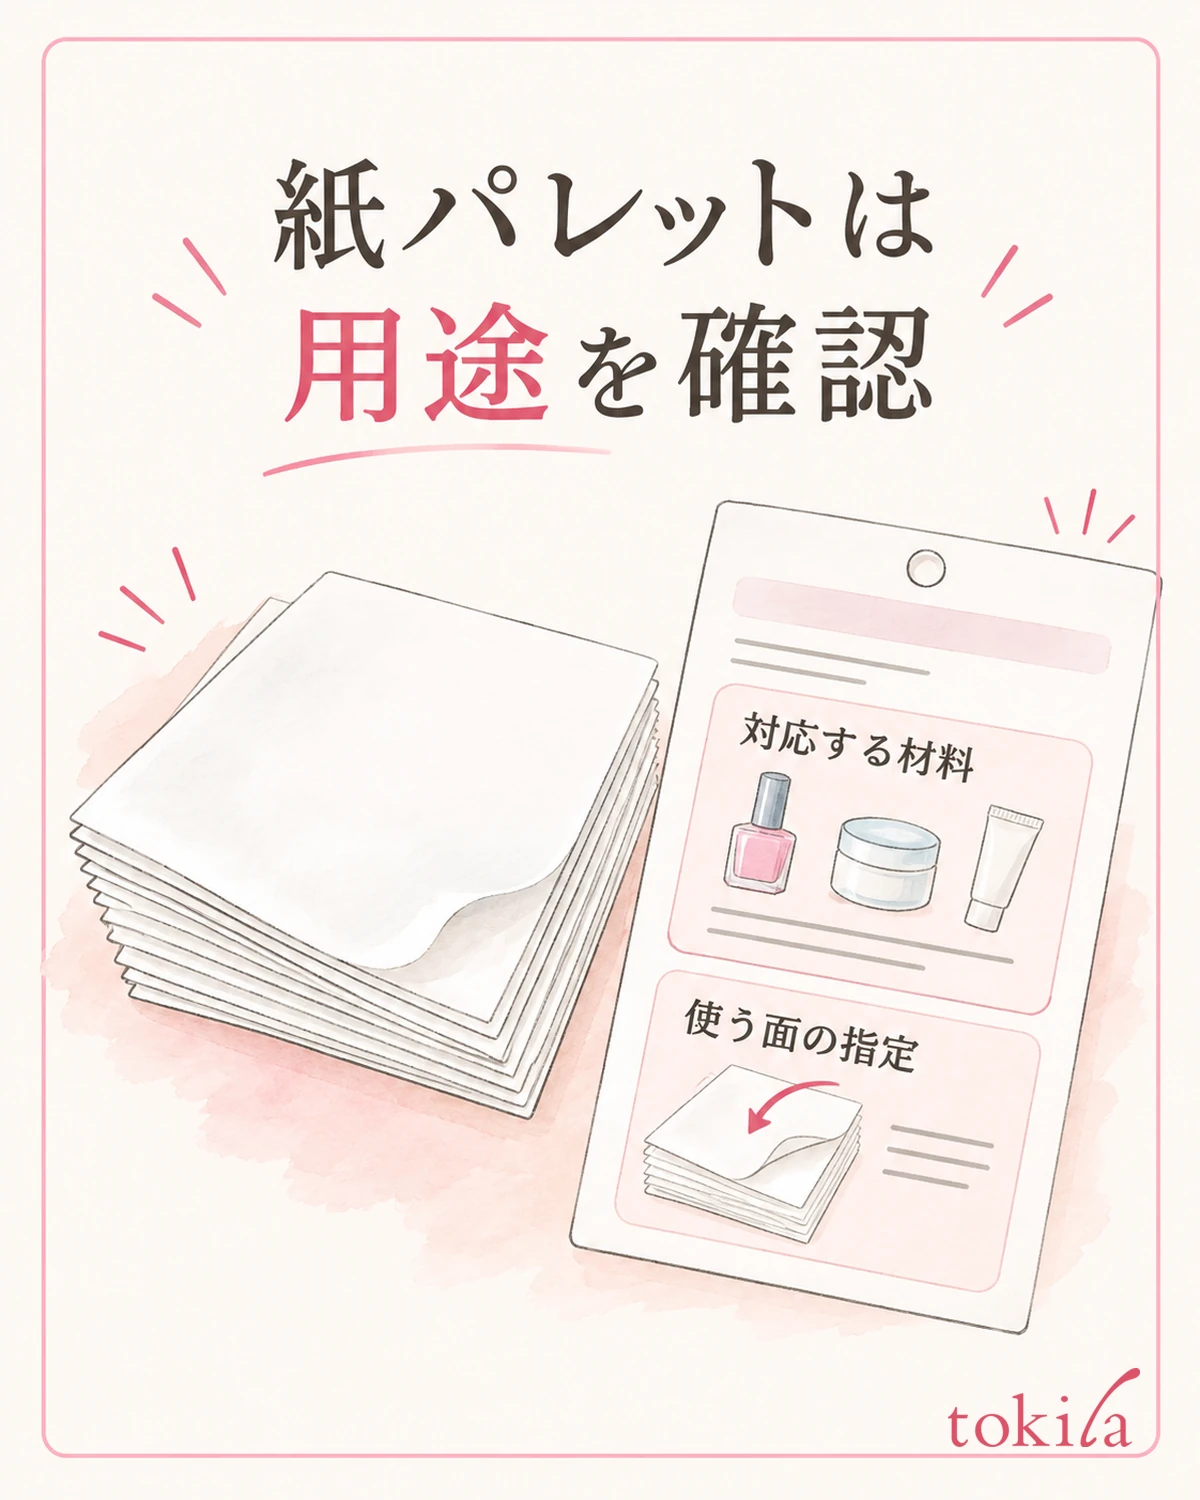
First read the product name and intended use on the packaging, and confirm that it is a paper palette for nails. Don't assume that because it looks like white paper, copy paper or kitchen paper can be used in the same way. Check which paints your product supports before you start working.
Paper palettes include pads made of sheets with a treated surface. Whether a product is meant to be used on one side or on both sides differs from product to product. Don't decide which side is which just because you found the glossy one; look for guidance on the packaging about the side to use and the compatible materials.
Don't stretch a statement that it supports gel or acrylic paint into meaning that it supports every paint you own. If you will put out other materials, such as polish or a dedicated liquid, check whether those can be used too. If you don't know whether they are supported, check the combination before using it rather than spilling a little to test.
Disposable sheets and plates you care for and reuse are also put away differently. Don't assume that paper can be washed and dried to return to its original state, and don't wipe it with a liquid to reuse it without checking whether it is designated as disposable. Also avoid judging water resistance or solvent resistance from the color or thickness of the paper alone.
Keep the packaging within reach until you finish working. However, don't lay it under the surface where you put the paint, and store it in a place where liquid won't get on it. If you keep the product name, the usable materials and the side to use visible all at once, you won't mix up the instructions for a different tool partway through.
A material you apply to your nails can't always be put out on a paper palette meant for drawing. Even among paper products, the intended purposes can differ. Don't repurpose the tool you have for another use; confirm both that it is for nails and that the material you want to use is listed in the instructions.
2. Look at the boundary between the pad and a single sheet, and separate sheets as directed
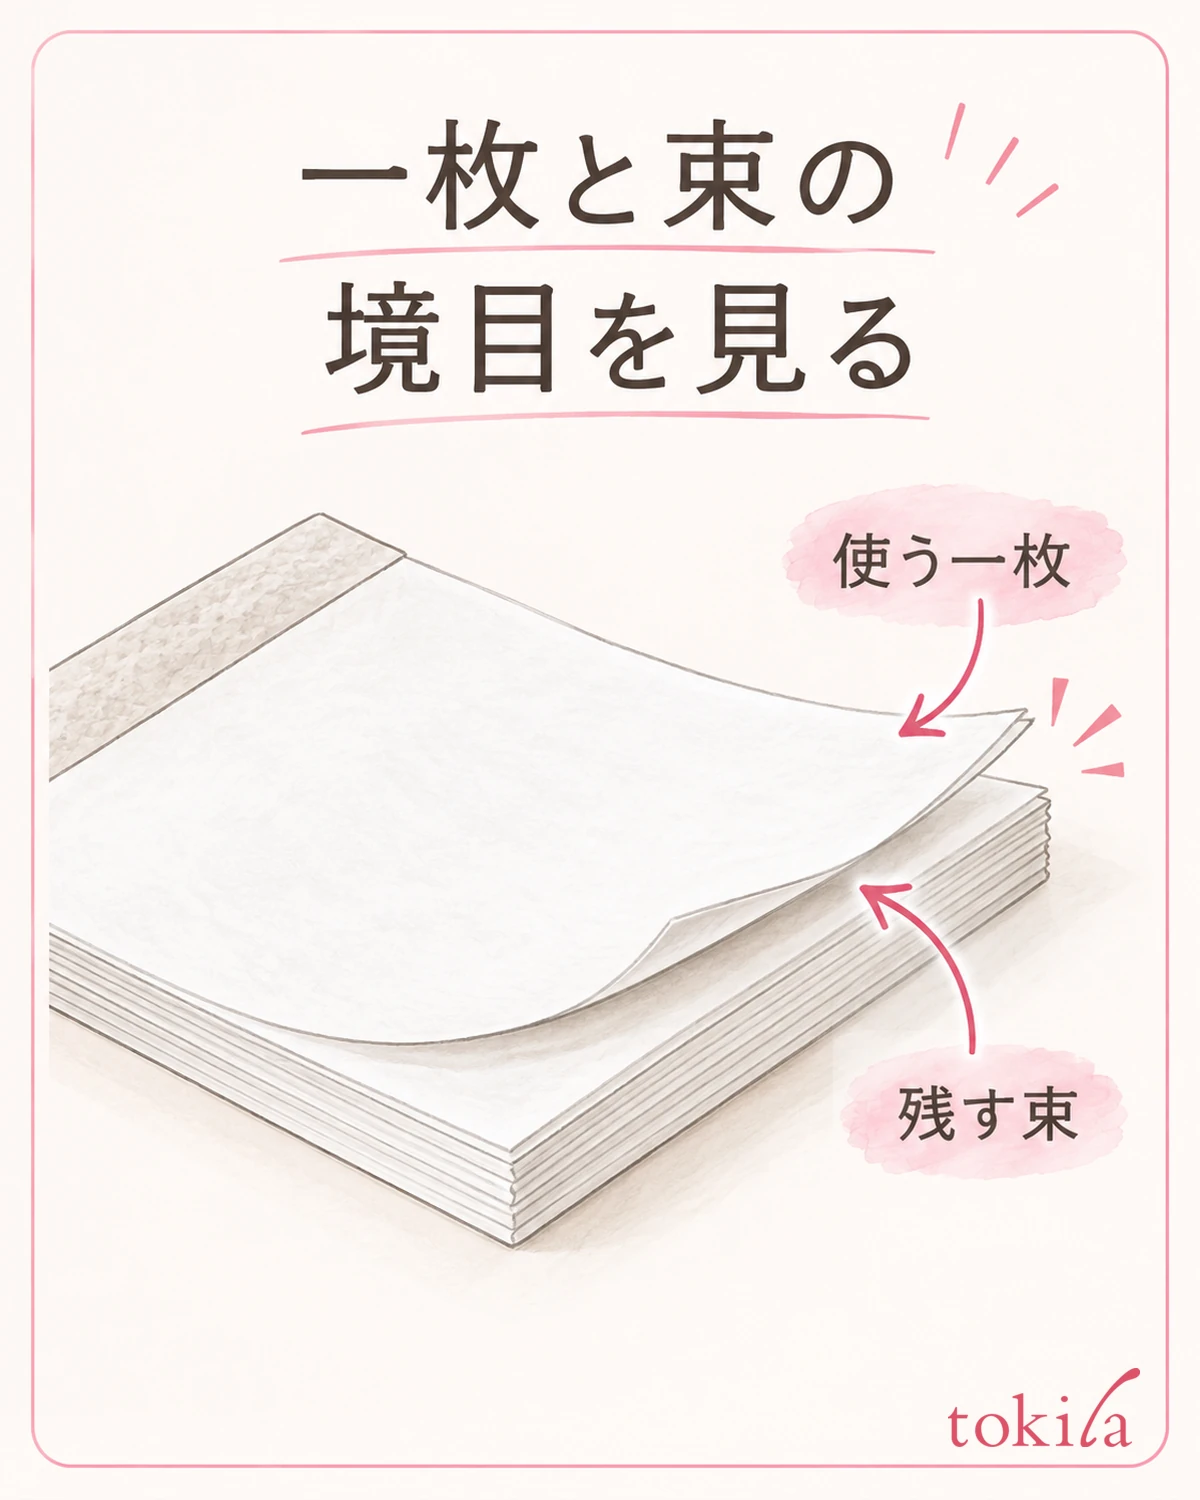
With a bound product, first look at the edges and the glued side. Several sheets may overlap and look like one, so look closely at a corner and check the boundary between the sheet you will use and the pad you will keep. Don't tear it off by force and bend the paper underneath.
If the instructions say to detach a sheet for use, separate one sheet before you put down any paint. If it is built so that you use the pad as it is and remove only the finished sheets, follow that guidance. You don't need to separate every paper palette at the start. What comes first is matching how you use it to the structure of the product you have.
After separating a sheet, check whether the side you will use has any folds or tears. It is easier to work calmly if you fix the condition before you start than if you keep holding down a sheet that is badly curled and lifting, or one with a turned-up edge. Don't repair a damaged surface with liquid or adhesive and use it.
Keep the unused pad away from where you set out the paint. When you remove a soiled sheet, don't slide the unused pad under it. If you separate where you put used sides back from where you take out the next sheet, you can also tell by looking which is unused.
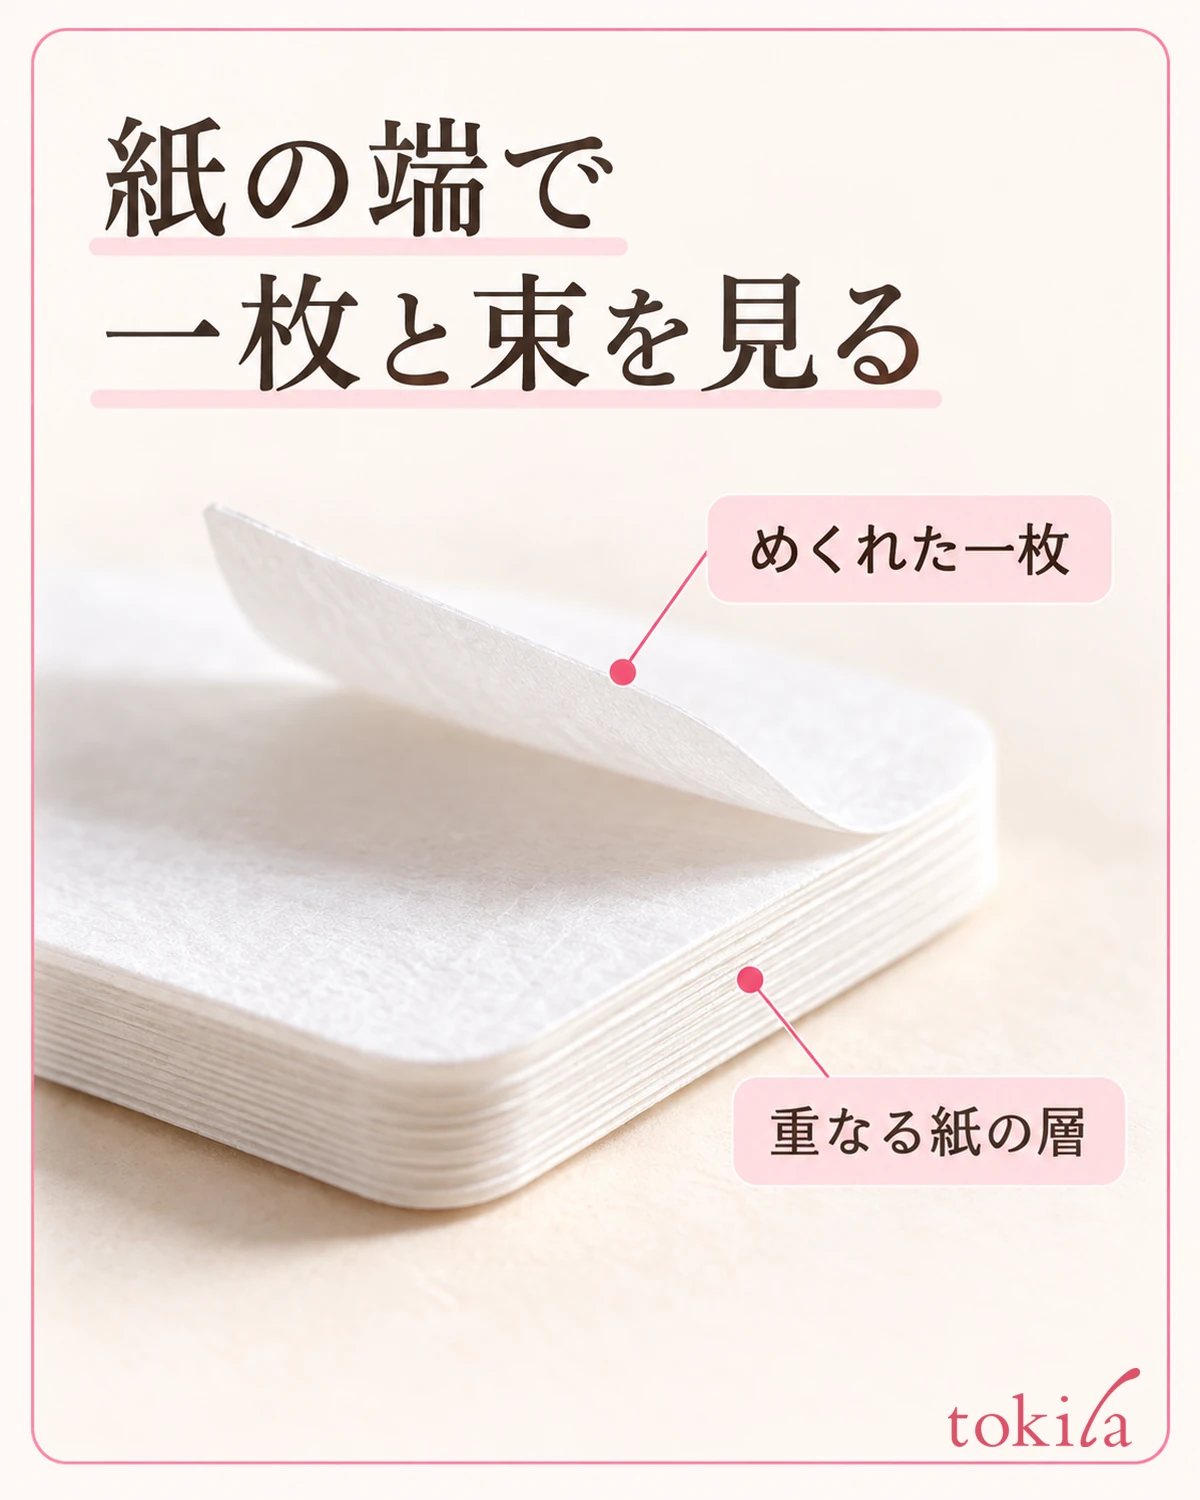
Layering many small sheets to make a wide surface increases the seams and steps. If you don't have enough working surface, choose a product in a compatible size or reduce the number of colors you set out. The point is to decide the area you need first, and not to try to catch the paint by layering paper.
If the whole pad lifts when you try to remove just one sheet, go back to where the glued side is before pulling harder. You don't need to cut open with scissors or a blade something whose release point you can't see. Review how the packaging says to take sheets out, and choose a way that doesn't damage the sheets you are keeping.
3. Clear space for your hand and brush, and place the paper on a flat surface
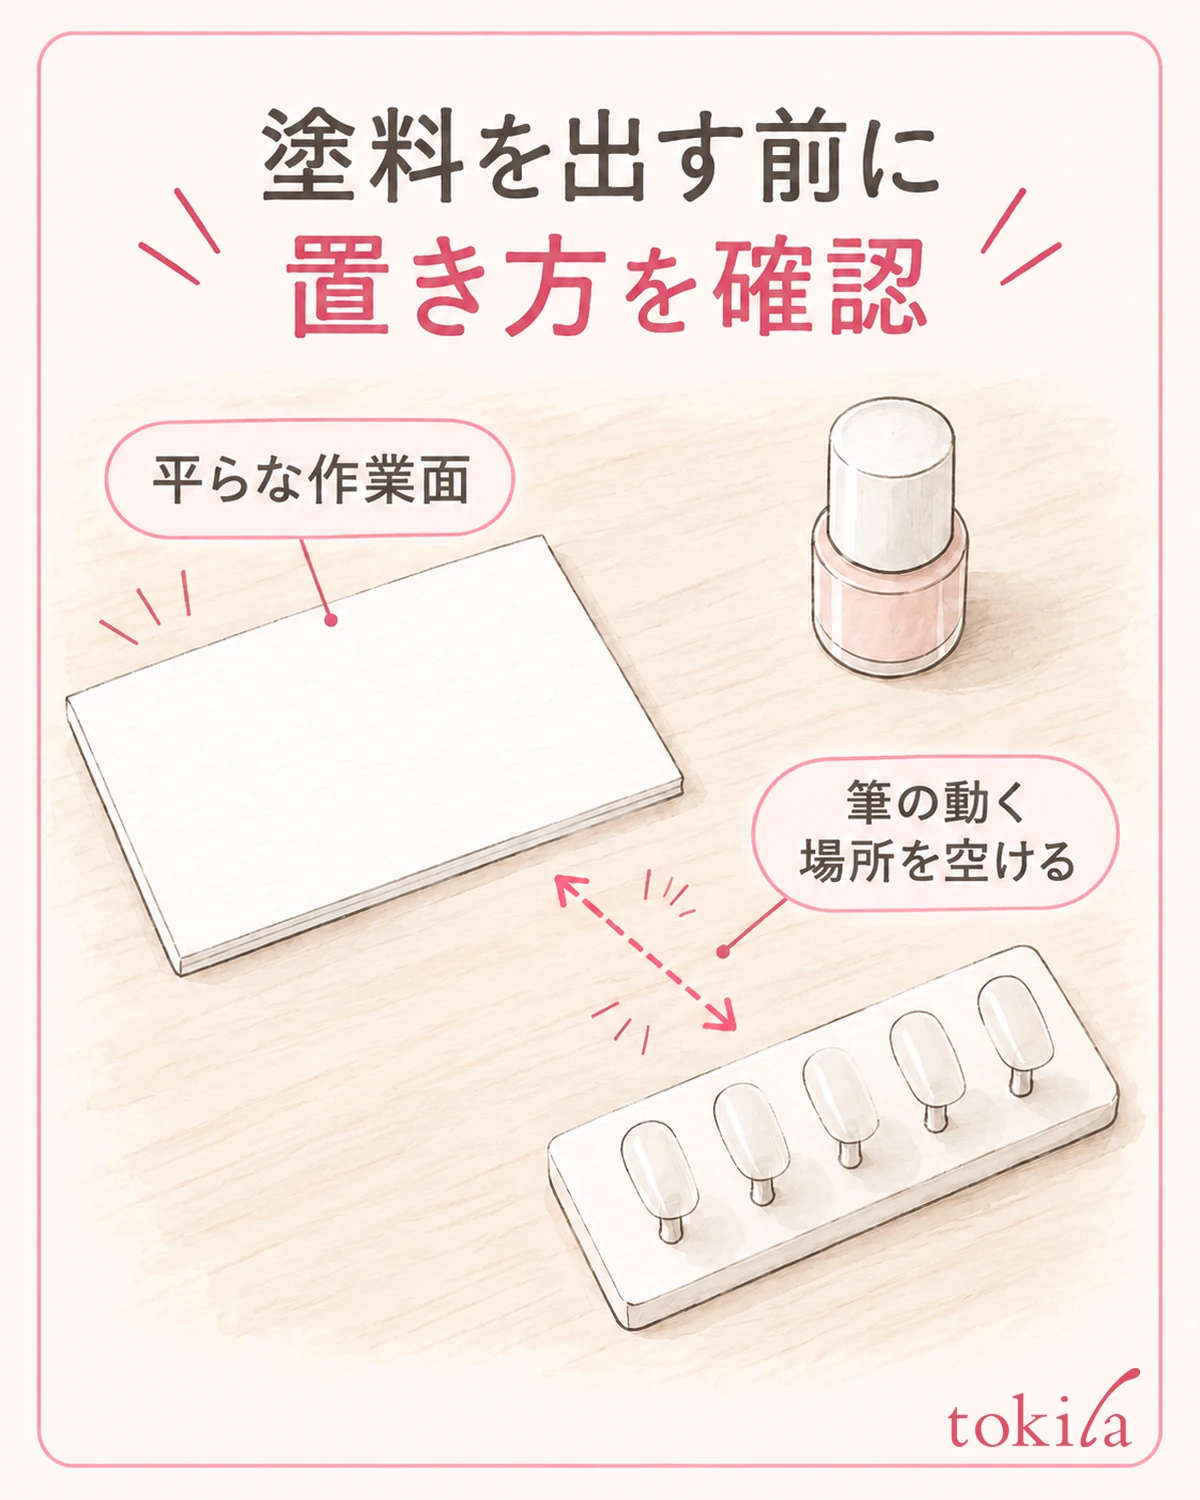
Place the palette on a flat, stable work surface. If the paper hangs over the edge of the table, or is tilted because a tool is caught underneath, fix that before you put out paint. Don't assume paper alone fully protects the desk; prepare the work surface too in a way that suits the materials you use.
Next, set down, for now, the hand that holds the brush, a practice tip and the paint containers. If you arrange things so that carrying the brush from the palette to the tip never crosses over an open container, it is easier to spot where you might knock into something. The side that is easier to move differs between right-handed and left-handed people, so you don't have to treat the left and right of the diagram as the one correct layout.
With the brush still dry, move it and check whether your sleeve touches a corner of the paper and whether your wrist pushes the paper around. This is the stage to rearrange tools. Rather than lifting the paper after the paint is out to look for something to stop it slipping, arrange how you move before you work.
If the paper slips, first recheck whether the surface underneath is flat and whether the paper is curled. Follow the product's guidance for fixing it, and don't leave tape or adhesive exposed on the side where the paint goes. Don't use holding the paper down with a finger next to the paint as a substitute for a stable setup.
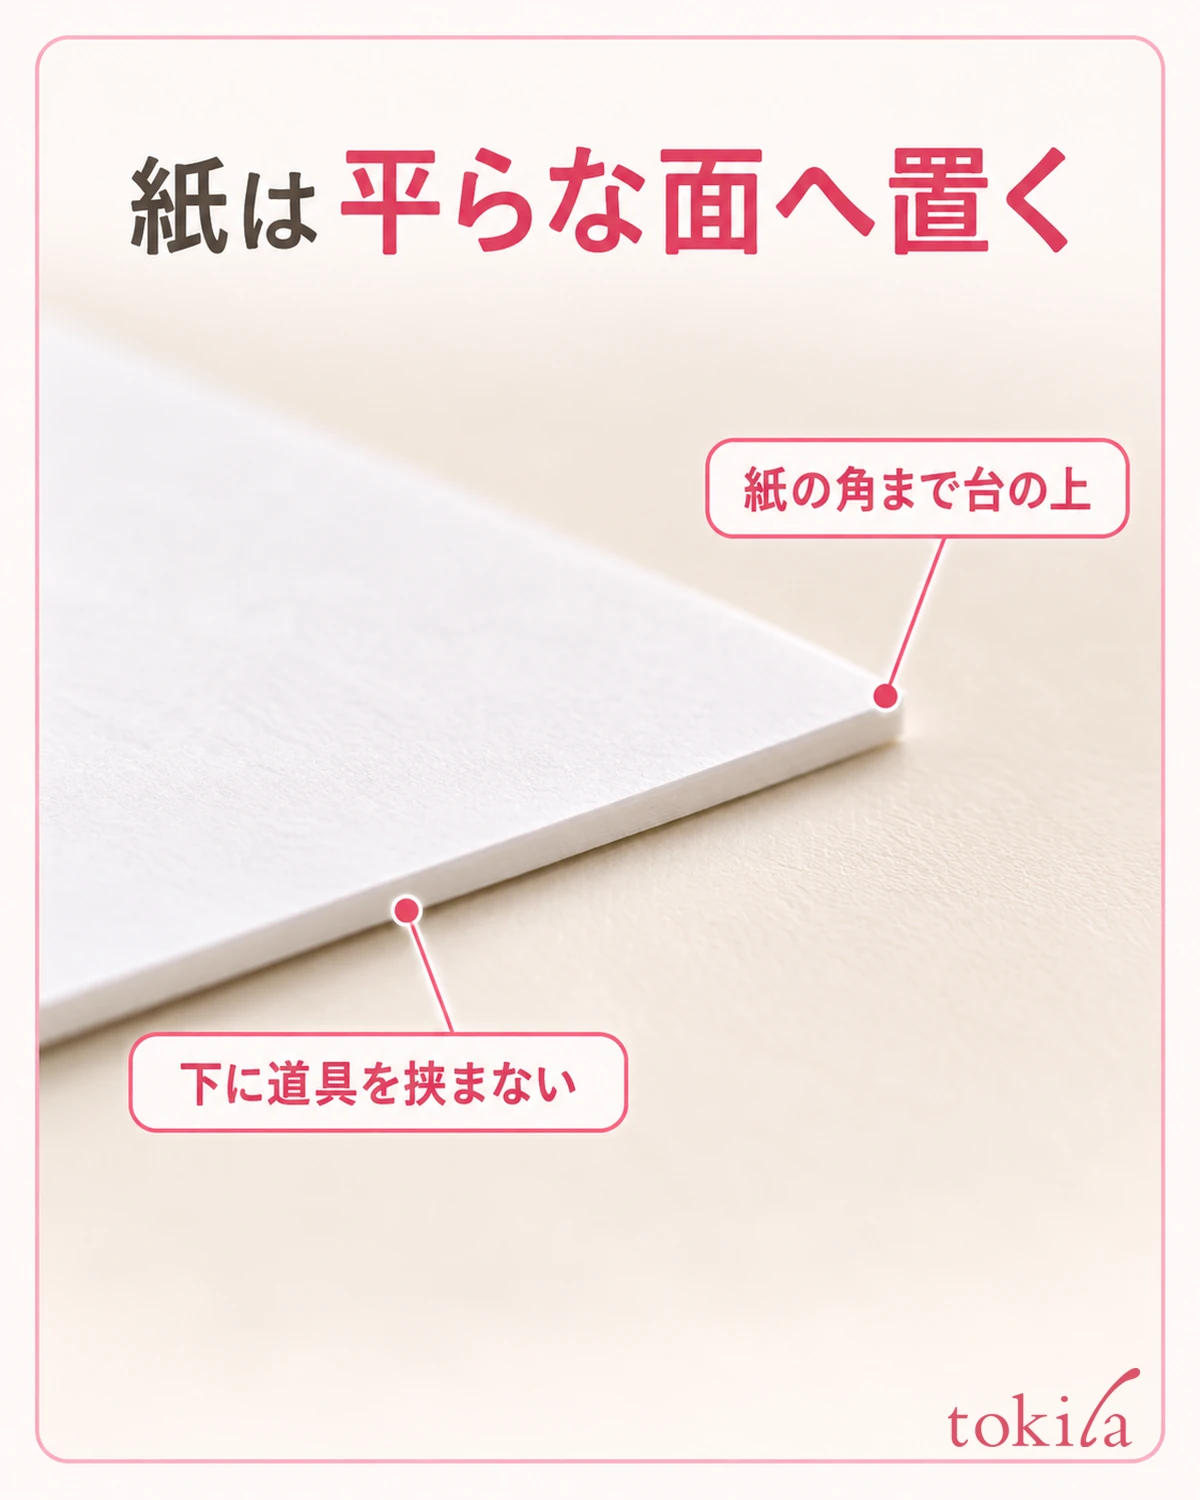
Put out only what you will use around you. If food and drink, a smartphone or the pad of unused paper are close by, you end up moving things more often to avoid the spots where you have put color. Secure the one work surface you need, then set out the paint a little at a time.
Putting a bottle on the paper as a weight can shrink the area where you paint. Before adding tools for stability, check the orientation of the paper and the size of the table. Also set aside a separate place for the brush, and avoid arrangements where you rest the brush across the edge of the palette and its weight moves the paper.
4. Set out the colors you need separately, and don't return what is left to the container
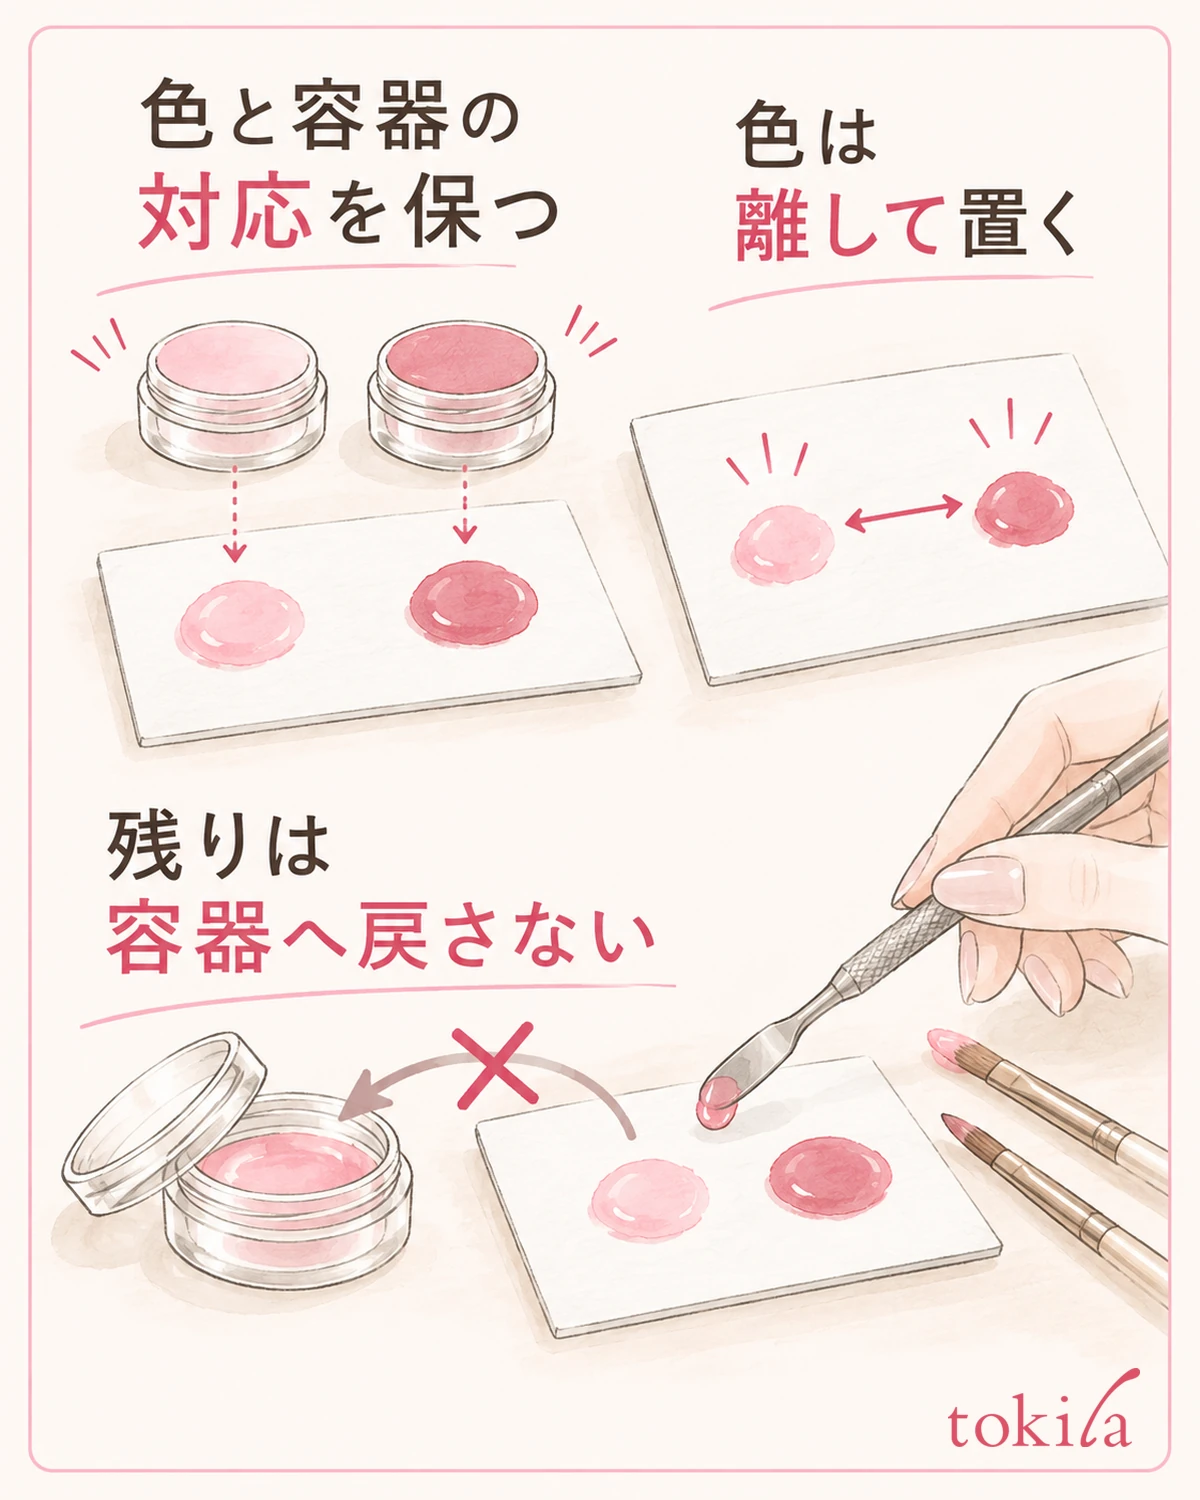
Decide how much to put on the palette from the area you will use in that session. Don't settle on a number of drops that is right for everyone; match it to the paint's instructions and the amount you will practice. If you don't need to mix colors, leave space between the spots so that the brush never touches a different color.
Use tools for taking out colors that suit that paint, too. If another color gets on a color you have taken out, don't return the tool with the mixture to the original container to adjust it. Keep each container paired with its own brush and lid, and make it a routine never to return what you set out to the original.
Check whether mixing colors on the palette is permitted even within the same product line. A paper supporting the material and paints being mixable with each other are separate conditions. Don't make it a step to mix different products just because the colors are similar or both are gels.
Don't use your own judgment to add water or a solvent you have on hand to paint that has begun to dry or whose thickness has changed. Handle the material you put on the palette according to that paint's instructions as well. Don't treat paints cured under a light and paints that air-dry as having the same working time, and close unused containers as needed.
If paint spreads to the edge of the paper, don't pinch the paper and move it as it is; put the brush down and look at the situation. If the paper is damaged or paint has gone through to the back, check the work surface underneath as well. When you run out of usable surface, prepare a clean, compatible side rather than flipping a soiled sheet over and continuing.
On days when you use two colors, decide where the brush goes back to as well. Even if the spots for the colors are far apart, colors can mix if you move the same brush between them without cleaning it. Prepare the tools that keep the colors separate together with the matching care steps, and don't try to solve it with the size of the paper alone.
5. Keep used sides distinct and put away as the paint's instructions say
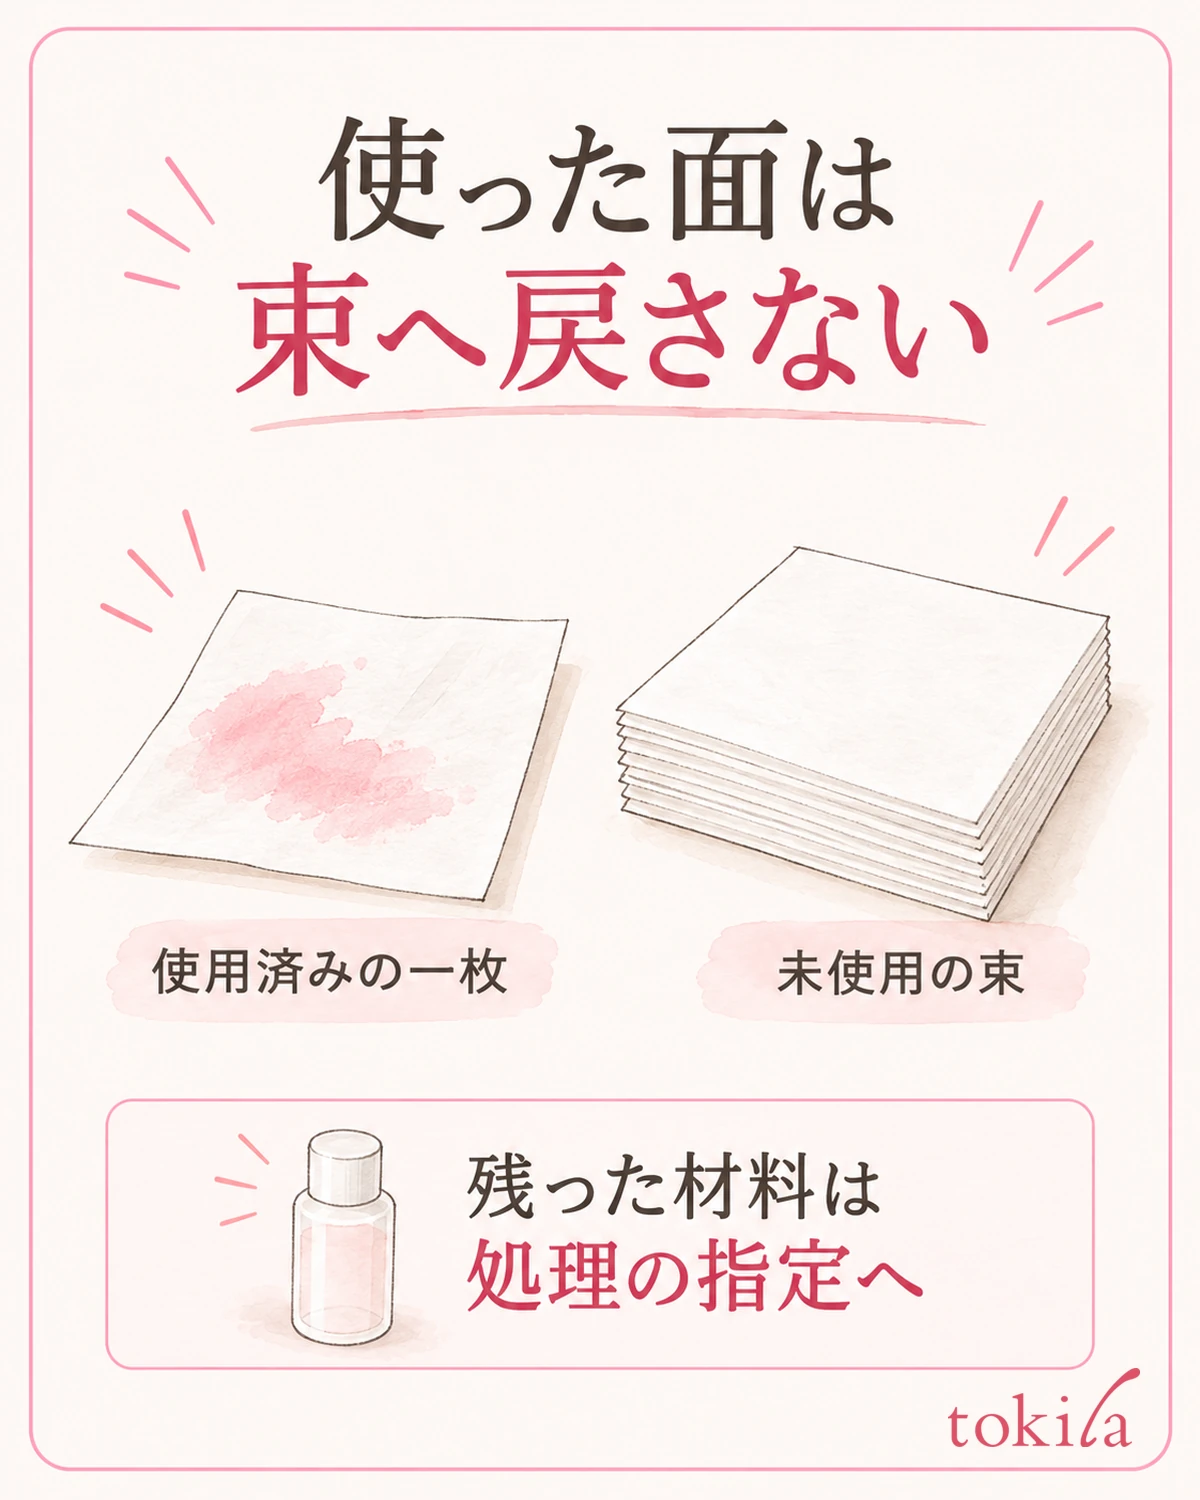
After working, first put away the brush and containers, and look at the material that is left before you move the paper. Even if the surface looks dry, don't decide how to dispose of it by appearance alone. Follow the paint's precautions and your local disposal rules, and don't return paper with liquid on it to the unused pad.
When you remove a used sheet, check an edge that has no color on it and handle it so that you don't transfer any residue to the paper or desk beneath. If material is also on the edge, don't pick the soil off with bare fingers; check which tools and methods suit handling that material.
Methods such as washing used paper to reuse it, or assuming that anything can be thrown away once the leftover gel is cured all together, can't be recommended across the board. Conditions differ depending on the combination of paper and material, so if you don't know the disposal instructions, check them rather than borrowing the steps for another paint.
Check the unused pad you kept for dirt or moisture, and return it to the storage conditions on the packaging. Don't put used paper in the box still stacked; keep it distinct from the clean sheets that remain. If the way you store it makes the edges of the paper curl, review where you keep it before you take out the next sheet.
Next time, it helps to note down one point you were unsure about this time, such as "check the instructions for using the pad as it is" or "put it away from the containers," and carry it into your preparation. Check the purpose and the side before putting out color, tell one sheet from the pad, arrange how you set things down, and put away without returning used sides. Handle your paper palette in this order.
After removing the paper, also check whether the surface underneath is dirty. Even if the paper shows few marks, material that has spread out past the edge may have gotten on the table. Care for the table according to its material and the paint's instructions, and don't assume the same liquid you used to deal with the paper will do for wiping it.
If you are moving on to practicing thin lines with a brush, you can also use how to check the brush tip, amount and pressure on practice tips. Treat the paper you prepare and the tip you actually paint on as separate tools, and check the compatible materials for both.



