You open a sheet mask packet and find one piece that covers your forehead and nose and another that goes around your mouth and chin. Unlike with a one-piece mask, you may pause to wonder which goes on first or whether the edges can overlap at your cheeks.
For a two-piece sheet mask, read the packet or instructions to find out which piece goes on first before unfolding them. Use the eye openings to align the upper piece and the mouth opening to align the lower piece. Once both pieces are on, check the seam at your cheeks for any edges that have folded inward. This guide covers masks with two pieces for the upper and lower face. Kits that use separate spot patches first have a different application process.
1. Identify the upper and lower pieces and check which goes on first
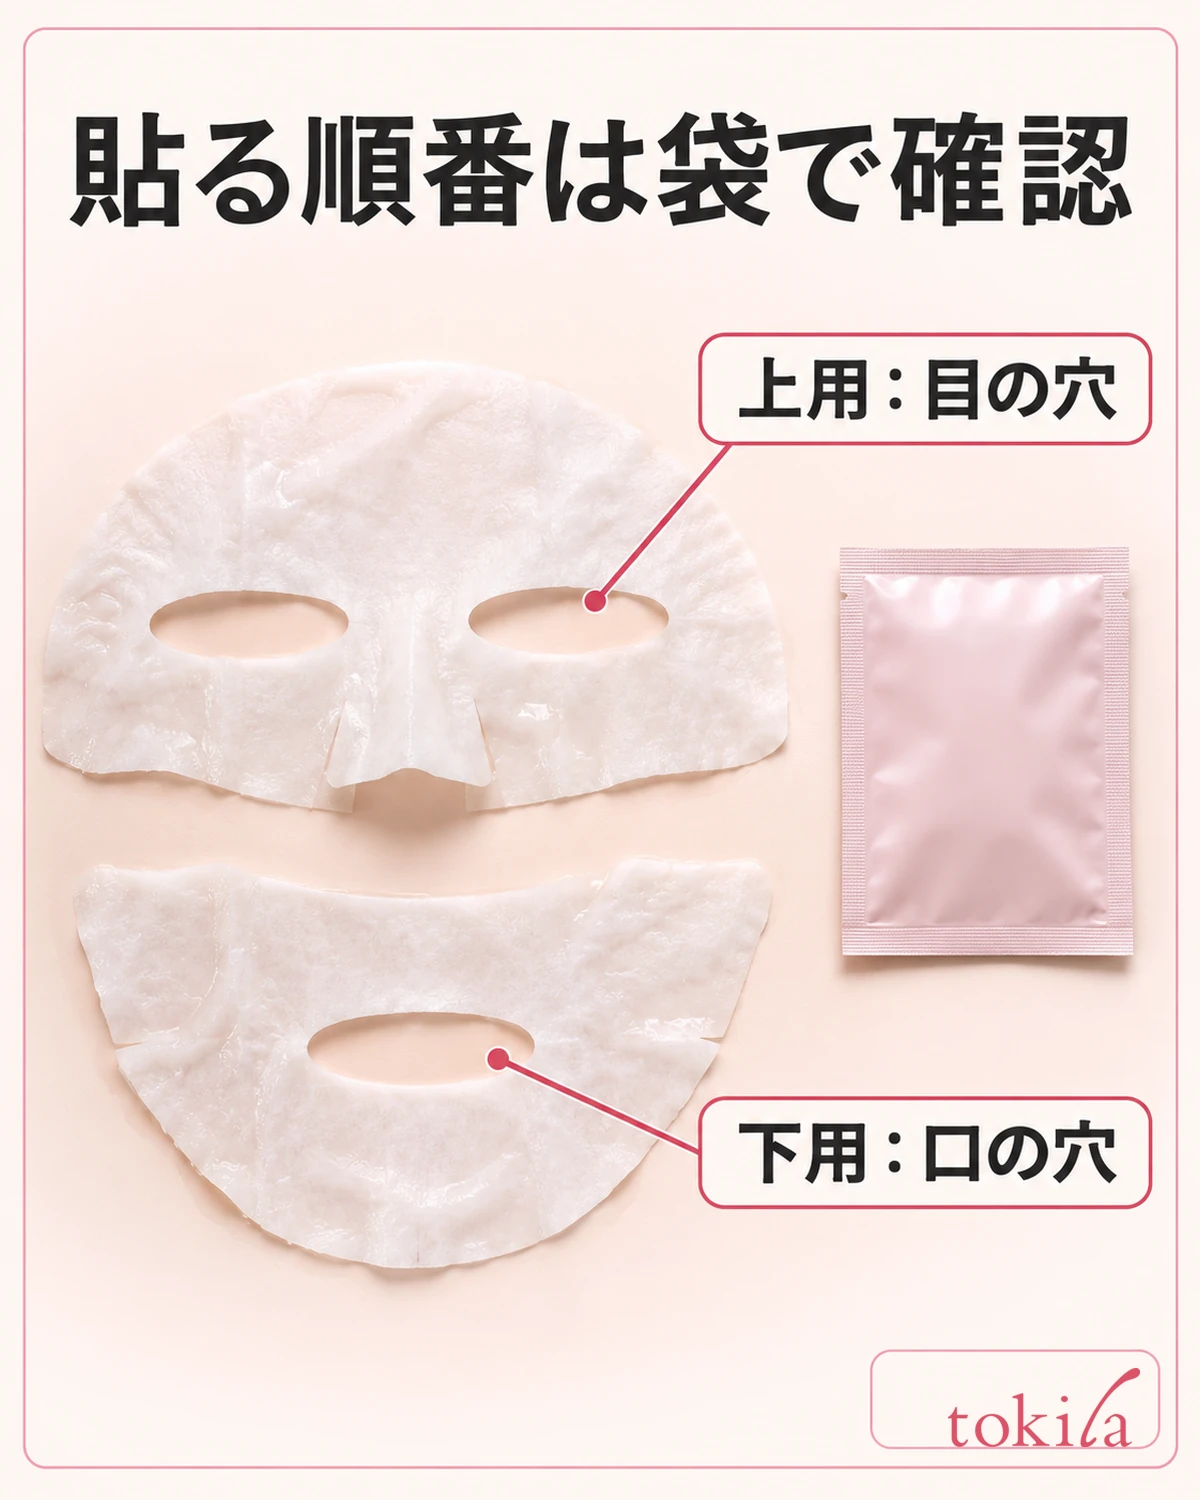
If the pieces come in separate packets marked “upper” and “lower,” lay them out side by side before opening them. If they share one packet, look at the illustration on the back to see the shape of each piece. The upper piece has two eye openings and extends over the forehead and nose. The lower piece has a mouth opening or a notch that leaves your lips clear, and covers the chin area. Looking beyond the size or color of the folded fabric helps you avoid mixing them up.
“Upper” and “lower” tell you where the pieces go. Which piece to apply first may be stated separately. Check the numbered steps or arrows to see whether to start at the top or the bottom. A packet may look like one you used before, but the order can differ. Follow the directions for washing your face, using toner, whether to have wet or dry hands or skin, which side of the sheet faces your skin, and how to handle any backing.
If the pieces are packaged separately, put the one you need first closer to you so you will not have to turn the packet over once serum is on your hands. Follow any specified opening method. If the folded sheet is stuck together and you cannot find the edge, look for a slight step at a corner before pulling at the middle. Once you find an edge you can grasp, use your other hand to support the lower layer and open the overlapped section a little at a time.
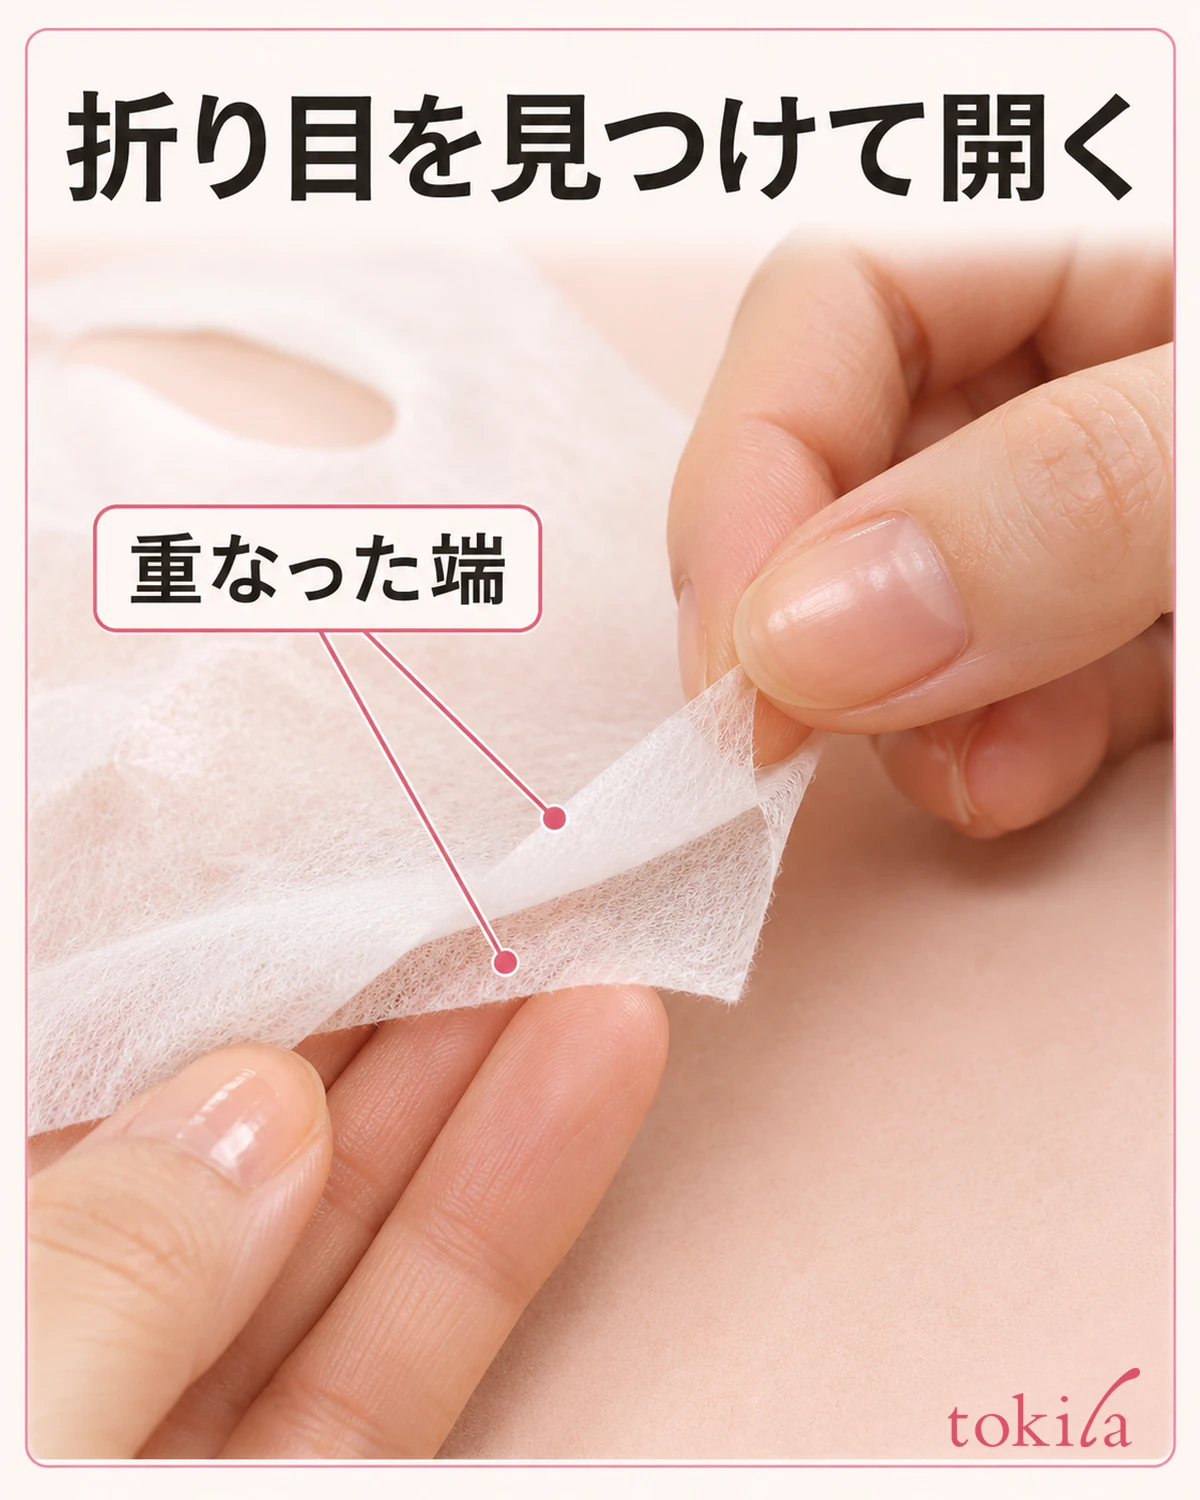
With a two-piece mask, be sure to distinguish the two pieces you wear from any backing or protective film that helps you handle them. If you cannot tell the fabric from the film, go back to the diagram and check when the film should be removed before throwing away a layer based on how it feels.
2. Align the upper piece at the eyes, then smooth it over the forehead and nose
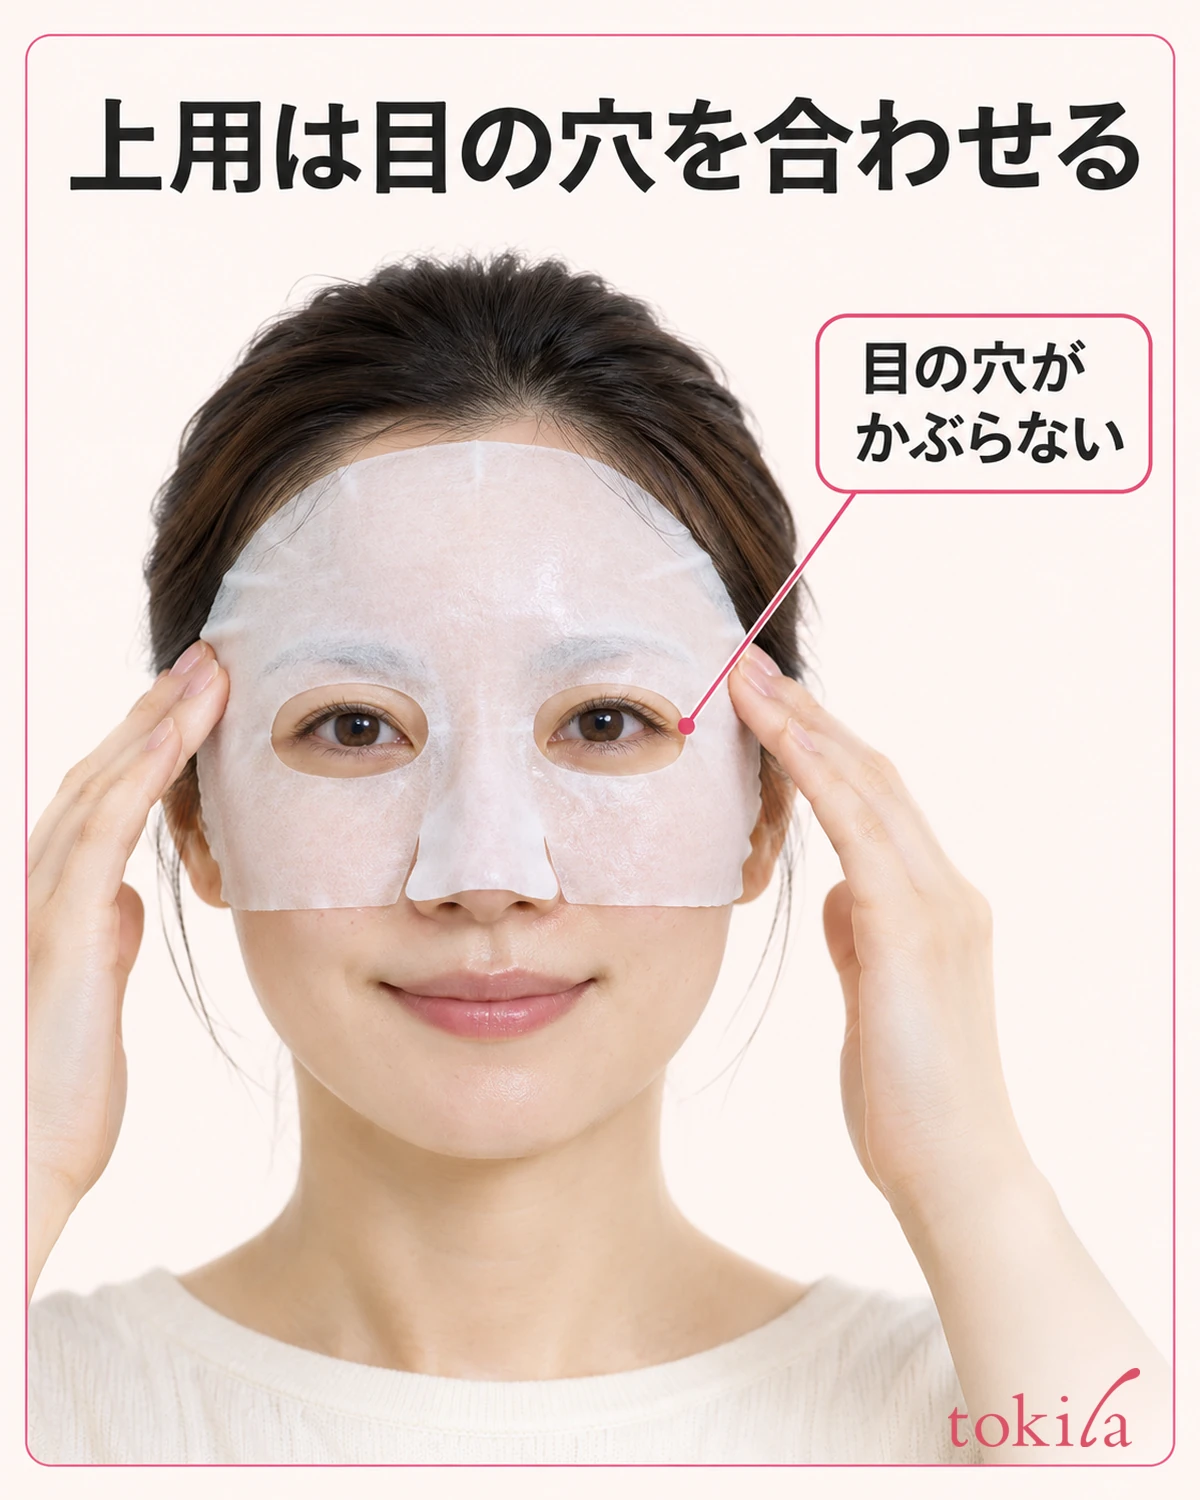
Unfold the upper piece until you can see both eye openings and the part that goes over your nose. If an edge is still stuck, one eye opening can look narrower than it really is. Before bringing the sheet to your face, look at the rims of the openings and the fabric over the nose, and unfold only the areas that have tucked under.
Set a mirror directly in front of you and bring the upper piece close to your face. Find a position where both eye openings line up, then gently smooth the sheet onto your forehead and under your eyes. If you align the top edge first and the openings then sit too high or too low, you will need to reposition the forehead area. If one rim feels too close to your eye, lift the upper piece slightly and realign both openings instead of tugging that edge outward.
If your mask has a separate flap over the nose, check that it has not rolled inward. Where the sheet runs from the bridge of your nose toward the cheeks, shadows can hide a fold when you look straight ahead. Turn your face slightly to check. If the product has flaps that cover the eyelids, follow its directions for those flaps. Avoid forcing the sheet into a position where it covers your eyes or nostrils.
Even if the lower piece goes on first, use the eye openings to position the upper piece. Pulling the upper piece down to align the seam at the cheeks first can shift the eye openings. Once the eyes are aligned, adjust the edges near the cheeks.
3. Align the lower piece at the mouth before wrapping it around the chin
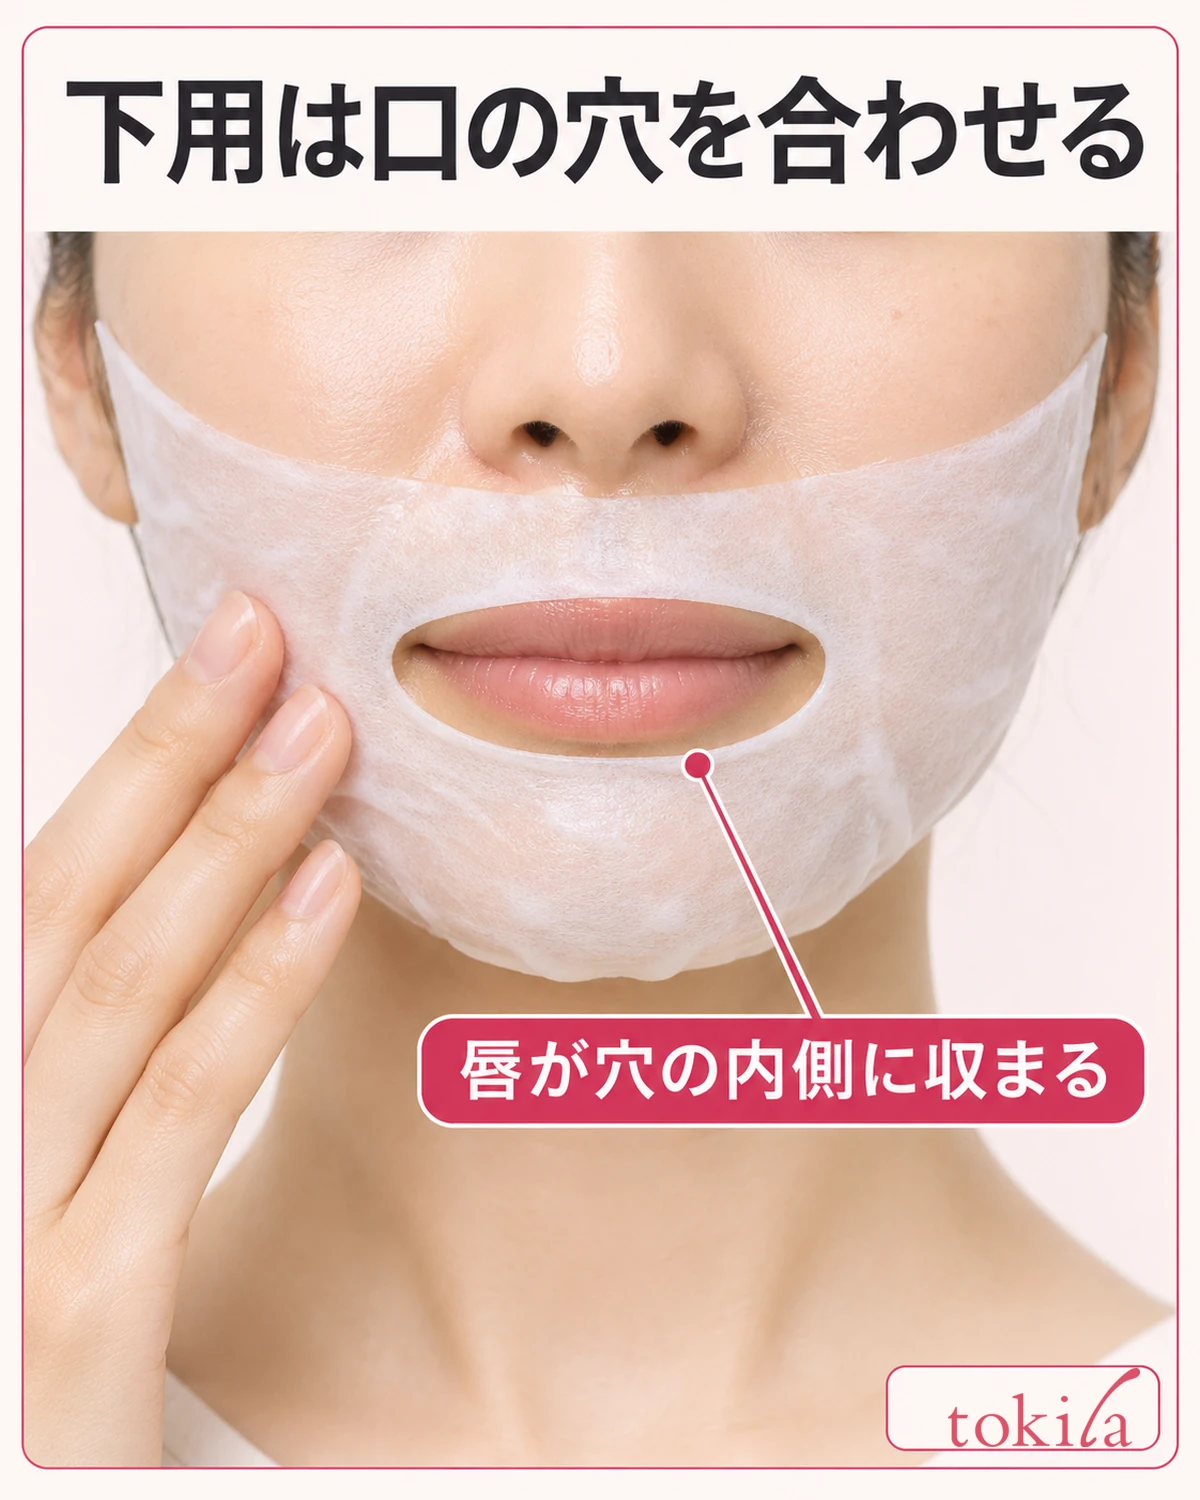
Unfold the lower piece to find the mouth opening or notch and the section that wraps around your chin. In front of a mirror, close your mouth naturally and find a position that leaves your entire lips within the opening. If fabric covers either corner of your mouth, reposition the mouth opening before adjusting the length around the chin. If you align it with your mouth wide open, the way the sheet hangs will change when you close your mouth.
Once the mouth opening lines up, check the front and underside of your chin and smooth the sheet out toward both cheeks. If the fabric has tucked under at the chin, lift the edge briefly and open just the fold. If the sheet has slits for wrapping it under the chin or directions for stretching it, follow that shape or those directions. Areas without such instructions do not need to be pulled hard to increase coverage.
If the sheet seems longer on just one cheek, check whether the mouth opening and the center of the chin section line up before changing the sheet's shape. If the mouth fits but the fabric looks twice as thick on one side of the chin, you may only need to straighten a fold there. If the opening still covers your lips after you reposition it, keep that fit in mind the next time you choose a mask instead of tugging both sides to make it fit.
4. At the cheek seam, distinguish folded edges from flat overlap
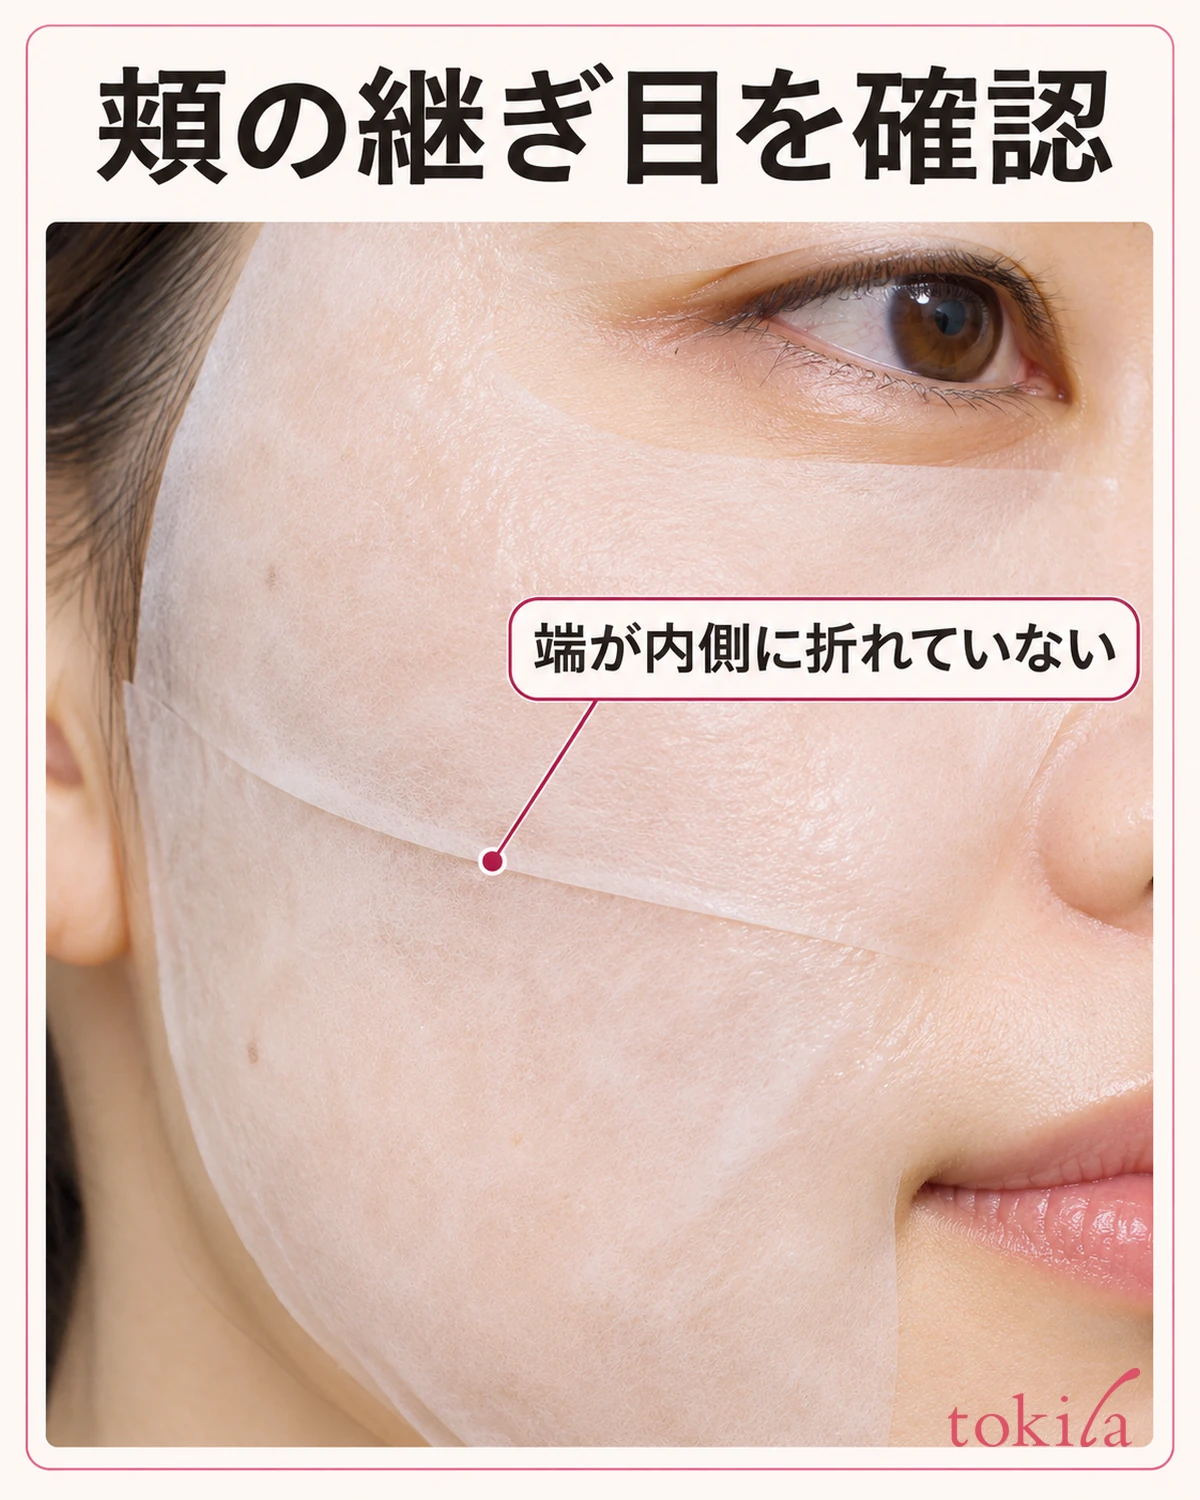
Once both pieces are on, check the seam on your cheeks from the front and from an angle on each side. When the edges overlap flat, you may see only a fine line at the join. When one edge folds back over its own sheet, you may see a whitish strip or a small raised step just in that spot. A visible seam alone does not necessarily mean you need to reposition the mask.
If you cannot tell which sheet the edge belongs to, follow the line from under your eye toward your cheek in good light. An edge that curls back inward over a short stretch can indicate a fold like the one shown in the photo. Look for the raised edge rather than pressing down the entire seam to hide it.
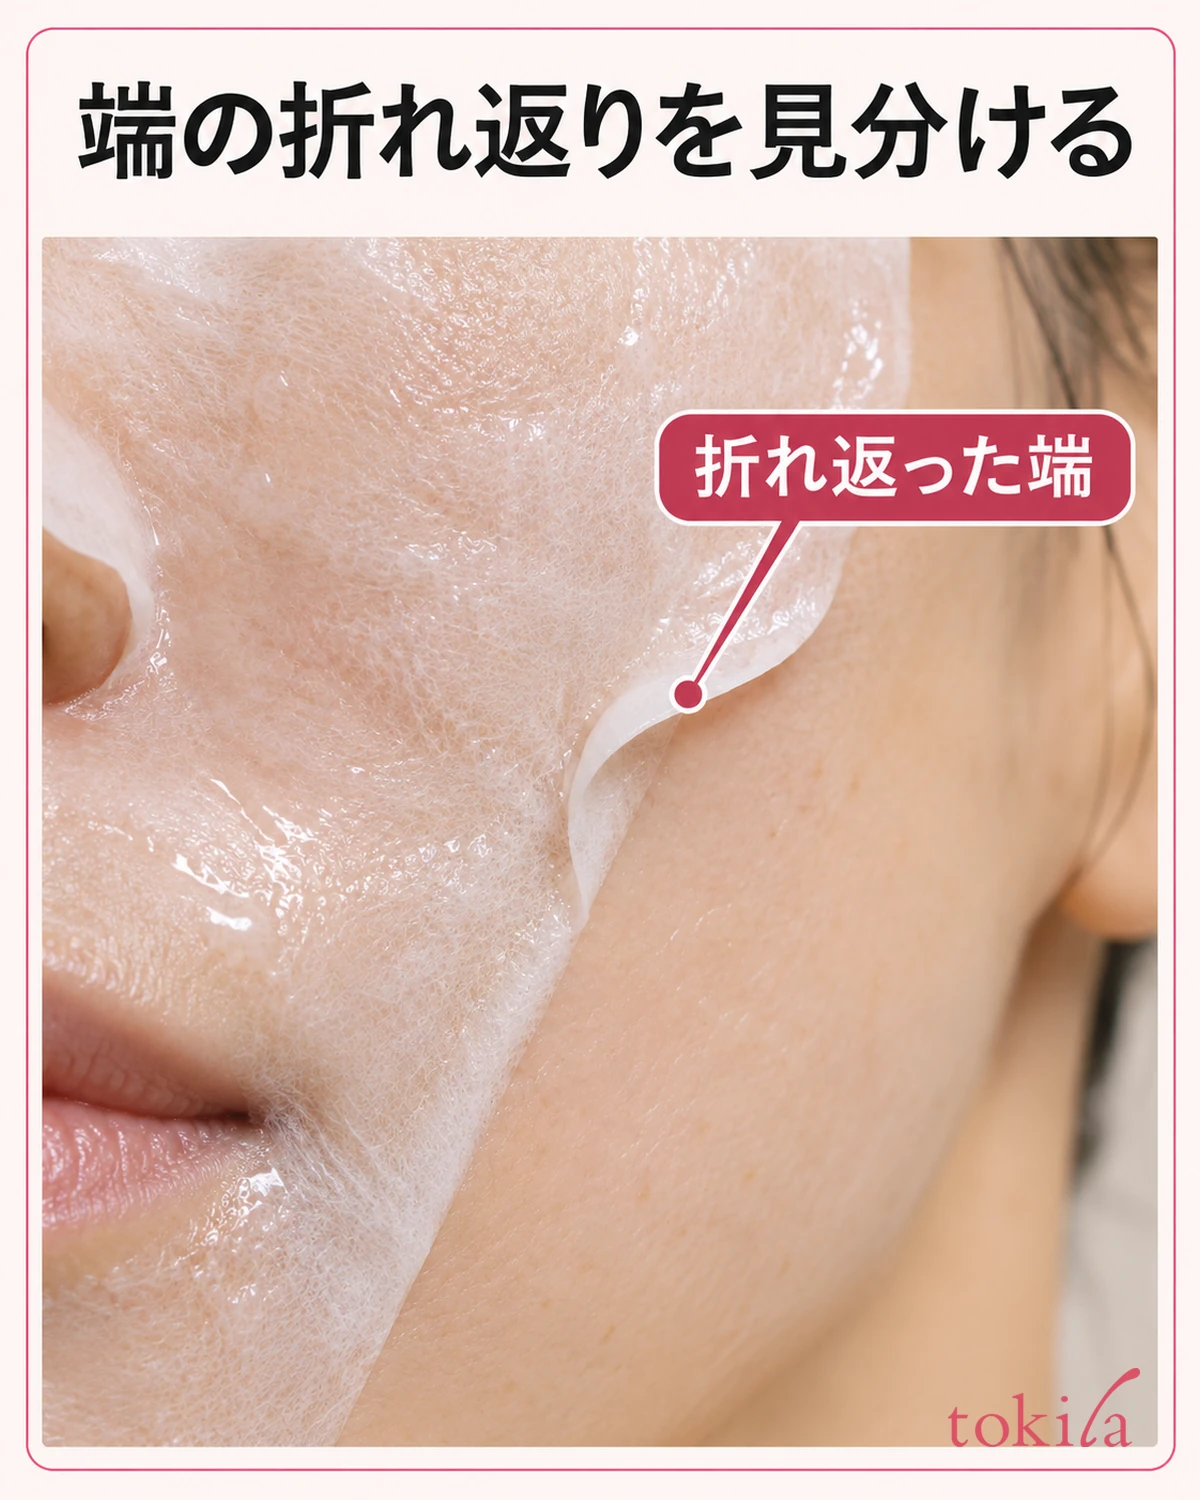
If you find a fold, gently lift that edge, unfold it, and smooth it back onto your cheek. Keep the eye and mouth openings in place as you work, without pulling the whole upper piece down or moving the lower piece up. If the directions specify how to overlap the pieces, follow the diagram. If it shows a gap, leave the gap. Focus on whether each piece lies against its intended area of the face.
If the sheet is also lifting around your nostrils or forehead and it seems unrelated to the seam between the two pieces, see how to fix lifting and folds in a sheet mask. If the seam is the only issue, adjust it first and check that the eye and mouth openings have stayed in place.
5. Remove at the stated time and note what to look for next time
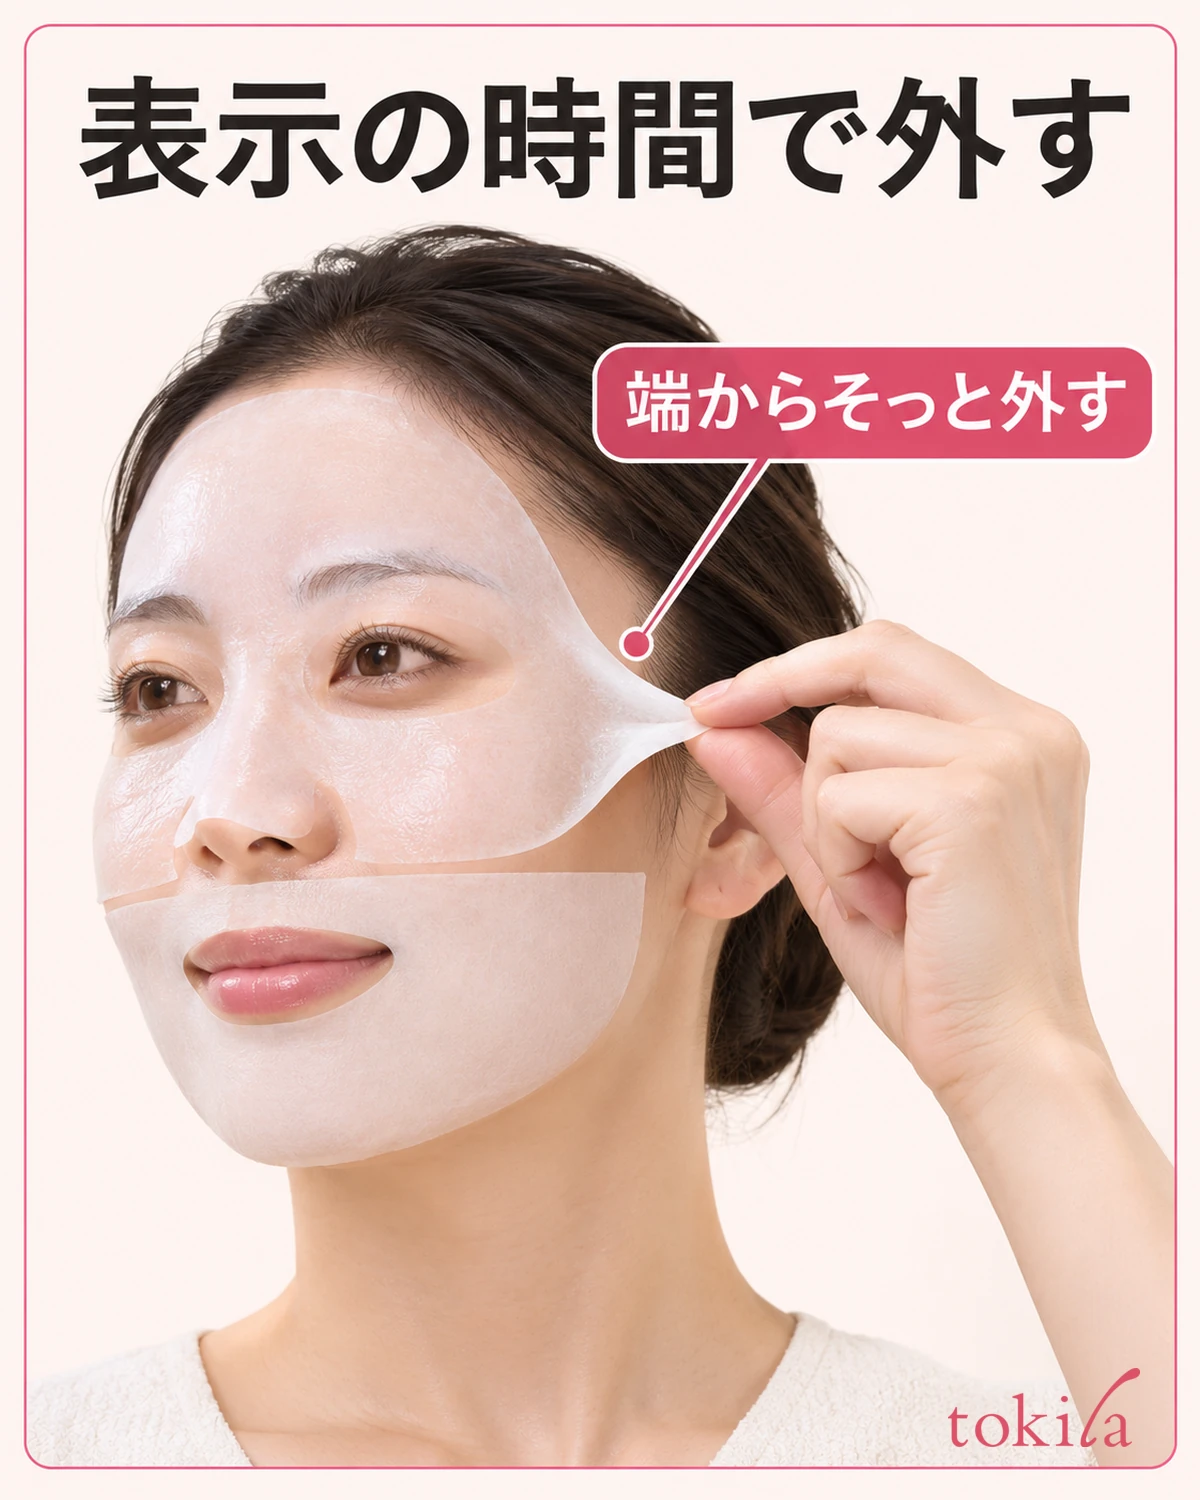
Read the directions for when to take off the mask. The sheet's dryness is a poor guide. If each piece has a specified time or removal procedure, follow it. If you use your phone as a timer, read when to start timing before applying the mask so you will know what to do as you put on the second piece.
When time is up, lightly pinch an accessible edge and gently peel it off without pulling on your skin. Where the pieces overlap, they may move together. If the instructions call for removing them separately, lightly hold the piece you want to keep in place. Follow the product directions for whether to smooth in or wipe away any liquid left on the skin and what to use afterward. Some masks use different formulas in the upper and lower pieces, so there is no need to mix the leftover liquids in the packet and reapply them yourself.
Remember one area that did not fit well to help you choose next time. If the eye openings line up but you have excess fabric at the cheeks, look at the length of the upper piece and how the two pieces overlap. If the mouth opening fits but fabric bunches under the chin, look at the shape and slits in the lower piece. A two-piece mask lets you adjust separate areas, while the openings themselves are still cut to a set shape.
The next time you open a packet, check which piece goes on first. Align the upper piece with your eyes and the lower piece with your mouth. Finish by checking the edges at the cheeks. Breaking it into these three checks makes it easier to see where to adjust if a piece shifts.