
Right after you put your socks on, the bulge of the heel has slipped toward the sole or the ankle. Even if you tug at the cuff with every step, the same spot keeps bothering you. When that happens, check the front and back of the sock and the position of the heel before pulling it up.
This article focuses on everyday socks with a shaped heel and explains an order for readjusting them from the toes while seated. For tube-shaped socks without a heel and for compression socks, the same method is not applied across the board, and the labeling on the pair you own comes first. It also helps to remember that how you put them on cannot solve problems of size or wear by itself.
1. Check where the slipping happens and which way round the sock is
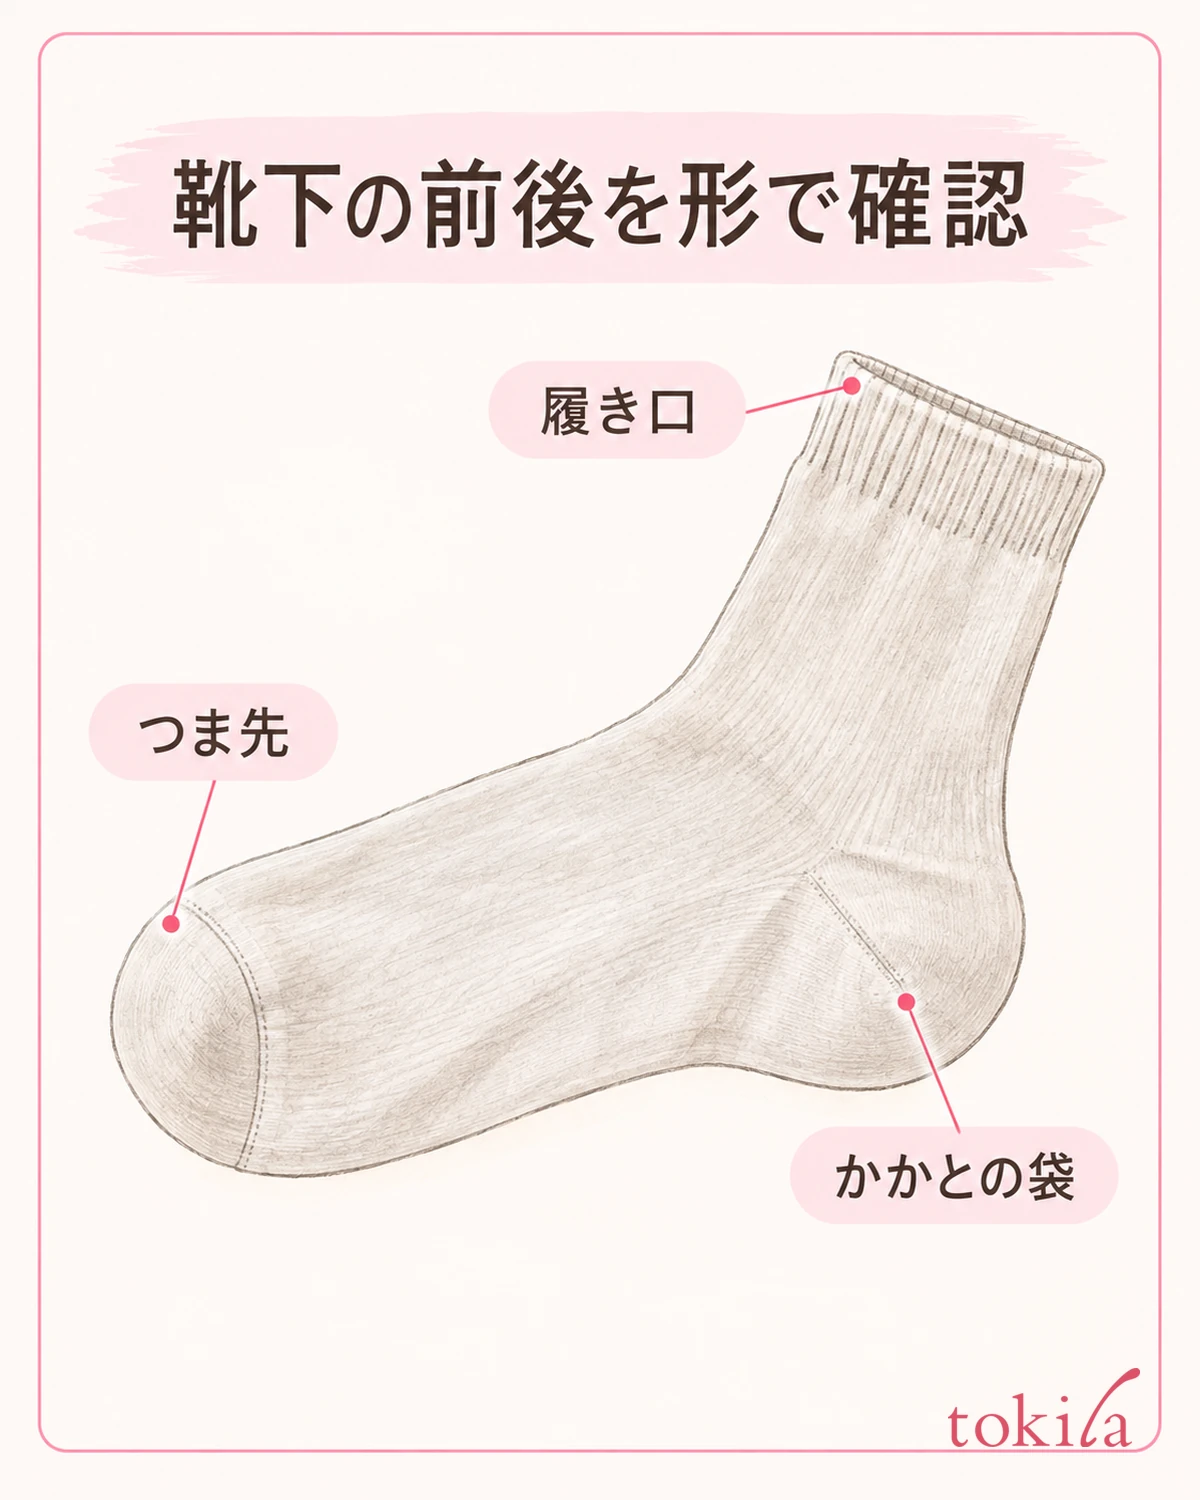
First take off your shoes and sit on a stable chair. Look at where the sock is slipping, and whether the bulge of the heel has moved toward the sole or up toward the ankle. If only the cuff is dropping, and if the part that wraps the foot is rotating, the places to check are different.
Take the sock off once and lay it down sideways. Find the toe pocket, the bulge of the heel, and the tube that continues up from the ankle. Do not decide front from back by the position of a pattern or logo alone; look at the actual shape. If the product has left/right designations or front/back marks, check those labels too.
A tube sock with no heel division is outside the scope of the explanation about matching a particular bulge to the heel of your foot. Do not force a fold or decide that a color boundary is the heel. If the shape is hard to tell, check the structure from the instructions that came with the product or the information at the time of purchase.
Check the right side and the wrong side by how the seams show and by the labeling. Some socks are designated to be worn inside out, so do not assume that both sides are the same. If only one sock is turned inside out, match it to the product's designation before comparing the feel or shape of left and right.
If a seam runs diagonally across the top of the foot, or the sole of the sock has turned sideways, do not keep twisting back only at the ankle. The toe side may be twisted as well, so it is easier to check by taking the sock off and straightening its direction.
If you had folded the cuff, return it to its natural state once before checking the position. If you pull it up with layers of fabric still stacked, it is hard to tell which part is in excess. Think of making the sock look short and fitting it to your foot as separate tasks.
Even on days when only one foot slips, do not decide that the cause is only the difference in size between your feet. Look in turn at the shape of the left and right socks, how they are worn, and the condition when you put on your shoes. Do not hurry to pull both up with the same force; start by checking the position of the one sock that bothers you.
2. Sit, put in your toes, and fit the heel pocket

Hold the sock and gather up the tube part so that your toes go in easily. Rather than grabbing only the cuff and pulling it all the way from the toes in one go, get it into a state where the shape of your foot can be seated step by step. Hold it with the pads of your fingers so that nails or rings do not catch on the knit.
Put in your toes and check whether the fabric is stretched tightly over your fingertips. Do not push the extra fabric between your toes or force the seam under the sole. The position of the toe seam differs by product, so do not make it a rule that it always sits above the nail.
Next, seat the sock's heel pocket on the heel of your foot. From the side, check that the bulge of the pocket is not far off toward the middle of the sole or behind the ankle. Rather than looking for a perfectly fitted single line, the starting point is to see whether the roundness of your heel sits inside the pocket.

If your toes are pulled hard at this point, stop pulling the cuff further up. Return fabric between the toes and the heel and readjust, and if it is still tight, check the size and shape. Do not keep wearing the socks with your toes curled just to correct the heel position.
Even if there is a lot of extra fabric around the ankle, first check whether your heel is in the pocket. Sending all the excess toward the toes can make your fingertips feel awkward. Arrange the fabric little by little, look at the toes, heel and instep in order, and do not gather the wrinkles in any one place.
If leaning forward is hard, do not keep pushing through it; consider a posture in which it is easier to support your foot, or a dressing aid you already have. You do not need to fix the sock while standing on one leg and lifting your toes. Here, being able to check your feet while seated takes priority over rushing the steps.
3. Without moving the heel, smooth the fabric above the ankle

Once the heel is seated, smooth the fabric upward little by little, starting from the fabric near the ankle. Do not keep pulling hard on the cuff alone; hold the middle of the tube from both sides and check that the wrinkles are not collecting in one spot. Stop at the sock's natural length and do not stretch it to look longer.
After smoothing upward, look from the side once more to see whether the heel pocket has risen toward the ankle. If it has, stop pulling only the tube further, return a little fabric from the ankle downward and adjust the position. Check at the same time that your toes are not cramped.
If the fabric is twisted over the instep, loosen it once and correct the direction rather than turning only the ankle. Do not insist on lining up the vertical line of a pattern straight to the front; use as your guide that the sole sits on the sole of your foot and there is no twisting or strong tightness.
For socks designed to have the cuff folded, adjust them according to that guidance. Do not fold ordinary socks in several layers and tighten them to stop the slipping. Switching to something with stronger elastic will not necessarily solve it either, so first review how well the part that wraps your foot fits.
When comparing with a pair of a different length, remember that not only the length but also the heel shape and the foot size labeling differ. Even if a short sock gives no trouble and a long one bothers you, there is no need to decide that length alone was the cause.
Products with designated order or positions of wear, such as compression or medical socks, should be separated from the everyday adjustments introduced here. Do not change the pressure by folding over or layering, and check how to wear that product. Even for everyday socks, avoid fixing the position by putting up with pain.
4. Separate the moments of slipping before and after putting on shoes

Once the position is right while seated, lower your feet to the floor before putting on shoes and check the standing state. Look at whether extra fabric remains at the toes and whether the bulge of the heel is far off. If it was already slipping from the start, put the sock on again before blaming the way you walk.
Next, put on the shoes you normally use. Loosen the openable parts of the shoes enough, and put your foot in without crushing the heel counter. Check for differences from before wearing them, such as the sock being pulled as you push into the shoe or the toes becoming cramped inside it.
Walk a short distance without strain, then sit down once and take off your shoes. Look at the heel, toes and direction of the instep of the sock and check which part has moved. To investigate slipping, you do not need to walk for a long time or stick homemade non-slip items inside your shoes.
If it slips only when you wear shoes, also check the thickness of the socks and the room in the shoes. Before adding adjustments such as layering thick socks to fill the space or wearing two thin pairs to hold them in place, see whether your foot sits well with your usual single pair.
If it slips no matter how many times you fix it, leaving a short note about the slipped state helps narrow the conditions for what to choose next. Write the situation and the place, for example "the heel has extra room even before I put on shoes" or "the toes get pulled when I put the foot in the shoe." Do not assume that a state that does not fit is the fault of the shape of your own foot.
After the fit feels comfortable, choose the visible length and color. There is no need to change the heel position for the sake of the color scheme. When matching with clothes you own, also refer to How to compare sock colors and visible width, and check with the socks seated on your foot.
5. If it keeps happening, review the labeled size and the condition of the socks

If the heel still does not fit after putting the socks on again, look at the size labeling on the pair you own. Do not assume that shoe size and sock labeling are the same thing; check whether it is within the range that suits your foot size. Even if the number is within the range, the shape, thickness and comfort are not necessarily the same.
Distinguish between the case where the toes have extra room and the heel pocket is far off, and the case where the fingertips are pulled hard and the pocket is hard to reach. Do not decide a number such as how many centimeters smaller based on appearance alone; leave it as an item to check by trying on or by size guides when you buy a replacement.
For a pair after washing, also look at the stretch of the cuff, thinned areas on the sole and heel, and differences in shape between left and right. Do not conclude the pair's lifespan from the look of the knit alone; judge it together with whether it still sits as it did before. Do not attempt homemade repairs such as tying the stretched part tightly or shrinking it with heat.

When choosing a size again, assume that even pairs with the same labeling fit differently depending on length and knit. Check together that there is no extra room at the toes, that the heel sits in place, and that only the cuff does not press hard. For parts you cannot check at purchase, confirm the return and exchange conditions beforehand as well.
Check the washing and drying methods on that sock's label. Not all materials can be handled at the same temperature or with the same drying method. Do not assume that washing and reshaping will always fix the slipping; if it still does not fit after care as labeled, it is time to review the size and shape.
If you try something next, choose just one of the order of putting them on, the size or shape of the socks, or the shoes you pair them with. Rather than changing several pairs at once to compare, use the situation in which they slipped as your clue. If you feel pain or numbness, stop adjusting and take them off, and if the discomfort continues, seek advice.
When the heel position slips, look at the shape before pulling the cuff, and go back through the toes, heel and ankle in that order. For a pair that never finds a place where it fits, do not keep stretching it to use it; compare the labeling of the pair you own with how it actually feels to wear, and choose again.



