
The color in the bottle was a calm pink, but on your nails it looks sheer, too reddish, or not as deep as you expected. Before adding more color, sort out what you are comparing and the conditions under which you applied it. The color inside the bottle cannot serve as an exact sample of how it will finish on your nails.
This article covers air-drying nail polish and explains how to tell apart tone, sheerness and shine, as well as base coats, layering and matching the light. Do not apply it to light-cured gel or nail stickers; follow the directions for the product you have as you go.
1. Tell color differences apart from differences in sheerness and reflection
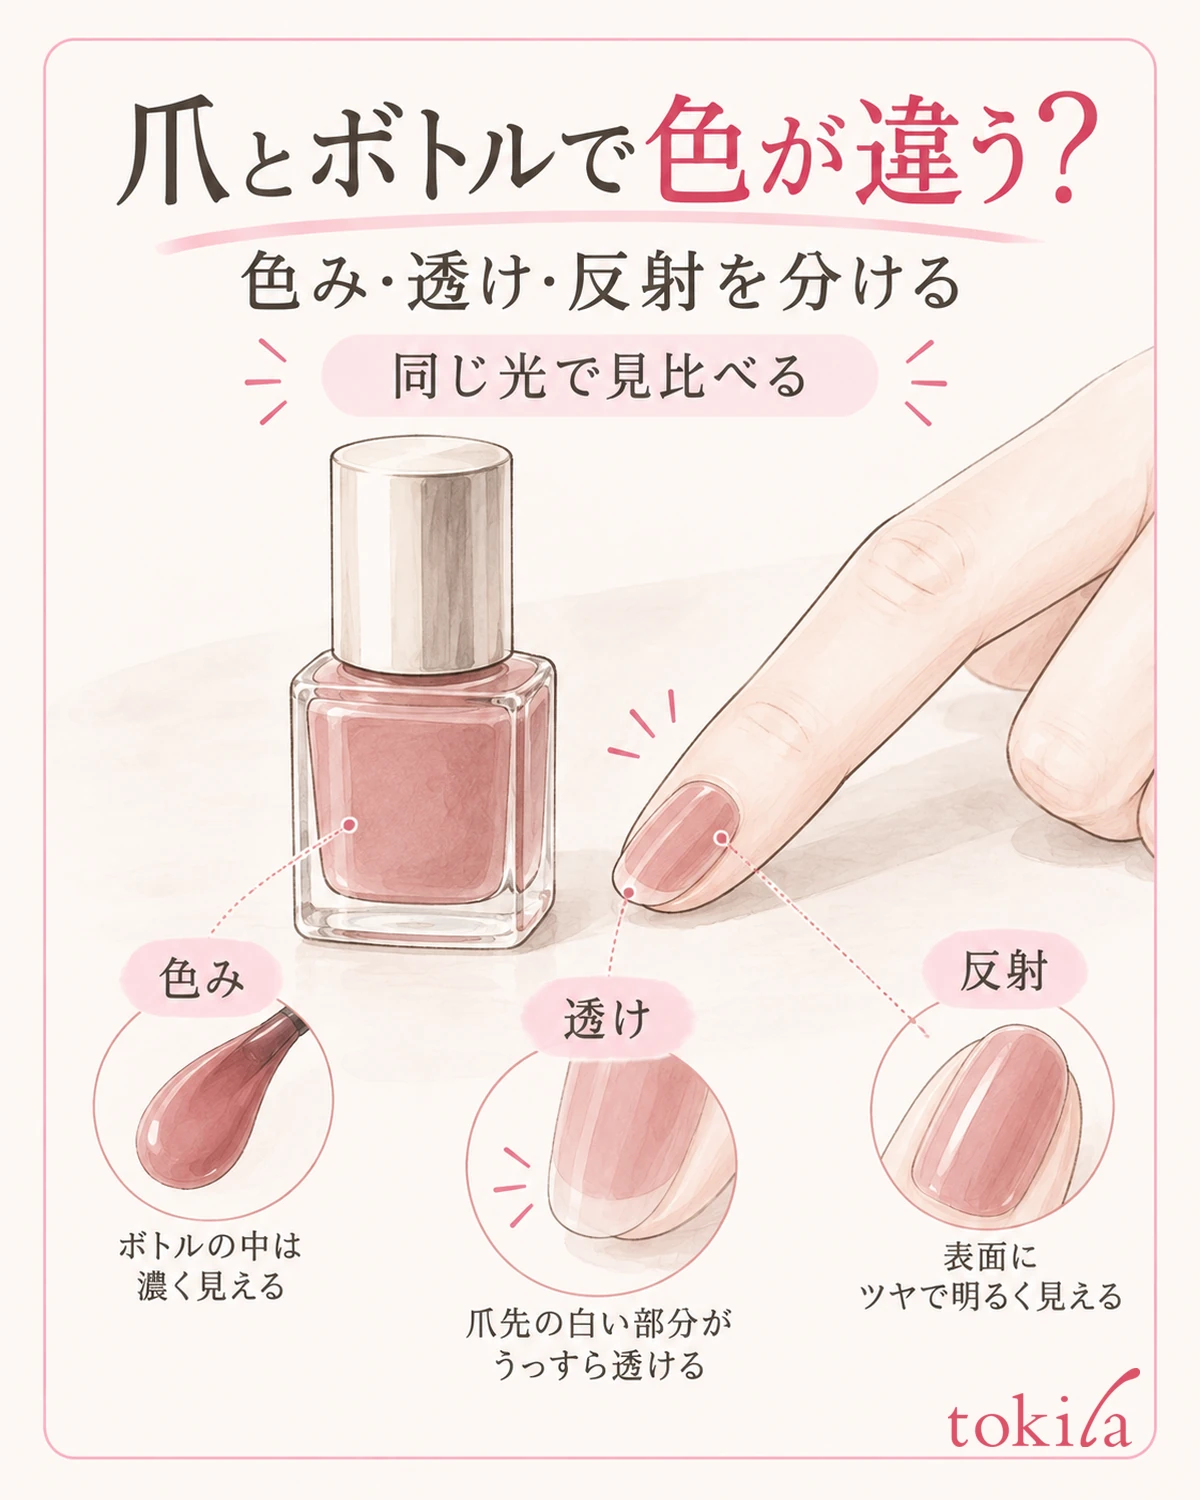
First, look at your dry nails and put the one thing that bothers you into words, such as "too reddish," "I can see the white tip of my nail," or "only the shiny spots look white." The feeling that the color is different mixes up differences in tone, depth, sheerness and gloss. If you layer on more without deciding what to review, it becomes hard to judge whether you are getting closer to the color you wanted.
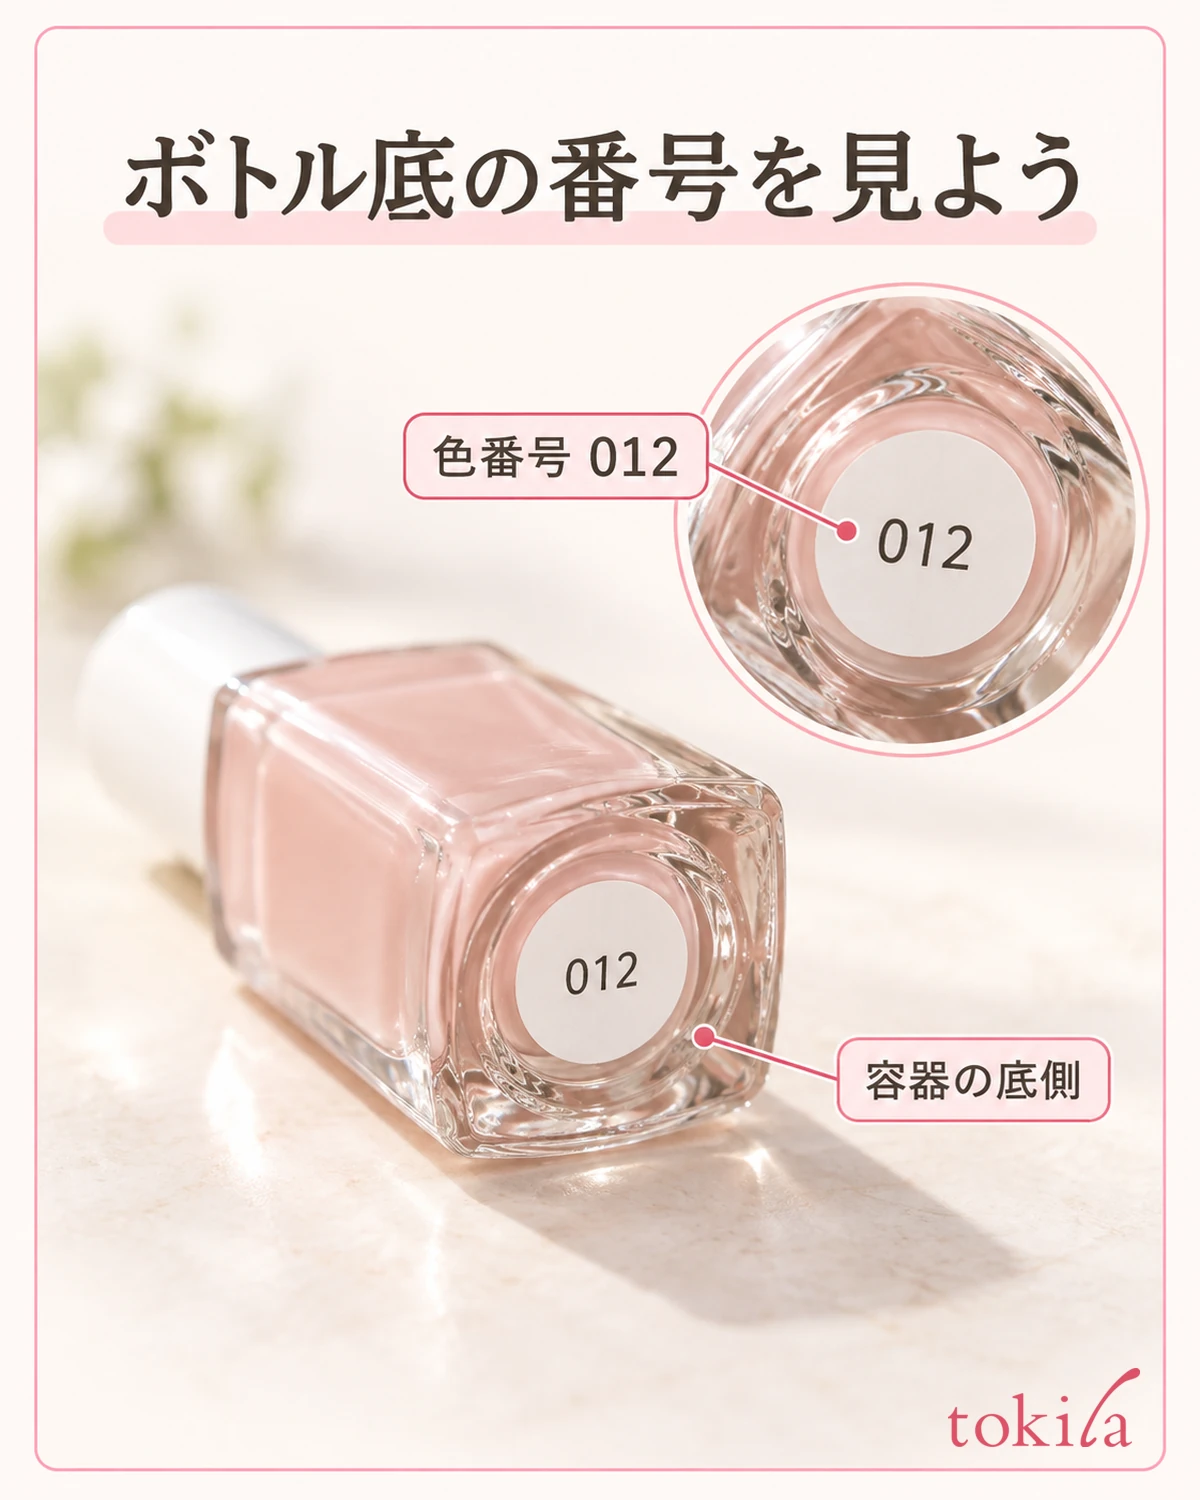
Check the color number on the bottom of the bottle or on the outer box. Even a name similar to a store sample or a color you used before does not mean the number or finish is the same. Also check that what you thought was a color is not a tinted base or a coat meant to be layered.
Close the bottle and place it near your nail, then look at both under light from the same spot. The liquid inside a container with thick, rounded glass and a thinly applied, dried nail are not seen under equal conditions. Do not set the goal of matching the container color exactly; use whether the color finished on your nail suits your taste as the standard.
If sheerness bothers you, separate whether the whole nail is evenly sheer or only the single stroke where the brush passed is thin. The former may be a characteristic of a sheer finish, and the latter is a clue to review uneven thickness in how you applied it. However, do not judge a product defect or the condition of your nails from appearance alone.
With pearl or glitter polish, tilt your finger slightly and look at the sparkling particles and the color surface separately. Do not decide it is "too white" from only the angle where the particles reflect strongly; check at the hand position you normally use too. You do not need to add many layers to turn glitter into a uniform solid color.
If you were looking at a color swatch on a screen, also check whether it is the same color number and whether there are notes on the number of coats or the base. Adjusting the screen brightness cannot guarantee a perfect match with the real thing. Pause adding more polish to your current nails just because it differs from the photo.
2. Check the base coat color and the conditions before you apply
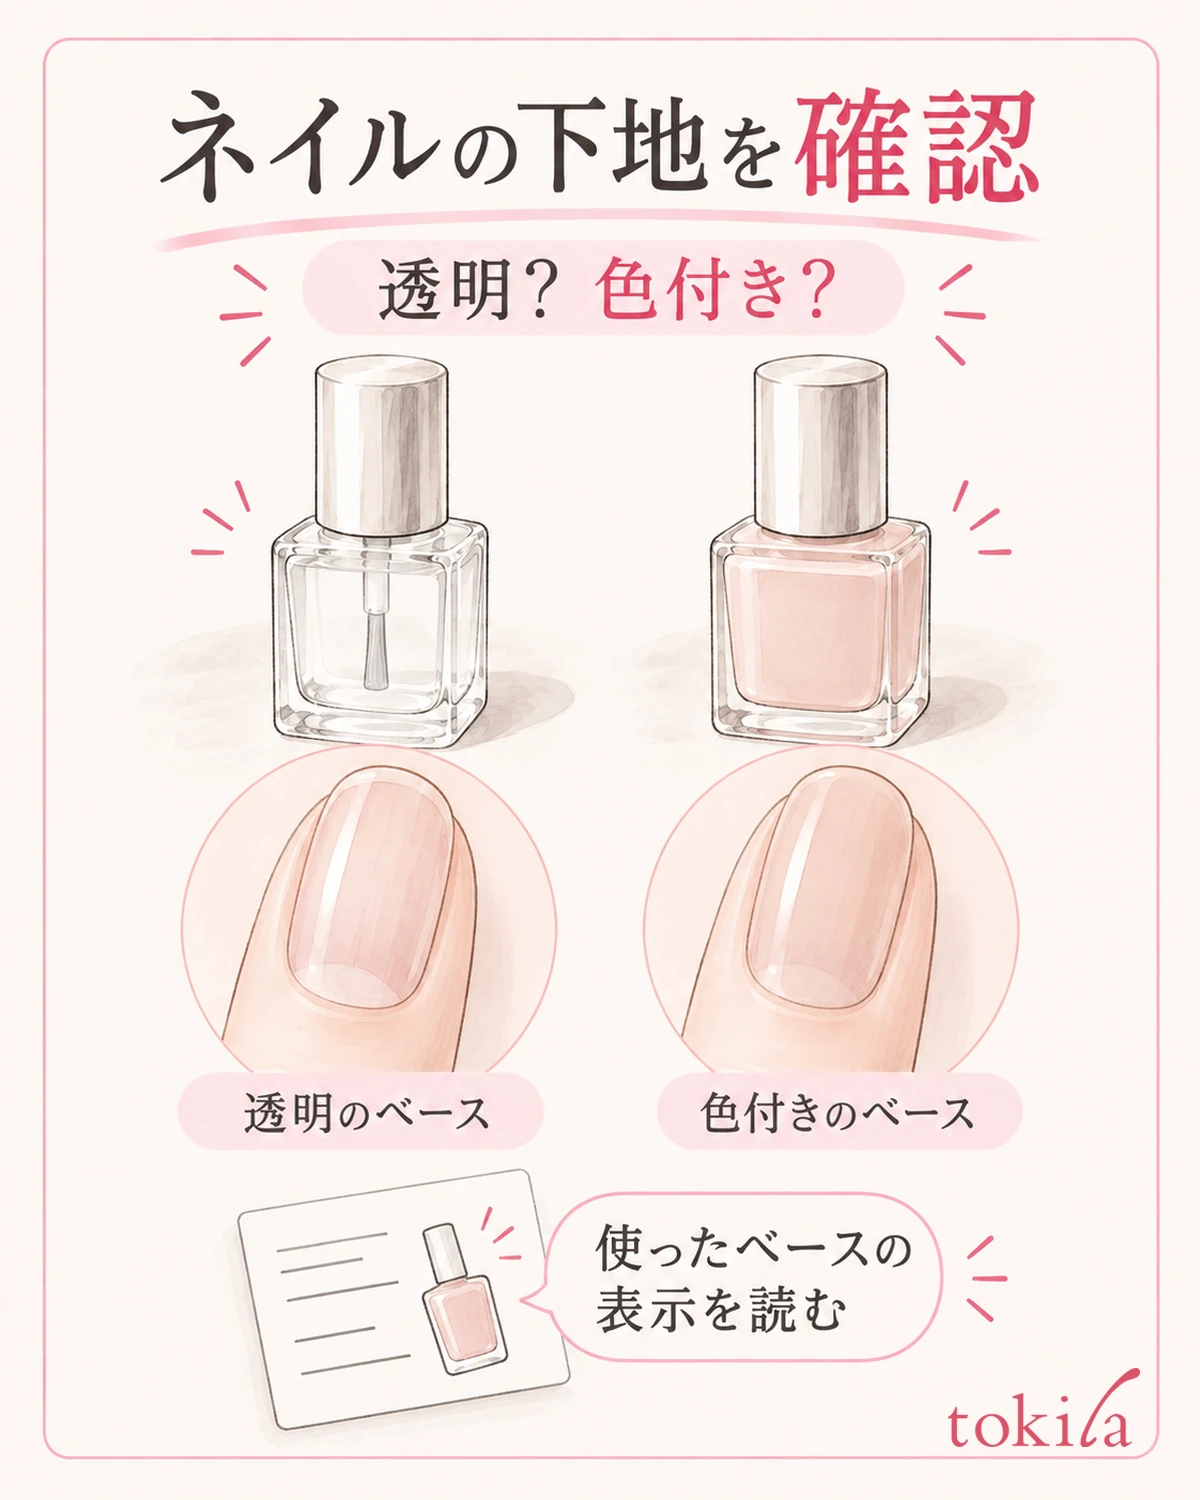
When you review the color you applied to your nails, look back at what you applied under the color. The finish of a base is not just one thing: clear bases, tinted bases, and types that smooth out ridges all exist. If the color is a sheer type, the color underneath also affects how it looks.
First take out the container of the base you used and read whether it is tinted or clear and whether it specifies how to combine it with a color. Even if you find that "I used a tinted base," you do not need to remove everything right away. You can choose next time's combination depending on whether you want to keep that finish or see the color's own sheerness.
If you want to keep the sheer feel but the base shows up whitish and clear, one option is to try a compatible clear base next time. Conversely, even when you want to tone down how your natural nail shows, do not make it a universal step to always apply white polish underneath. Changing the base color can also change the tone you were after.
Before changing the base, also check how it combines with the color and the drying order. Do not assume a thicker base makes the color look better; use the specified amount. Avoid judging the next color as good or bad only from how it looks while it is still drying.
If you compare, narrow the conditions by changing only the type of base today. If you layer a different color or top coat on only one side, it becomes hard to tell which layer made the difference. Nail color and shape also differ from finger to finger, so do not treat how two nails look as the result of a strict product comparison.
Do not thinly file down your natural nails to get closer to a color, and do not layer polish only to cover discoloration. If you feel pain, have damage, or notice a change from the usual, stop comparing colors. Treat everyday color choice and the response to nail abnormalities as separate matters.
3. Check by not applying thickly at once, following the specified drying and layering
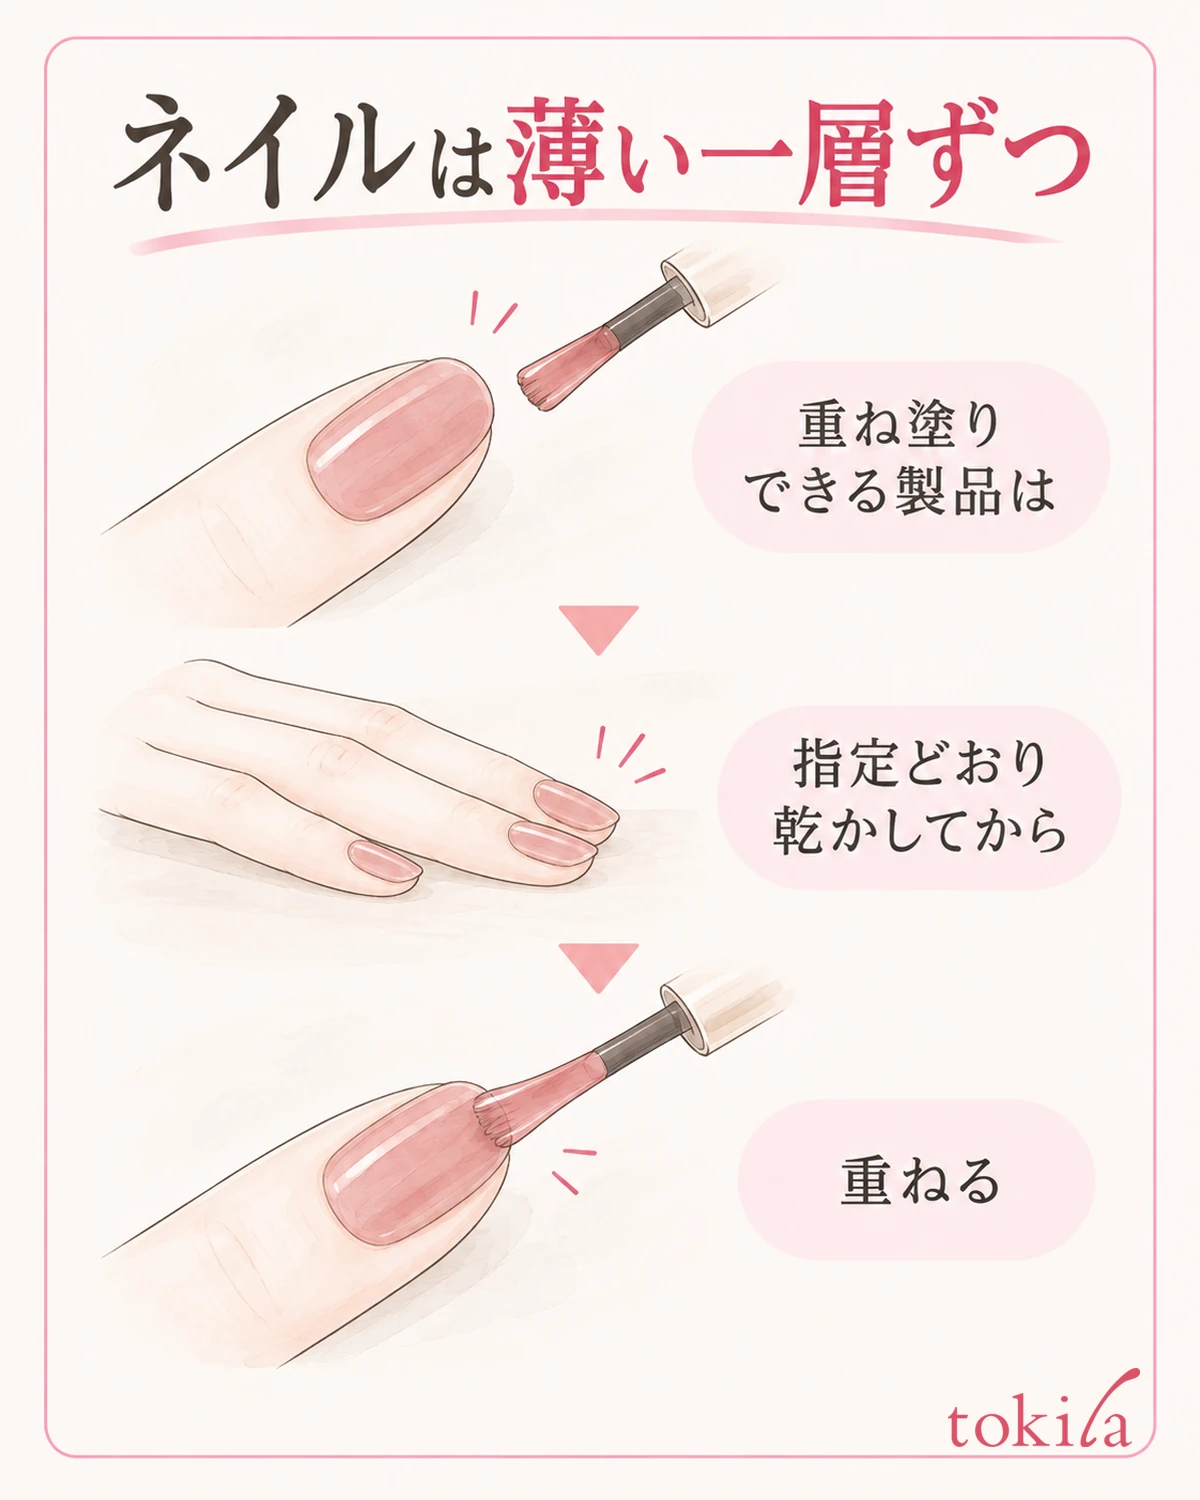
Check whether the color you are using is meant for one coat or whether it directs you to layer. Some colors come out deep in one coat, and others are meant to be enjoyed for their sheerness. Do not decide that every nail polish is finished with two coats, or that layering will always give you the bottle color.
If the color looks separated between the top and bottom of the liquid, do not start applying as it is; check the label for how to mix it before use. Do not uniformly swap the instruction to shake with the instruction to tilt the container to mix. If an unusual state remains even after mixing, put off the color comparison and hold off on using it.
When you are about to apply, do not carry a large drop on the brush to your nail; adjust the amount of liquid according to the label. Rather than making the first coat thick because you want a deeper color, spreading a thin, even film and waiting until you can move on to the next step makes it easier to see color change and thickness separately.
For a product that can be layered, if you want more color, apply the next coat only after going through the specified drying stage. Do not repeatedly touch the surface to check whether it has dried, and do not go back and forth with the brush over the same half-dry spot. We give no waiting time that applies to every product ("wait X minutes"); decide by the directions for the product you have.
After finishing one nail, lift the brush away and look at the surface of the color. If it is evenly sheer and a color you like, you may finish there even if it looks lighter than the bottle. Even if the color is not enough, if the film is wrinkling, streaks are increasing, or the thickness bothers you, it is important not to try to fix it by adding more coats.
If more small round dots appear the more you layer, look at the state of the film separately from color development. Go toReviewing air bubbles in nail polishand stop adding color for now. Do not decide on your own to put water or remover into the bottle to thin it as a way of adjusting color.
4. Look under the same light and background, then move to your usual place
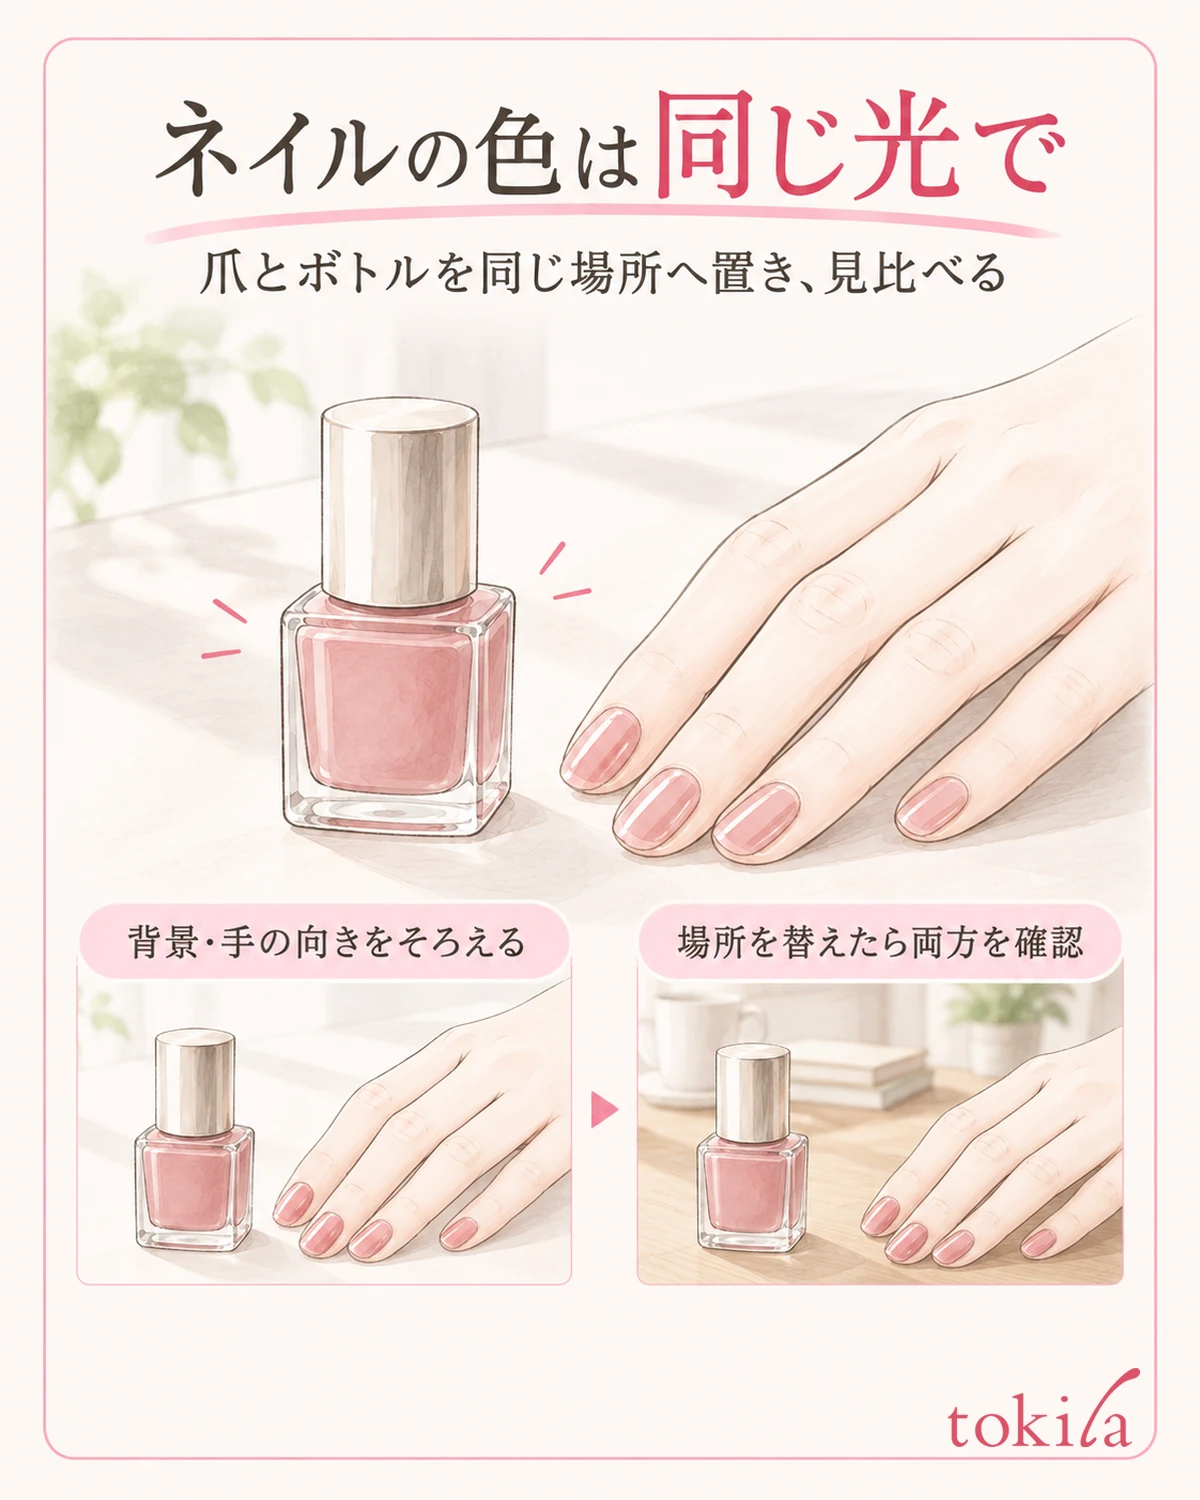
When comparing colors, match the place where you rest your hand, the lighting, the direction of your fingers and the background. If the bottle is on a bright windowsill and your nails are in your own shadow, you are looking at two different conditions at the same time. First put both in the same place and check that your hand is not darkening your nails.
Underneath, place something such as plain paper or cloth that makes it easy to follow the outline of the nail you want to look at. Do not use dark clothing or a strong pattern behind only one of the two; keep the background constant. This does not mean that placing white paper will show the absolutely accurate color. It is preparation to reduce differences in viewing conditions.
Next, move to the room where you usually spend time or a bright shaded spot outdoors, and look at the same nails. When you change places, carry the bottle you are comparing with you. If the color looks different in another light, remember it as how it looks in that place. This check is not meant to decide that one light alone is correct.
Glossy nails can reflect the lighting like a white band. Turn your hand slightly to avoid the reflection and also look at the color around it. Do not try to erase even the changes that come from the angle of pearl by comparing only in a dark place, or by keeping your face close to your nails.
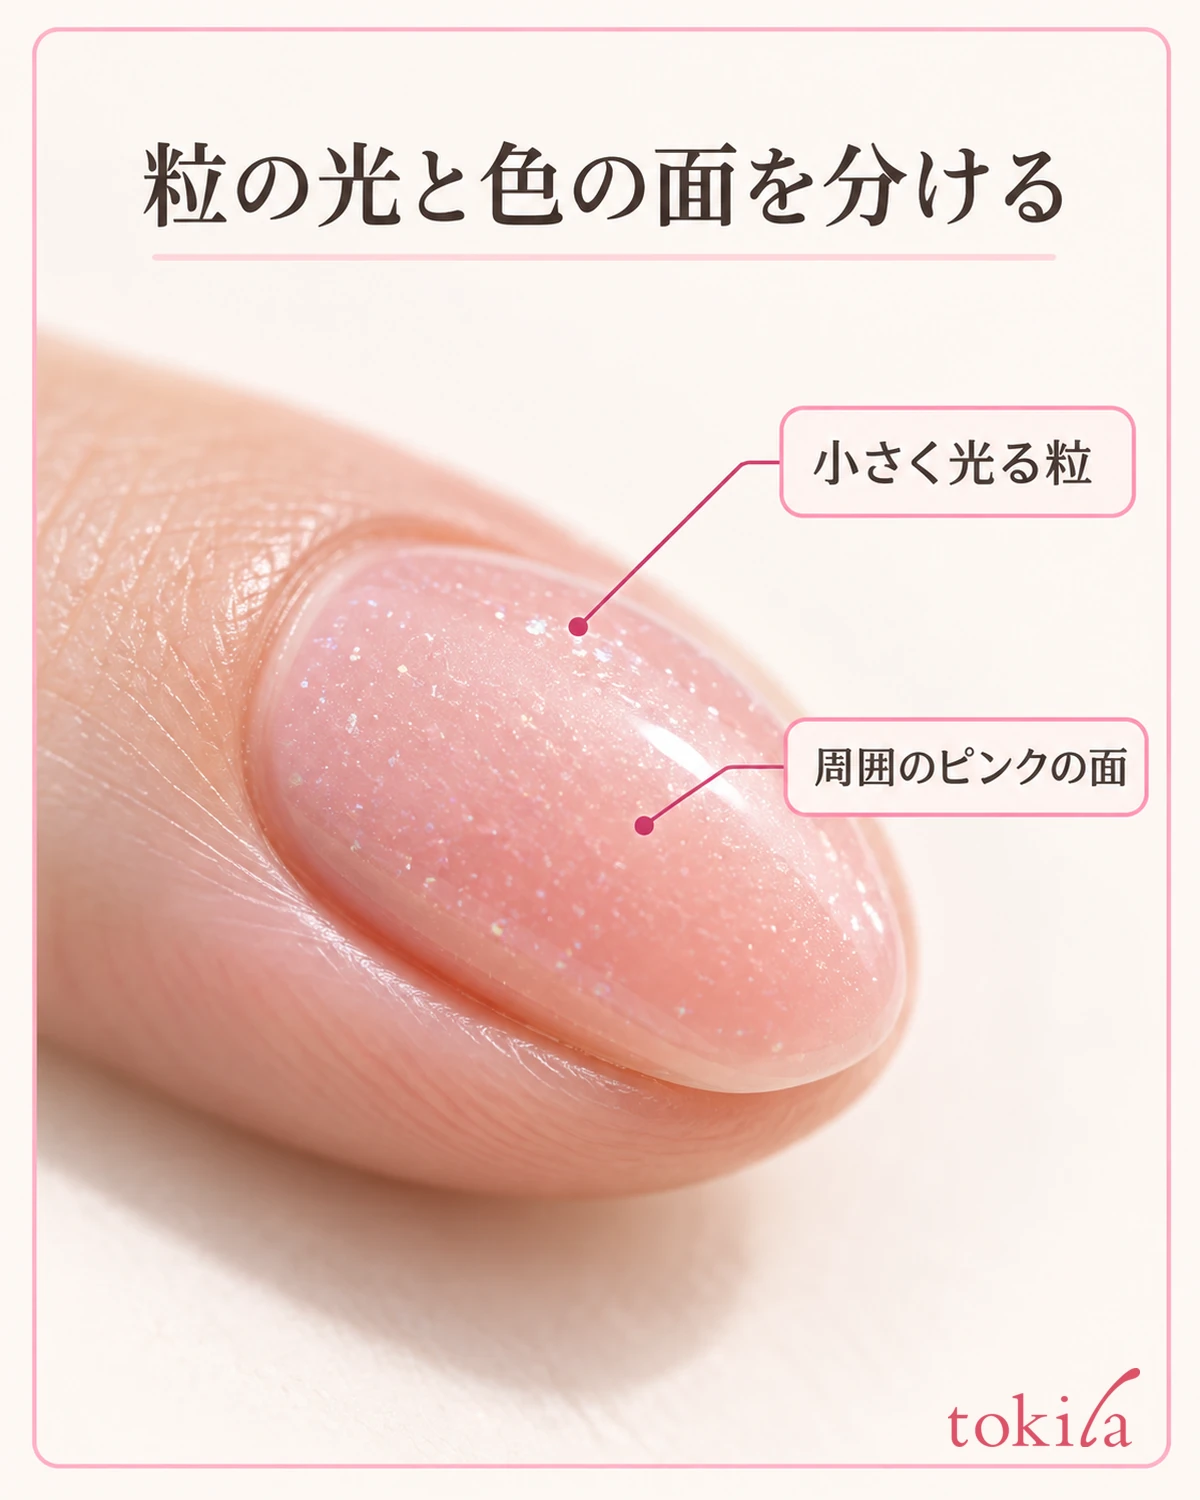
For the area where you notice a difference, look at the same range from base to tip. If the place you look at changes, such as a sunlit tip on one and a shadowed base on the other, it is easy to confuse with a difference in the color itself. The range you look at is also one of the conditions of the comparison.
If you take a photo to keep, place your hand against the same background in the same spot and use it only as a memo aid, without correction or filters. Photo colors also change with the device and settings, so do not decide the finish from a photo alone. In the end, return to looking at your own hand from your usual distance.
5. Choose by the dry finish and note the condition to change next time
If you use a top coat to finish, also check the specified order and drying. Do not treat clear ones, ones that add color or glitter, and ones that change how gloss looks as the same finish. If switching the top coat changed the impression, remembering it separately from the color's own development will make it easier to choose next time.
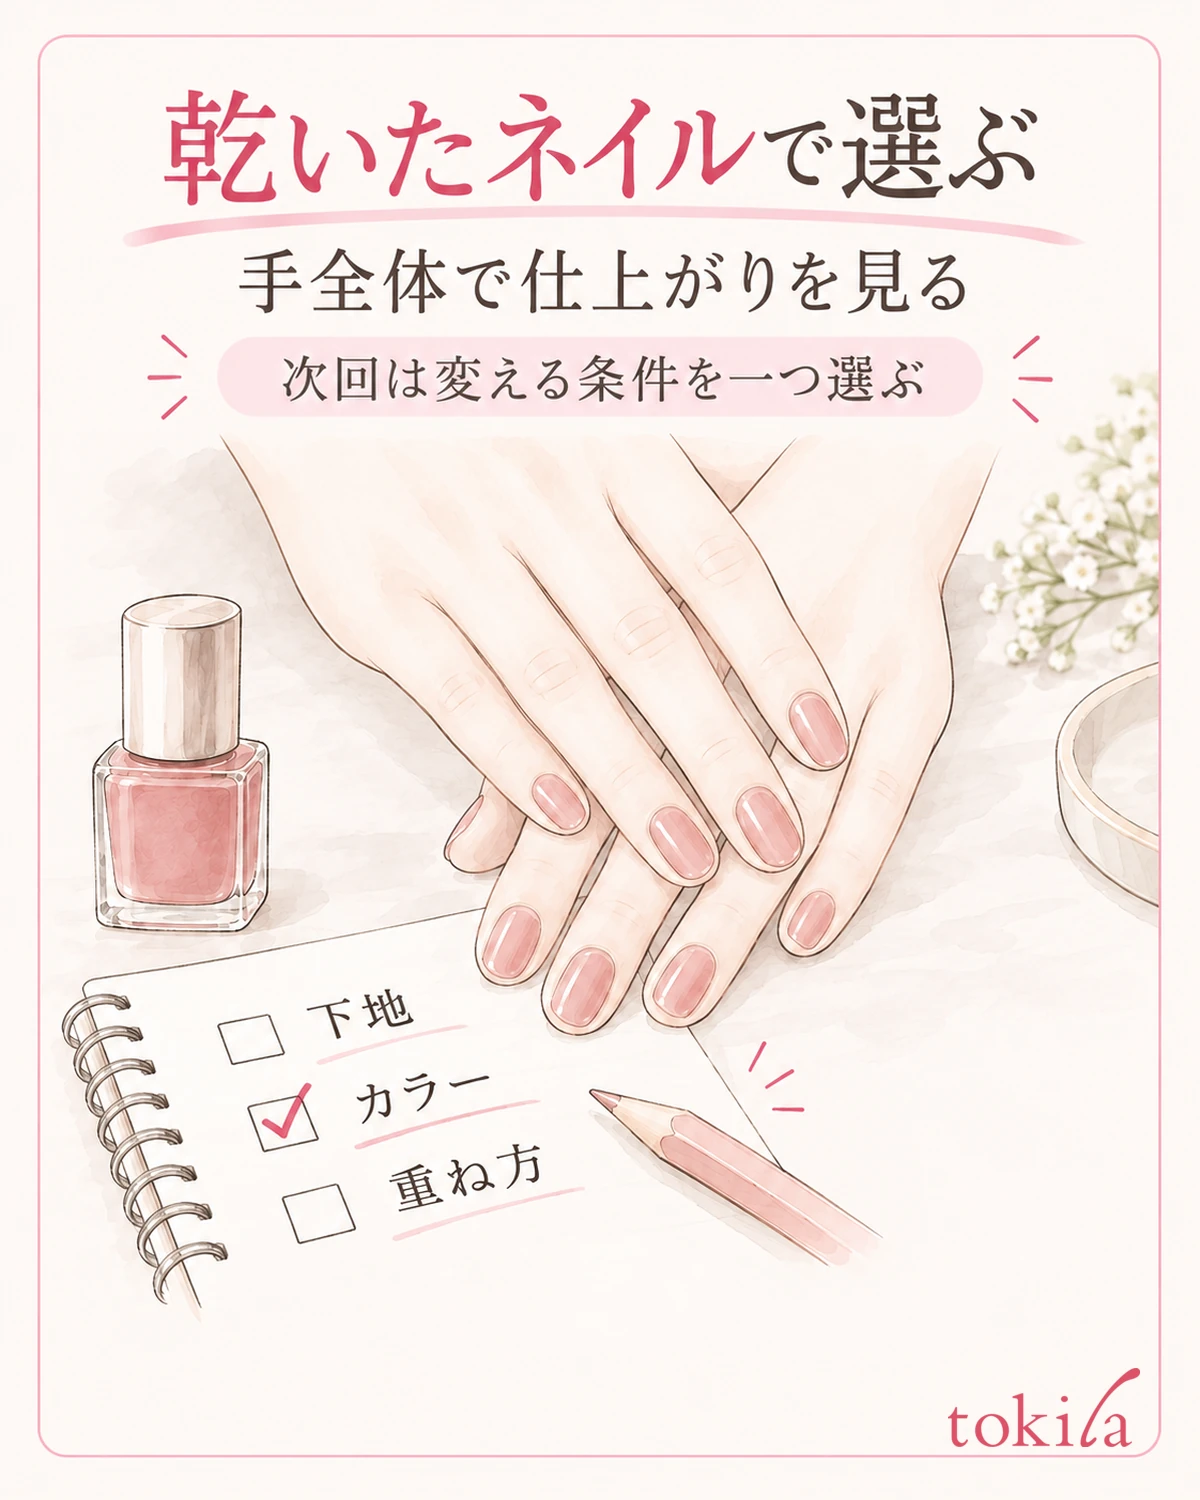
When you have finished applying, look at your whole hand, not only a close check of a single nail. Even if it is paler than the bottle, if you like the color on your hand, you can accept that finish. Conversely, if it does not suit your taste even in your usual places, you can remove it that day with the matching remover or choose a different color next time.
When redoing it, do not try to recover by covering it with different colors again and again; follow the directions to remove the color from the nails that need it and go back to the preparation. On days when removing repeatedly feels like a burden, it is fine to take a break. You do not need to repaint all ten nails over and over just to check a color.
For next time's note, briefly write down the combination and how it looked, such as "clear base," "color with the number of coats on the label," and "reddish indoors." If you change something, choose one of the base, the type of color, or the way of layering. If you had been using it differently from the directions, correct that condition first.
If your main concern is that it feels off next to your clothes,the basics of coordinating clothing colorscan also be a clue. First grasp the color finished on your nails, then think about how to match that color with today's clothes, and you will have more options before you repaint.
If it looks different from the bottle, sort it out in the order of sheerness, base, layering and light. The goal is not to reproduce the container color but to choose a finish you like on your own nails. Judge by your dry hand and finish by leaving one condition to try next.



