
You put your hair into a night cap, and it bulges out only at the back. You press your bangs down too hard, or strands slip out every time you readjust the opening. When that happens, before pulling the cap down even further, take another look at the cap's shape and where your hair goes. Besides head circumference, the width and length of the pouch that holds your hair can also guide your choice.
This article covers night caps that adults wear while sleeping, and sorts out how to tell the shapes apart, preparation before use, the order for tucking in your hair, comfort, and care. The same way of wearing it does not work for every type. Give priority to the instructions for the item you own, and instead of assuming that bedhead will certainly disappear or that hair will be repaired, check whether you can wrap your hair comfortably.
1. Tell the cap-style from the tube-style, and look at the space for your hair
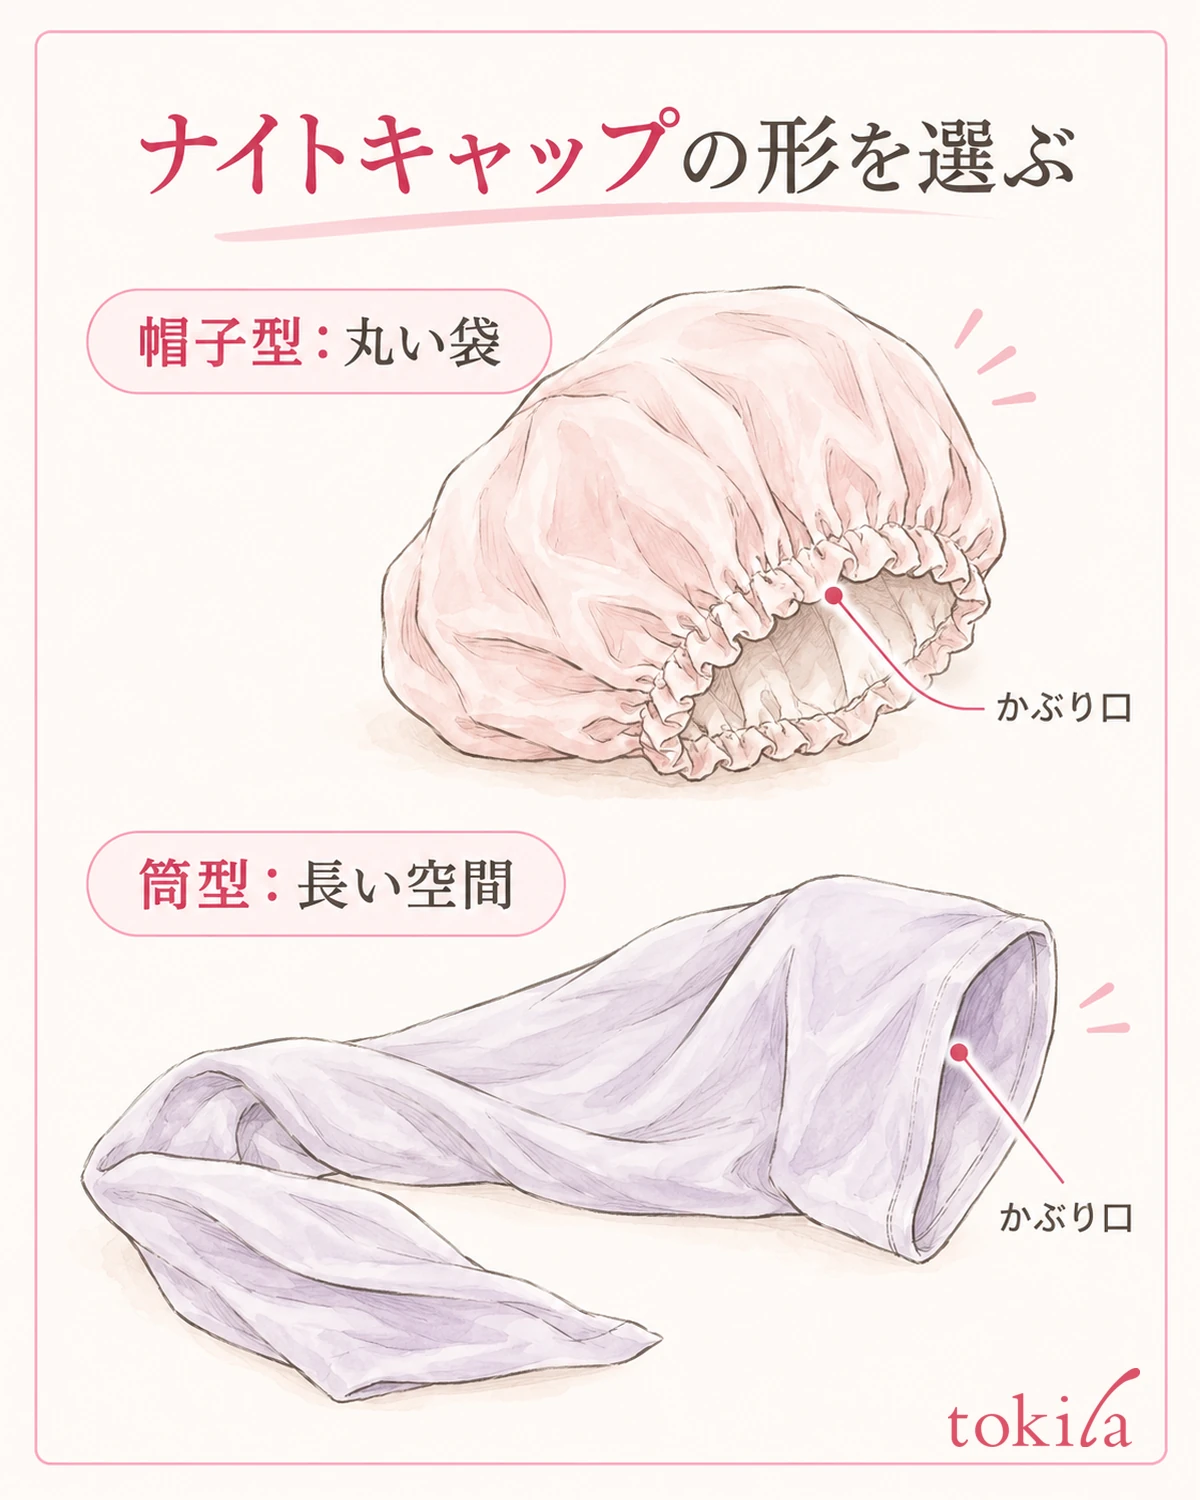
First, spread the cap out on a desk and look at the opening for your hair and how the fabric continues beyond it. The cap-style, which tucks hair into a round pouch, and the tube-style, which covers the ends with a long piece of fabric, place your hair in different spots. Don't choose by color or sheen alone; check the inside shape too.
On a cap-style, the fabric gathers around the opening, leaving space at the back of the head for your hair. Those secured with elastic and those adjusted with fabric ties are also different. Even if ties are attached, they may be purely decorative, so follow the product description for where they can be tied and how far they adjust.
Tube-styles include open-ended ones and long pouch-like ones closed at one end. Don't decide that you put your head through the neck just because it is called a "tube-style." Check the structure and description of your own item, including which end you put on first and what to do with the extra fabric.
Consider the space for your hair in terms of both length and volume. Even short hair needs a roomy pouch if there is a lot of it, and with long hair, where the ends can go changes. Picture your hair inside, and compare the head circumference size and the pouch dimensions separately.
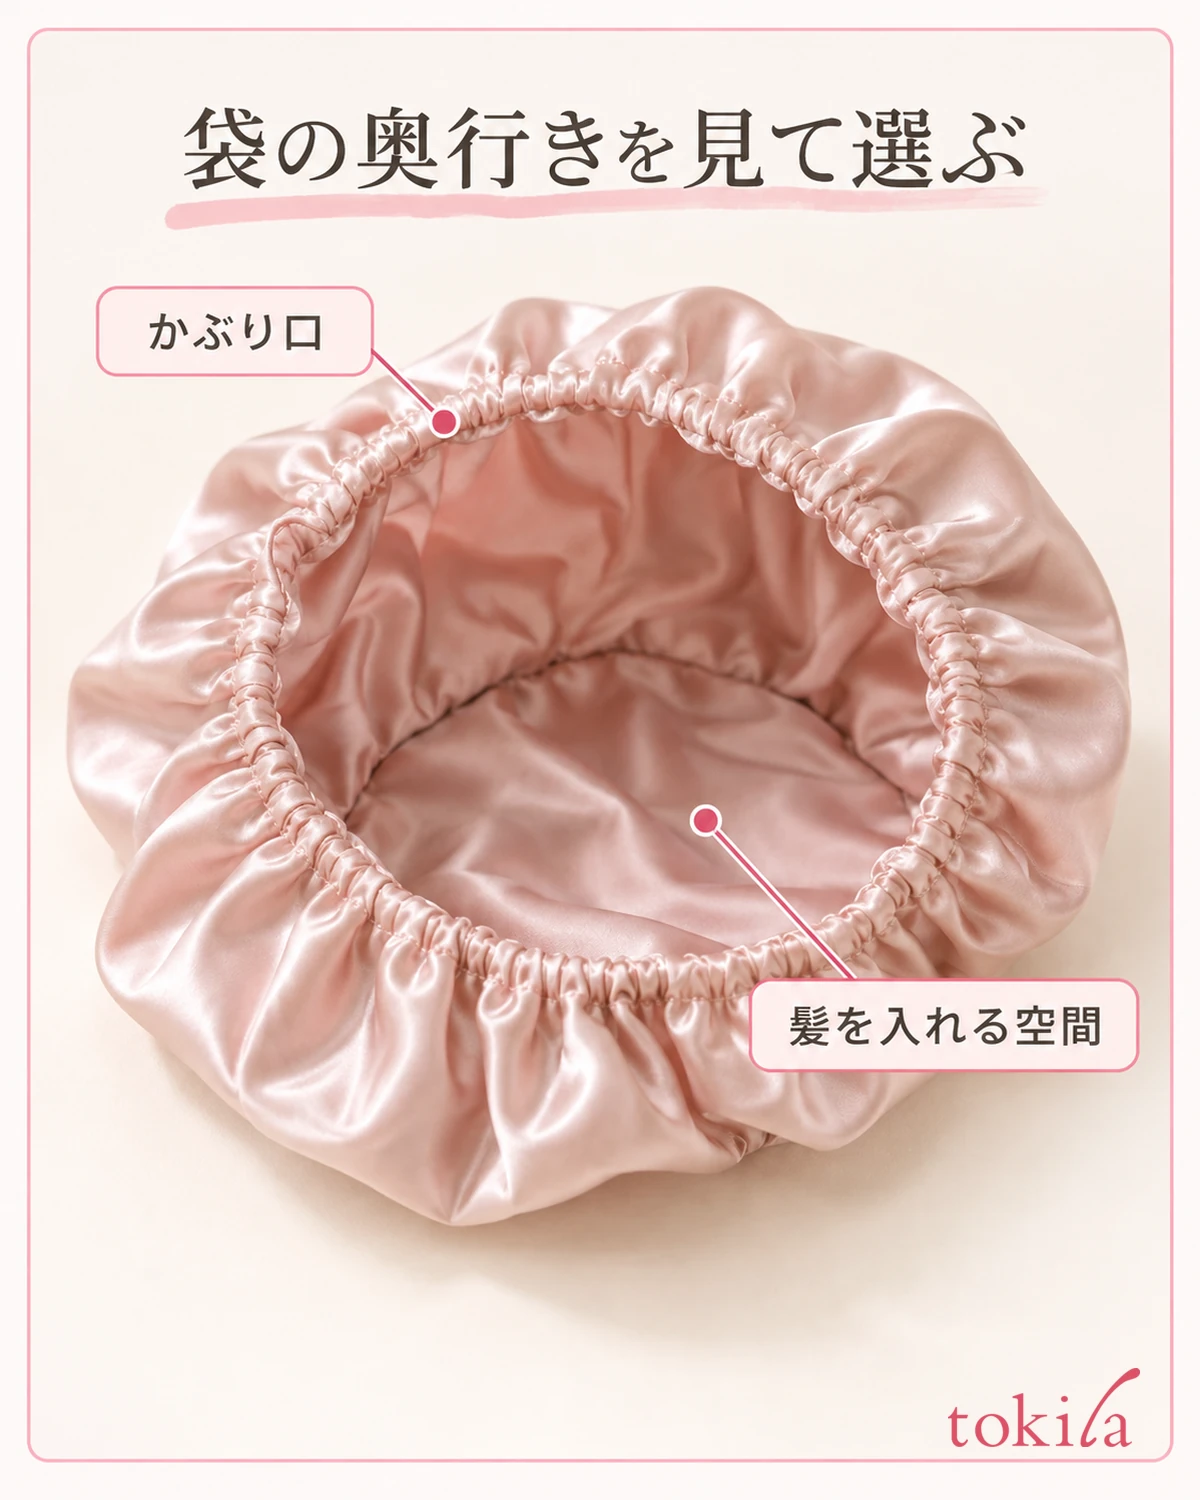
Before buying, don't judge that "a cap for long hair will surely fit" based on hair length alone. Compare the shape, the pouch length, and the range the opening supports together.
Think about storage as well. A long type needs room to spread out the fabric not only when worn but also when washed and hung to dry. Check whether you can dry and store it in your daily life, and balance a shape that is easy to put hair into with one that is easy to handle. If your hair only goes in when you force it into your current cap, it is also worth keeping the option of changing the shape or capacity, not just adjusting how you wear it.
2. Dry your hair and the cap, and check the inside and the fastening
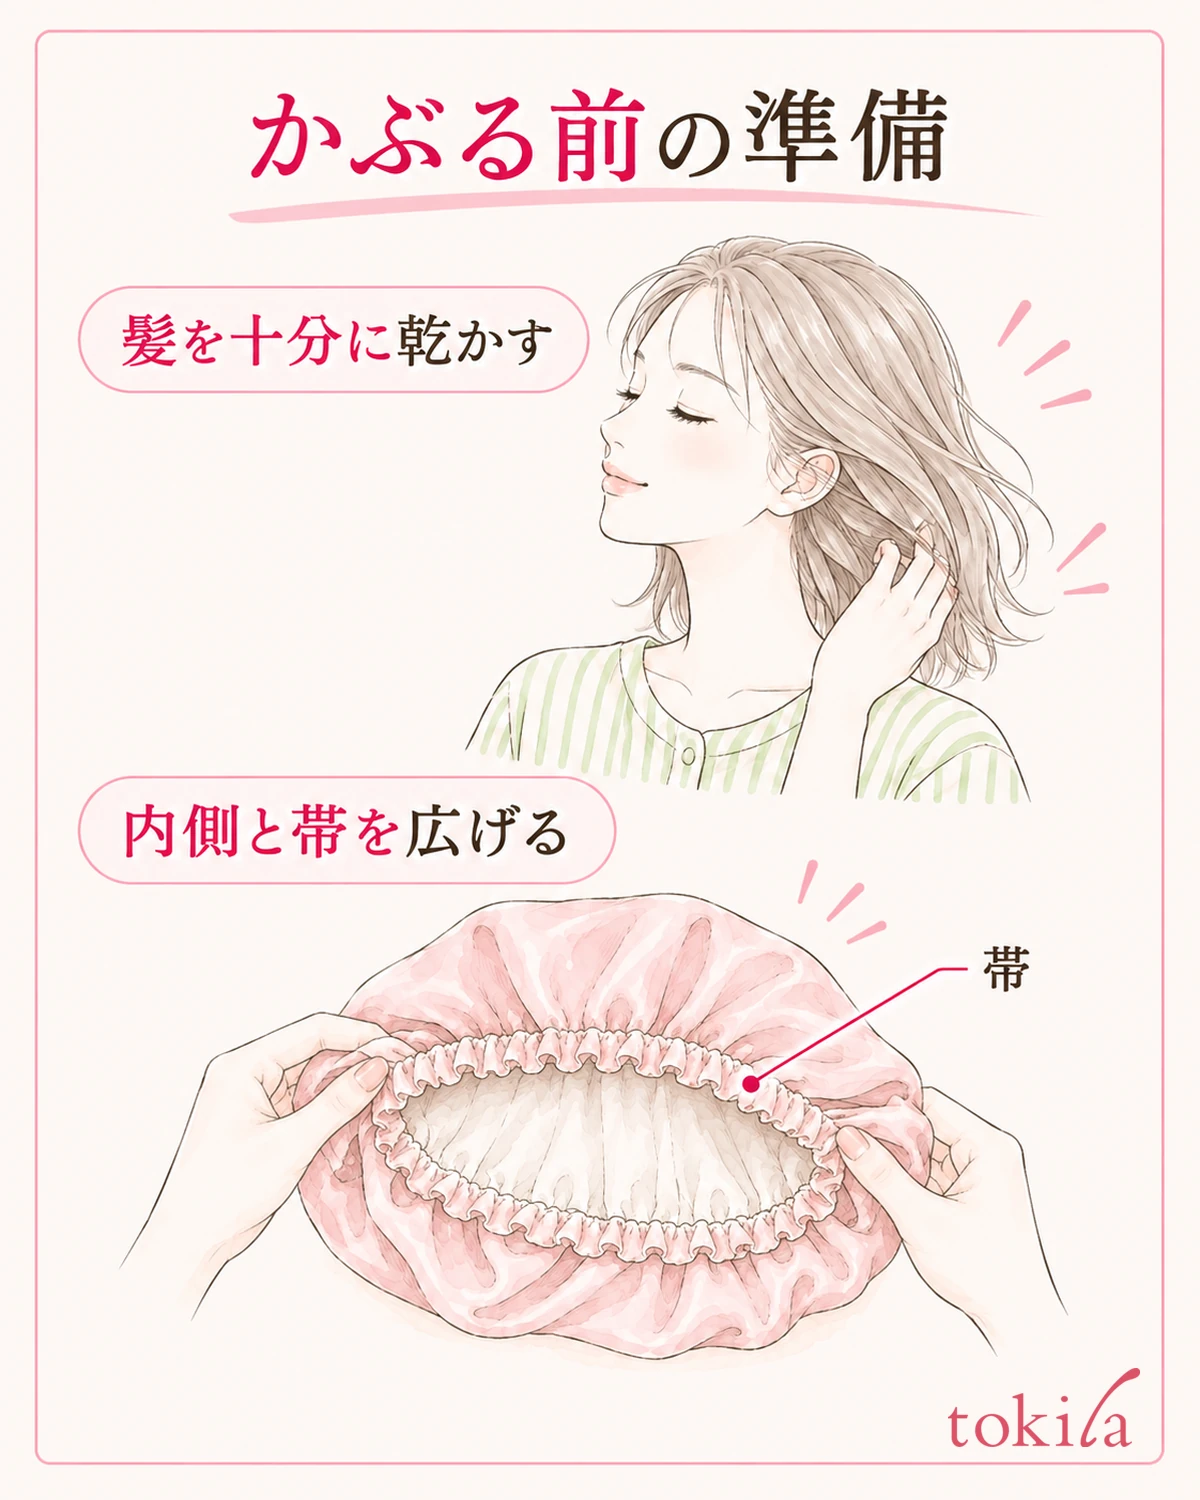
Before putting it on, dry your hair thoroughly. Check not only the ends but also places that tend to stay damp, such as the nape and behind the ears, and do not use the cap to dry your hair inside it. If you are unsure about how to dry your hair itself, get your usual drying routine in order first, then try the cap.
The cap, too, should be free of leftover moisture from a previous wash or from sweat. Open up the inside and look at the seams, the band at the opening, and the pouch where your hair goes. Don't decide which side is the outside just by looking at the glossier side; use the tag, the stitching, and the instructions on which way to wear it as clues.
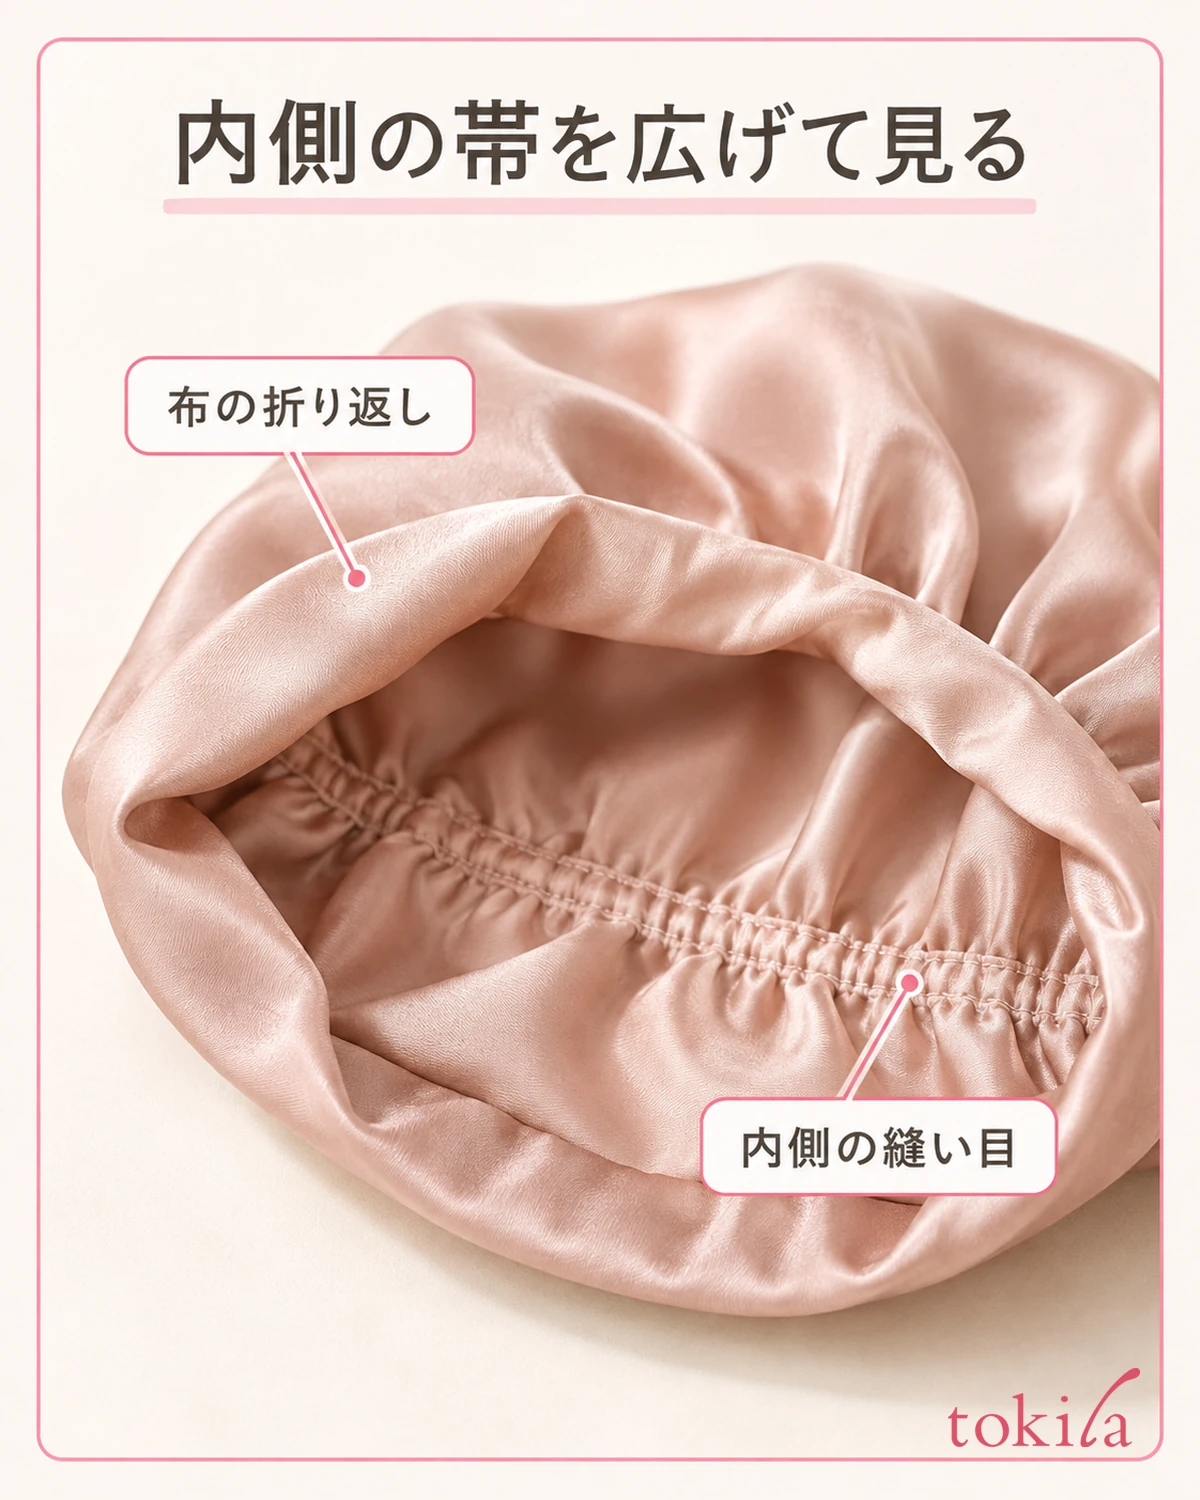
Check that the band containing elastic is not twisted inside the fabric. If your item is adjusted with ties, first check which part to hold when moving them. Removing the elastic, unpicking seams, or adding another string is not a standard way to adjust the size.
Take off any hairpins or hard metal fittings you used to gather your hair. Avoid pressing your head with the fabric while leaving metal fittings inside the cap. Even if your hair is long and hard to hold, first support the strands by hand and think of a way that no hard fastener presses on you while you sleep.
If you use a styling product or a leave-in treatment, check the usage conditions of that product and of the cap separately. There is no need to use more just because it will go in the cap, or to treat use on wet hair as a standard step for every product. When you are ready, try it in a posture where you can move both hands comfortably in front of a mirror.
On the first day, you can also compare the instruction diagram with the actual opening, then try putting it on and taking it off for just a short time. Instead of handling complicated ties or strands when you are already sleepy, check beforehand until you understand which way to take it off, and you can then judge whether to fold it into your nighttime routine.
3. Tuck in your hair in the order that suits the type, without pushing the ends in
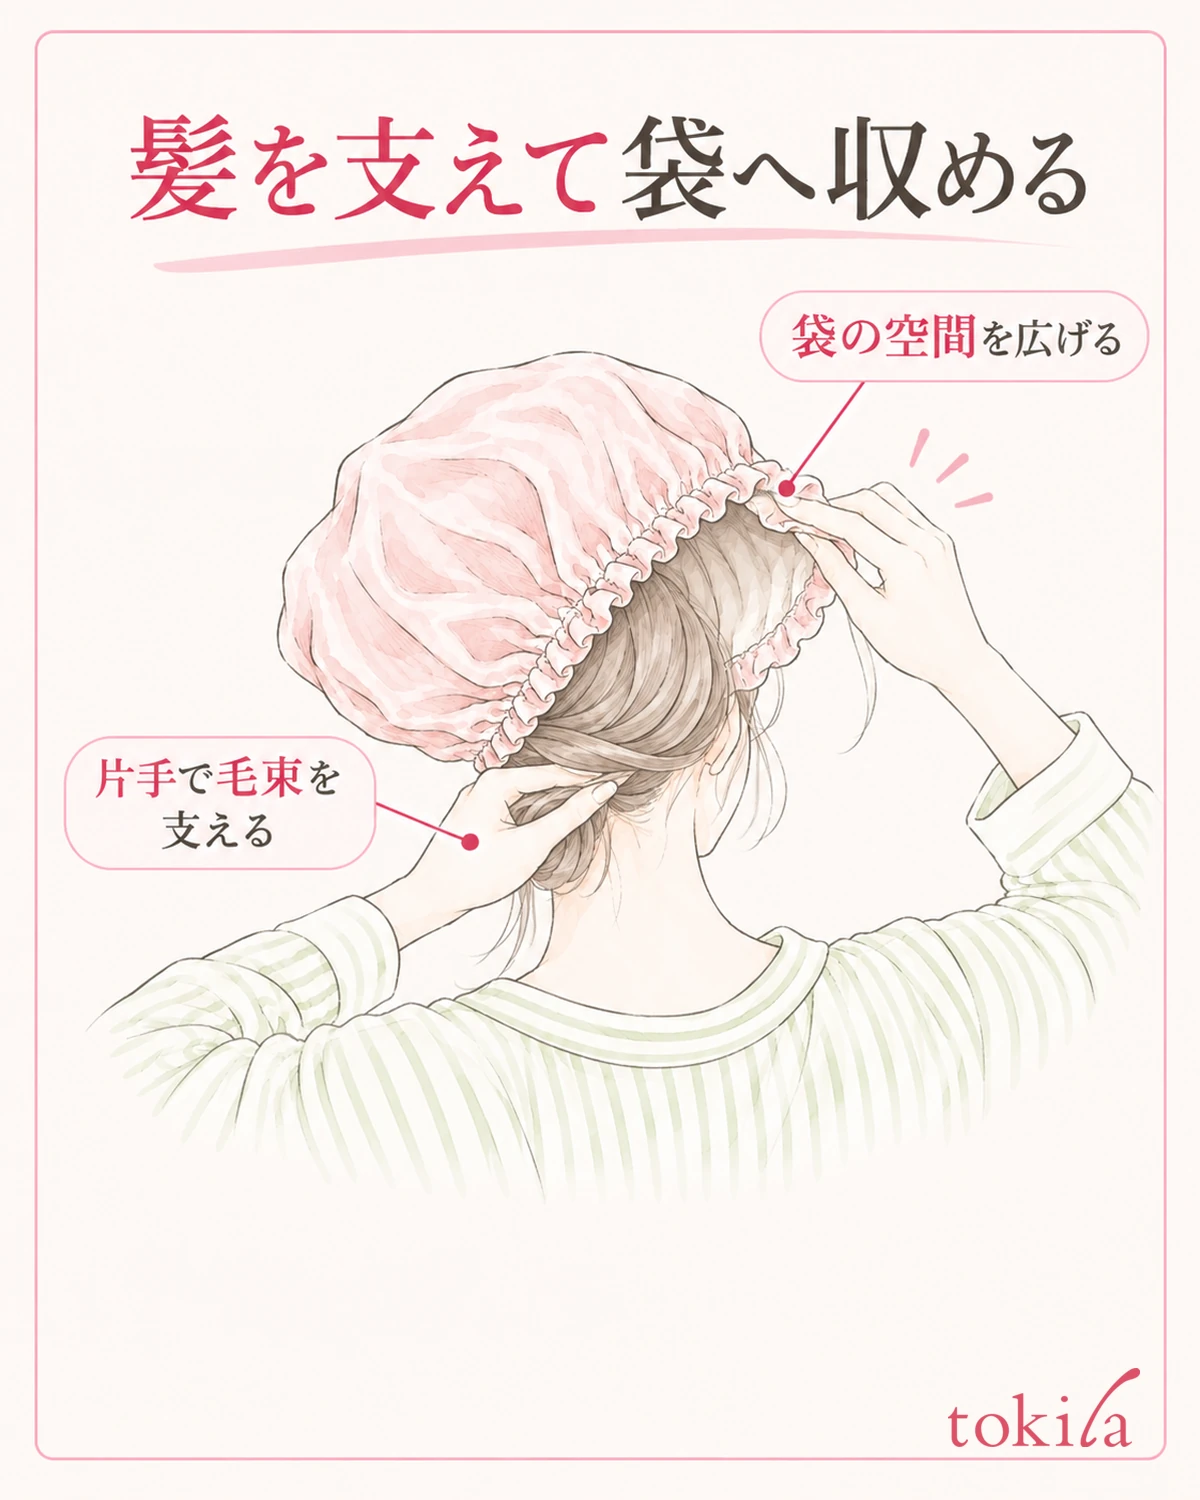
With a cap-style, first align the opening following the instructions and create space in the fabric pouch for your hair. Rather than hooking the edge of the fabric over your hair and pulling it up hard, support the strands with one hand and widen the pouch with the other, and it is easier to see where you are pulling.
With long hair, before folding the ends small again and again to push them in, see how much room there is to place them in the pouch. If your item specifies dividing the hair left and right, divide the strands that way. Don't apply the twisting direction or the left-right crossing to a different type as is.
Once one strand is in, check that the first strand isn't caught in the band before putting in the other. Rather than trying to push everything in at once, look at the nape, behind the ears, and the ends separately, and it becomes easier to spot the stretch that is sticking out.
For a tube-style, use it from the opening your item specifies. Even with a type you pull up over your neck, if you feel strong resistance on your face or neck, don't force it through. Check whether the ends fit in the fabric extending toward the back, and handle the extra fabric as your item's instructions say.
If your hair gets pulled partway, don't pull only the ends back while holding the band; loosen the opening once and take it off. After untangling your hair, reconsider the direction you put it in or the capacity of the pouch. Rather than getting closer to a finished look, first check that you can put it on and take it off without leaving any snags.
When the ends are sticking out, before pushing just those few strands under the band, look at where they are coming out. If it is near the opening, the order of tucking may be the cause; if it is at the tip of the pouch, the length may be insufficient. Take it off once, spread everything out, and avoid repeating the motion of pushing in at the same spot.
4. Adjust how it sits on your bangs, around your ears, and at the opening
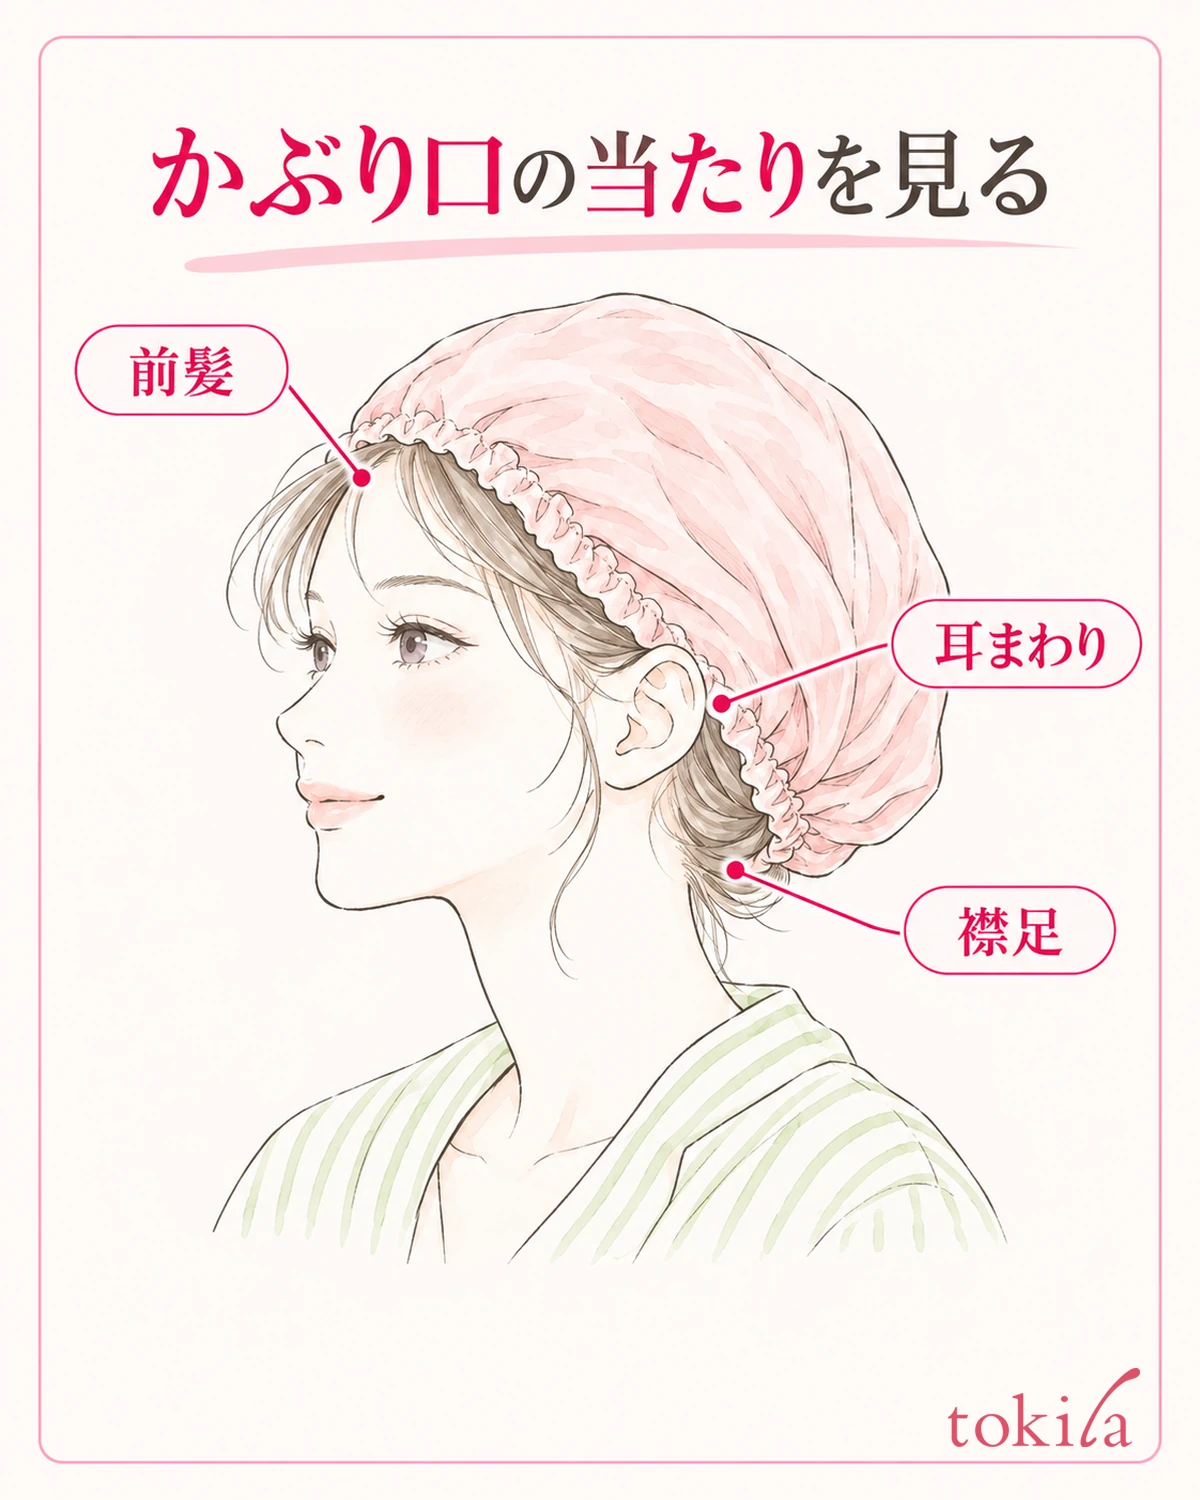
Once your hair is tucked in, check the sides and back in the mirror, not just the front. Check in order whether your bangs are folded unnaturally under the band, whether the fabric is bunching at the base of your ears, and whether the hair at your nape is being pulled across the band.
If you push your bangs up and fix them, they may be held in a direction different from their usual flow. Whether to tuck them in or leave them out depends on the type's instructions and your preference, and even when tucking them in, avoid folding the ends hard and pinching them under the band. There is no single position that prevents bedhead.
It is also important not to keep tightening only the opening because it feels like it will come off. Separate whether your hair is bunched in one place in the pouch, whether the band has shifted, or whether the head circumference size doesn't fit. Think of the looseness of the fabric and the tightness of the band as separate matters.
If your item can be adjusted with ties, use the position given in the instructions and a knot that can come undone. There is no need to wrap a long tie around your neck or fix the cap to your head with extra pins so it won't come off. If you feel pain, itching, or strong pressure, take it off and do not try to get used to it while wearing it.
While you are awake, slowly turn your face left and right and check that the fabric doesn't pull your hair. This cannot guarantee how it will be while you sleep, but it helps you find the places that press from the start. If it is still uncomfortable after putting it on again, skip using it that night and consider a different size or shape.
If the direction of your bangs changes every time you adjust the opening, try using separate hands: one to hold the band and one to support your hair. So that you are not tidying only the front visible in the mirror while pulling the hair at the back, check the nape again after adjusting. Stop at the point where both the look and the comfort are in order.
5. Look at taking it off and the next morning, and choose one condition to change next time
When taking it off, loosen the ties or adjusters first, and while supporting your hair with one hand, lift the fabric away bit by bit. If you grab the tip of the pouch and pull it off in one go, it becomes hard to see whether the hair inside is being pulled too. If you feel a snag, stop, untangle the overlap between the band and the strands, and then take it off.
If the folded ends or the direction of your bangs bother you the next morning, think back to which spot touched the band and where in the pouch you placed the ends. Don't conclude that the cap alone damaged your hair, or conversely that it worked based on how it looked once; first check how you put it on and how your hair sat.
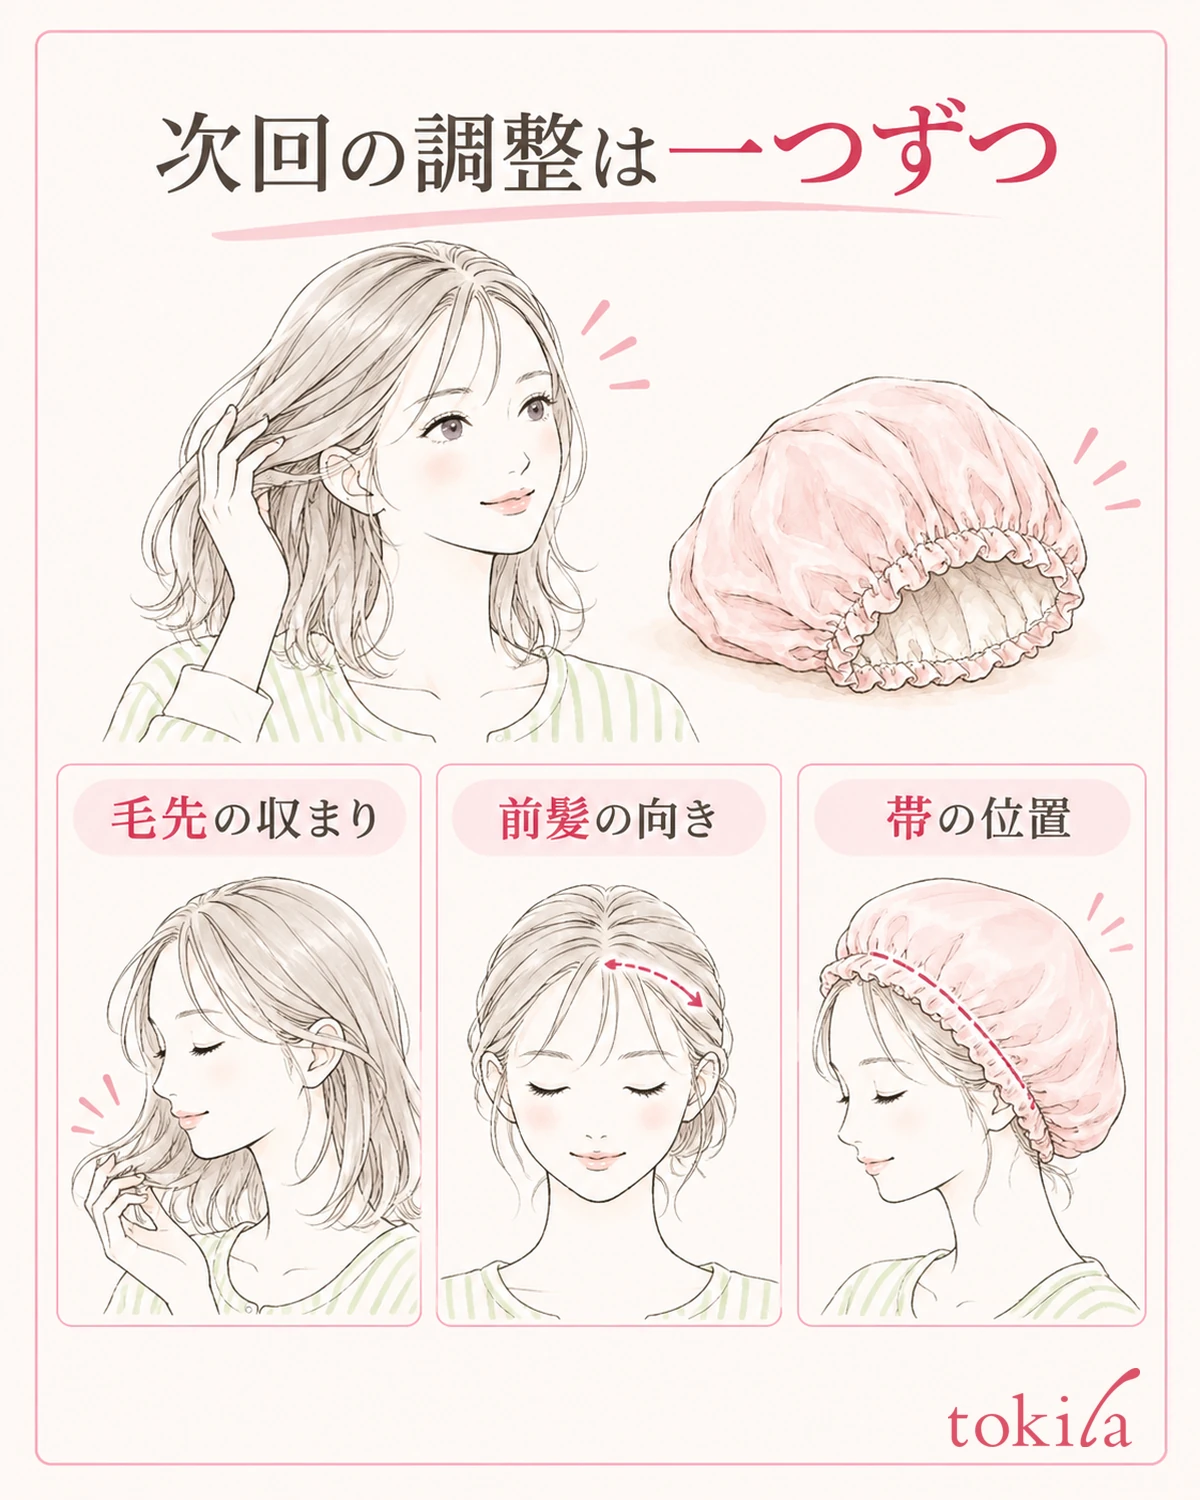
Next time, choose one condition you can change, such as how you tuck in your bangs, how you divide the strands inside the pouch, or the position of the adjustable band. If the capacity is insufficient, rather than piling on adjustments that increase tightness, reconsider changing the shape. Continuing to use the same item every night does not have to be the goal.
After use, check the inside for moisture and dirt, and care for it according to the care label. A material name such as silk, cotton, or a blend alone does not decide the water temperature, detergent, or whether a washing machine or dryer can be used. Look at the label on your actual item, including the stitching and elastic, and choose how to wash and dry it.
Store it once it is fully dry, and the next time you use it, also check the band for stretching and the seams. Thinking separately about how your hair sits, how it presses, and how easy it is to keep up with care makes it clear where to take another look. On days when you can't find a shape that suits you, don't force yourself to wear it; return to your everyday routine of drying and styling your hair.



