
You love both your blush and your nail color, yet when you see your face and hands together in the mirror, one of them seems to stand out too much. On days like that, before repainting both in the same color, decide on the one thing you can change today and compare. Cheeks and nails differ in both location and texture, so matching the colors of the containers is not the only way to choose.
Here we introduce a way to choose today's blush using your finished nails as the reference. Move between holding your hand near your face and your usual hand position, and check tone, depth and shine in that order. Keep both options open, whether you want your hands to be the star or want to draw the eye to your cheeks, and look for the combination you like.
1. Use the nails as the reference and view your face and hands under the same light

First, make sure your nails have finished the final steps, including drying and curing. If they are still in progress, do not bring your hand to your cheek to compare; finish the steps the product describes first. You do not need to press a nail against your skin to check the color. Set today's standard: leave the nails as they are and choose the blush.
If your nails use several colors, start with the one that looks widest on your hands as a clue. You do not need to match every color of the small decorations to your cheeks. If your two hands have different designs, raise each to the same position, then lower both hands and look at the whole.
Finish your usual base makeup, and before adding blush, look at your face and hands in the mirror. Rest your elbow in a comfortable position and lightly raise your fingertips beside your cheek. Without touching your face or hair, hold them at an angle where you can see the nail color and your cheek together. There is no need to bend your wrist awkwardly or hold the pose for long.
Avoid places where strong light hits only one side, and keep your face direction and the lighting the same while you swap candidates. If you want to check under different light, look at each candidate again in the same place. Think of it as checking not only by the window but also whether you like how it looks in the room where you will spend the day.
Lining up the blush in its container with your nails is just preparation for narrowing down candidates. Color applied lightly to your cheeks is not always the same as the color in the palette. A nail color sample is also no guarantee of the finished result unless it was layered the same way as what you wear on your hands. Use your real face and hands as the standard first.
Put what bothers you into words, narrowing it to one point, such as "the colors of my cheeks and nails look far apart," "both stand out sharply," or "only the shine of my nails is strong." If you add blush without deciding what is different, you lose track of what you want to adjust. If there is simply a difference, you can also choose to enjoy it as it is.
When looking near your face, check your cheeks, lips and nails in turn. Do not isolate just the blush and the nails; include the eye makeup and lip color you have already finished. On days when you are unsure about your lip color too, you can use matching lip and blush colors as a separate check.
2. Choose one tone you want to bring closer, rather than a color name
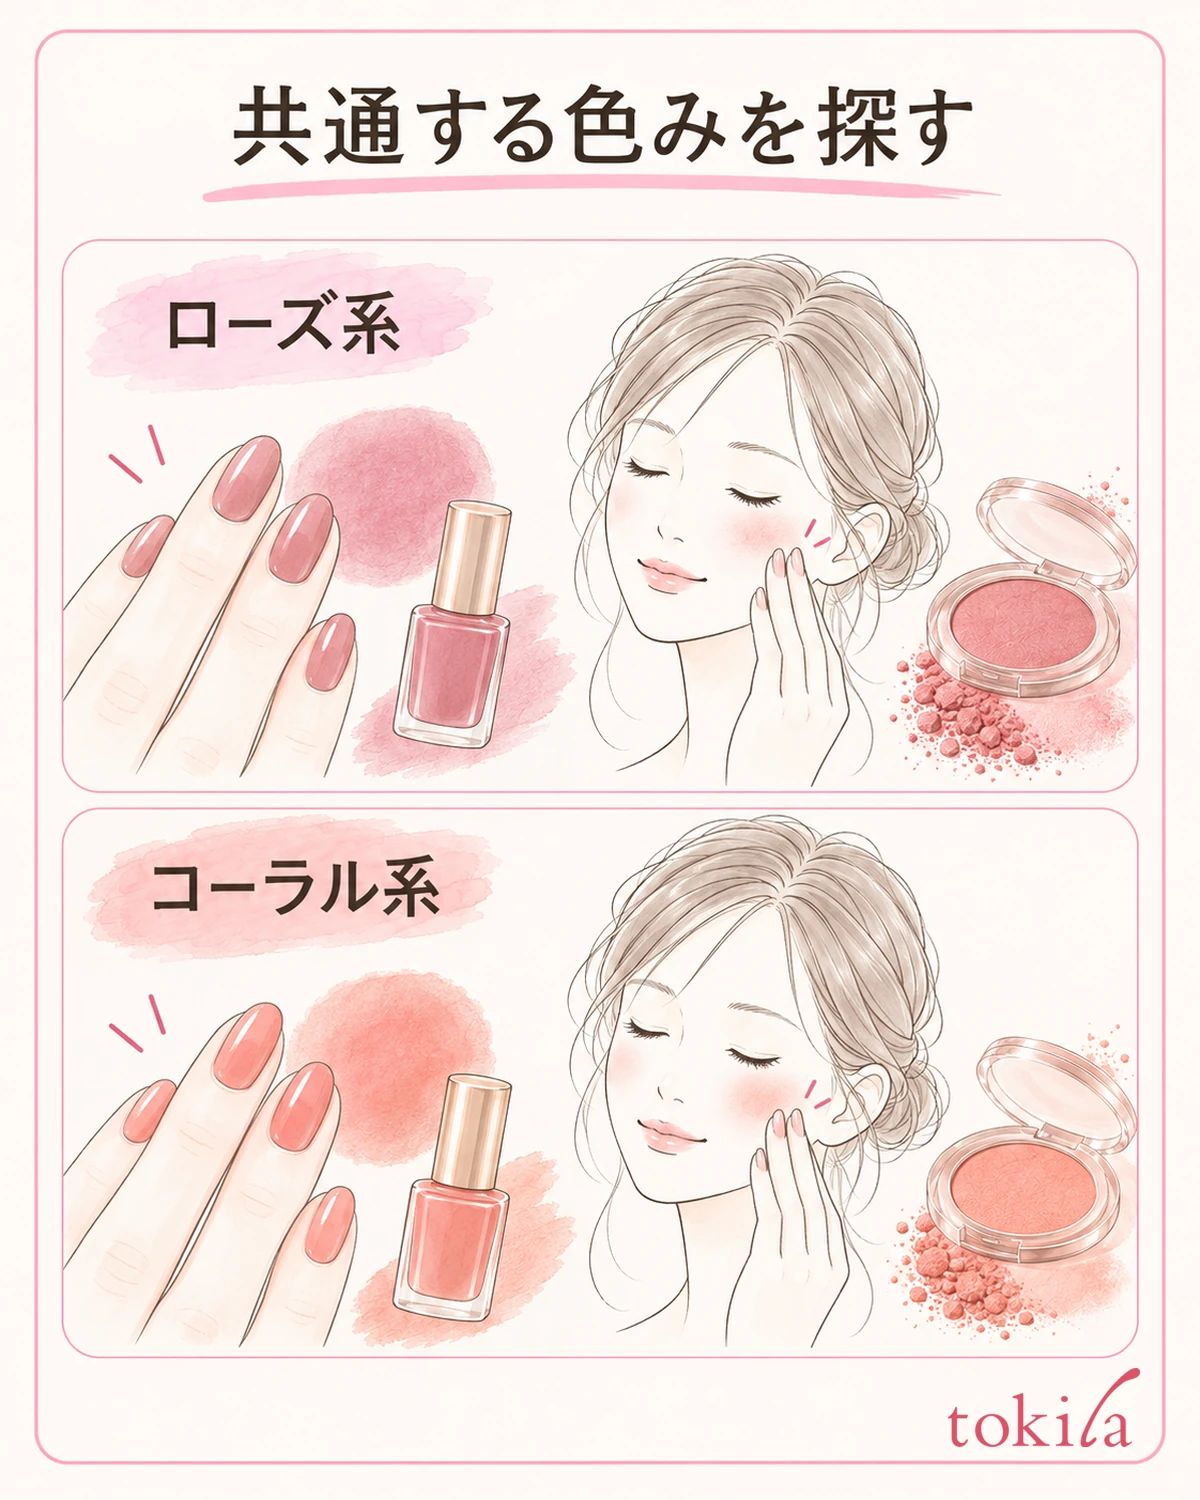
If you want to try a cohesive look, choose one blush that shares a tone with your nails. For example, start with a rose cheek for muted rose nails, or a coral cheek for peachy nails. These are only example candidates, not a claim that this combination is the only right answer for a particular skin tone.
Even products labeled "pink" can lean orange, lean blue or contain beige. Rather than matching color names, look at which color you want to bring closer to the nails you have now. If you are torn between two blushes, do not layer both at once; narrow it down to the one candidate you will try today.
Even with similar tones, differences in brightness and vividness remain. You do not need to match the depth of deep rose nails and pale pink cheeks. As an idea that keeps what the colors share while changing the strength, look at your face and hands at the same time to confirm your preference.
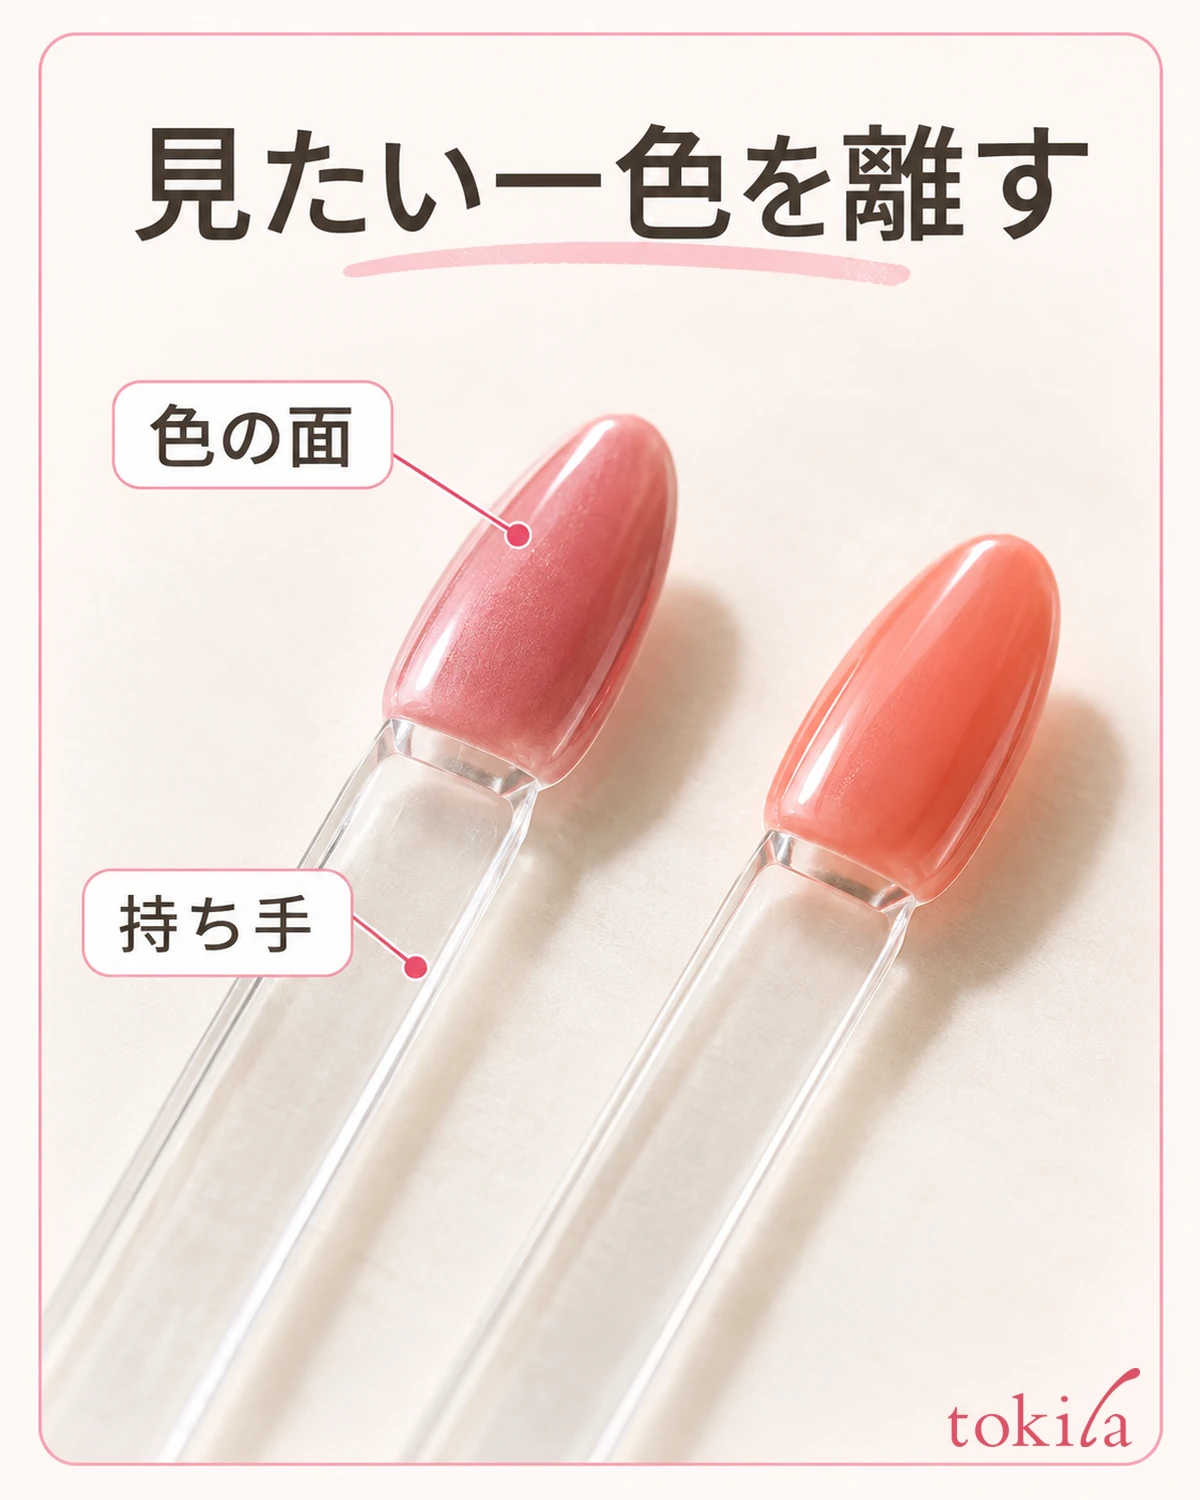
If you use nail color swatches you own, hold the handle of the stick and keep the one color you want to see away from the other swatches. This makes the outline of that one color easier to see than looking at it while it overlaps the neighboring color. Do not press the tip against your cheek, and do not treat it as a tool that proves the actual color payoff of a product.
On days when you want to enjoy a combination with different tones, you do not have to erase the difference. For example, keep a muted pink cheek with blue nails and think about whether you want your face or your hands to stand out more. This is not a procedure that must end in close colors; it is a step to check whether the difference is one you chose yourself.
If you look at the same candidate over and over and find it hard to decide, put your tools down for a moment. You can also stop at a light finish today instead of mixing in the next candidate on top. Do not assume that you will keep wiping off your skin and reapplying to search for a color combination.
If color terms confuse you, you can also check the basics of tone, brightness and vividness. Do not use colors on a screen as swatches for what you own; read it to organize the vocabulary, and in the end go back to the real items to choose.
3. Leave the nails as they are and decide the depth of the blush little by little
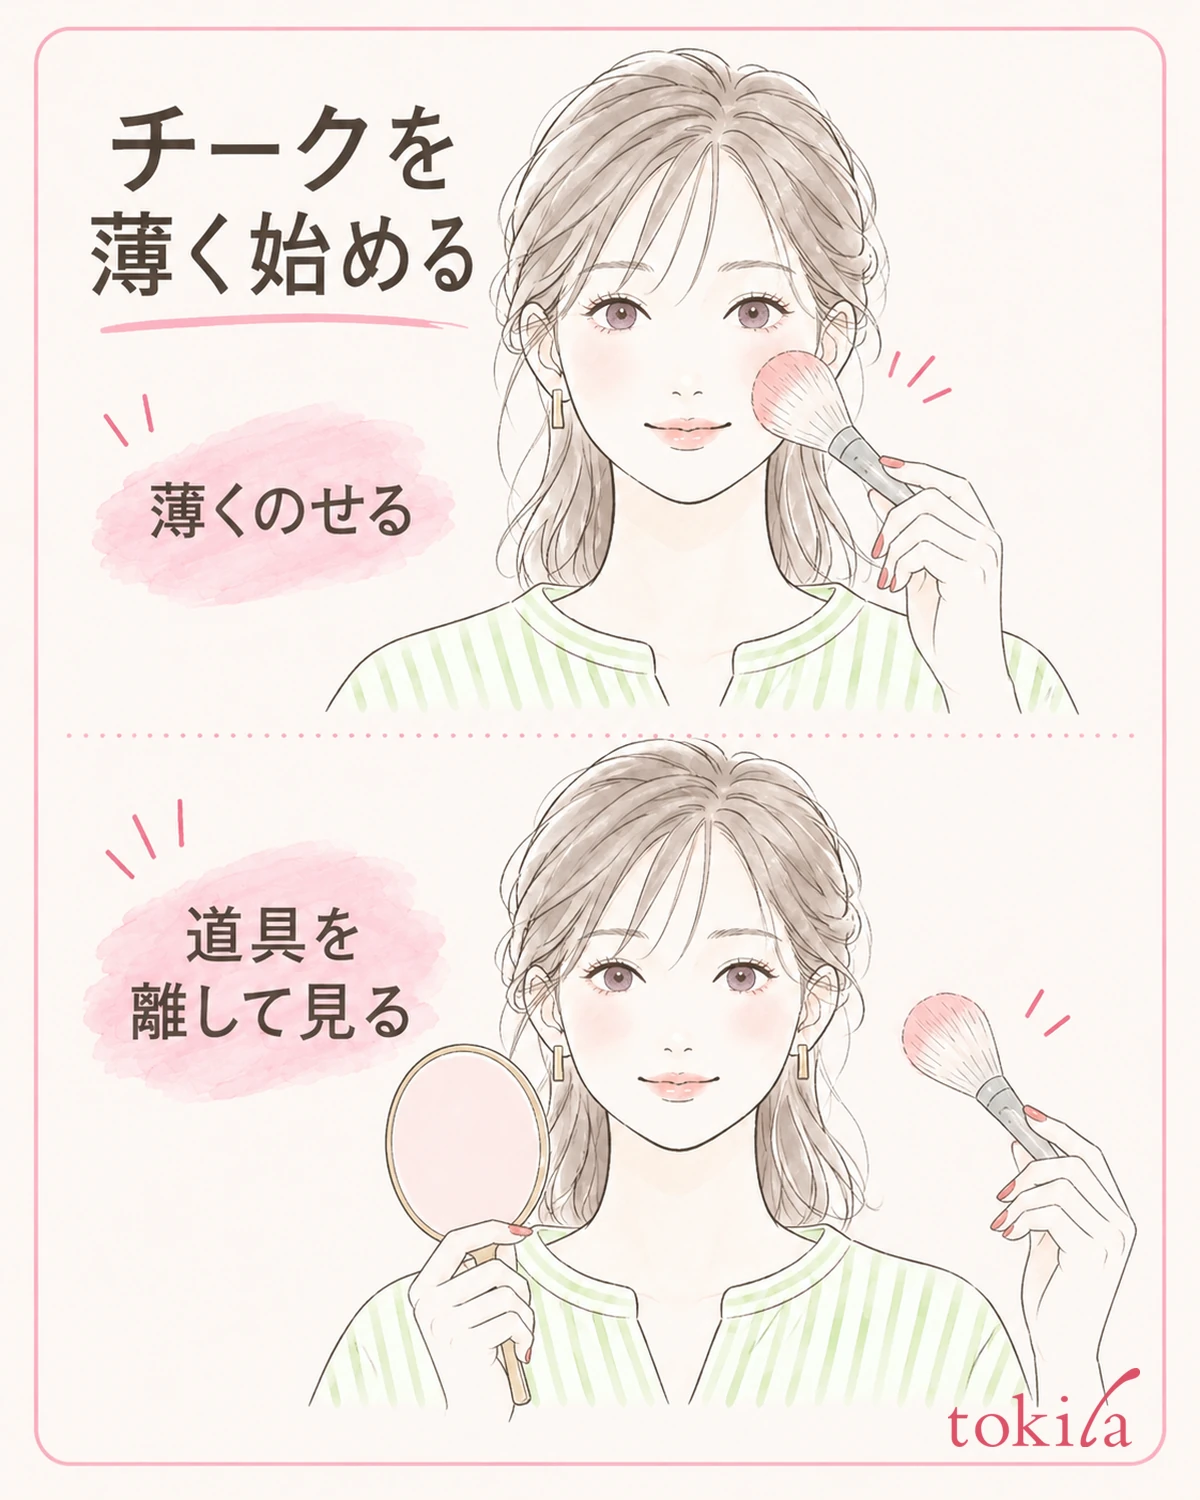
On days when you use the nails as the reference, do not finish the blush deep from the start; begin lightly, following the product's instructions. Powder, cream and liquid use different tools and steps. For the sake of matching colors, do not replace them all with the procedure of applying everything with the same brush.
For powder blush, pick up the powder with the specified tool, remove the excess, and then bring it to your cheeks. For cream or liquid, check that product's application method and the order with your base. Use the color on the back of your hand only as an aid to see how it appears, and do not assume it will be the same as the finished color on your cheeks.
After applying lightly to the area where you usually put blush, take the tool away and look at your face and hands. If you want your hands to be the star, check whether a subtle cheek still suits you. If you want the blush to be the star, rather than adding until it outdoes the nails, stop at the point where the color you want is visible within your whole face.
Adding color to the blush and widening its area are separate things. If you only want to review the depth, do not add more outward blending every time; review the area you have already chosen. Conversely, if the color on your cheeks is too wide, decide whether to lift off only the parts you need rather than adding another color on top.
Blush and nail products are each used on the parts they are specified for. Even if the colors are similar, this is not a method of putting nail polish on your cheeks or blush on your nails. For multi-use cosmetics too, check the label for where they can be used. Do not confuse matching colors with using the same product for both.
If you have made your cheeks too deep, check whether you can tidy them in small movements with a clean tool that has not picked up fresh powder. If even the base gets disturbed, remove only the parts you need following the product's removal instructions. If you also wiped off the UV protection layer during the day, make sure to reapply it as well.
4. Separate color from shine, and change the angle of your hand slightly
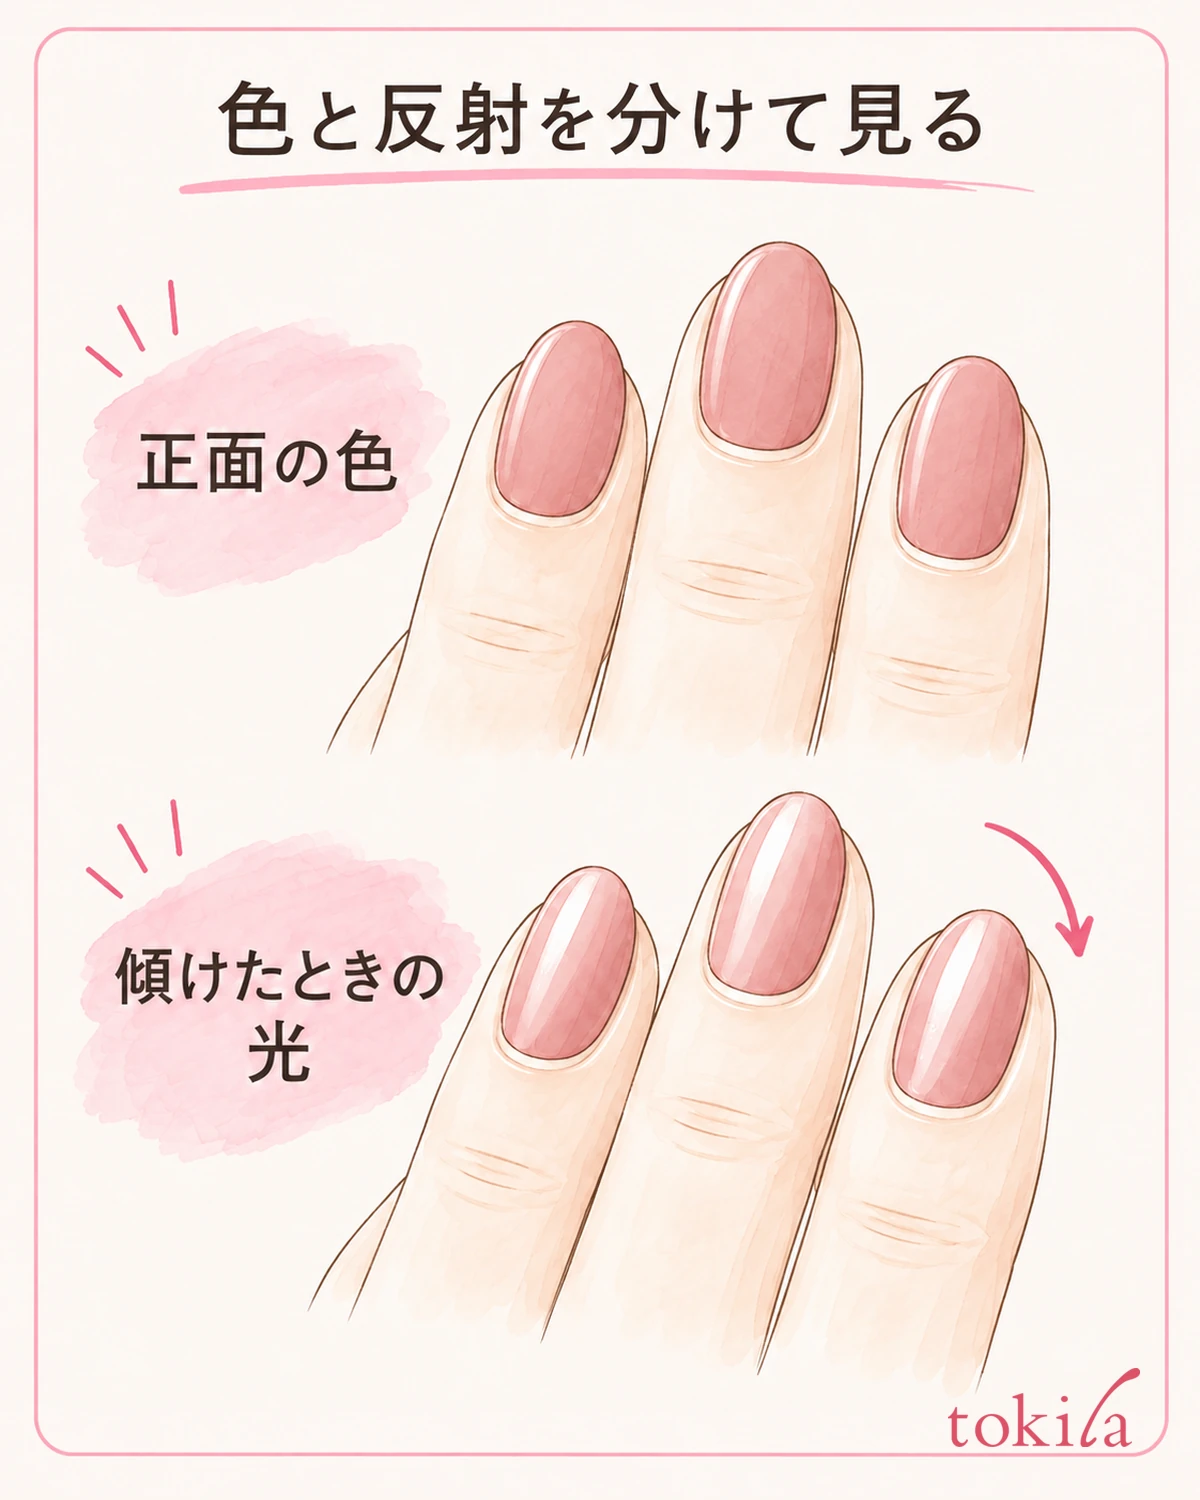
Even when you choose colors of the same family, a strong reflection on nails and a soft color on cheeks stand out differently. Look separately at whether the colors are far apart or whether the shiny spot is what bothers you. Instead of continuing to add color to your cheeks to chase the shine of your nails, first return to a look that appears calm from the front.
Next, tilt your hand just slightly and watch where the shiny part moves. Check the color from the front and the reflection when tilted separately. Just because part of a nail shines white, you do not need to decide that the color is lighter there. When you compare under different lighting, move your face to the same place too.
If your cheeks also have pearl or glow, turn your face slightly to the side and then return it. This is not a procedure that requires the shine of nails and cheeks to be the same strength. Check, in your usual face and hand positions as well, whether you want to enjoy both shines or keep one subdued today.
On nail color swatches, a thin streak of reflection may appear along the curve of the surface. If you want to see the color, do not decide only from an angle where the reflection covers the center; change the angle a little and look at the color area too. Take care not to mix up the shadow under the swatch or the color of the stand with the color of the painted part.
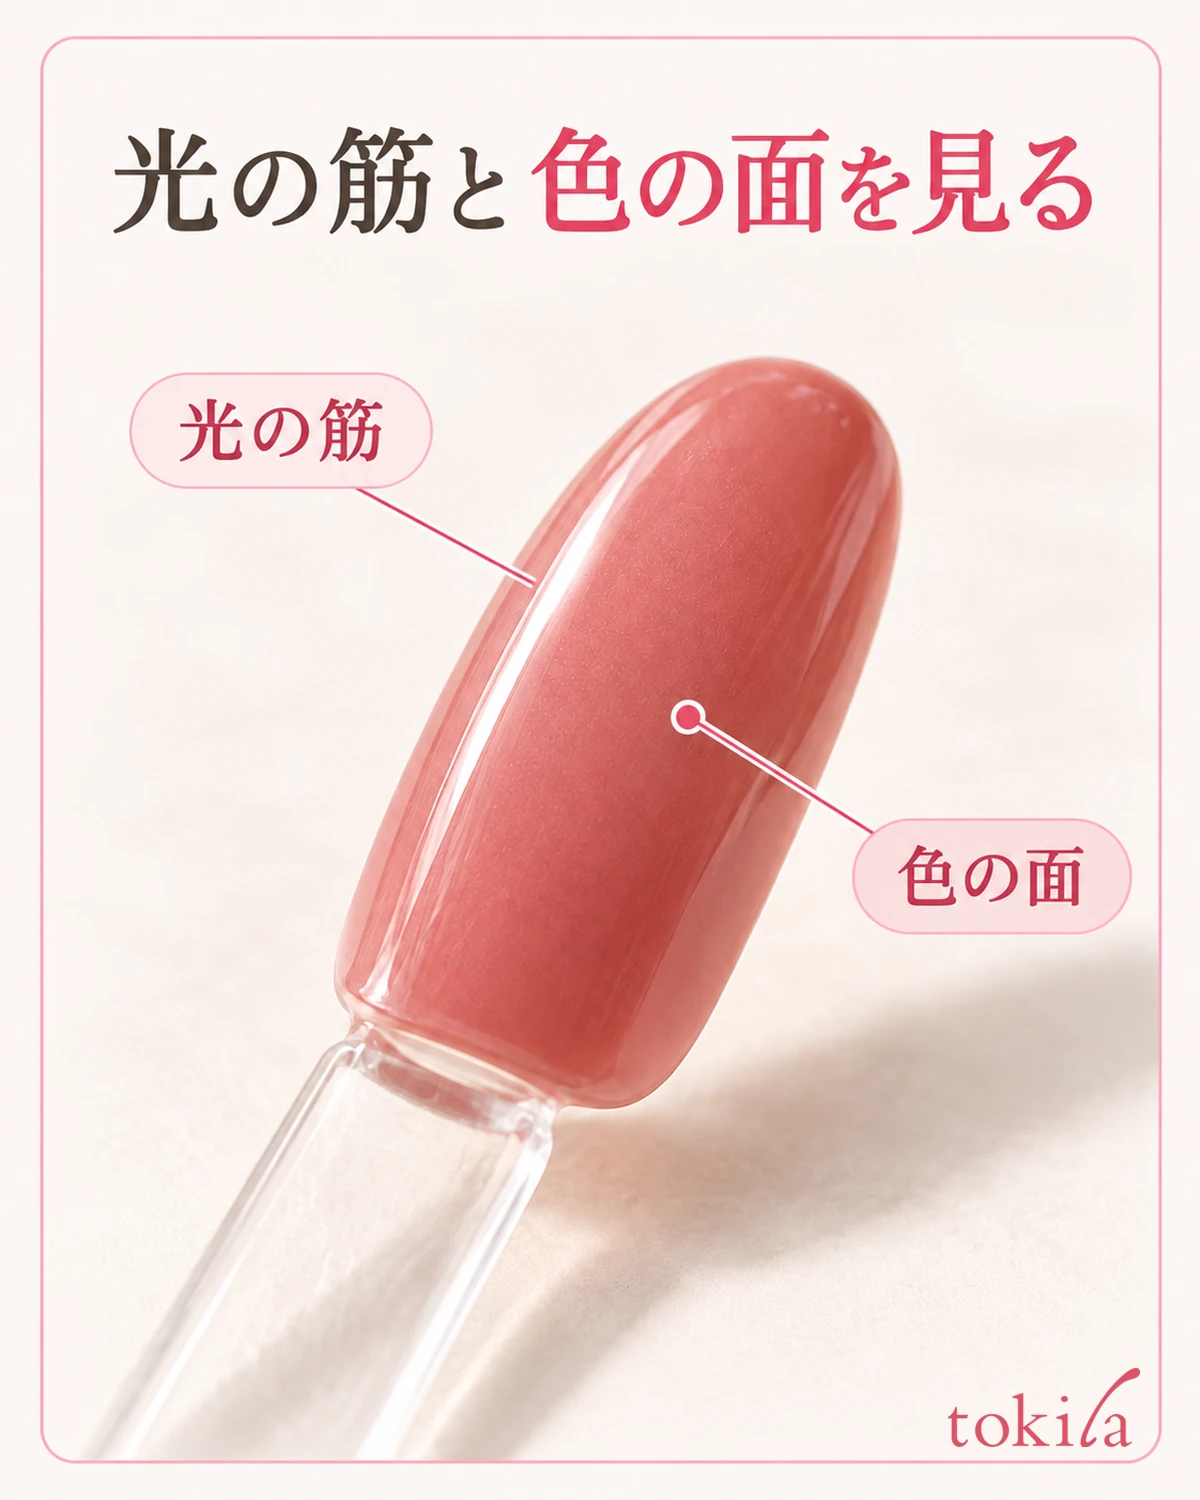
To change the gloss of finished nails, you do not need to rub the surface or layer on liquids that have no instructions. Either choose on the blush side, which you can change today, or keep the combination as a candidate for next time. If you repaint your nails, treat everything from removal to finishing that product as a separate process.
5. Lower your hands and decide on the combination as you look day to day
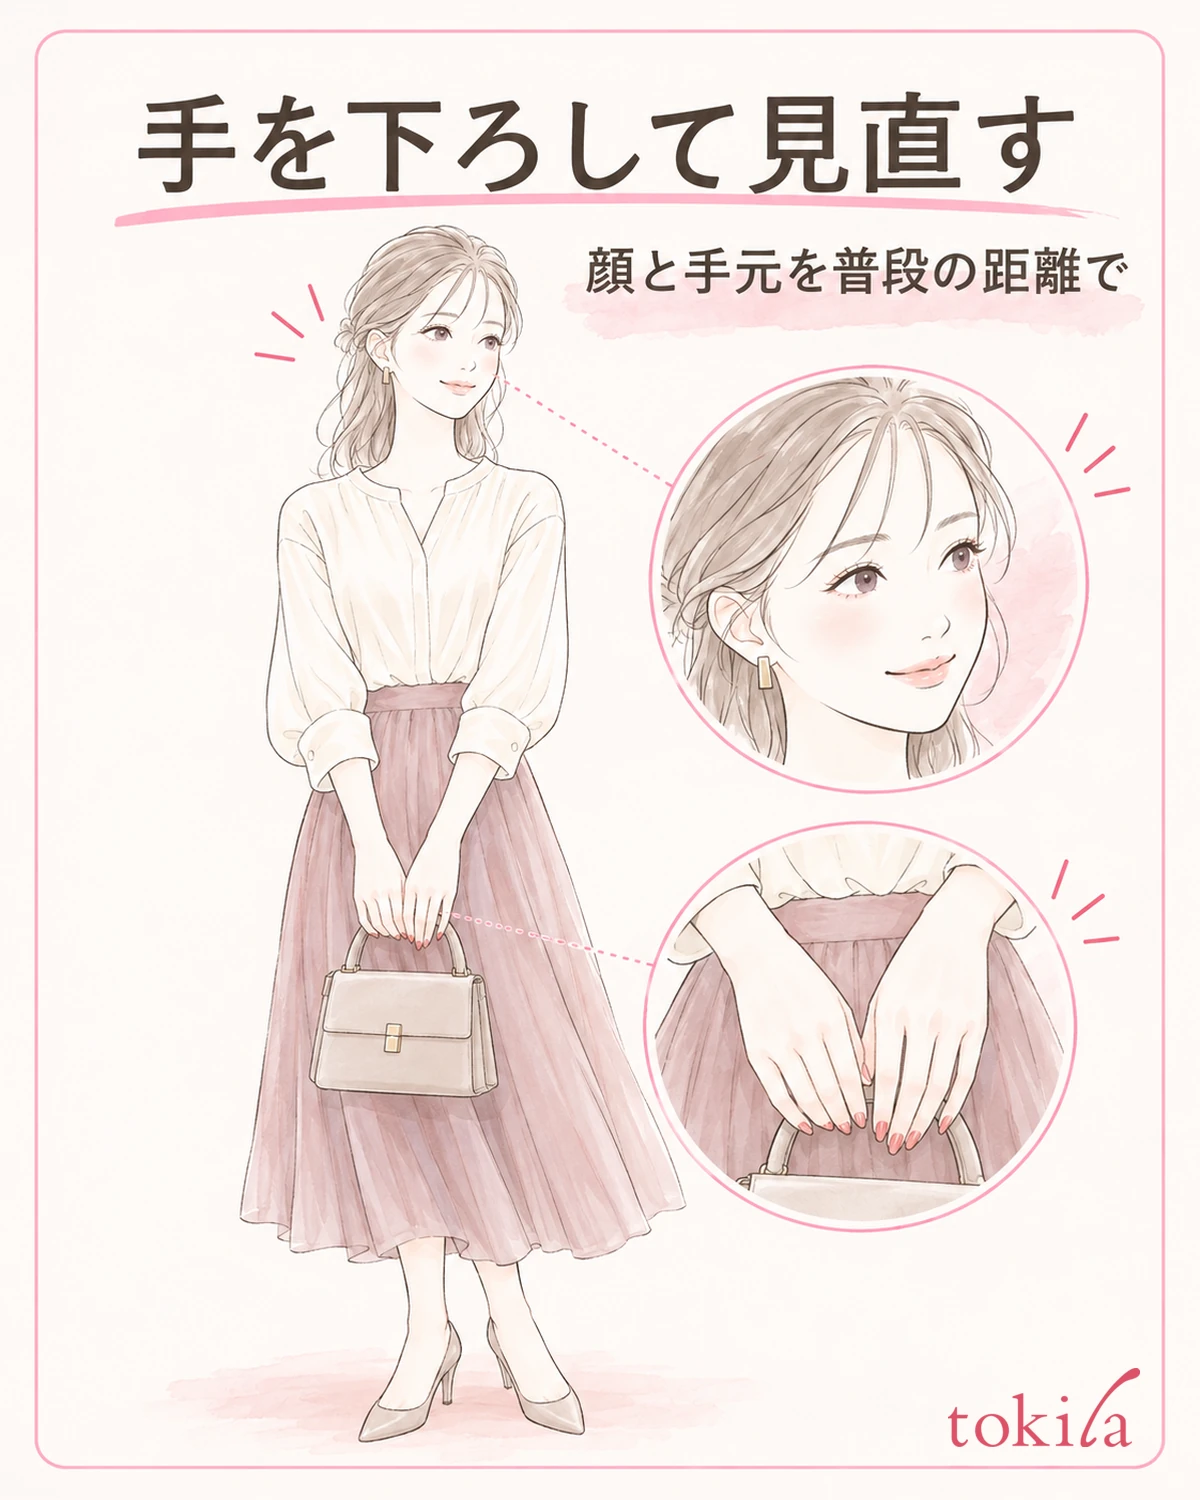
Once a candidate is decided near your face, lower your hands to a natural position. Step back a little from the mirror and look at your face and hands standing or sitting in a chair. Two colors that look good together in a photo with the hand held near the cheek are usually apart from each other. Check whether you like it including that distance.
You can also look in the postures you often take today, such as holding a cup or resting a hand on a bag. There is no need to press anything with your nails; a relaxed posture is enough. Even if the difference in tone bothers you up close, if it looks like an accent you like from your usual distance, you can make that today's finish.
The colors of your clothes and rings also come into view. If you like the combination of your face and hands but only the cuff bothers you, check the relationship with your clothes before changing the blush further. The steps for comparing nail and clothing colors let you check from sleeves and rings out to your whole outfit.
On days when you stay undecided to the end, return to the one point you first put into words. If the cheeks are strong, start lighter next time. If the shine of your nails bothers you, look at color and reflection separately. Do not treat being unable to make your face and hands the same color as a failure; settle on an endpoint among the combinations you can use today.
In your notes, record the color and posture, such as "rose nails, pale rose cheeks, preferred when hands are lowered indoors." If you use photos, match the lighting and whether any retouching or filters were used, and avoid deciding depth from the screen alone. Next time, change only one thing, either the blush candidate or its depth, and the point you are comparing will be clearer.



