
You gather your hair to the back for a half-up, and only one ear sticks out a lot. Even when you retie it, only one side puffs up. In that case, before swapping your hair accessory, check where on the left and right you took the hair from. The position where you tie and the range of hair that goes into the bundle you tie are separate points to check.
Here we deal with sectioning for a half-up where you want the left and right to be roughly even. You do not need to fix a hairstyle that intentionally differs left and right. Ear positions and the way hair grows differ from person to person, so rather than matching the number of strands or the height of the line exactly, adjust while looking at the hair you leave around your face and at the back view.
1. Before tying, look separately at the left and right starting points and the hair that remains
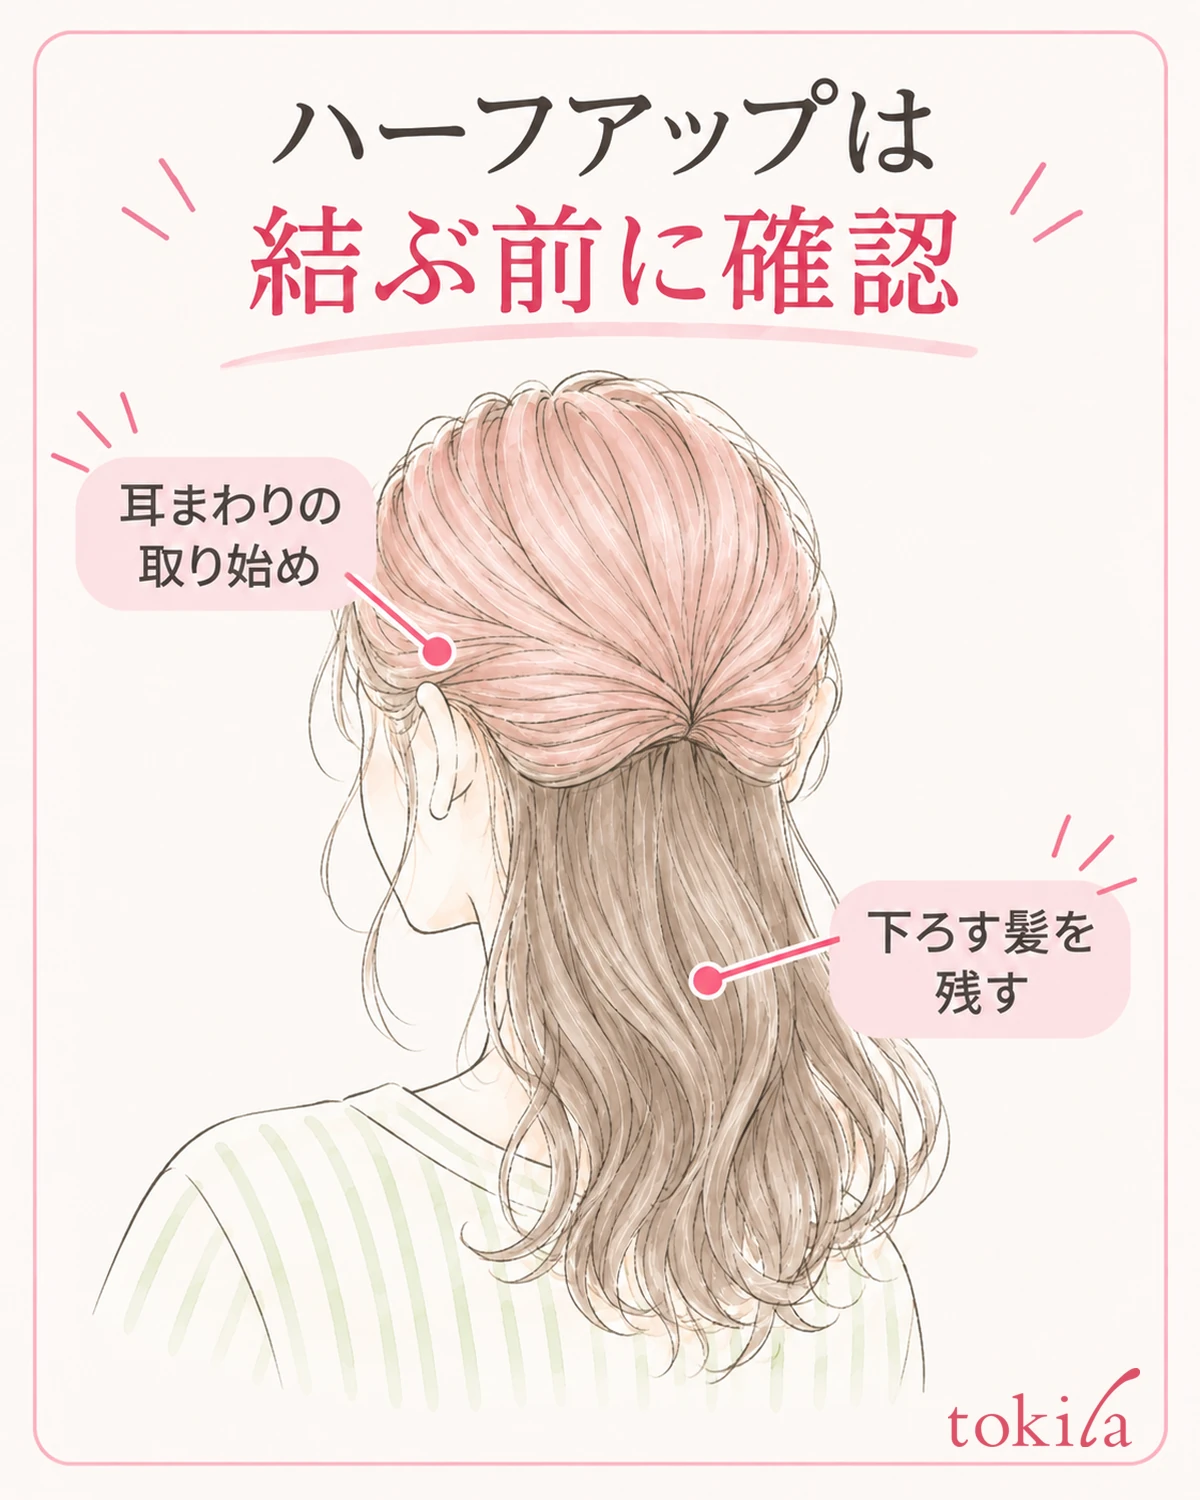
First put the elastic or clip down for the moment, and let your hair down in your usual part. Face straight ahead in a mirror in front of you and check the positions where you carry hair back from around your left and right ears. If you tilt your head and look up at only one side, the position where you take hair can look different.
Narrow the left-right difference you care about to one place. Look at whether the starting point above the ear differs, whether on only one side the hair in front of the ear is also in the bundle, or whether the thickness of the gathered bundle differs. Instead of trying to fix everything at once from the start, take the most obvious difference as your starting point.
The area above the ear is a guide for finding where to take hair, but it is not a line that specifies the same height for everyone. If the position of your ears, the roundness of your head or the part of your bangs differs, taking hair at the same height will look like a different amount. Rather than matching by numbers, decide which hair to gather up and which to leave down.
Also check first the short hair you leave around your face. If you leave a lot of long hair on only one side, the impression is hard to even out by adding to or removing from the top bundle alone. If you want to leave the hair in front of the ears, look at the range you leave on both sides in the mirror and then gather the rest to the back, in that order.
Do not treat it as a failure in itself that your hairline or part differs left and right. If you force your natural hair flow to the opposite side to make the same shape, it may spring back when you let go. This is a check to get a state where you can compare left and right, and it does not judge any abnormality of the hair or head shape.
If the difference appears only after tying, the direction you pull it back may differ more than the starting point. First look at the state with it lightly held without tying, and remember whether it looks even there. That makes it easier to tell in later checks whether it reverts at the sectioning or at the fastening.
2. Create a boundary between the hair you gather up and the hair you leave down
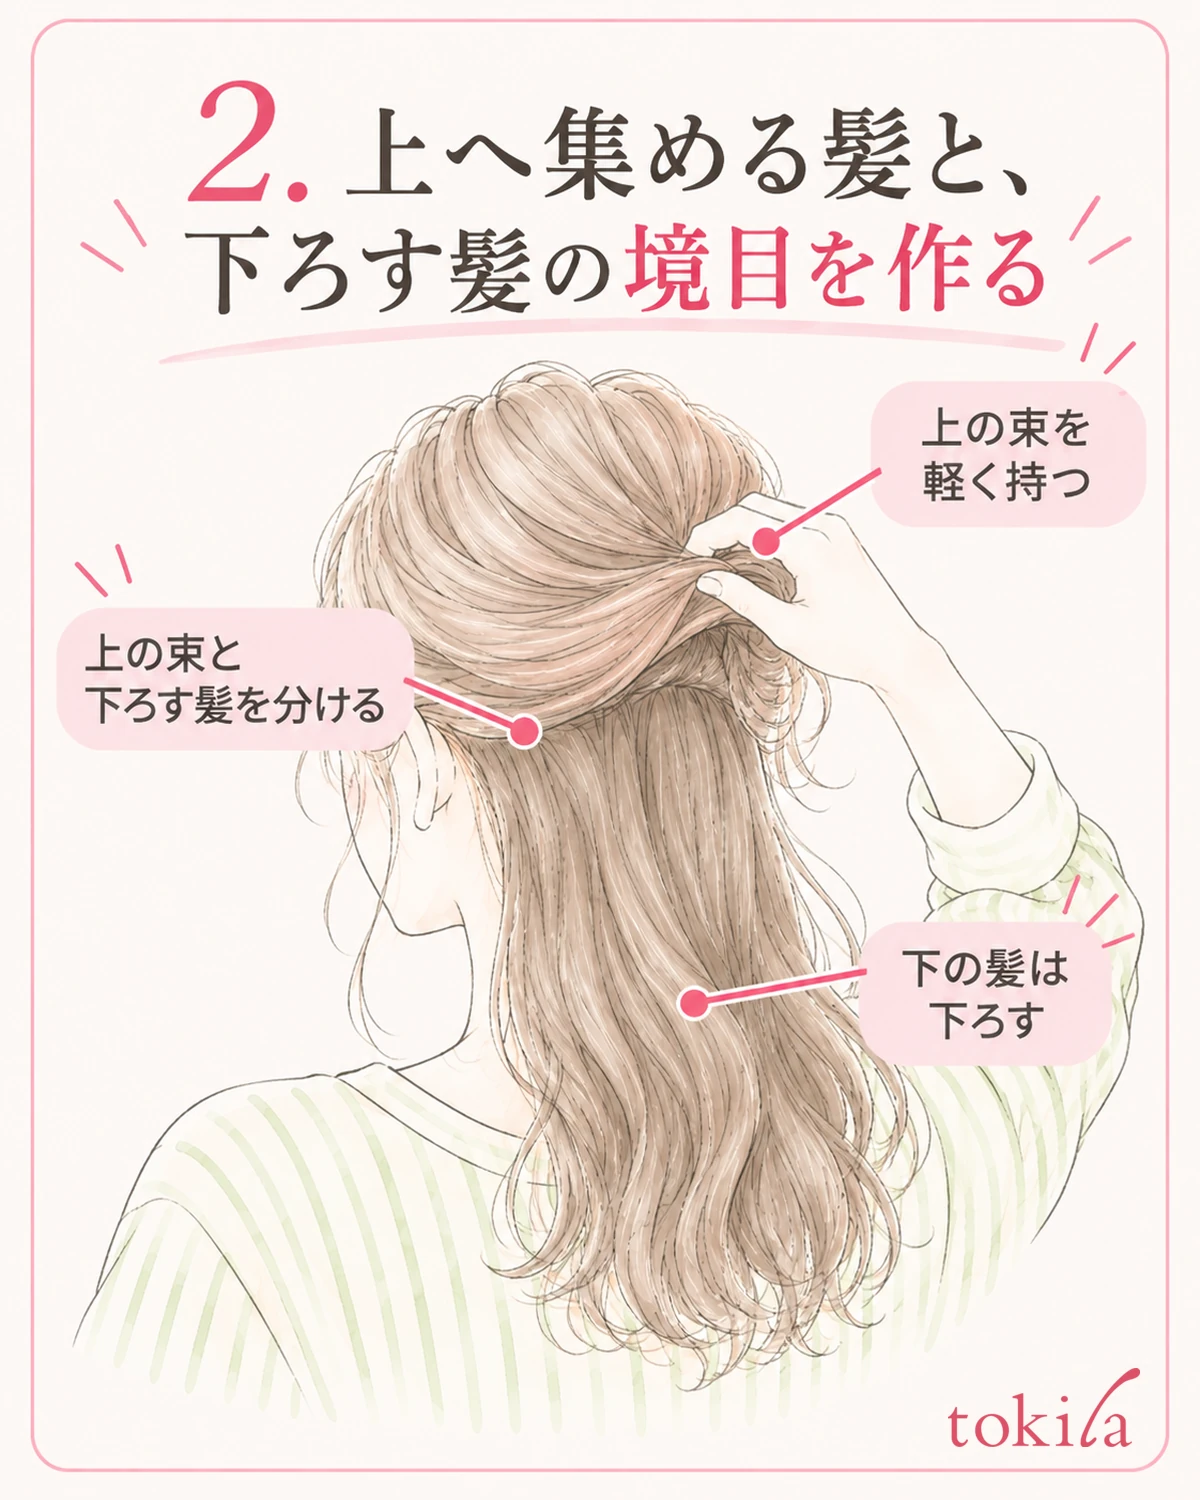
Put your fingers at the starting point around the ear and lift the hair you will gather up, a little at a time. Do not scoop up the hair you leave down along with it; move toward the back while watching the boundary at the roots. Do not scratch the scalp with your nails or pull hard on tangled hair.
After you take one side, lightly support that bundle with your hand and take the other side in the same way. Pass your fingers between the top bundle and the hair you leave down, and check that no thin strands have mixed in partway. If any part of the lower hair has been pulled up, return just that hair down before tying.
The boundary does not have to be a perfectly straight line. For a hairstyle where you do not want the straight parting line to stand out, there is also a way of taking hair with the boundary shifted little by little. However, so that you do not take a lot too deeply on only one side, check the amount of hair left on both sides as you go.
If you need to reposition the bundle you have taken, temporarily hold it with a clip for gathering hair. If you clip the hair you are leaving down as well, the boundary will change the next time you hold the bundle. Tell apart the hair caught in the clip from the hair falling below it, and use it in a position that does not hurt.
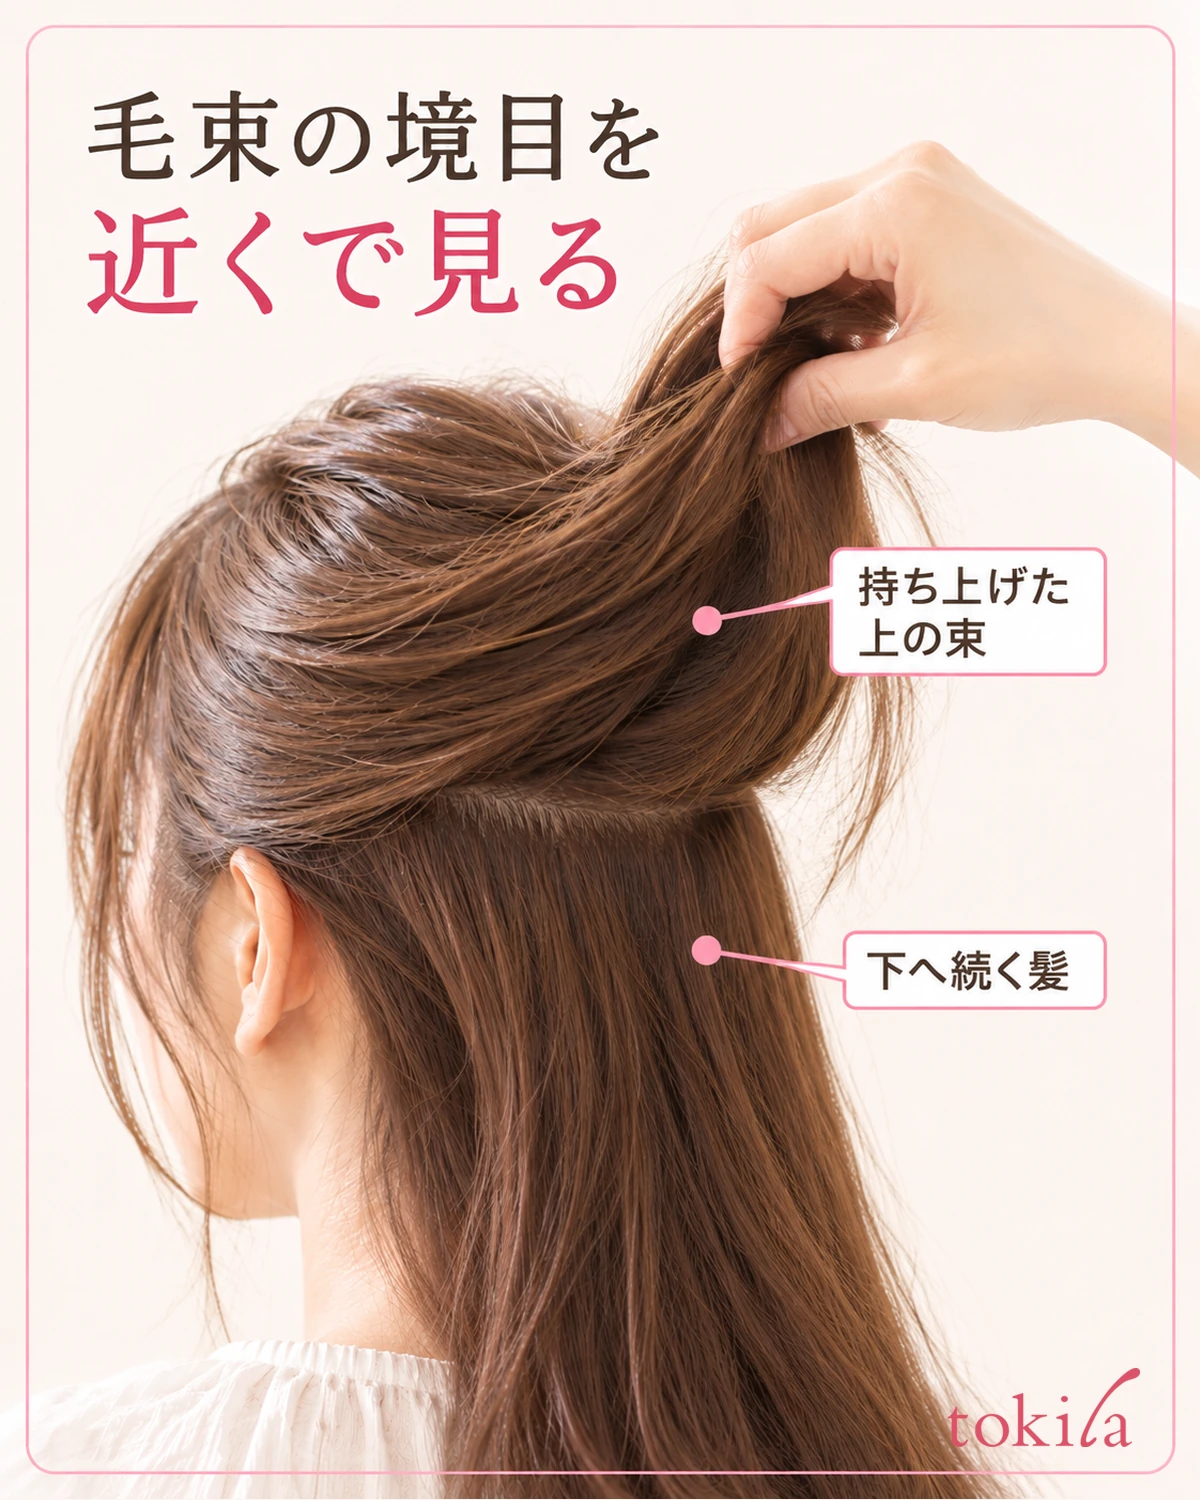
If the bundle comes loose while you are separating the left and right, rather than taking a wide section at once, gather again little by little from what you can see. Do not just increase the strength of the clip or force a larger bundle in. Also check the amount of hair and the way to use the fastener you are using.
You do not need to wet your hair heavily or keep layering styling products only to help with sectioning. If you use styling products, follow that product's label. First give the hand that supports the bundle and the hand that separates the hair you leave down different roles, and create a state where you can check the boundary.
3. Do not even things out by bundle thickness alone; compare how both sides look
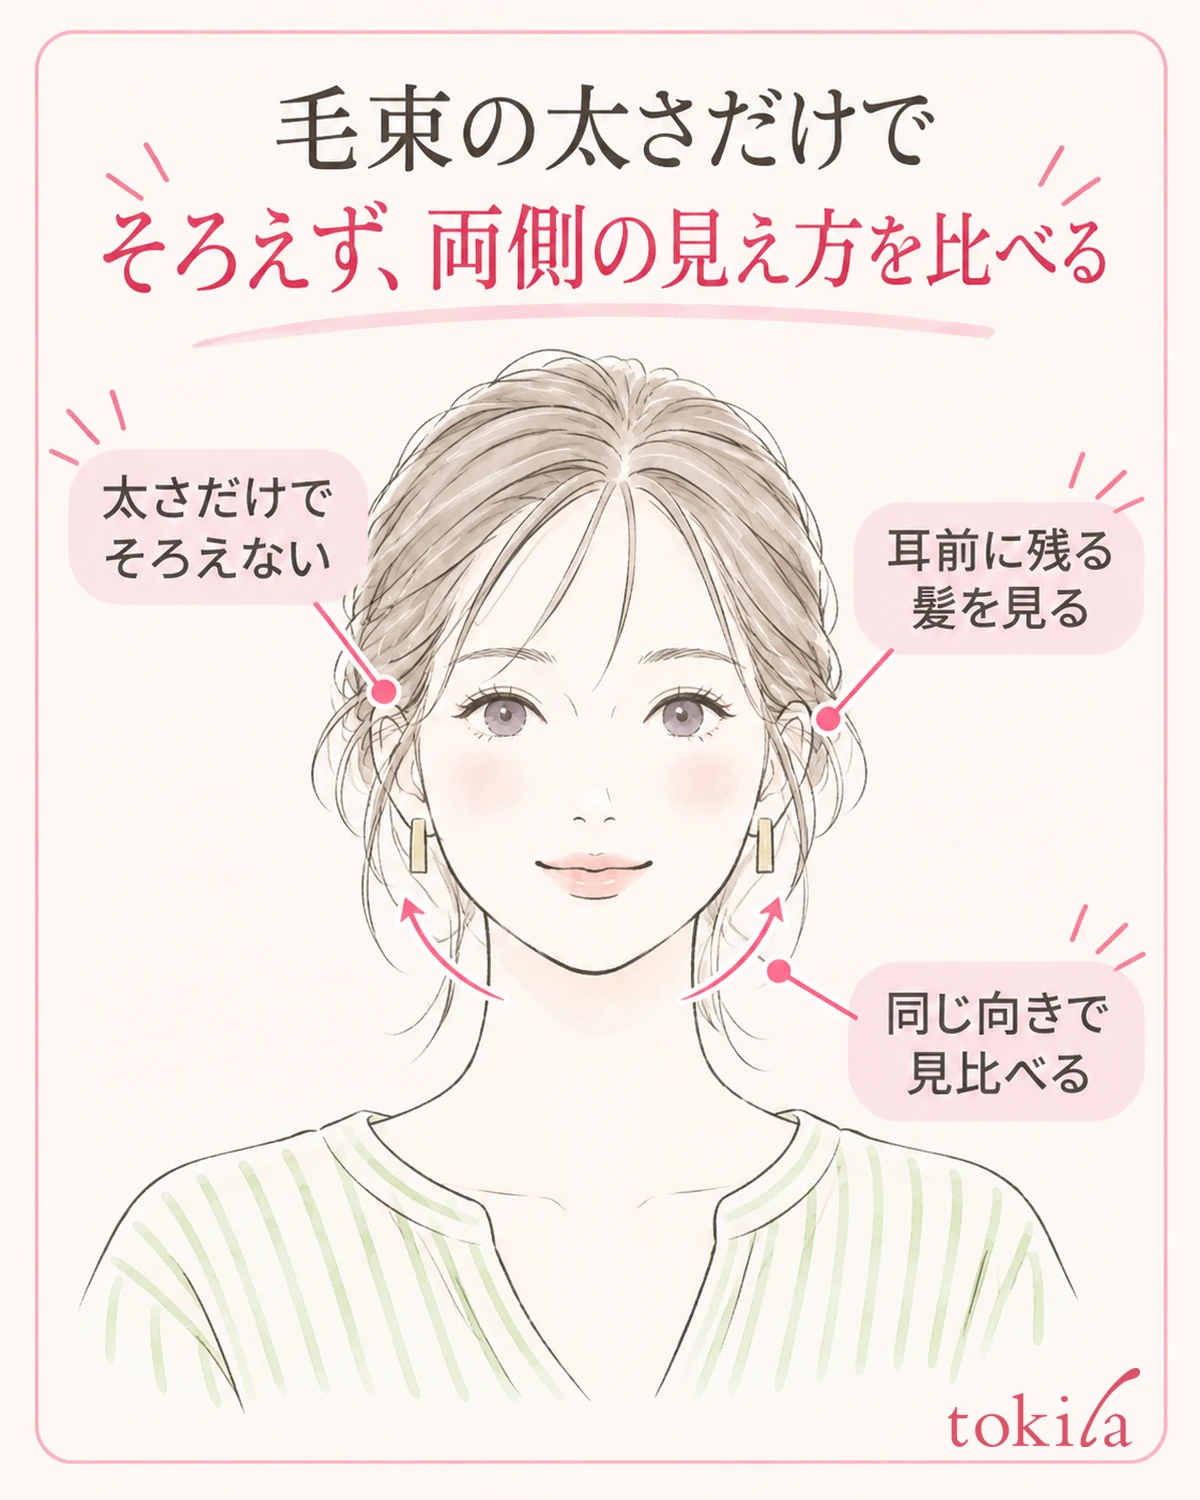
Lightly hold the left and right bundles at the same hand position and bring your face back to the front. Look in turn at how much of the ear shows, the outline running from the temple to the ear, and the thickness of the hair left below. Even if you compare by gripping only the tips of the bundles, the thickness changes with differences in length and steps along the way, so do not use that alone as the standard.
If one ear shows a lot, check whether you have gathered too much of the hair in front of the ear on that side. If hair you want to leave has gone into the bundle, return some of it and hold it again. You do not need to pull up all the hair on the other side to match; adjust starting from the shape you want to keep around your face.
If only one side puffs up, in addition to the starting position, also check whether lower hair has mixed into the inside of the bundle. Rather than smoothing down only the visible surface hard, it may be easier to check by letting that side's bundle down once and recreating the boundary.
If your part is not in the center, you do not have to make both sides the same number of strands. If long hair flows from one side to the other, it may connect naturally even when the amount in the bundle differs. Prioritize how the area around your face and the hair you leave down look over eliminating the difference in volume.
If short hair falls out on only one side, check whether its length reaches the bundle. Rather than pulling hair that does not reach to force it in, you can choose, for example, to change the range you leave down or go for a different hairstyle. Do not make pain or strong pulling a condition for evening out left and right.
Make adjustments one place on one side at a time. If you change the position you take hair and the range you leave on both sides at once, it becomes hard to tell what to put back. Stop once, compare the side you changed and the side you did not in the same orientation, and then decide where to move next.
4. Align the direction you gather toward the back, and view the back with a temporary hold
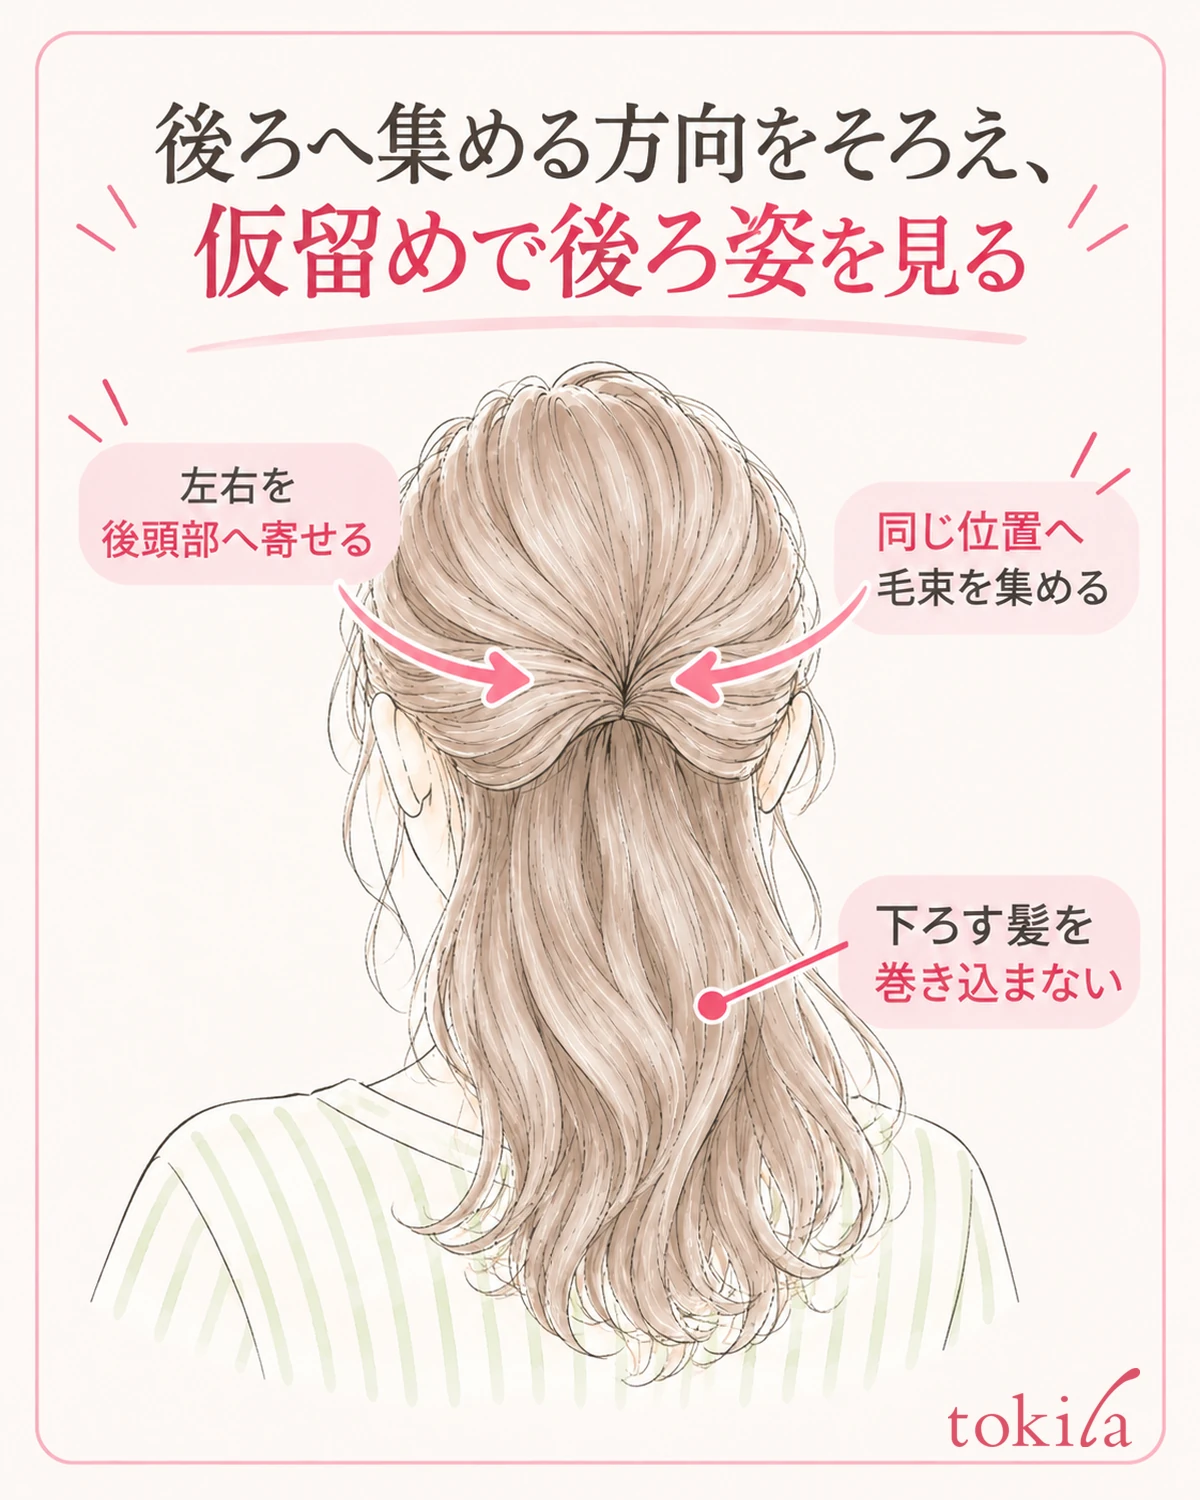
Gather the left and right bundles toward the position you chose at the back of your head. If you pull one side up to a high position and draw the other side in from straight beside it, the way the area around the ears is pulled changes even when you take the same range. At first, do not add twisting, and look at where the hair is gathered from.
Lightly support the gathered bundle with one hand and check with the other that no lower hair has mixed in. Before tying, confirm that the left and right bundles reach the position where they meet without strain. If you gather with your neck bent back hard, it may look different once you return to your usual posture.
Once you have clipped it temporarily, use the mirror in front of you and a hand mirror to look at the back view. Adjust the angle so the back of your head shows in the hand mirror, return your head to the front-facing posture, and then check. Do not keep twisting your neck at a strained angle; if it is hard to see, lower your hands once and change the position of the mirror.
At the back, look at whether the left and right boundaries connect, and whether long lower hair has been pulled into the top bundle. If a thin strand on only one side is pulled up, look for the place where that part mixed in. Before hiding it with an accessory and calling it done, remove the temporary hold and return the hair in small amounts.
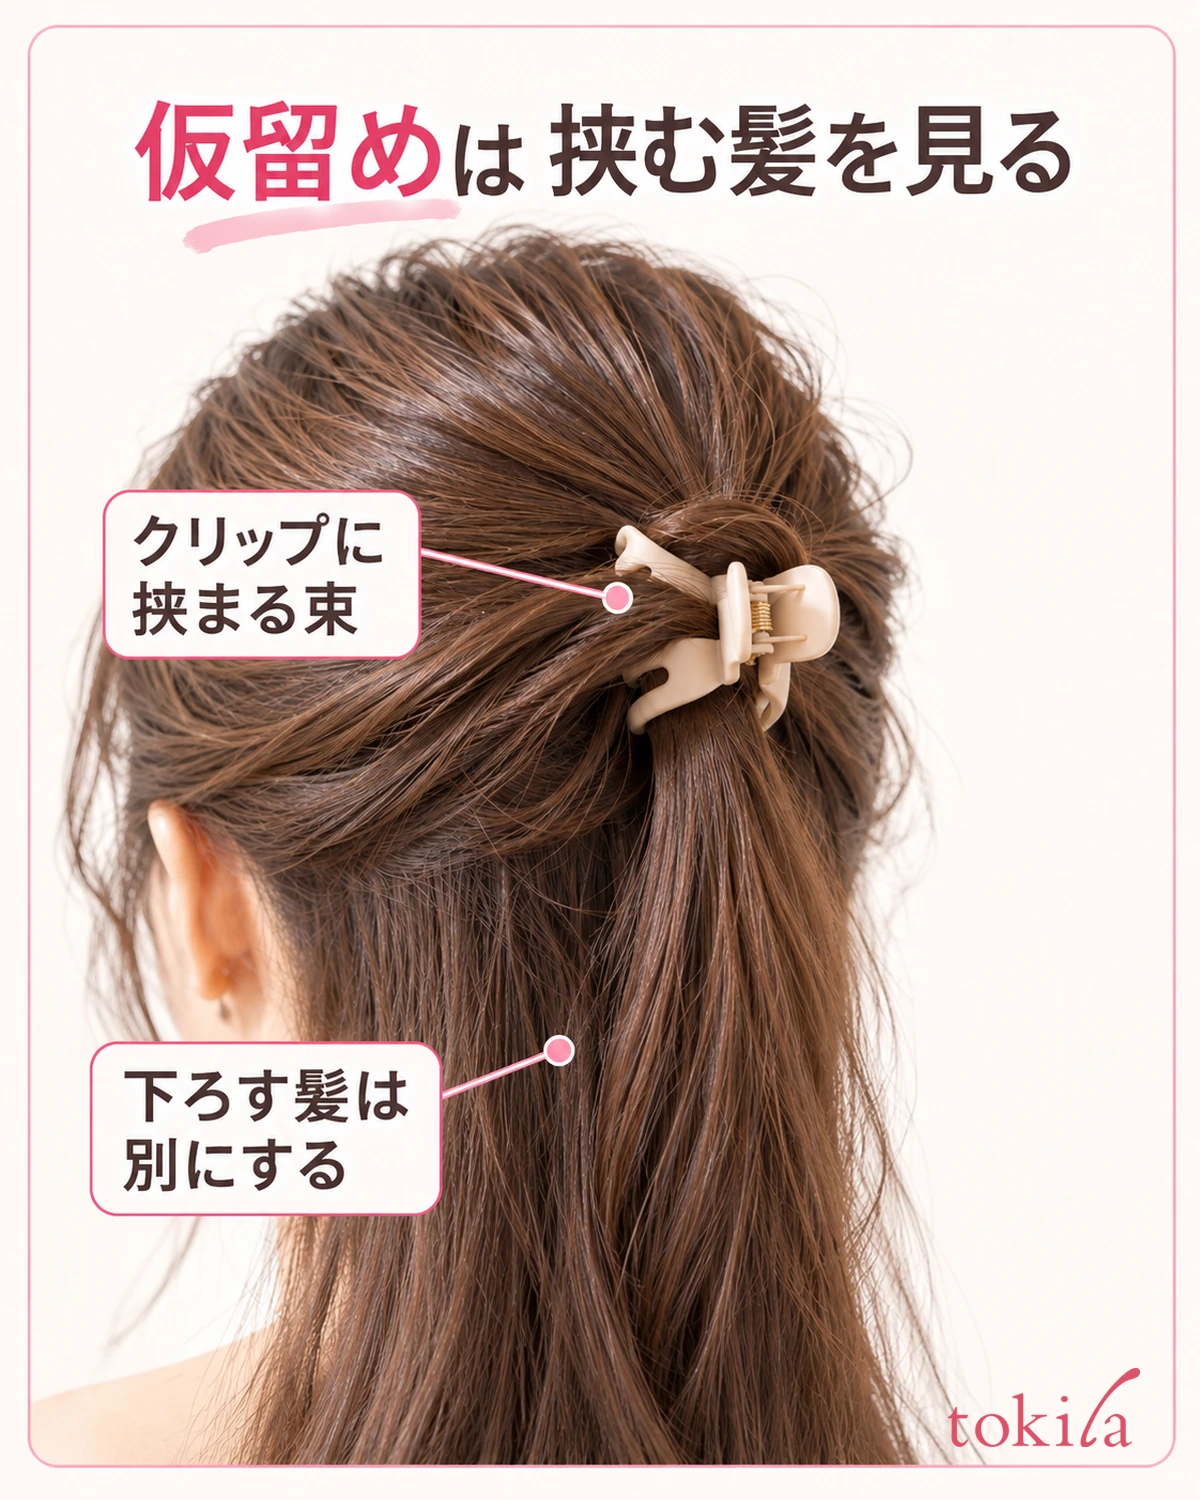
If it looks even with the temporary hold but tilts after you fasten it with the elastic, do not keep changing only the sectioning. Look back at whether you pulled one side hard when tying, or whether the direction in which you pulled the bundle at the end changed. Keeping the starting point and reviewing the position of the hand that fastens it lets you separate the points to check.
Add other techniques such as a rolled-through ponytail only after you have checked how it looks up to this point. Basic arrangements are also introduced in hair arrangements such as the kururinpa. When you adjust left-right differences with twists or accessories, choose a form that does not pull hard on the scalp.
5. Look at how it settles after you move, and decide where to start next time
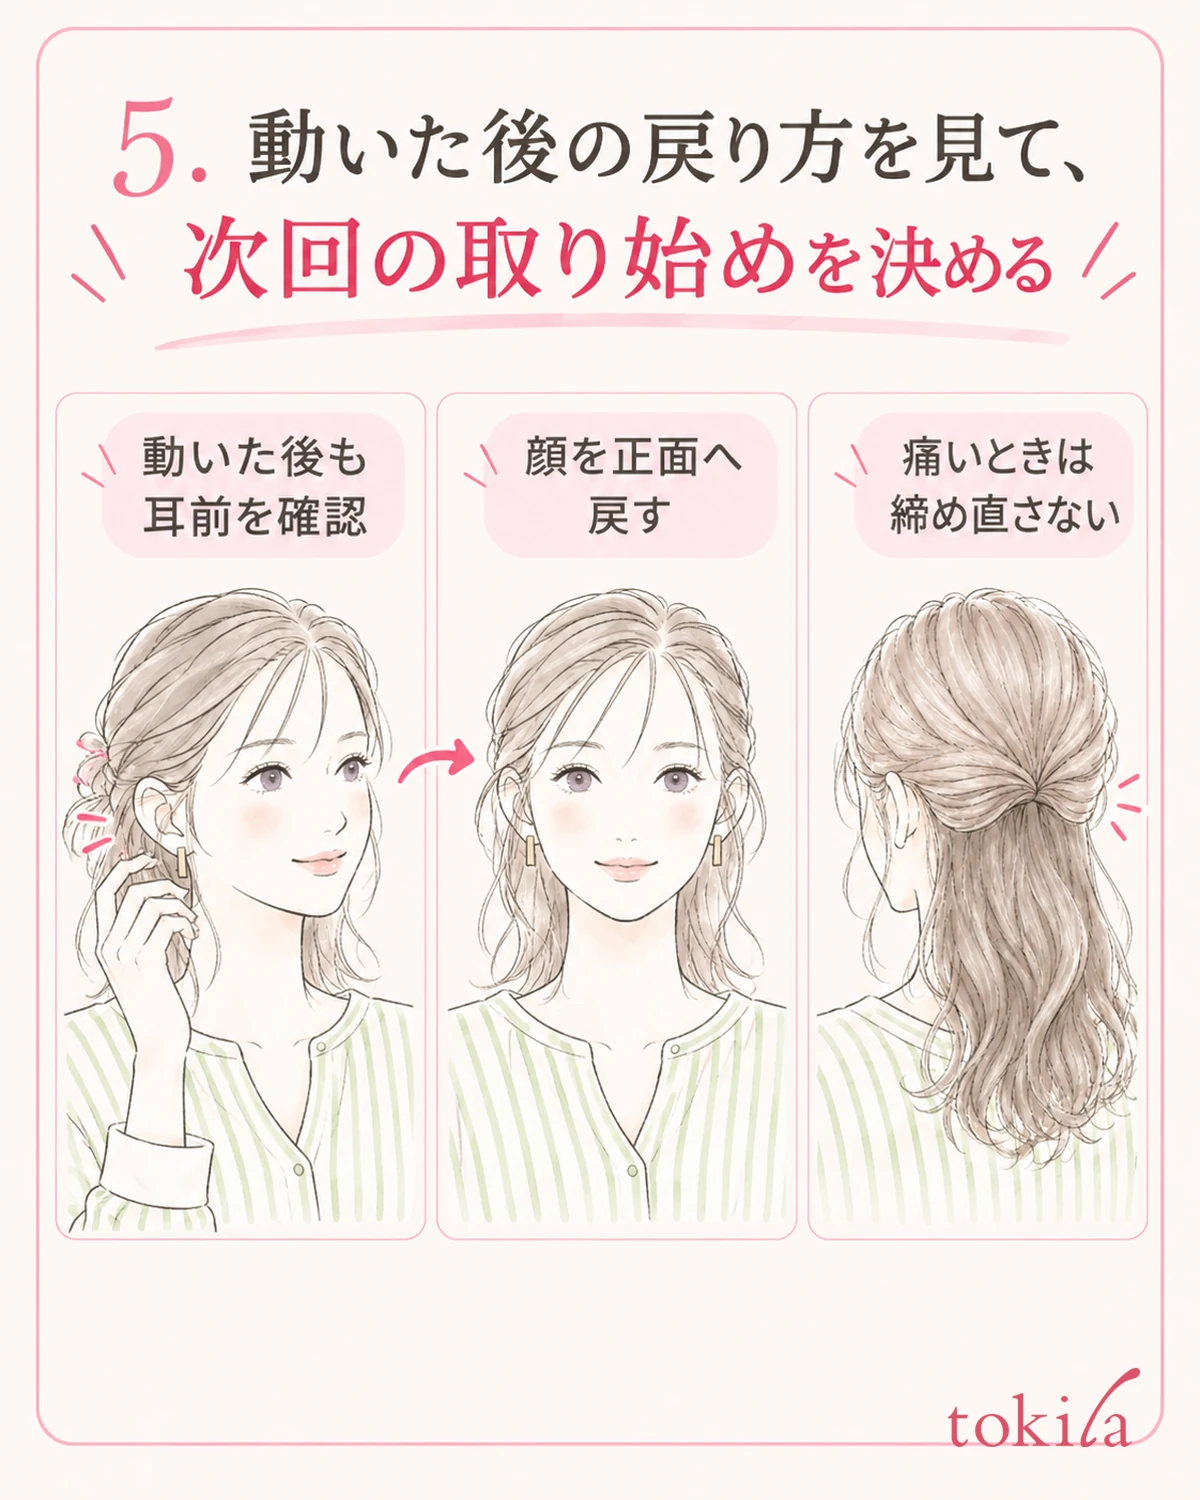
Finally, in your usual posture, slowly turn your face to the left and right and return to the front. Check how the hair you left in front of both ears and the hair you left down settle back. Rather than evening out the line only at a still moment, set it so that it does not bother you after your normal movements.
If hair falls out on only one side, look at the length of the fallen strands and the place where you first took them. What to review differs depending on whether the short strands were not reaching or the long strands went back down during the temporary hold. Do not redo all the fallen hair; also think about whether you can leave it while keeping the current shape.
If you feel your scalp being pulled or pain around the ears, do not tighten further to keep the look. Take it out once and change the range you take or the position where you fasten it. More fasteners do not always mean more stability, so you also need to consider switching to a hairstyle you can handle comfortably.
For notes for next time, one of "the starting point above the ear," "the hair left in front of the ear" or "the position where it meets at the back" is enough. For example, if you write "I had gathered up to the front of the right ear, so next time I'll leave that hair," it is easier to repeat the same check than adjusting the amount of hair by feel alone.
If you look back using photos, match the direction of your head and the distance from the mirror. In a photo taken from close on only one side, or with your head tilted, it is hard to compare the amount on the left and right. Rather than aiming for perfect symmetry in the photo, check whether the places that bothered you in the real mirror have settled.
For left-right differences in a half-up, looking separately at the starting point, the hair you leave and the direction you gather makes it clearer which step to go back to. Do not try to settle the whole shape at once; start by readjusting a small part before tying. Fit it to your own hair flow and length, and make the finish whatever you can keep comfortably in your usual posture.



