
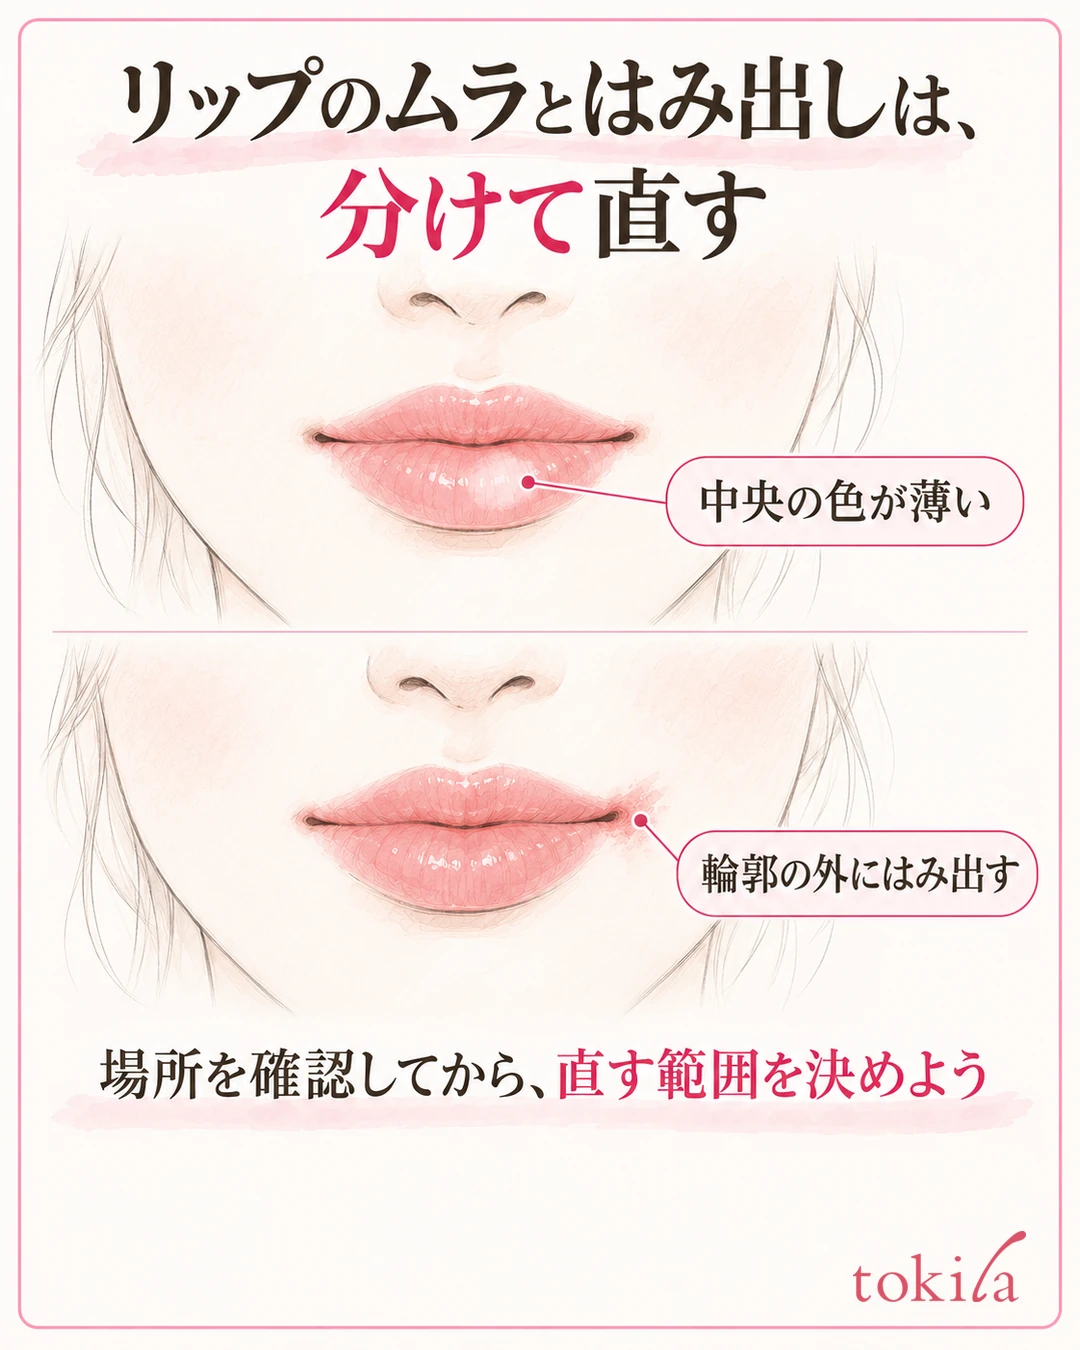
To fix uneven or bleeding lip color, first find where the problem is, then prepare the surface, and finally add color only where it is lacking. Remove color that has gone outside the lip line first, and add a little at a time to thin areas. Before layering over the whole lips again and again, narrow down the area you are fixing in this order. Also tell apart the natural lip color showing through from lipstick that has built up thickly.
This article is a guide limited to uneven color when applying the lipstick you already own, and color bleeding outside the lip line. For the types of products, see the basics of lip makeup. For color combinations, refer to matching lip and cheek colors.
1. Separate where the color is uneven from where it bleeds past the lip line
Check the center of your lips, the outer edges and both corners of your mouth in a mirror. Does the color fade only in the center, collect at the outer edge, or is the peak of the upper lip hard to draw? The whole lip is not always in the same state, so before layering over everything from the start, find where you want to fix.
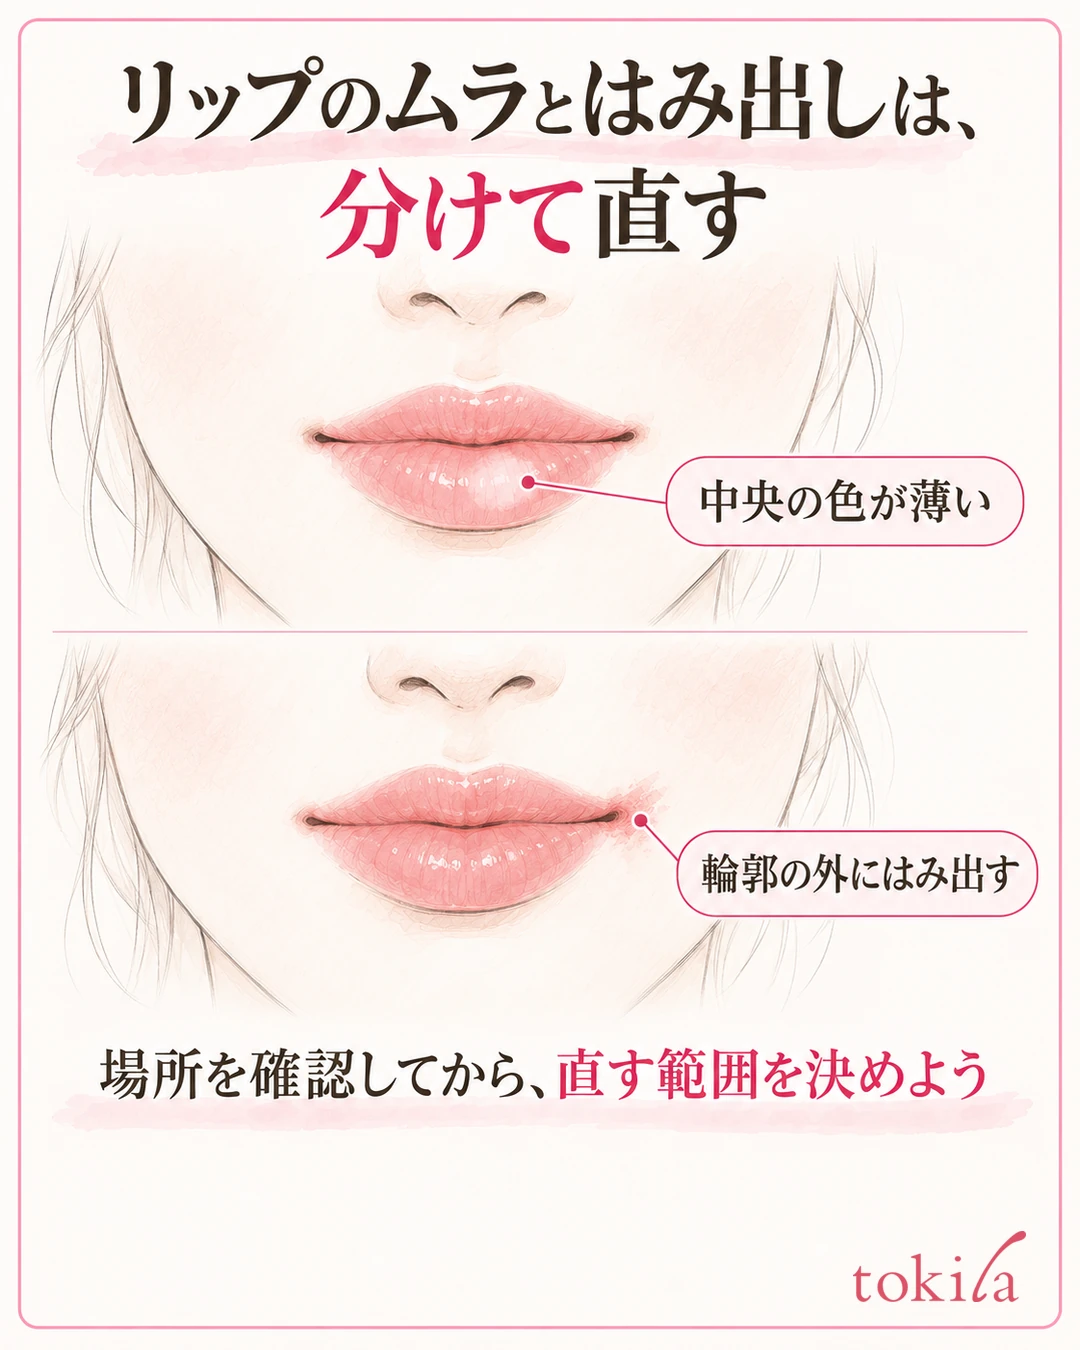
If the color looks patchy, think separately about differences in how thickly the product sits on the surface and your natural lip color showing through. With sheer products, the finish can differ from person to person even with the same lip color. Do not conclude that you applied it wrong just because it looks different from the color inside the container.
Decide whether you want a finish that lets your natural color show or one that covers evenly, and you can avoid layering more than necessary.
Check in the same light, both up close and for your whole face
When you lean toward a small mirror, check the position of the uneven spots and the lip line. After that, step back to a distance where your whole face is in view. If you look only at your mouth magnified, you may want to paint over even slight differences in shade, and end up with a deeper color than you like.
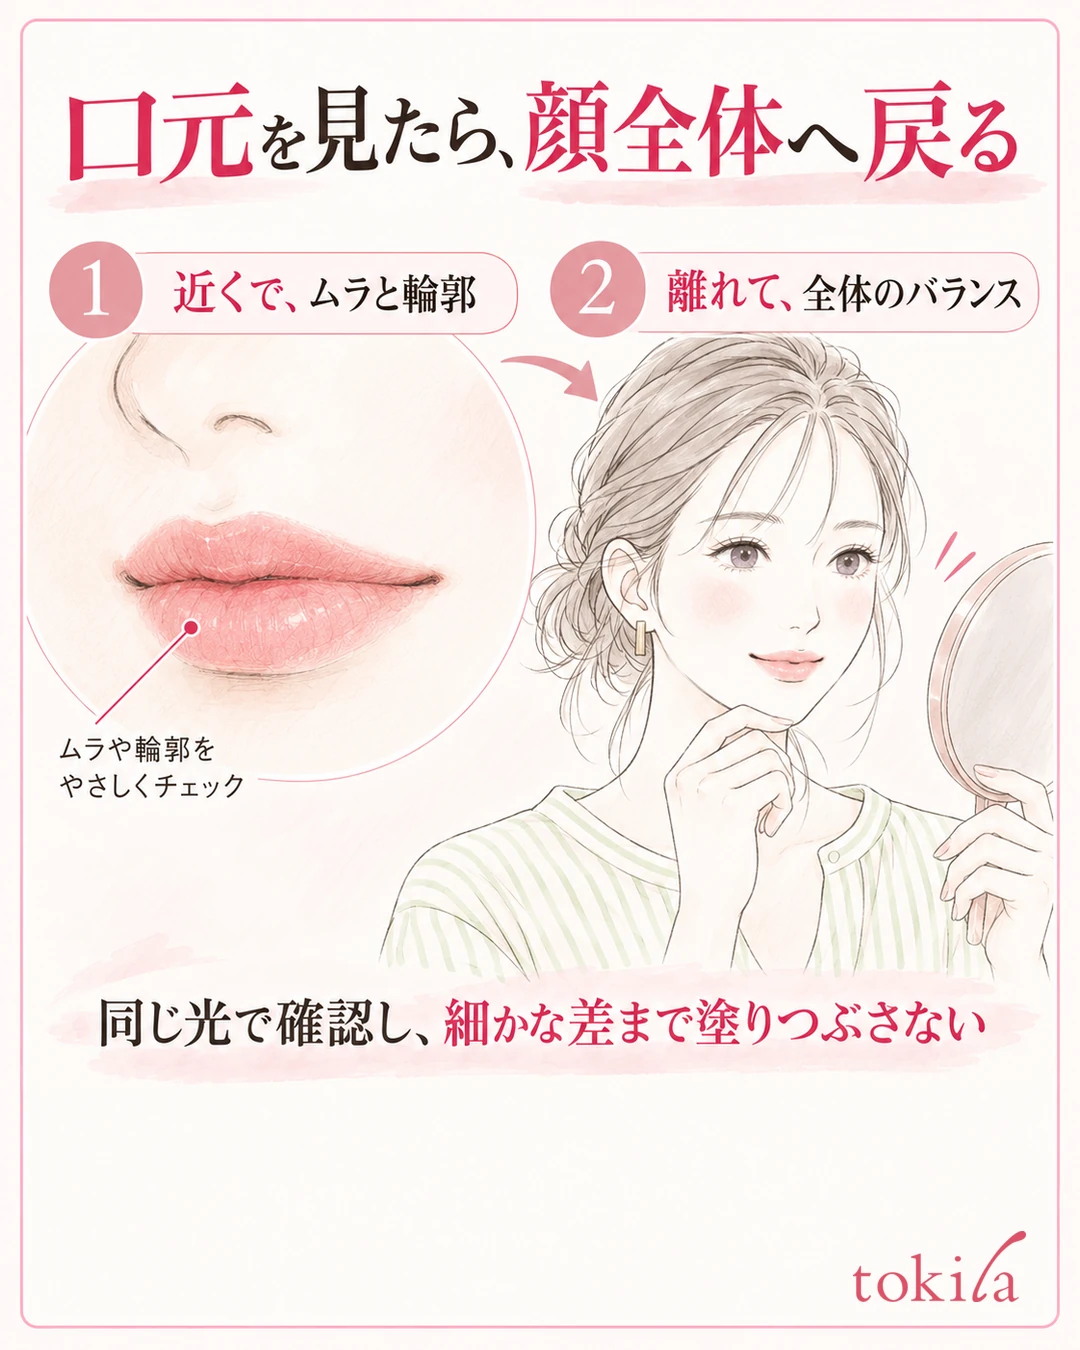
When comparing left and right, make sure a shadow does not fall on only one side. The side facing the light can look paler and the shadow side deeper, so move your face slightly and check under the same conditions. This check helps you tell differences in color apart from shadows made by the shape of your lips.
If you take notes, add the location, such as "pale in the center" or "bleeds at the right corner." Next time you apply, you can start by reviewing the amount in that area or the angle of your tool. Checking one problem is easier than changing how you apply everywhere each time, and it leaves you with a routine that suits you.
2. Before applying, prepare the lip surface and excess oil
After meals and the like, lightly tidy up the area around your mouth with a clean tissue before applying. If your lips are dry, work in a lip balm you already have, following its directions. Before adding color, look at what is left on the surface.
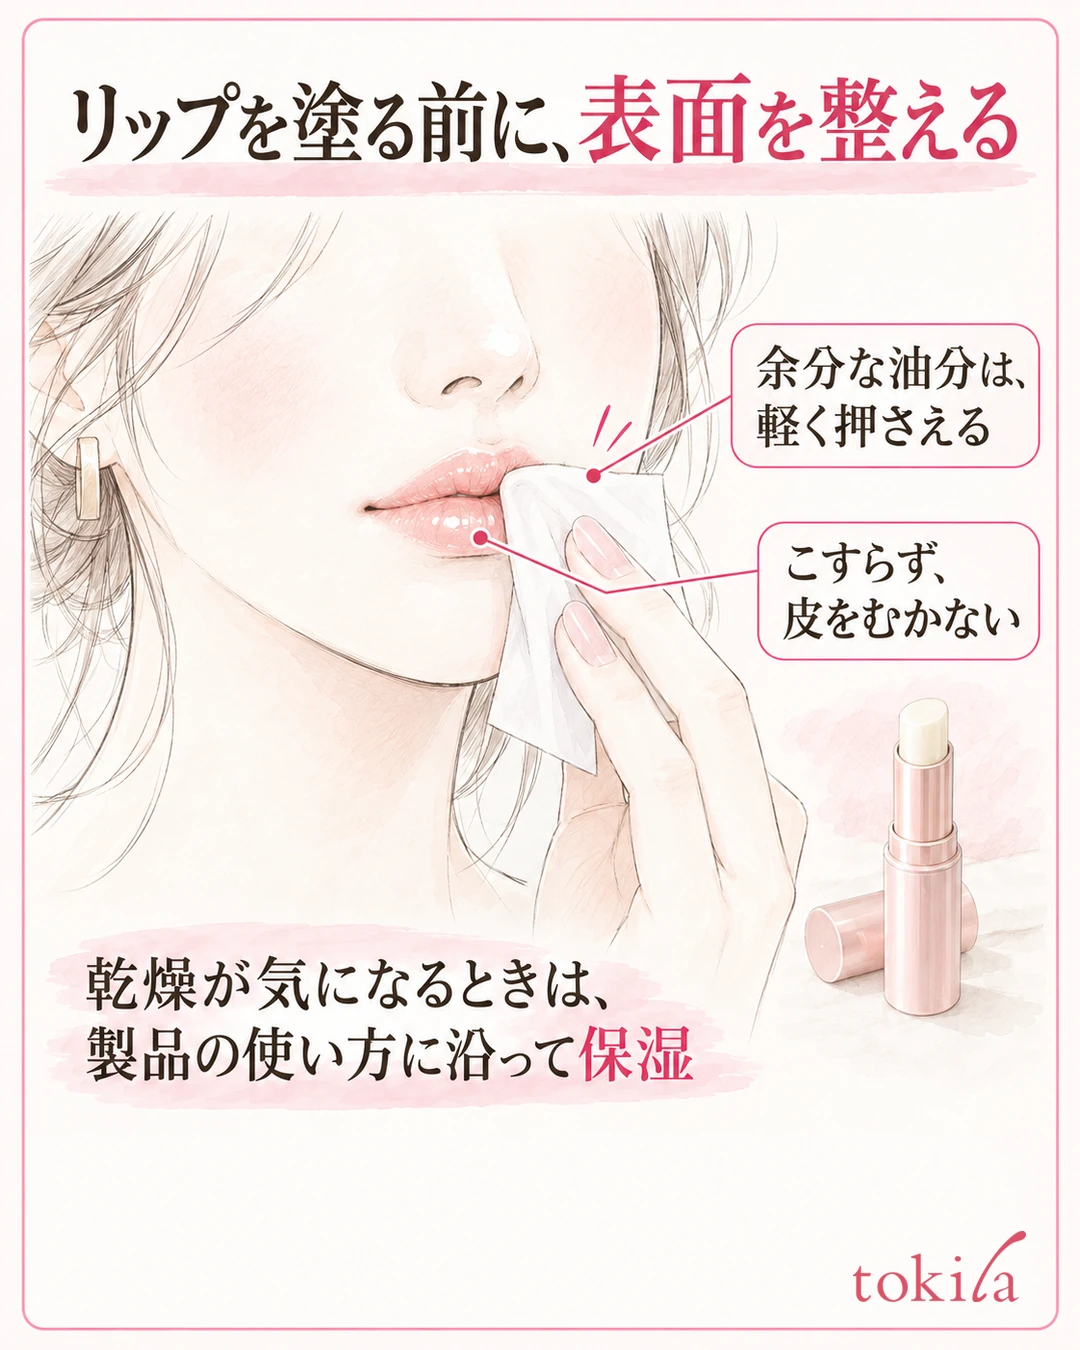
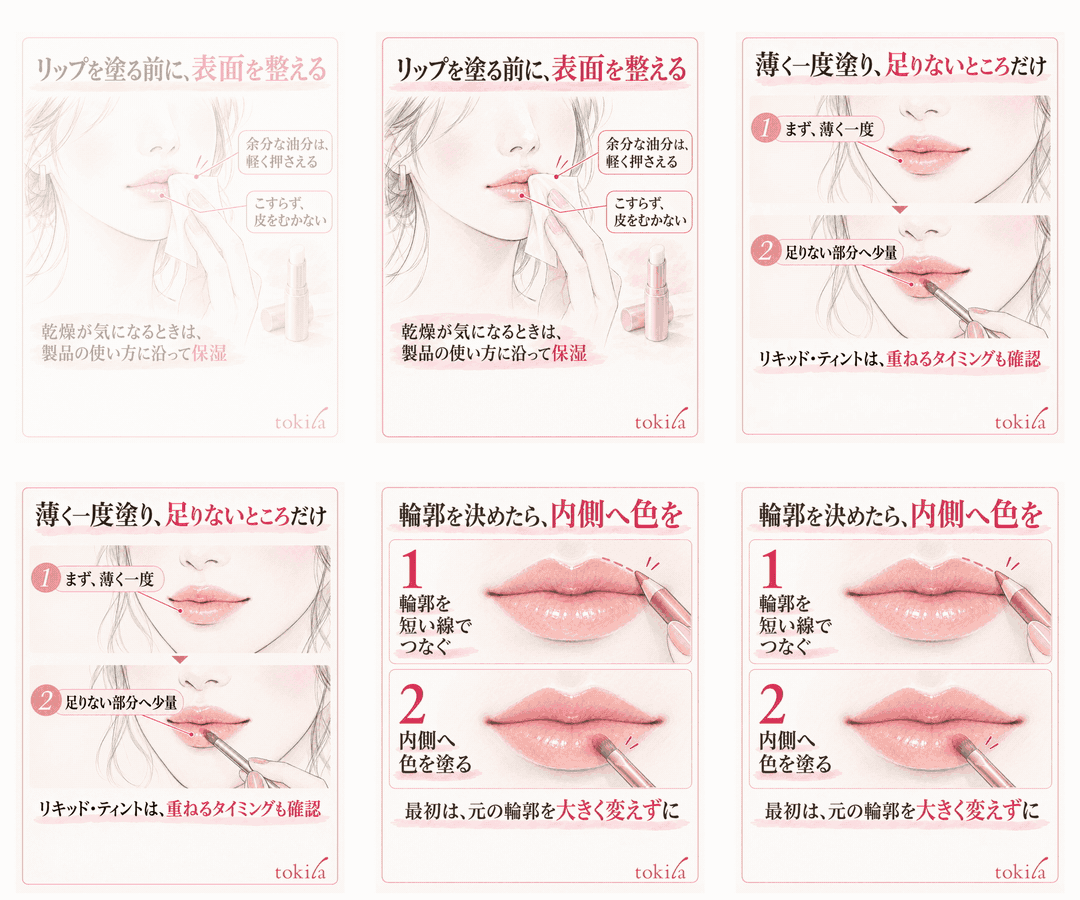
If lipstick slips and spreads right after moisturizing, check whether too much product remains on the surface. Tidy it by lightly pressing with a tissue, and do not try to rub everything off. Adjust the amount of moisturizing product as well, using the product directions as a guide.
It is also important not to press lipstick hard onto areas where skin is peeling, or to go back and forth every time it catches. Do not force off peeling skin to make application easier; depending on the condition, it may be better to skip makeup. If you feel pain or irritation, do not try to hide it by layering color.
If you use a base, apply a thin layer of a product made for lips
If you want to even out your natural lip color, consider a base made for lips. Do not treat it as a routine where any face product can be used on the lips.
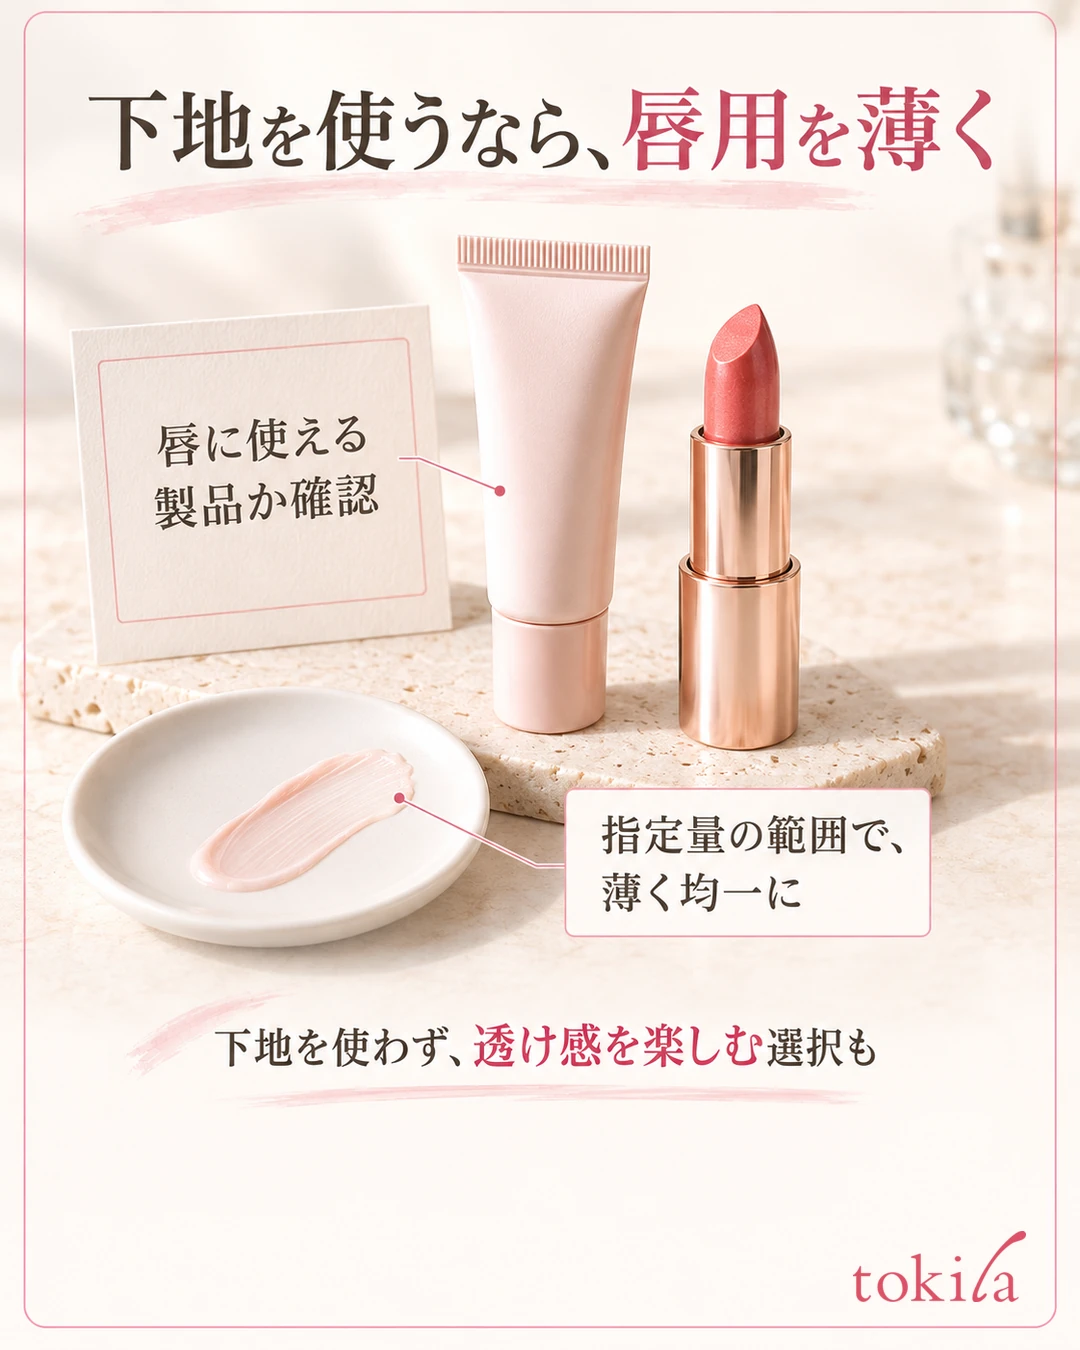
When you use a base too, start by spreading a thin layer within the specified amount, and check how it looks with lipstick layered over it. A thicker base does not always make unevenness disappear. If the base itself collects in some spots, review the amount before adding more color on top.
If you use a new base and a new lipstick at the same time, it becomes hard to tell which one affected the finish. When trying at home, change one condition at a time, for example by comparing against your usual lipstick with the base added. A sheer finish without a base is also an option.
3. Apply lipstick little by little and add to areas that need more
First apply a thin layer once, then look at where color has taken and where it is lacking. If you go back and forth over the center many times, the center tends to get thick while the outer area stays pale. Do not try to boost color by pressing hard on your lips; add a small amount where it is needed.
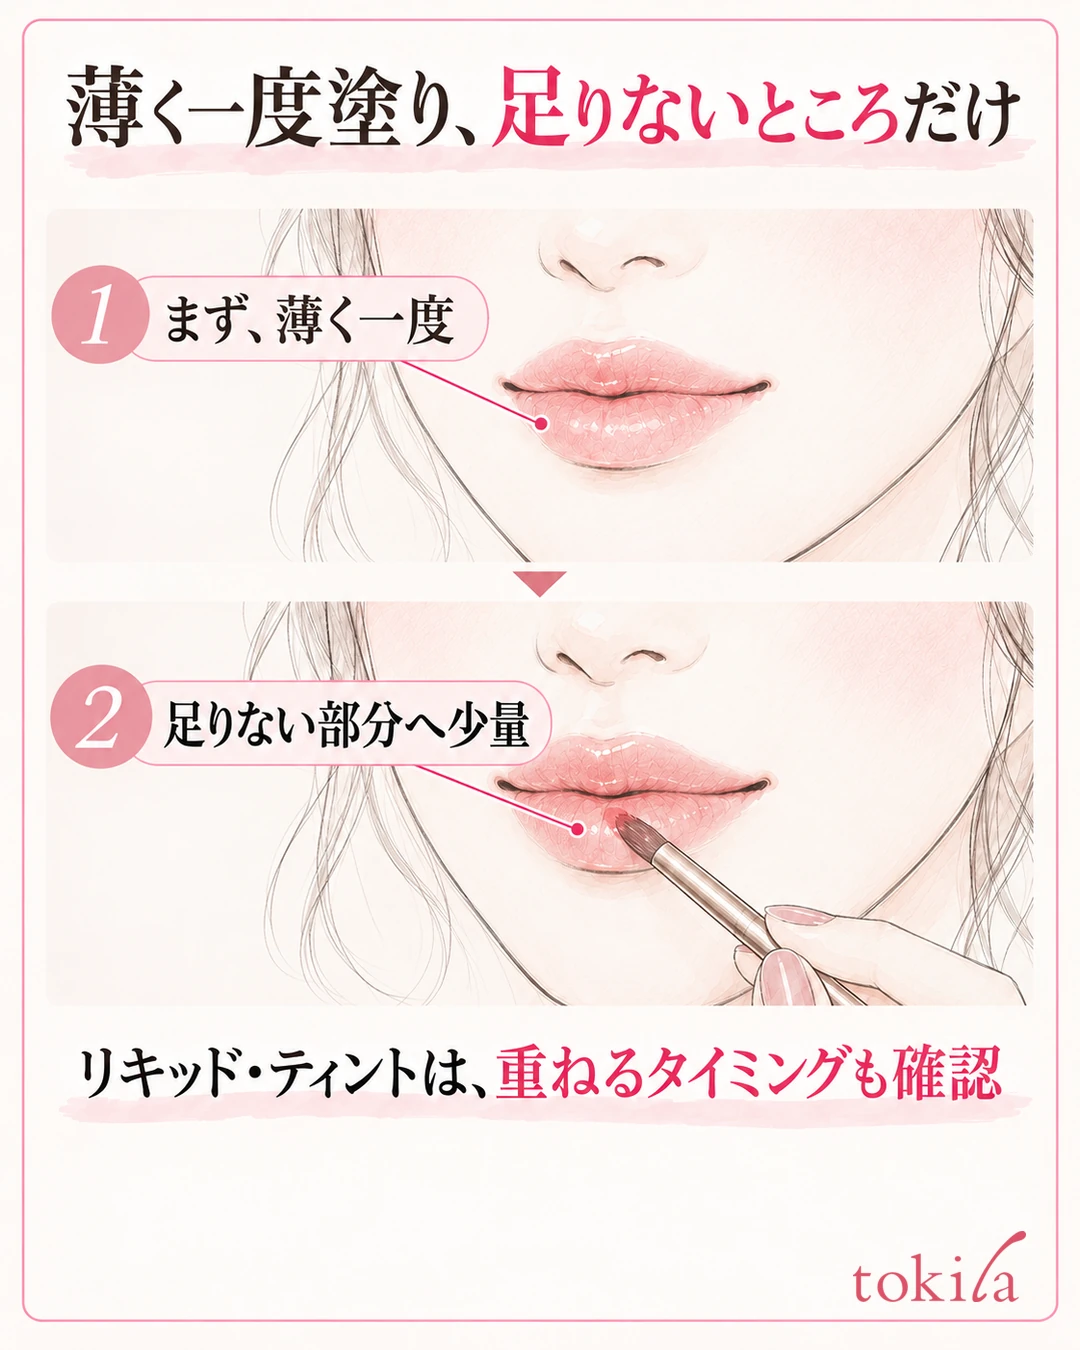
When applying directly, go on while watching where the tip of the lipstick touches. If you push your lips out strongly they look different from your usual lip line, so keep them in a natural state, slightly open or closed. At the end, return to a natural mouth and check for missed spots and bleeding at the corners.
For liquid lipsticks and tints, the amount to apply, the drying time and when to press the lips together differ by product. Do not rub your lips together many times as you would with other lipsticks; read the directions first. If a thick spot has built up, stop once instead of layering more. For how to tidy it and when you can reapply, follow the directions of the product you are using.
Shape the tip of a lip brush before using it on fine areas
When using a brush, pick up color, shape the bristle tip, and then bring it to your lips. Use the side or the tip for the lip line, and spread color inside only as far as needed.
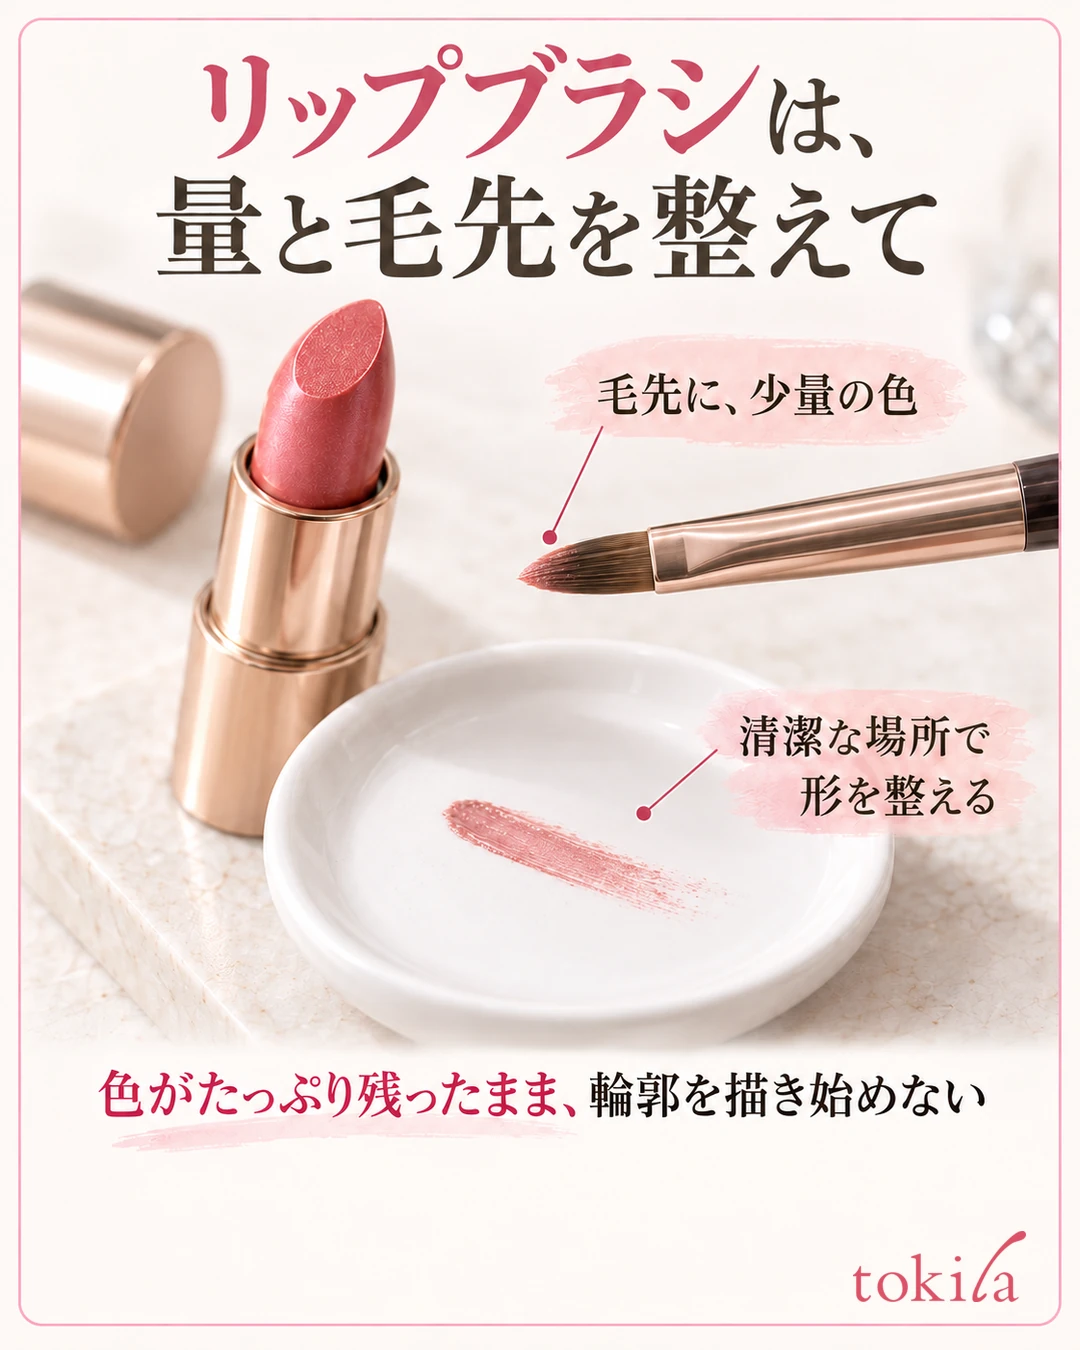
For the corners of the mouth, which tend to bleed, going a little at a time makes the position easier to see than moving a large area at once. Do not start drawing the lip line with a brush that still holds plenty of color; adjust the amount and the shape of the bristles on a clean palette or similar. When wiping it off, do not pull the bristles hard, and follow the care instructions for your brush. If color gets on the skin outside your lips, stop there and fix it first.
After use, clean the brush according to the product care instructions. If you apply a different pale color with a brush that still holds a dark color, the mixed look may be mistaken for unevenness. Prepare so that you can keep the color you used before separate from the color you want to use now.
4. To define the lip line, apply color inside the line
If the lip line is hard to draw, one method is to check the shape with a lip liner close to your lipstick color and then apply color inside it. First look at the peak of the upper lip, the center of the lower lip and the corners of the mouth, and connect them with short lines. There is no need to rush to finish both sides in a single stroke.
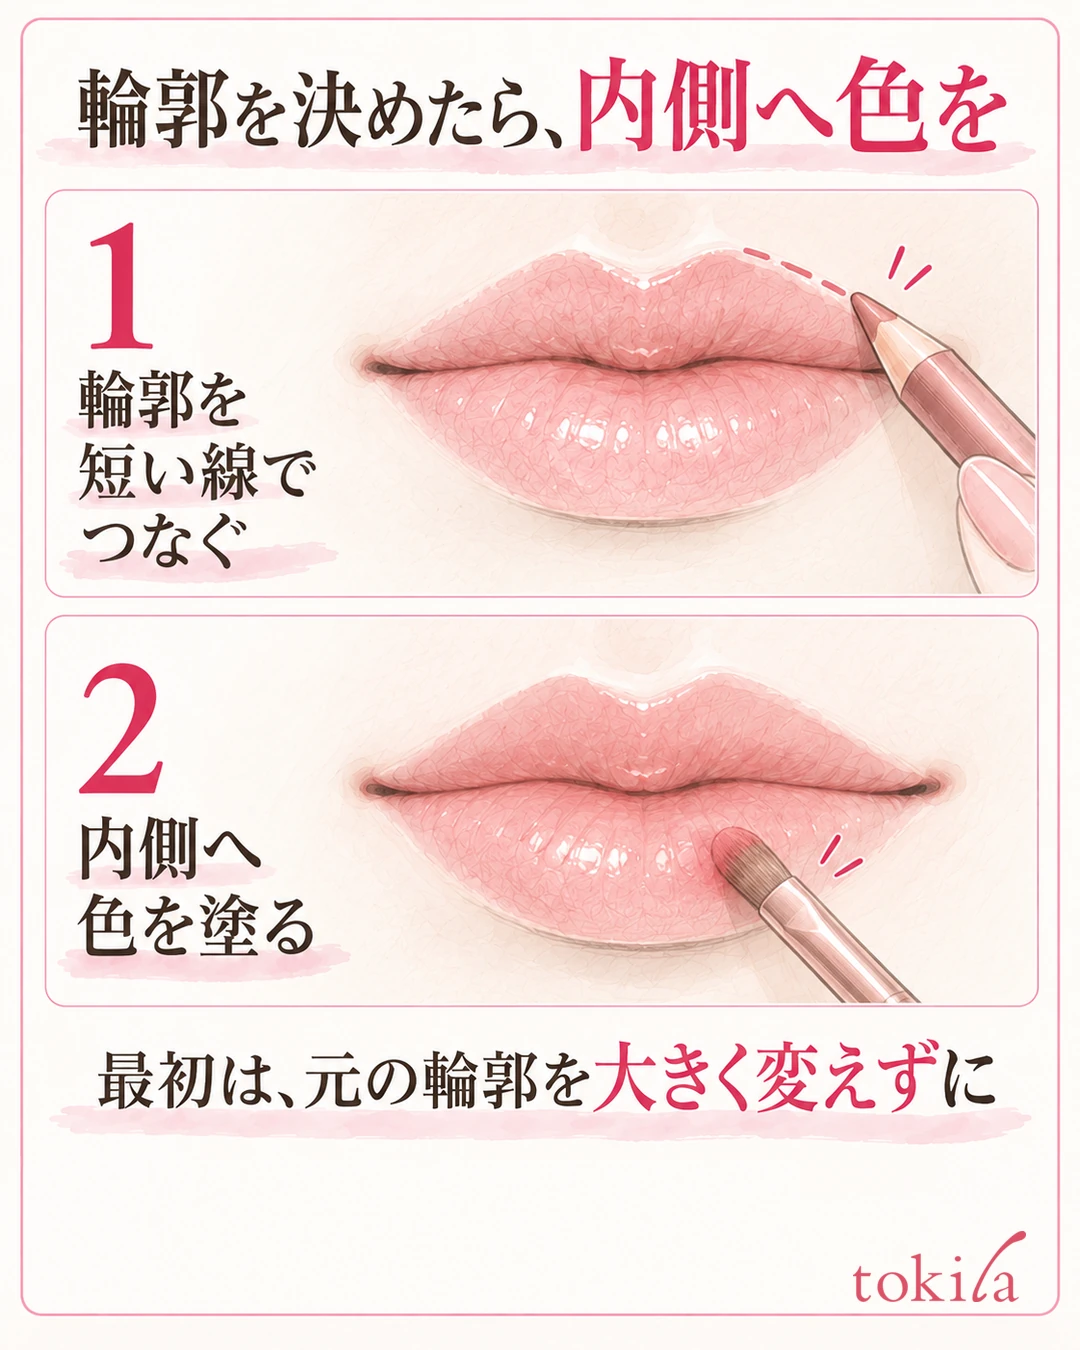
Thinking of the lip line and the area to fill separately makes it easier to avoid applying thickly all the way to the corners in one motion.
The first time you try, start by tidying without changing your natural lip line much. Even on days when you want to change the shape, check both with your mouth open and closed. If color remains only outside the corners when you smile, make a small adjustment there.
Decide on days for a crisp finish and days for a softened line
Drawing the whole lip line clearly is not the right answer every day. On days when you want a polished impression, check the peak and corner positions and tidy the line. On days when you want a soft impression, choose the steps to match the finish, such as lightly blending the edge of the colored area.
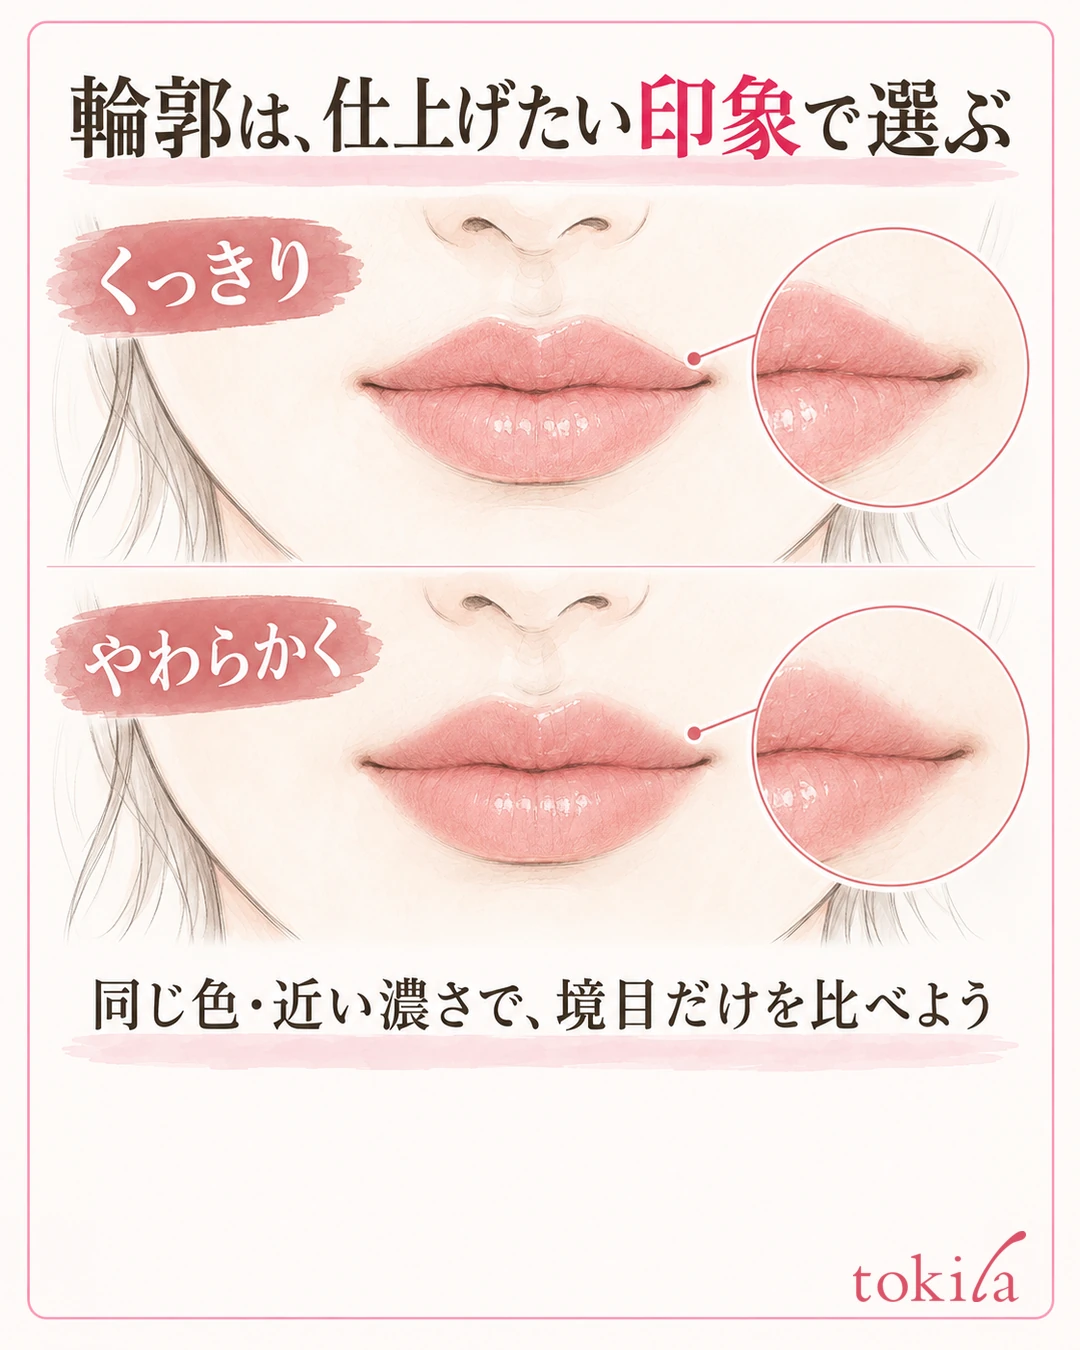
When blurring too, keep spreading color widely outside the lips separate from softening the edge. Blend finely with a part of the brush that holds little color, and remove any color that has stuck outside the corners.
When you change how the lip line finishes, comparing in the same color and a similar depth makes the difference clear. Do not change color, depth and shape all at once; try it in a way like "today, only the lip line." Look at your whole face and check the balance with your eyes and cheek color before finishing.
5. Remove bleeding first, and add only to the pale areas
Before layering foundation thickly over color that has bled out, tidy that area with a clean cotton swab or folded cotton. If you need to remove it, follow the directions for an eye and lip makeup remover that suits your lipstick. Do not drag the outer color and spread it over the whole lips.
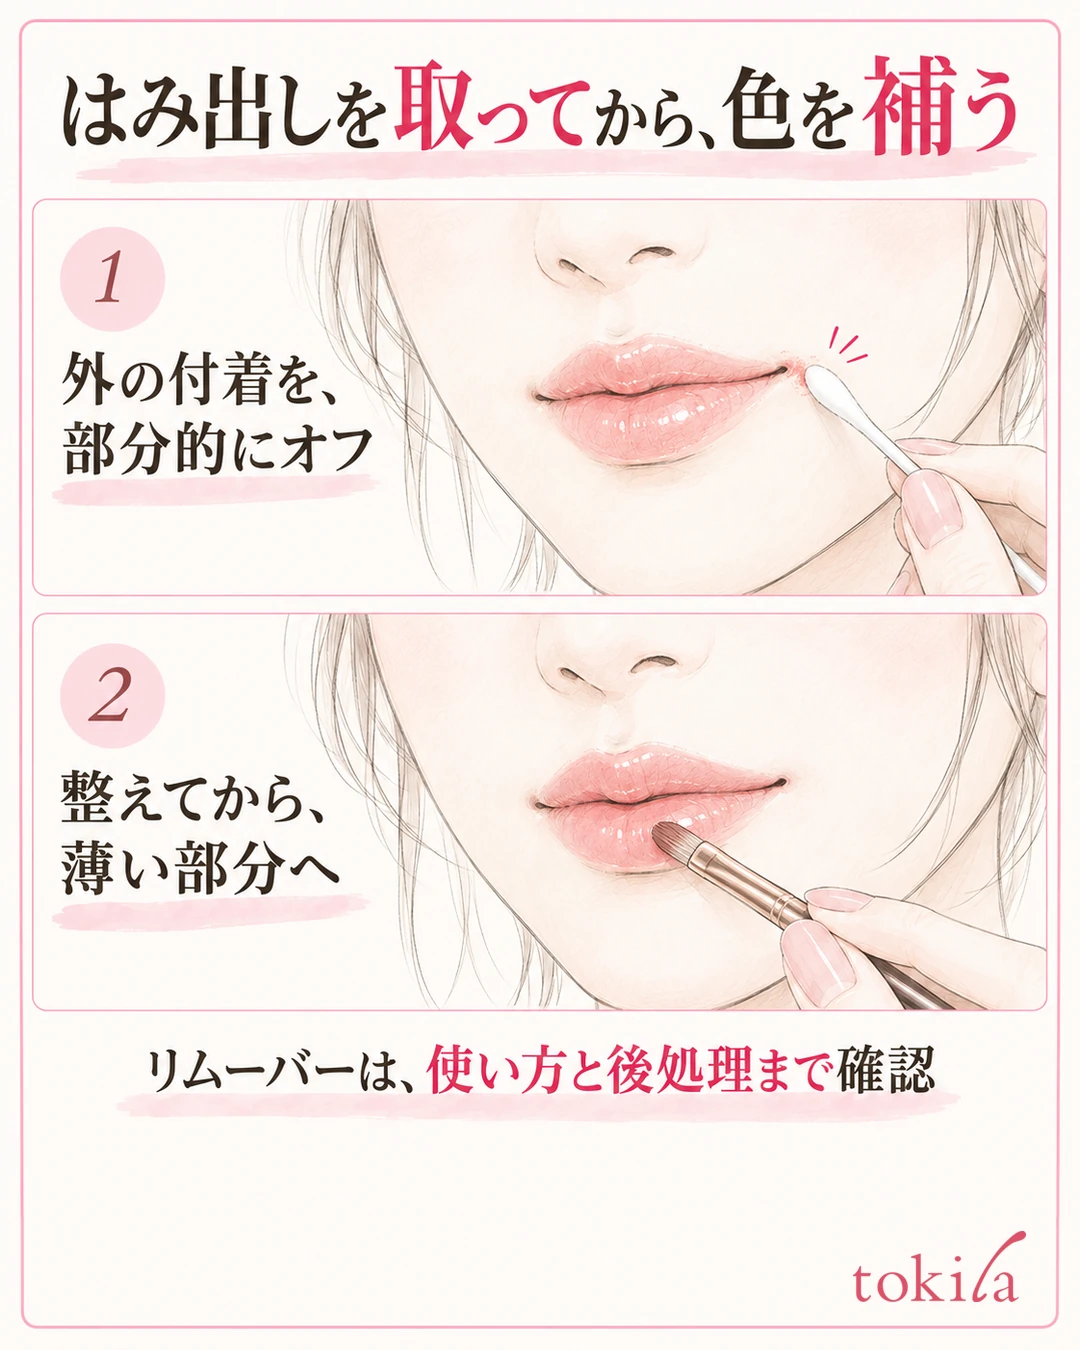
If remover is left on the area you removed color from, take care of it as that product directs. After tidying, look at the skin tone around your mouth and the lip line, and add only the color you need. Keeping the removing step and the adding step separate makes it easier to avoid layering color while it is still mixed.
If the color has become pale only in the center after a meal, before reapplying over the whole lips many times, tidy dirt and excess oil and put a small amount on the area where it came off. On the outer area where it remains thick, do not add more; blend the center and the edges. If you are also fixing your base makeup, refer to the order for touching up makeup as well.
To finish, check the corners of the mouth and color on your teeth, and set a stopping point for layering
Open and close your mouth naturally and check for missed spots and bleeding at the corners, and for color on your teeth. Tidy any stuck color in a clean way, and add a thin layer where it came off. You do not need to reapply over the whole lips every time you check.
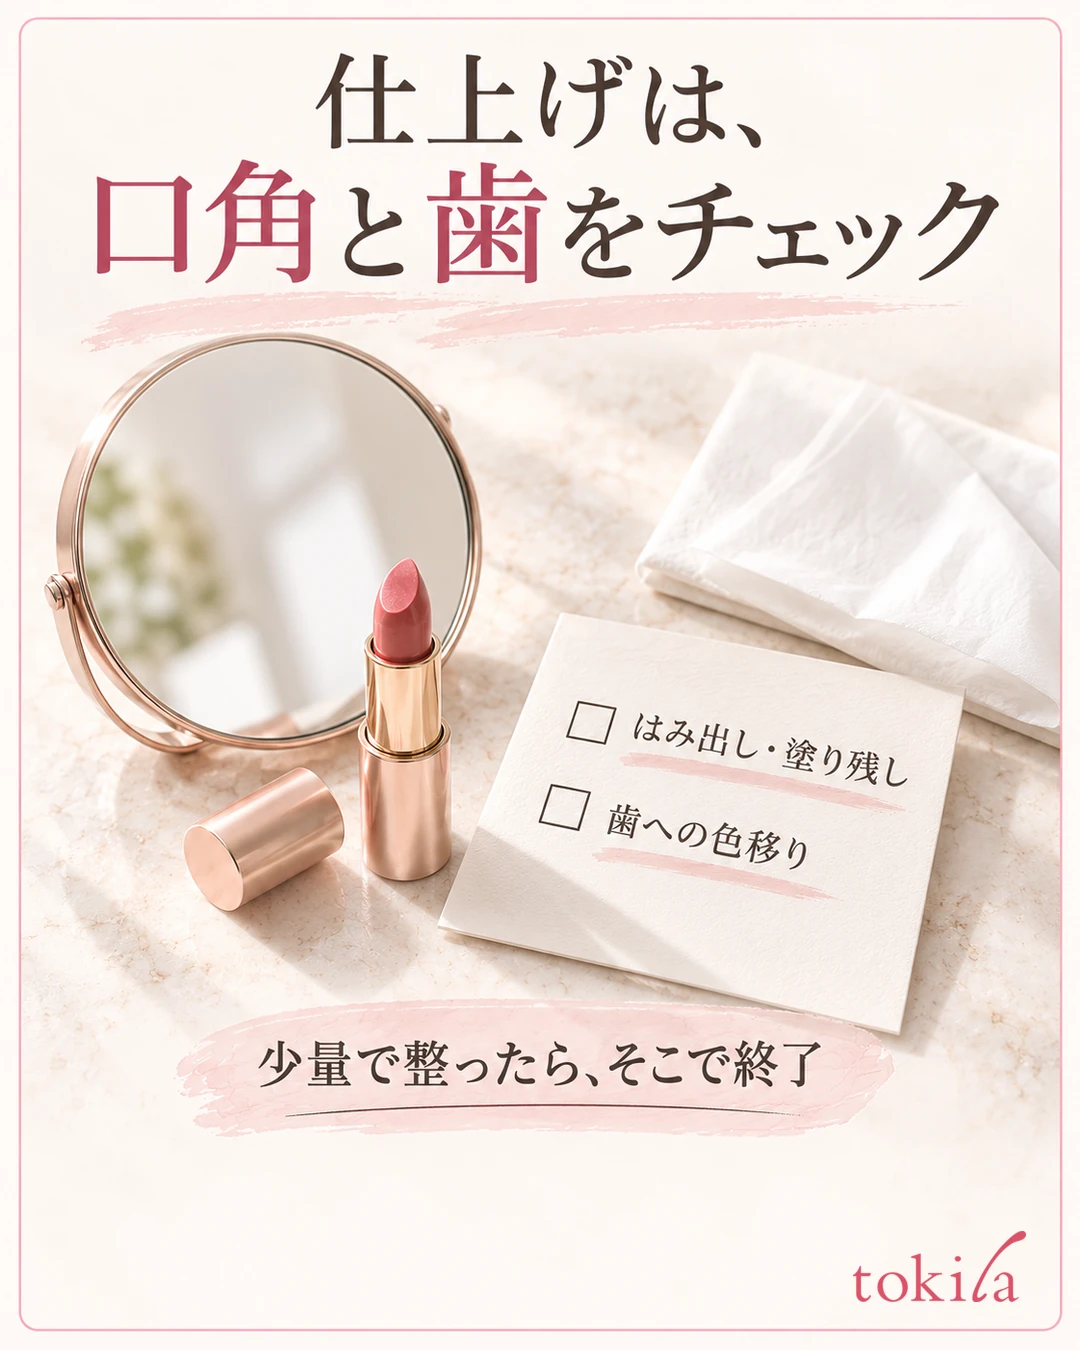
There is also a way to finish by lightly pressing with a tissue, but this changes the gloss and how the color looks. Use it according to the product directions and the texture you like, and avoid repeatedly pressing hard so that color comes off and you apply again. If a small amount gave you the finish you want, stop there.
The next time you apply, try changing just one thing to match today's cause. If it slipped, the preparation and amount; if it bled, the tool and the lip line; if the center was pale, where you add color. Before increasing the color on your whole lips, try choosing the steps that suit the place that is giving you trouble.
Written by the tokila editorial team. The editorial team organized adjustment steps you can try with the tools you already have.
If you are concerned about lip color transferring to cups or masks, you can check tips for blotting with a tissue and reapplying.



