
The shirt hem that looked neat in the morning comes out of your pants on just one side when you stand up from a chair. Even if you push the part that came out back in, you may find the front pulls tight or fabric bunches up at the side. When this happens, before tucking the hem in any deeper, take a look at where it moved.
Here we introduce how to check when an unintended left-right difference appears in a tuck-in, where you wear the shirt with its hem tucked into pants or a skirt. The aim is not to make the left and right shapes exactly the same, or to get a finish that never comes out no matter how you move. It is to find the range you can tidy comfortably with the clothes you already own.
1. First check the shape of the hem and where it came out

First, stand in front of a mirror with your arms hanging naturally, and look at the front and the left and right sides. Tell apart whether what is out is the edge of the hem or fabric that has puffed up above the waist. If the fabric is only puffed up, you don't need to push all of it in. If you can see the edge of the hem, check whether it came out from the front, the side or the back.
Next, pull the hem out once, let the shirt hang naturally and look at its shape. Some clothes are built that way, with a different length front and back, slits at the sides, or different shapes left and right. Don't pull only the short part to match the long part; check the seams and slits. It is important not to assume that a length difference present from the start is the shirt coming undone.
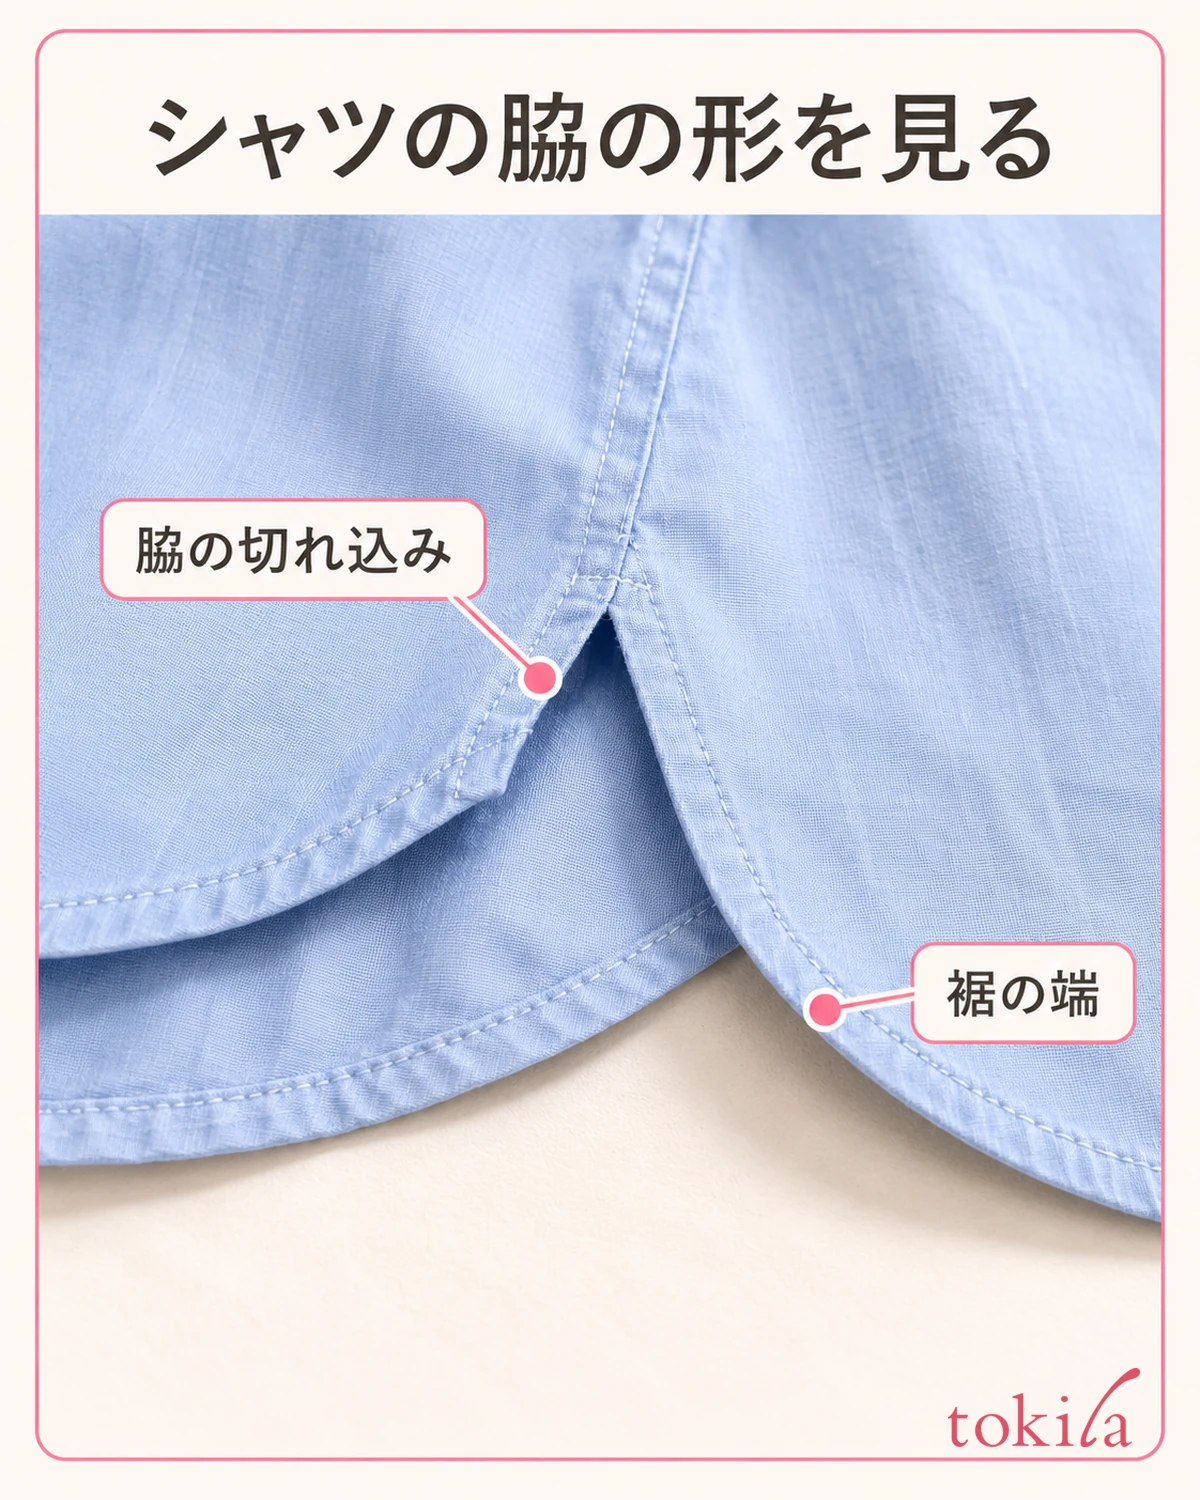
If the fabric is lifted on one side only, also check whether a bag strap or the hem of a jacket is catching on it. Set your bag down once to check, and don't push the hem in while it is caught on something. If you find where it came out before fixing it, you won't need to move things around repeatedly all the way to the other side.
The size marking at the time of purchase alone does not decide whether a garment is easy to tuck in. Even with the same size label, how it feels to wear changes with the design. Check on the spot the combination of the shirt you own and the bottoms you paired with it today.
When checking the shape before you put it on, you can also lay the shirt flat and look at the positions of the left and right sides. Just smooth out the wrinkles, without pulling so much that the shape changes. The range of hem you want to hide differs between days you want to tuck in only the front and days you want to tuck in all of it. Decide how you will wear it today before adjusting.
If left and right were neat once and one side comes out only after you sit, check that movement later. Keeping it separate from the case where one side was shallow from the start makes it clearer whether to fix how you tuck, or to adjust the ease after movement.
2. Decide the front center and re-tuck the hem all the way around
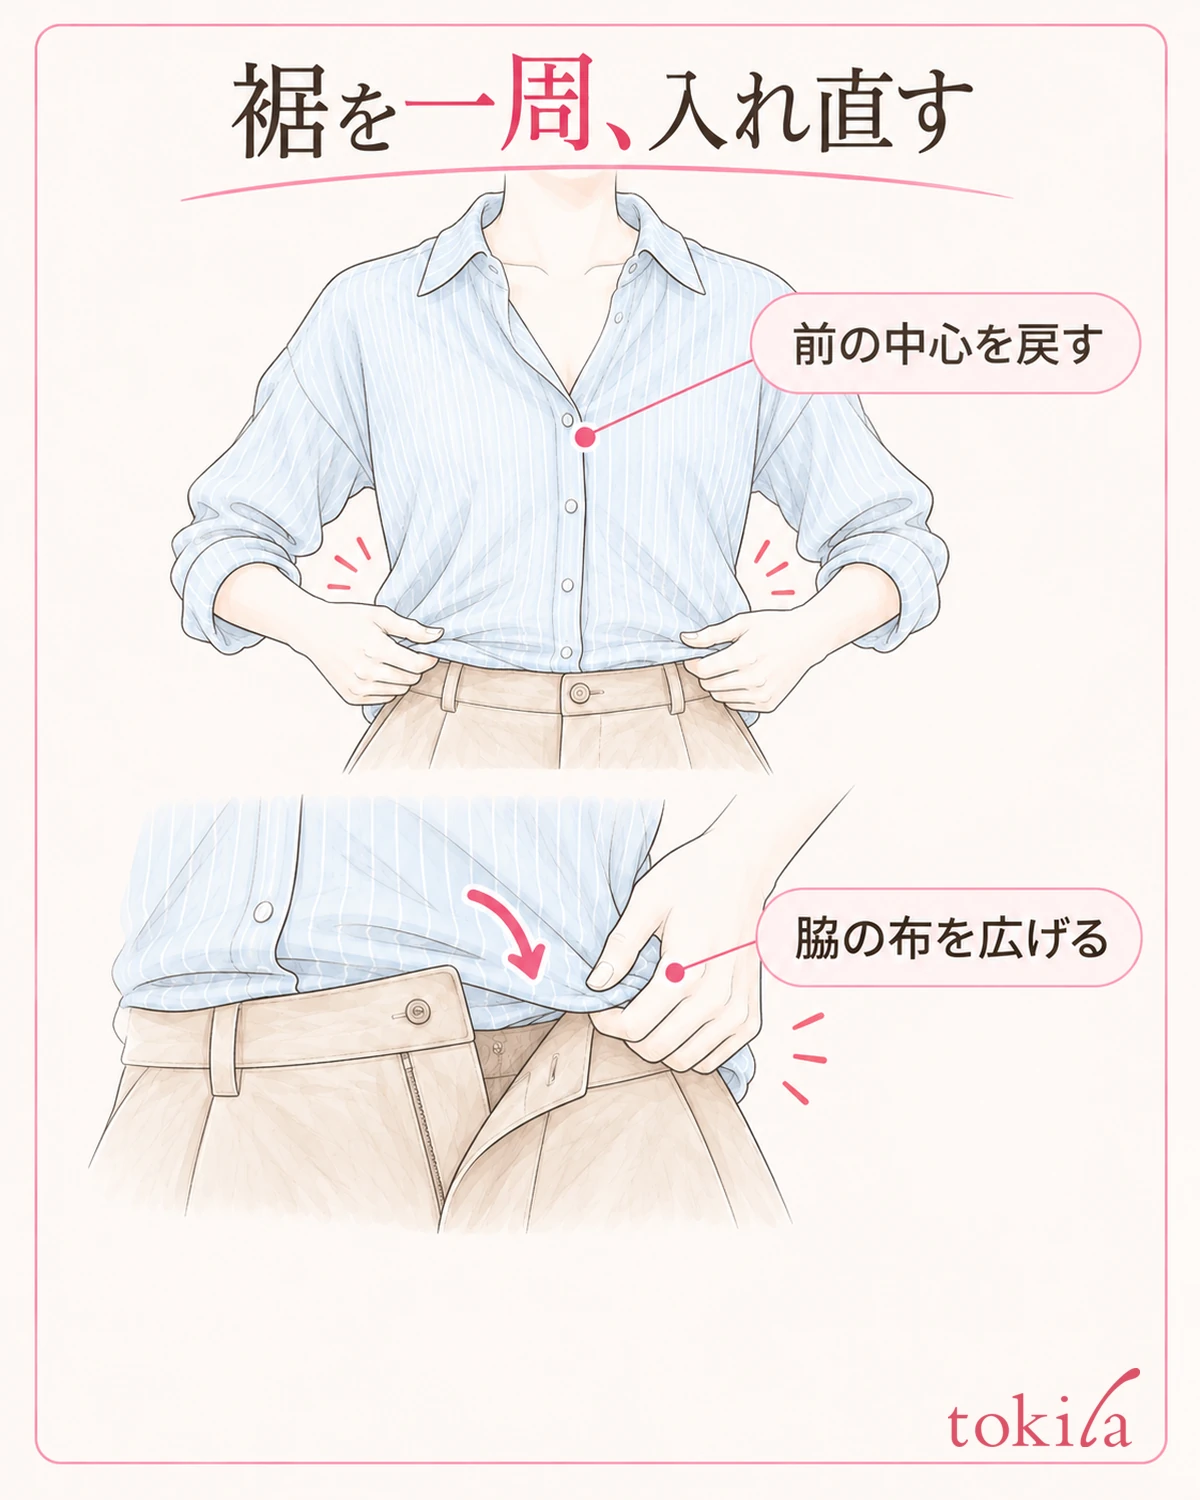
When you re-tuck, do it in a place where you can calmly tidy your clothes. Take off your jacket, set down your bag, and loosen the fastening of your bottoms as much as necessary. It is hard to tidy if you push your fingers in with the fastening closed, so create a state where you can move the fabric without pressing it against your body.
For a shirt with front buttons, first look at the position where the row of buttons follows the front of your body naturally. If you pull down only the left or right hem, the row of buttons can go diagonal too. Using the front center as a guide, undo the twist of the whole shirt before tucking the hem into the bottoms.
Tuck the fabric all the way around, a little at a time: the front, the left and right sides, then the back. More than following the order strictly, it matters to proceed while checking that the fabric is not gathering in just one part. If a bunch forms at the side, don't squash it down from above; pull the hem at that spot out once, spread it, and put it back without overlapping too much fabric.
The depth of the tuck on the left and right does not need to be the same number. A hem with a front-back difference or a shirt with side slits settles differently depending on its shape. If trying to tuck in as far as the short part of the hem pulls at your shoulders or chest, stop pulling there.
For the back, which is hard to reach with your fingers, look sideways in the mirror and spread and put back the fabric one side at a time. You don't need to push in one lump without seeing it. If it puts you in an awkward posture while you are dressed, choose an easier method, such as taking off the bottoms once and starting over.
Once the bottoms are fastened, check the fabric above the waist and near the fastening. Make sure the shirt is not caught in the button or zipper. Even when the other side is tidy, don't keep pushing only the part that came out further in; re-tuck while looking at how it connects to the surrounding area.
3. Put back a little fabric above the waist so you can move
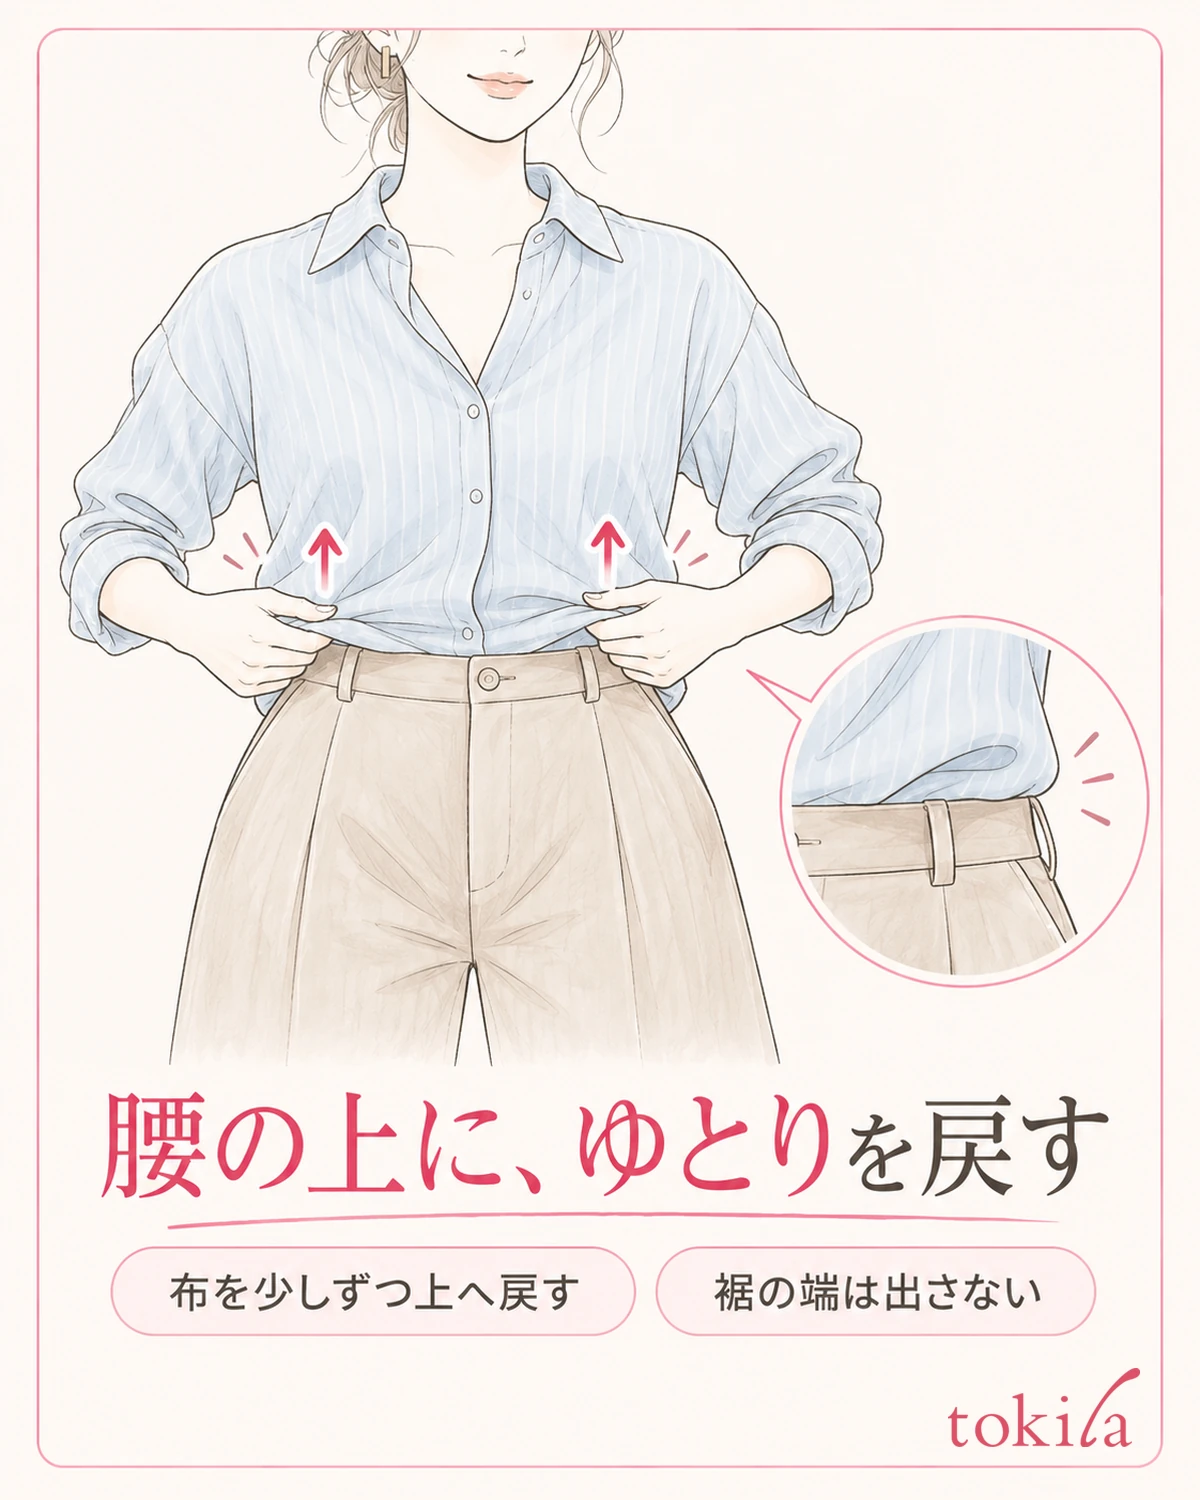
After tucking in the hem, with your arms down, look at the fabric on your chest and back. If the fabric is stretched in a straight line, the spaces between buttons are pulled, or it is hard to move your shoulders, check whether you have pushed the hem in too deep. Don't treat a shape with the fabric pulled all the way down as finished.
Bring the shirt fabric above the waist back up a little at a time at the front, the left and right sides, and the back. This is an adjustment called blousing, which creates moderate fullness above the waist. Don't pinch a large amount in one place; move a wide area a little at a time. The point to check is that you don't pull the edge of the hem out.
How much to put back changes with the shirt's length and body width and the position of the bottoms. Don't assume that "so many fingers" or "so many centimeters" is a standard common to everyone; stop within the range where the fabric isn't stretched with your arms down and the edge of the hem is hidden. If the hem comes out when you try to make room, put that part back once and adjust to less.
If one side bulges a lot, before pulling that fabric over to the other side, check whether fabric has gathered inside the side. If it is folded and overlapping inside the bottoms, it can be easier to adjust by loosening it a little again and spreading it. Don't try to hide thick fabric by pushing it into a small area.
Even with a thin shirt, if you grab it together with an undershirt, a different piece of fabric may come up too. What you want to adjust is the shirt fabric on the outermost layer. While checking that the clothing underneath is not caught up, put back only the outer layer a little, and also check that no thick step is left inside at the waist.
How the fullness looks also changes with preference. Rather than matching left and right exactly, look at whether the center has no twist and whether the front and sides connect naturally. If the cuff turns are also bothering you, settle the hem first and then separately do a review of how you roll up your shirt sleeves.
4. Look again after sitting, standing and moving your arms
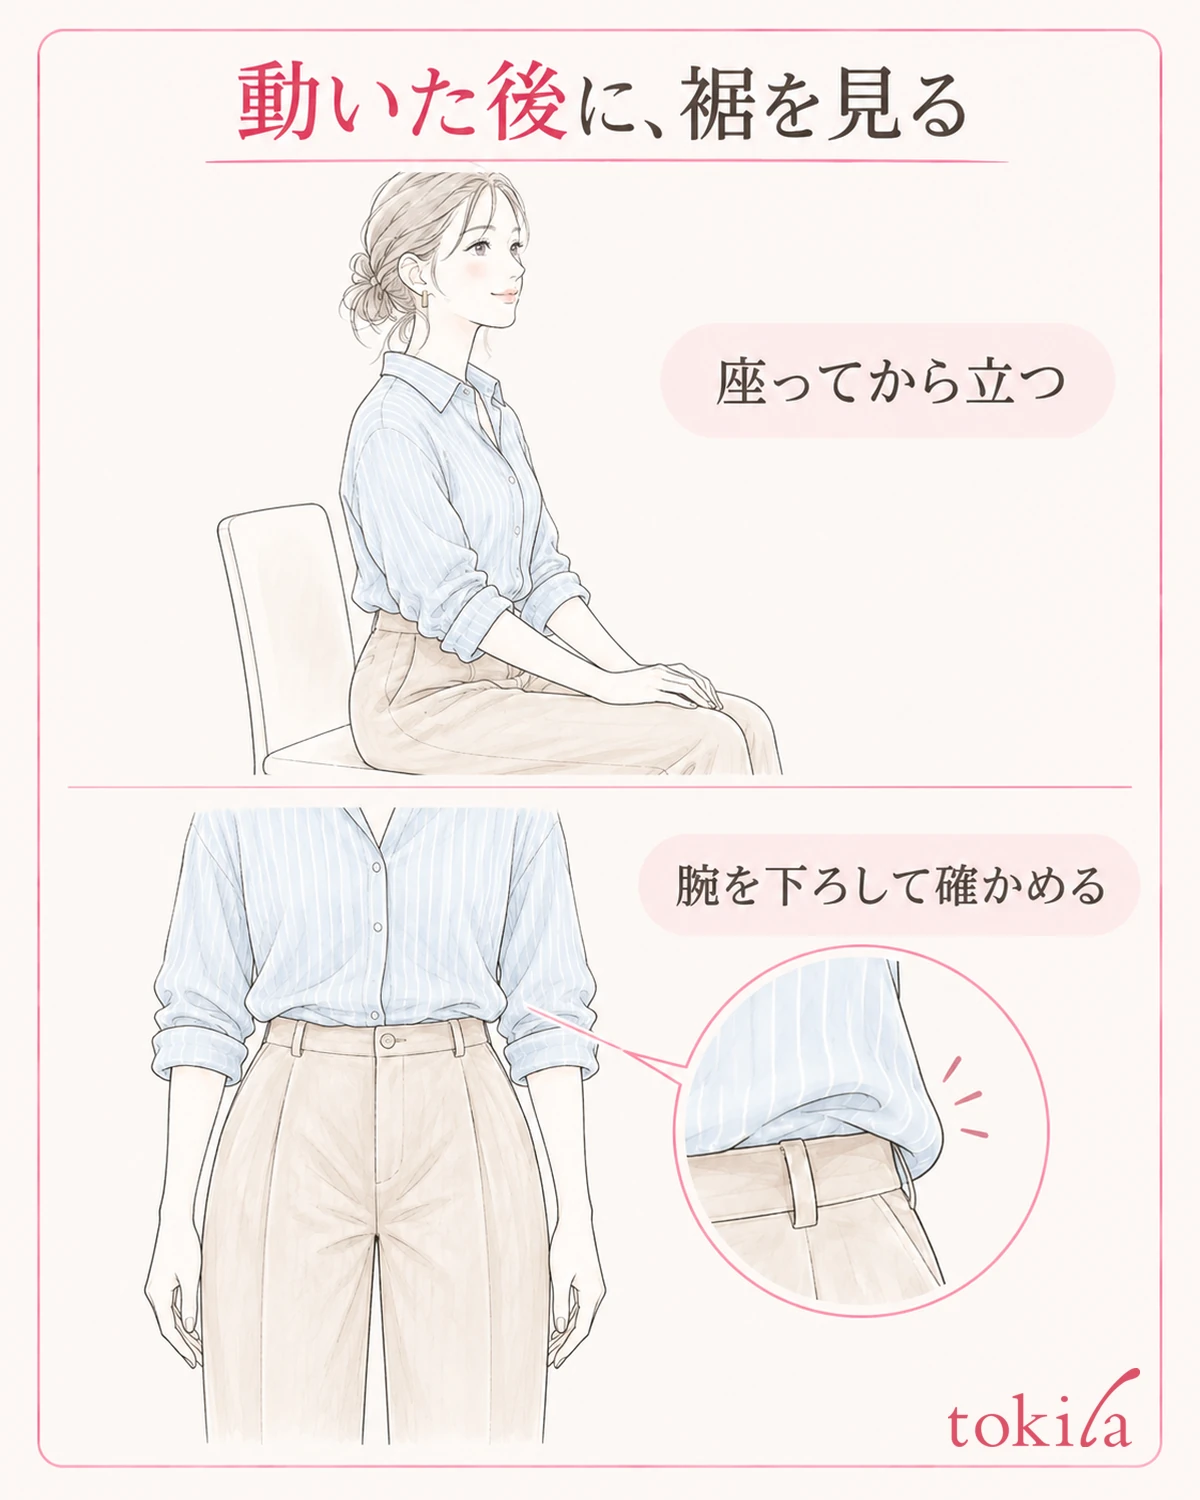
Once you have tidied up in front of the mirror, try everyday movements in a small way. Do them one at a time: sit in a chair and stand up, stretch your arms forward within a comfortable range, and hang a bag on your shoulder. You don't need to test how hard it is to come out by keeping your hands stretched high or by pulling the clothes hard.
After moving, lower your arms once and look at the hem in the same posture as at the start. If you compare left and right while the posture has changed, even the way the fabric gathers because of the direction of your body looks like a difference. Look at which movement made the edge come out of which place, and make only that place the target of the next adjustment.
If the edge at the side comes out after you sit, check whether it was a short part of the hem or whether it was tucked in shallowly to begin with. Change only the position where you tuck, and do the same movement again. If tucking deeper makes your back feel tight instead, don't push in any further; move on to deciding to change the combination.
If one side lifts only after you put the bag on, check whether the strap is catching the shirt. Fix the hem, put the strap back on, and look for a position where the fabric is not pulled along with it. If the shoulder strap itself is twisted, how to check a bag's shoulder strap can also be a reference.
If you do the movements in a row, you can't tell when things changed. The trick for checking is to separate the steps: look once after sitting and standing, then, if there is no problem, look again while carrying your things. When you repeat the same movement after fixing, do it within a range close to everyday, without forcibly pulling your clothes or body.
You do not need to aim for a finish that stays the same all day once tidied. Some clothes shift in position a little with each movement. Reviewing at moments when you tend to notice, such as before going out and after sitting, is more realistic than fixing it tightly so that it never comes out.
5. When it keeps coming out, change something other than how you tuck
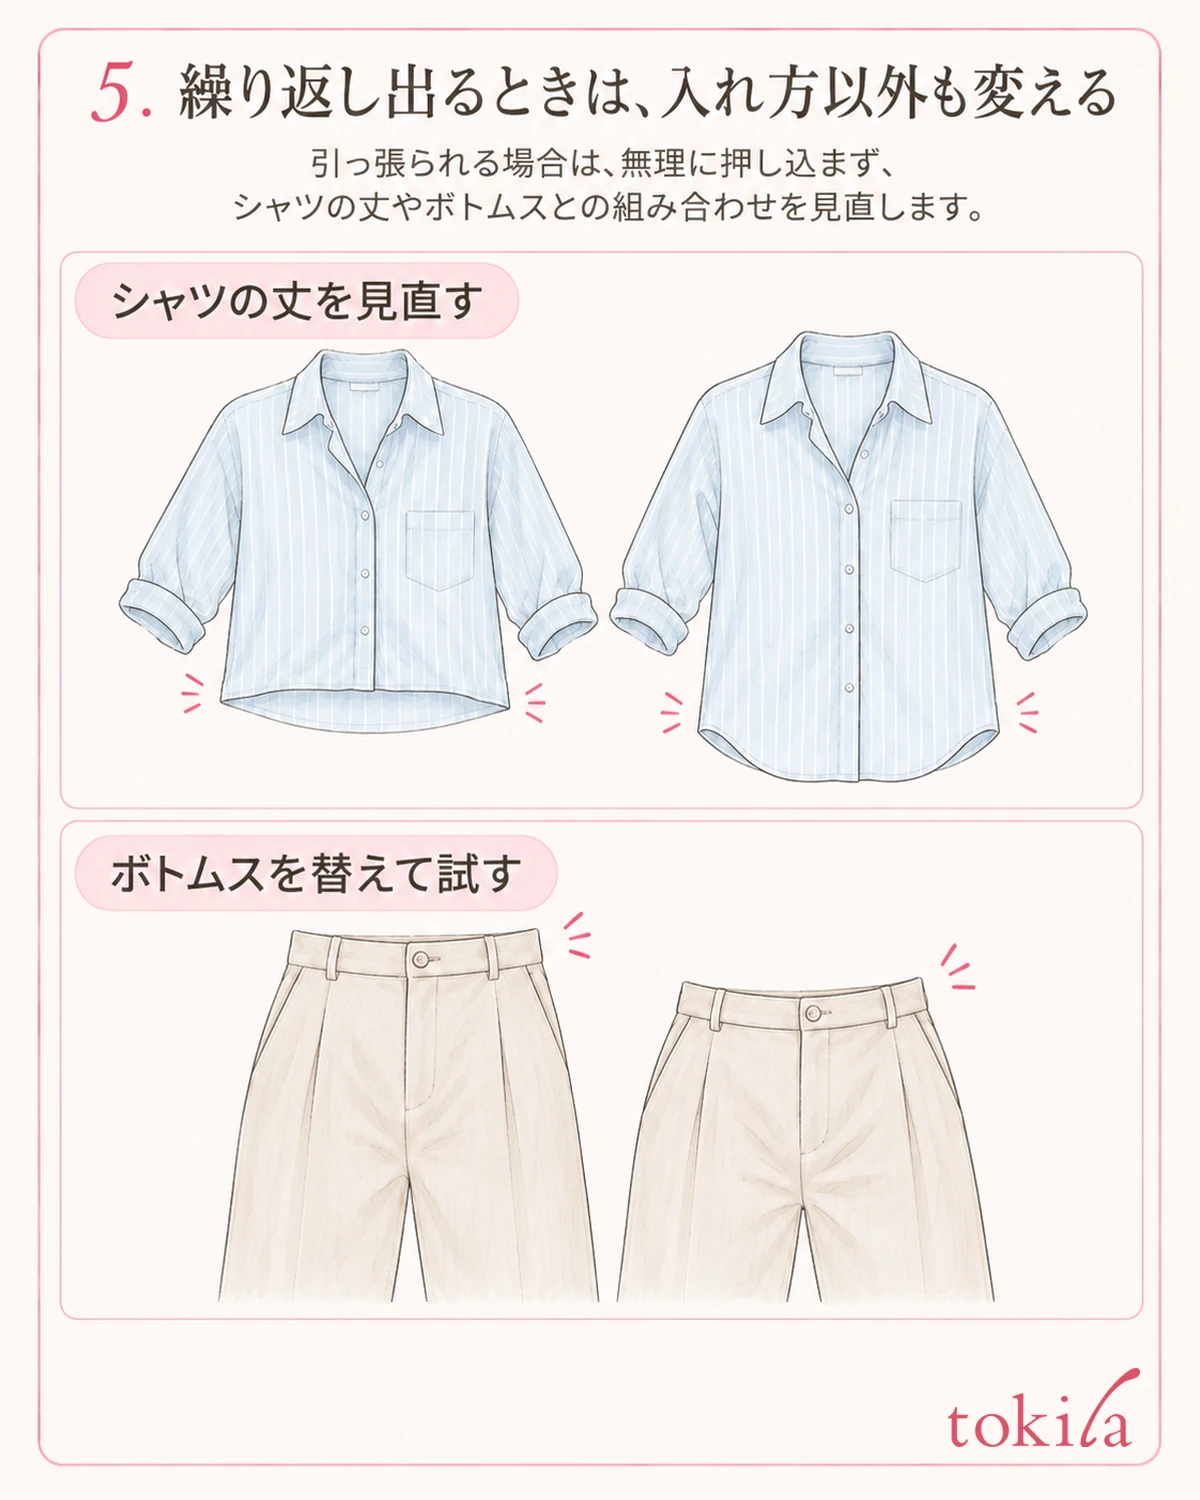
If the hem comes out right away even after you tidy it, or it is hard to move when you tuck it deep, review the combination of the garment's length and the position of the bottoms. Some shapes are hard to wear fully tucked in, such as a short length or large side slits. Don't look for the cause only in how you tuck.
If you try other bottoms, choose ones that fit comfortably around the waist. You don't need to go down a size or tighten the belt hard to hold the hem down. Use the belt as an aid to tidying your clothes, and loosen it if you feel any tightness or pressure.
If you can change the shirt, try one you own that is a little longer, or one where the fabric doesn't overlap too much when tucked in. When comparing before buying, look not only at the size marking but also at the length and body width laid flat, together with how easy it is to move in when worn. A longer one is not always a better fit.
If it is a design you can wear untucked and it suits the dress code of where you are going, giving up the tuck-in is also an option. Even when you wear it another way, such as tucking in only the front, check separately the part you left out on purpose and the part that came out as you moved. We do not recommend fastening it to the fabric with adhesive or pins just to remove a left-right difference.
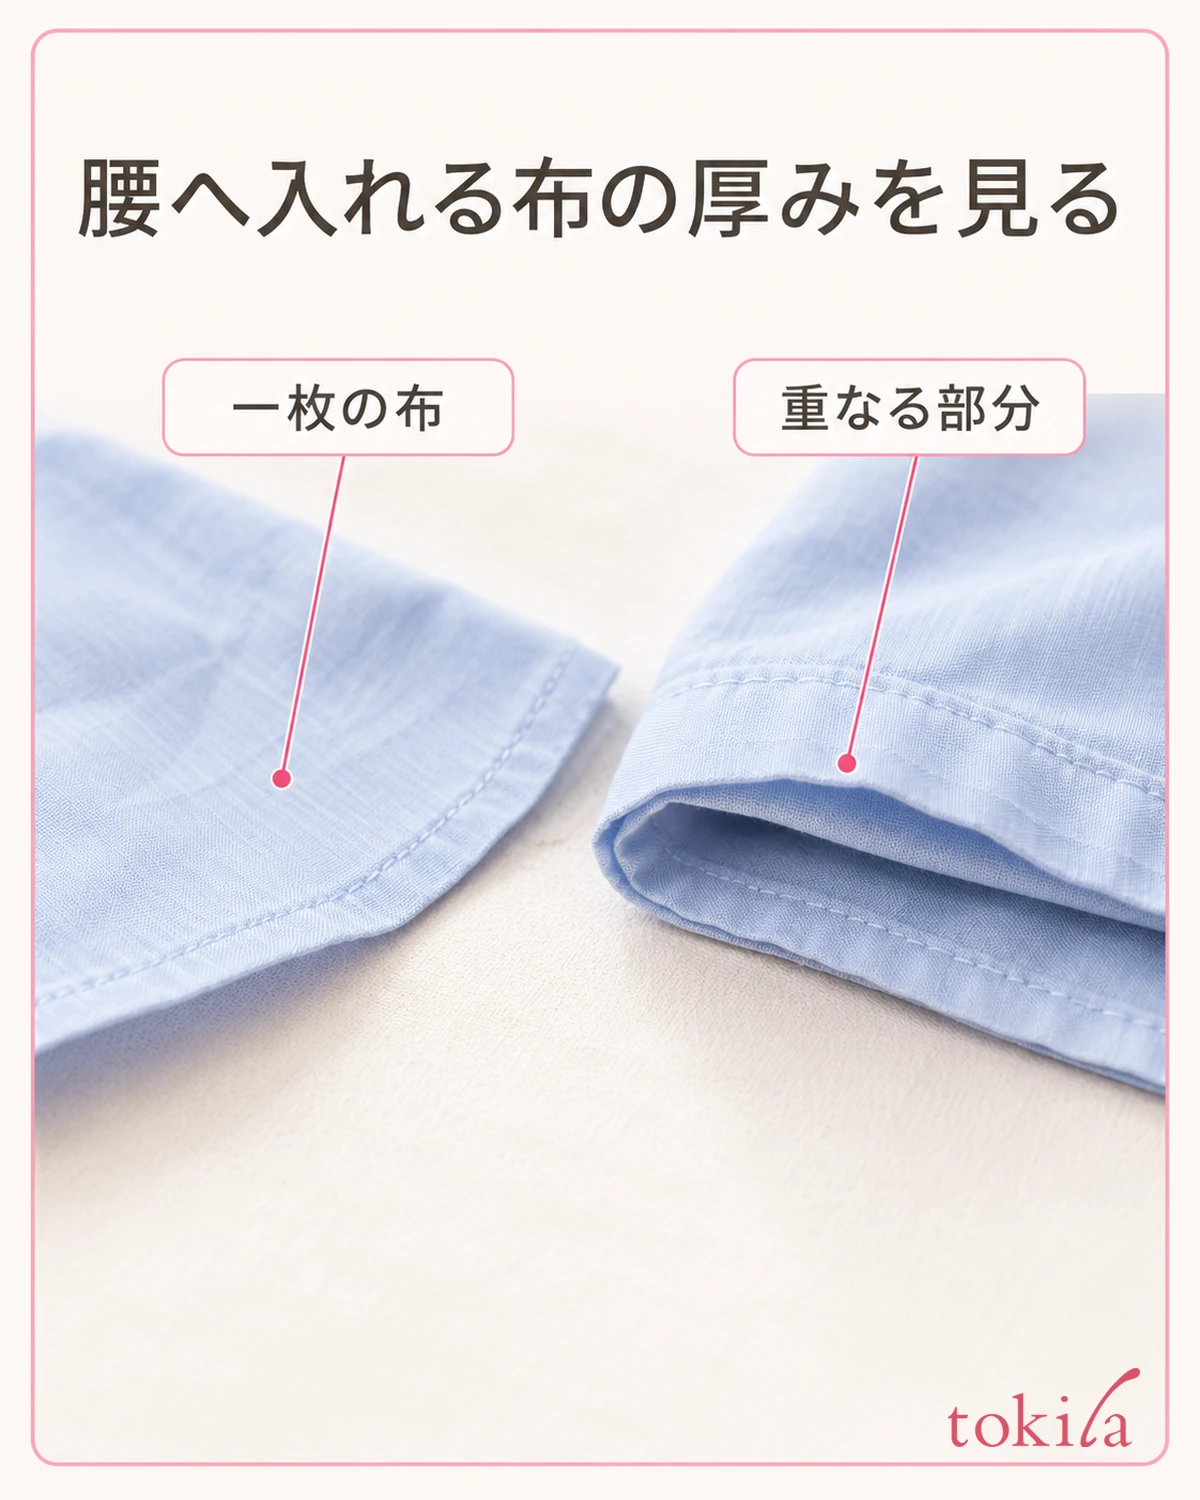
Also look at the thickness of the fabric. When a large overlap remains inside at the waist, there is an option not only to change how you tuck in small ways but also to compare the fit with a thinner shirt or different bottoms. Prioritize not putting up with difficulty sitting or fastening just to match the look.
The next time you wear it, narrowing down to one action you try, such as "I put the front center back," "I spread the fabric at the side," or "I put a little of the fabric above the waist back," makes it easier to review. Look at the shape of the hem, re-tuck the whole thing, and check by moving. Following this flow, try finding a comfortable fit that suits the clothes you have now.



