
When you make a three-strand braid, the weave is wider on only one side, or it curves off at an angle partway down. In that case, before you pull hard on the finished braid to straighten it, try looking at where the difference began. If you separate the first three sections, the order in which you cross them and the place where you switch your grip, you can narrow down where to redo it.
Here, I cover the basic over-braid, in which the outer sections are alternately laid over the middle one on the left and right. I treat it separately from a braid where you add hair from the head as you go. The way the ends turn out varies with hair length and layers, so rather than aiming for everyone to get the same shape, look for a way of braiding that holds together without pain.
1. Find where it starts to curve, and check from which direction you are looking
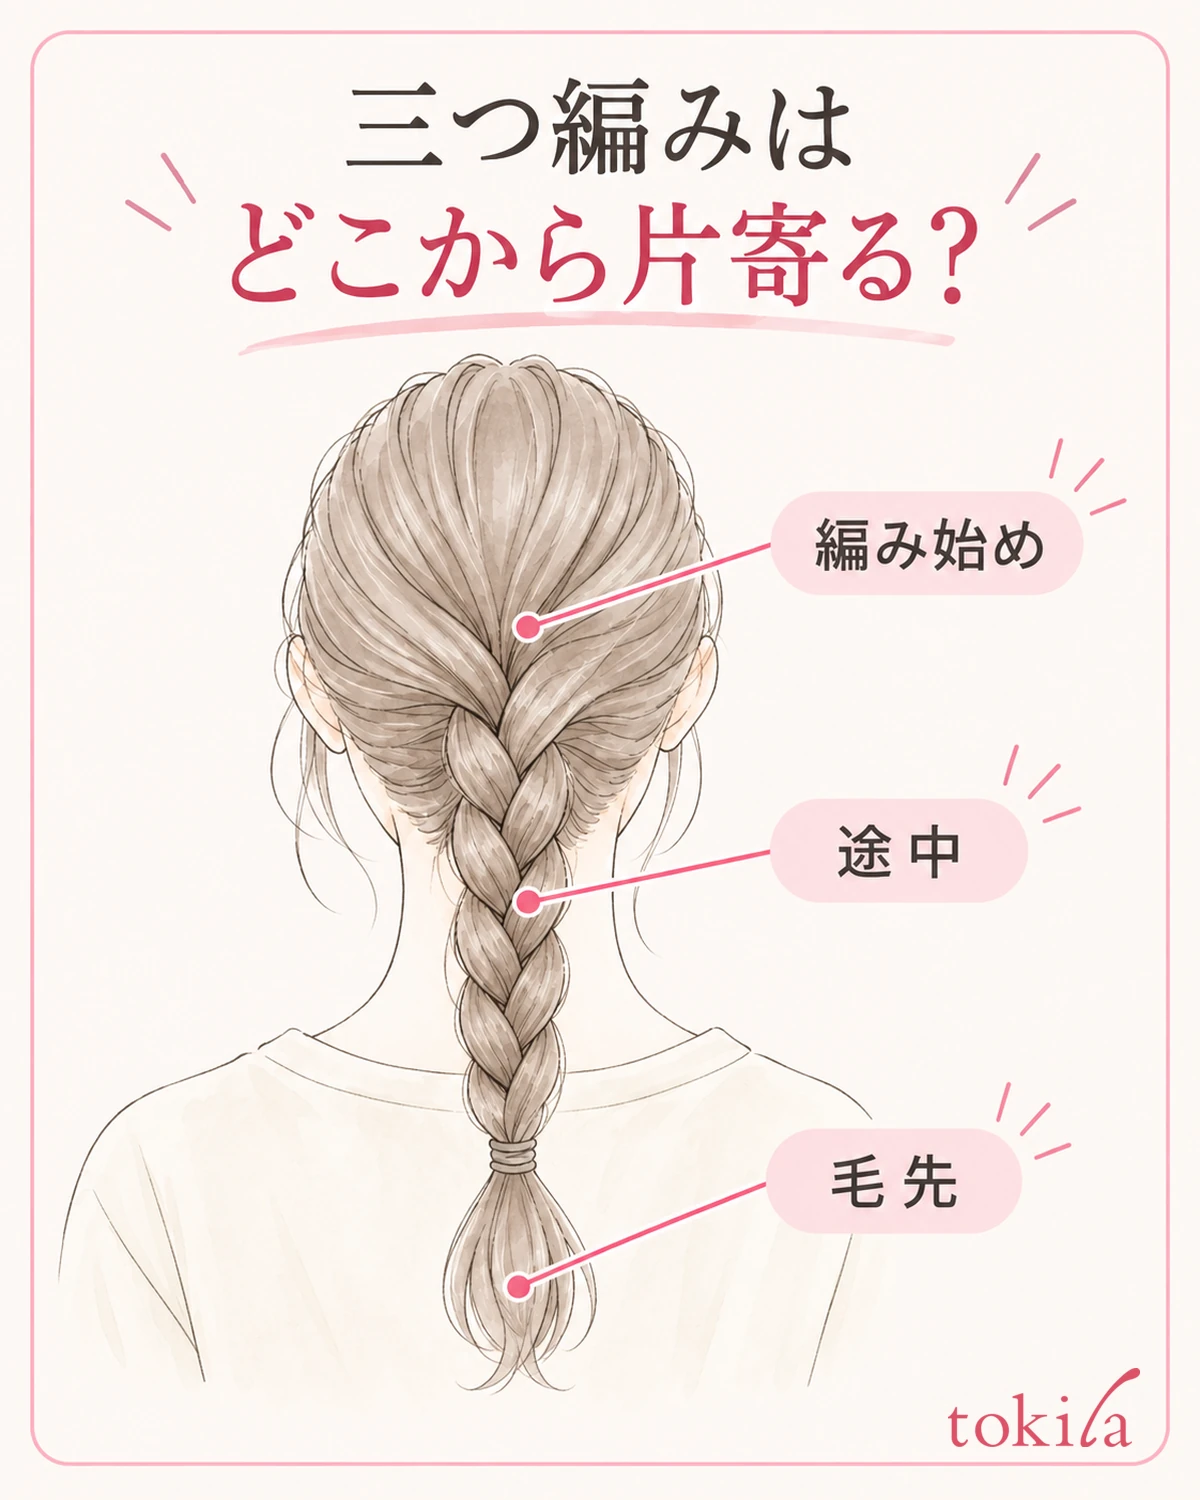
First, let the braid hang naturally without pulling it to one side. In the mirror, look at whether it drifts from the very start of the braid, whether the width changes at a single spot partway down, or whether the sections simply get thinner toward the ends. The starting point is not to treat the thinness of the ends and a weave that is larger on only one side as the same problem.
If you move hair you plan to let hang down your back to the front of your shoulder to braid it, the braid may look neat in your hands, but its direction changes when it goes back. Decide in advance where it will hang when finished, and hold it without pulling it far from that direction. If you plan from the start to sweep it to the side, you do not have to force it to the center of the back.
To check the back of your head, show your back view with a standing mirror and a hand mirror. Rather than letting go with both hands partway through to switch mirrors, pause at a point where you can support the hair and check. If looking in the mirror strains your neck or shoulders, you can also practice with sections at a lower position that are easier to check by hand.
If the left and right of the mirror and the left and right of your own hands get mixed up, calling them "the current outer section" instead of "the right on the screen" makes the order easier to follow. The middle section changes every time you switch. Do not keep the left and right names you gave at the start fixed all the way to the end.
What you are looking at here is your preference for the finished shape and the position of the sections. There is no need to decide that the way your hair grows or the shape of your head is a flaw, or to try to remove every left-right difference with a three-strand braid alone. If it hurts, or if the start is pulled tight, loosen it before adjusting the shape.
If you record the shape with a photo of the back view, bring the angle you shoot from and the place where the braid hangs close to each time. Do not decide that a difference is in the weave when you are comparing with a photo in which only one shoulder was raised. Also check whether the image is mirrored, and use it as an aid so that you do not mix up which side to fix.
2. Before braiding, separate the three sections and check they are not mixed together to the ends
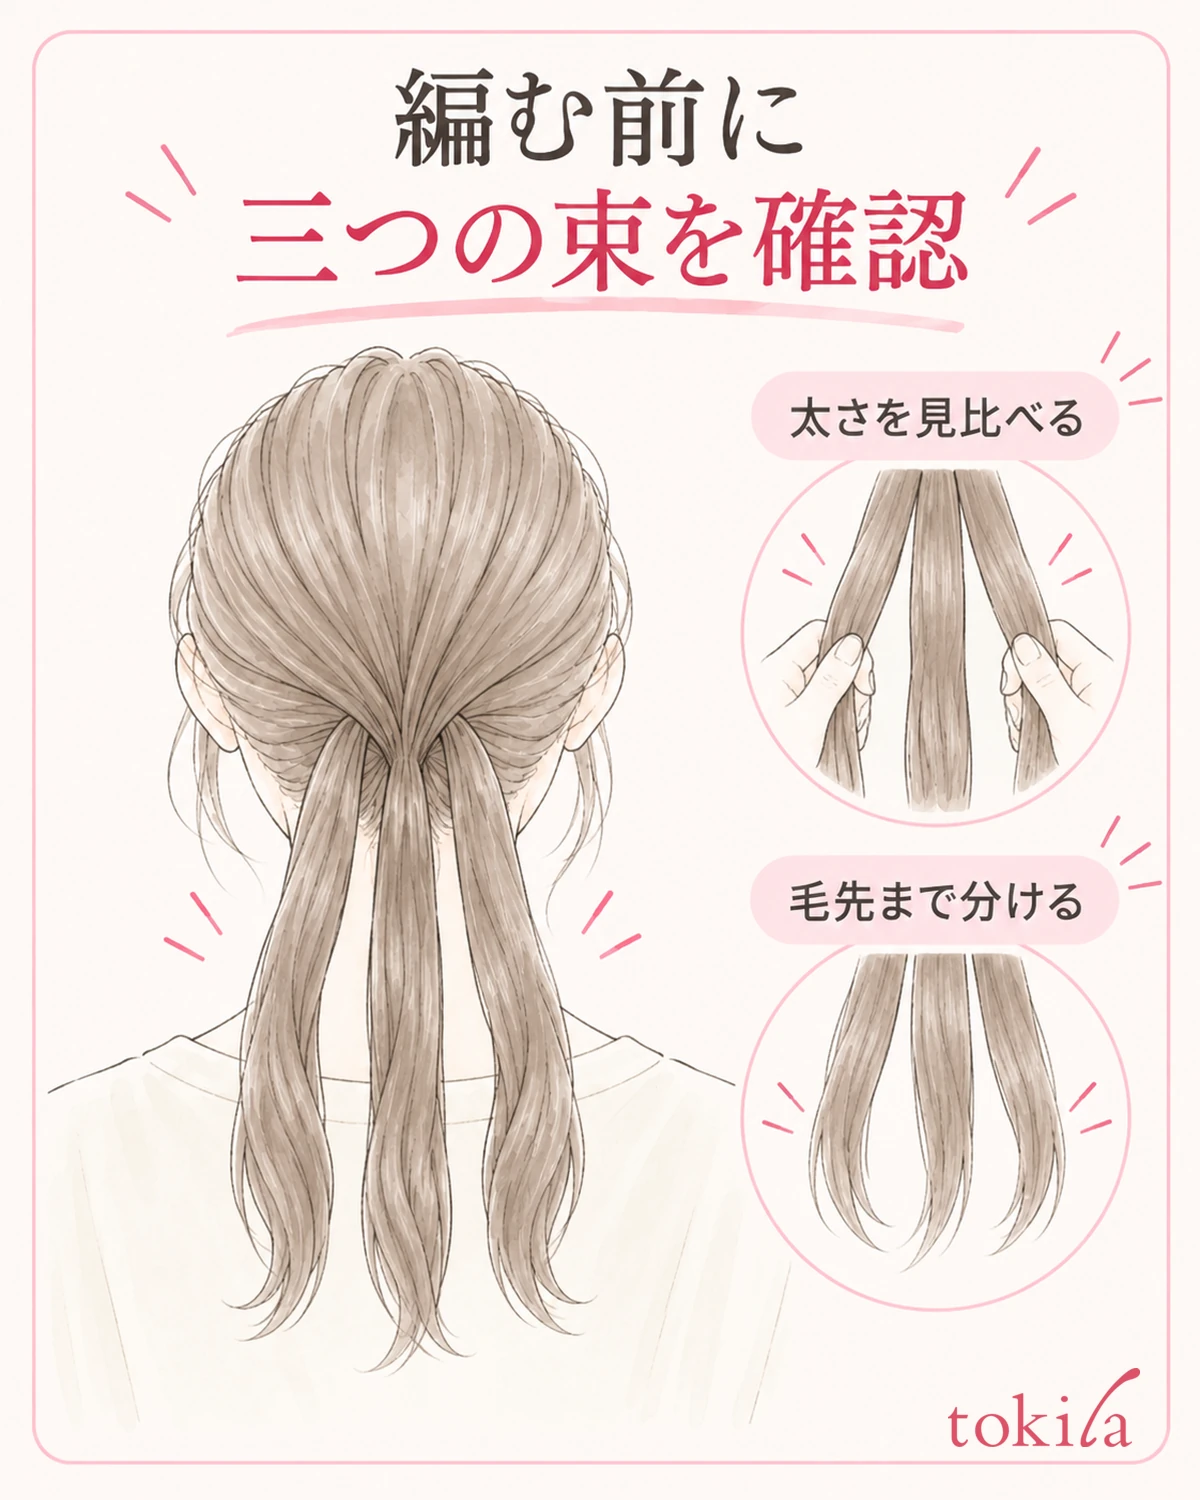
Take the hair you will braid and divide it into three sections with your fingers. Even if it looks like three equal parts near the roots, if hairs cross into a neighboring section toward the ends, they will catch partway through the crossing. Hold the three sections lightly, and check that they are separated down to the ends as far as your fingers pass through. Do not pull tangles apart by force.
Compare the thickness of the sections at the same position before you grip them. If you spread one flat and leave another twisted, it becomes hard to compare their apparent widths. Check after getting all three into a similar state, and if one is clearly thicker, divide them again before you have started braiding.
If your hair has layers, the ends of the three sections may not match in length. Rather than adding short hairs to a long section to force them to the same length, look at how far you can keep crossing. Choose where to finish to suit the length of your own hair, for example by tying it off just before you can no longer keep the number of sections.
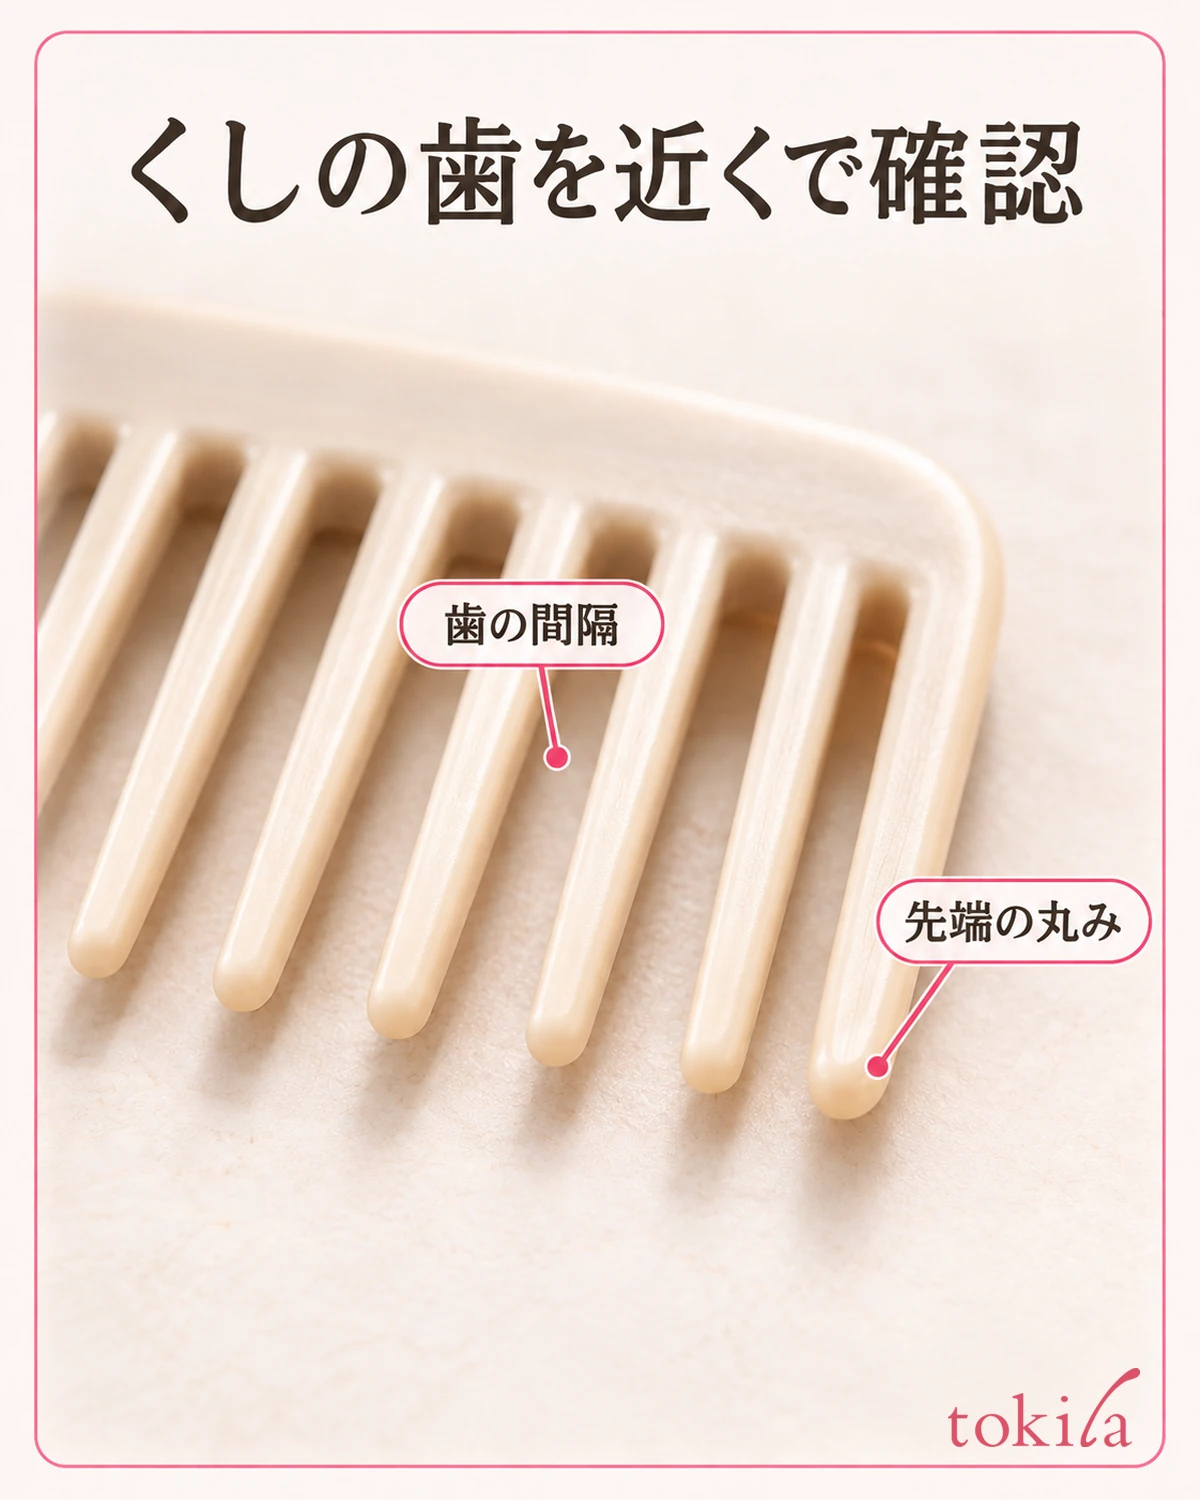
If you use a comb, look at the spacing of its teeth and the shape of its tips. Do not treat pushing a fine-toothed comb through tangles in one go as preparation for dividing into thirds. Separate the step of tidying your hair from the step of dividing the sections, and stop if it hurts. Styling products are not required either; if you use one, follow the product's instructions for amount and the condition of hair it is meant for.
Once you are holding the three, check once more, before you braid, that hair from one side has not passed under another section. If the dividing lines are not clear in this check, it is easier to follow the steps if you open your hand and divide them again than if you pull to fix it after braiding on.
If the three sections look overlapped as you divide toward the ends, move each one slightly apart as far as you can see. You do not need to pull your hair hard to the left and right to undo it. Make three paths that you can trace with your fingers, follow each connection to the tip of its section, and then begin braiding.
3. Alternately lay the outer sections over the middle
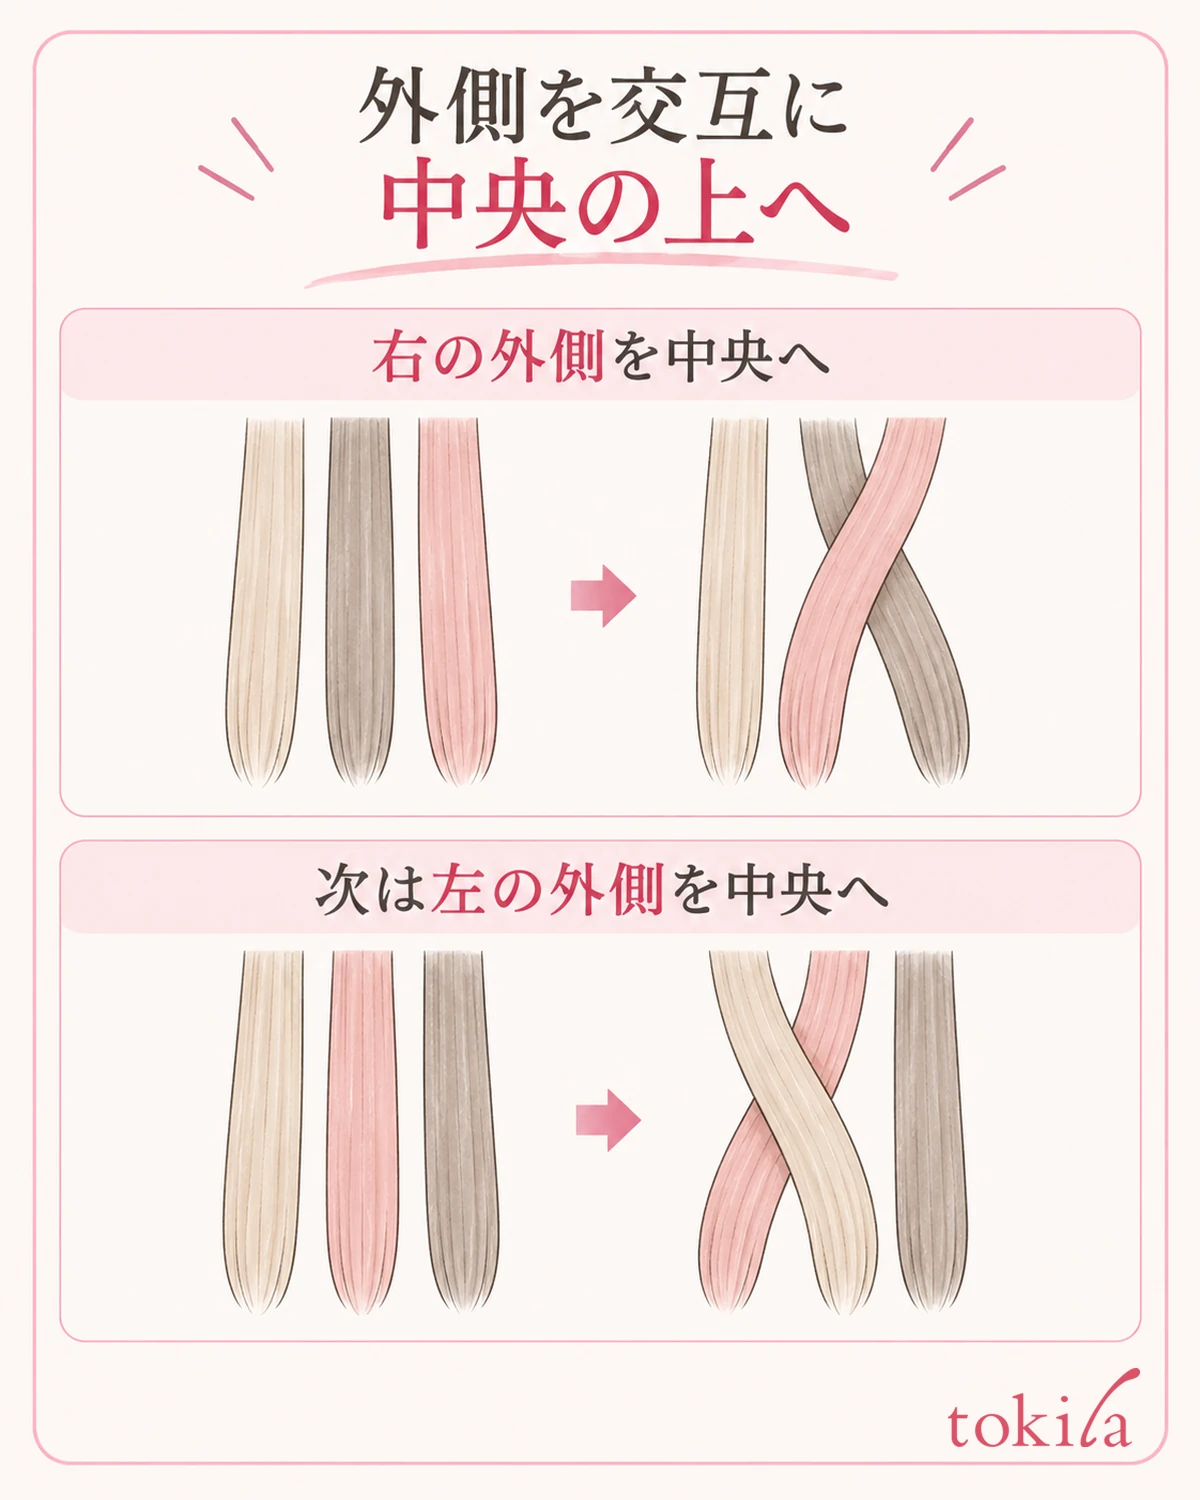
In an over-braid, you first lay the outer section on one side over the middle section and carry it to the center. Next, lay the outer section on the opposite side over the section that is in the middle at that moment. After you have moved left and right once each, stop and check that three sections remain in your hand.
What matters is not to keep looking for the section that was in the middle at the start. The section that comes to the middle changes with each crossing. What you move next is the outer section at that moment. Look at the positions of the sections each time so that you do not keep carrying one side to the middle, or keep wrapping the same section sideways.
Also, do not mix an over-braid, where you lay sections on top, with an under-braid, where you pass them beneath, partway through. If the weave suddenly looks different partway down, check not only the thickness but also which side you passed through. Here we choose the over-braid, and continue the movement of laying the opposite side over the middle as well.
Move where you hold to a position that is not too far from the crossing you just made. Rather than gripping only the ends and swinging them widely, support near the crossing and switch your grip after receiving the next section, which makes it harder to lose track of the three. There is no need to press your fingertips hard against your scalp.
Prioritize the order of confirming you have received a section before letting go over moving your hands quickly. Do not try to make the force of left and right equal as a number; proceed while checking that you are not pulling hard on only one side and that nothing hurts. If you lose track, stop at a point where you can still tell the three sections apart.
4. If one side loosens, go back to the previous crossing and tidy it
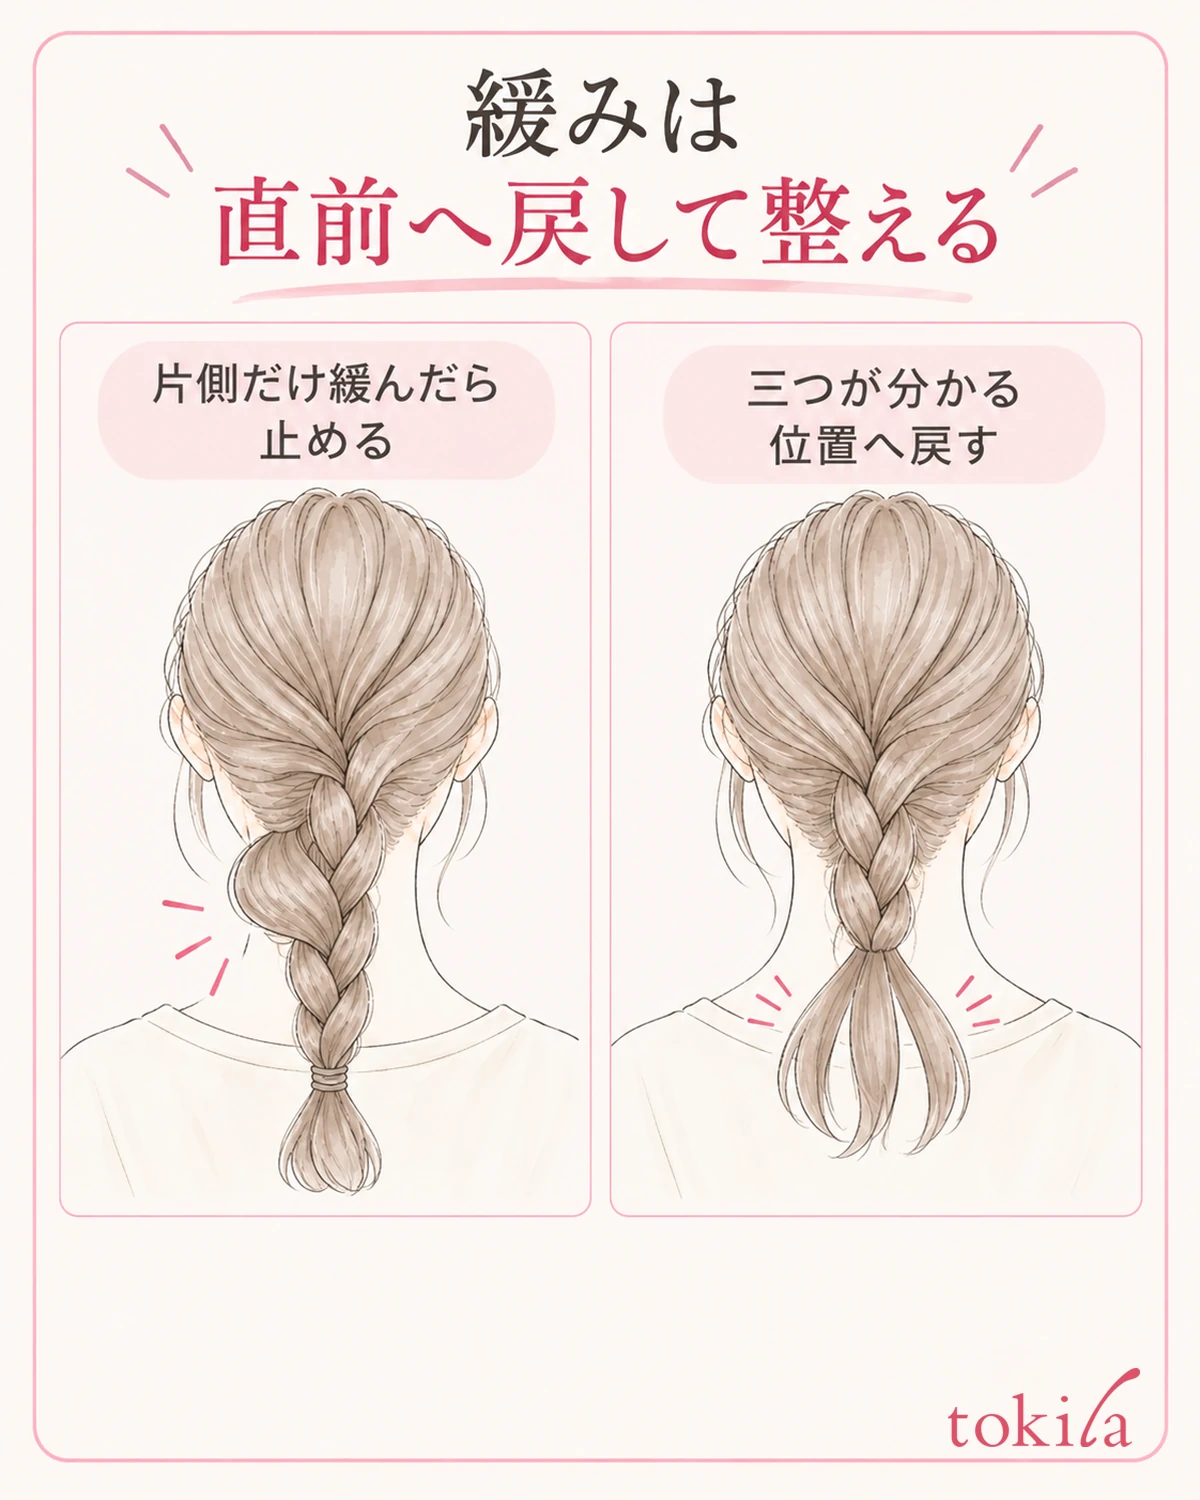
When the weave on only one side becomes larger, do not keep tightening the finished weave one after another from the top. Support the three sections you are holding now, and find from which crossing the looseness shows. If it is only the one crossing just before, undo that crossing and take hold again with the three sections separated.
When you undo it, return the sections you laid over one at a time to the outside, going back in the order you braided. If the ends catch, stop there and slowly separate the tangles first. Do not pull out several weaves at once, or drag the hair along with the tie still on.
If it is skewed from the very start of the braid, tightening only the middle will not change how you divided it at the beginning. Rather than forcing it by pulling, undo it once and check the thickness of the three sections and the direction in which it will hang when finished. Do not insist on narrowing the range you redo; go back to where the sections are clear.
Even if there is a slight difference in appearance, if it does not hurt and is stable where you want to fasten it, you can choose it as the day's result. Loosening, in which you pull one side out widely to tidy the look, is a separate step. While you are still checking the basic crossing, do not pile on moves that hide the difference by increasing the sections you have undone.
If you lose your place at the same spot again and again, practice by stopping after a few crossings. You do not have to go through to the finish in one go; check in separate steps: "divide into three," "outer section to the middle," and "opposite side to the middle too." Rest when your arms get tired, and do not finish tying while putting up with pain.
5. Decide where to tie it, let it hang naturally and look at the result
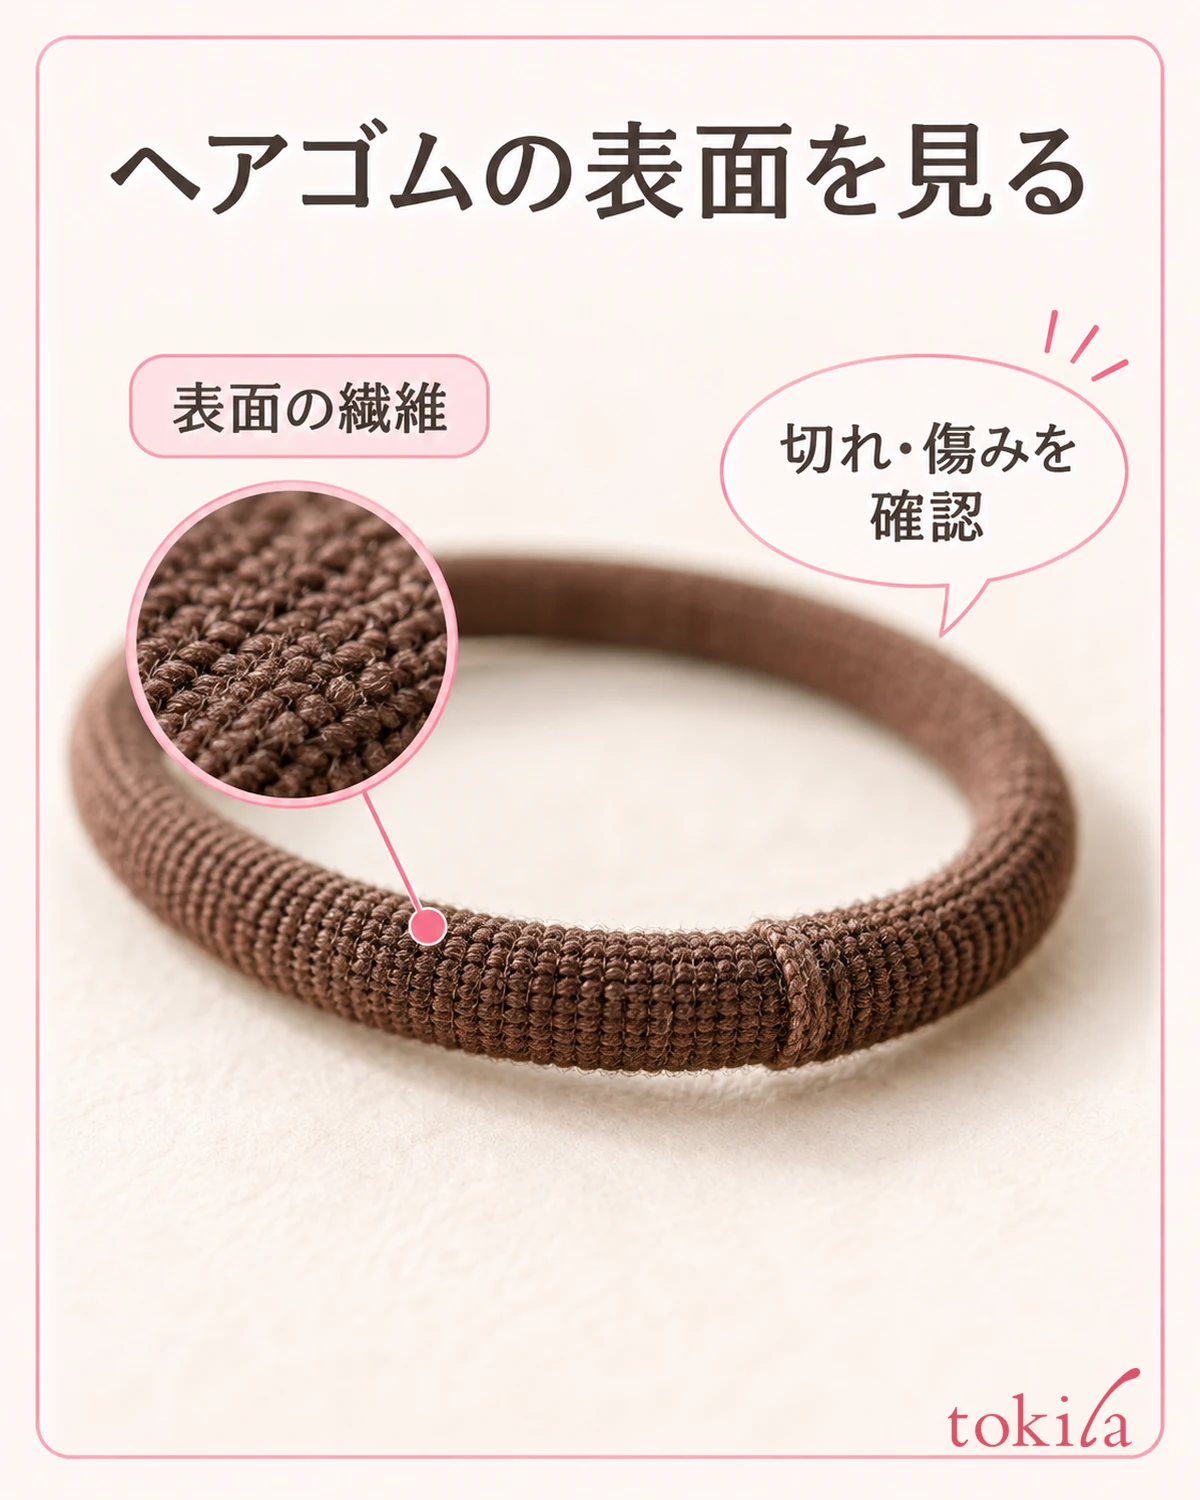
When you reach the ends and it becomes hard to hold each of the three sections, decide where to tie it just before that point. Do not try to keep the same weave thickness into the area with many short hairs; adjust the length of the ends you leave. Check that the hair tie has no damage or breaks, and fasten it so that it does not catch hair.
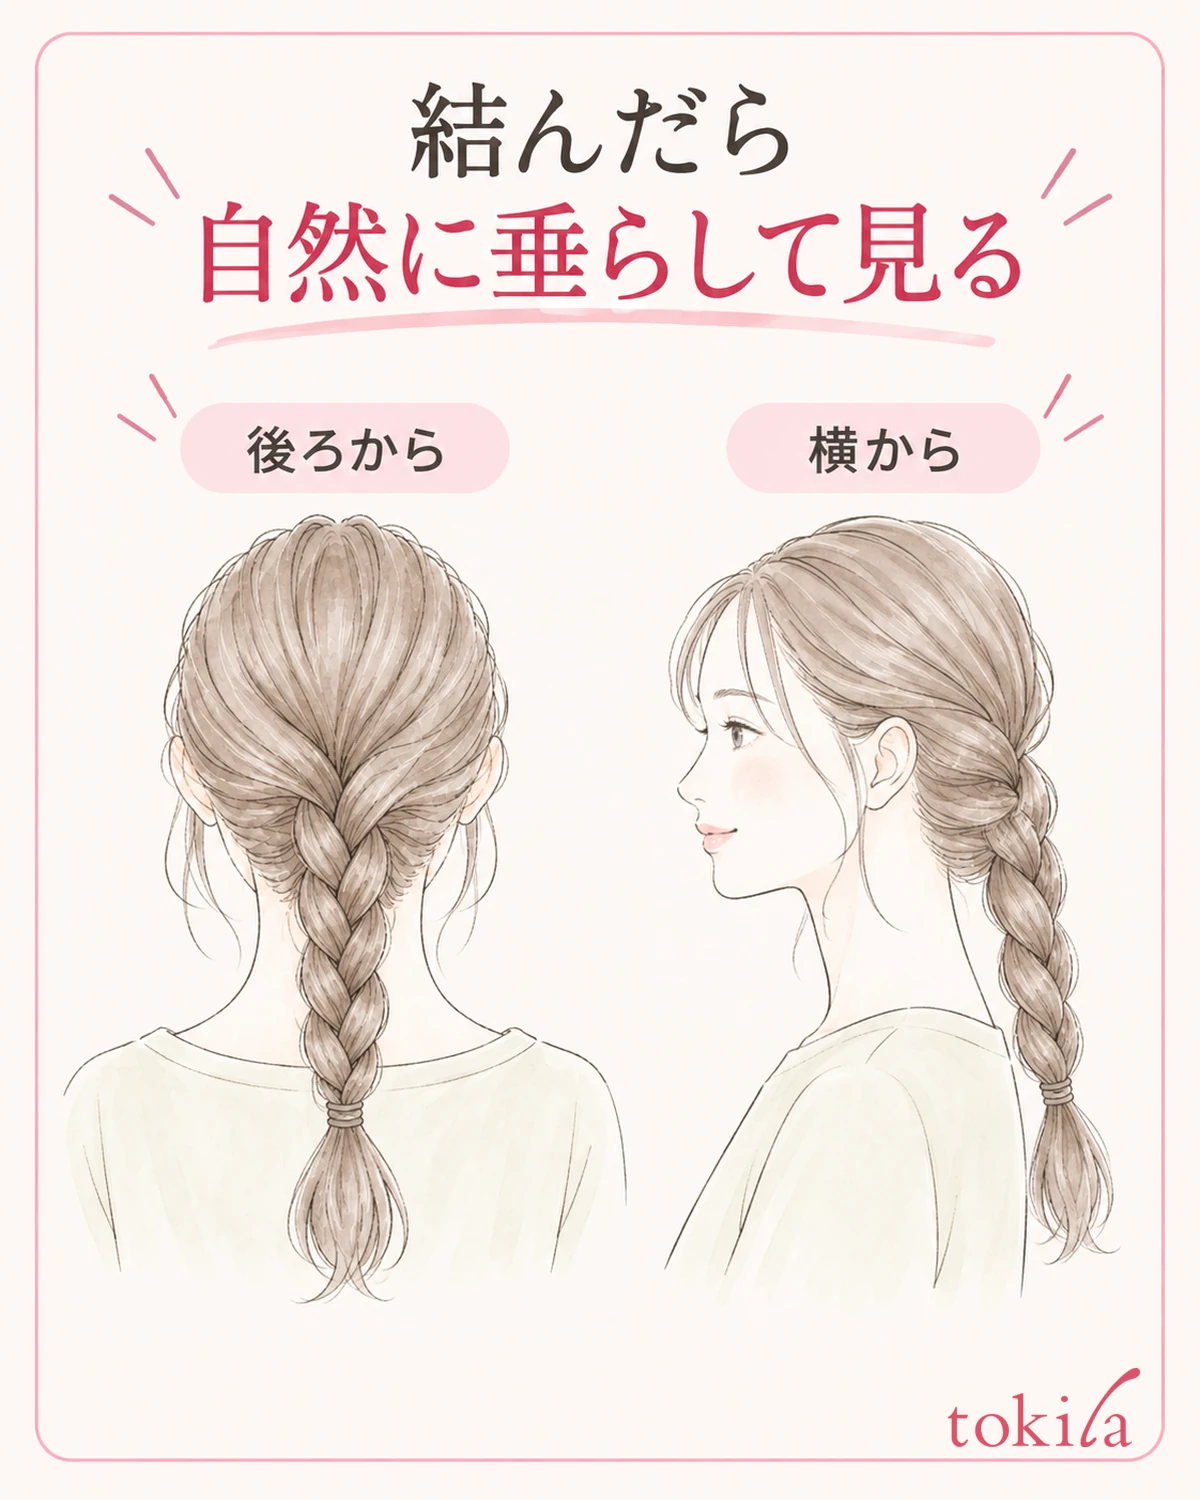
When you finish tying, release the hand that was pulling while you braided, and let the braid hang naturally in the position you planned. Do not judge from the shape you get when you pull it to the side by hand; check how it looks from the back and from the side. Here, too, whether it drifts from the first section or only the width partway differs gives a clue for next time.
When you loosen it as a finishing touch, treat it as a separate step in which you support the tied part and move the surface a little at a time. Do not use a method of pulling out widely from the roots to fix the way it was braided. For how to loosen an updo as a whole, also refer to the basics of an updo and checking its balance.
Next time, pick one of the following to review: the thickness of the first three sections, the height at which you switch your grip, or the direction of the hair you braid. Even if the left-right difference did not bother you, briefly noting where you let your hair hang that time makes it easier to recall the same steps. Use it to look back on your technique, not as a record that asserts your hair type has changed.
A braid drifting to one side can be checked by not losing track of the three sections and by continuing the same way of laying them over alternately. Rather than pulling hard to even out the look, go back to where the difference begins and choose a shape that stays in place comfortably with the length of your hair.
If there is a part you braided well, look at the width of that weave and how you held the sections. Rather than calling the whole thing a failure, separating the stretch where you kept going well from the stretch where you lost track makes the next place to practice more specific. Before adding styling products or tools all at once, check the steps you are using now one by one.



