
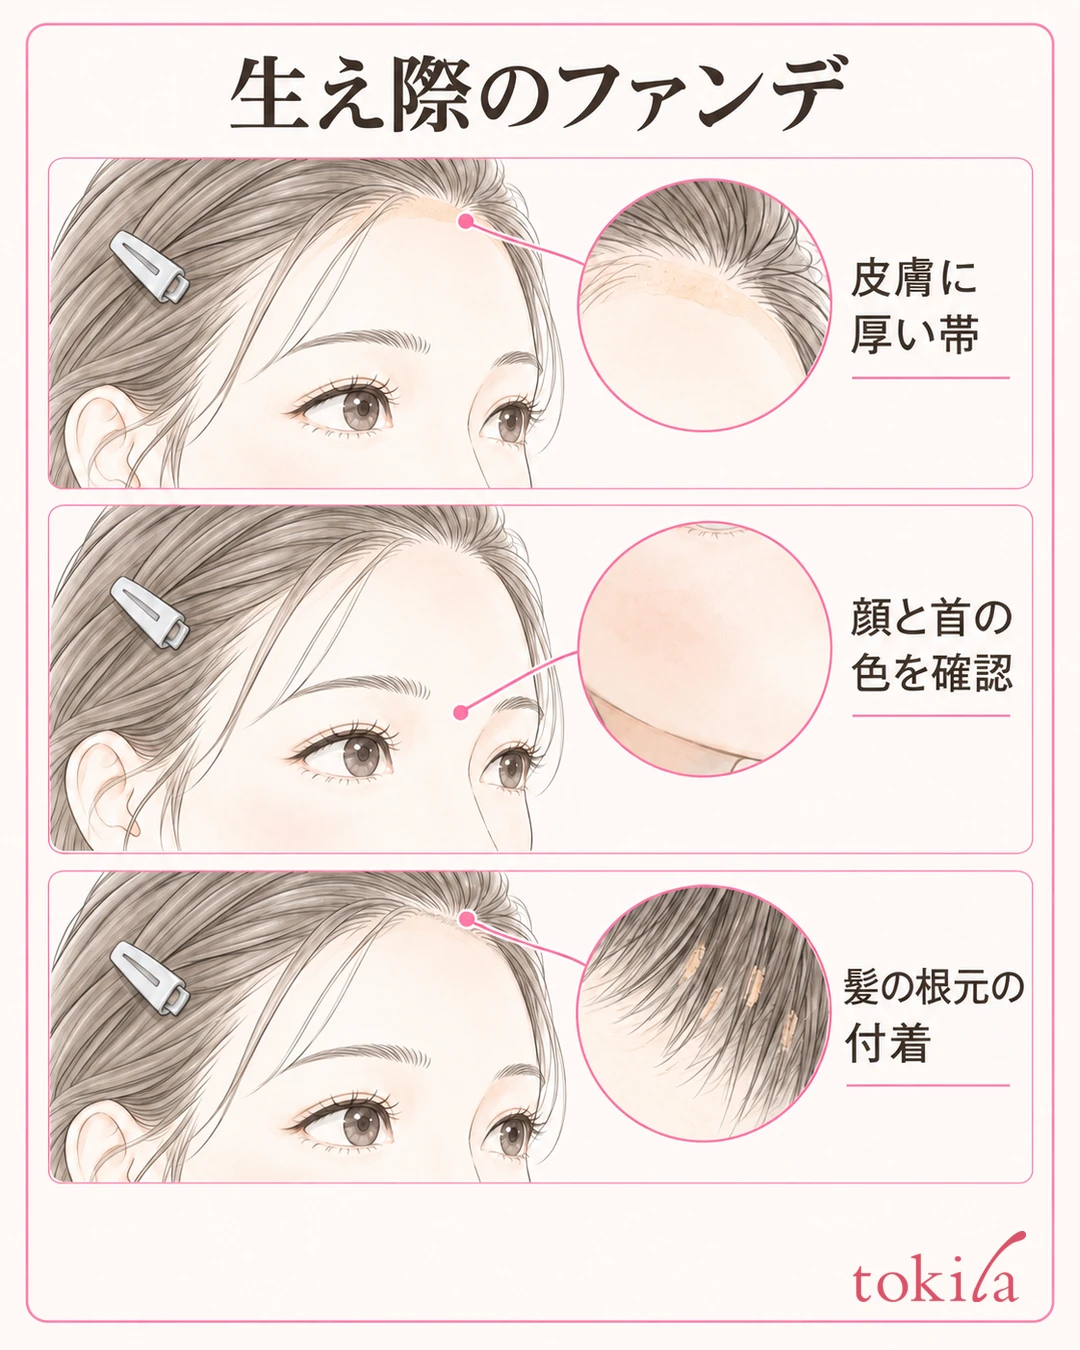
Your forehead looks smooth, but a band of foundation remains only at the hairline. It may be hidden when you let your bangs down, but the edge can stand out when you move your hair aside. Before adding more, separately check the thickness on the skin, the color difference across your whole face, and the color that has gotten on your hair.
This article revisits foundation that has built up at the forehead hairline. It explains how to move your hair aside so you can see the area, how to blend thinly from the center outward, and how to decide on fixing what remains. If the amount, tool or handling of moisture specified by the product differs, follow that guidance first.
1. Tell apart a thick band on the skin, a color difference and product on the hair
First, move your bangs and side hair aside without pulling the skin. Use the mirror both at a distance that magnifies only your forehead and at a distance where you can see your whole face. After looking straight on, turn slightly sideways and check the edge running from the center of the forehead to the temples. It is also important not to judge the color under a strong light from only one side.
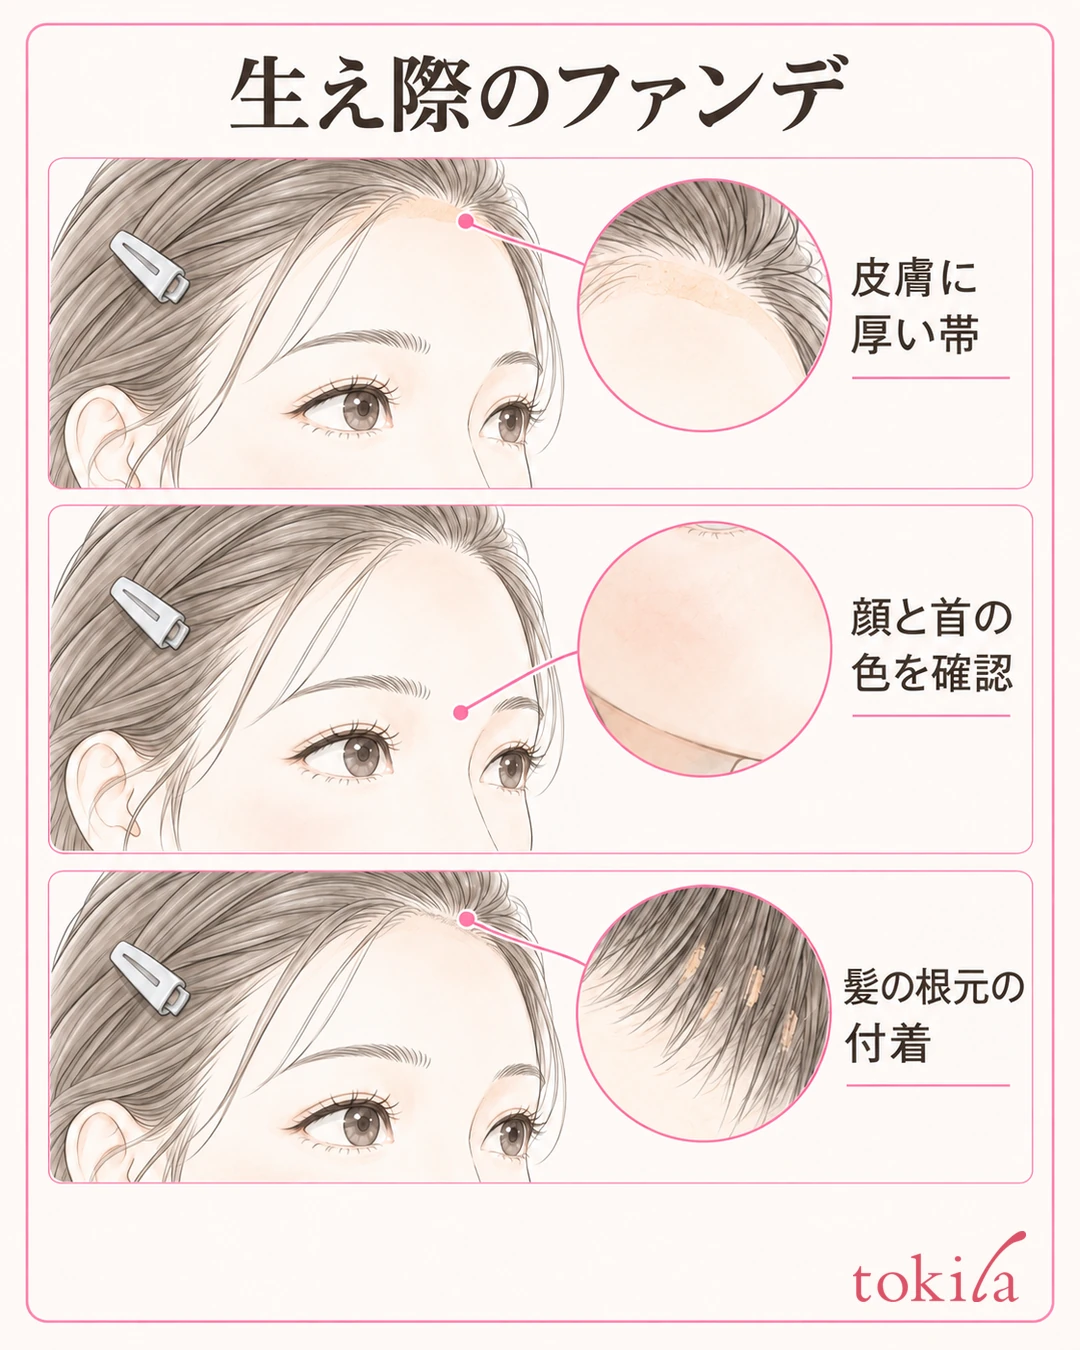
If there is a thin band or clump on the skin at the hairline and only that spot looks thicker than the center of the forehead, first review the amount and how you blend the outer edge. In contrast, if your whole face looks brighter and floats above your neck, that is a different issue from thickness at the hairline alone. Adding more of the same foundation at the edges may not resolve a color mismatch across the whole face.
There are also cases where skin-colored product sits at the roots of the hair and there is no band on the skin once you move the hair. In that case, separate product on the hair from the finish on the skin. Do not start with a fix that layers powder or liquid onto the skin; check where the product actually is. Do not assume that hair reflecting light, or your natural hair color, is foundation sticking.
Try putting each spot that feels off into words, such as "a thick band at the right end of the forehead" or "skin color at the roots of the hair." It is easier to limit the area to fix than to go at every spot on both sides with a tool. If you look at the skin surface in a close mirror and at the connection between face and neck in a distant one, you can decide before touching the same area again and again.
If you are bothered by your whole face looking washed out, how to check your foundation color may also help. This time we deal not with choosing a new shade number but with the amount and the edge remaining locally at the hairline.
2. Move your hair aside and prepare a sponge suited to the product and the base
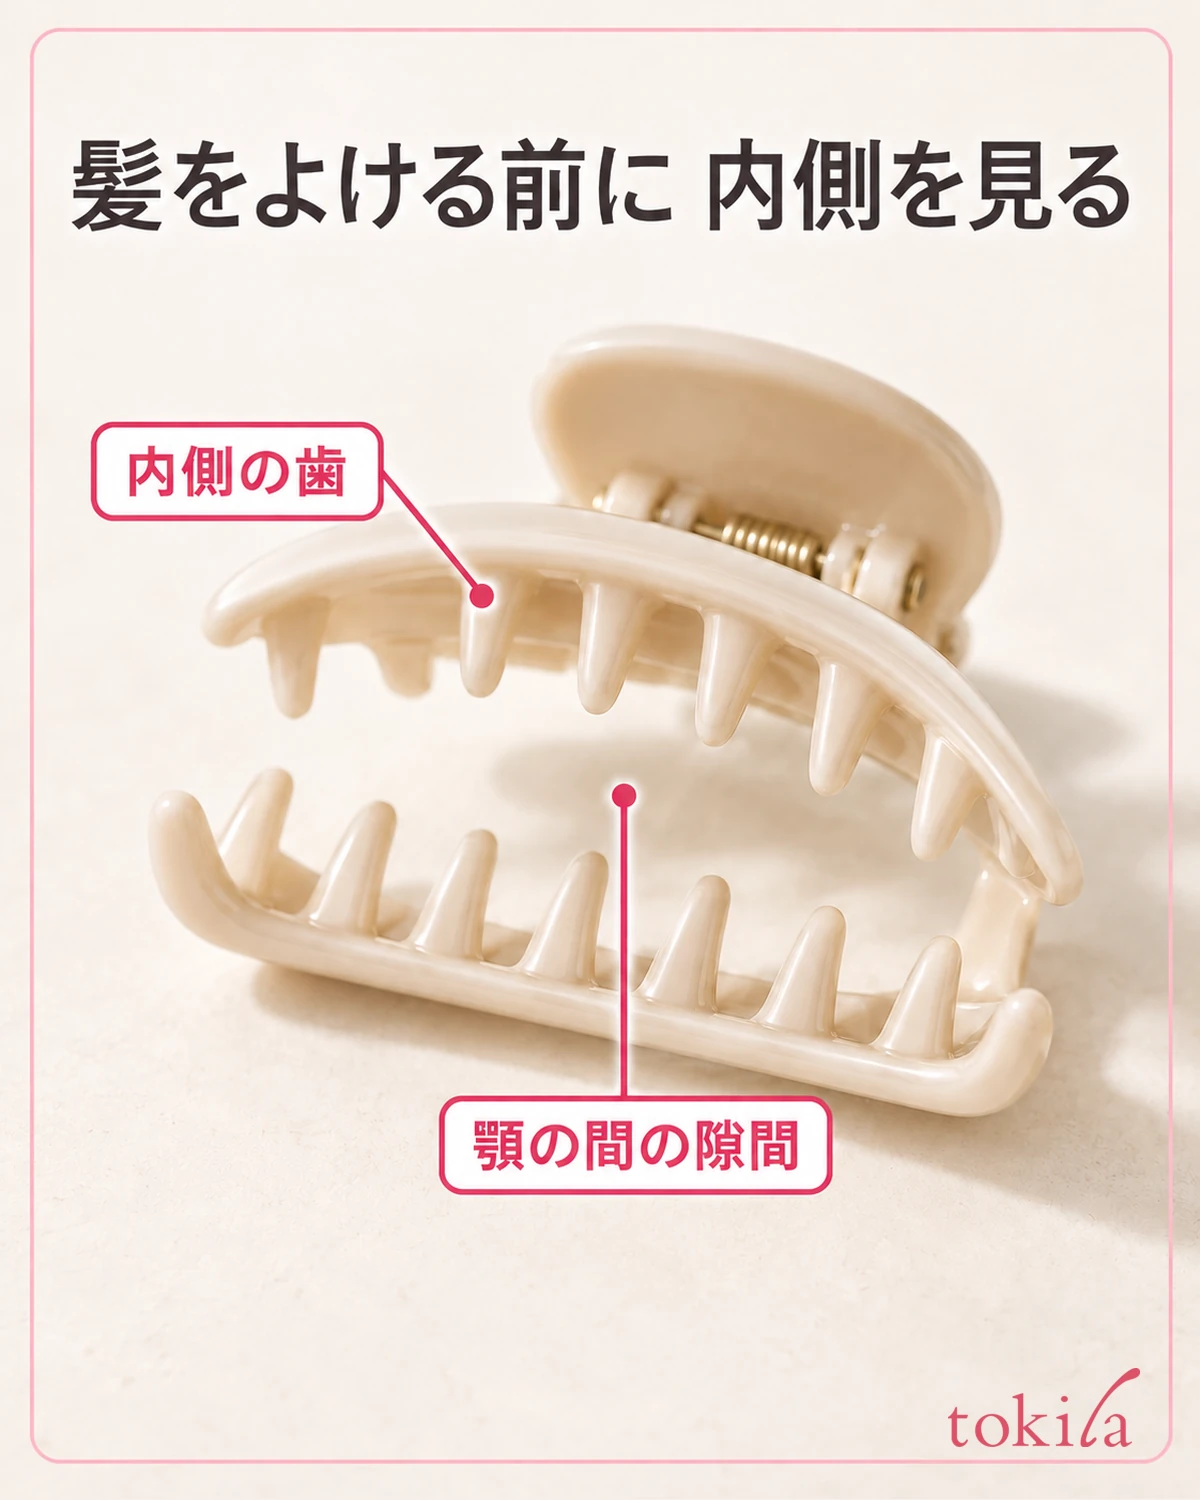
Before redoing it, keep your hair from coming back onto your forehead with something like clean hair clips. There is no need to pull your hair hard. If you make the temples visible too, you can place the tool on the outer edge of the skin without pushing it into your hair. Rather than keep holding your bangs with your fingers to peek into the mirror, free up your hands before you start.
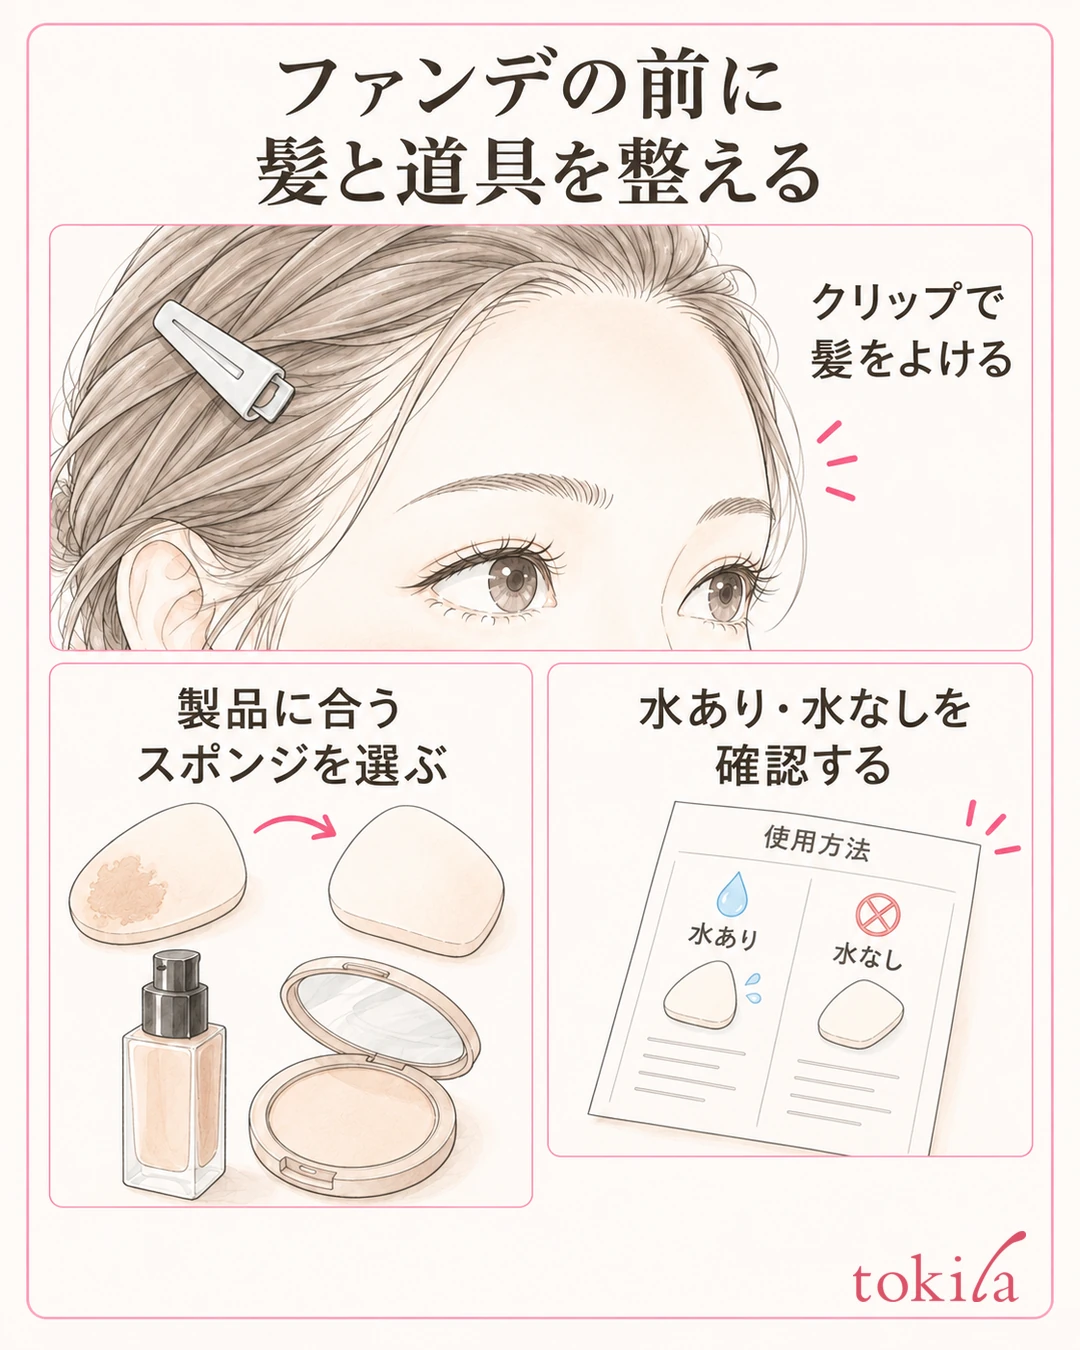
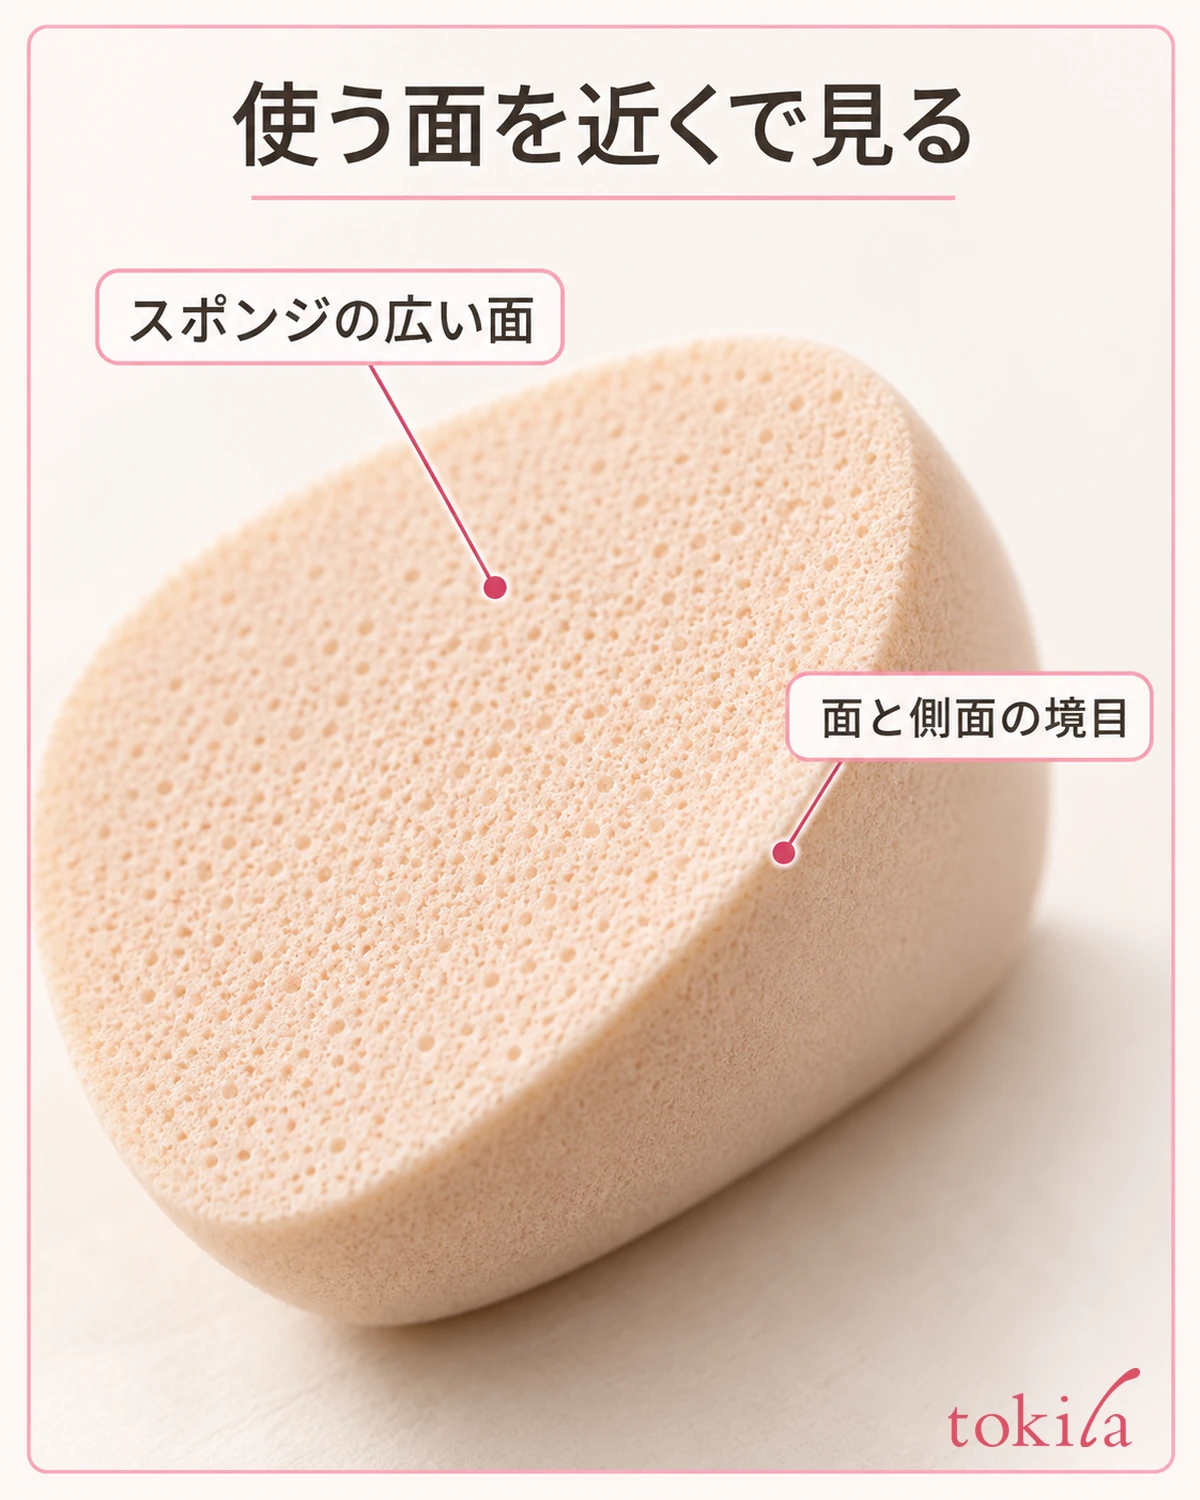
Choose a sponge that is made for the foundation you use. A sponge for powder may not be fine to use as is for a liquid product. Check the working surface for hardened foundation or leftovers of another shade, and if it is dirty, switch to a clean sponge. Including dampness, going back to the tool's directions comes first.
Also check whether the product or tool is meant to be used wet or dry. Do not wet a tool on your own judgment if it is not specified for use with water.
Look at the base on your forehead, too. If your skincare or primer is still uneven, or blobs of product remain on the surface, tidy that up before adding foundation out to the edges. Follow the amount and order given for each product, do not set a waiting time that applies to everyone, and check that no spots are missed.
Do not try to create a thin finish by using less sunscreen. What you thin out is the thickness of the foundation. If the product is described as not needing a primer, you do not necessarily have to add one. You can check the flow of the whole morning base in how to apply base makeup.
If you check the working surface, secure your hair and set up the mirror first, you can cut down on touching the same spot again and again midway. Before picking up fresh product, check "can I see the skin rather than the hair?" and "can the sponge in my hand be used with this product?"
3. From the center of the forehead outward, blend thinner toward the hairline
When applying to the forehead, basically work from the center outward according to the product's directions. Rather than covering all the way to the edge with the same amount, be careful not to increase the thickness as you get closer to the hairline. Reflect on whether you have ended up placing a large blob of new foundation on the outer edge of the skin and spreading it back inward.
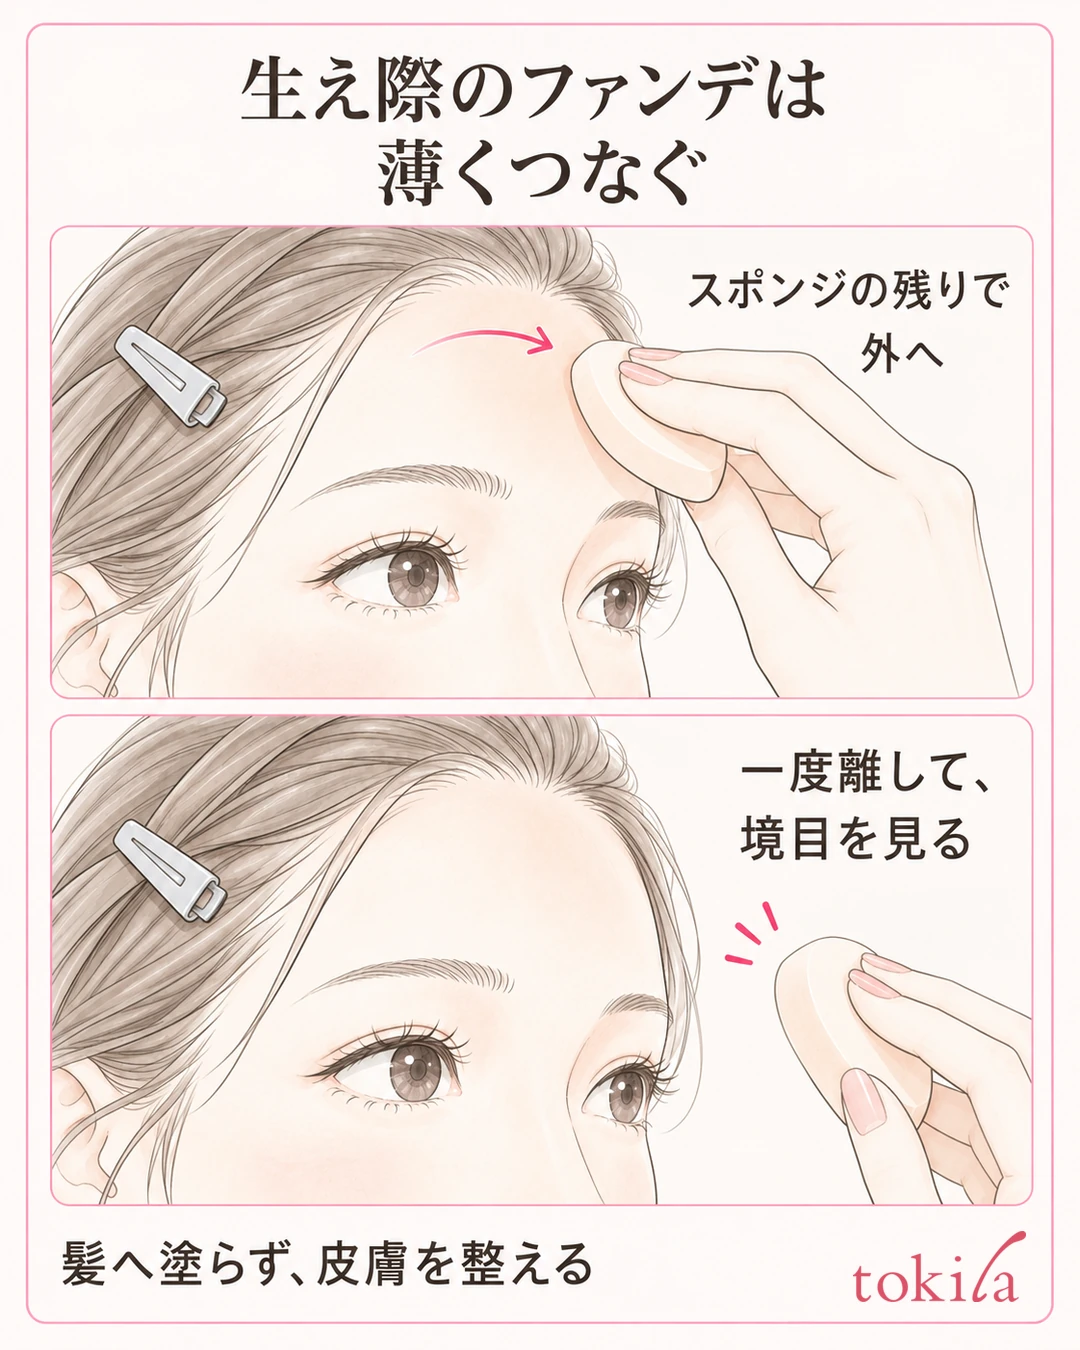
For a product used with a sponge, after finishing the wide area of the forehead, connect outward with the small amount left on the working surface. Rather than picking up extra product just for the hairline from the start, look at the blend in the mirror and decide. Touch the face of the sponge lightly to the skin, do not push it into the roots of the hair, and lift the tool away once.
Coloring the hair and finishing the edge of the skin are different things. If you keep tracing the hairline as a single line, the same amount can pile up at the outer edge. If the color at the center of the forehead already blends naturally outward, you can also choose to stop there rather than try to cover every fine hair. Do not pull the skin hard or rub the same spot over and over.
When you lift the sponge to check, look not only at brightness but also at whether a thick band remains. A small amount may not give the coverage you wanted, but do not make the amount you add at the center of the forehead the same as the amount you add at the outer edge of the hairline. Add only where needed and within the product's range, then step back and look again.
With powder, the point to check is when you pick up more powder; with liquid, it is where you place the product on the skin. There is no need to force product that has already dried and is hard to move by spreading it with strong friction. If more handling leaves streaks or clumps, move on to the next touch-up decision before adding more.
4. Fix the remaining band and the color on the hair as separate places
If extra thickness remains on the skin but the base is still holding, lightly tidy a small bothersome area with a clean sponge and look from a distance once. The points to check are not to load it with new liquid or powder and not to spread it too far around. Do not turn the step of tidying the excess into a step of rubbing hard to remove everything.
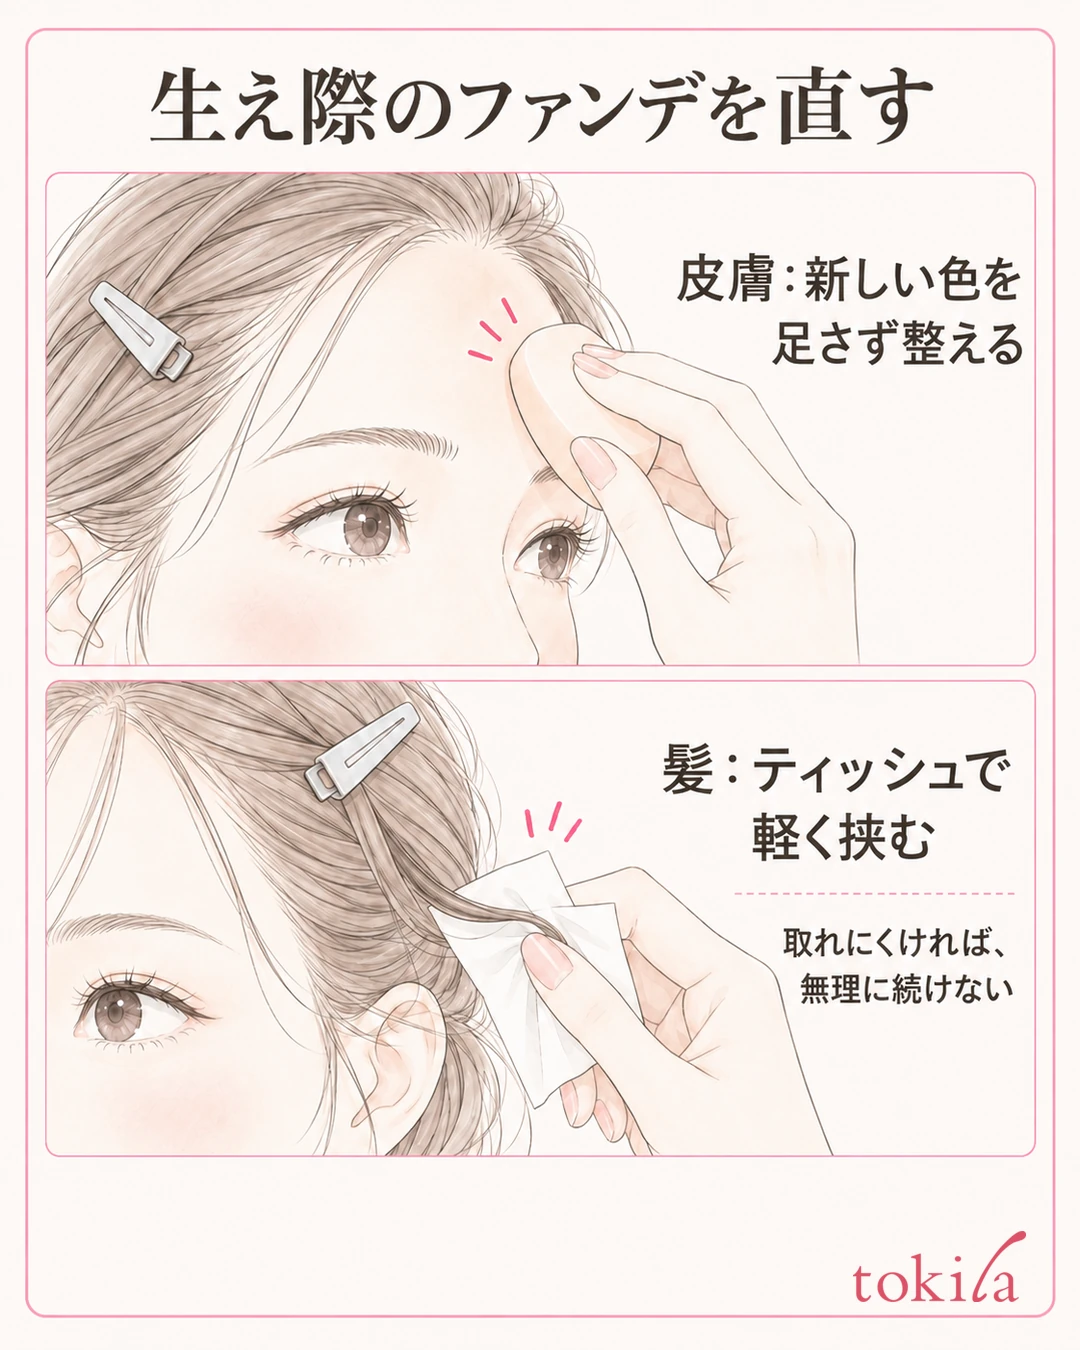
If the product you have shows a different touch-up method, follow that guidance. Do not scrape a dried film or clump with a fingernail, or go back and forth over the hairline with a stiff brush. If each touch makes the base on the skin come off and the hole widens, it is time to consider whether you need to redo that part rather than hide it by layering over it.
If you redo it, gently remove only the target area of skin, following the directions of your makeup remover. Check the labeling for whether to wipe off or rinse off, and whether a face wash is needed afterward. After removing, restore the skincare and base you need, and if you removed the UV protection layer during the day, also check how to reapply it.
If skin-colored product is on your hair, first separate the hair from the skin and treat it separately from fixing the skin. If it is a small surface deposit, check whether you can lightly pinch the hair with a clean tissue or similar and remove it without spreading it around. Do not pull the hair hard or rub your hair with a sponge. Also do not switch to using a makeup remover for skin on your hair without conditions.
If it has dried, is hard to remove, or covers a wide area, do not keep trying to remove it on the spot; tidy it by washing your hair as needed. There is no need to layer more foundation on the skin just because the color on the hair bothers you. Before putting your hair back, check that the base on your forehead is even and that your tools do not touch your hair.
Breakdown over time with sweat and shine is separate from product pooling right after application. For overall fixes while you are out, the order for touching up makeup according to how it breaks down may be helpful. If you feel irritation or pain, stop using it instead of continuing to adjust the finish.
5. Before putting your bangs back, check the edge from the front and the side
Finally, before letting your bangs down, look from the center of the forehead to the temples under the same light. In a close mirror, check for thick bands or clumps and product at the roots of the hair; at the distance of your whole face, check whether only the forehead floats. Even if it does not bother you from the front, the edge may be visible only from the side.
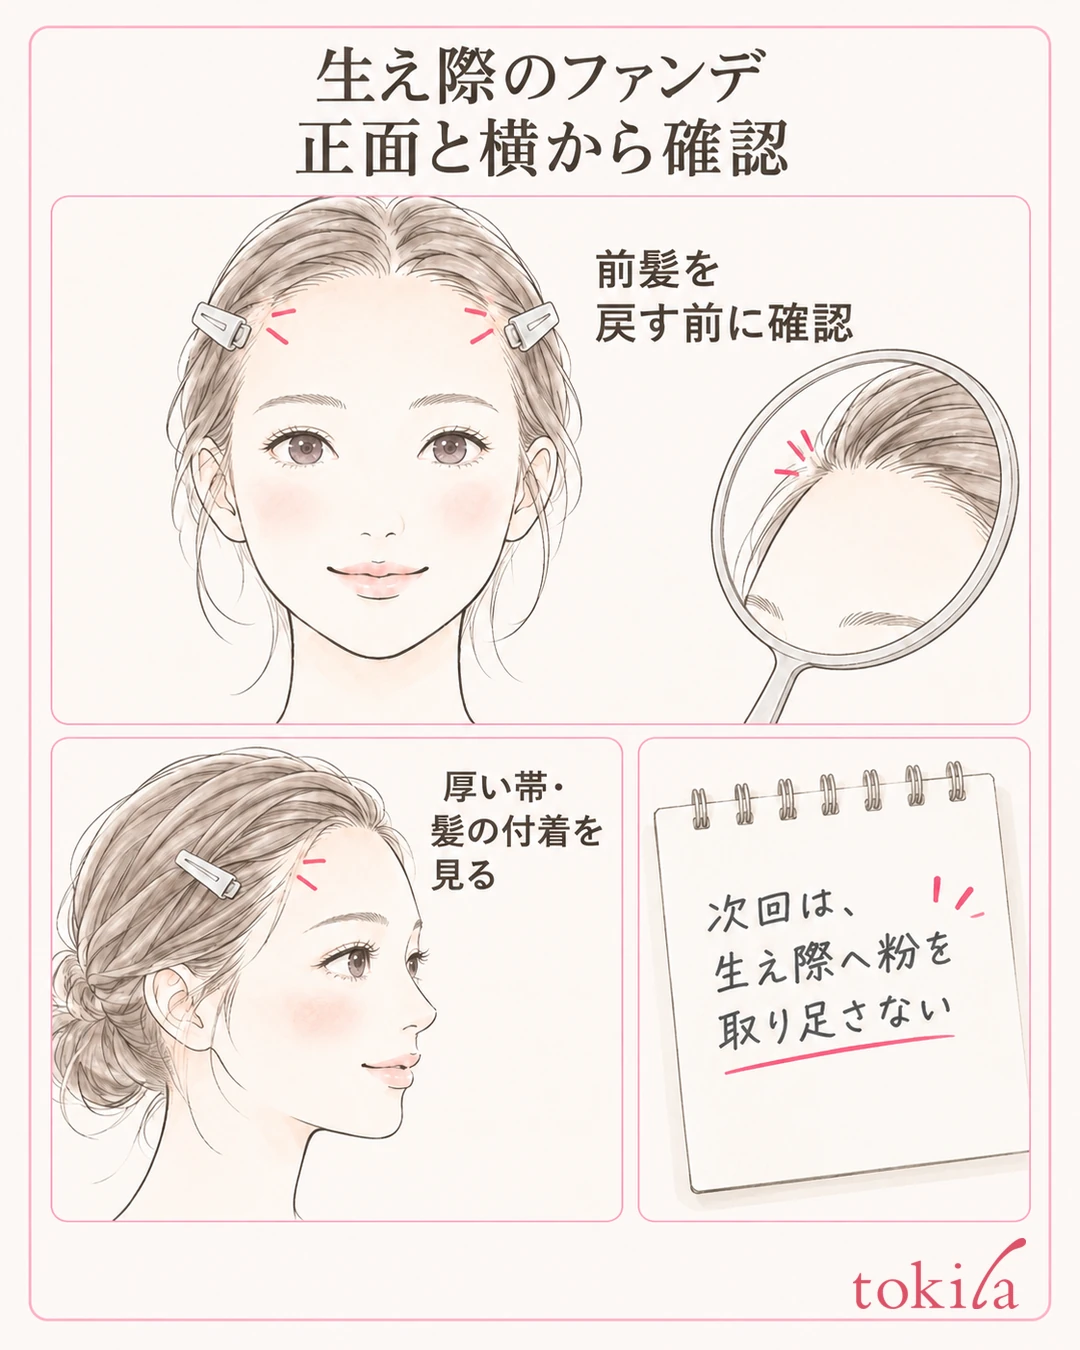
To even out the left and right, you do not need to add the same amount to the side that is already tidy. After you neatly fix a band that remains on only one side, look at both sides again from a distance. The longer you zoom in on one part, the more you want to add, but make the end point where your whole face blends naturally.
After putting your bangs back, lightly move your hair aside once more and check that no new streaks have formed on the skin you touched. If your hair is pressed hard against your forehead, that gives you material to reflect on the thickness right after finishing and how you handled your hair. However, one instance of color getting on your hair does not decide how well the product suits you or how long it lasts.
Next time, choose one action from "do not pick up more powder at the hairline," "return the place where you put the liquid to the center side of the forehead," and "move your hair aside with clips first," whichever fits where you had trouble. Keep to the amount and usage specified by the product, and organize your steps within that. Rather than changing the amount, tool and order all at once, it makes clearer what you are reviewing.
In your notes, record the foundation and sponge you used, the position where the band remained, and what you did just before. If you write "right temple, band after picking up powder again, next time connect with the remaining powder," your check points for next time become concrete. If you compare photos, match the light and angle, and do not treat brightness correction of the image alone as a difference in the finish.
Fixing the hairline does not have to start with redoing your whole face. Move your hair aside and separate thickness from product on the hair, blend thinly from the center outward, and step back to check. If you need to redo it, limit it to a small area, and finally look from two distances, front and side. That is the procedure this time.



