
The polish looked smooth right after you applied it, but small round bumps have appeared. When bubbles bother you, before adding more color on top, look back separately at how you mixed the liquid, how thickly you applied it in one coat, and where you let it dry. You do not need to settle on a single cause from appearance alone.
This article is a way to review bubbles in typical air-drying nail polish. It does not apply as is to gel that is cured with a light, press-on types, or water-removable types. Handle the nail you are concerned about one at a time, and give priority to the label of your product for how to mix it and when to layer coats.
1. Tell whether it is a bubble in the film, or glitter or dust
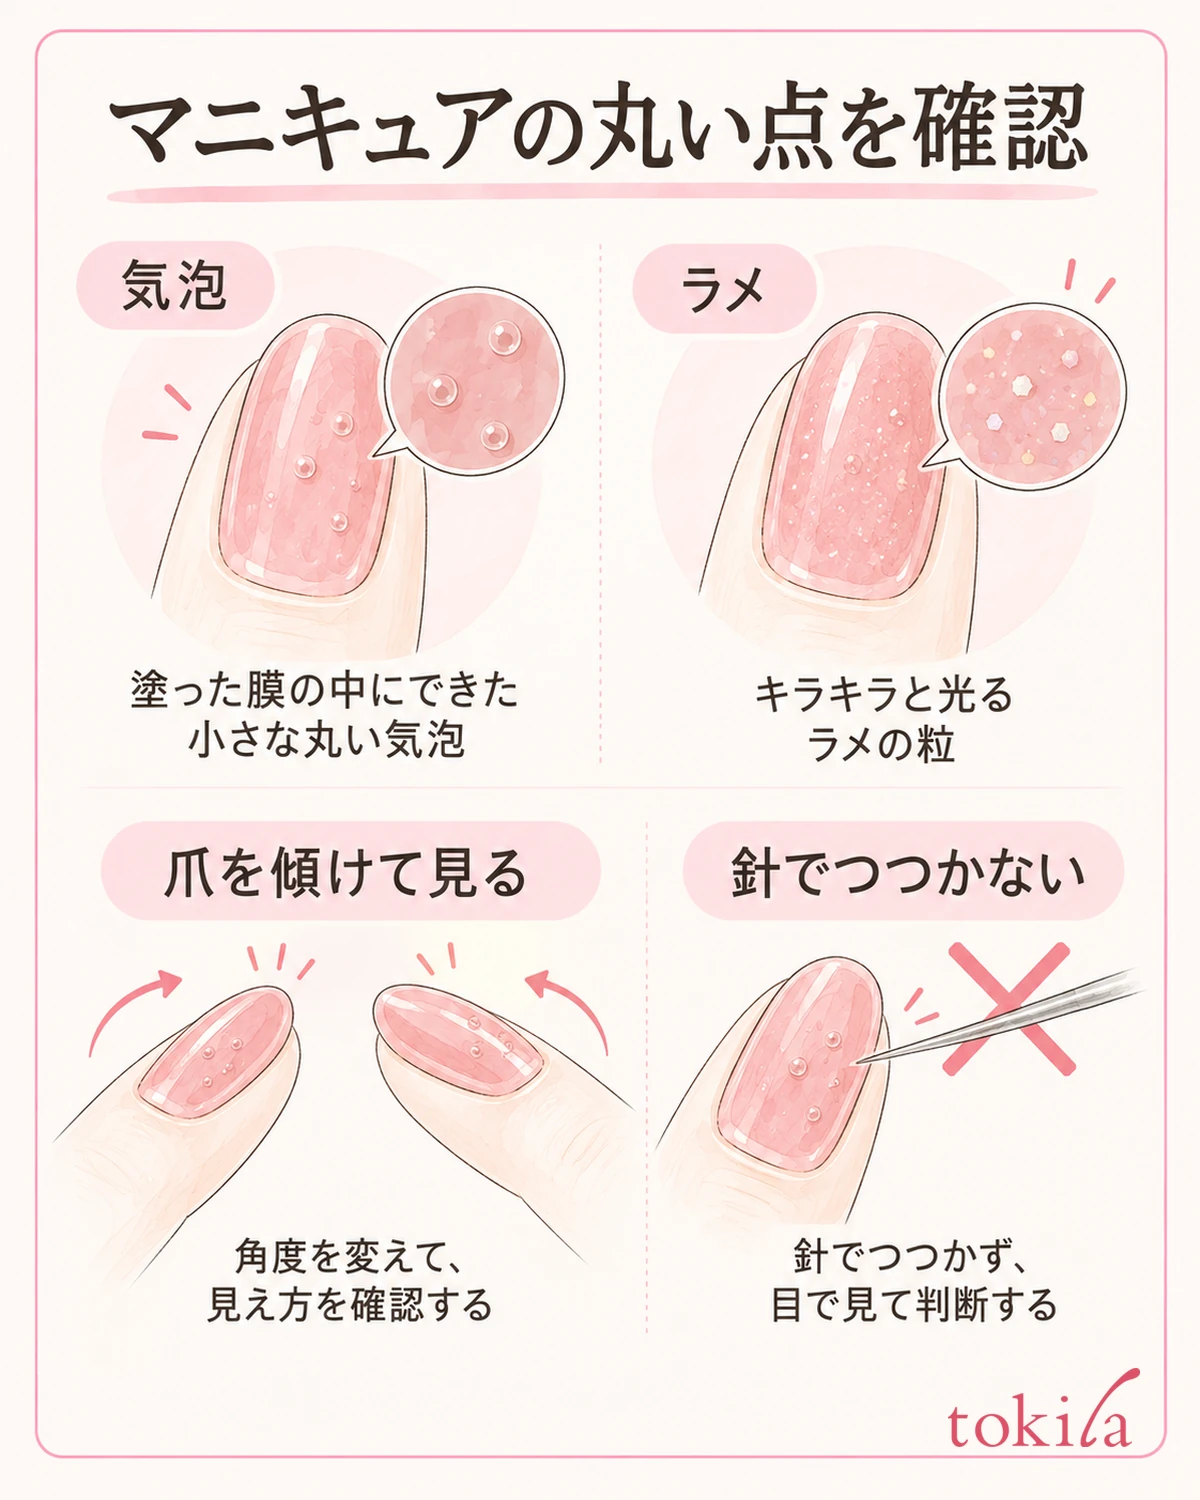
First, in a bright place, tilt your nail a little and look at the surface. Check whether the small round bumps or hole-like spots appeared after you applied the color. Particles of glitter or pearl, dust that has stuck, and the natural ridges of your nail can look the same. Do not probe the nail surface with a finger or a needle; sort it out from what you can see.
Look at whether it is only one nail or the same condition appears on several. If it is only one, think back to whether you loaded a lot of polish on that nail or touched it midway and added more. If it is several, also check steps they share, such as how you mixed the bottle and where you dried them. This is a clue for narrowing down the cause, not a judgment that attributes bubbles to deteriorated polish or a mistake in application from their position alone.
If you are still in the middle of painting, do not pile on color one after another to fill the bubbles; put the brush back in the bottle for now. Stroking a half-dry film over and over adds streaks and wrinkles on top of the bumps, and it becomes hard to tell where to start fixing. Before rushing to paint the remaining nails, recheck the polish and the brush you are using.
If glitter or similar particles are simply shining evenly, you may not need to repaint to get rid of bubbles. On the other hand, if dust has stuck, dealing with bubbles will not solve it. Also check whether fibers are floating from the desk or a towel, and tidy the place where you bring your nails close. Do not treat every small difference on the surface as a defect; start by deciding the range that bothers you and the step to review next.
If the same ridges or discoloration remain on a bare nail, think of them separately from bubbles in the applied film. Do not file the nail hard or layer thick color in order to get rid of those ridges. If you cannot tell whether it appeared only in the film, you can choose to skip color this time instead of forcing any treatment of the surface.
2. Check the condition of the liquid and mix it as the label directs
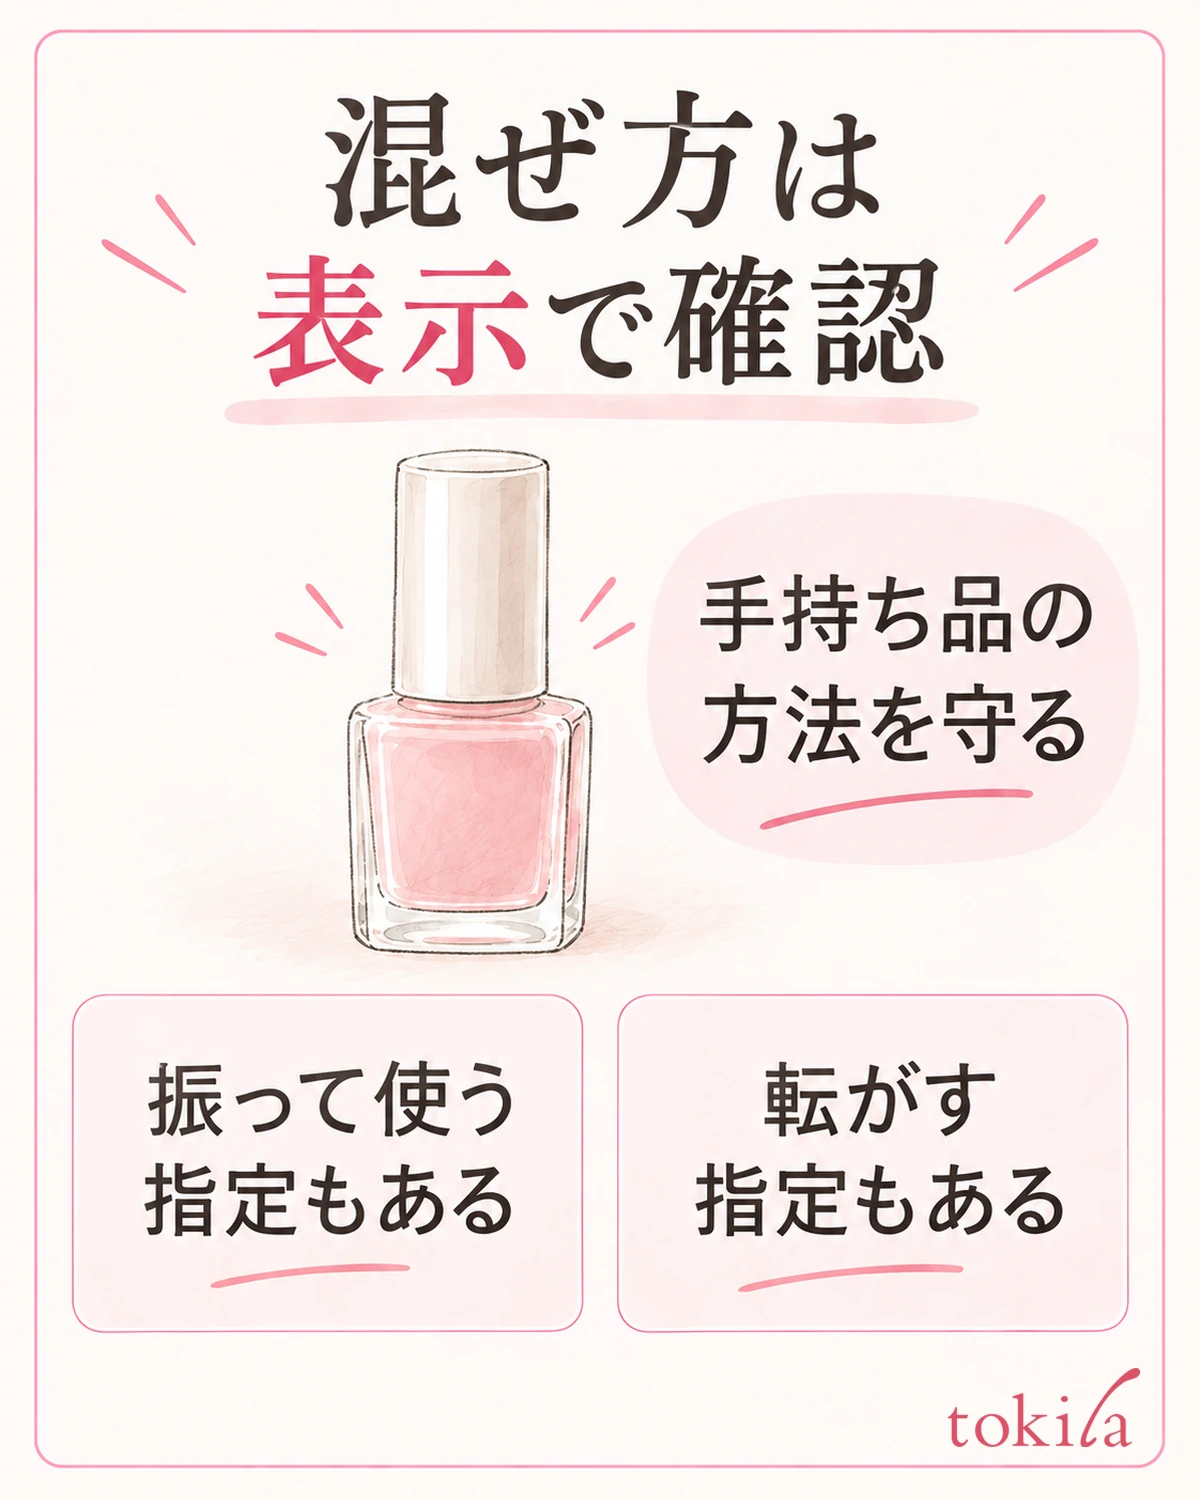
Before using a bottle, look at whether large bubbles remain in the liquid, whether the color has separated, and whether the polish pulls into strings on the brush. Separation alone does not necessarily mean it cannot be used right away. However, do not assume that a liquid that looks different from usual will always return to normal if you mix it for a long time. Check how to mix it before use and how to store it on the container or outer box.
Some types are mixed gently by tilting the bottle and rolling the ball inside. Other products specify shaking before use. Do not change every product to the same motion because bubbles bother you; handle the product according to its instructions. When you do not know how to mix it, avoid continuing to shake it vigorously up and down.
If noticeable bubbles remain in the mixed liquid, do not carry them to your nail; close the cap and leave it for a while. The time until the bubbles disappear cannot be set for all products. Do not assume that waiting some number of minutes is always enough; look at the liquid and brush again when you use it. There is no need to pump the brush in and out vigorously to get rid of the bubbles.
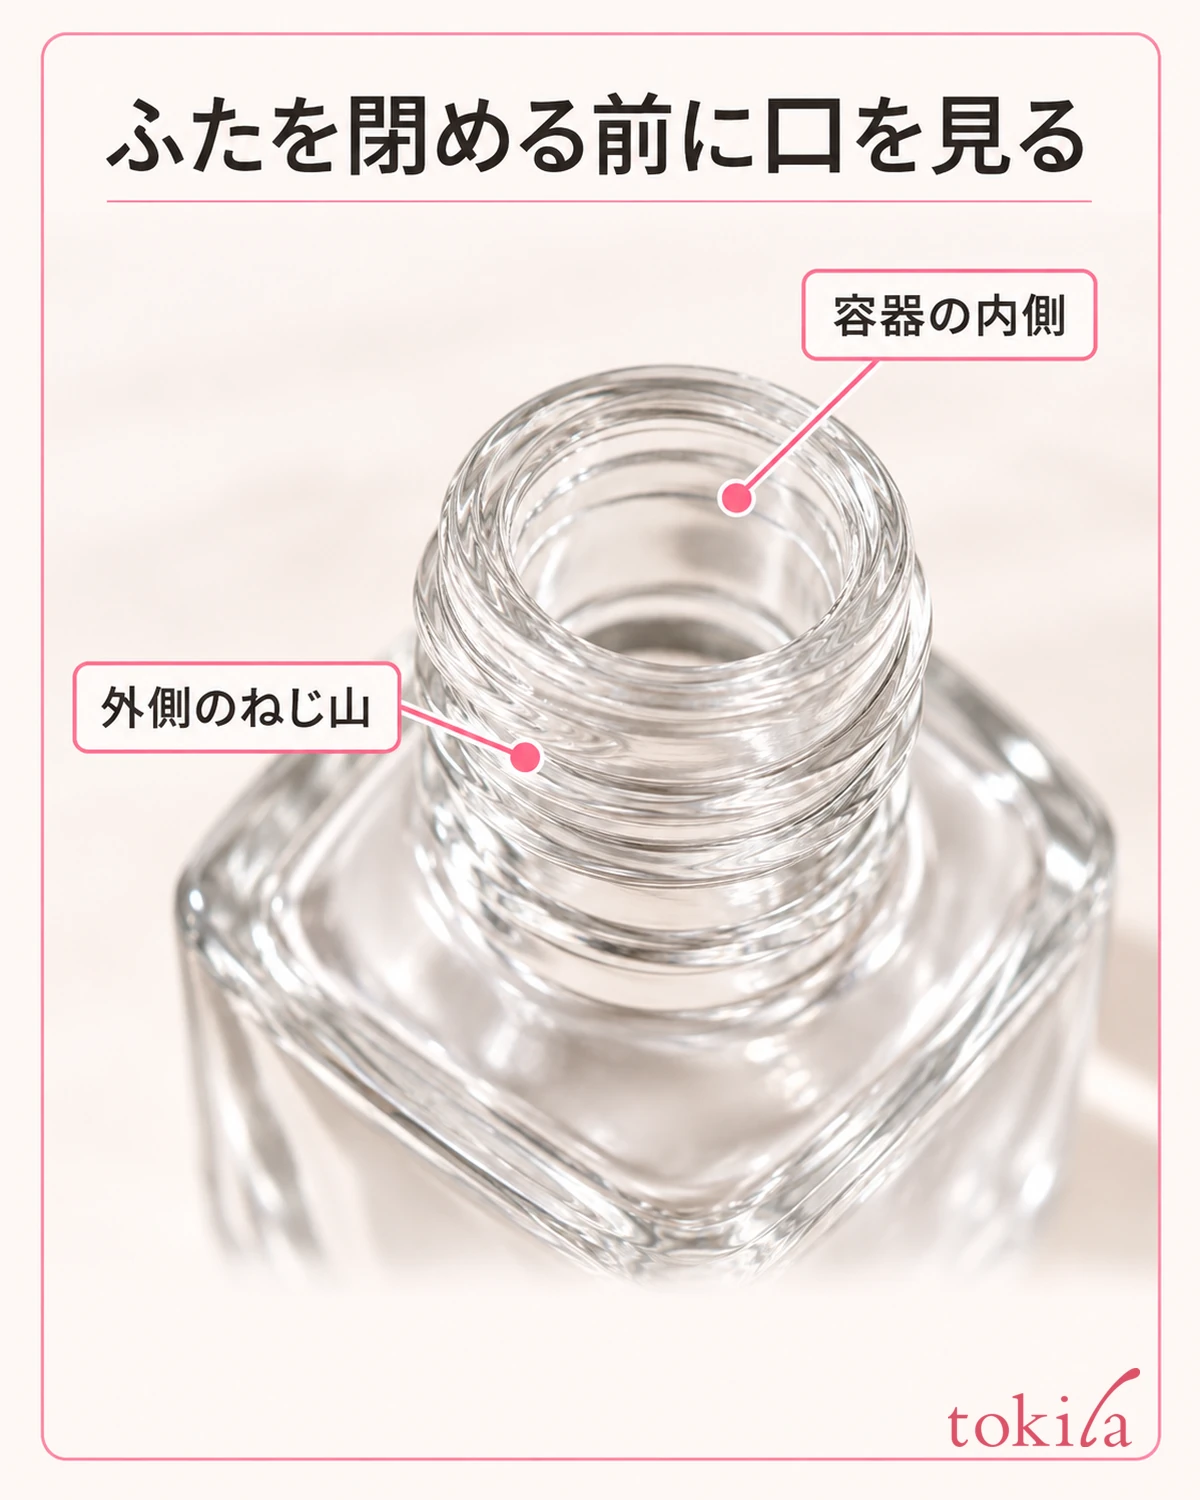
If the liquid is thick and hard to spread thinly, check its condition of use before stretching it with force. Putting remover into the bottle is different from using it to take color off your nails. Even when you thin it, do so only when you can confirm the matching dedicated liquid and how to use it. Do not mix in water or solvents you have at hand on your own judgment to adjust it.
Store the bottle as the product specifies. Warming the bottle or chilling it in a refrigerator as a measure against bubbles is not made a common method. When you are not working, keep the cap closed and do not place it in direct sunlight or near fire. Rather than forcing yourself to use up a liquid that is hard to use, it is fine to switch to another color for the day or to skip painting.
3. Wipe off excess polish from the brush and do not make one coat thick
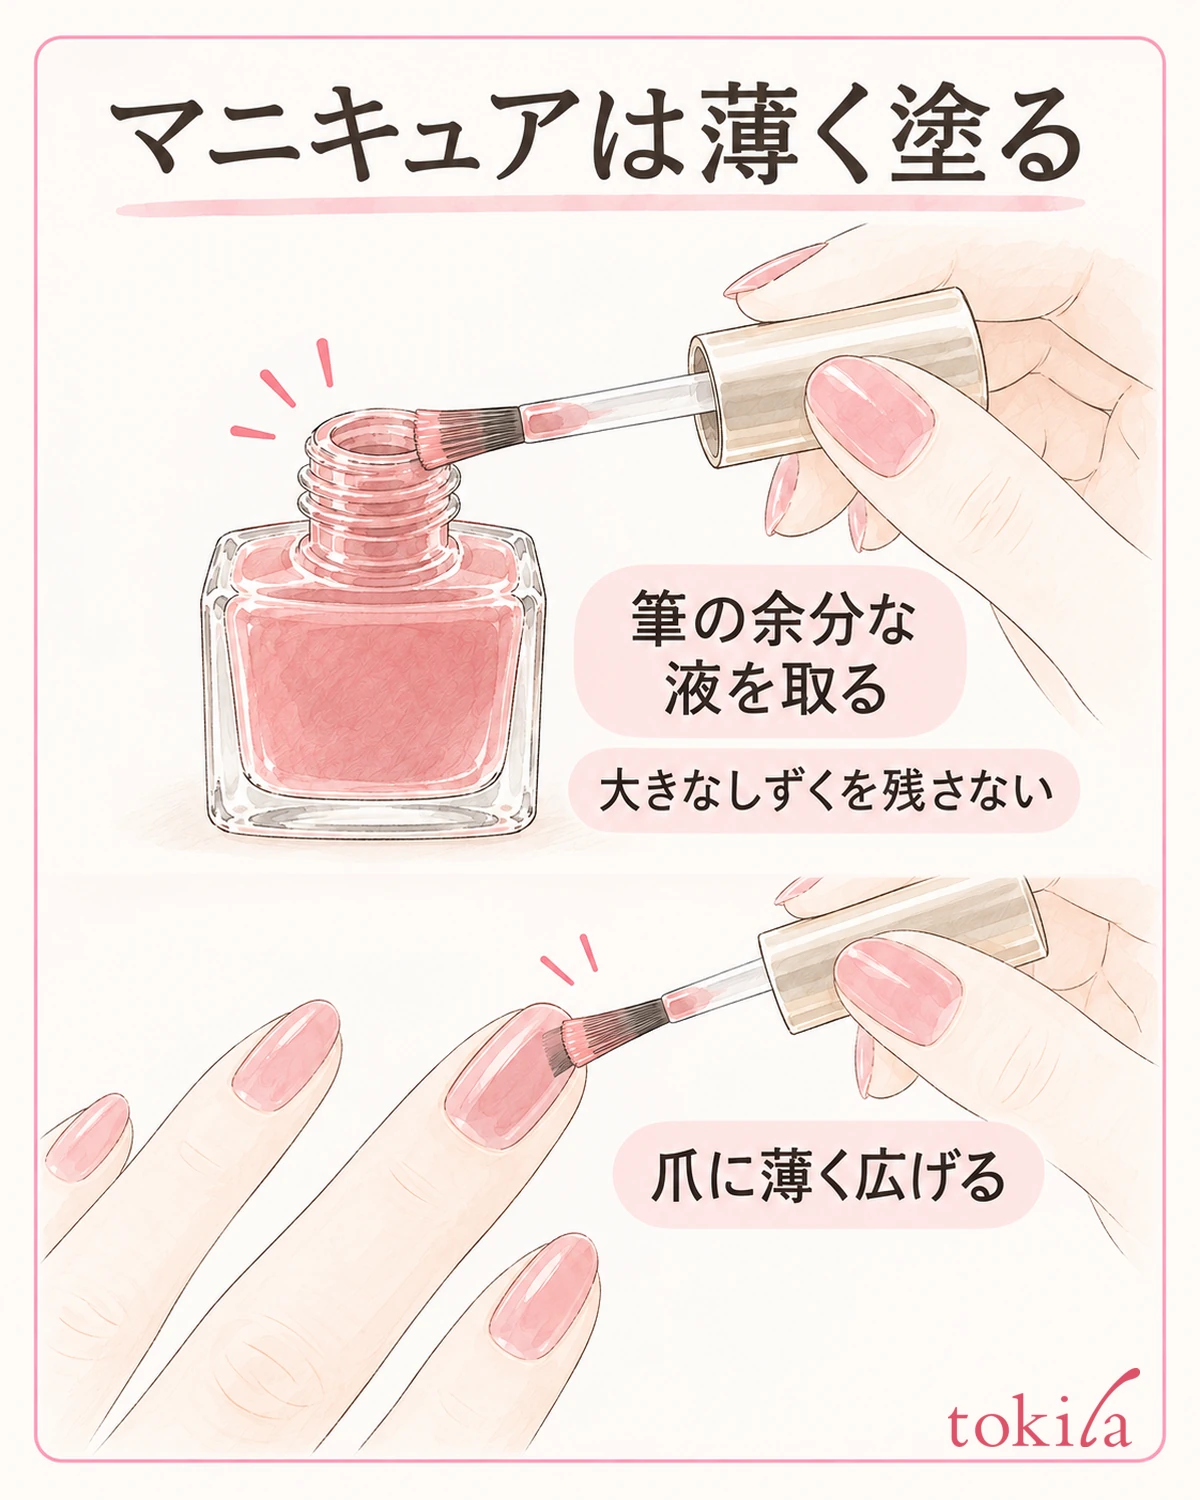
Before placing it on your nail, remove the excess polish from the brush at the mouth of the bottle. If a large drop is about to fall from the tip, do not put it on your nail as is; adjust the amount before bringing it over. How many times to wipe depends on the width of the brush, the thickness of the polish and the size of your nail, so you do not have to copy a number of times. The goal is also not to make the brush nearly dry.
Touch the brush lightly to the nail, spread the color from the center toward the tip, and then tidy the left and right sides. Do not load a large amount of polish to get a deep color in one go, and do not leave pools of raised polish. If you press the brush hard and splay the bristles, the color may run sideways or the thickness of the film may be uneven. Relax your pressure enough that you can see the nail touching the brush as you go.
Some colors look sheer in a single coat. If you add polish to the same spot every time you see sheerness, it tends to become a partly thick coat. For the first layer, check for uneven thickness rather than depth of color, and do any needed layering in the next step according to the product's directions. If the product directs a single coat, do not change that condition and pile on layers.
If the brush catches from the start of painting, it may not be only a matter of the amount of polish. Recheck the condition of the liquid, whether color has hardened on the brush tip, and whether the nail surface is dirty. Rather than keeping on filing the nail surface as a measure against bubbles, stopping the painting and checking the preparation that suits your product will lead to a better next decision.
If the amount of polish is not steady when you paint your dominant hand, where you support both hands also matters. For how to rest your hands, you can also see how to support your hand and the order to follow when painting your dominant hand's nails. There is no need to hurry in order to apply thin coats; proceed one nail at a time in a posture that is easy to move in.
4. Recheck the waiting time before layering and where the air blows
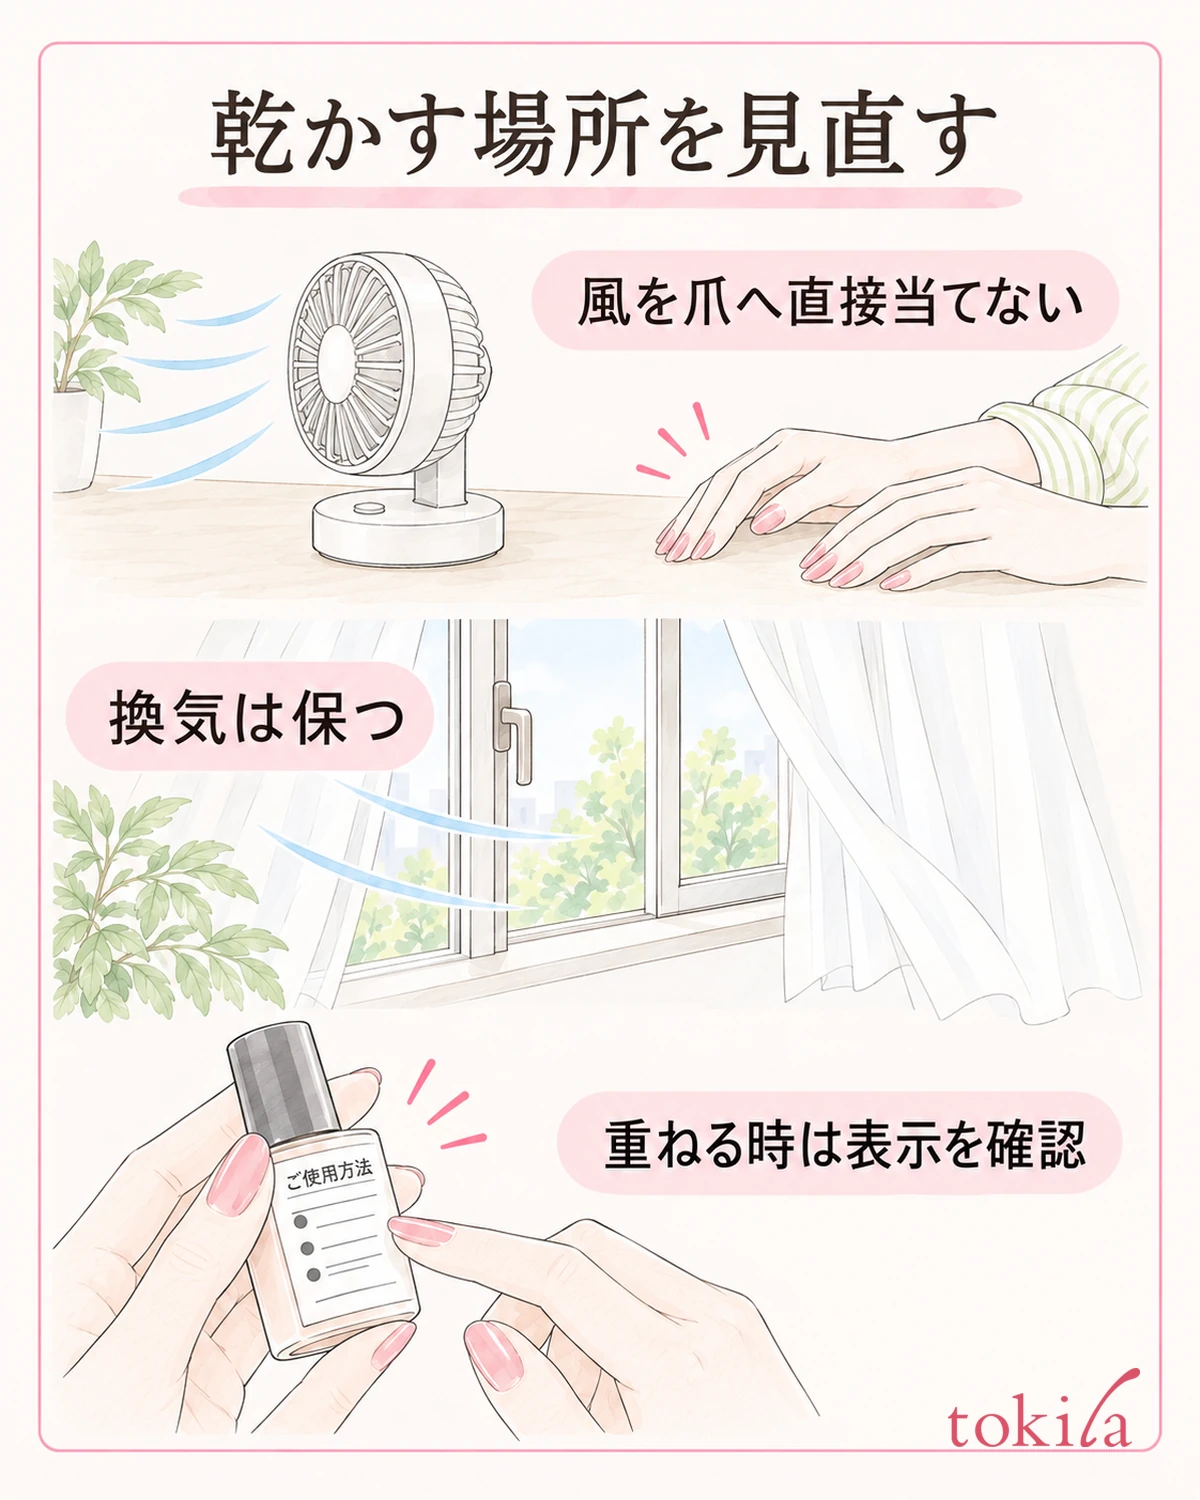
After applying one coat, follow the product's directions for when to layer the next. Even if it says quick-drying, it does not dry in the same number of seconds at every thickness. Even if the surface looks dry, the inside of a thick part is not necessarily in the same state, so avoid touching it repeatedly to check. Also avoid filling in a mark made by pressing with a finger by applying more thickly.
The thicker the layer you applied, the longer it may take to dry. If the waiting time becomes longer than planned, rather than adding more and more layers, choose either to make use of the sheer look of a single coat this time or to repaint. Check the finish you expect and the steps, including whether the product allows you to reduce the number of coats.
If you were keeping your hand right in front of a fan or an air conditioner vent, move it to a position where the air does not blow directly on your nails. Keep the room ventilated, and do not use the method of drying only your hands quickly with hot air. Keep fire away from where you use the bottle or remover, and there is no need to put your hand in a strong draft just because you opened a window.
If you look for a bag or keys while your nails dry, you may touch the surface and wrinkle it. Take out what you need before painting, and if you rest your fingers on a desk, keep your nails from touching it. Rather than thinking only about preventing bubbles, securing a time when you can stay without touching anything keeps you from adding steps of repainting midway.
On a day when you have little time before going out, you do not have to plan to finish the color on both hands. Instead of applying heat to shorten the drying time or layering liquids the product does not specify, you can choose to remove the color and tidy up today. The more limited your time, the more important it is not to try to make up for it by adding steps.
5. Remove only the nail that bothers you and repaint from the next coat
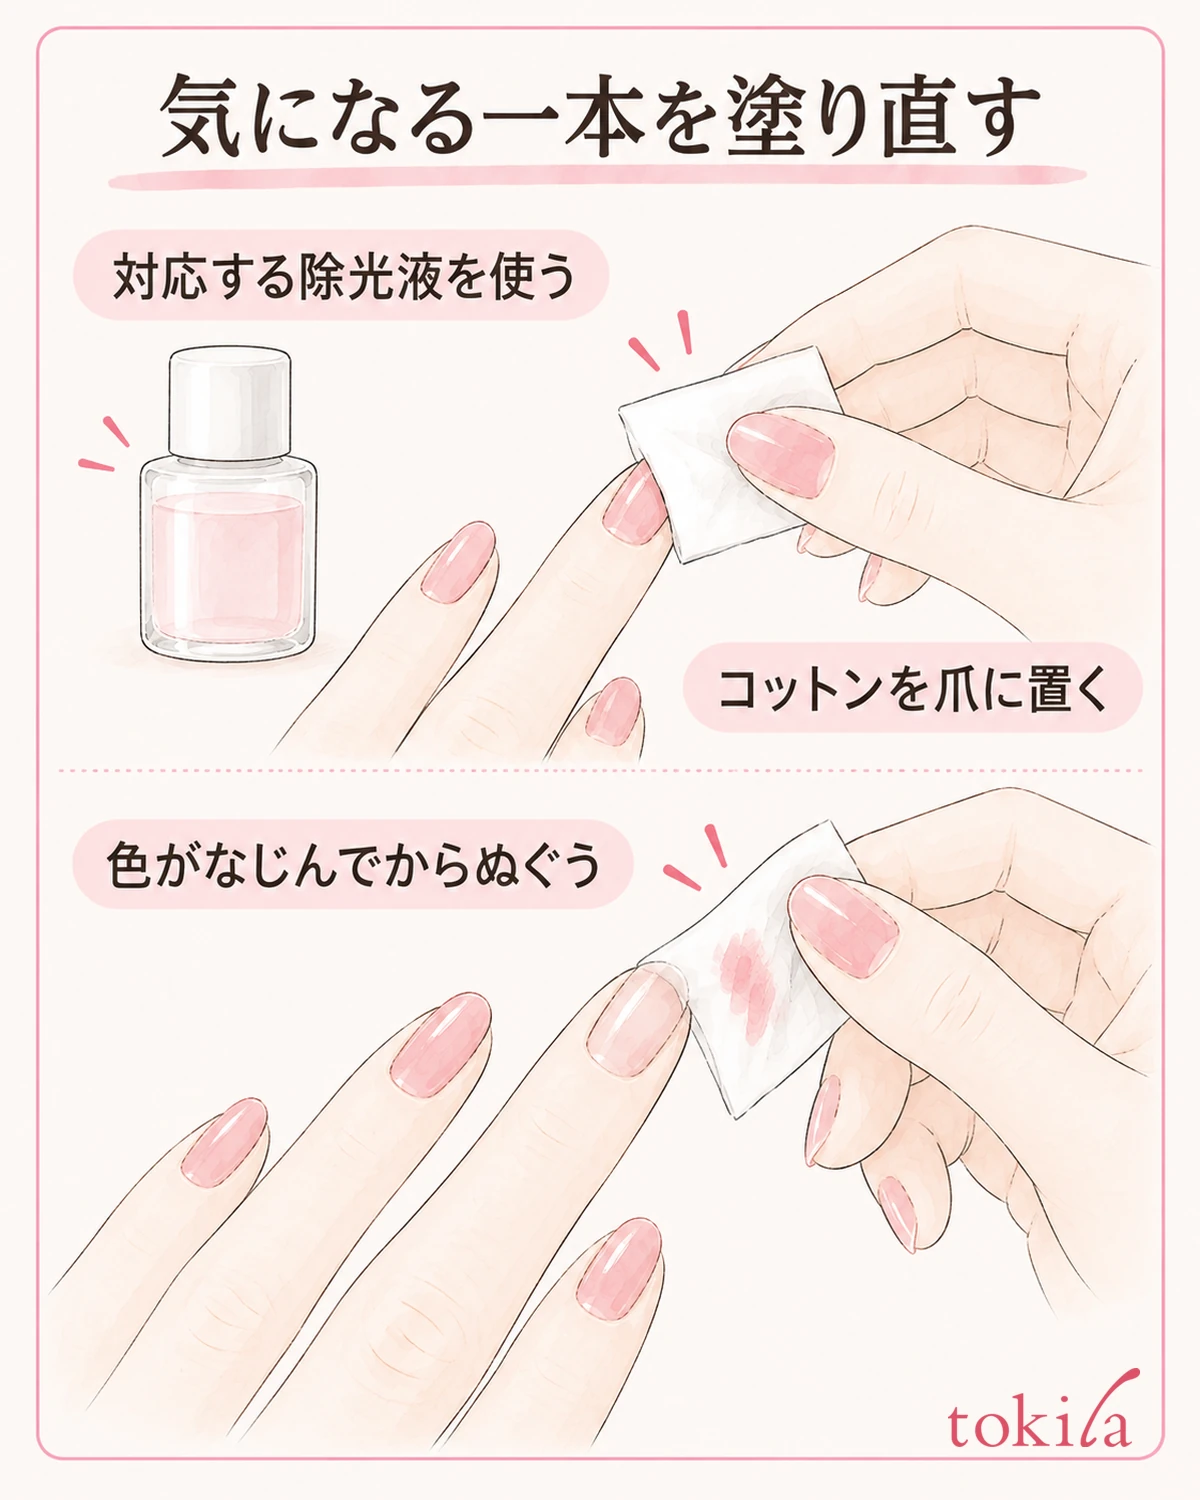
If there are many bubbles in a film that is nearly dry or already dry and the bumps bother you, you can choose to remove and repaint one nail at a time. If you pop every small spot with a needle or toothpick, or spread remover over the nail with a finger, it becomes hard to even out the film. Scraping only the surface is not made the standard quick fix for bubbles.
Prepare a remover that is compatible with the polish you are using, and soak a cotton pad as the label directs. Place it on the nail and, once the color has loosened, wipe it off by wrapping the pad around the nail. Do not rub hard over and over, and if color remains, switch to a clean part of the pad. Prepare your work area first so that the liquid does not get on furniture or clothing.
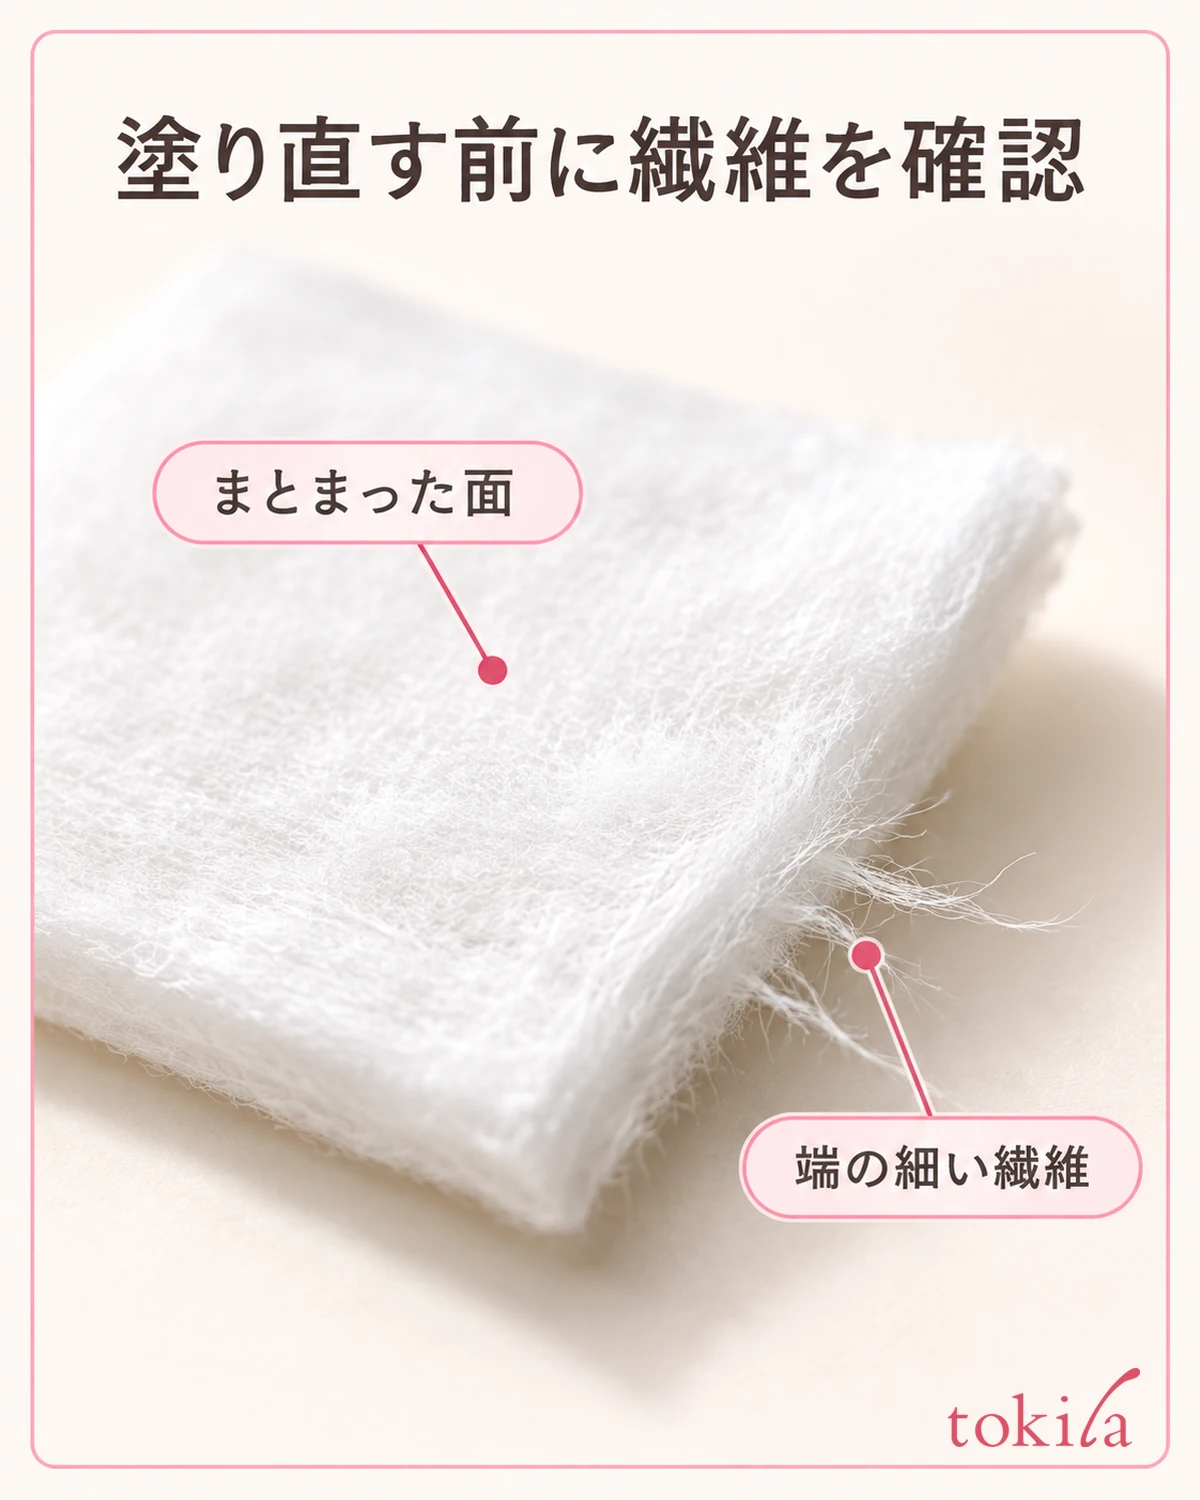
When you have finished removing it, check that no cotton fibers or liquid remain on the nail, and return to the preparation that suits your product. When you repaint, also check on your own product whether a base, color and top coat are needed and in what order. Reviewing the amount in the first coat makes it easier to sort out your steps than first adding a thick top coat to hide the bubbles.
On the next nail you paint, pick one step that bothered you this time and adjust it. For example, if the drop on the brush tip was large, adjust the amount of polish; if you were right under the airflow, adjust where you rest your hand. If you change how you mix, the color and the number of coats all at once, it becomes hard to look back and see which adjustment made it easier. However, if you were using the product differently from its label, correct that condition first.
On a day when it does not turn out as you hoped even after repainting, you do not have to keep removing and trying again. You can skip color this time, check how you are using the product and the condition of the liquid, and try again later. Rather than asking for a guarantee that bubbles will disappear completely, remembering "the nail that bothered me," "the step I reviewed" and "how I will paint next time" makes it easier to prepare for next time.



