
You pull your stockings all the way up, and the fabric is bunched diagonally on one leg only. You smooth the front of the knee, and now the toes feel cramped. When that happens, before pulling harder at the waist, take a look at where the direction of the fabric starts to change.
This article looks at twisting and uneven fabric while putting on ordinary pantyhose. It covers the front/back marking on the pair you own, how to line up the toes, and a step-by-step way to raise each leg a little at a time. Medical compression stockings and dedicated compression products are not covered, so please follow the wearing instructions that come with them.
1. Check the front/back marking and where the twist is
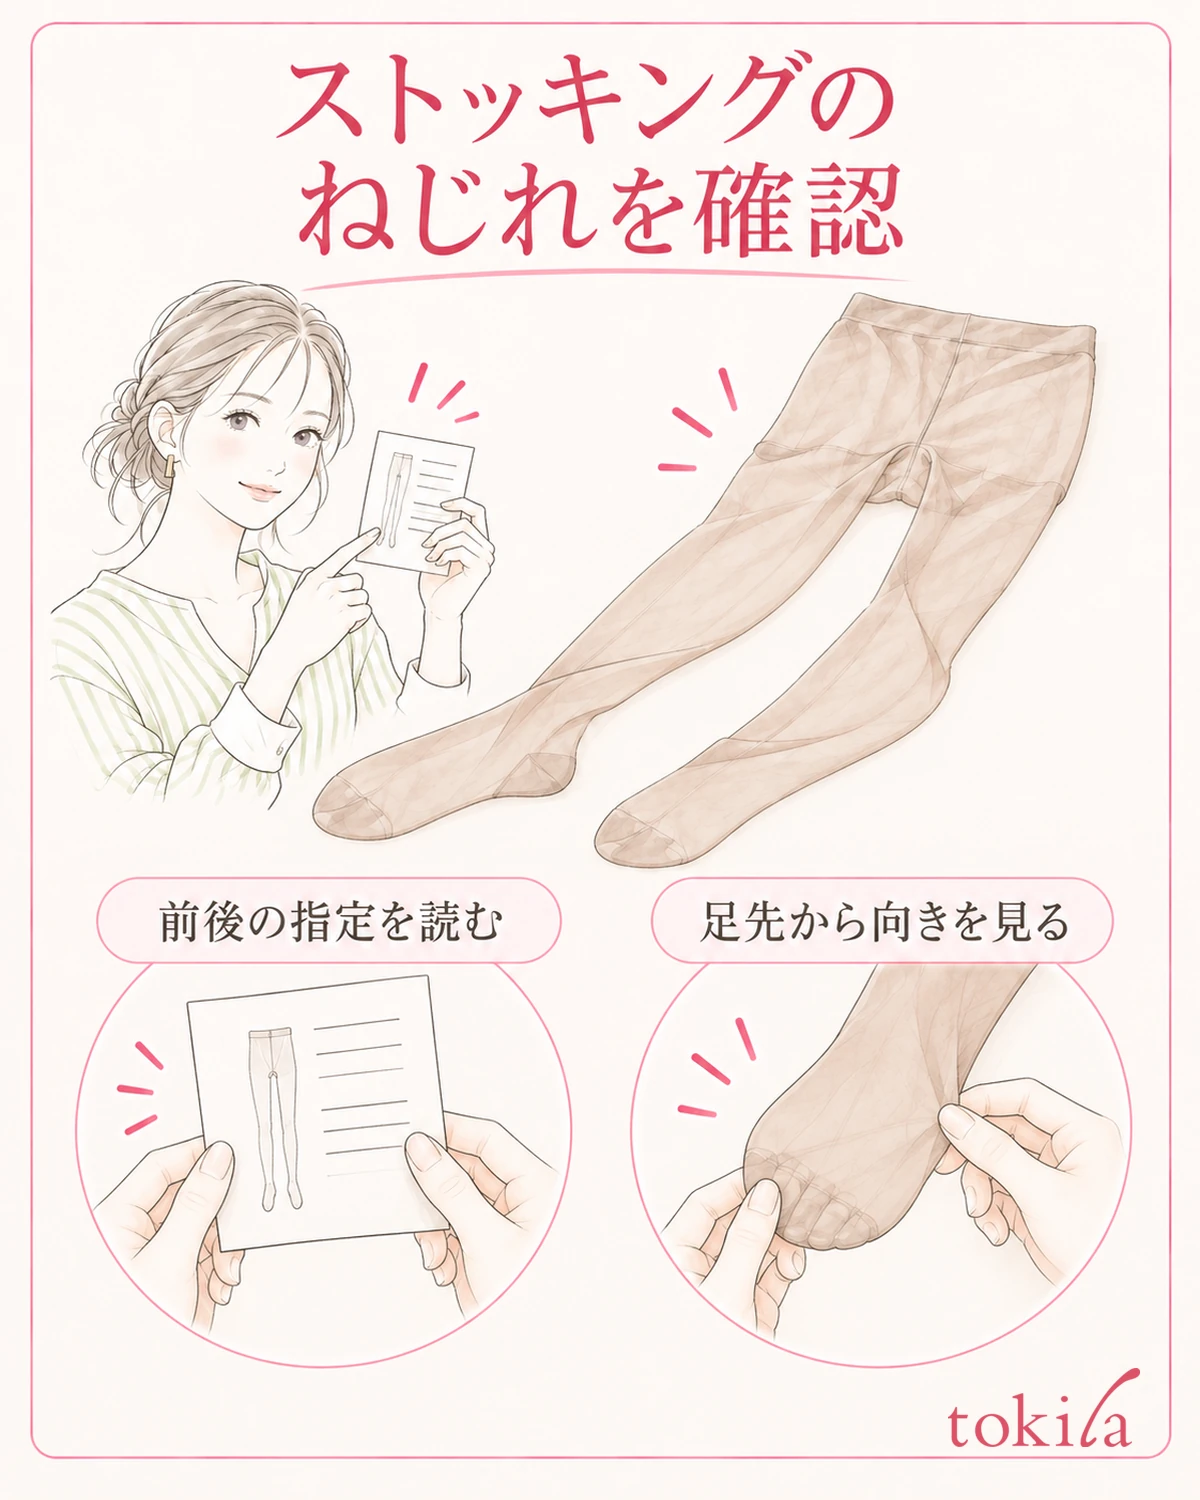
First, get the stockings and their package ready before putting them on. Read whether there is a mark or a tag explanation showing front and back, and whether the toe or heel shape has to be lined up in a specific way. The starting point is not to reuse a rule you learned on another product, such as "the side with the tag is always the back."
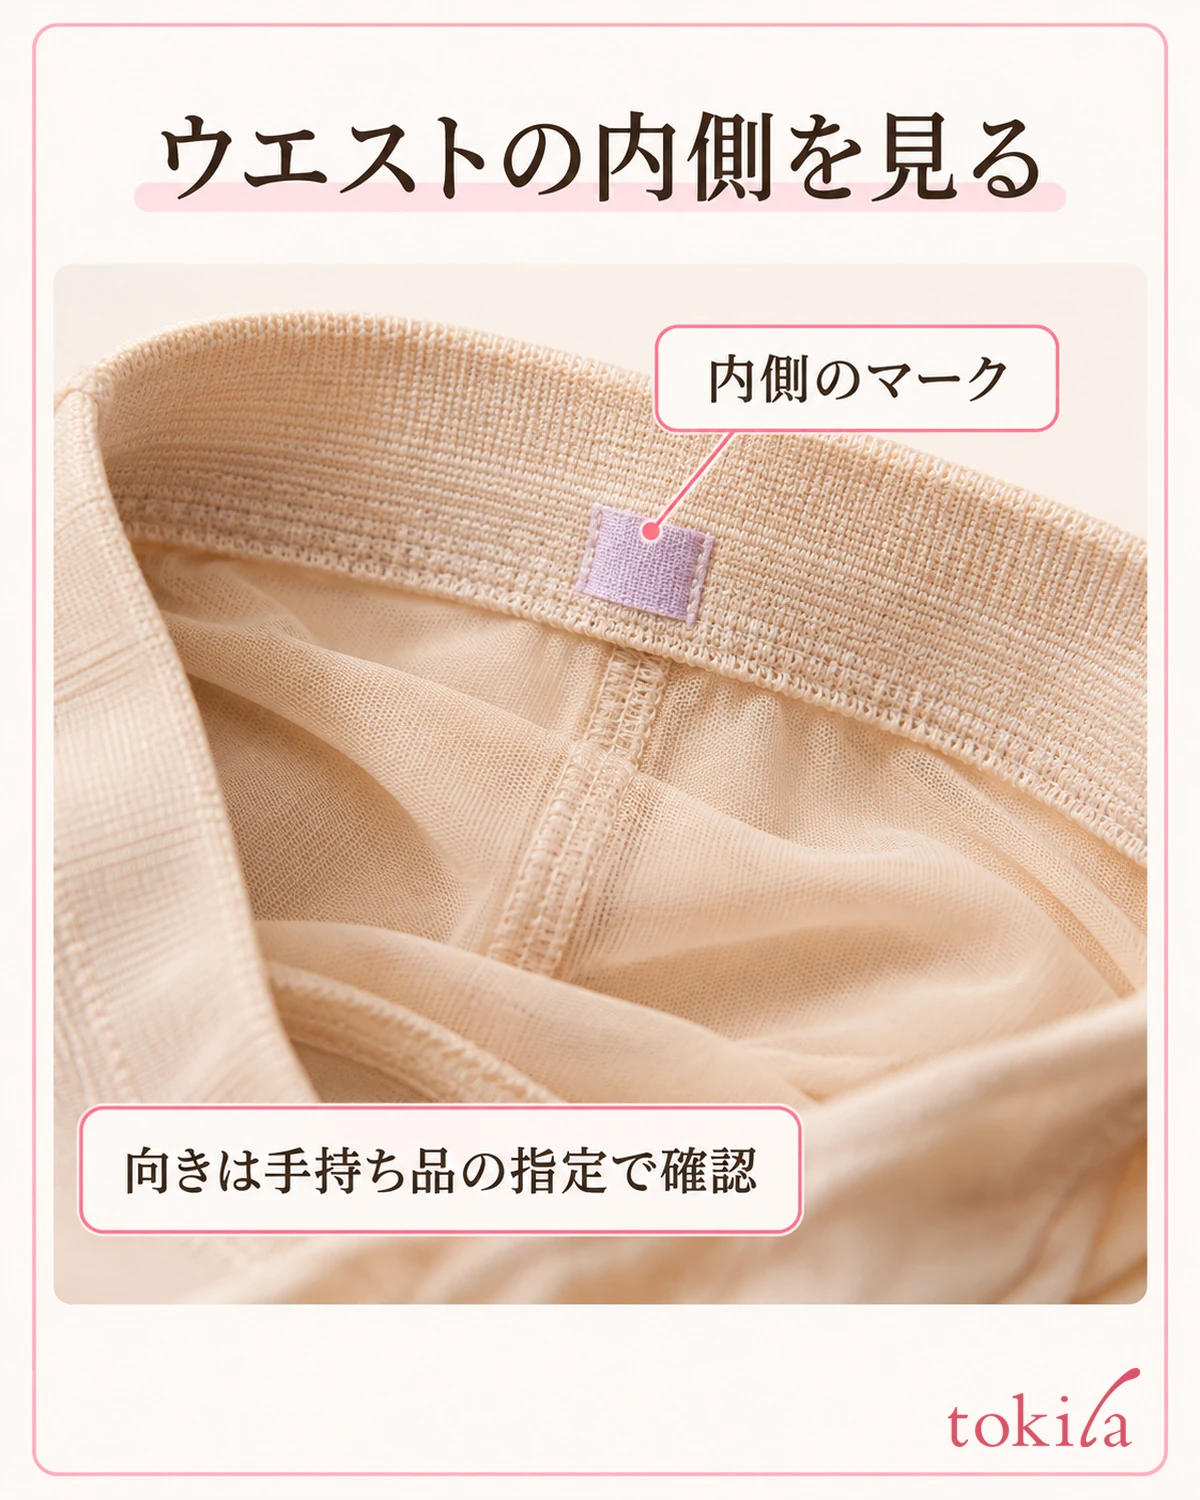
If the product has a mark indicating the back side, follow that. If you cannot find a mark, look at the inside of the waistband in a bright place rather than stretching the fabric to search for it. If you cannot decide the direction from the seams or the gusset shape alone, do not force them on until you can check the instructions.
If you notice a problem after putting them on, sit somewhere you can settle, and check in this order: toes, ankles, knees, crotch. Is it horizontal wrinkles piling up at the ankle, fabric shifting diagonally as if winding around the leg, or the whole thing pulling tight because it does not reach the crotch? Sorting out where it bothers you keeps you from trying to fix everything at the waist alone.
This order of checking is meant to find where the twist begins. Even if only the area below the knee bothers you, look at the direction of the toes before touching that spot. If the toes sit naturally and the fabric turns diagonal above them, remember the position that bothered you before taking them off, so you can stop and check at the same place when you put them on again.
Do not conclude that there is a twist from differences in color shade alone. Lighting and how the fabric stretches also change the look, so view both legs under the same light and confirm whether there is an actual fold or unevenness. With patterned stockings, the direction of the pattern is a clue, but do not tighten your legs just to stretch the pattern vertical.
If the discomfort while wearing them is strong, there is no need to keep checking and put up with it. If you feel pain, numbness or the like, stop wearing them. Do not stretch this article's checks into a way of investigating the cause of a health problem or adjusting the strength of compression.
2. Prepare your hands and gather the fabric down to the toe
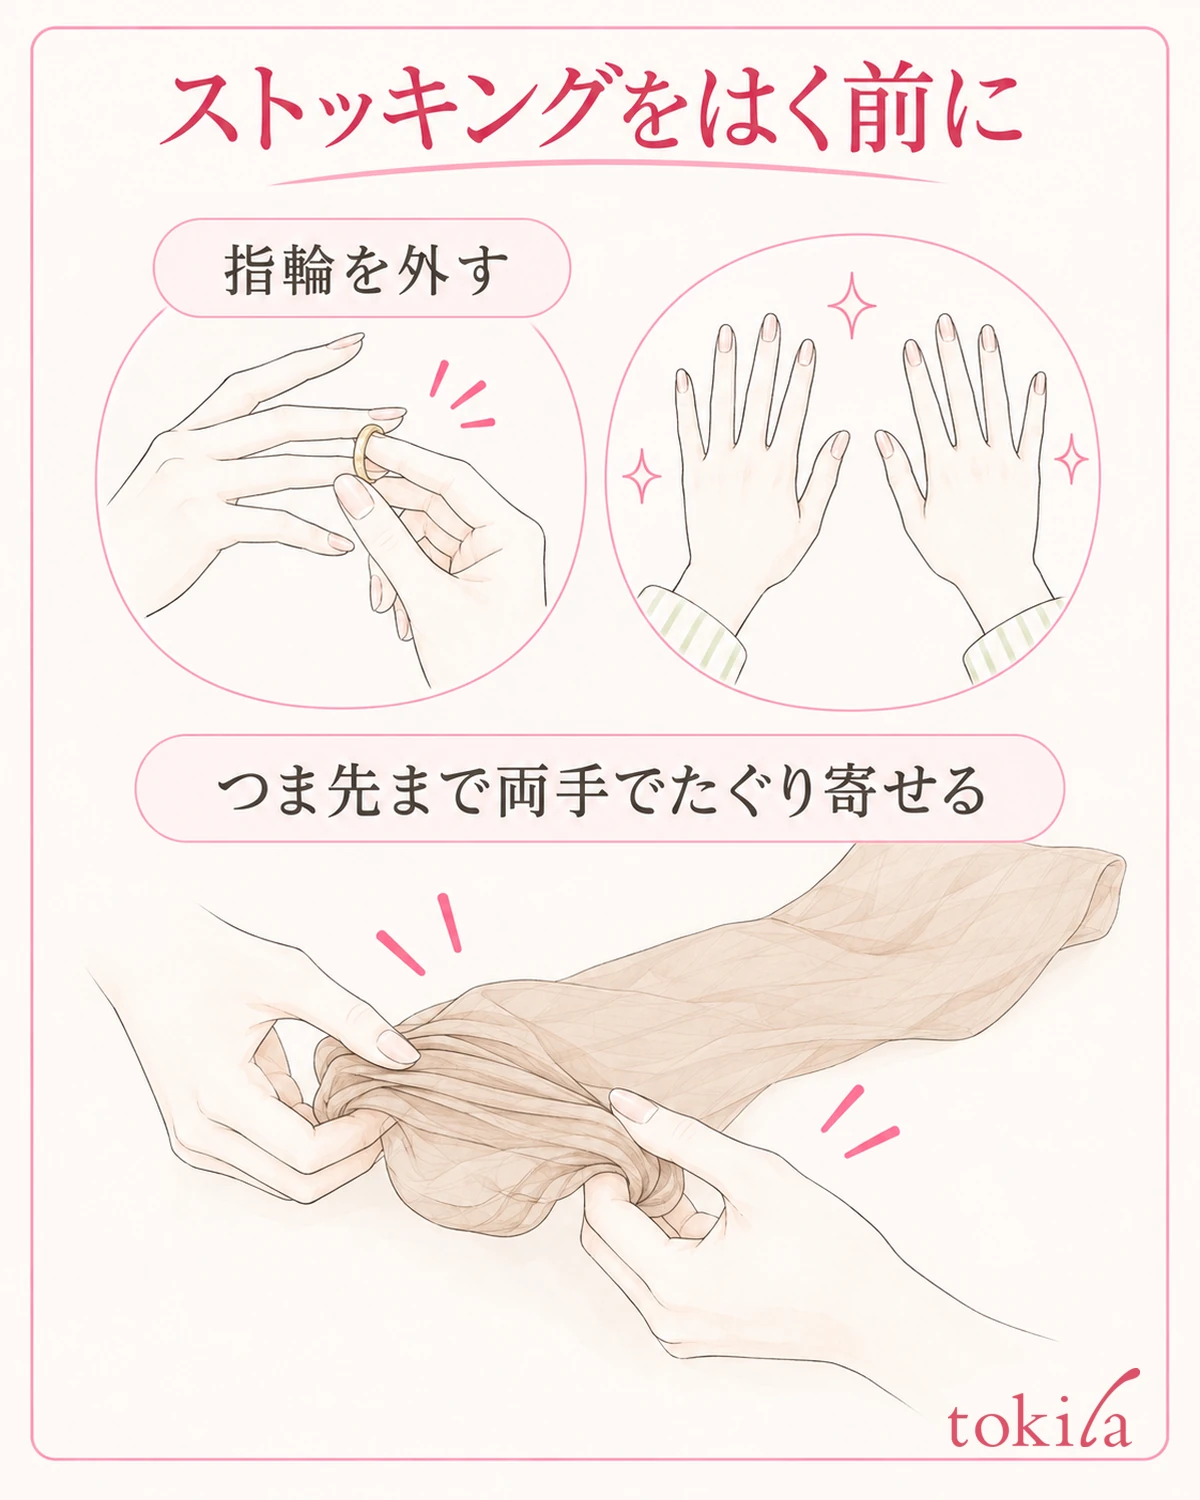
Before putting them on again, take off watches, rings and anything else that could snag the fabric. Watch out for nails and hangnails too, and handle the fabric with your palms and the pads of your fingers. Applying hand cream is not a required preparation. If slipperiness or residue on the product concerns you, clean your hands, dry them, and get them into a state where you can handle the fabric.
Sit in a chair so that you can move your feet steadily. Rather than standing on one foot and pulling in a hurry, which risks a fall, choose a spot where you can sit and check each foot's toes one leg at a time. Also make sure the fabric does not touch nearby zippers, bag fittings or a rough chair surface.
From the waist opening, gather one leg's worth of fabric little by little with both hands down to the toe. Do not twist the leg tube along the way, and keep the passage to the toe visible. There is no need to grip it into a tight lump. Do not dig your fingertips into the fabric; support the gathered fabric with both hands.
While gathering, receive the leg tube evenly with your left and right hands, and avoid bundling it by twisting it in just one place along the way. After preparing it, check whether you can see the toe at the far end of the opening. Once you know where the entrance and the tip are, you can stop before pressing your toes against fabric partway up.
If you push your foot in without finding the toe, it becomes hard to tell which part you are wearing. If the fabric is bunched inside out, or one leg is wrapped around the other, set it down on a clean surface for now, return it to its natural orientation, and gather it again.
If you find a hole or a snag at this stage, do not try to repair it by, say, pushing the thread back with a nail; instead, reconsider whether you can use that pair. This is so that a small flaw in thin fabric is not widened by the force of putting them on. If a new pair still has its backing card, do not push it in along with your foot; take it out first in the usual way.
3. Match the toes and raise each leg alternately to the knee
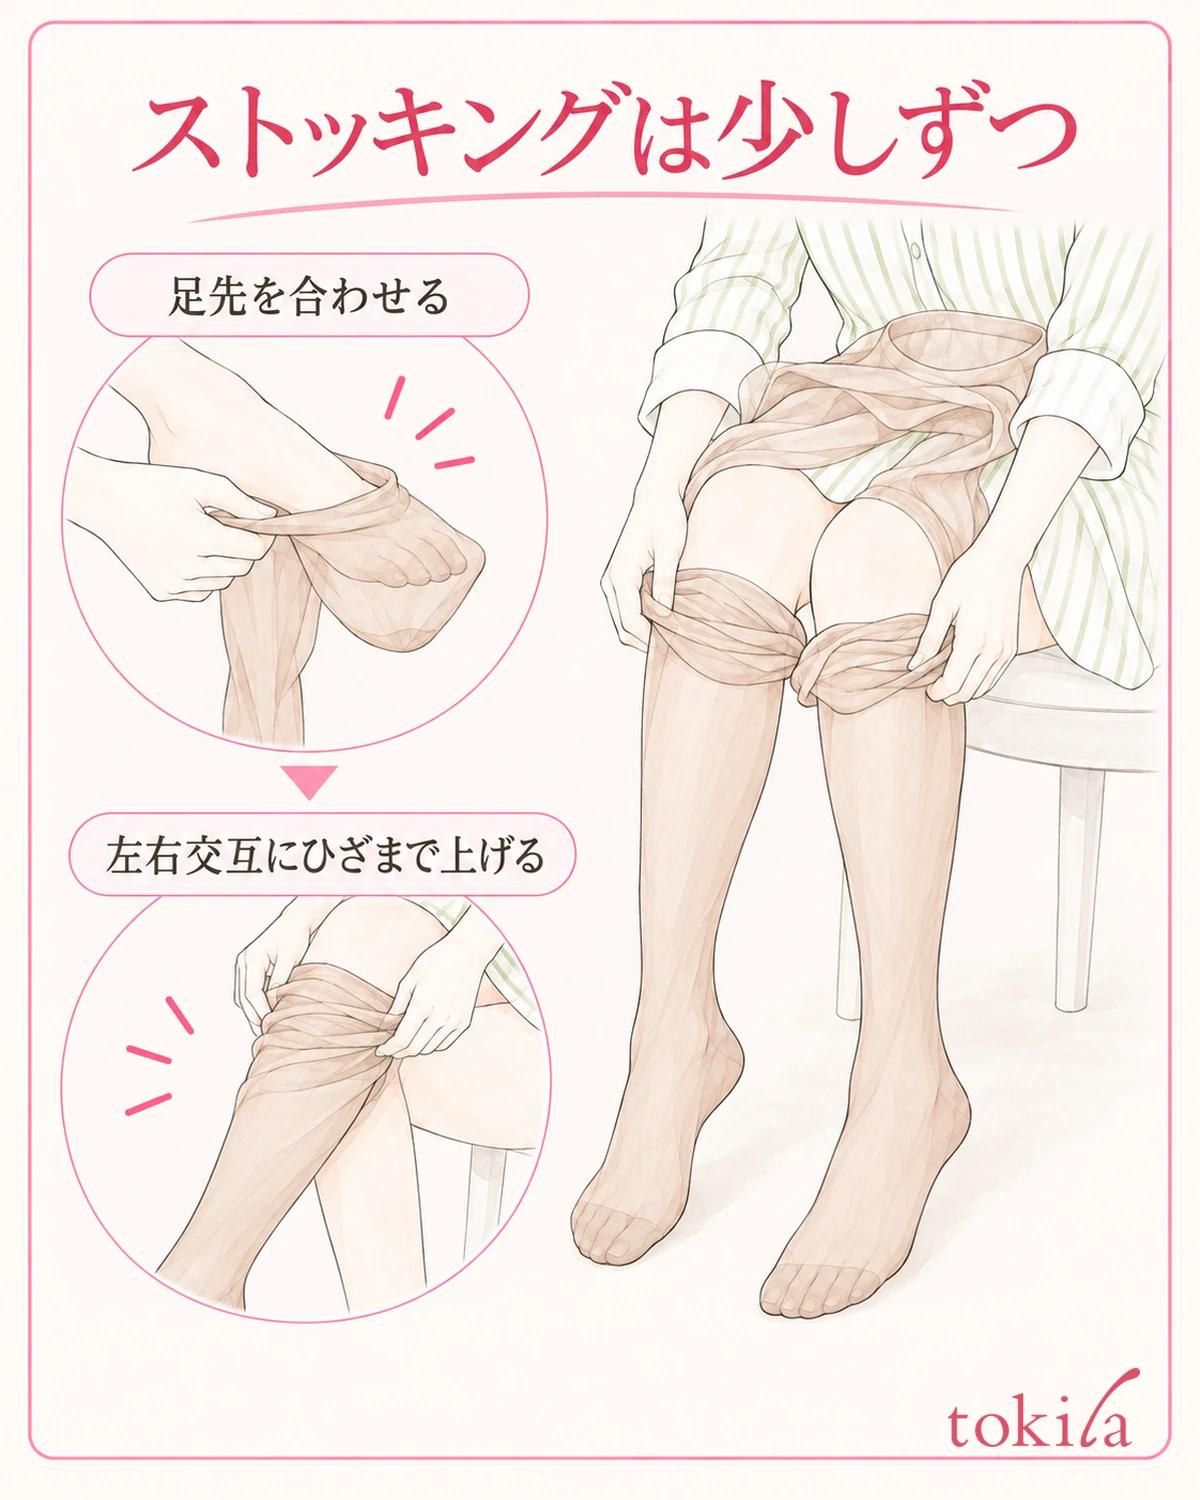
Put your toes into the gathered leg so that your toes settle naturally into the tip. If there is a specification for the toe seam or the heel shape, line that position up with your foot. With a product that has no heel shape, you do not need to look for the same outline as in the figure. Do not stretch the tip tight with your toes curled.
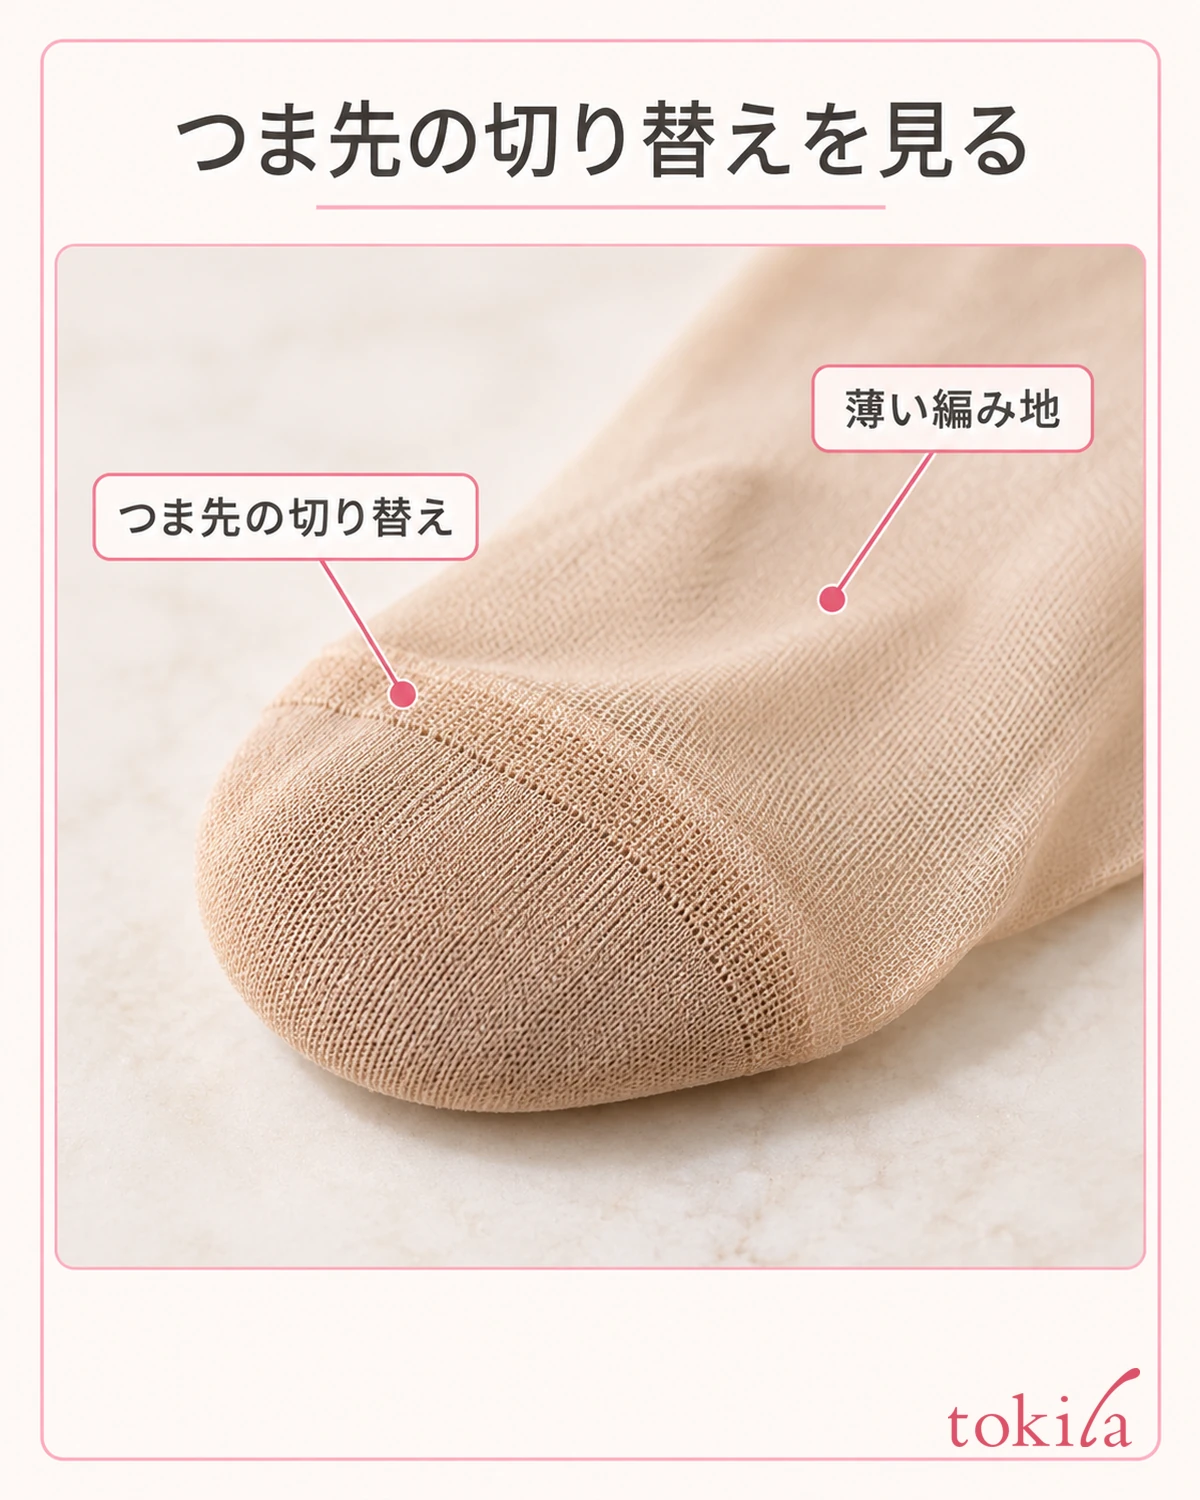
Once the fabric has settled over the toes, raise it little by little from the ankle. Support the surrounding fabric with both hands, and avoid pinching just one side thinly and pulling it a long way. As you go, watch whether the direction of the fabric is turning diagonally and whether wrinkles are collecting on one side only.
Match the toes of the other leg in the same way. Rather than raising only one leg all the way to the thigh at once, raise left and right alternately, a little at a time, up to the knee. If you put your thumbs inside, keep your nail tips from touching the fabric, and do not pull harder when you feel resistance.
"Alternately" does not mean measuring and matching the same number of centimeters each time. It means raising one leg a little, then the other, and checking both along the way. If one side has gathered fabric and the other is taut, do not even them out by force; stop for a moment and look at how the fabric is distributed.
When you reach the knee, stop once. In a seated position, check whether the toes feel cramped, whether the fabric at the ankle is folded in, and whether there is a large difference in how far the two legs have been raised. It is important not to keep pulling up the lower fabric just to make only the front of the knee look neat.
If you realize partway that the leg tube has rotated, do not continue upward; go back to putting them on again. Pulling only the top edge with the twist still in place does not let you check the direction of the toes. The more you are in a hurry, the easier it is to keep track of where things were still correct if you pause and check at the toe, ankle and knee.
4. If the twist remains, do not pull upward; put them on again
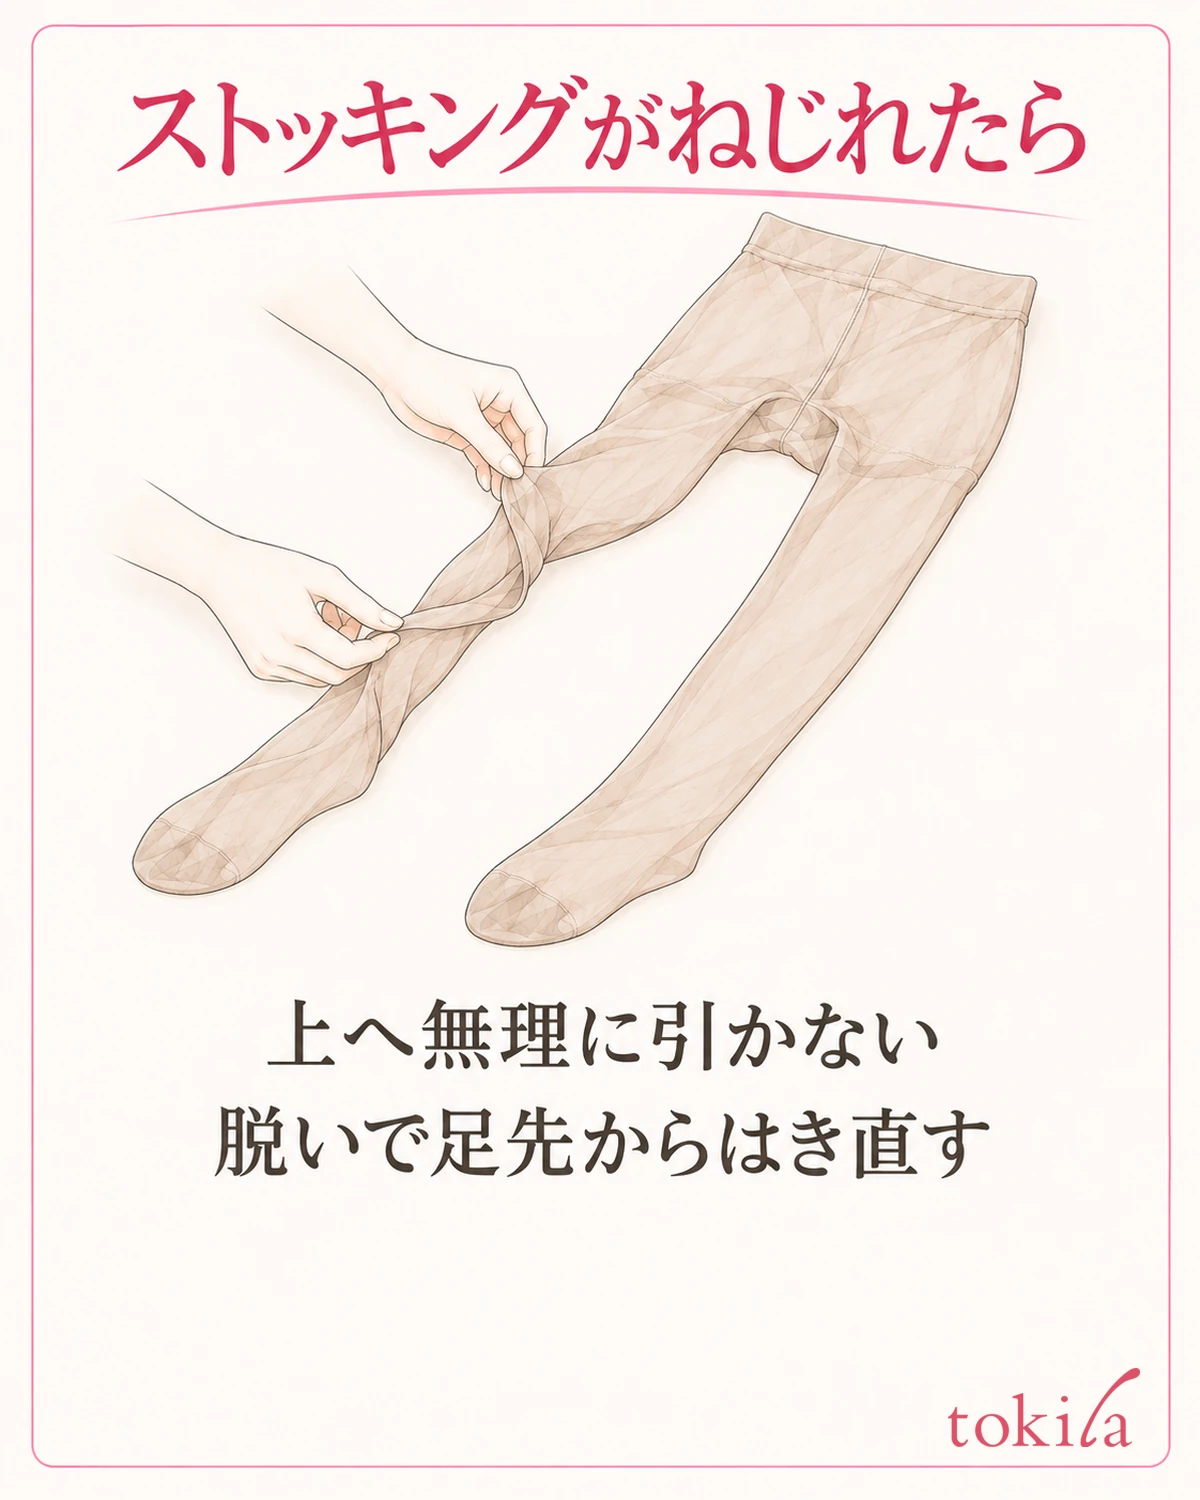
Even if it looks like turning the fabric near the knee would fix it, avoid twisting it hard while the lower part is taut. If you can no longer tell which way the fabric is facing, take them off calmly, return each leg tube to its natural state, and put them on again. Rather than correcting them by force while still wearing them, this means checking the direction again from the toes.
When taking them off, too, do not grab only the waistband and drag them down at once; lower them little by little on the left and right. If the toes catch, do not pull while standing; sit down and remove them while supporting the fabric with both hands. If you are wearing shoes, take them off first. Do not yank out fabric that has tangled in a fitting.
For stockings you have taken off, trace each leg from the toe to the top edge and straighten out any inside-out parts or twists in the tube. Even if some part looks stretched, do not pull on it to even out the length of the two legs. Check for noticeable damage such as holes or pulled threads, then decide whether to use them.
After putting them on again, raise them alternately from the knee to the thigh, a little at a time, match the crotch, and then adjust around the waist. Do not try to match up by pulling only the waist high when the fabric has not reached the crotch. Check from the bottom up whether the fabric is distributed over the whole leg without bias.
If they keep pulling tight in the same place, or still do not settle even when you follow the front/back marking, check the size label and the wearing conditions. There is no pull-up amount that applies to everyone. Rather than forcing a size outside the suitable range, or folding down the top edge to make it fit, you can also choose a different pair for that day.
5. Check the toes and crotch before and after layering clothes and shoes
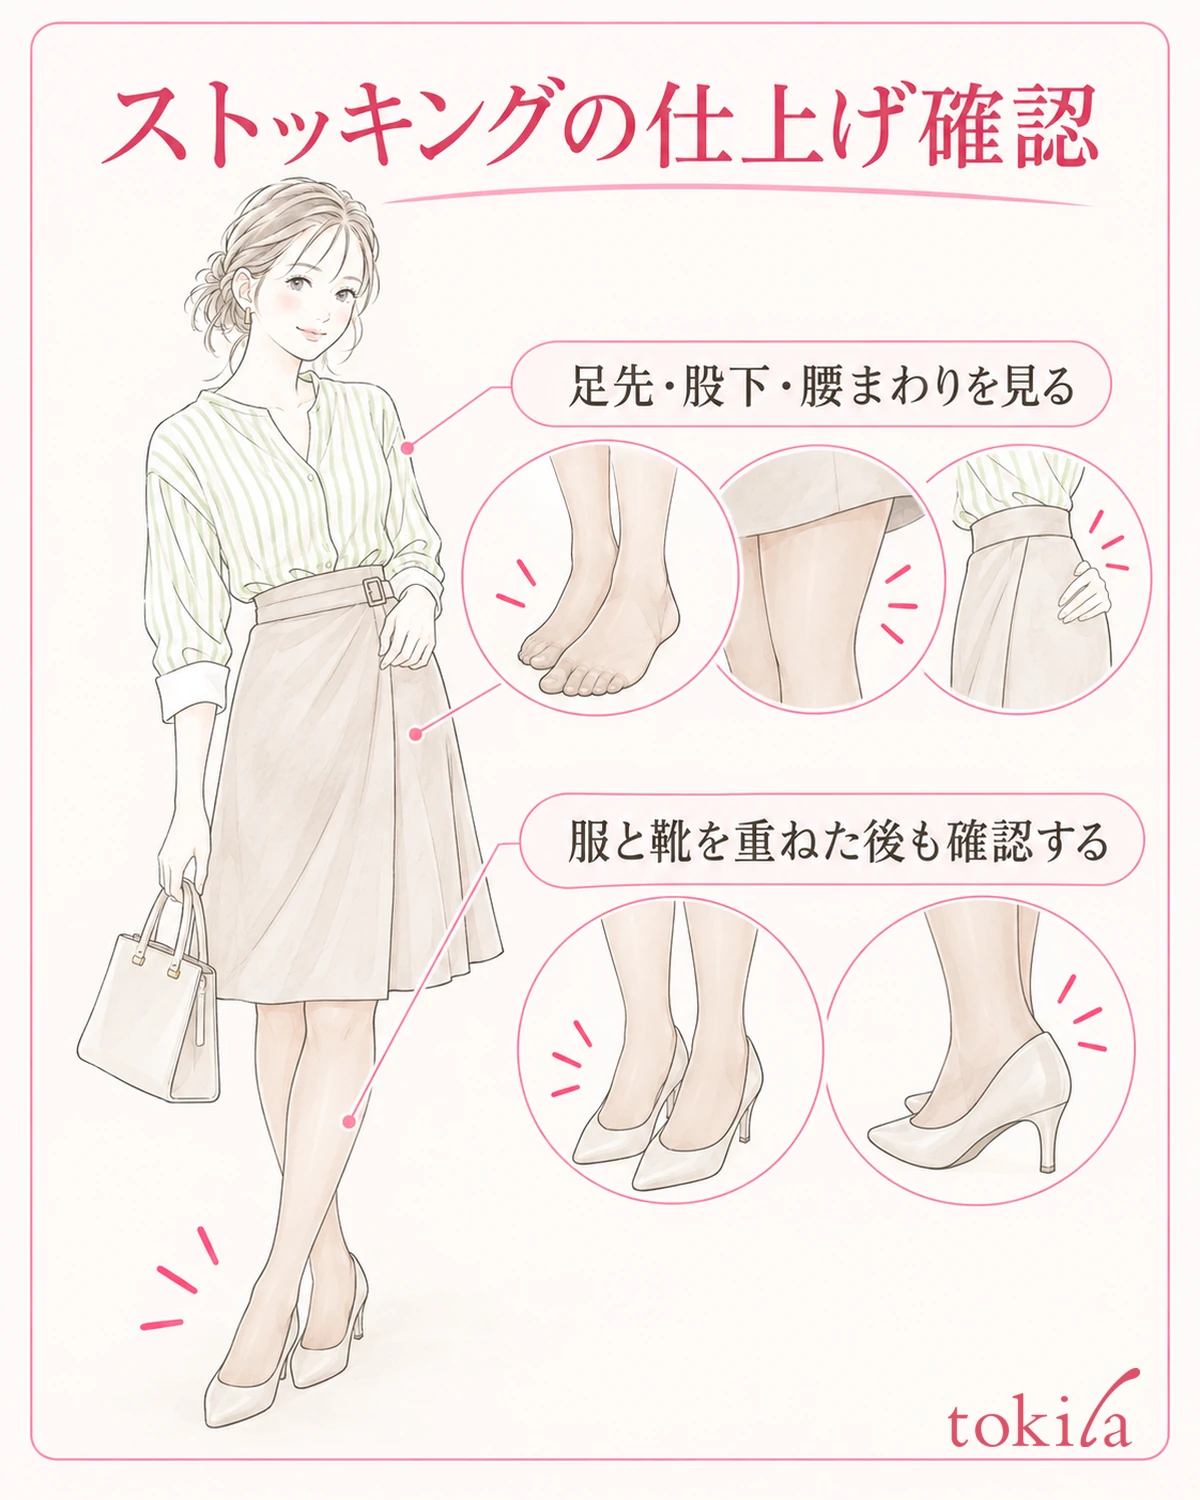
Once everything is in place up to the waist, look again at the toes, ankles, knees, crotch and waistband. This is not a job of pulling from top to bottom in order, but a check, with your hands off, of whether any tightness or unevenness of the fabric remains. There is no need to decide that a spot with only a shadow on the surface is a wrinkle and pull it again.
After layering clothes such as a skirt, check that the top edge or the fabric of the stockings has not been tucked inside. If the lining on the clothing side bothers you, treat it as a separate fabric by using how to check when a skirt lining shows below the hem. The point is not to try to pull both together to tidy them.
After putting on shoes, walk around indoors within a comfortable range, and check again when you stand up after sitting. If the toes feel pulled inside the shoe, take the shoe off and look at the place that has changed since just before you put it on. Rather than pulling up the fabric at the ankle while walking, check somewhere you can sit steadily.
If you keep a record for checking, match the package of that pair with a note of the spot that bothered you. A place and a moment, such as "right ankle" or "after putting on shoes," are enough. Do not use the record to even out the shape of your legs on left and right, or to aim for the same look as someone else's photo of wearing them.
For next time, remember the moment when it happened, such as "the toes fit when I put them in, but only one leg turned partway up to the knee." Then pick one action, such as stopping to check at the stage of raising left and right alternately. If you change the size, the shoes and the way of putting them on all at once, it becomes hard to compare the points you reviewed.
For a pair you have finished wearing, care for it according to the care label attached, and put it away after checking its condition rather than balling it up with the twist still in. Reshaping it with heat or water in your own way is a different matter from putting them on again. Use fashion know-how as well, and fine-tune the preparation before you put things on and the check after you move around to suit what you own.



