
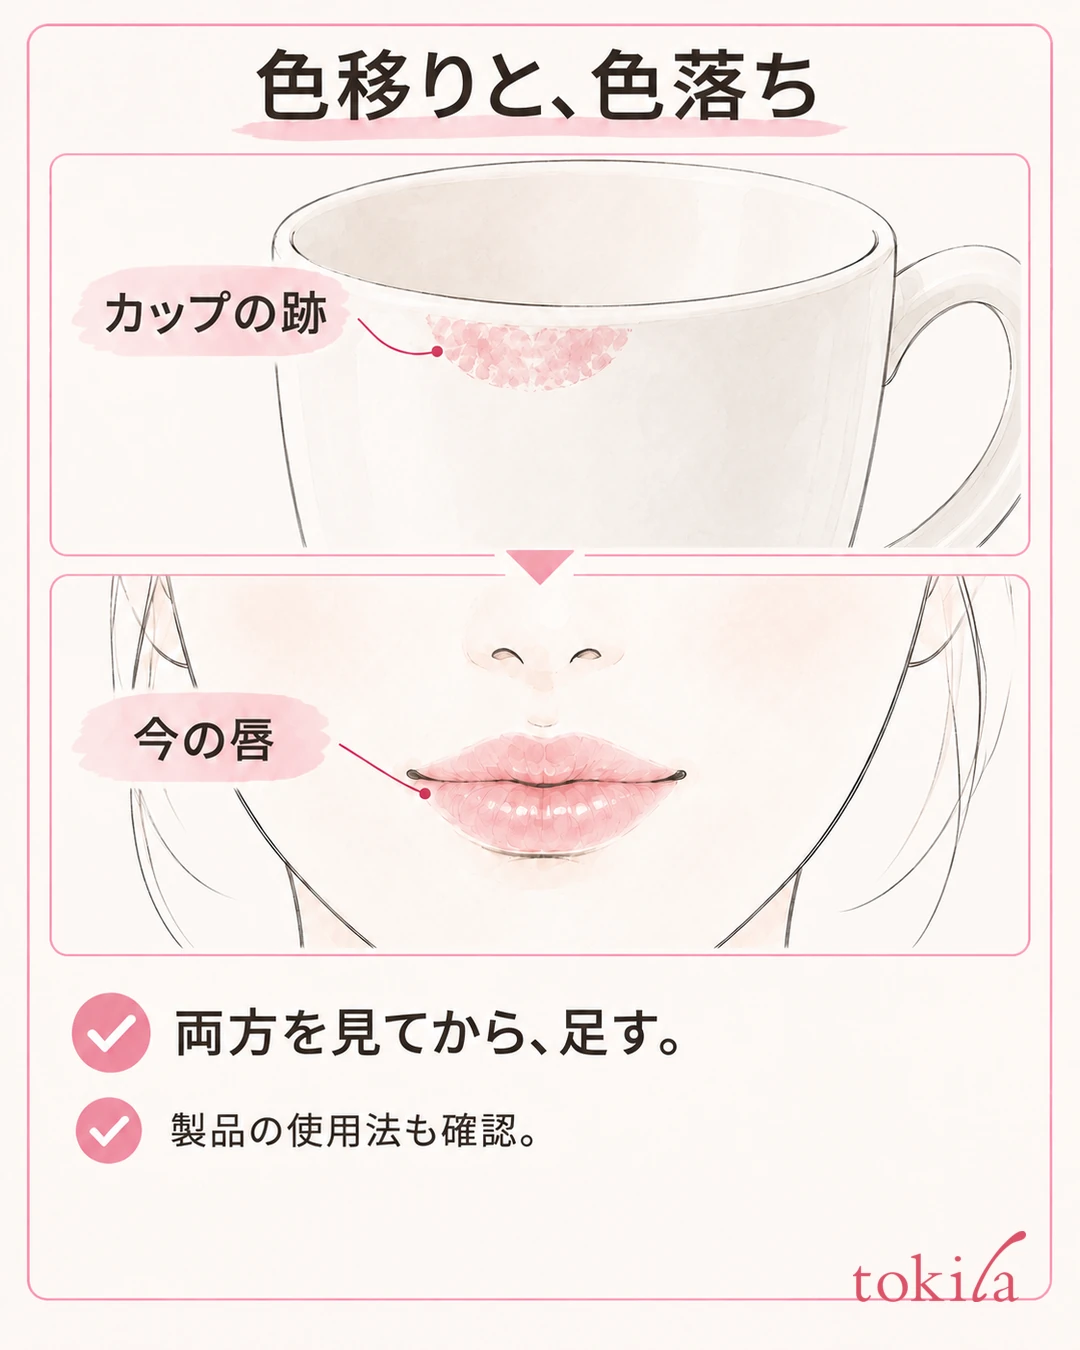
If lip color transferring to cups or masks bothers you, review how much you apply and the excess product left on the surface. Finish thinly and, if it suits the product's directions, lightly blot with tissue. That is the starting point. Some products are meant to be left untouched after application, so it is important not to apply the same steps to every lip product.
This article uses diagrams to show how to observe color transfer and color fading from the lips separately, how to prepare after moisturizing, how much to blot with tissue, and how to reapply when you are out. It is not a method that guarantees your color will not transfer at all, but a way to review your routine so the lip products you already own are easier to handle.
1. Separate color transfer from color fading, and read the directions for your lip product
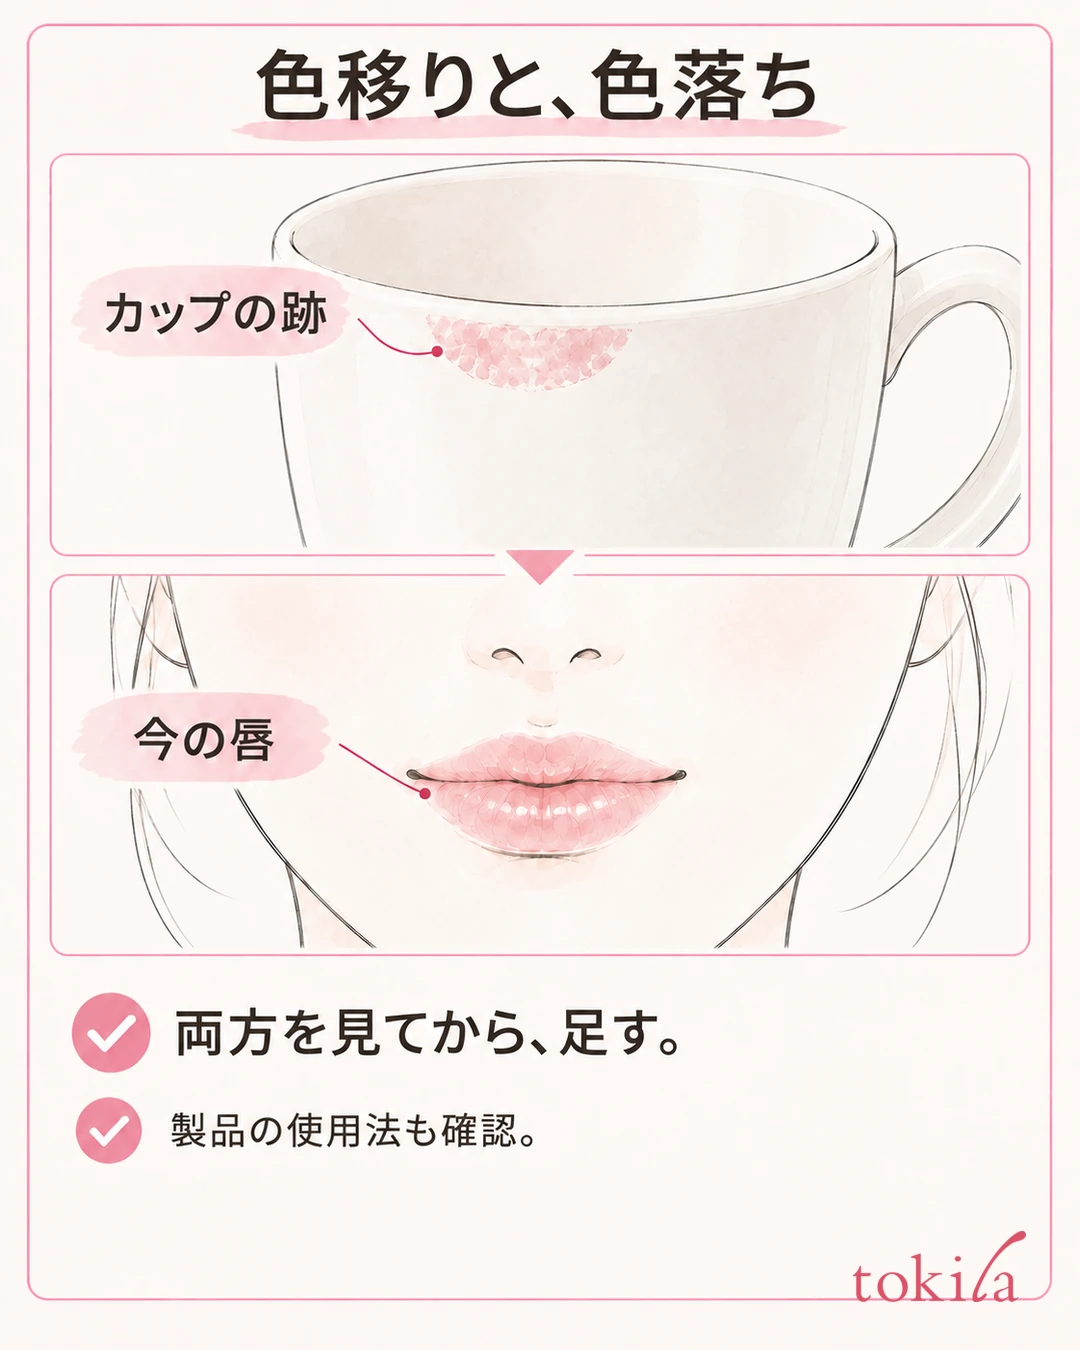
Color on the rim of a cup does not necessarily mean all the color has left your lips. Conversely, even if the mark on the cup is faint, the color may have faded only in the center of your lips. First look at your lips in a mirror and check the thick layer on the surface, the color in the center, and the outline. Rather than judging from the transferred mark alone that "applying more will make it last," sort out what your lips need now.
If color transfers heavily right after application, check how much you applied at once and how much of your earlier lip balm is left. If the color fades after eating or drinking, also think about reapplying on the spot. However, you cannot pin down the ingredients or a single cause from appearance. Even with the same lip product, how it looks changes with the amount used, what you layered it with, and how it was touched.
Next, read the container or outer box for how much to apply, how long to wait after applying, and whether it is fine to press your upper and lower lips together. Do not assume that the categories tint, matte and glossy all mean the same way of use. The directions for the product you use take priority over the general trick of blotting the surface with paper.
This time is a condition of that product. It does not mean that other lip products also finish in exactly five minutes or that you may blot with paper right after applying.
Narrow down what to try today to whatever suits your product among "use a thinner amount," "wait as directed" and "lightly blot with paper." Before switching to a longer-lasting type, check how your current directions differ from your own routine. You cannot judge each product's durability or ranking from this diagram.
If your main concerns are lipstick going outside the lip line or patchy color at the time of application, also see How to Fix Uneven Lip Color and Define the Outline. This article focuses on the amount and finishing for color that transfers to cups and masks.
2. Blend in moisture and tidy up excess stickiness on the surface
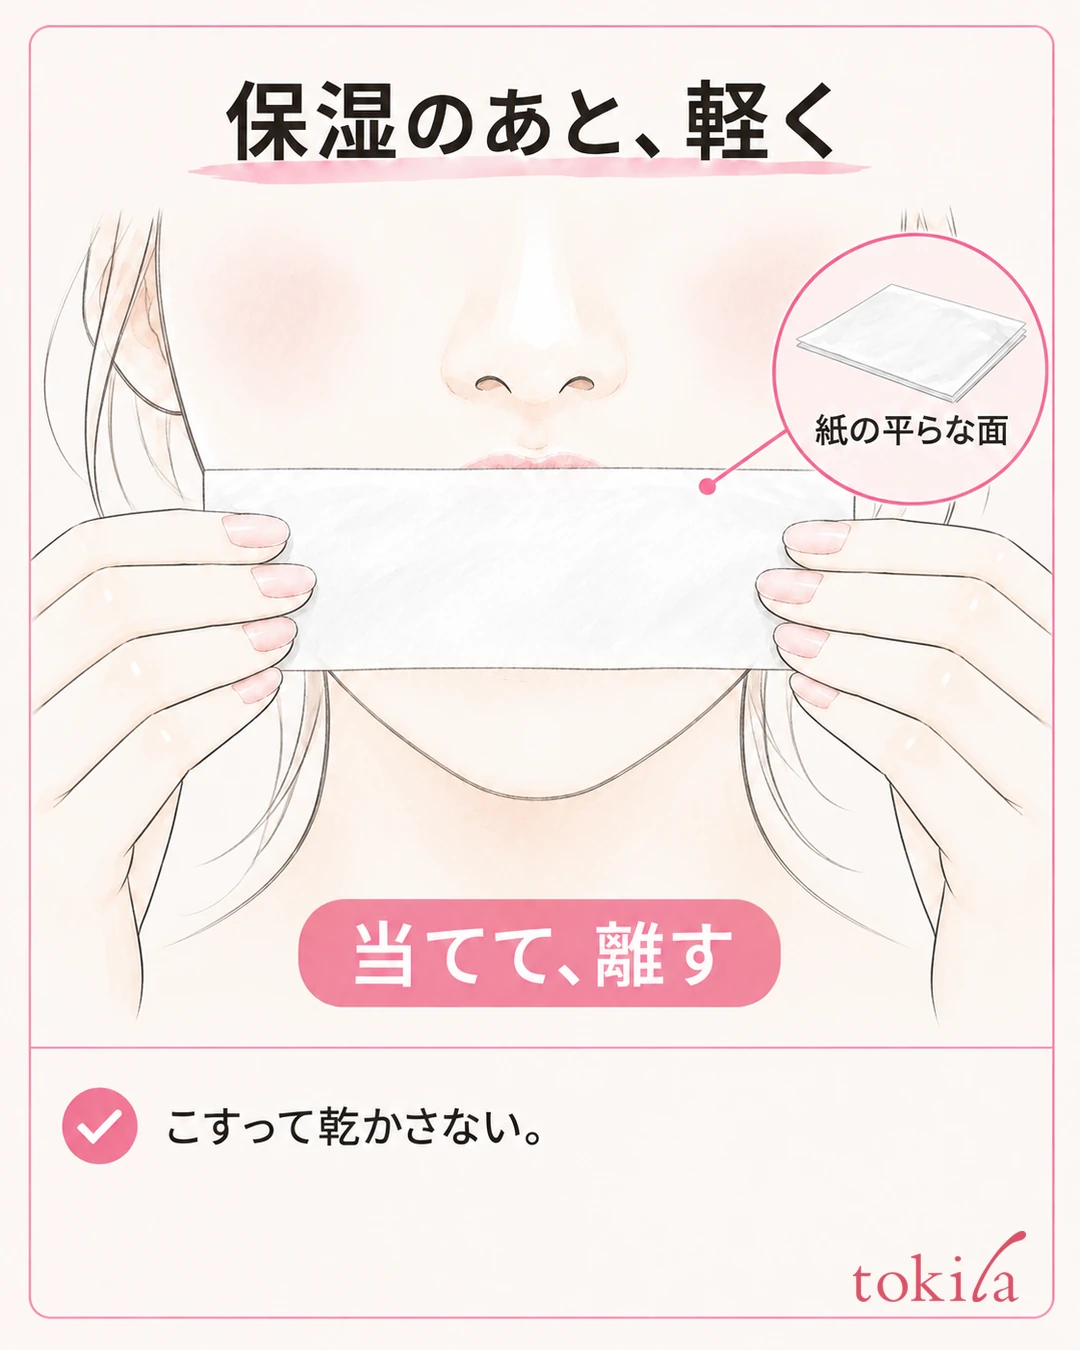
Worried about color transfer, you do not need to press lipstick hard directly onto dry lips. If your lips feel dry, tidy them up with a lip balm or similar, following the directions for the product you use. Keep separate the idea of removing all moisture and the idea of lightly tidying excess stickiness left on the surface.
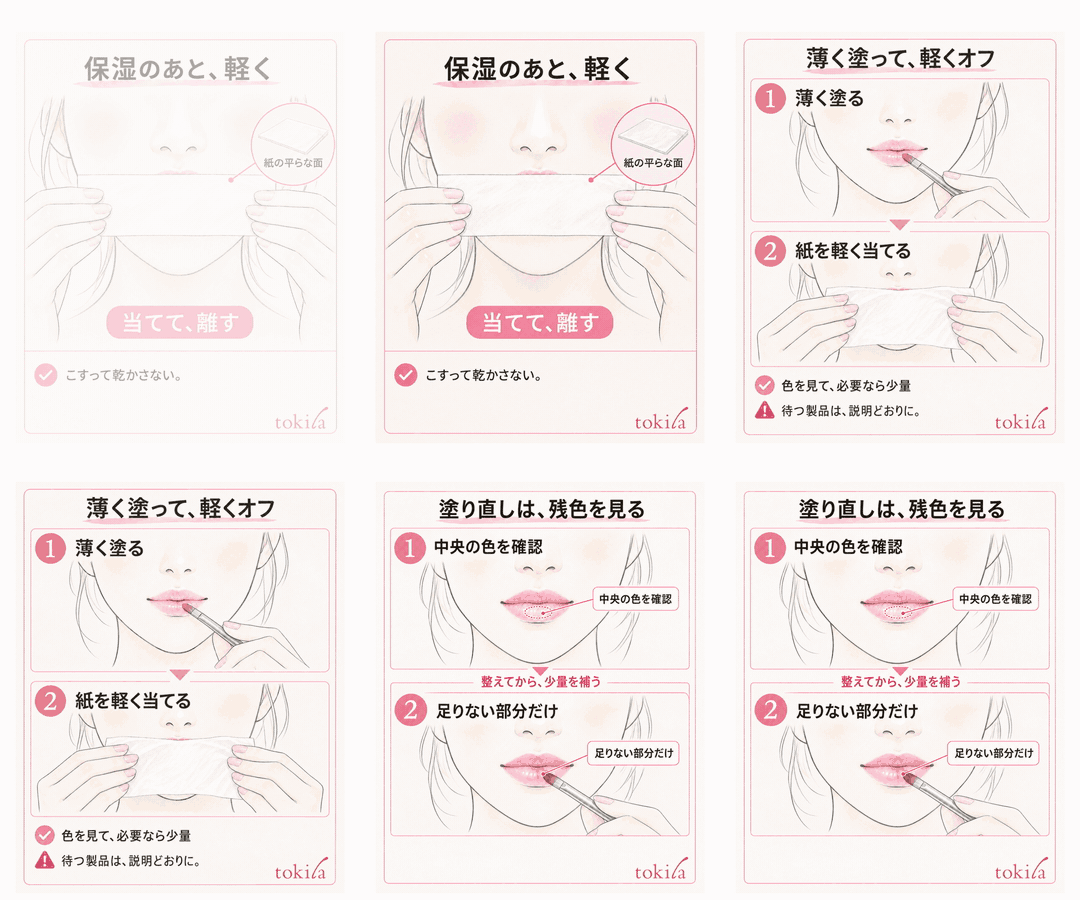
If so much remains that your lips feel slippery even after it has settled in, lightly touch the flat side of a clean tissue once, lift it, and see how it looks. The key is not to turn this into a step that wipes hard and dries the lips out.
Use a soft, folded flat side of the paper, not a small, hard, balled-up corner. Gently touch the outside of the lips and lift off without dragging sideways. You do not need to put the paper inside your mouth or bite down to clamp it between your lips. Keep the touching surface clean so that you do not put back the color and oil you have removed.
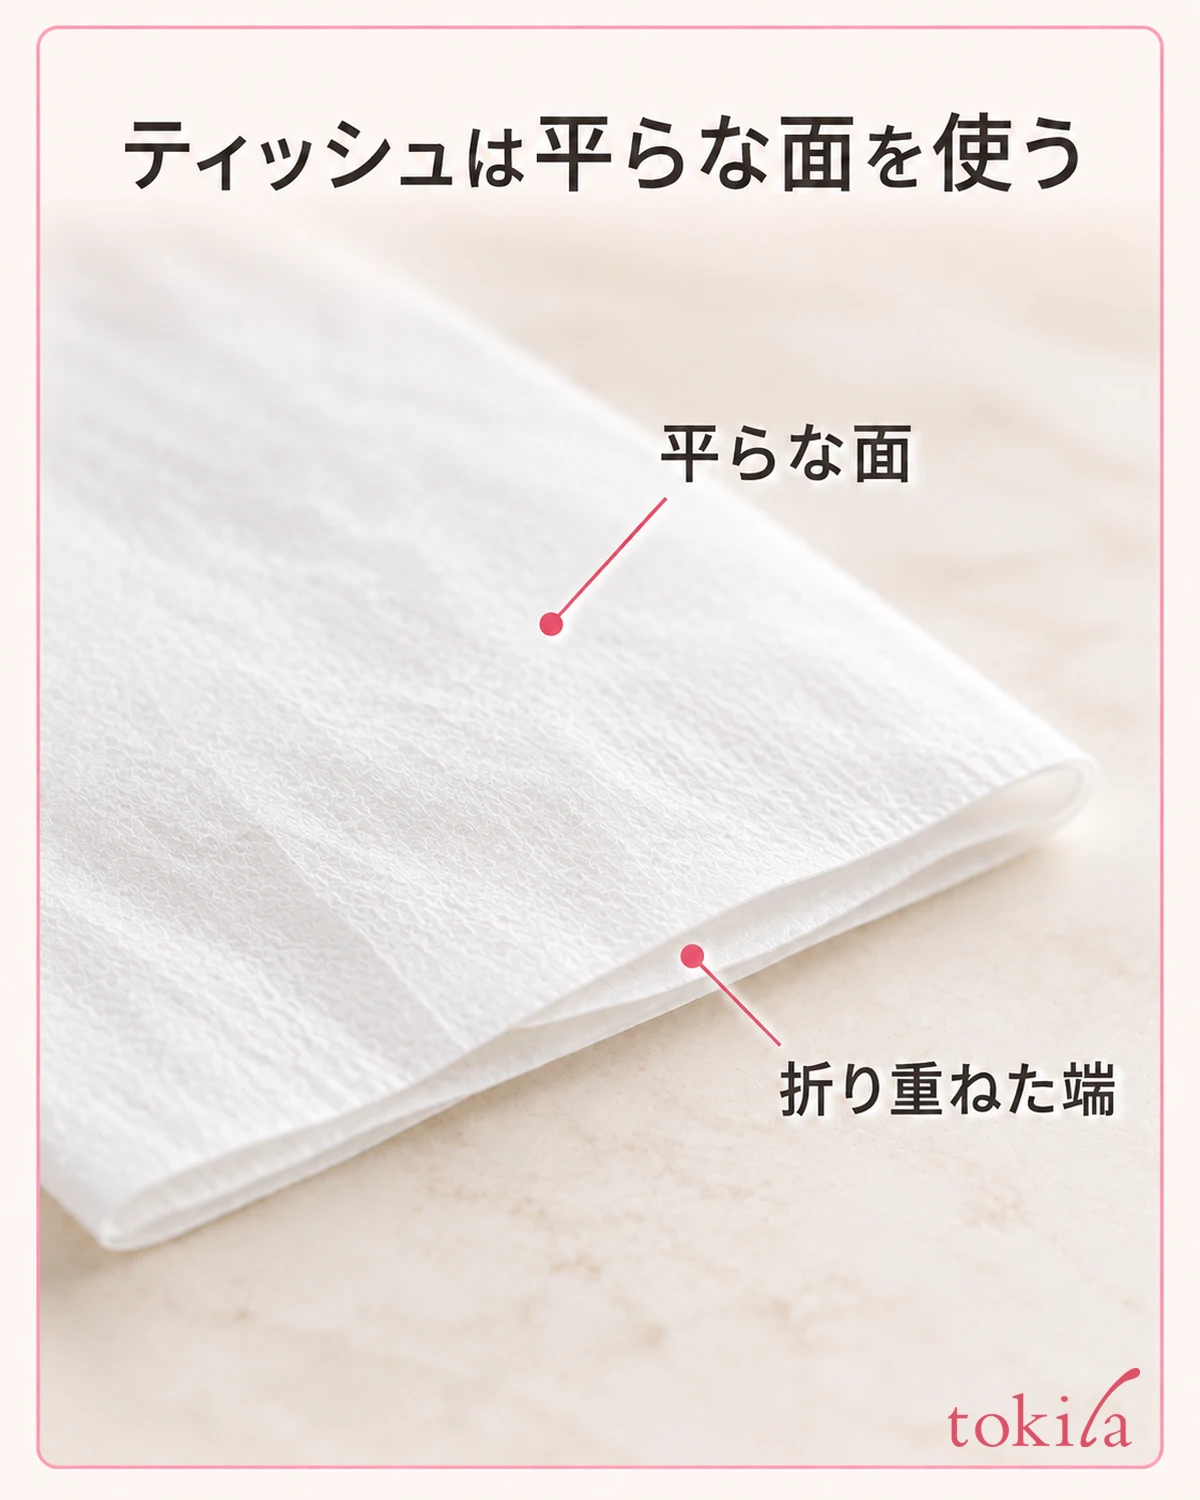
Check the product's directions on whether to layer lip color right after moisturizing or wait. Thickly layering just anything under lipstick does not always make it adhere better. Also check whether your lip balm is meant to be used as a base or to go over lip color, and sort out your usual combination.
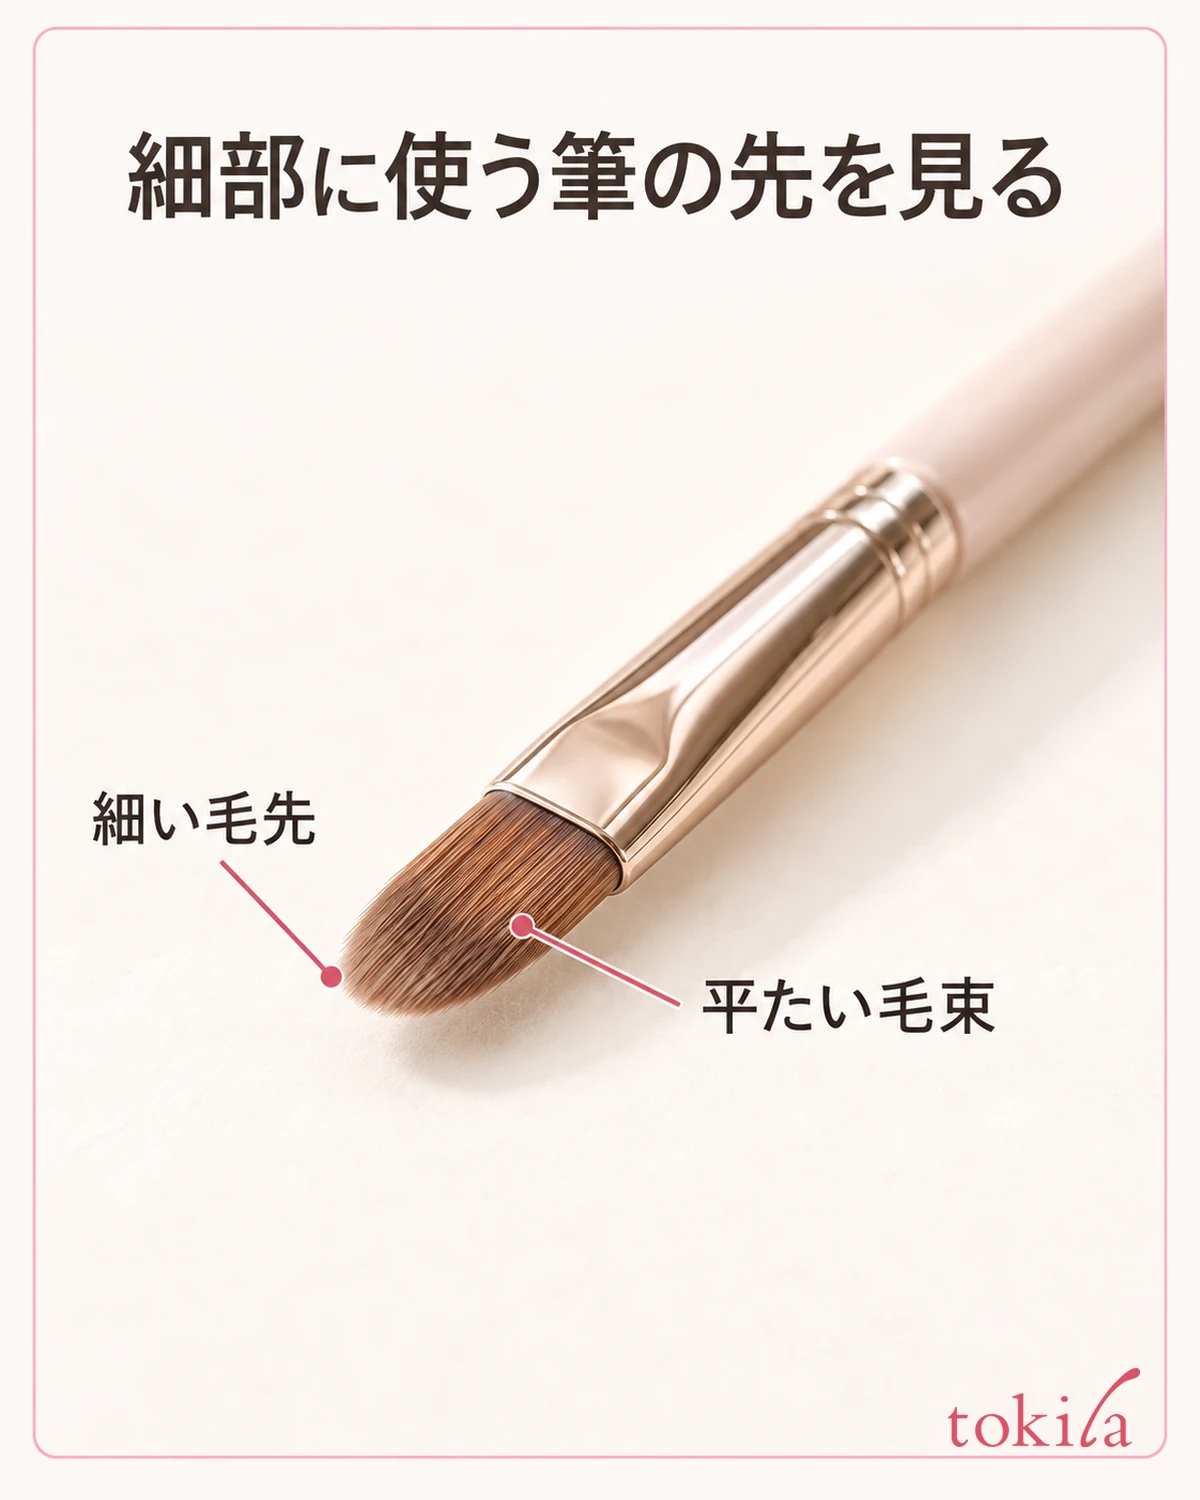
Basically, you need your own lip product, a clean tissue and a mirror. If you want to adjust fine areas, you may add a lip brush that is suitable to use. Rather than adding more tools, first create conditions in which you can see how much of the product you applied earlier is still left.
If your lips feel pulled or uncomfortably dry after blotting the surface, do not keep pressing with paper. Do not make skipping moisturizer your goal for achieving zero transfer; proceed from a state where you can apply thinly and comfortably. If you feel pain or irritation, do not try to solve it with the amount of makeup.
3. Apply thinly, and touch the tissue lightly without rubbing
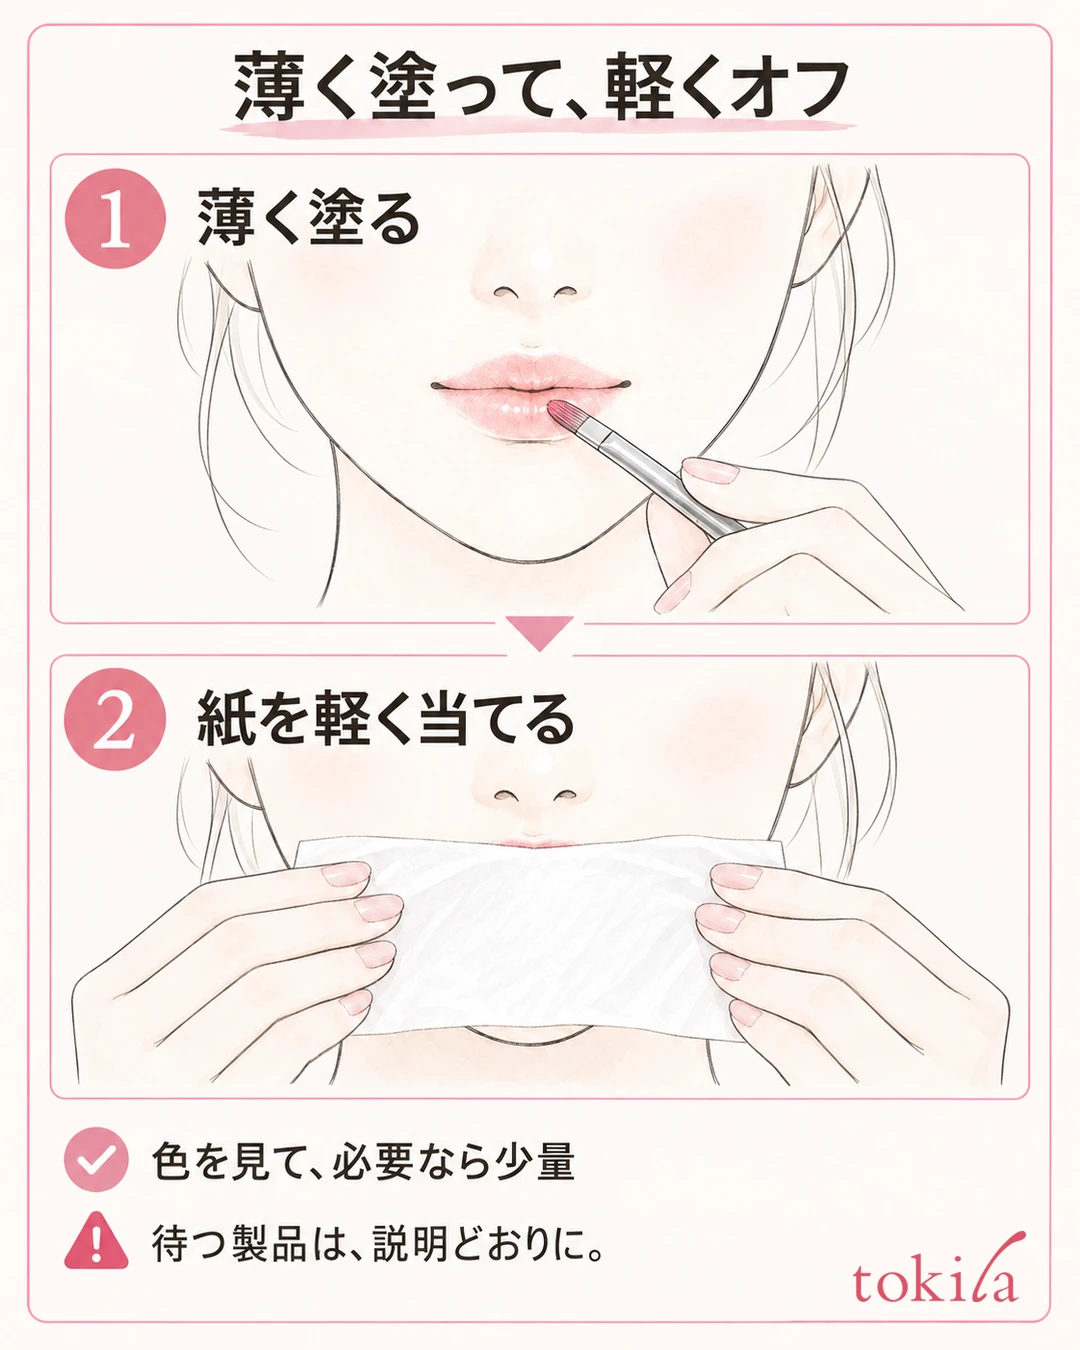
Dispense an amount suited to the product and apply a thin layer of color once. Do not extend the stick far out or press so hard that your lips dent; work with a light touch. We do not fix one length as a number for all products.
Once you have applied thinly, first check in the mirror how the color has gone on. Even if the color still feels weak, do not immediately add a thick layer all over; check whether product is pooling on the surface of your lips. If the product specifies a waiting time, move on to that step. It is also important not to try to finish quickly by rubbing your upper and lower lips together repeatedly.
For a lip product that can be blotted with tissue, fold a clean piece of paper, lightly touch its flat side to the outside of your upper and lower lips, and lift it off. Do not make it a motion that scrapes the color sideways with the paper. Do not press so far that you change the shape of your lips; check the color and feel after touching once. Do not make continuing until the paper is pure white your passing condition.
This article does not fix the number of times for everyone; the starting point is the order of applying thinly, lightly pressing, and looking at the remaining color. If needed, add a small amount following the directions and check the finish again.
The color becoming slightly paler after pressing is not necessarily a failure of the steps. Tidying up the excess on the surface changes how it looks compared with the first thick layer. If you want to keep your desired depth, add a little at a time where it is lacking rather than putting back the original amount all at once. If it becomes quite patchy, consider reapplying instead of continuing to layer on top.
With glossy lip products, pressing with paper may also change the texture. Choose, according to the day's finish, whether you prefer to keep the gloss or to reduce transfer. Putting a lot of powder on your lips to prevent transfer is not part of the common steps in this article.
4. When you are out, tidy up leftover color and dirt before reapplying
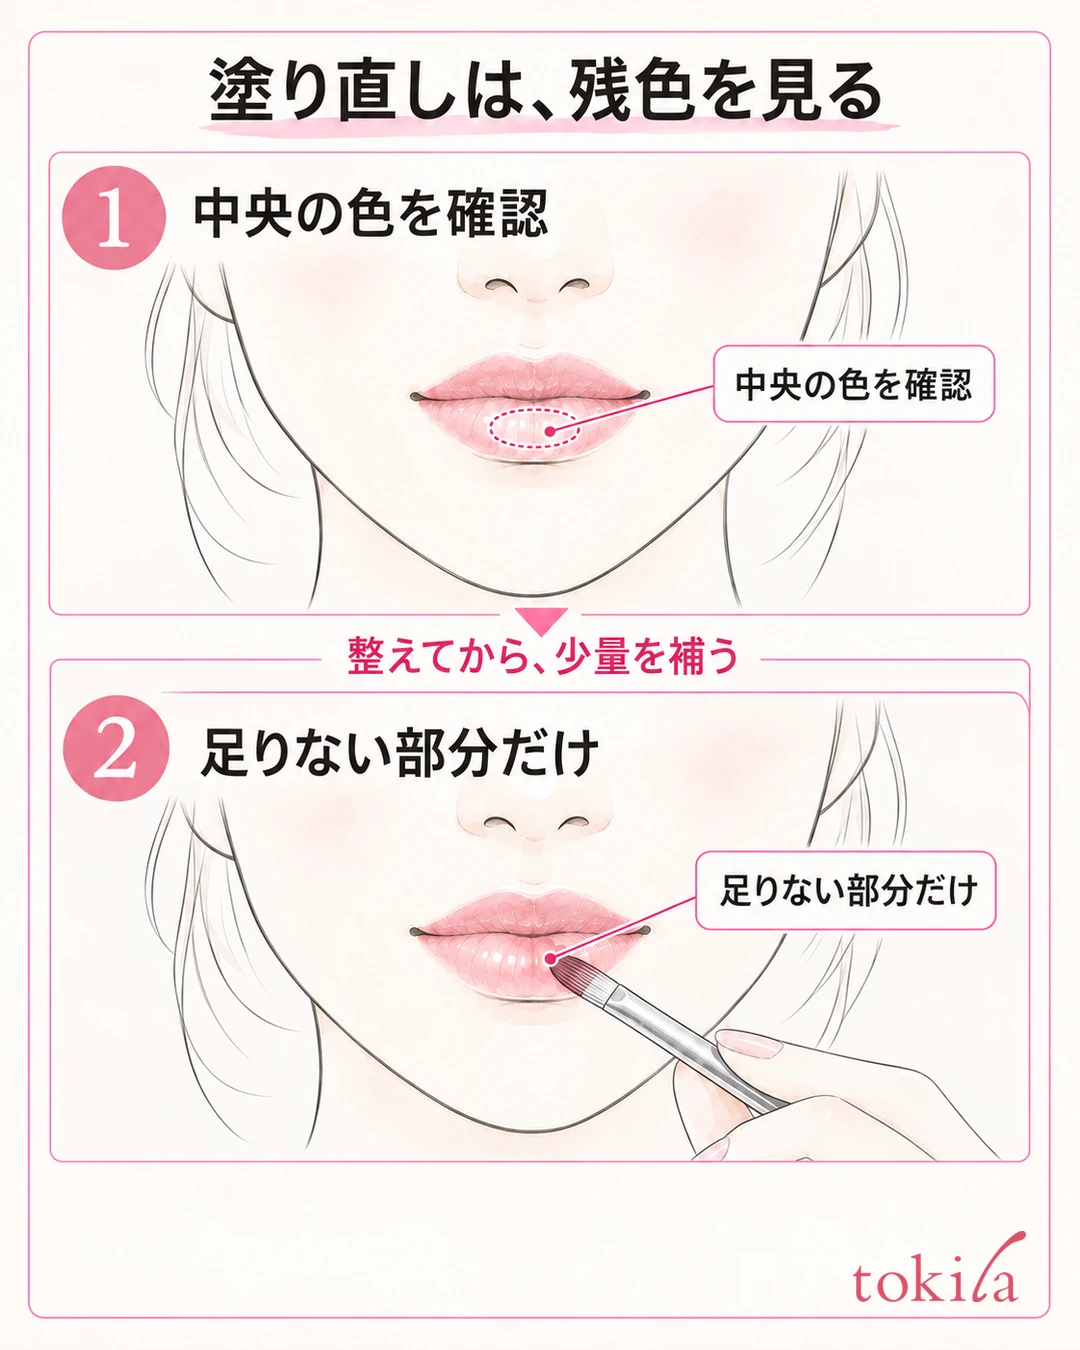
After eating or drinking, check the center and outline of your lips in a mirror. If you can see leftover food or drink, or lip color that has moved, do not layer new color straight on top. Gently press with a clean tissue, see where color remains and where it has faded, and then decide the area to add.
Take the idea of tidying up leftovers following the product's directions as a reference; the diagrams in this article do not show a motion of rubbing hard sideways. Do not try to remove color that tissue alone cannot lift by force.
If only the center has faded and the outline is natural, first add a small amount to the faded part. If the border stands out, lightly blend it with a suitable tool and check it from the distance at which you see your whole face. Reapplying the same amount to the outer area that still has color would increase the original thickness. If it looks natural after adding a small amount, you may stop there.
If dark color remains on the outline and there is a large step from the inside, adding only to part of it may make it hard to even out. In that case, remove the necessary area following the directions for a remover you own, prepare moisture and the base, and then finish thinly. Avoid repeatedly rubbing with dry paper to erase the remaining tint color.
When reapplying, check the waiting time after application and how to handle tissue blotting in the product's directions, just as you did in the morning. Even in a hurry, do not apply a large amount and then immediately blot it off hard with paper. Apply thinly first, see whether the color you want is enough, and proceed with the steps you need.
When you finish touching up your mouth, replace the paper you used, and clean the lip product and tools following the product's guidance. You can check the flow of touching up your whole face in The Order for Makeup Touch-Ups. Not continuing to reapply all over just because of a transferred mark, even though color remains on your lips, helps you manage the amount.
5. Check color and texture, and choose one thing to change next time
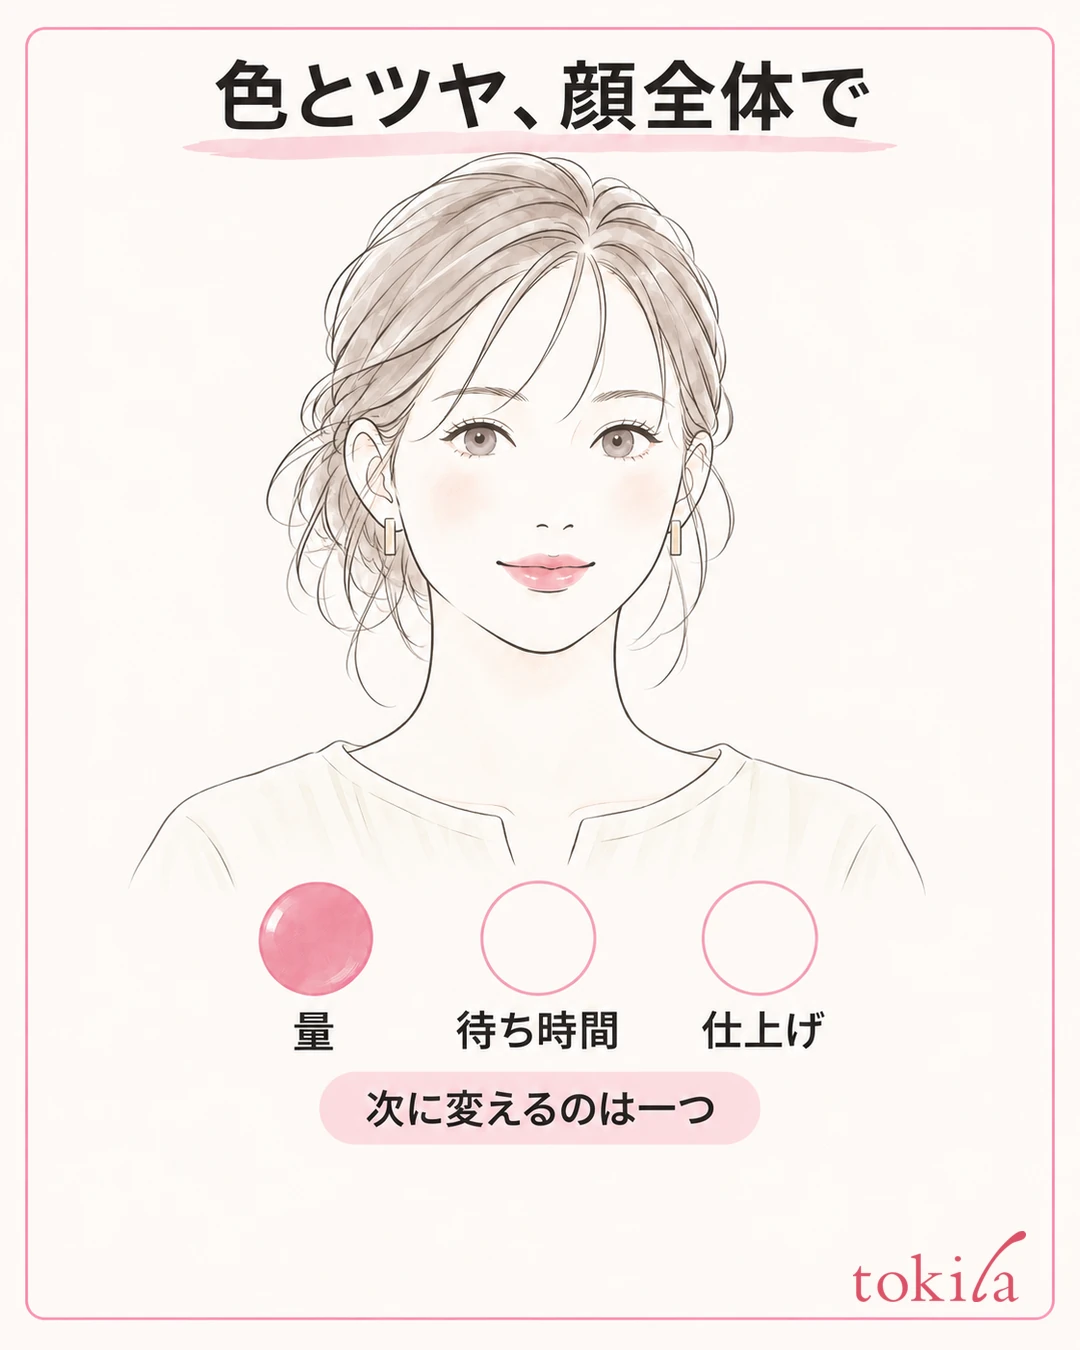
Finally, do not judge the result only by how much color is on the paper; look at your lips and your whole face in the mirror. Check whether the color you want remains, whether the center and outline connect naturally, and whether there is dryness or discomfort. Repeatedly testing durability with tissue is not the purpose of your everyday finish.
Even if a little color transfers to a cup or mask, you do not need to change all your steps right away. Tie it to today's process: right after application or after eating, a day you added gloss, a day you layered a lot of moisturizer. Putting into words one situation that troubles you makes it easier to decide what to review next time.
Next, choose one of these conditions: apply one level thinner, observe the waiting time the product specifies, or tidy up only the excess surface after moisturizing. Changing everything at once makes it hard to tell which adjustment was easier to handle. Before switching products, try sorting out the steps with the same lip product.
Short notes such as "color transferred to the cup right after applying" or "pressing lightly reduced the gloss" are enough as a record. Keep this separate from timing how long color did not transfer in order to guarantee a product's performance. Because eating, drinking and touching differ from day to day, do not decide which lasts better from a single result.
If you still find it hard to get the finish you like after reviewing your steps, choose the texture or way of use of your lip product again. Rather than asserting from categories alone that tints never transfer or that matte suits everyone, compare the official features with the gloss and color you want to keep. The differences between types are also introduced in the Lip Color Guide.
To deal with color transfer, start by keeping the moisture you need, applying thinly, and choosing a finish that suits the product. When you are out, look at the remaining color before adding, and check your whole face at the end. Rather than pressing paper hard to remove all the color, adjust the amount and order in small steps to get closer to the lips you like.



