You tried to draw fine hairs with a brow pen that splits like a fork, but color filled the spaces between the strokes. Before drawing over the brow again, look at which part of the tip touches your skin. Find the angle where several prongs touch and the one where only the outer prong touches, so you can choose the angle that fits the spot.
This guide focuses on how to place the split tip of a liquid eyebrow pen. The strokes you can draw depend on the number and length of the prongs and the angle of the pen. Start with the diagram for your product.
1. Look at how the fork tip splits
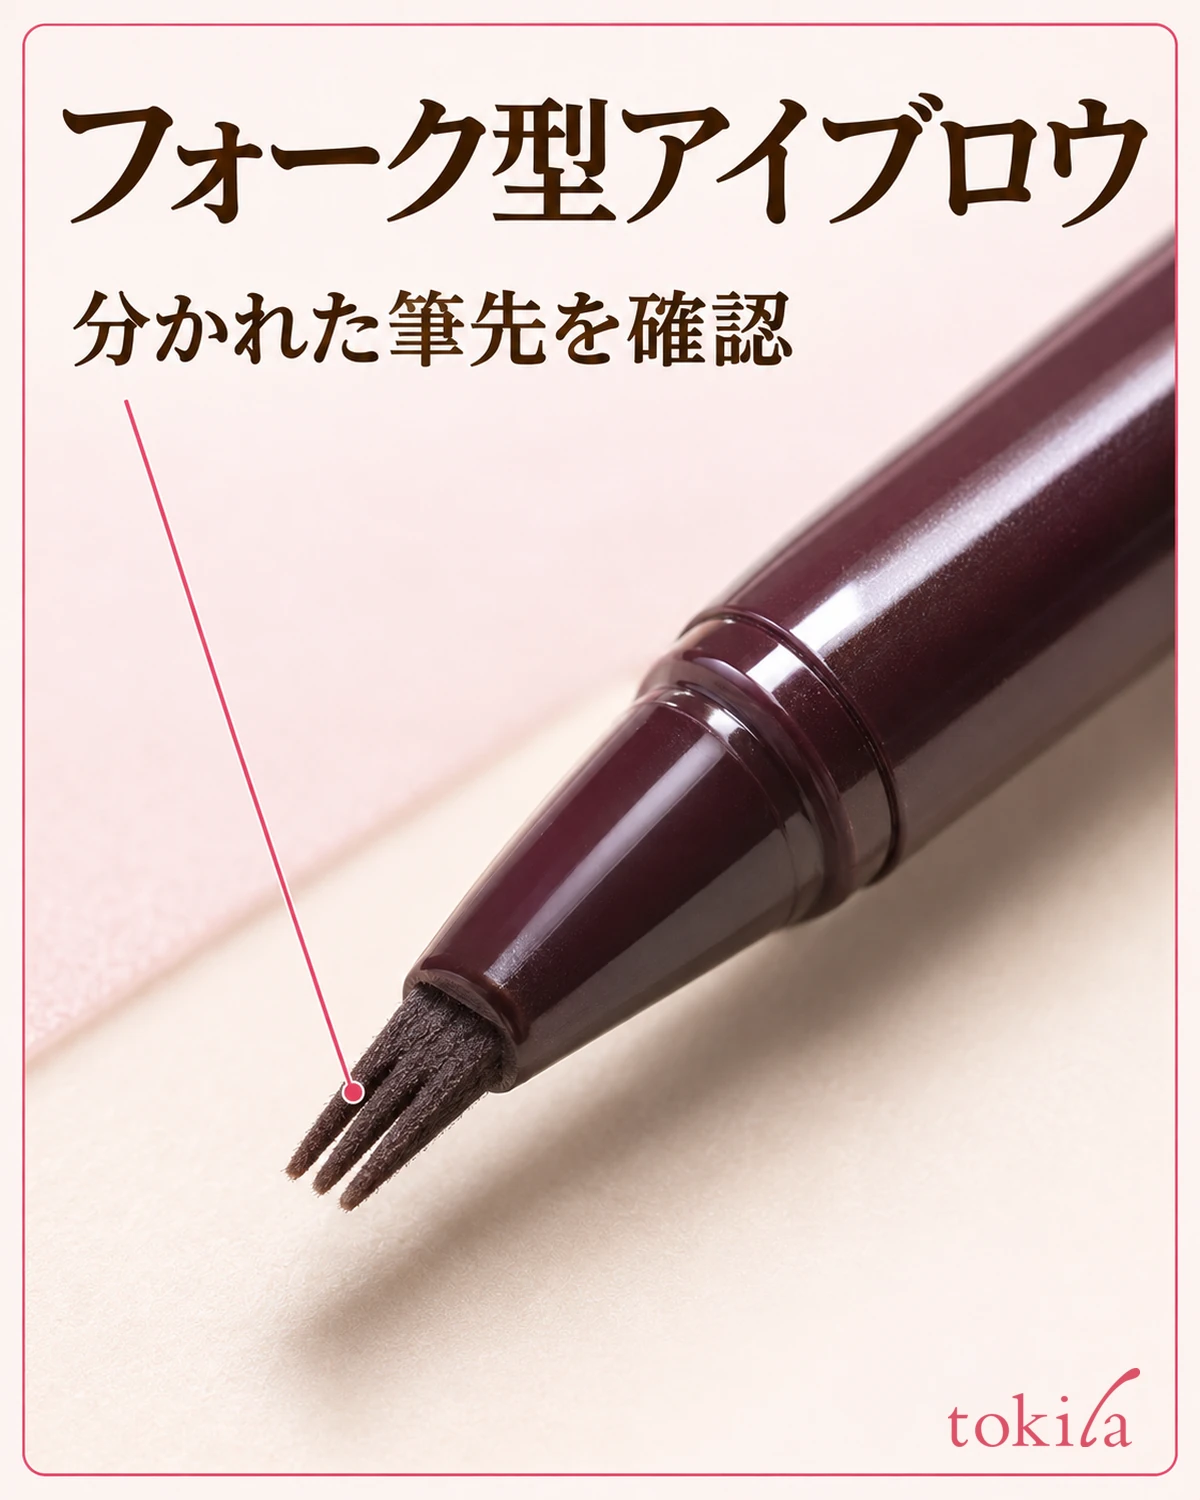
Remove the cap and look straight at the tip to see how many fine prongs it has. The angle that shows them clearly in a row helps you find the side that draws several strokes at once. Slowly roll the pen between your fingers and you may find an angle where the prongs overlap and look narrower. Looking at the actual tip, rather than memorizing the pattern or logo on the barrel, lets you check the angle whenever you adjust your grip.
Check the tip from the side to see whether the prongs are all the same length or are staggered on a slant. With slanted prongs, the strokes differ depending on whether only the long prong touches or the shorter ones touch too. If the case or backing card shows the different strokes, match each one to the corresponding angle.
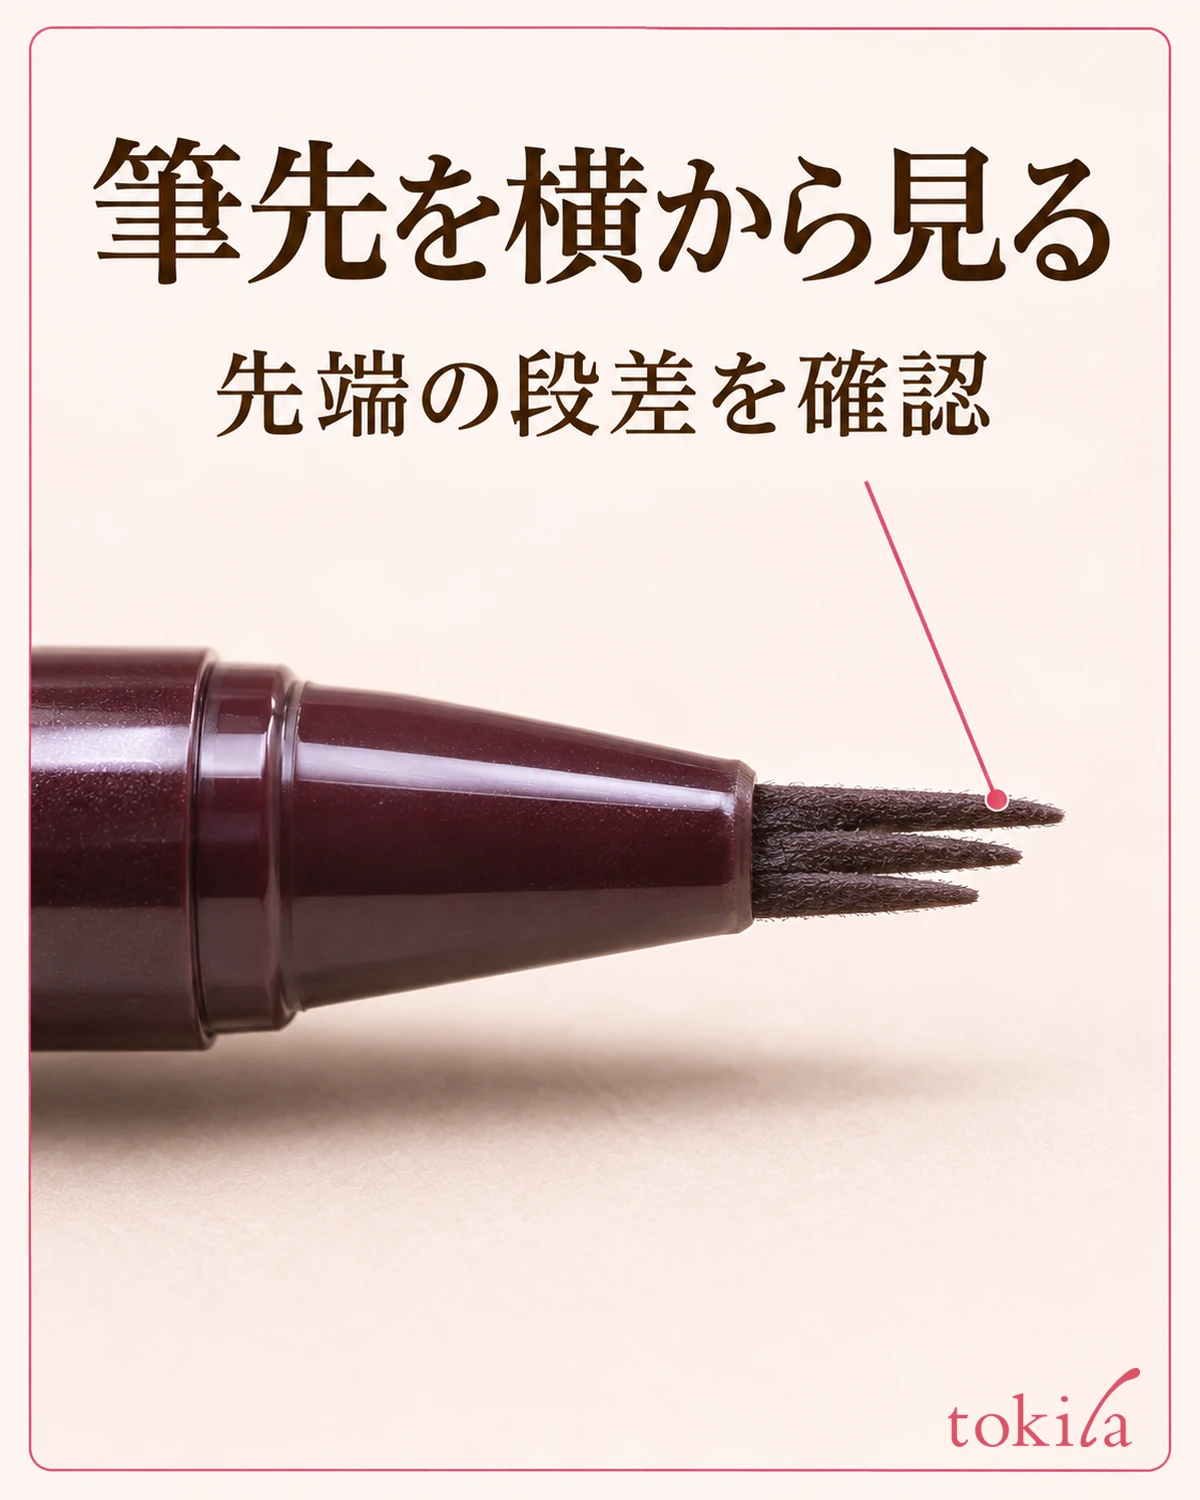
With a single-tip liquid eyebrow pen, you decide where each stroke goes as you set down the tip. A fork tip makes neighboring strokes in one motion, so check whether a prong will touch somewhere you want to leave alone. If you use a single-tip pen, see how to draw fine strokes one at a time.
If you use other brow products too, check the order on the box. Some products direct you to start with the liquid pen and follow with powder or brow mascara. Others are meant for spot work at the end. The split tip alone does not tell you the application order or removal method.
2. Make test strokes to find a grip that leaves space between the lines
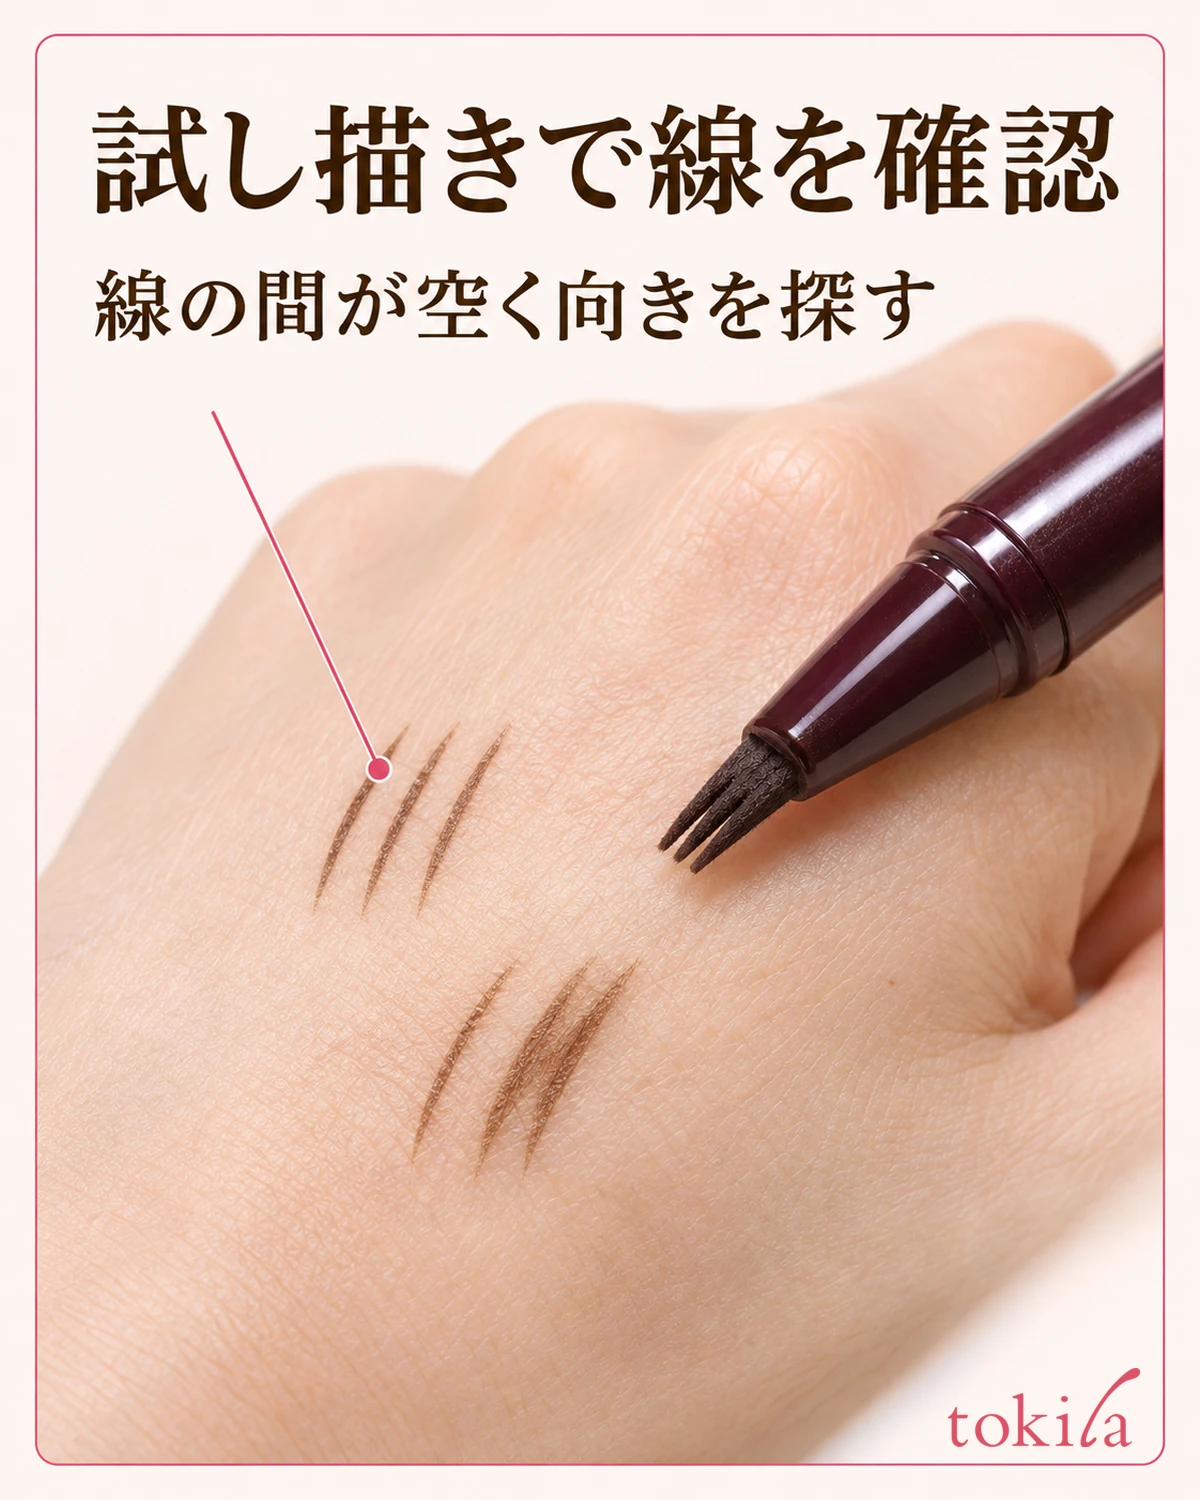
If the directions allow test strokes, see how the pen draws on the back of your hand or another specified area before touching your brow. Support the pen with your fingers and start with the prongs lined up against your skin. Make a short stroke and lift the pen. Look for visible skin between the parallel strokes and check whether they merge anywhere. The goal here is to find an angle your hand can remember, rather than choose a brow color.
If the strokes merge into a thick line, move to a fresh spot and change just one thing about how you set down the tip. Ease up if the prongs spread or flatten under pressure. If the short prong alone leaves no color, roll the barrel a little between your fingers and test while watching where the tip touches. If you change the angle, pressure, and length at once, it is harder to tell what changed the strokes.
If your product has directions for using the narrow side, lightly touch the outer prong down and try one short stroke. Remember which way you turned the barrel, instead of how tightly you held it, so you can reproduce the angle on your brow. A stroke looks different on the back of your hand and on your brow. Do not assume the test color or intensity will look the same on your brow.
If foundation or powder gets on the tip, or the test strokes become faint, check the product's care instructions before pressing harder to get liquid out. Directions for wiping, shaking, or storing the pen in a different position vary. Wetting the tip or prying the prongs apart with a hard object can make it harder to judge where the tip touches.
3. Use multiple strokes only in wider gaps where hairs grow in the same direction
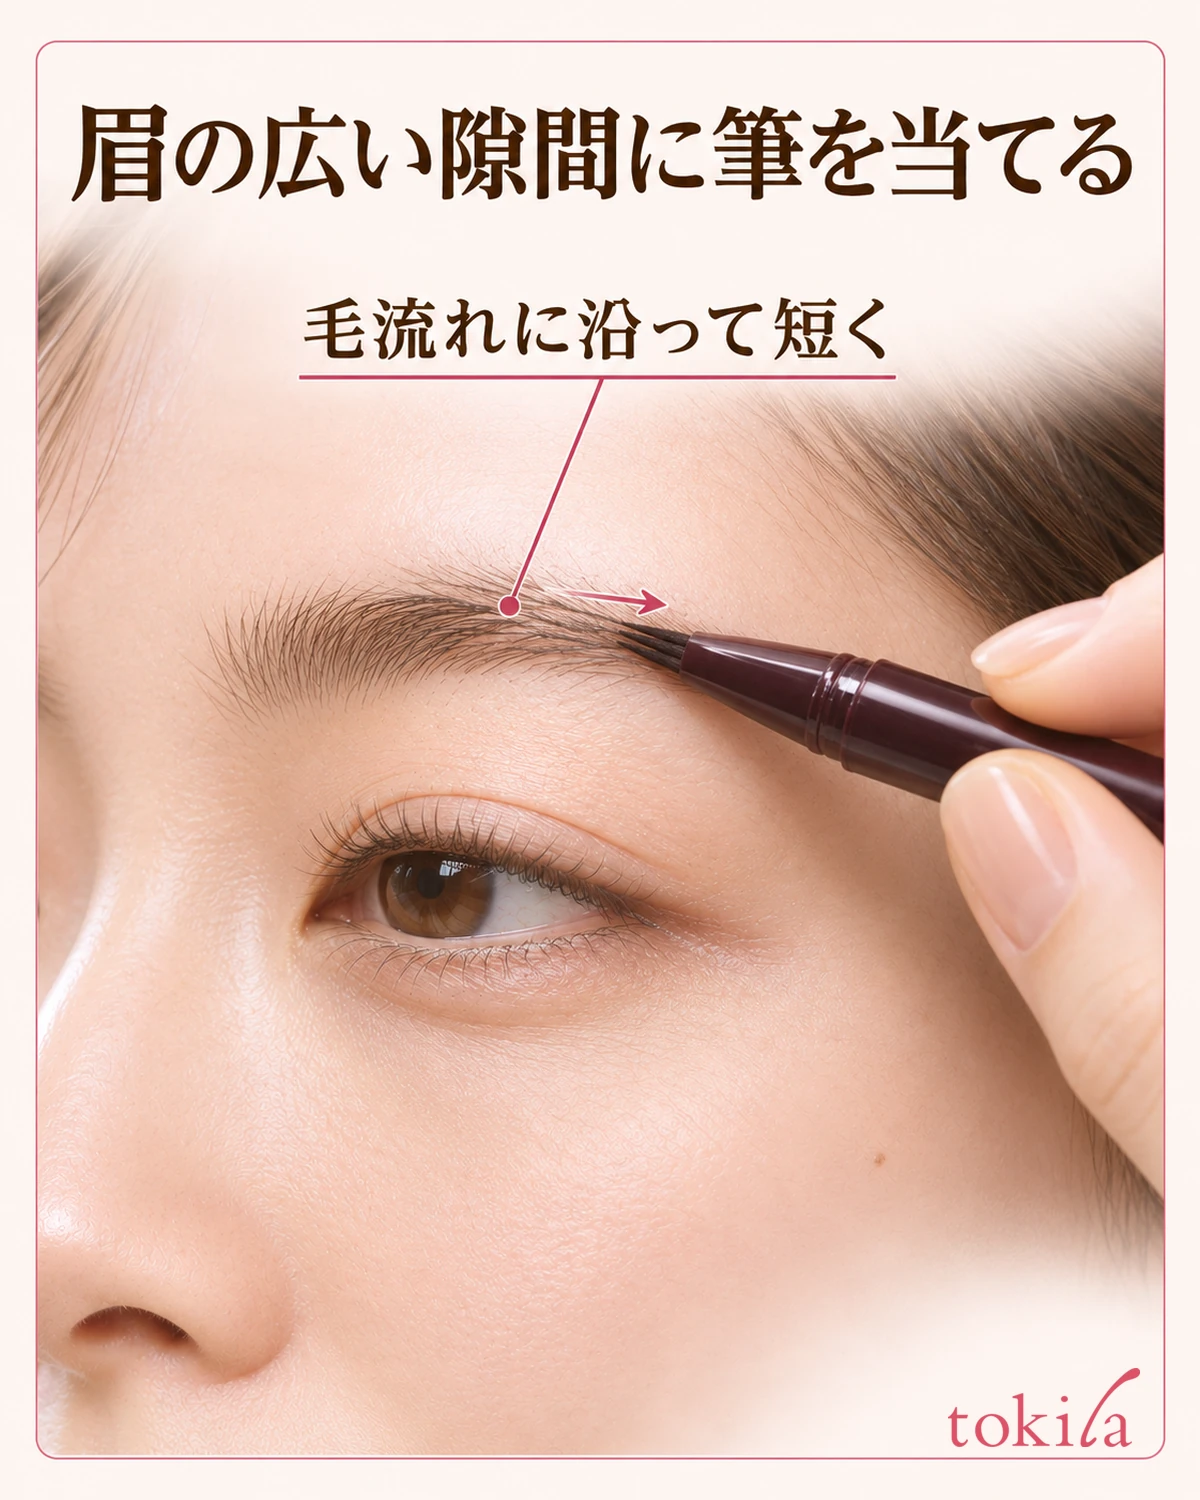
Face forward and look for visible skin at the front, middle, and tail of each brow, in that order. You do not need to fill every visible gap. It is easier to draw several strokes at once where there is room to add them and the nearby hairs grow in similar directions. In a small section near the middle of the brow, for example, check that all the lined-up prongs fit inside the area where you want to draw.
Hold the pen at the angle that kept the test strokes separate and touch the prongs down lightly. See which way the nearby hairs grow from the root, move the pen a short distance, and lift it. If most hairs at the front point up and those at the tail point out, avoid drawing in one direction from end to end. Change the pen angle in short sections as the hair direction changes.
Once you have made a stroke, move the mirror a little farther away and look at both brows together. A gap that stands out up close may blend in with the existing hairs at your usual viewing distance. Keeping the pen away from your brow until you choose the next spot helps you avoid darkening the same area with repeated passes.
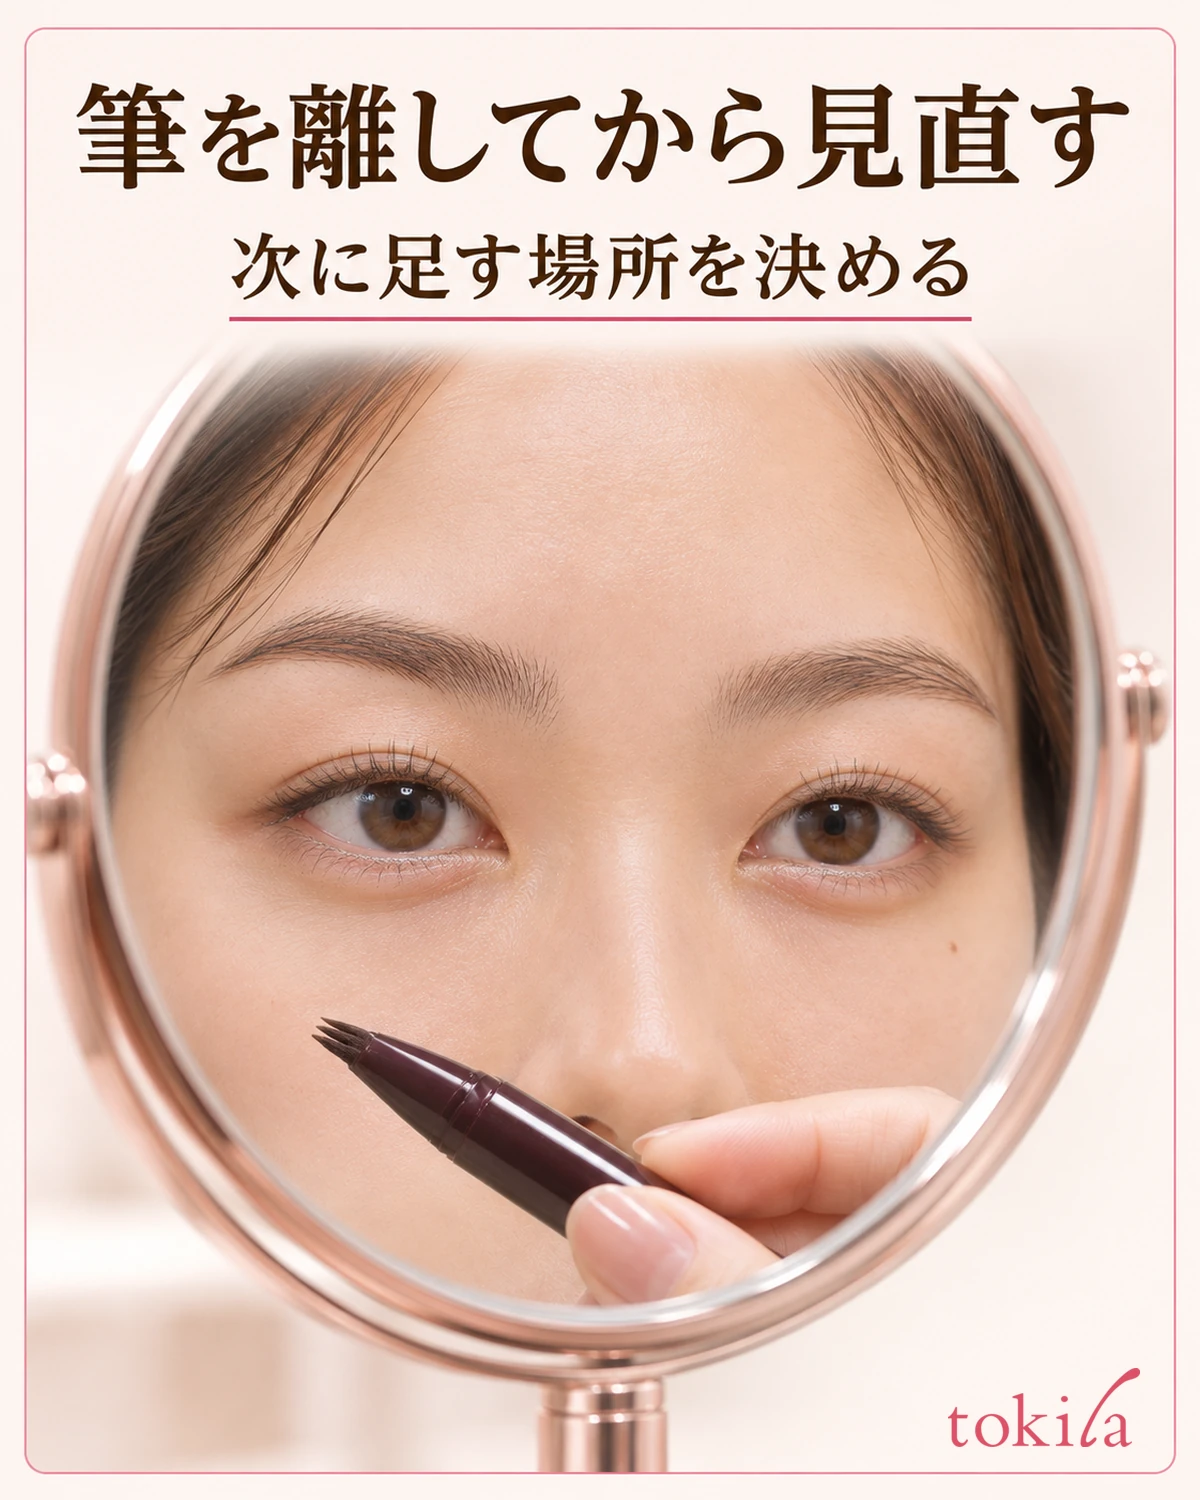
Two strokes on one side do not require two on the other. If the gaps or hair direction differ, the same motion can give a different result. If a difference in brow height or length stands out first, use this guide to drawing brows with uneven shapes to establish the overall shape, then add strokes only where needed.
4. Turn the tip to touch fewer prongs to narrow gaps
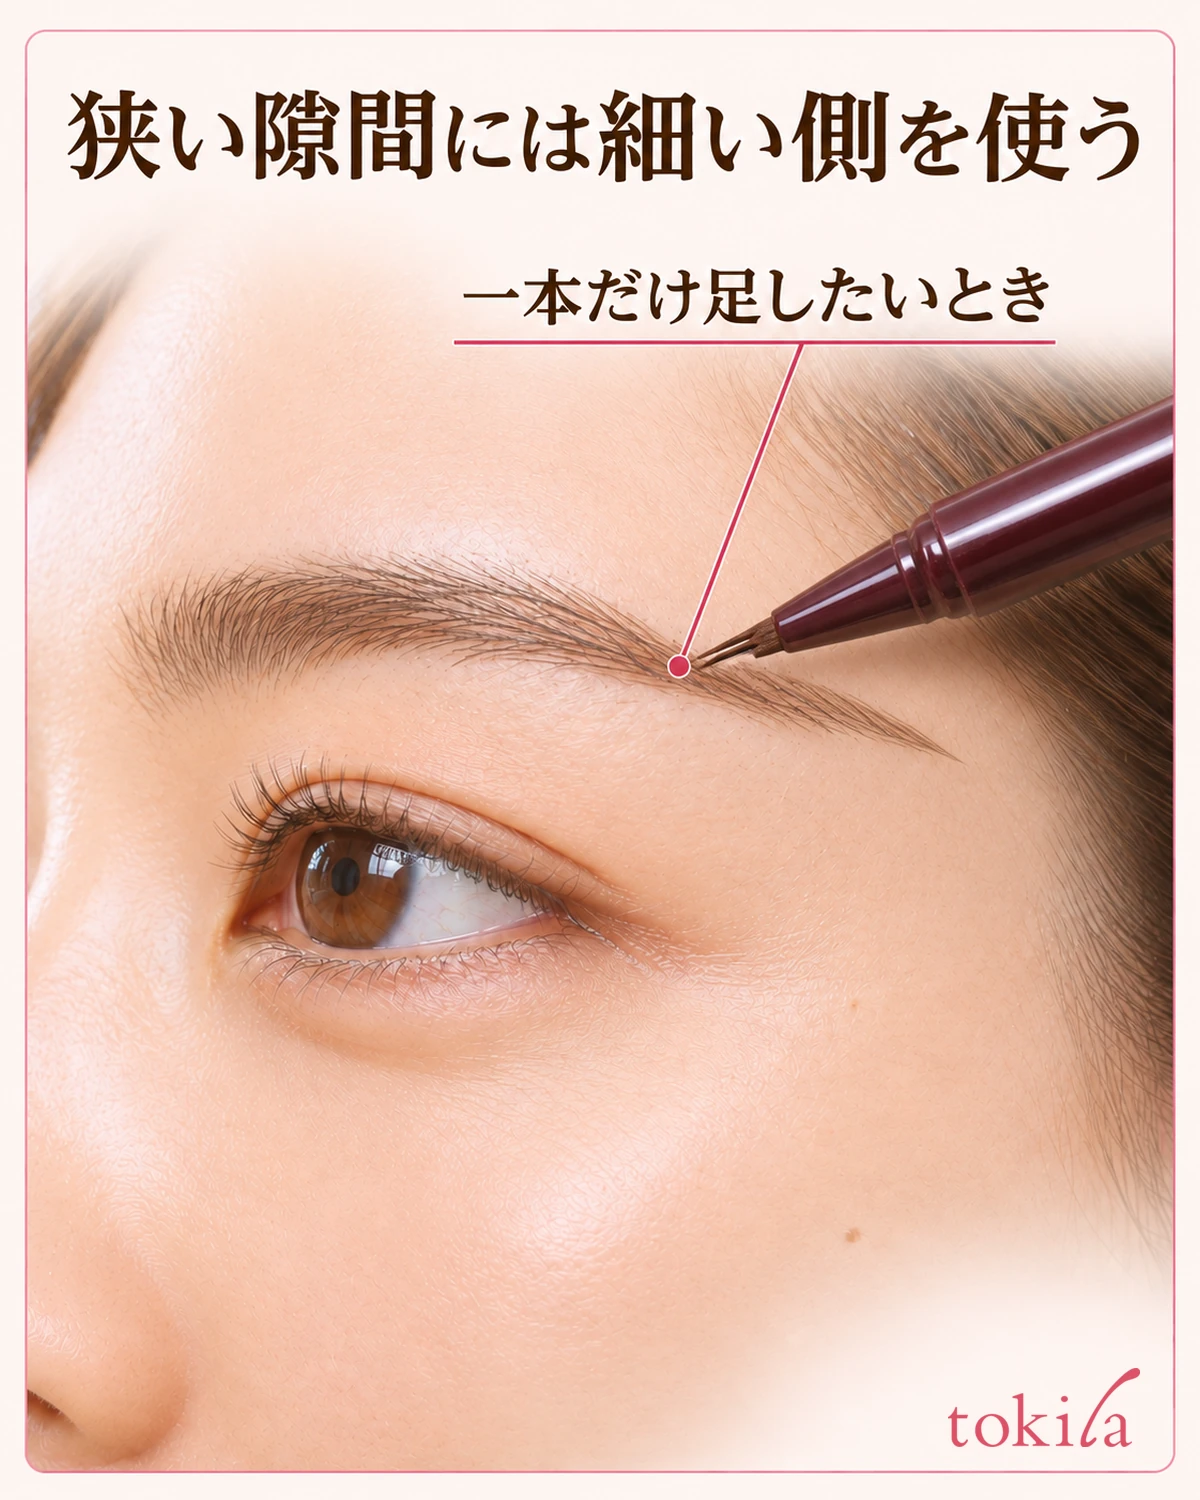
At a slender brow tail or a small gap with hairs beside it, setting down all the prongs can draw outside the brow. If the product lets you draw with the narrow side, turn the barrel to the angle you found in testing so that only the outer prong touches. Lift the pen off your skin before turning it to avoid touching another prong to the skin below the brow.
Draw the extra stroke short and in the direction of the surrounding hairs. For a gap inside the tail, for example, look at the existing outline first and stop while the stroke still fits inside it. Decide separately whether the outline needs extending. Keep the length consistent while checking how fine a stroke you can draw.
If you still get more strokes than the gap can fit after adjusting your grip, you can switch from the fork tip. Try a single-tip pen or a fine brow pencil that fits the space. When switching products, check both labels to see whether you can layer the next product over freshly applied color and which product goes first.
5. If strokes merge, adjust only the dark spot
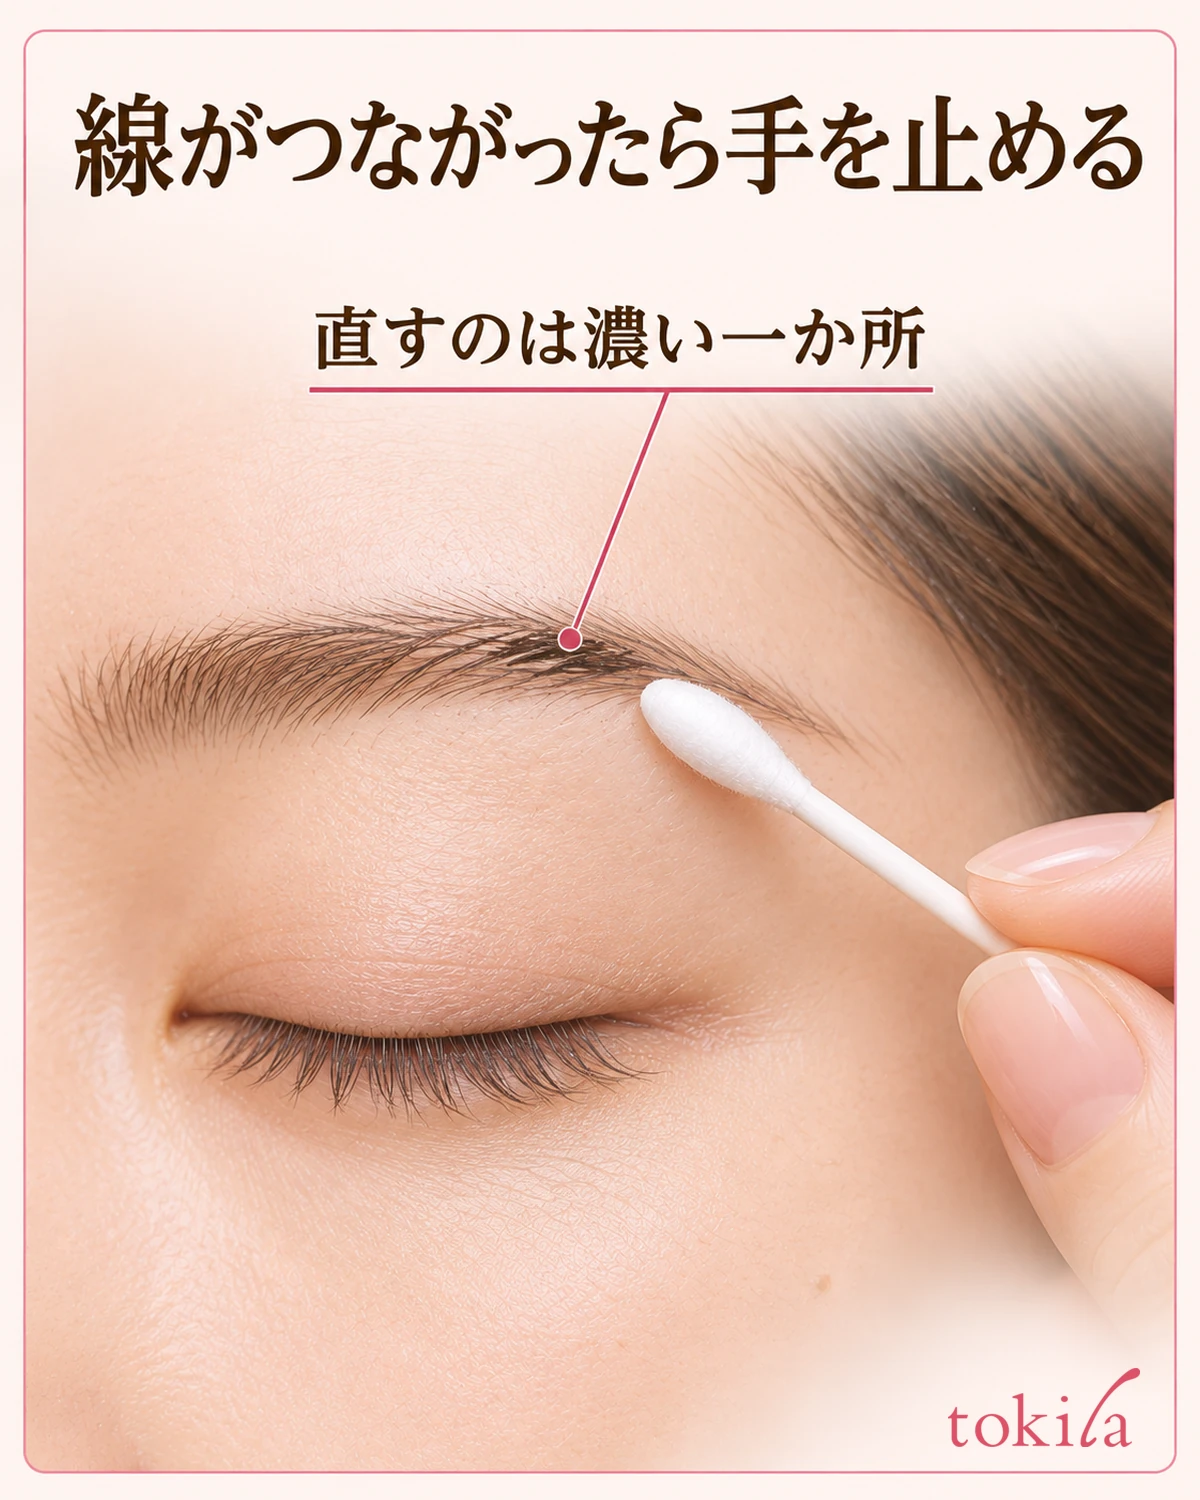
If a thick line appears, lift the pen first and check whether the whole brow looks dark or only one set of strokes has joined. Rubbing the surrounding hairs can spread color and make a small fix bigger. Follow the product's removal instructions and, if needed, use a cotton swab or similar tool to remove color just in that section so you can redraw it without rubbing hard. If the color is difficult to remove, check the directions before applying more pressure.
When you redraw the same gap, change one thing: make a shorter stroke, touch down only part of the tip, or use lighter pressure. If a line went beyond the brow, check which side of the tip touched. If the strokes merged inside the brow, check your pressure or how many passes you made. Lift the pen and look from your usual distance before deciding whether you still need more color.
If you finish with powder or brow mascara, check whether you can layer it over the liquid and whether the directions say to wait until it dries. Where you want the fine strokes to stay separate, avoid rubbing the same area repeatedly with the next applicator. Put the cap back on and store the pen in the position specified by the product. Next time, look at the width of the spot first and choose between several prongs and just the outer one.