You open a pack of under-eye sheet masks and can't tell whether the narrow end faces the inner or outer corner of your eye. Once it's on, you feel the upper edge every time you blink. Before applying the sheet, check the diagram on the package for its orientation. Then look in the mirror to make sure the edge sits clear of your lash line.
This guide covers cosmetic sheets applied to the skin under the eyes. Masks that extend over the eyelids or warm masks placed on closed eyes have different instructions. Even among products for the eye area, check where each product goes, when to use it in your routine, and how long to leave it on.
1. Check that the sheets go under the eyes and identify the inner and outer ends
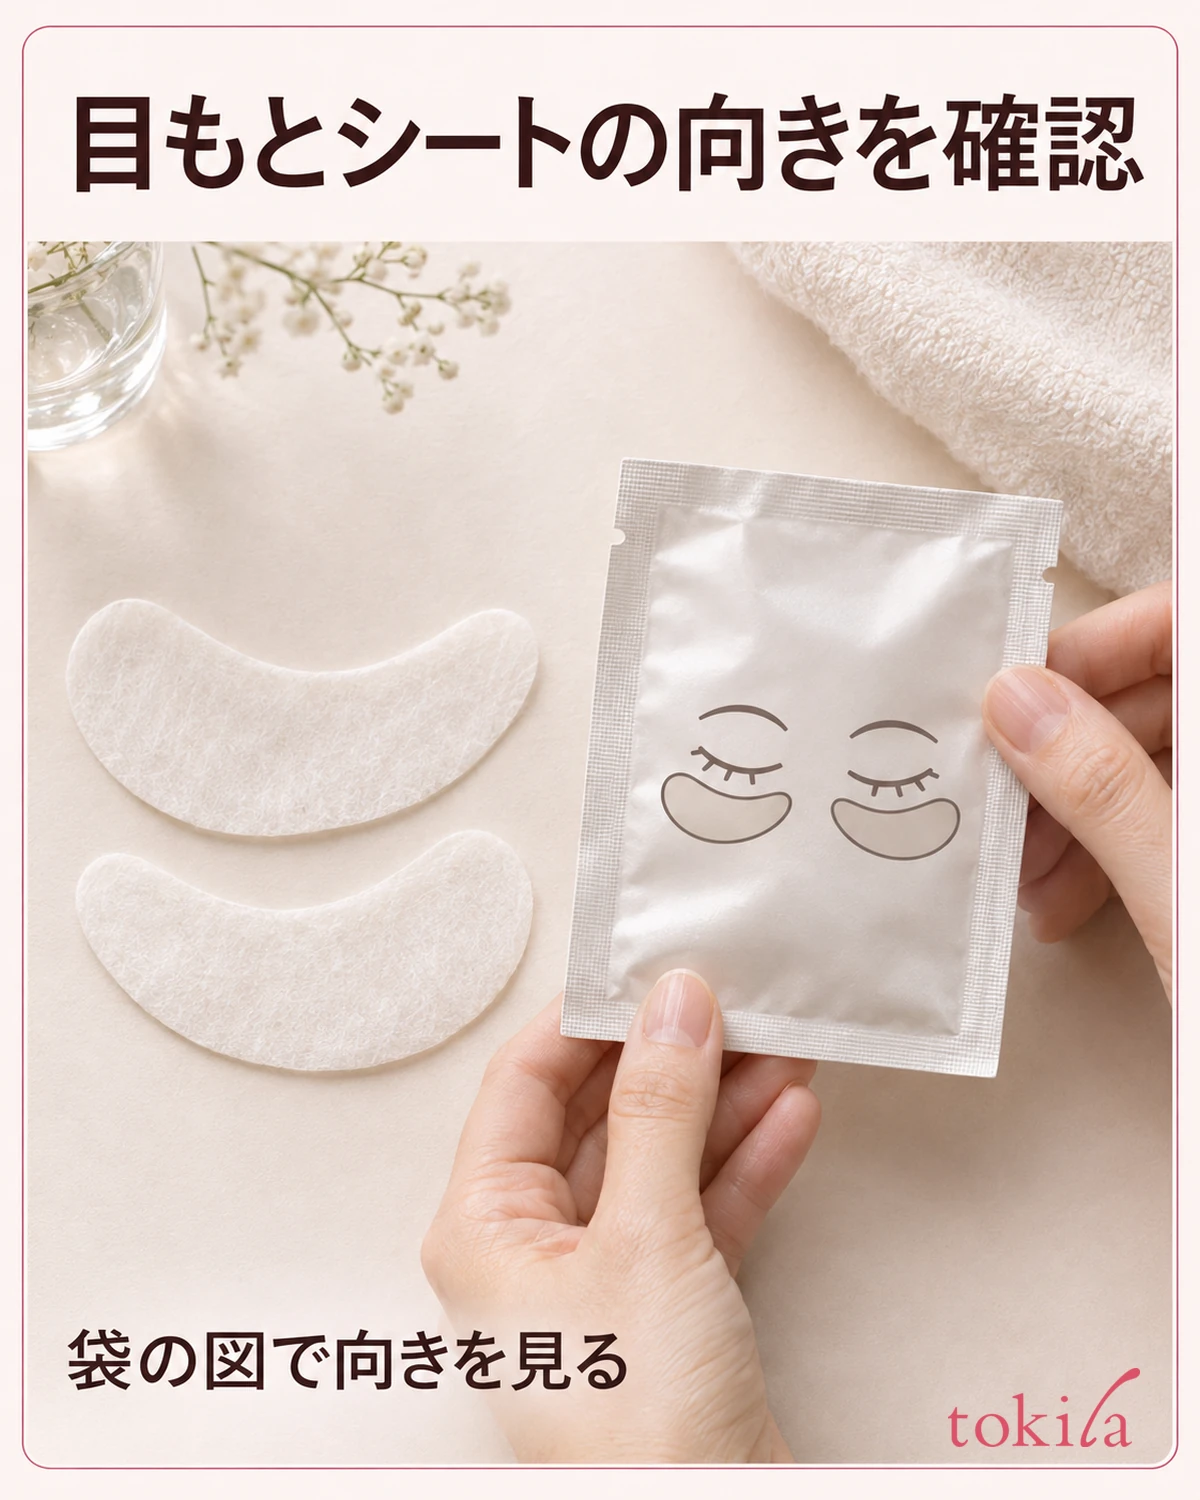
Before opening the pouch, look at the diagram showing where and how to apply the sheets. The words “for the eye area” alone won't tell you whether the sheet goes only underneath or extends over your eyelid. See where the upper edge sits in the diagram. If the sheets are marked for different sides, identify the one for your right eye first. Sheets can fold or stick together once you pick them up, so reading the instructions while your hands are dry makes it easier to keep going.
For crescent-shaped sheets, first find the edge that follows the curve under the eye. Use the package diagram to identify which end faces your nose and which faces your temple. If you assume the narrow end always goes toward the inner corner, a different shape can throw you off. When a photo or diagram shows the orientation, use it as your guide, including the placement on each side.
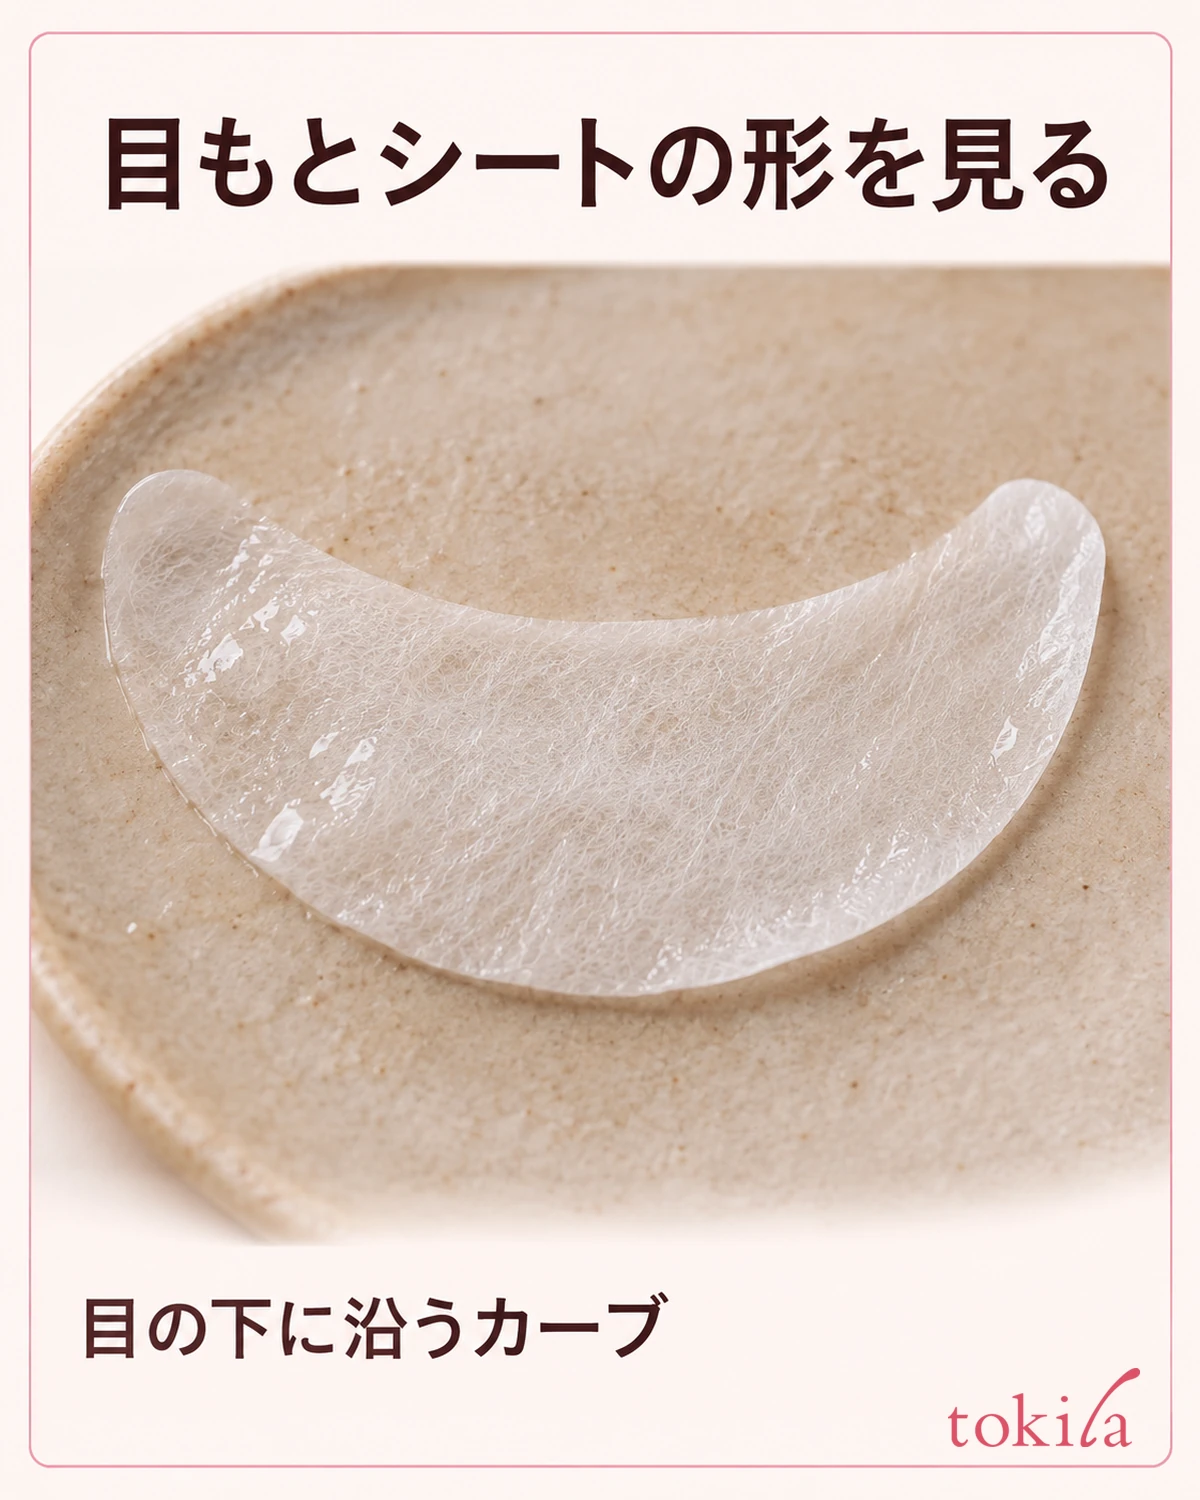
If the mirror makes it hard to tell right from left, use your own features as landmarks. The inner corner is near your nose and the outer corner is near your temple. That relationship holds even when you move the mirror. It also makes it easier to translate a front-facing diagram into placement on your own face.
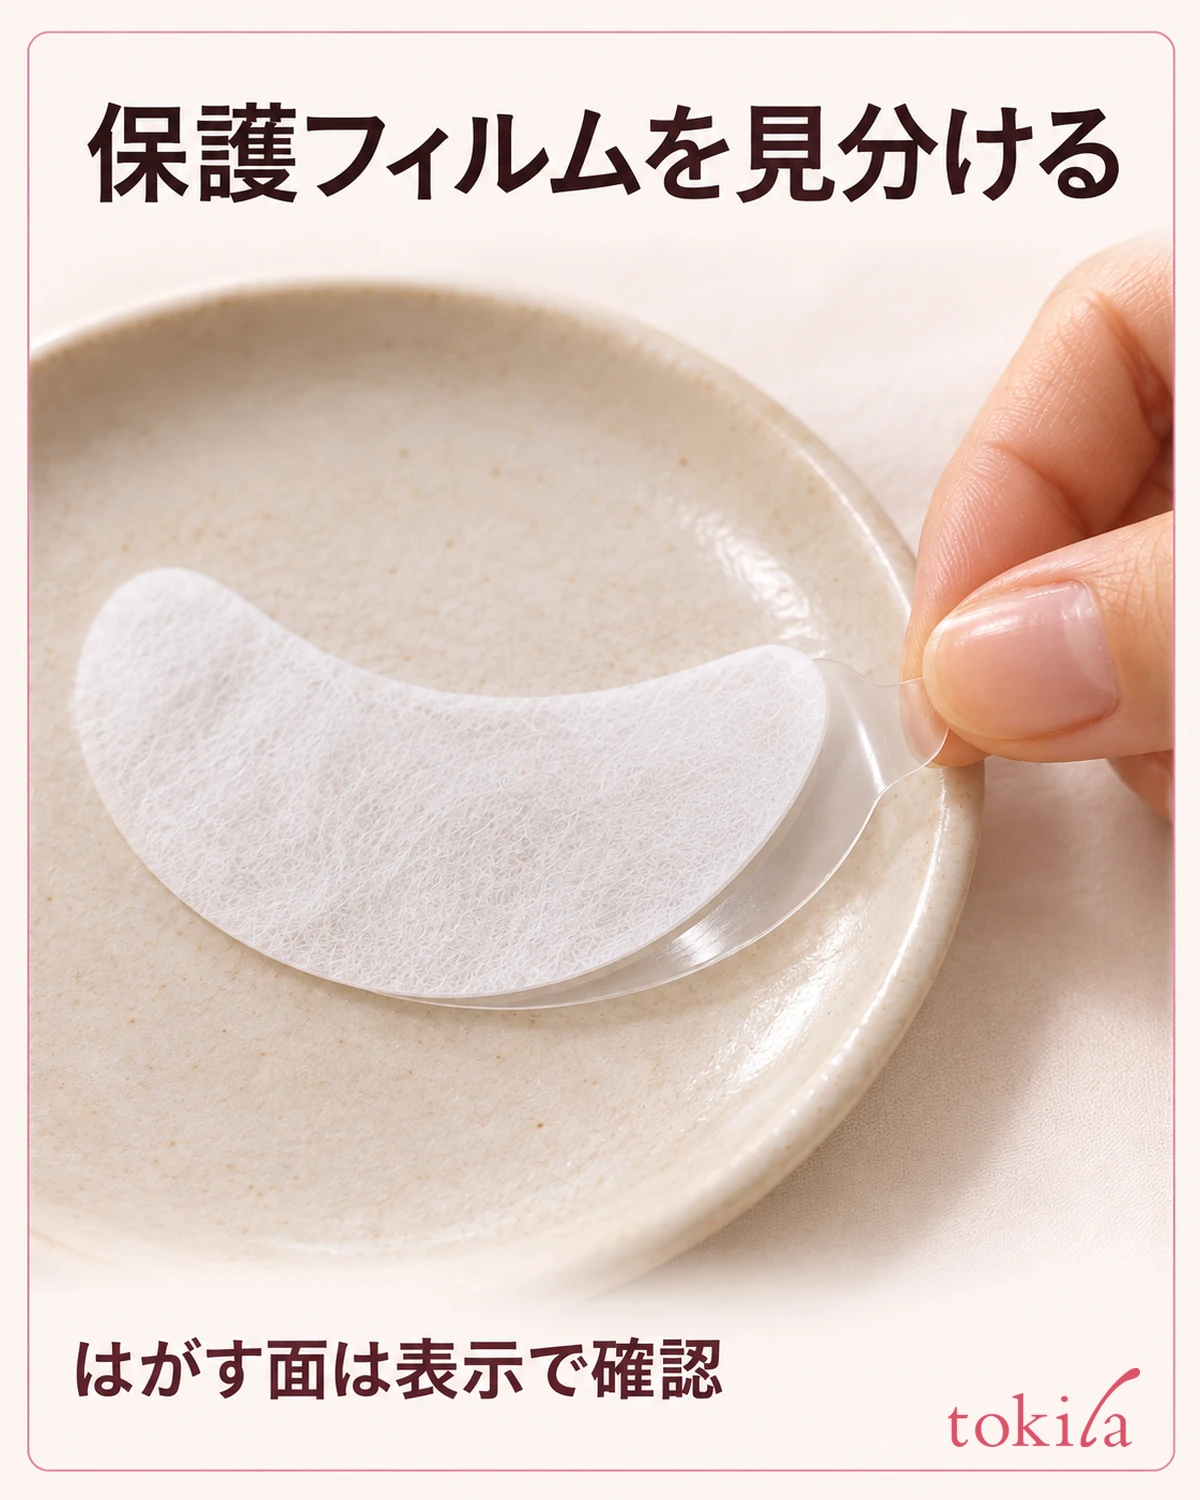
Check which side goes against your skin and whether you need to remove a backing. Some sheets are sandwiched between films, and left and right sheets may be stacked. If you see a clear layer, follow the instructions in order to identify which layer to remove and which face to apply before peeling anything away.
2. Check the order of use and take out one sheet at a time
There's no single point in a skincare routine for applying under-eye sheets. Some go on after toner or other prep. Others are the last step of your evening routine. If you're unsure whether they go before or after your emulsion or cream, check the steps listed before and after the sheets in the directions on the box. If you also want to use a full-face mask, distinguish it from these sheets by reading how to use a two-piece sheet mask and checking the directions for each product.
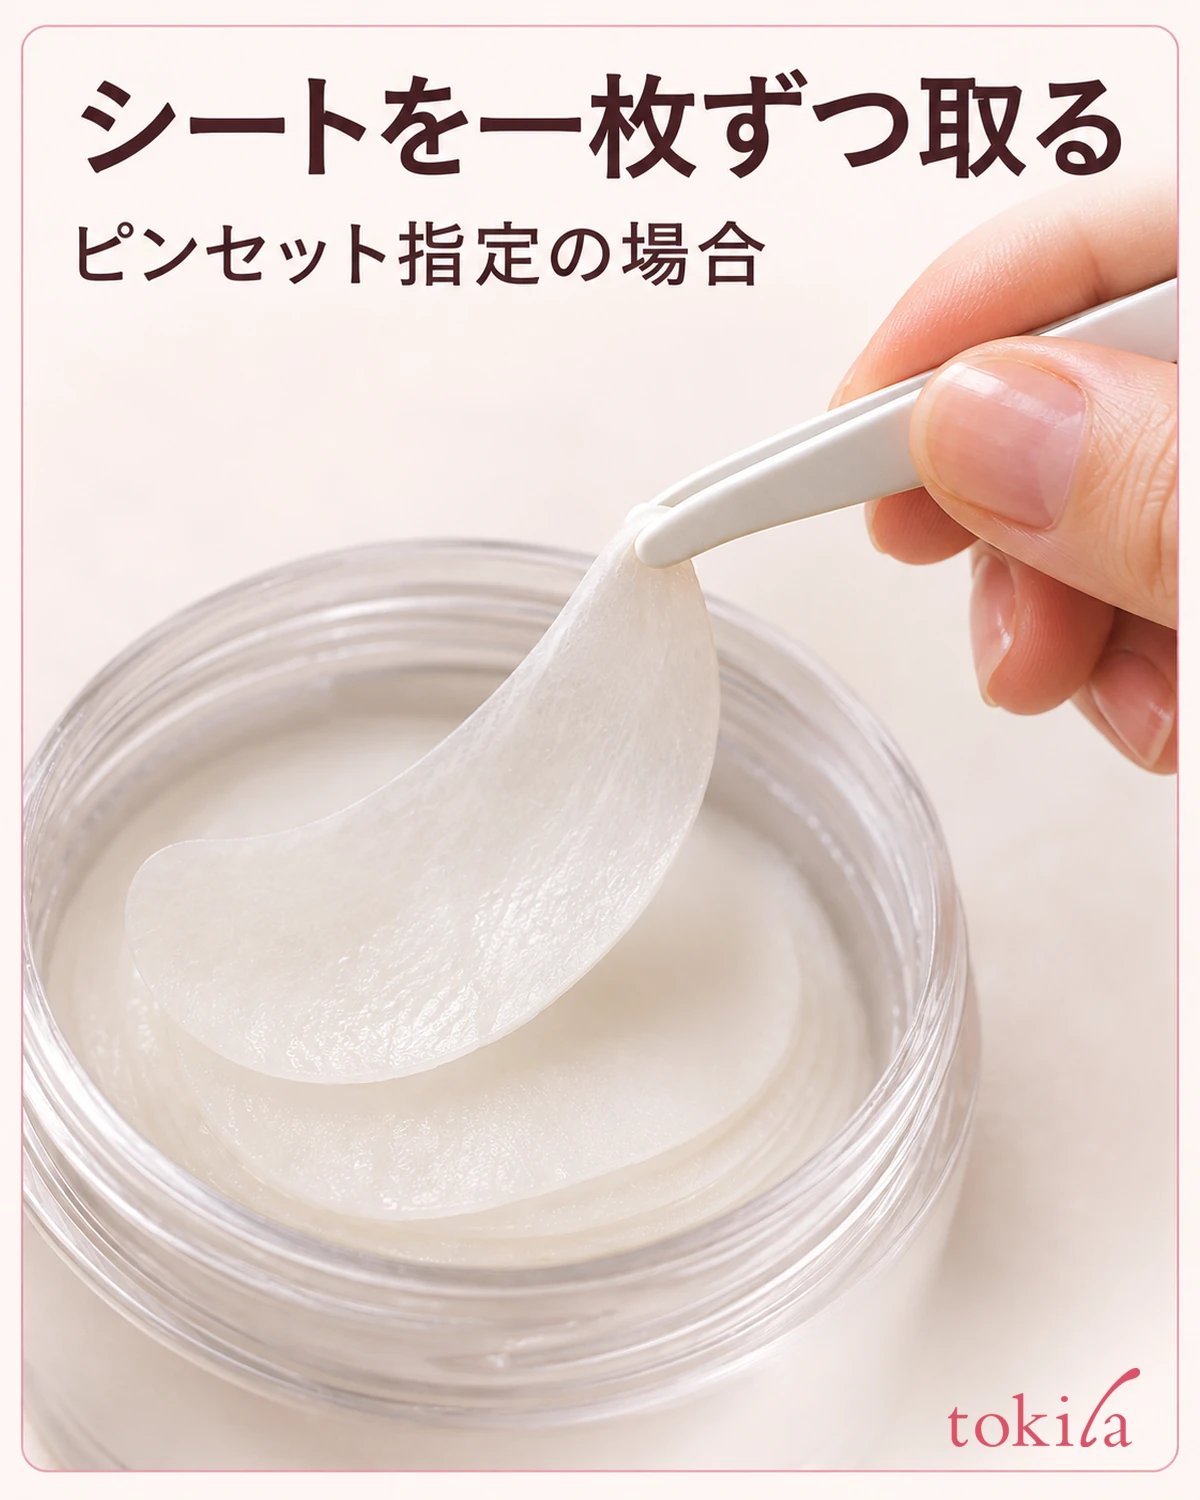
Open the pouch or container with clean hands. If the directions call for a tool such as the included tweezers, use it to grasp an edge and lift a single sheet. If the sheets look stacked, check the edge to see whether you've picked up two thin layers. Pulling from the center can make the shape hard to see, so unfold the sheet until you can identify both ends before moving to the mirror.
If the directions say to use the sheet immediately after opening, move your hair out of the way, set out a mirror and the directions, and make sure you can track the time beforehand. Taking one sheet at a time makes it easier to keep track of which one you're holding than spreading out both on your palm and letting them overlap.
If the sheet has a specified serum or cream side, use the way it was stacked in the container or the position of the backing to tell the sides apart. This avoids repeatedly touching both surfaces. A protective film with a tab extending beyond the sheet shows you where to grip. If the directions leave you unsure about the shape or which side to use, pause and check the diagram for that product before proceeding.
3. Apply the sheet to the skin under the eye, clear of the lash line
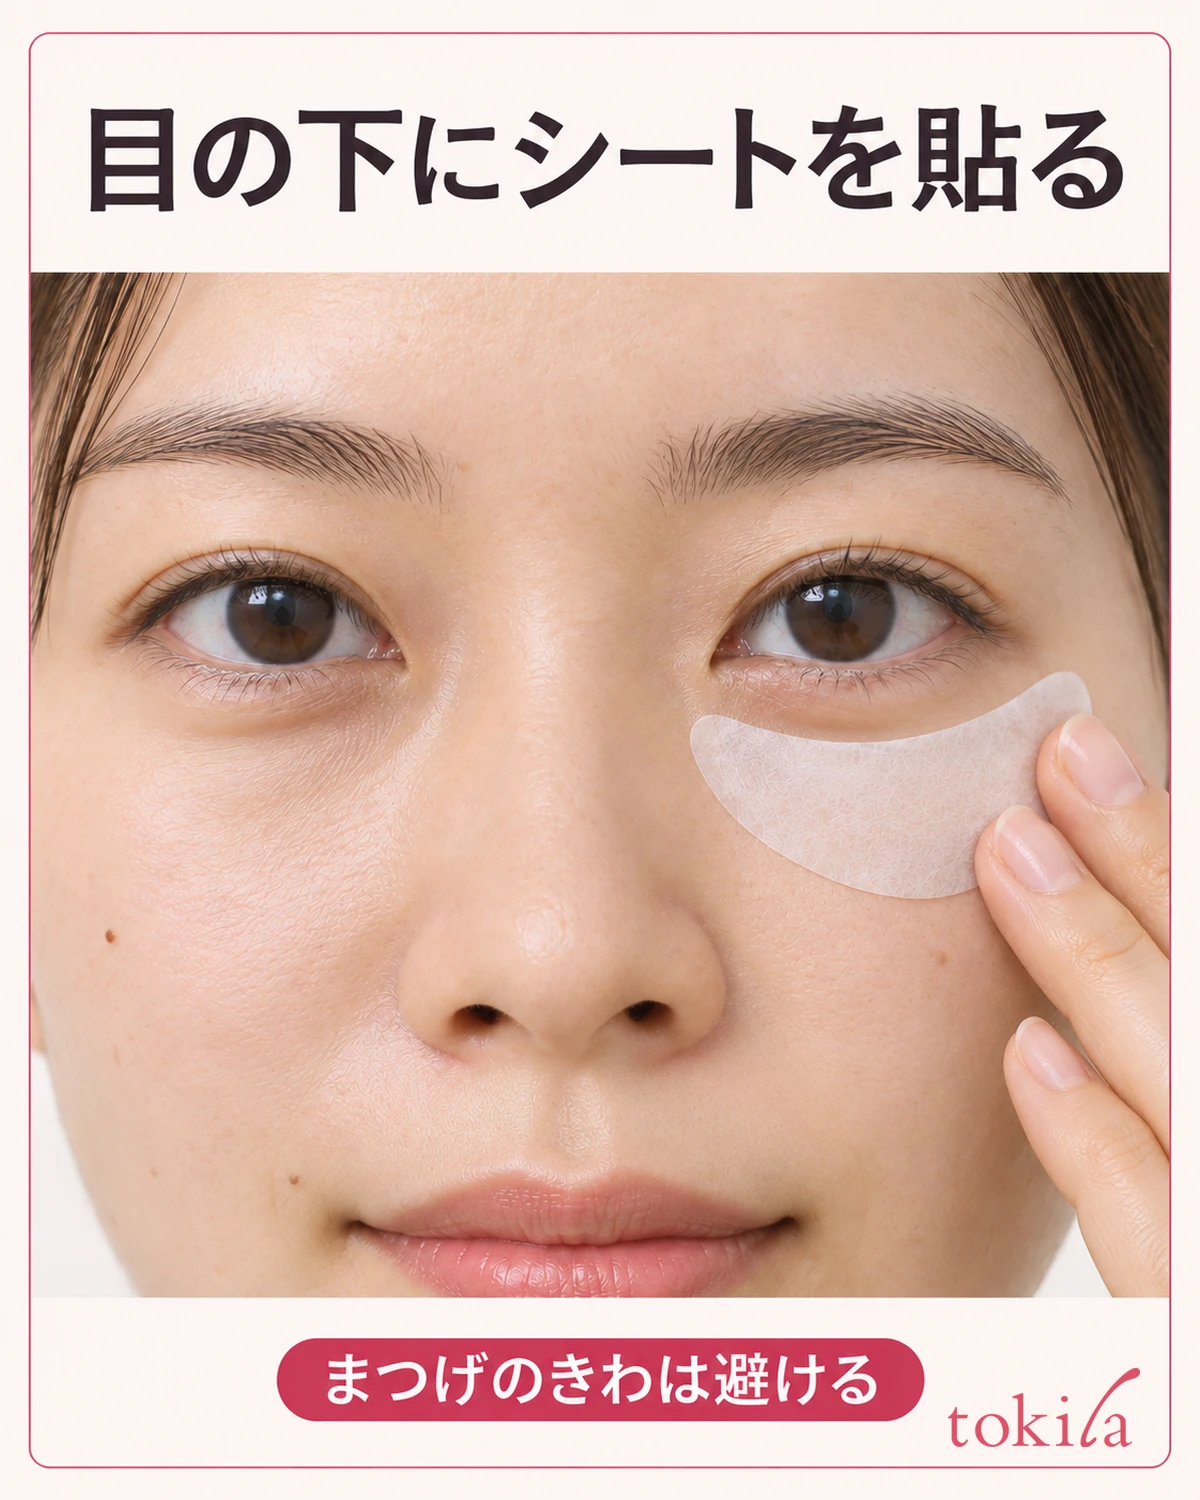
Set the mirror in front of you. With your eyes open as usual, look at the skin below your eye and the base of your lashes. Place under-eye sheets where the upper edge won't touch your lashes. Avoid bringing the sheet right up to the inner corner. Check where the outer end lands and keep the sheet within the area shown on the package. Check each eye for comfortable blinking before trying to match the height of both sheets.
First place the middle of the sheet gently against your skin, then smooth the ends into place toward the inner and outer corners. If an end has a small fold, lift just that spot and lay it back down without stretching the sheet sideways. Sliding a misplaced sheet across your face with a finger can make it hard to track where the upper edge goes. Check where the edge sits before adjusting it.
Look straight ahead and blink a few times. Check whether your lashes touch the sheet or the edge shifts up toward your eye. If the top edge is too close, move it farther from your eye and avoid pressing it upward to fit. Remove the sheet if it still seems likely to touch your eye within the recommended placement area. If liquid enters your eye, follow the product precautions, such as rinsing right away with water or lukewarm water.
This guide covers sheets shaped for the under-eye area. Choosing those lets you follow the product directions for which side goes where without cutting down a full-face mask. If you're concerned about the color or shadows under your eyes, see how under-eye circles look and basic care separately from adjusting where you place the sheets.
4. If an edge lifts, check where it lifts and how close it is to your eye
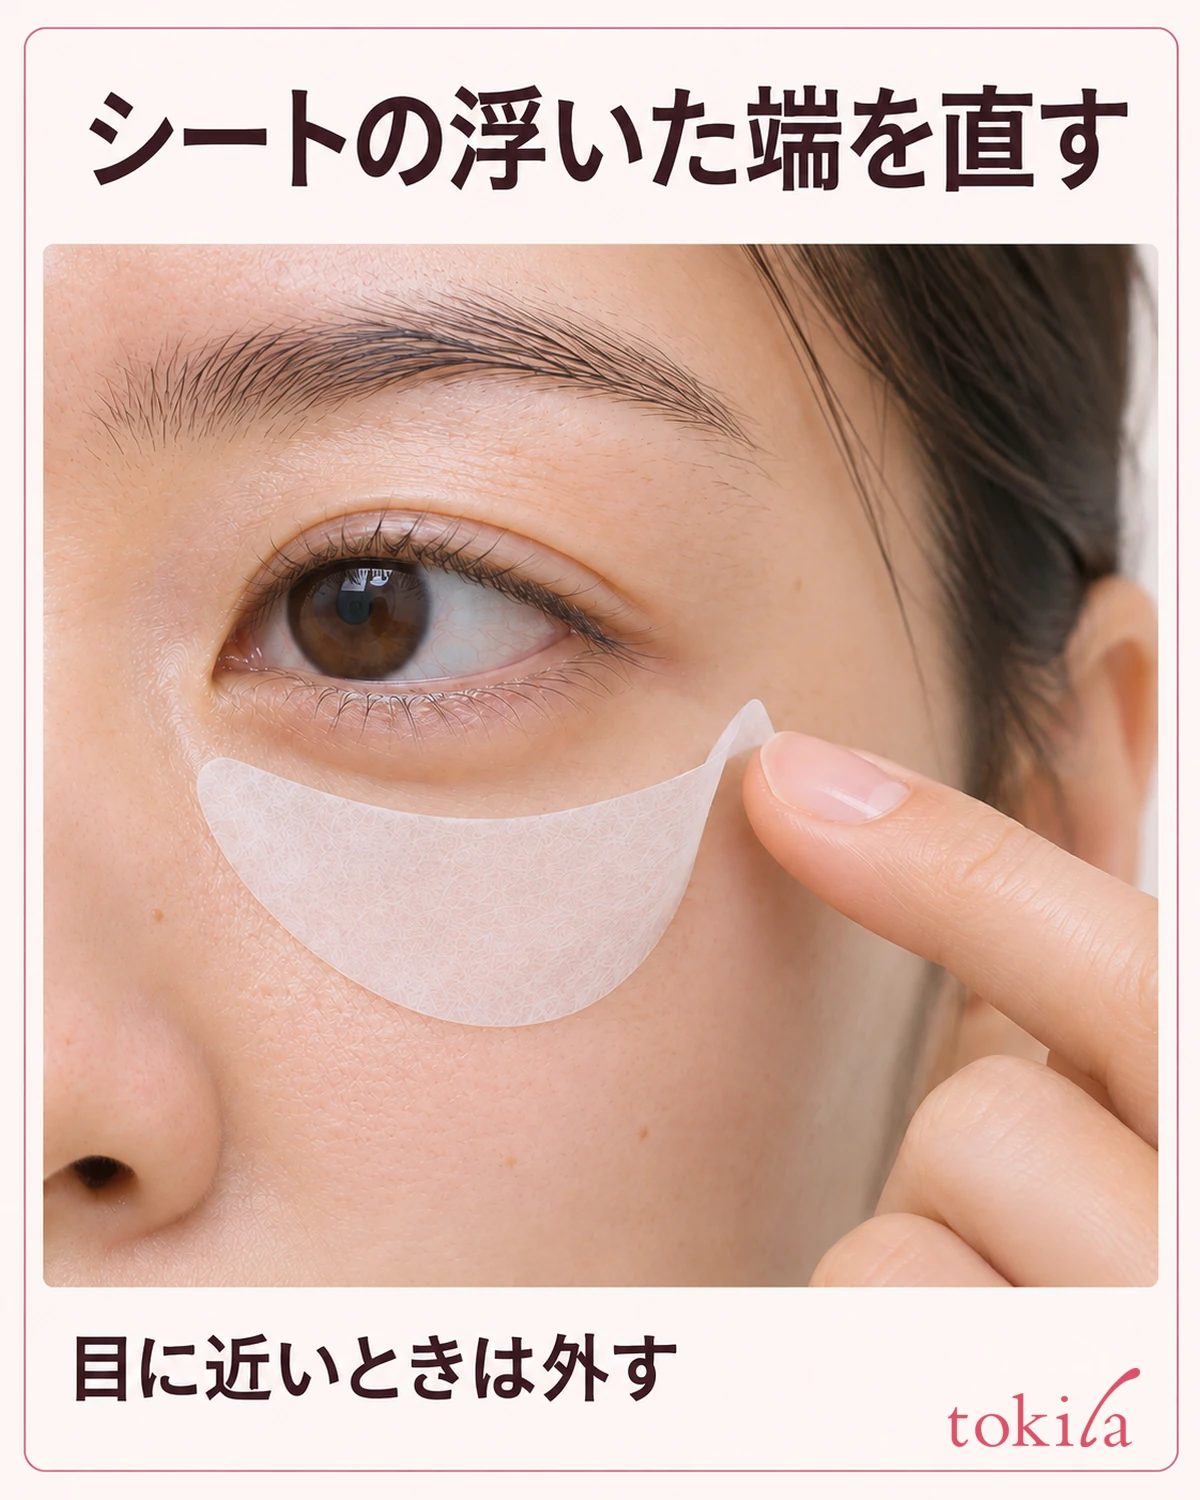
If only the outer end lifts, check in the mirror whether it has folded and stuck to itself or extends beyond the curve under your eye. If it's just folded, lift and unfold that spot and lay it back against the skin. If the whole sheet is being pulled out of place, check its orientation and position before trying to press the end down.
If the upper edge has shifted, first check that it's clear of your eye and lashes. You don't need to push a lifting edge closer to your eye or add liquid each time you adjust it. If it seems likely to touch your eye whenever you move, take it off even if there's time left. Noticing whether the upper or lower edge feels wrong helps you decide whether to reposition or remove it.
A sheet can sit well at first and shift when you look down to start doing chores. If you're worried about slipping, check the placement in an eye-level mirror and pick a time when you won't need to keep touching it. If the same area always extends past your skin's curve, compare the length of the edge that follows your eye and the shape of the outer end when choosing your next mask, along with the overall size.
5. Remove the sheets at the recommended time and check what to do next
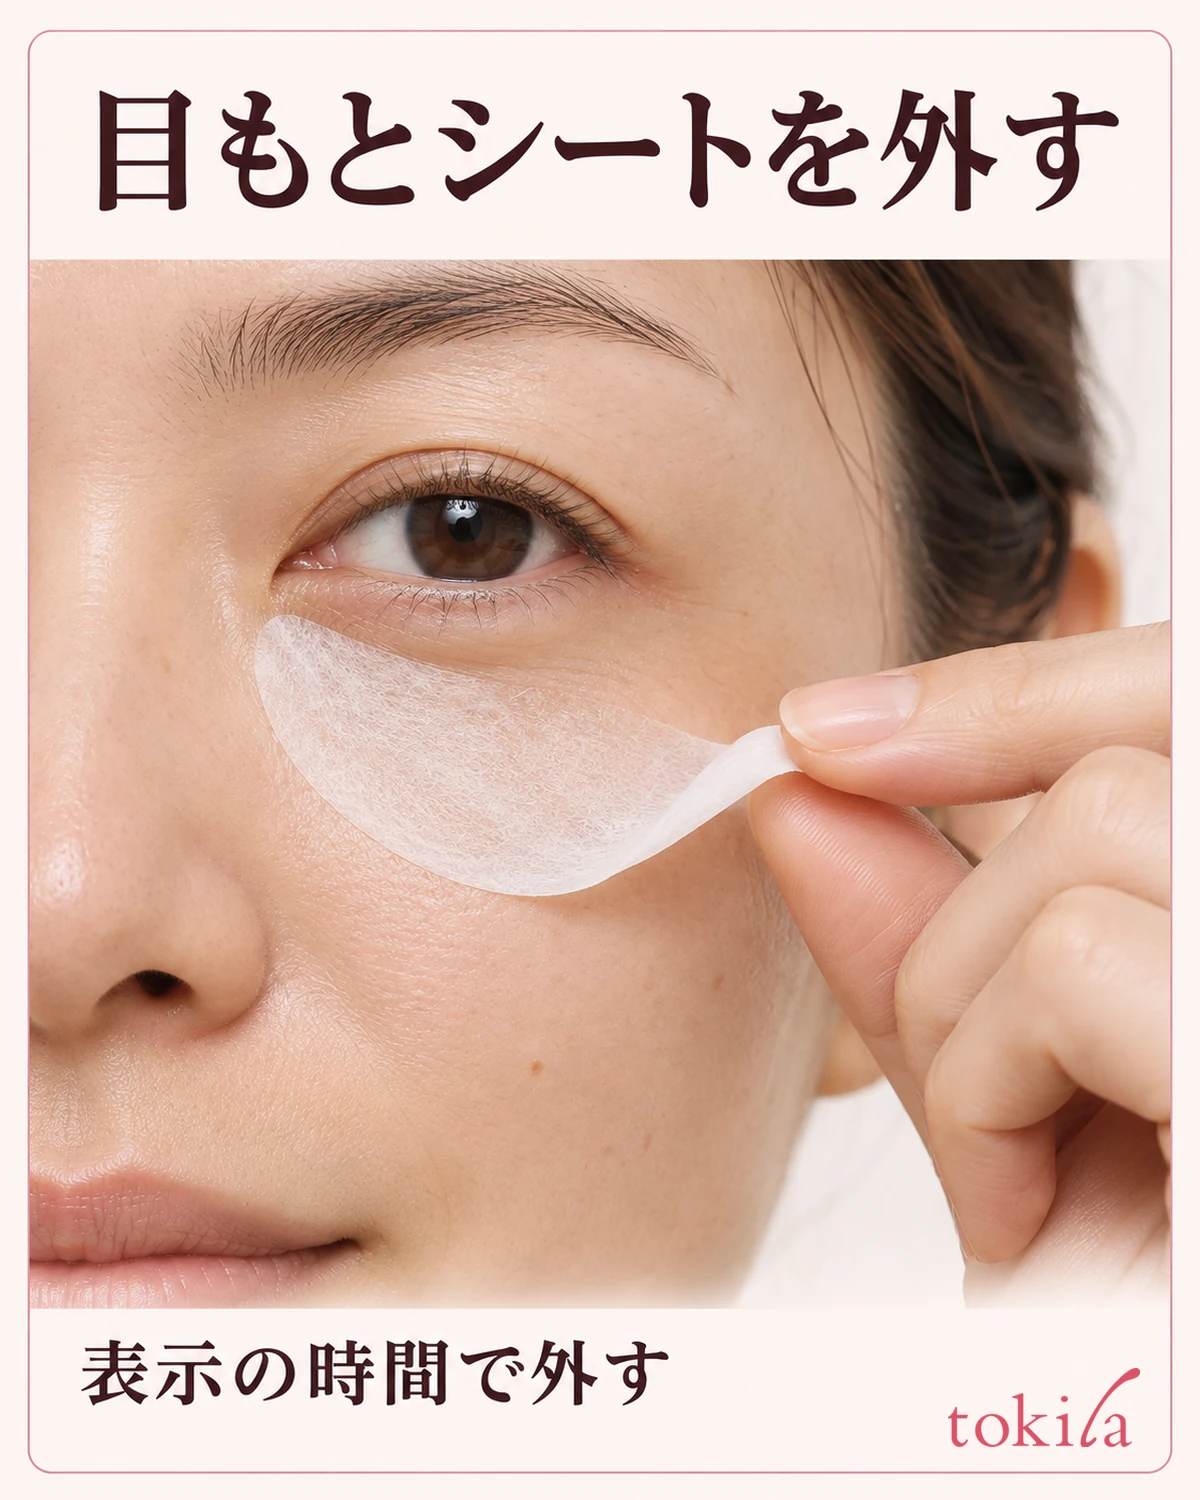
Before opening, read how long the sheets should stay on. Timing differs by product, so use the directions for the current mask. If you might lose track, set a timer after placing both sheets, following your product's instructions. A sheet that still feels damp doesn't need to stay on longer.
To take a sheet off, gently lift an edge you can grip without pulling your skin. Then read the rest of the same directions to see whether to smooth any remaining liquid over the surrounding area or move on to cream or another step. If the sheets are the last step of your evening routine, follow that order without adding steps from another product. If they're single use, discard them after removal instead of returning them to the container.
On your first try, use the diagram on the pouch to identify the nose and temple ends, check that the upper edge stays clear of your lashes once the sheet is on, and remove it at the stated time. Remember which end was harder to position, so you can spend less time figuring it out in the mirror next time.