If you fill in your brows with a pencil, consider the tip shape together with the area you want to fill. When shopping for an eyebrow pencil, you will see fine round tips, oval tips, and sharpenable wooden pencils. They all draw brows, but rather than assuming finer is better or thicker is easier, first decide where and what kind of strokes you want to add. This makes the options easier to organize.
This article explains how to compare tip shapes, colors, and everyday handling before buying. It is a guide to choosing your next pencil, rather than repairing or touching up an existing pencil that slips, breaks, or catches. The photographs explain shapes and where to look; they are not results comparing actual products’ color payoff or durability.
1. First decide whether to add fine strokes or fill a wider area
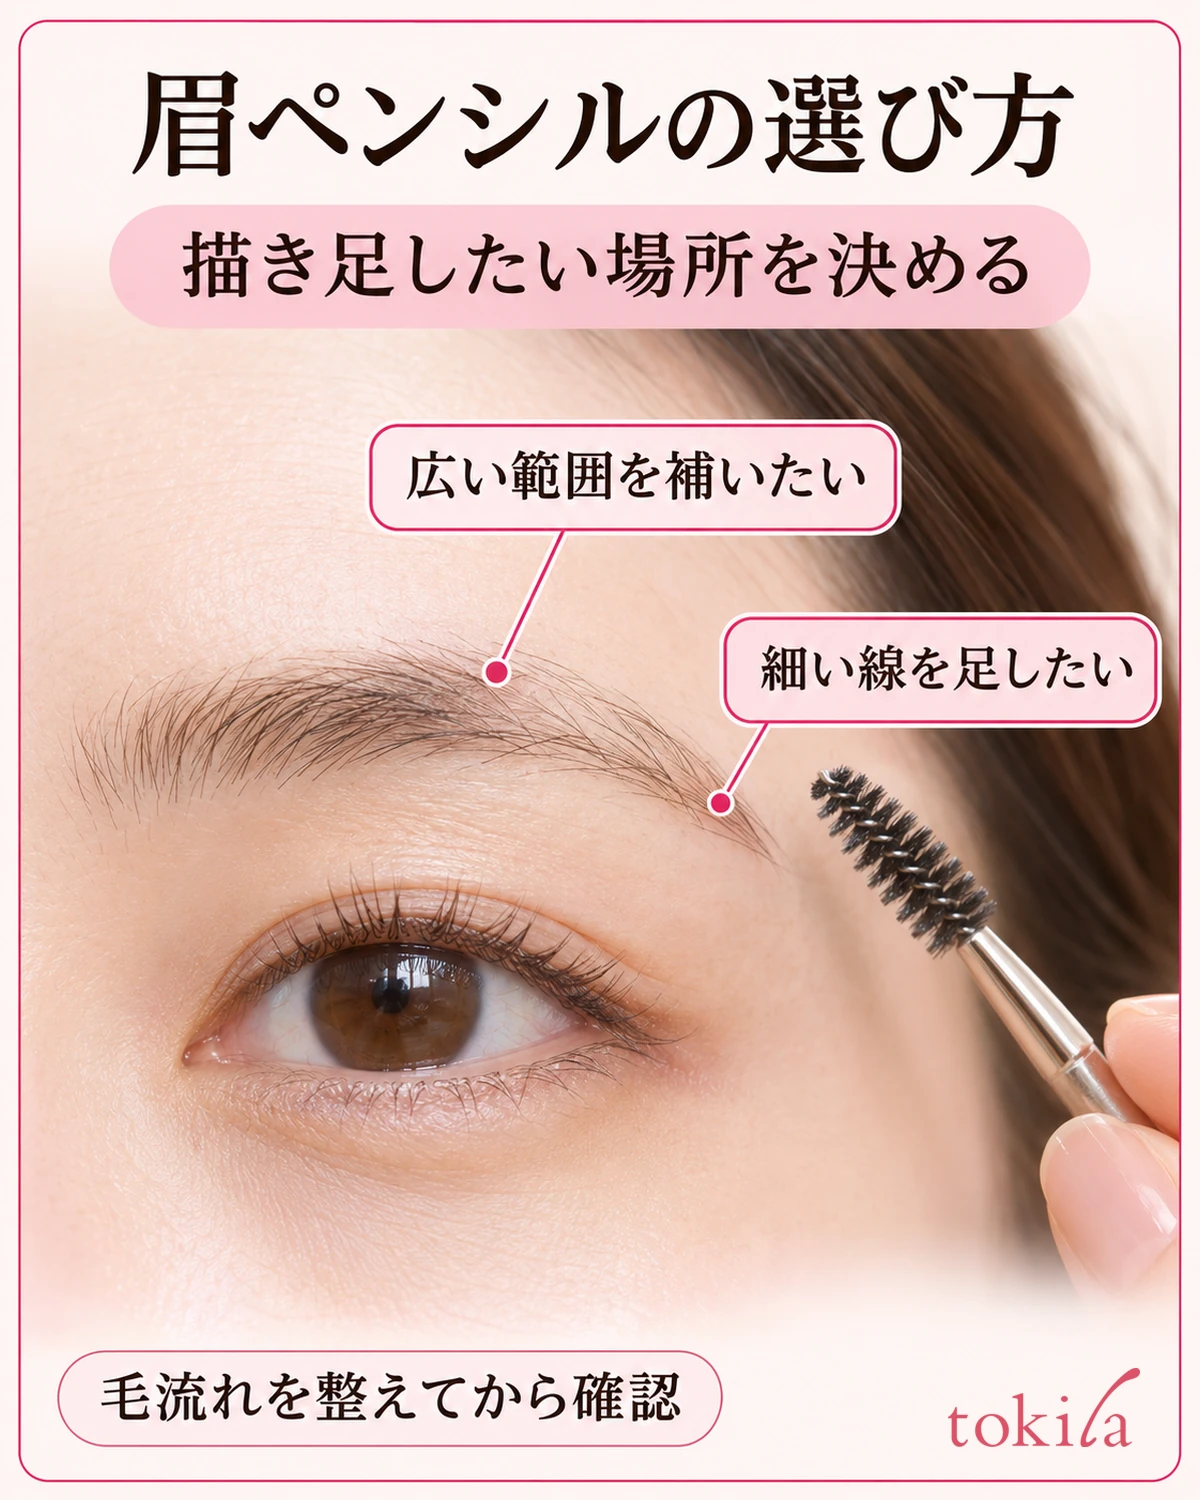
Look at your bare brows in a mirror with your face straight ahead. Lightly arrange the hairs and check whether an apparently hairless spot is actually a gap showing skin or simply hairs lying in another direction. You do not need to assume that buying a pencil means filling every area, including places with enough hair.
If you want to add individual strokes to a short section at the brow tail, use that small area as your selection criterion. If you want a light wash of color over a slightly wider area, such as below the arch, consider whether the shape offers a broad surface as well as a fine point. Even one person’s brows may have both areas needing fine strokes and areas needing broader coverage.
Make notes pairing an area with an action, such as “short strokes at the tail” or “light color in the central gaps.” Simply wanting a natural look leaves it unclear whether you are choosing fineness or color. If you keep a photo, save a personal reference that shows what needed filling, rather than only a dark result immediately after drawing. This provides a basis for comparison.
If the areas to fill differ between the two brows, you do not need the same number of strokes on each. Changing the overall brow color is also different from drawing into gaps in the skin. If you want to change how the hairs themselves look, first narrow down the missing function instead of simply choosing a thicker tip and adding more color to the skin.
Once you know where you want to draw, review the options in the order of tip shape, color, and daily handling. Consider whether one pencil really needs to finish everything or whether it can share tasks with a powder you already own. If you only need short strokes, you do not have to require broad coverage as an additional function.
2. Compare fine round and oval tips by the part that makes contact
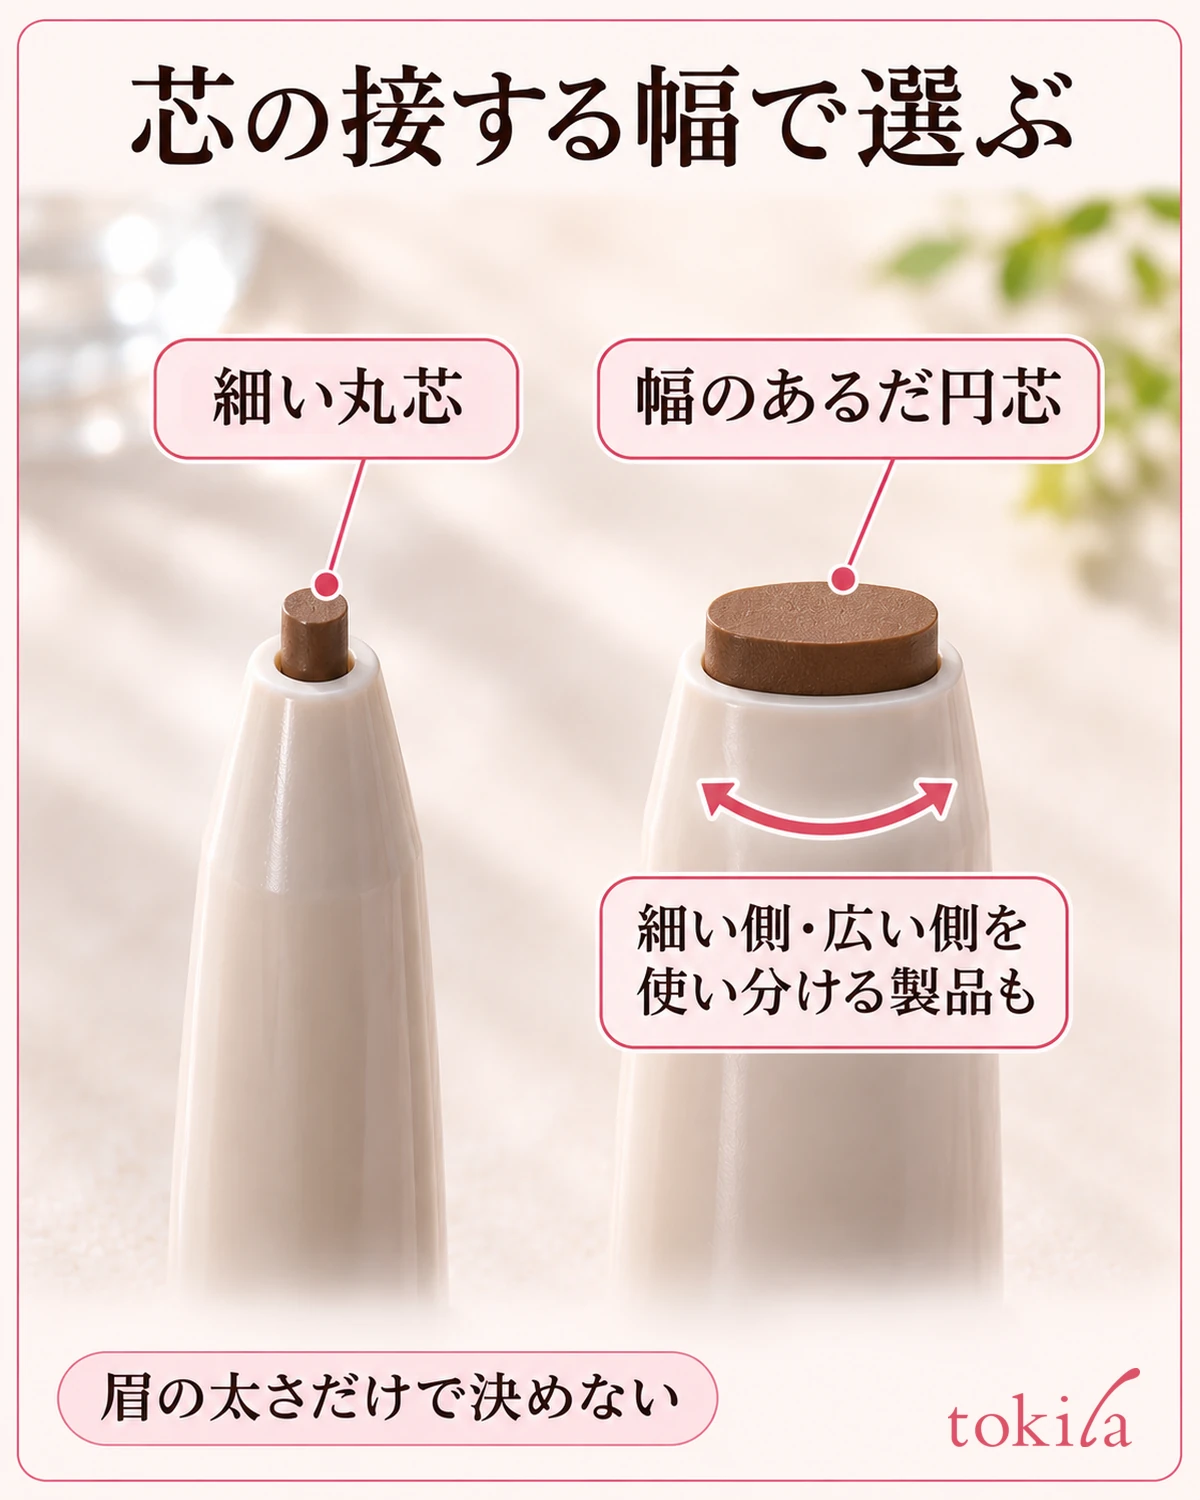
Some fine round-tip products are designed for adding small strokes. When buying, check not only the word “ultrafine” but also tip photographs and the drawing technique the product recommends. A fine tip does not mean you need to press hard or extend it far.
Some wider tips, including oval ones, allow you to use a narrow side and a broad side. If the instructions describe drawing in small areas with the narrow side and filling slightly wider areas with the broad side, consider whether you can orient those two surfaces comfortably in your hand. The same shape name does not guarantee identical dimensions, corners, or hardness.
When comparing tips, look separately at the outline from the front and the thickness from the side. An oval tip appears different in width depending on its orientation, so do not mistake it for a fine round tip based only on a side photograph. In close-ups, focus on the actual core that touches the skin, rather than the thickness of the barrel.
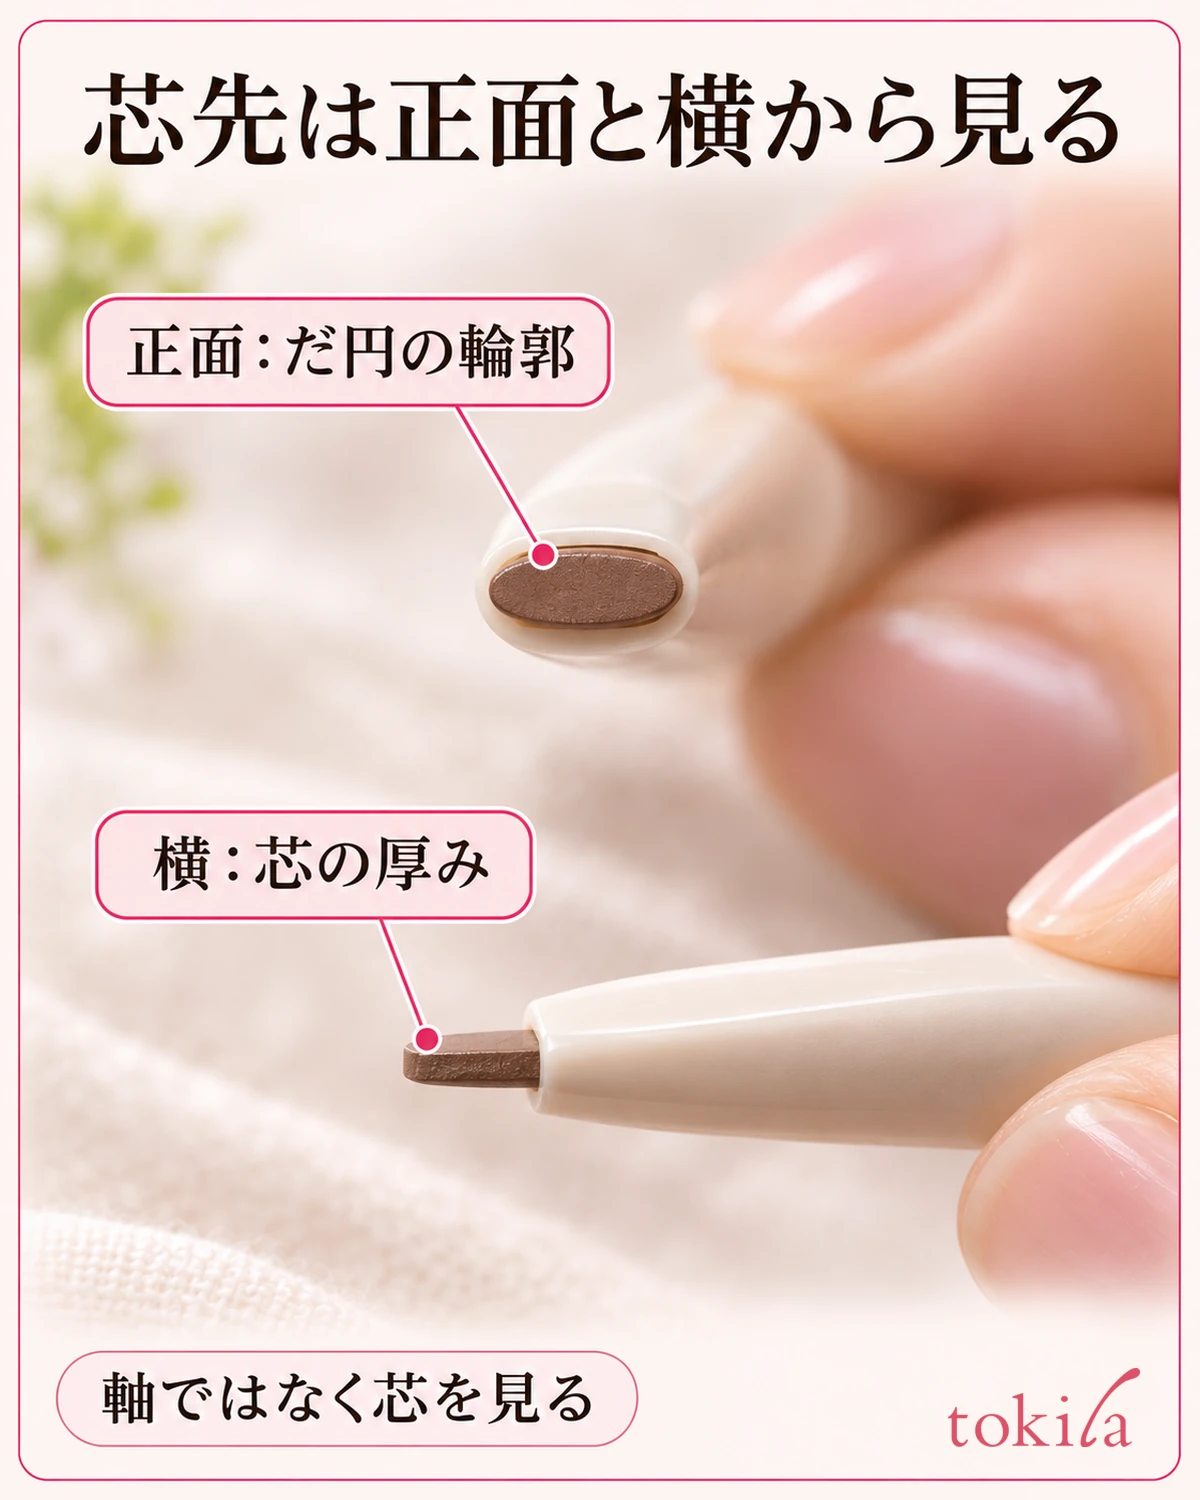
A wider tip is not necessarily for thick brows, and a fine tip is not necessarily for thin brows. The overall width of a brow and the width of the tip touching the skin at one time are separate factors. Wide brows may need only fine strokes between hairs, while thin brows may use a broad surface in certain areas. Compare the tip with the area you first identified, rather than the name of the desired brow shape.
If testers are available, follow the store’s hygiene rules and testing instructions. First see whether a light movement produces short strokes; with an oval tip, check how the contact width changes when you rotate it. Do not infer brow color or longevity solely from a line on your hand. Record it as an action you were able to check there.
3. Consider morning preparation for sharpenable and twist-up pencils
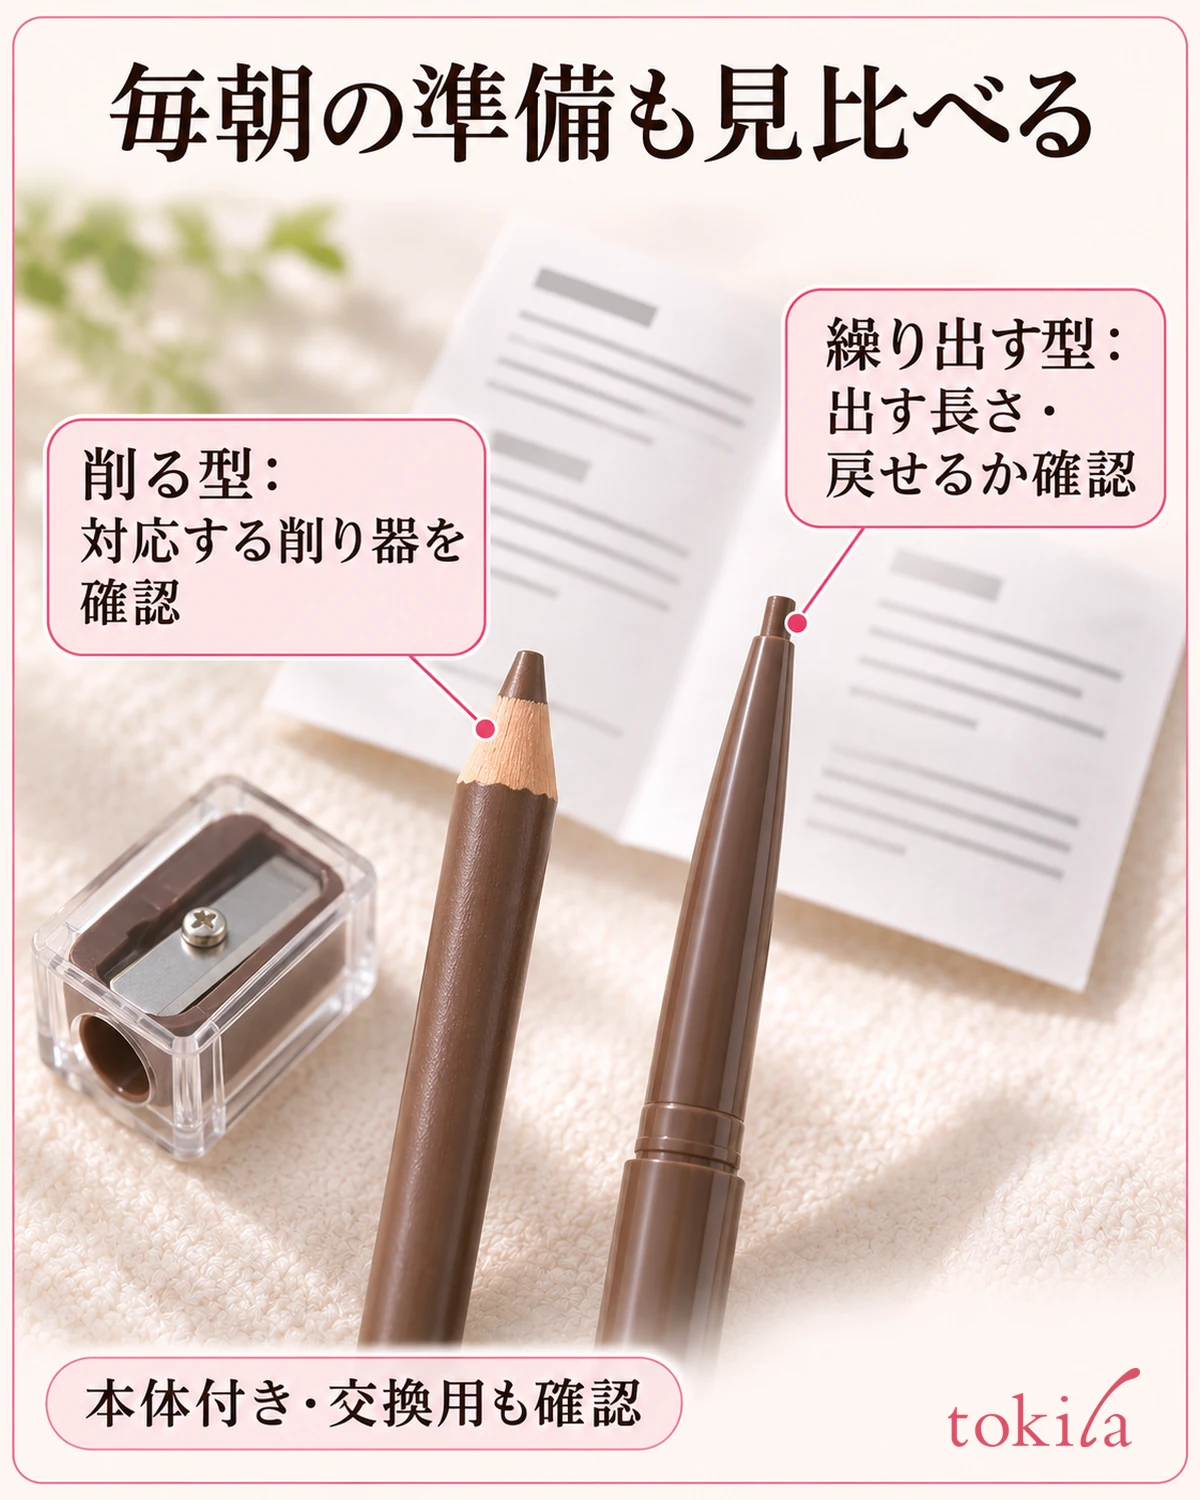
Along with the tip shape, check whether the pencil is a sharpenable type or one that twists up. Some wooden pencils require sharpening to shape the point, and a compatible sharpener is needed. Before pairing them, check not only whether your sharpener fits but also whether it is recommended for that product.
Even a twist-up pencil that does not need sharpening requires checking how far to extend the tip and whether it retracts. Some fine tips cannot be retracted, so reading the instructions before buying helps you picture their handling. Do not choose on the assumption that you can extend a long tip and simply twist it back.
Consider whether sharpening fits your morning routine or whether extending a fine tip a little at a time suits you. For carrying it, you can also check which end has a cap and whether a brush is included. However, first make sure the drawing tip suits your purpose rather than deciding solely by the number of accessories.
For refillable products, verify compatibility between the holder and refill by product name. Do not assume a refill from another series will fit because its shape or shade number is similar. When shopping online, check whether the item includes a holder or is only a refill, avoiding the disappointment of receiving something you cannot use on its own.
Before assuming you can reshape a pencil after buying it, read about its original shape and method of use. Sharpening a twist-up core like a wooden pencil or warming the core to soften it is not a way to compensate for differences between options. Choosing something you can handle as instructed supports everyday preparation.
4. Choose color by your natural brows and layered makeup, not just its name
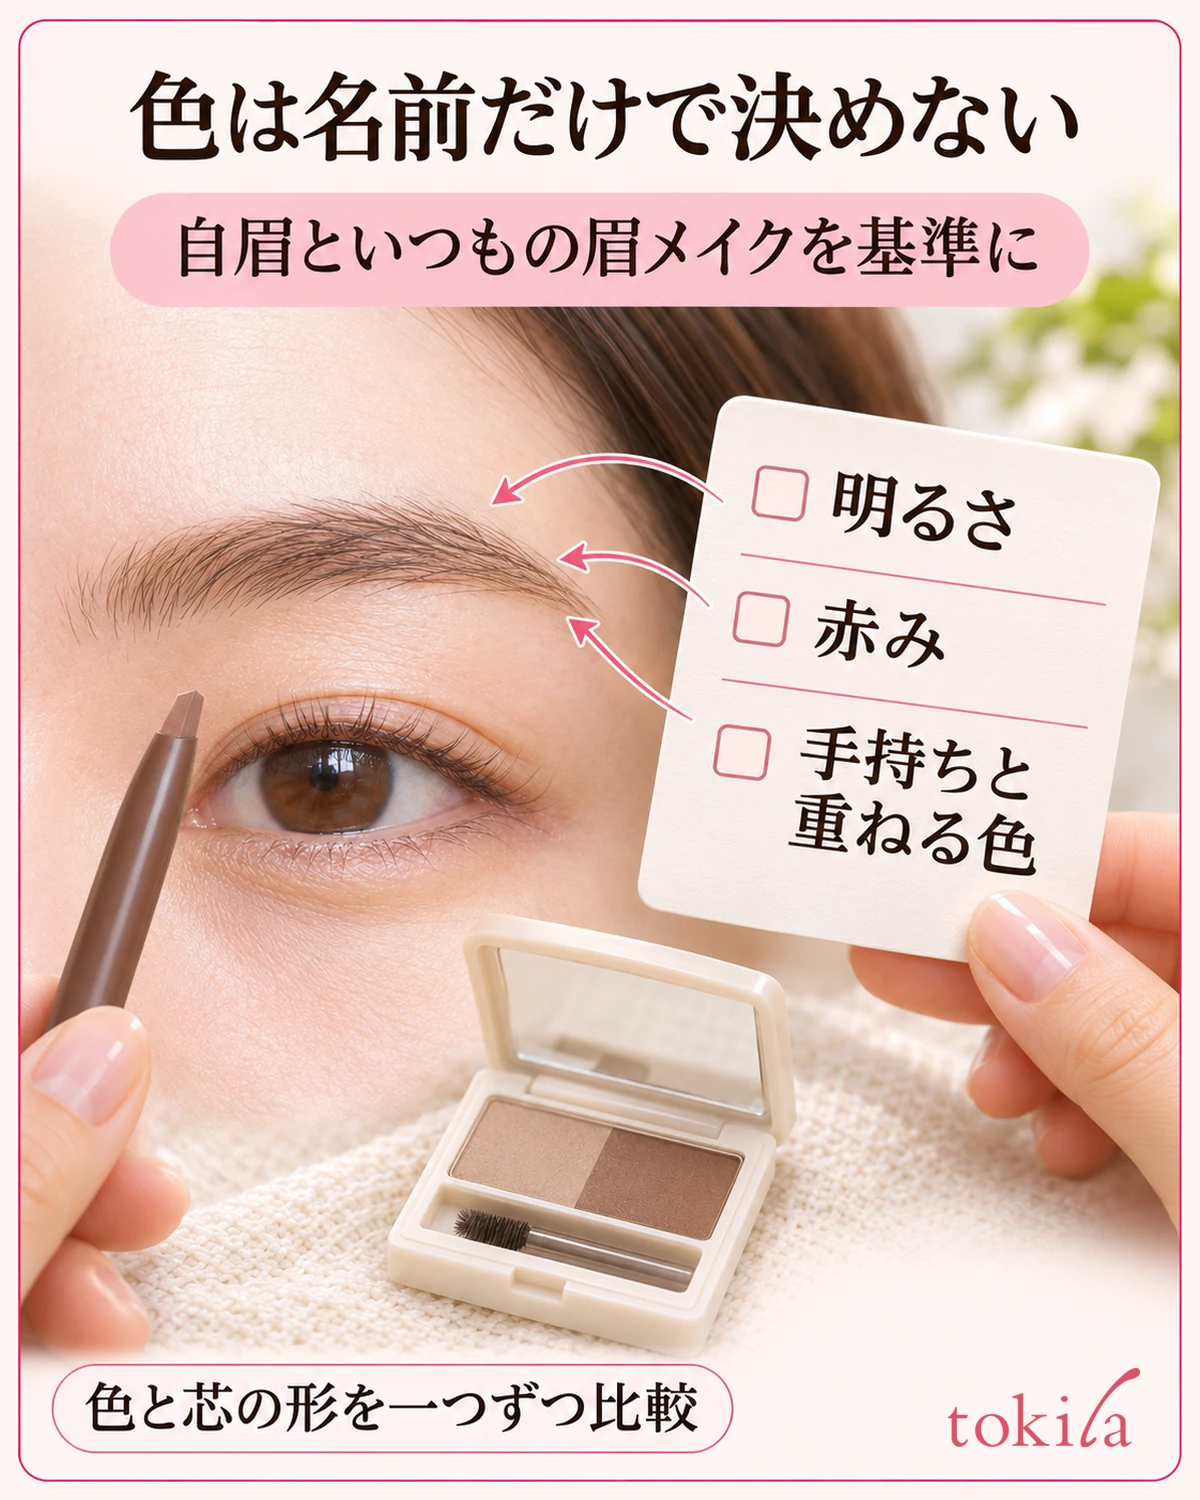
Names such as brown or gray do not establish identical depth or redness. Colors differ between products even when the names match. Read brightness, color direction such as redness, and whether the formula is designed for strong color or light layering separately. Do not adopt a universal, unquantified rule of buying one shade lighter than your hair.
If you will continue using your existing brow powder or brow mascara, decide whether the new pencil should work alone or only supply missing strokes. Recording your usual brow makeup’s shade names can narrow your options, but matching shade numbers across brands does not mean matching colors. Look at the role in layering rather than matching names.
The visible color of a pencil core is not the same as the color it produces on skin. A photograph can show the surface or cross-section of a brown core, but that alone cannot determine color payoff. Read shade swatches and product photographs as separate information, and do not use generated photographs as evidence for actual color selection.
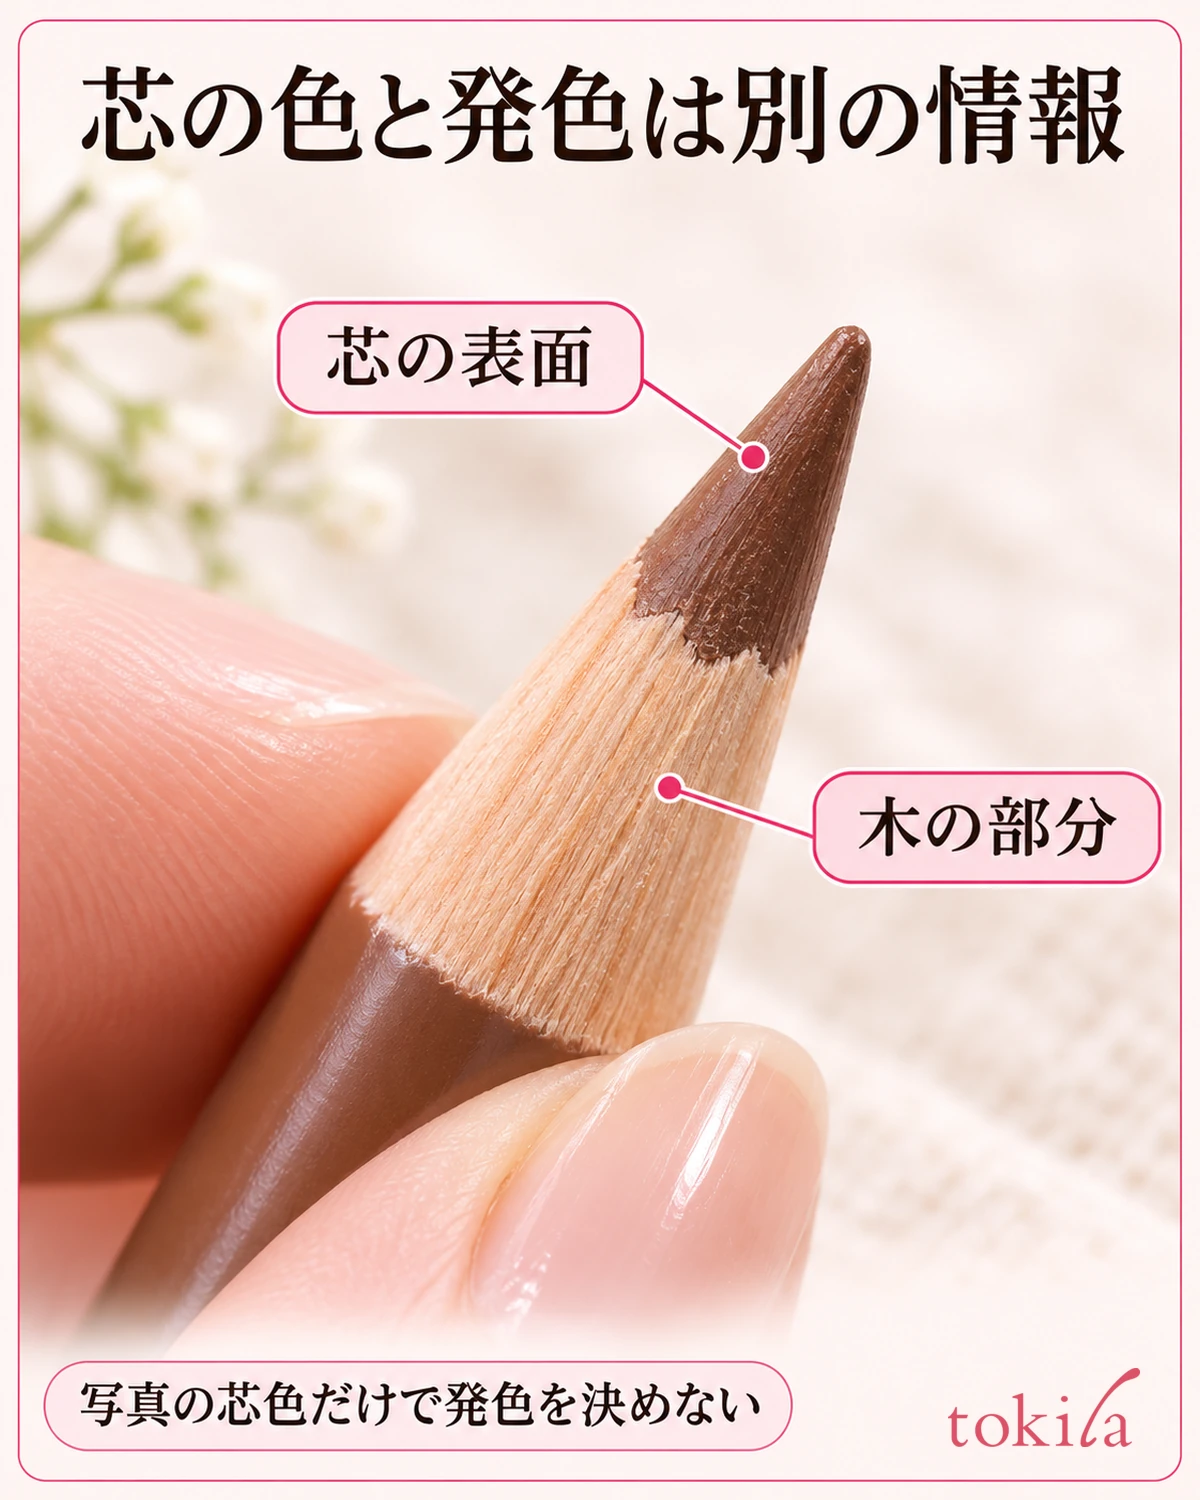
If testing is possible, try a small amount as instructed and also examine it without repeatedly going back and forth from the start. Lighting may differ inside and outside the store. Check that the brows do not stand out too strongly when you look at your whole face, and remember that a device screen cannot reproduce photographic color perfectly.
Even after switching to a lighter color, thick strokes can change the impression of the brows. If the color seems too dark, review tip shape and the number of layers as well. Conversely, if repeatedly building up a pale color does not suit you, review the amount drawn at once together with the color description. Comparing color or shape one at a time helps you preserve your reasons for choosing.
5. Narrow the options to two and state your reason for buying in one sentence
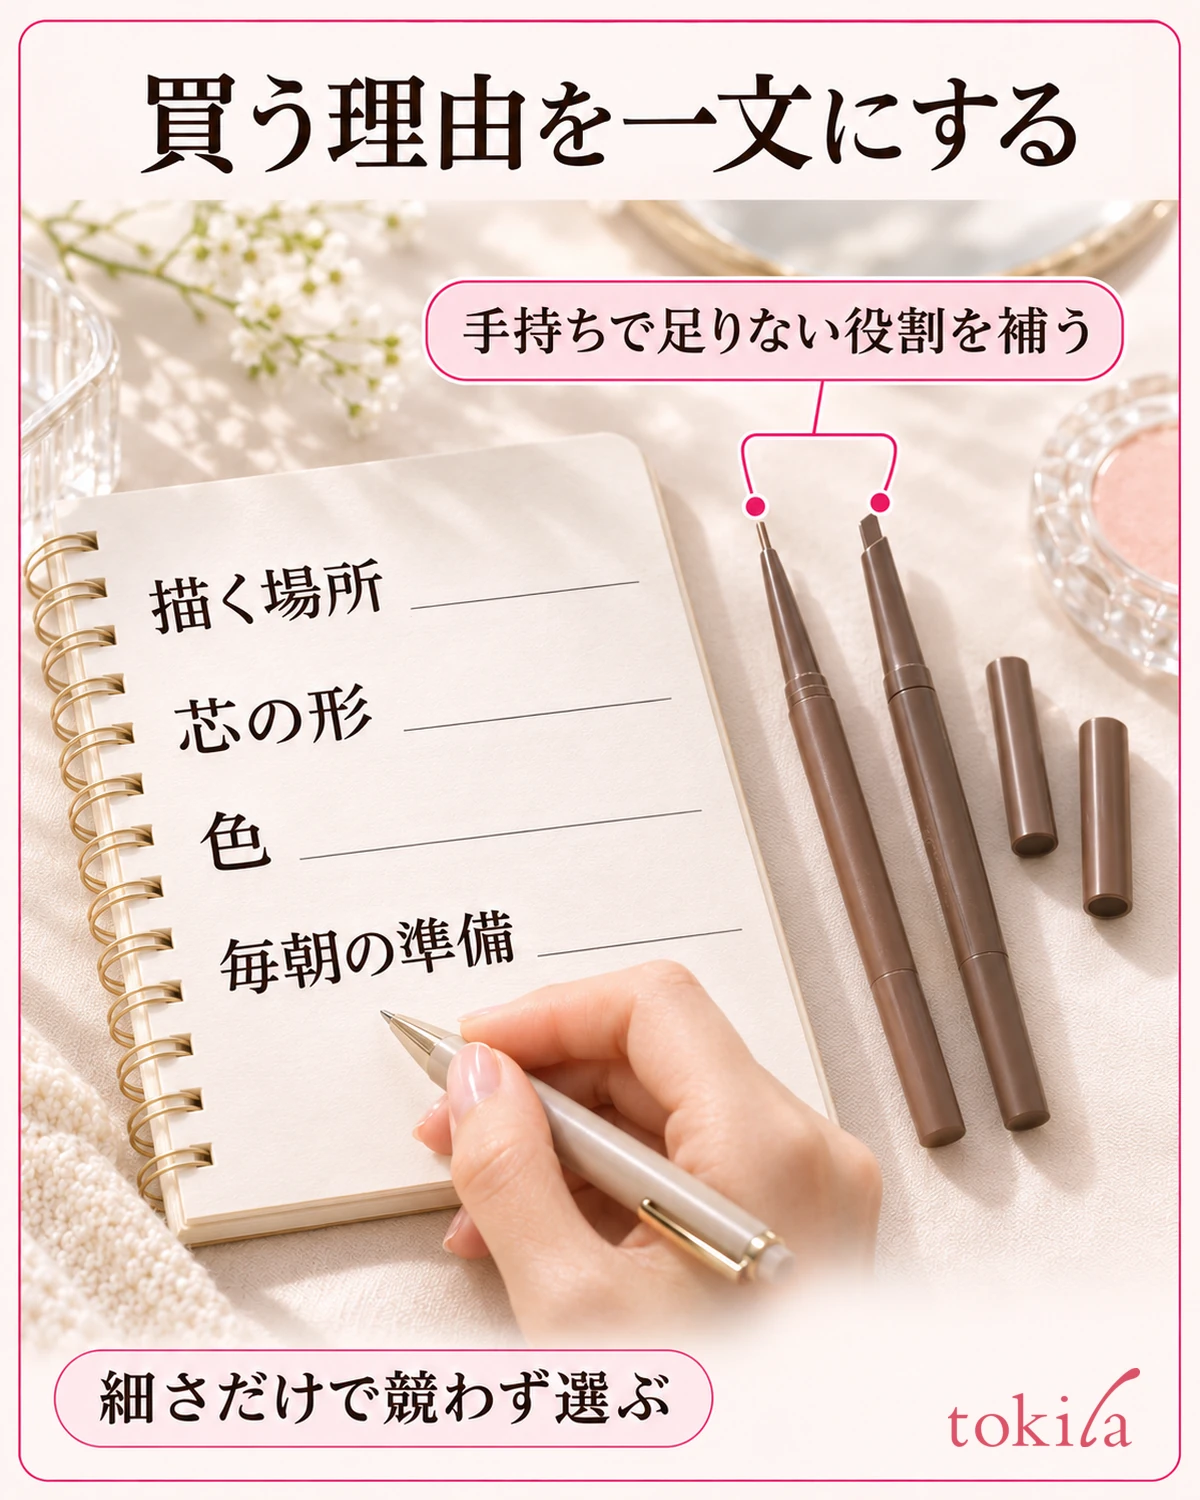
Finally, write down the drawing area, tip shape, color, and preparation for each option. Making the reason specific—“a fine tip mainly for short strokes at the tail” or “an oval tip to add both strokes and slightly broader coverage with one pencil”—makes it easier to avoid reconsidering just because a shape is popular.
If both look good, consider which fills a gap in what you already own. If you have a powder that lightly fills wider areas, you can let the new pencil handle fine strokes. If you do not want more tools, check whether changing the orientation of one tip covers your needs. Return to your own morning routine to decide.
If drawing feels difficult after buying, check tip extension and the surface of the area before immediately adding another color. Stop drawing if there is pain or an abnormal reaction, and do not use a damaged tip. Separating selection from troubleshooting the current problem can help avoid unnecessary repeated replacements.
Tip shape is not a rule prescribing a single brow finish. It is an option that connects the area you want to fill with a method you can use as instructed. Rather than competing over fineness alone, find a pencil that fits your drawing area, color needs, and daily preparation.
If your current pencil slips or makes lines too thick, also see what to check when an eyebrow pencil will not draw well.