
When you go to tie your sneaker laces, only one end is left long. Even if you pull the shorter side hard to even them out, the top of your foot feels tight or only one loop ends up small. Before making the knot bigger, take another look at the center of the lace and the path it takes through the eyelets.
Here we deal with ordinary sneakers with a single removable lace threaded alternately through the left and right eyelets. This is a procedure for when the slack differs between the left and right within one shoe. Shoes with elastic laces, dial closures or a specified special lacing method are a separate matter, so follow that product's instructions first.
1. Check the left-right difference within one shoe, and the wear on the lace
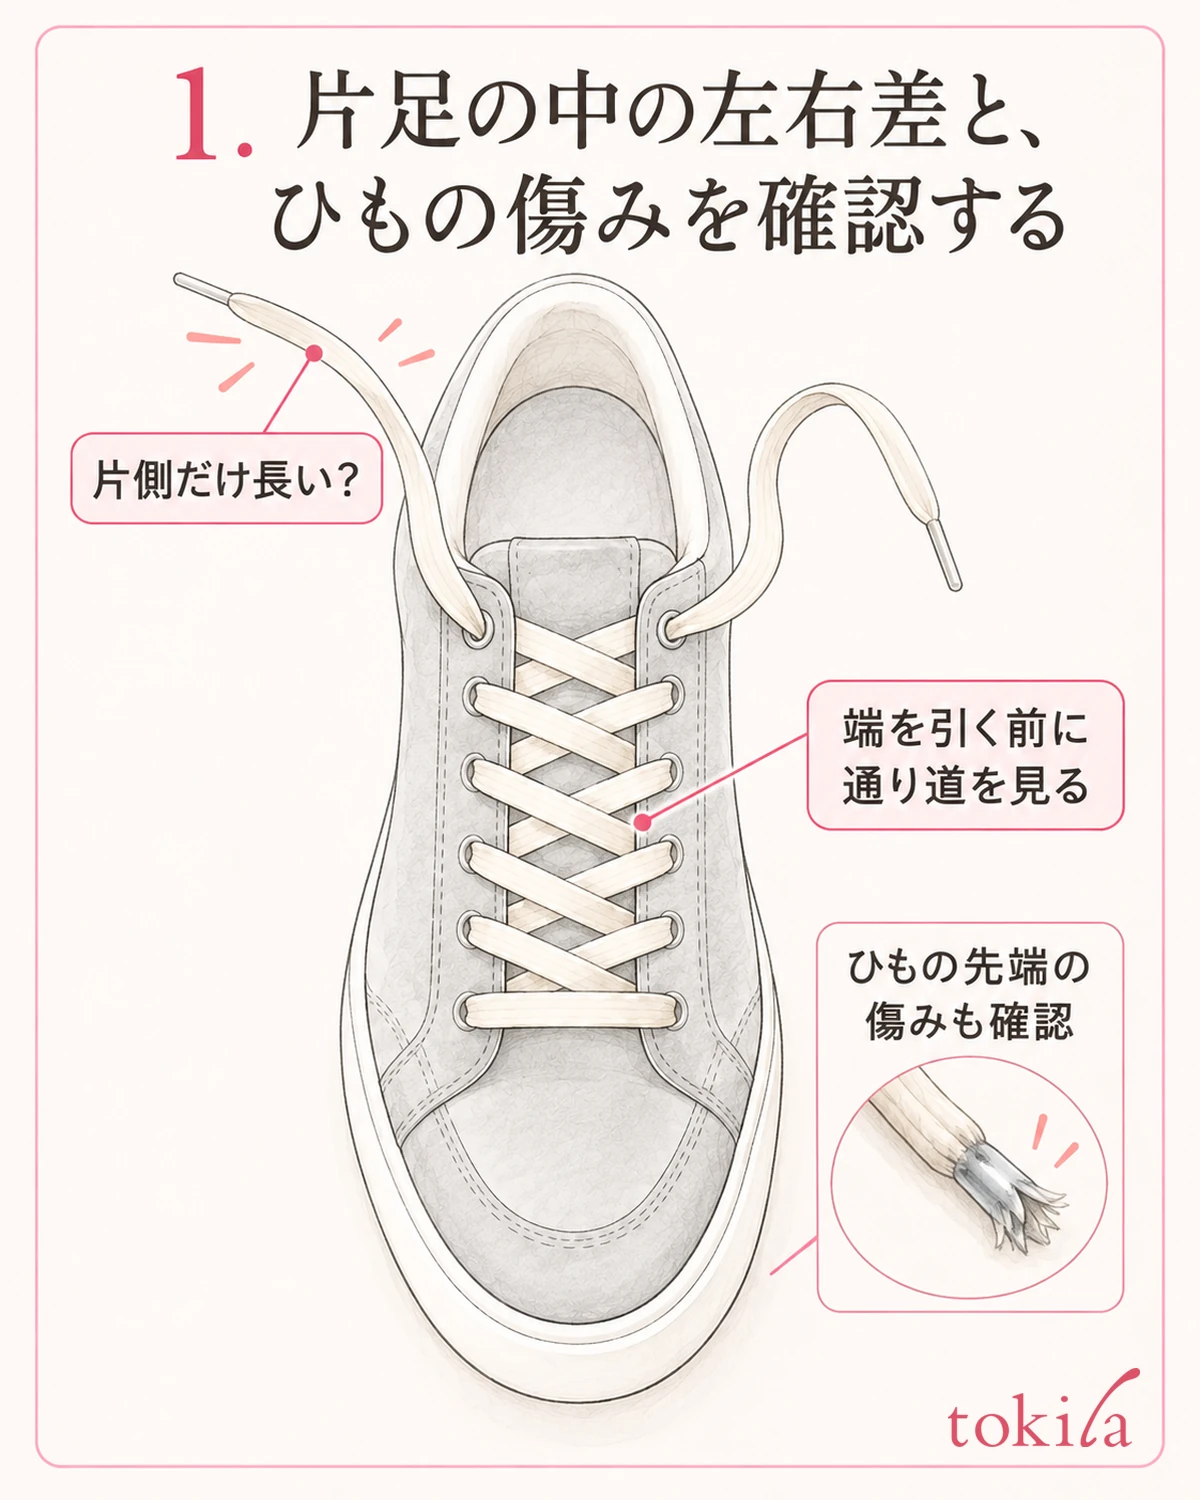
First, sit in a safe place, take off the shoe and set it on a desk or the floor. Untie the knot and gently stretch the two ends that stick out at the top in the same direction. Check which end has more slack within the shoe in front of you, not by comparing the left and right shoes.
Even if one side is longer, the whole lace is not necessarily too long. Before cutting just one end, look at whether the lace is caught at an eyelet along the way, and whether one side is taking an extra path. If you pull the short side hard to match the long side, the difference in length and the difference in tightness get mixed together.
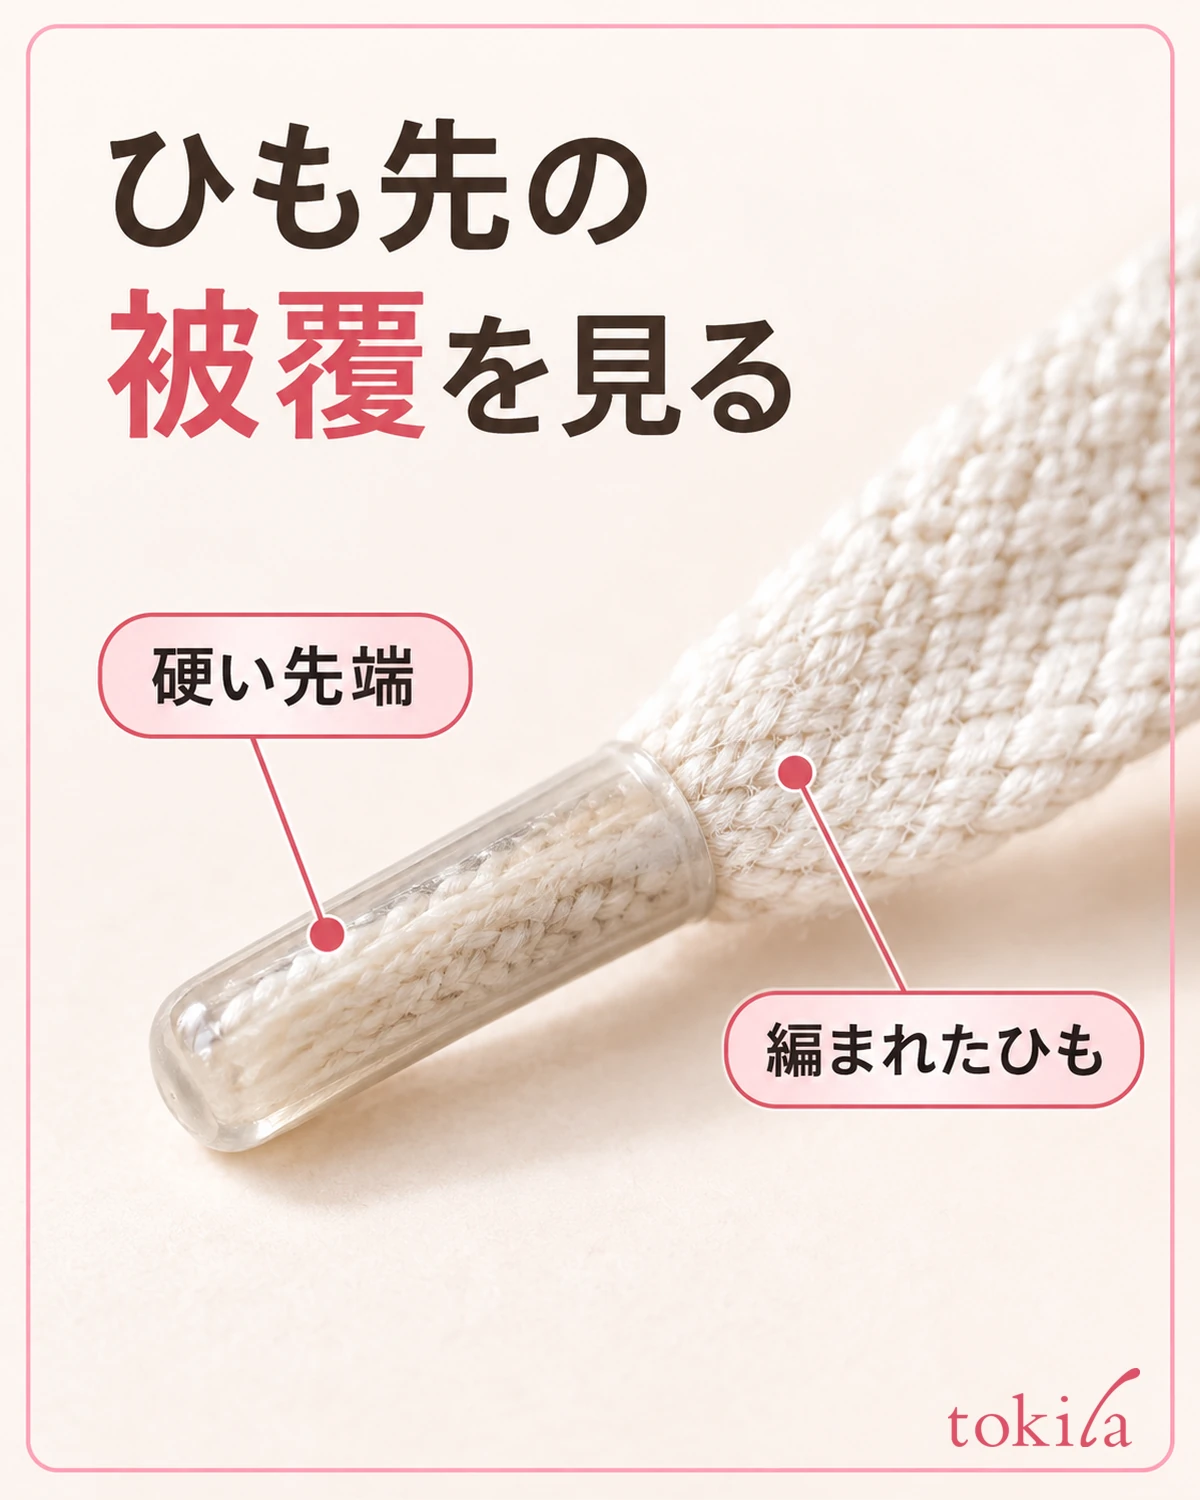
Also check whether the hard part covering the lace tip is cracked and whether the braided surface is badly frayed. If the edge of an eyelet is torn or deformed, stop forcing the lace back through. Do not move on to repairing the tip with adhesive, fire or heated tools; choose replacement or a place to consult about the shoe.
Before removing the lace, taking one photo of the current path from above gives you a clue for putting it back. However, whether the current lacing matches the product's specification is a separate check. Do not decide that the original state is correct just because you have a photo; if it conflicts with the instructions, check the instructions.
Look not only across the top of the foot but down to the lowest pair of eyelets. A bias in length can remain in places far from the ends. There is no need to soak the lace in water to clean it. This time, limit the work to checking the lace's path and slack in a dry state.
If you are wondering whether to change the color combination, think about it after you have sorted out the length and the lacing. Keep the purpose of this check separate from matching shoelace colors, and assume that you will not tighten the laces so your feet feel tight just to make the appearance even.
2. Even out the two ends at the bottom rung near the toe
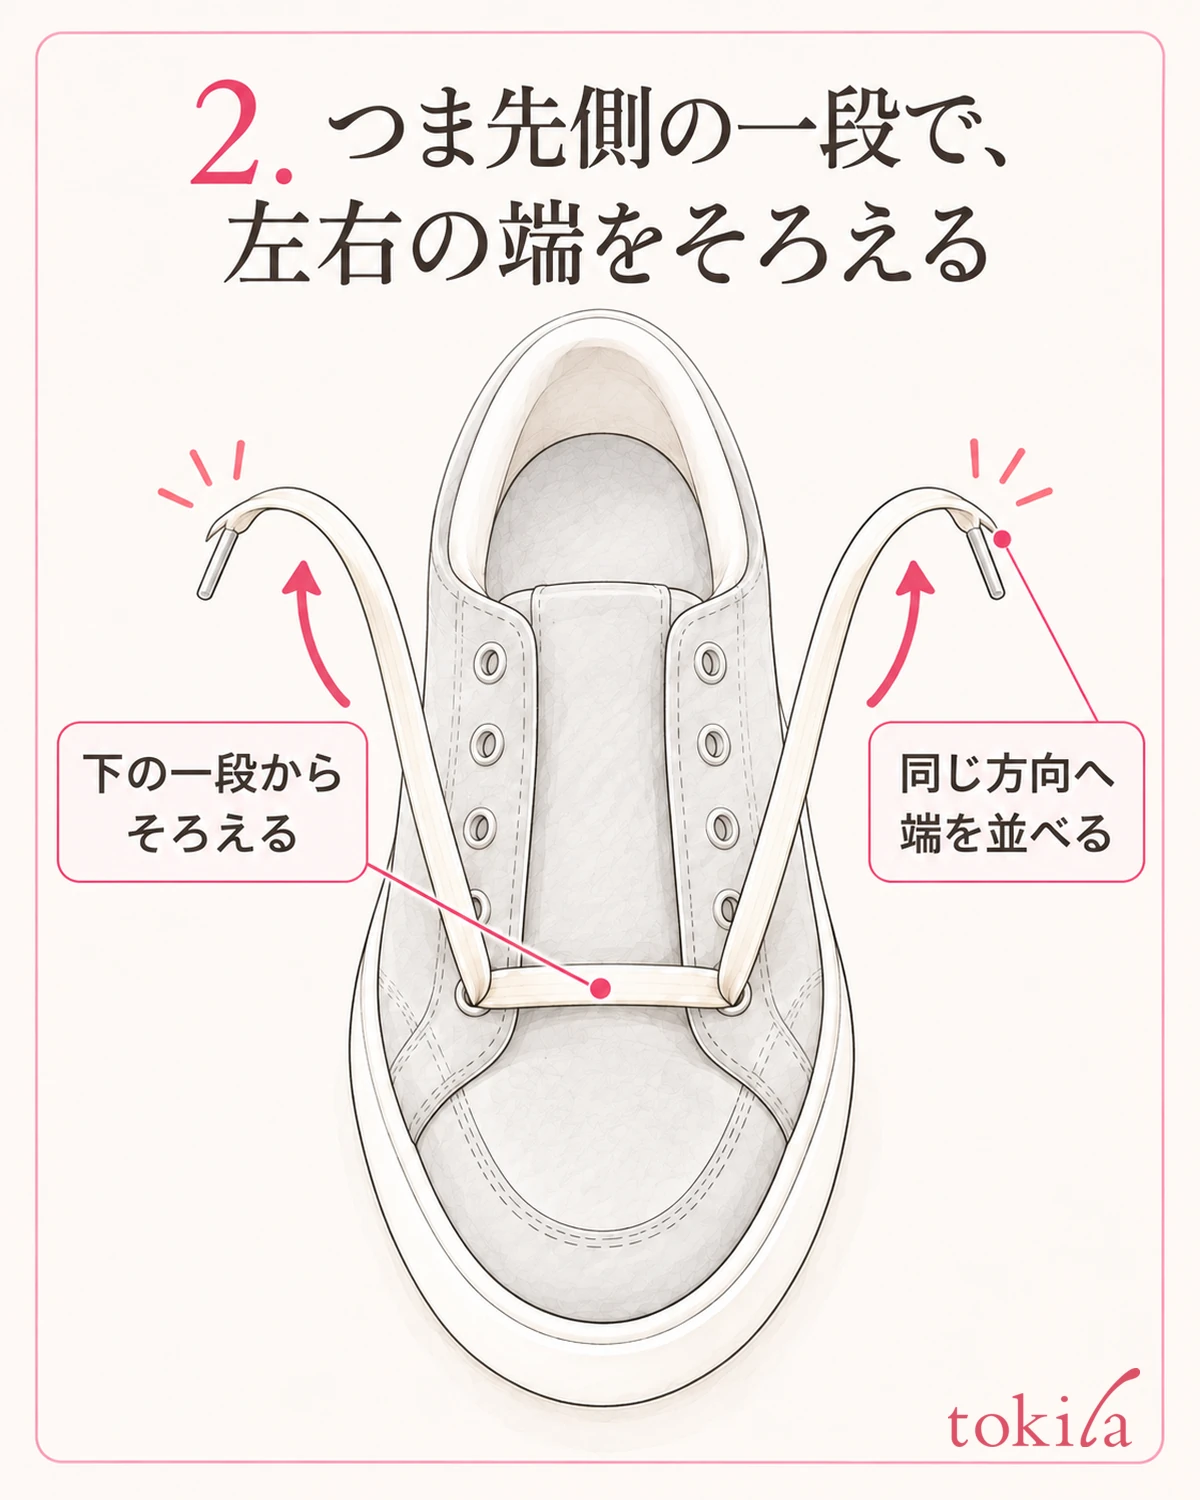
If you need to re-lace, pull the lace out one rung at a time from the tying side, back to the lowest pair of eyelets nearest the toe. Rather than pulling everything out at first, leaving the bottom rung and revisiting the distribution between the left and right makes it easier to see where the center should be.
Thread it through the bottom left and right eyelets in the direction specified for that shoe, then line up the two ends that come out. With no slack or lopsidedness in the part that crosses the middle of the shoe, feed the lace little by little from one side until the positions of the tips are close. If it catches at the edge of an eyelet, look at the direction and the snag rather than using more force.
What you are evening out here is the starting point before you put the shoe on. You do not need to pull the lace taut or tighten until the sides of the shoe touch each other. If the lace crossing the middle is twisted, straighten it while checking the wide face of a flat lace. Do not put sharp creases in it to fix its shape.
When comparing the length of the tips, do not pull just one at an angle; lightly stretch both in the same direction. Look not only at the length of the hard tip but at the whole lace from the eyelet onward. If the difference returns when you let go, check again that no large slack remains on the lower side.
If you replace the removed lace with another one, do not decide by the original length alone; also check it against the shoe's specification, the number and spacing of the eyelets, and the thickness and shape of the lace. A longer lace is not always easier to use. If the thickness would have to be forced into the eyelets, do not continue with that combination.
Once the ends are even on one shoe, check the other shoe separately. Even if you use laces of the same length on both shoes, the length left after putting them on does not always match. First go one shoe at a time and straighten the lacing using the bottom rung as the reference.
3. Follow the eyelets on the same rung and fix twists along the way
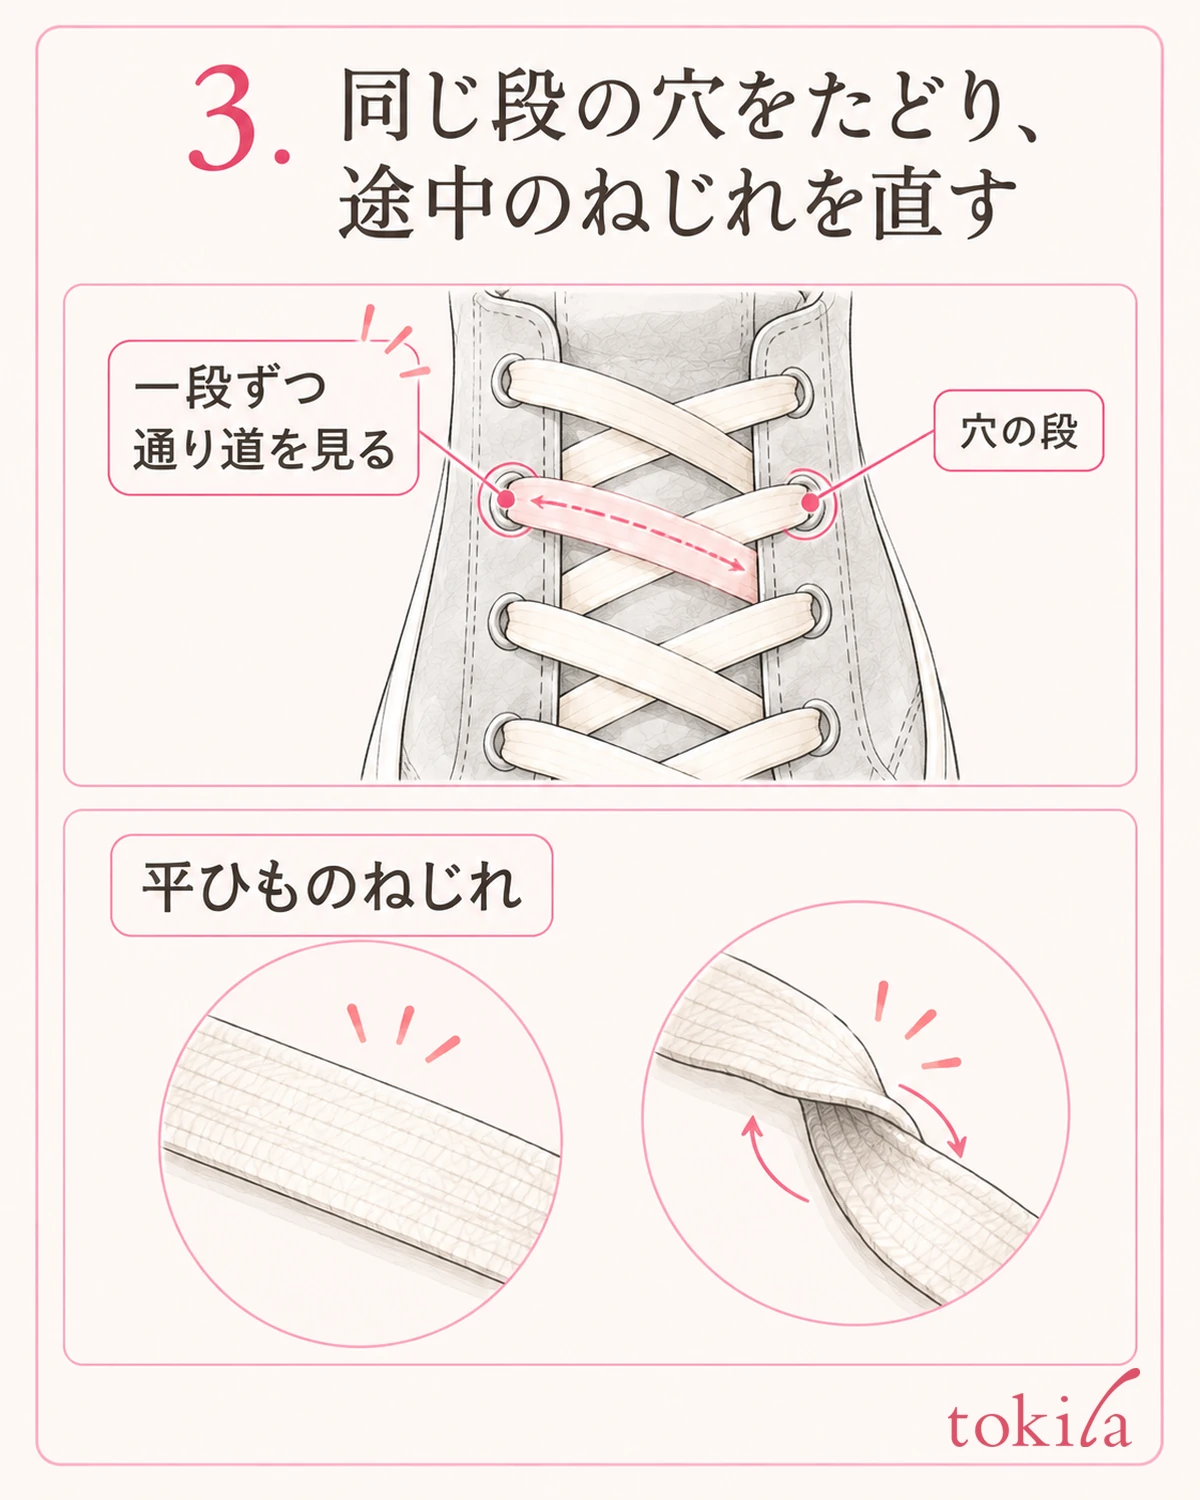
From the bottom rung, thread upward following the original instructions. If it is a type where the left and right laces go to the next eyelet on the diagonal, check at each rung that it passes through the eyelet at the same height. Also check that one side has not skipped a rung, and that it has not gone through an extra eyelet or another loop.
There is a type that comes out from below the eyelet and a type that goes in from above. Here we do not say that one is better for everyone. Choose one set of instructions that suits that shoe and its use, and follow it, without changing direction partway or mixing different types on the left and right.
For a flat lace, look at the wide face right after passing it through an eyelet and straighten any thin folds. Rather than stretching out twists all at once from above, returning a little of the slack on that rung and feeding it while checking the surface makes it harder to lose track of where to fix. A round lace does not need a front and back.
If the tip is hard to pass partway, look at the edge of the eyelet and the direction of the hard tip. If the tip covering is peeling, consider replacement instead of pushing it in with a needle or a pointed object. Modifications to make threading easier, such as widening the eyelet or cutting stitching, are not done here.
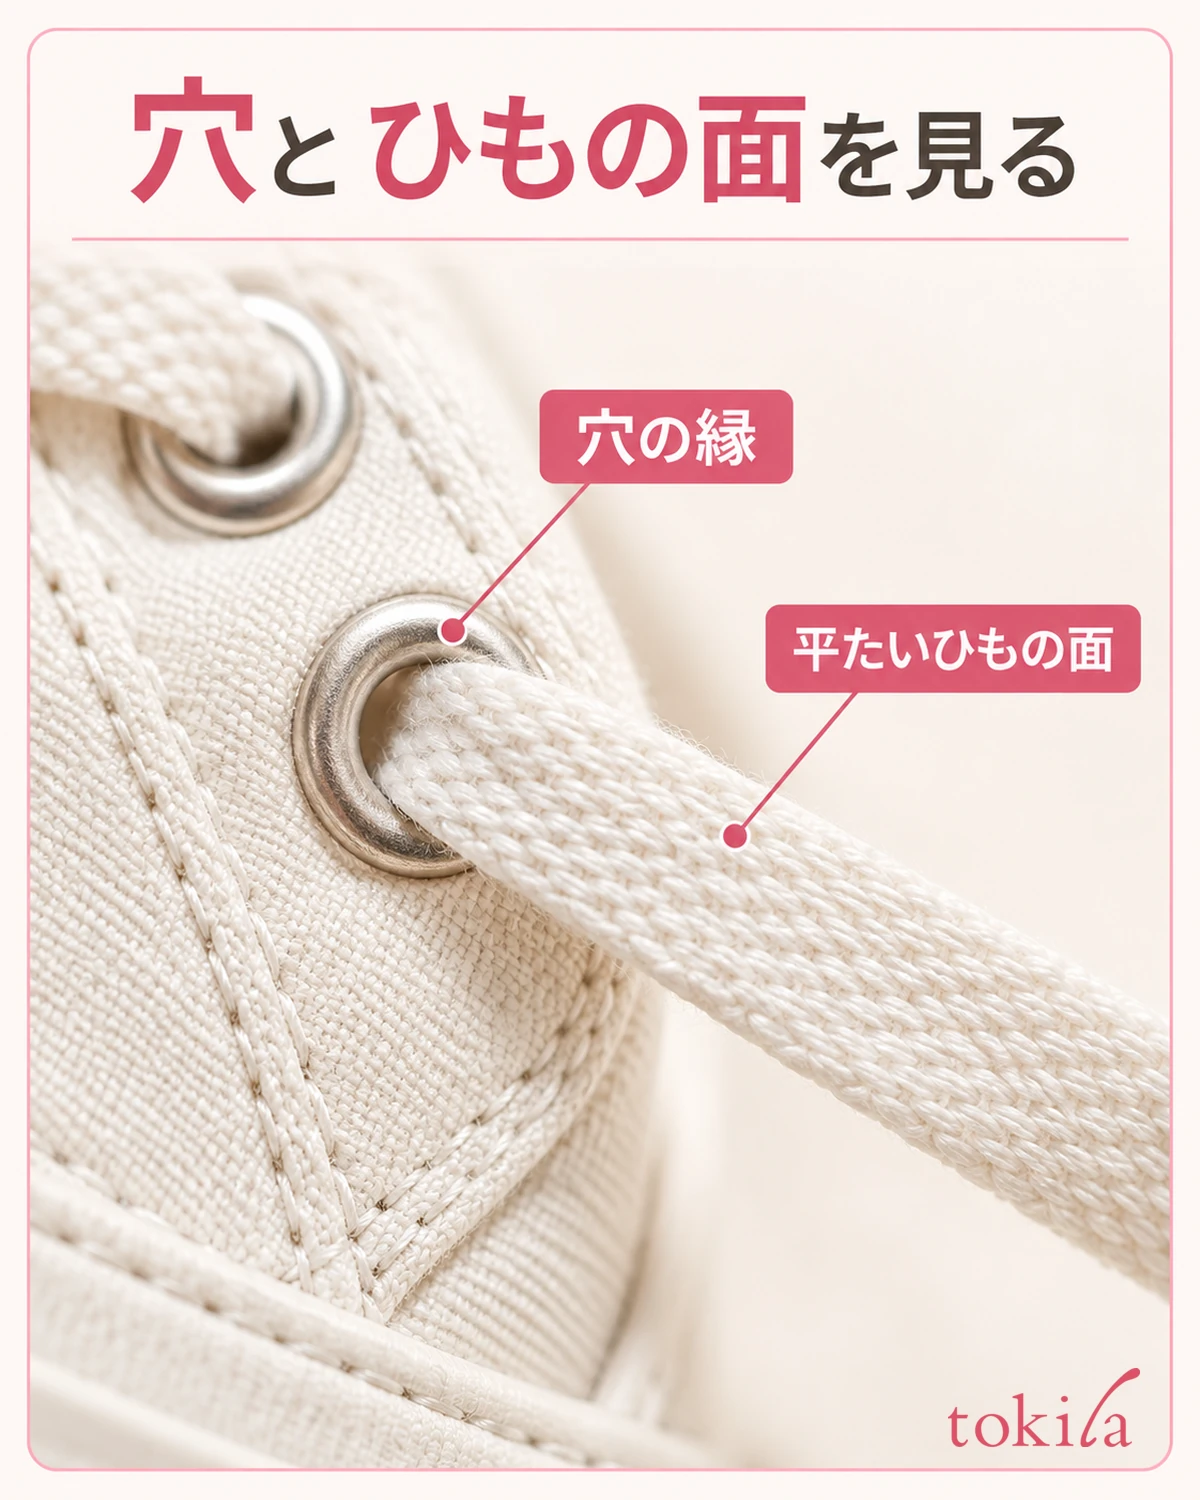
If the difference between the two ends suddenly widens, go back to the rung just before it. Before pulling everything out again and again, look one by one at how you skipped eyelets, twists, and large slack on one side. Do not just chase the length of the slack and make up for it by tightening only one side of the top of the foot.
Additional eyelets at the top, or lace loops on the tongue, are not necessarily used the same way on every shoe. If you do not know the original instructions, do not create a new path just from the shape; check the shoe's product information. Keep the decision to switch to a special lacing method separate from the length distribution this time.
4. Put the shoe on and check the tightness and slack
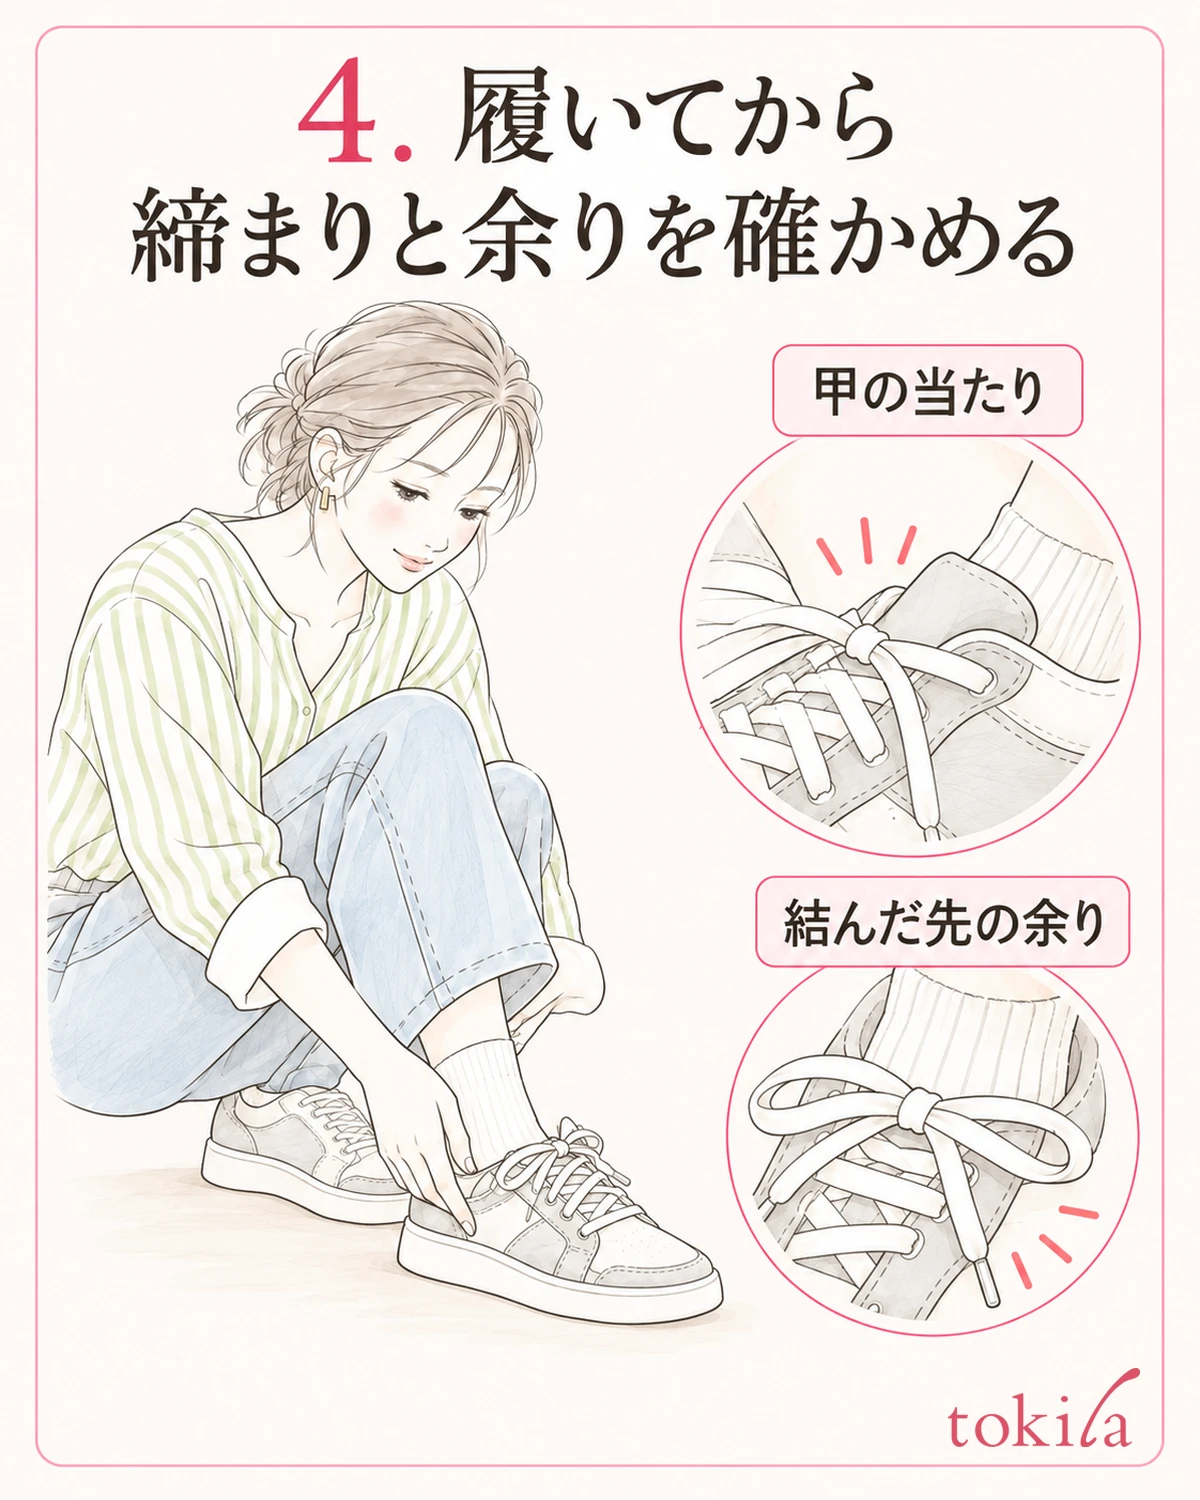
When you have finished re-lacing the eyelets, stay seated, put your foot in with your sock on, and align your heel to the back of the shoe. Do not call it done just because the ends are even without a foot inside; look at the slack over the top of the foot in the state you normally wear it. If the shoe has a specified way of putting it on, follow that first.
Working upward from the toe side, take up any large slack one rung at a time. Do not pull just the top two ends all at once; proceed while checking where it has tightened. Do not aim for looks such as keeping the left and right rows of eyelets exactly parallel or closed to the same width; check how it fits your foot.
If it hurts, goes numb or makes your foot hard to move, stop using it before worrying about how the ends look, and reconsider the tightness and whether the shoe fits. Tightening hard to shorten the slack on one side is not a solution. Do not assume that re-lacing alone can fix a shoe that keeps feeling uncomfortable.
When you reach the position for tying, check that enough of the two ends remains to tie easily. If one side is short and hard to form a loop with, before pulling hard to make up for it, go back and look at the large slack on the rungs you threaded and at the left and right paths. If it does not come together without hurting the fit, take the shoe off once and start over from the distribution.
After tying it securely in your usual way, also check whether the leftover ends or loops hang down to the floor. If there is a risk of stepping on a lace that is too long, do not just add loops to hide it; consider replacing it with one of a suitable length. We do not give a common number such as "this many centimeters of slack is safe for everyone."
Before you stand up and check, make sure the knot has not come undone. Even if a little left-right difference remains in the ends, there is no need to keep re-tightening for the sake of perfect visual symmetry. Check separately the length you can tie, how it fits your foot, and that nothing hangs onto the ground.
5. If it will not come together, review the path and the lace choice separately
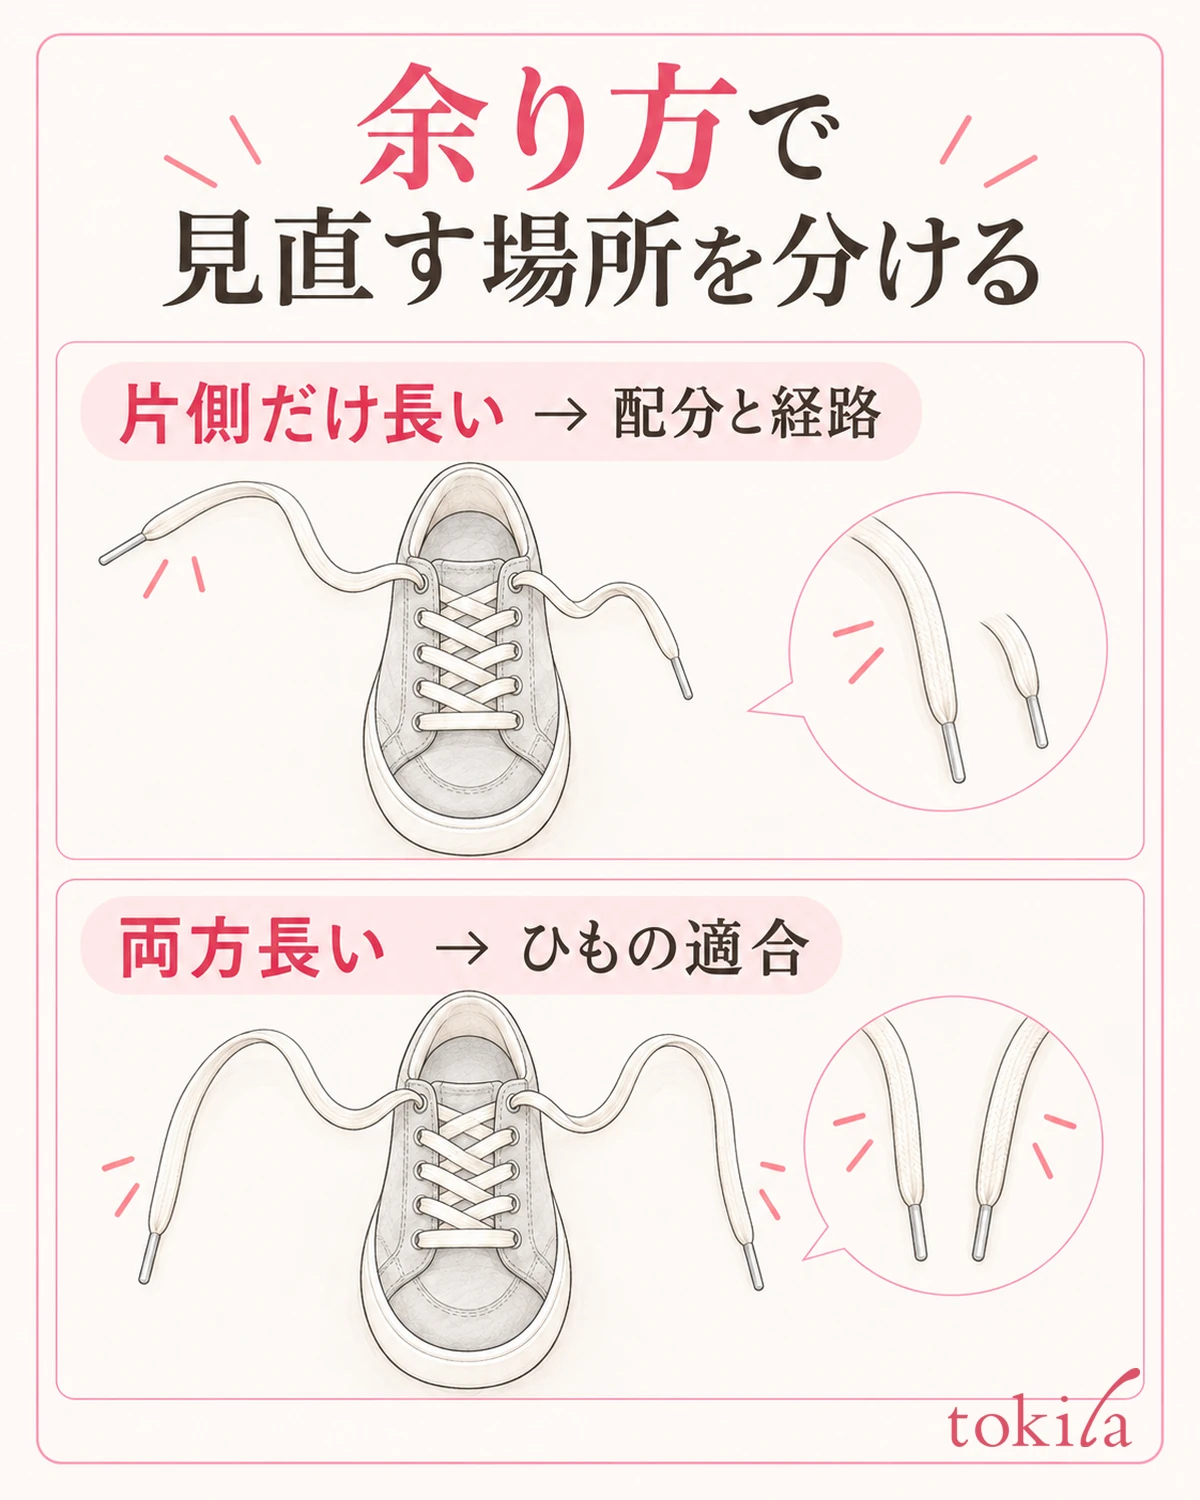
Finally, look in order at the left and right paths, the tightness, and the slack after tying. If you check them one by one, the next time the difference in the ends bothers you, it will be easier to choose whether to go back to the bottom rung, fix slack along the way, or replace the lace.
If one side is still extremely long even after re-lacing along the same path, check the distribution on the lower side again. If both remain long, consider whether the overall length suits the shoe and how you tie it. Separate these two, and do not decide that a difference on only one side can always be fixed just by swapping to a shorter lace.
When choosing a new lace, use the shoe and the original lace as clues to check a suitable length, thickness and shape. Color and material preferences also matter, but first look at whether it passes through the eyelets, whether it is easy to tie, and whether too much is left beyond the knot. Do not treat adjusting the left-right difference and comparing how well laces stay tied as having been tested together.
If you store the lace you removed, check the wear on the tips first, then bundle it so that you know it belongs to that shoe. If you mix it with another lace of a similar shape, it becomes harder to spot a difference in length next time. Follow the material label for washing and drying methods, and do not apply heat for the purpose of shortening the length.
If you leave a note, pair the place that bothered you with the next action, such as "even out the two ends at the bottom rung," "fix the skipped rung partway," or "both are long, so look for a lace that fits." You do not need to change every way of lacing; it is enough to check the one thing you found this time again next time.
When only one side is long, go back to the bottom rung and the path before pulling just the end. Review the tightness after putting the shoe on, and check the slack after tying too. In this order, while keeping the visual left-right difference and a state you can actually wear with your foot inside separate, adjust the laces you have.



