
You put on a sheet mask, but it lifts beside your nostrils, wrinkles on your cheeks, or slips on your forehead when you fix the mouth area. Before pressing it down again and again, check how the sheet is opened and where the openings sit. Pulling hard on one edge to line it up can push another area out of place.
This article covers facial sheet masks, including those soaked in serum and similar products, from reading the package to unfolding the sheet, aligning it, smoothing the parts that lift, and handling it after you take it off. The order and timing differ by product. Follow the instructions for the mask you have, and do not pull your skin hard to make the sheet cling or leave it on longer than directed.
1. Before opening the package, check the order of use and the time
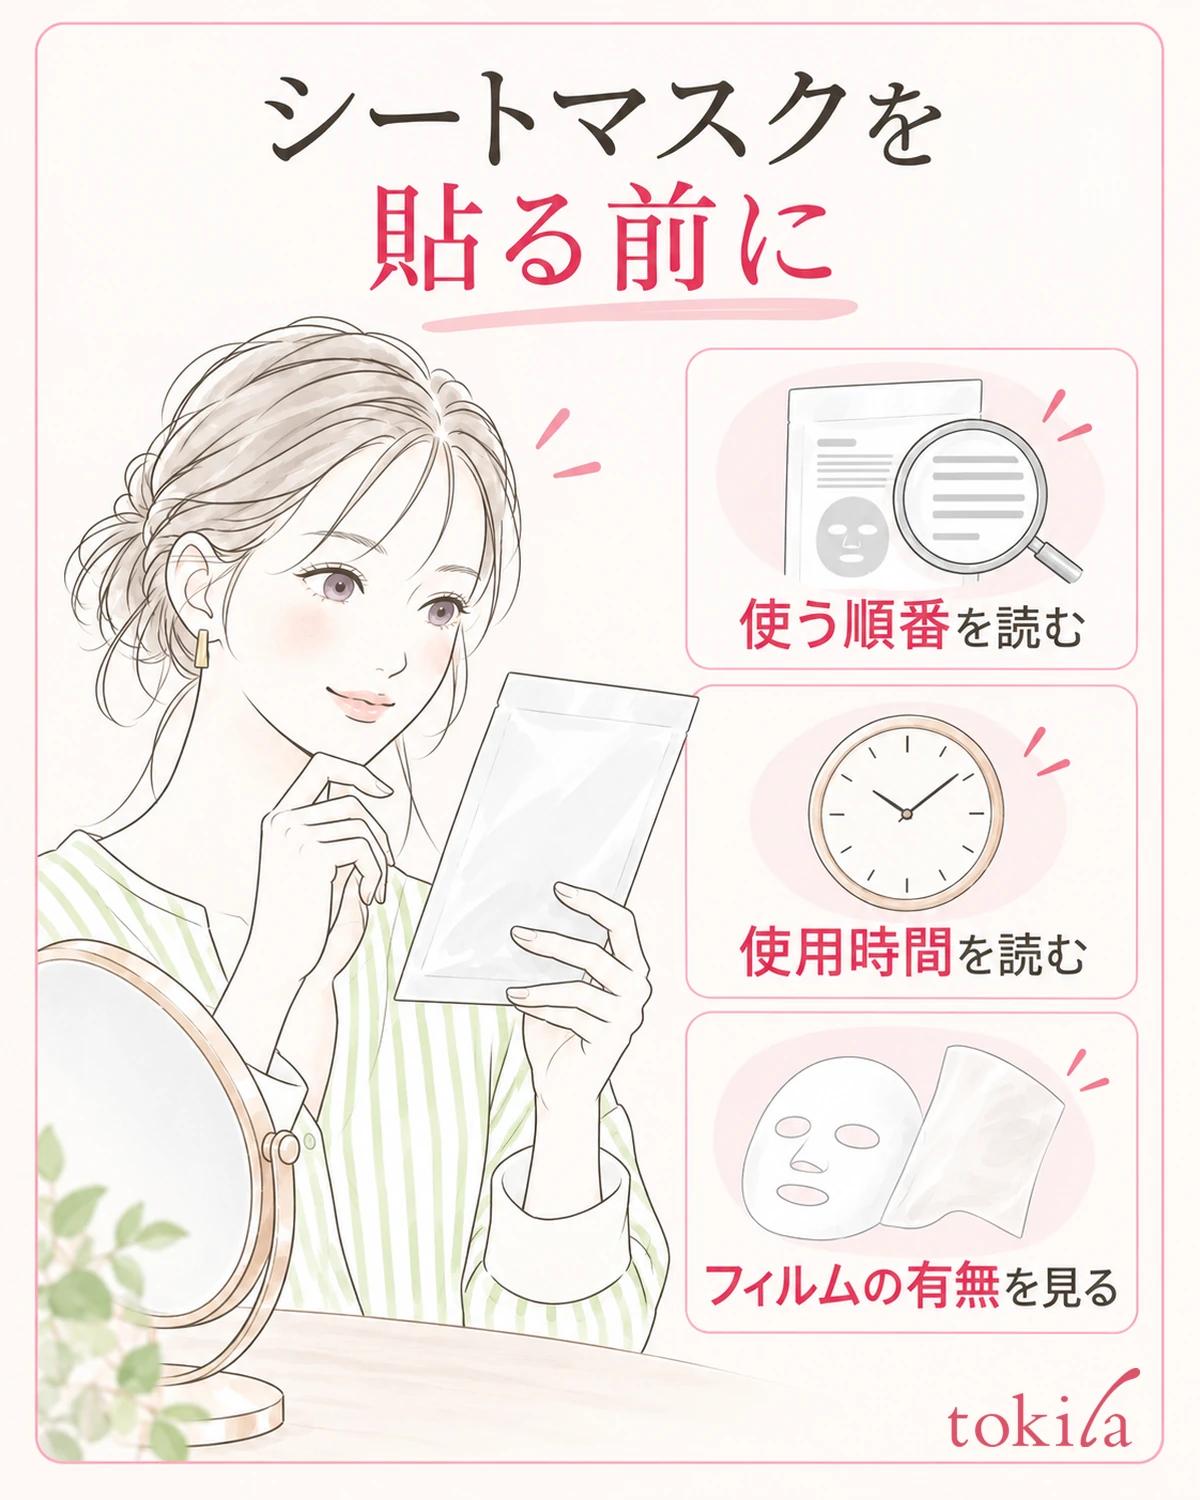
First, read the "directions for use" on the package or box to see where the mask fits in your skincare steps. Some masks go on right after cleansing, and others after toner has prepared the skin. If you apply your usual emulsion or cream first and then put the mask on, the order may differ from what your product specifies. Do not switch to the same preparation every time just because the mask lifts.
Next, check the time, the frequency, and whether there is a front and back or a protective film. Even within the same brand, masks of different types do not always share the same time or steps. Read the label of the product you are about to use instead of relying on what you remember from the last package. It also helps to see now whether you rinse off afterward or work the remaining liquid into your skin.
Wash your hands and prepare a place with a mirror in front of you where you can use both hands. If your hair falls over your forehead or cheeks, move it away from your face beforehand. If you fix your hair while holding the sheet, the surface you just opened may fold, or you may let go of the sheet in the middle of aligning it. Take the mask out after setting the package where it will not tip over and spill the liquid.
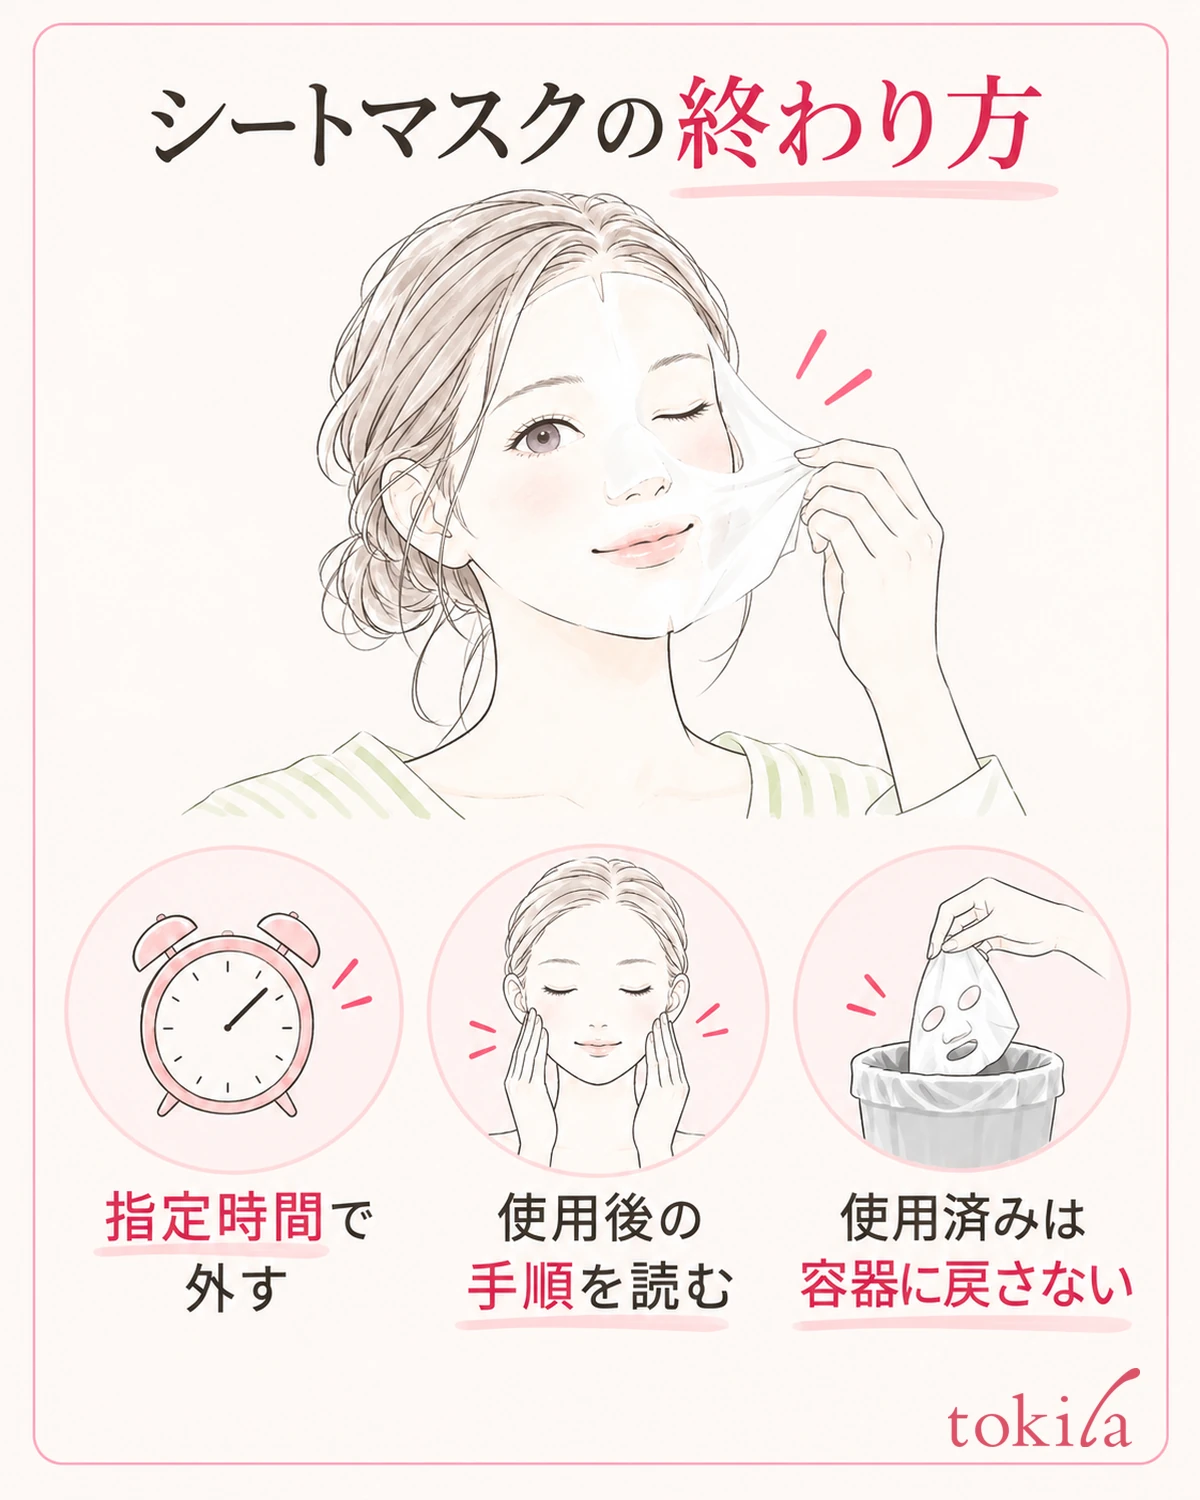
Keep a clock or timer nearby so you can check the displayed time. Instead of leaving the mask on longer by saying that the time spent fixing lifted areas does not count, note the time you started wearing it. If the label lists conditions under which you should not use it, such as wounds or eczema, follow that warning. Do not decide on your own that you can use it if you change how you put it on.
The points to check here are three: the order of use, the time, and the structure of the sheet. You do not need to remember all of them. Simply keeping the package where you can read it quickly lets you go back to it if you are unsure which way is up or which side is the front after unfolding. Rather than standardizing the steps for a first-time product and a familiar one, give priority to following the label on that one sheet.
2. Unfold the sheet until you can tell where the eyes, nose and mouth are
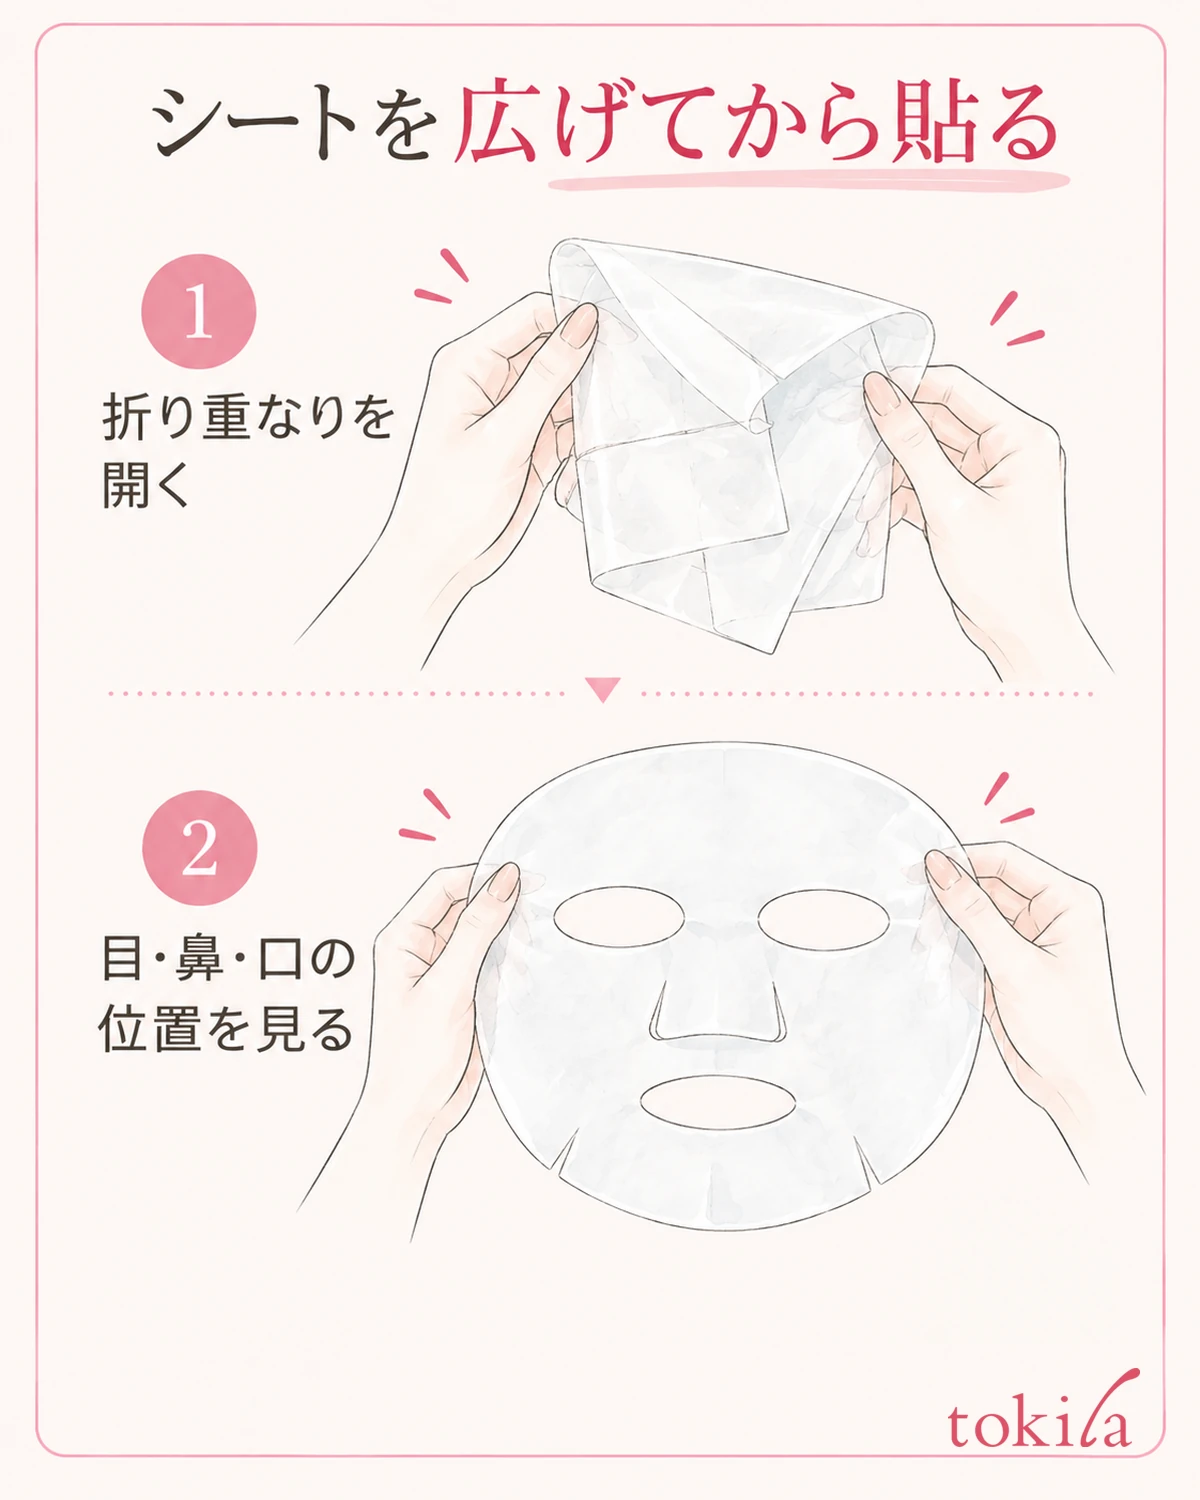
Unfold the sheet you took out of the package while checking where it overlaps itself. If you place it on your face still folded small, part of a cheek may end up doubled or the nose section may be tucked in, which makes it hard to tell where the lifting is. Before placing it on your face, get it into a state where you can see the positions of the eyes, nose and mouth and the shape of the outer edge.
Instead of pinching a thin edge with a fingernail and pulling it open in one go, hold both sides of the fold with the pads of your fingers and open it little by little. If you cannot tell which way it opens, stop and look at how the layers overlap. If the product comes with a diagram showing how to unfold it, follow that. For masks that drip easily, handling them near the package rather than rushing them to your face makes it less likely that you will stain the surroundings.
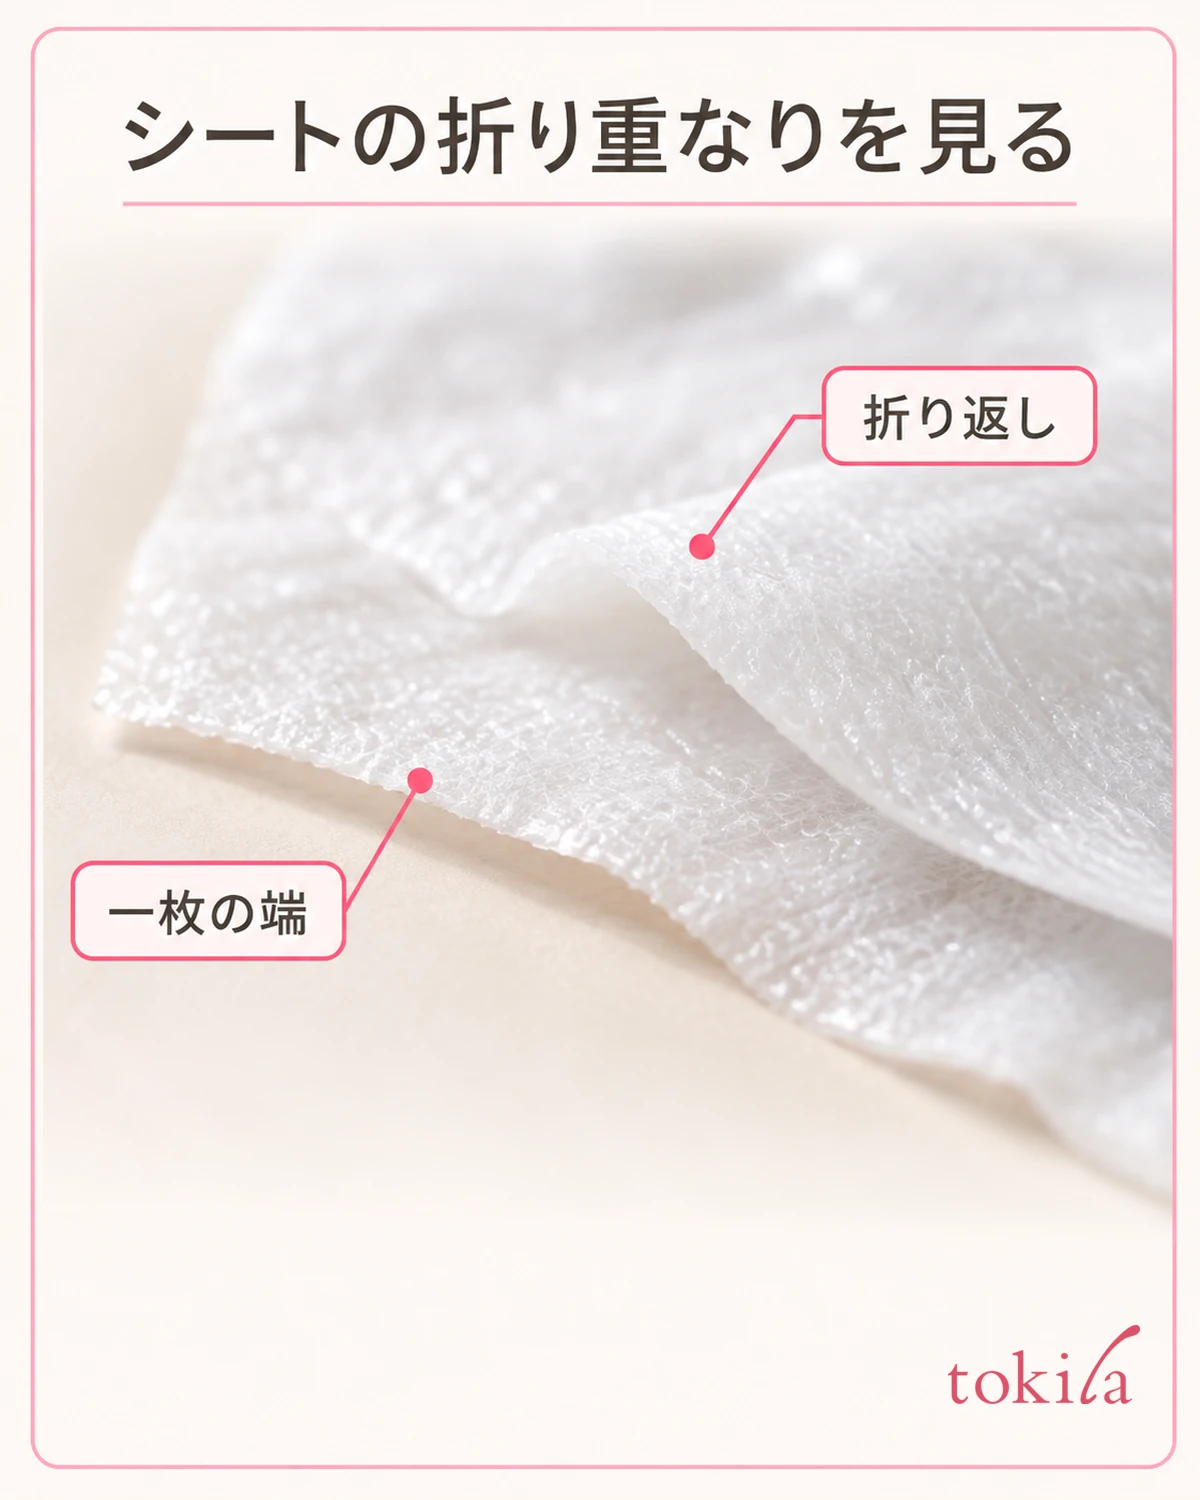
For products that come with a clear or white protective film or a backing sheet, use the label to tell what to remove and when. Finding a thin layer does not necessarily mean you have to peel off all of it. Compare the overlapping layers with the diagram before you start, so that you do not tear the main sheet that holds the serum.
Once it is unfolded, check that the parts that go over your left and right cheeks are not folded back and that the nose section has not slipped inward. If the edges are still stuck together, open it again there. This is not a step for stretching the sheet to increase its area. Your goal is to return the sheet to its original shape, not to change the shape by pulling it taut.
For products you take out one sheet at a time from a large container, also follow the instructions for removing a sheet and for handling the container after opening. If you wonder whether two sheets are stuck together, check the edges and the folds, and do not unfold several sheets to count them. Do not return a sheet you have taken out to the container or let it touch someone else's, and follow the hygiene precautions for your product.
3. Line up the opening and lay it along one cheek at a time
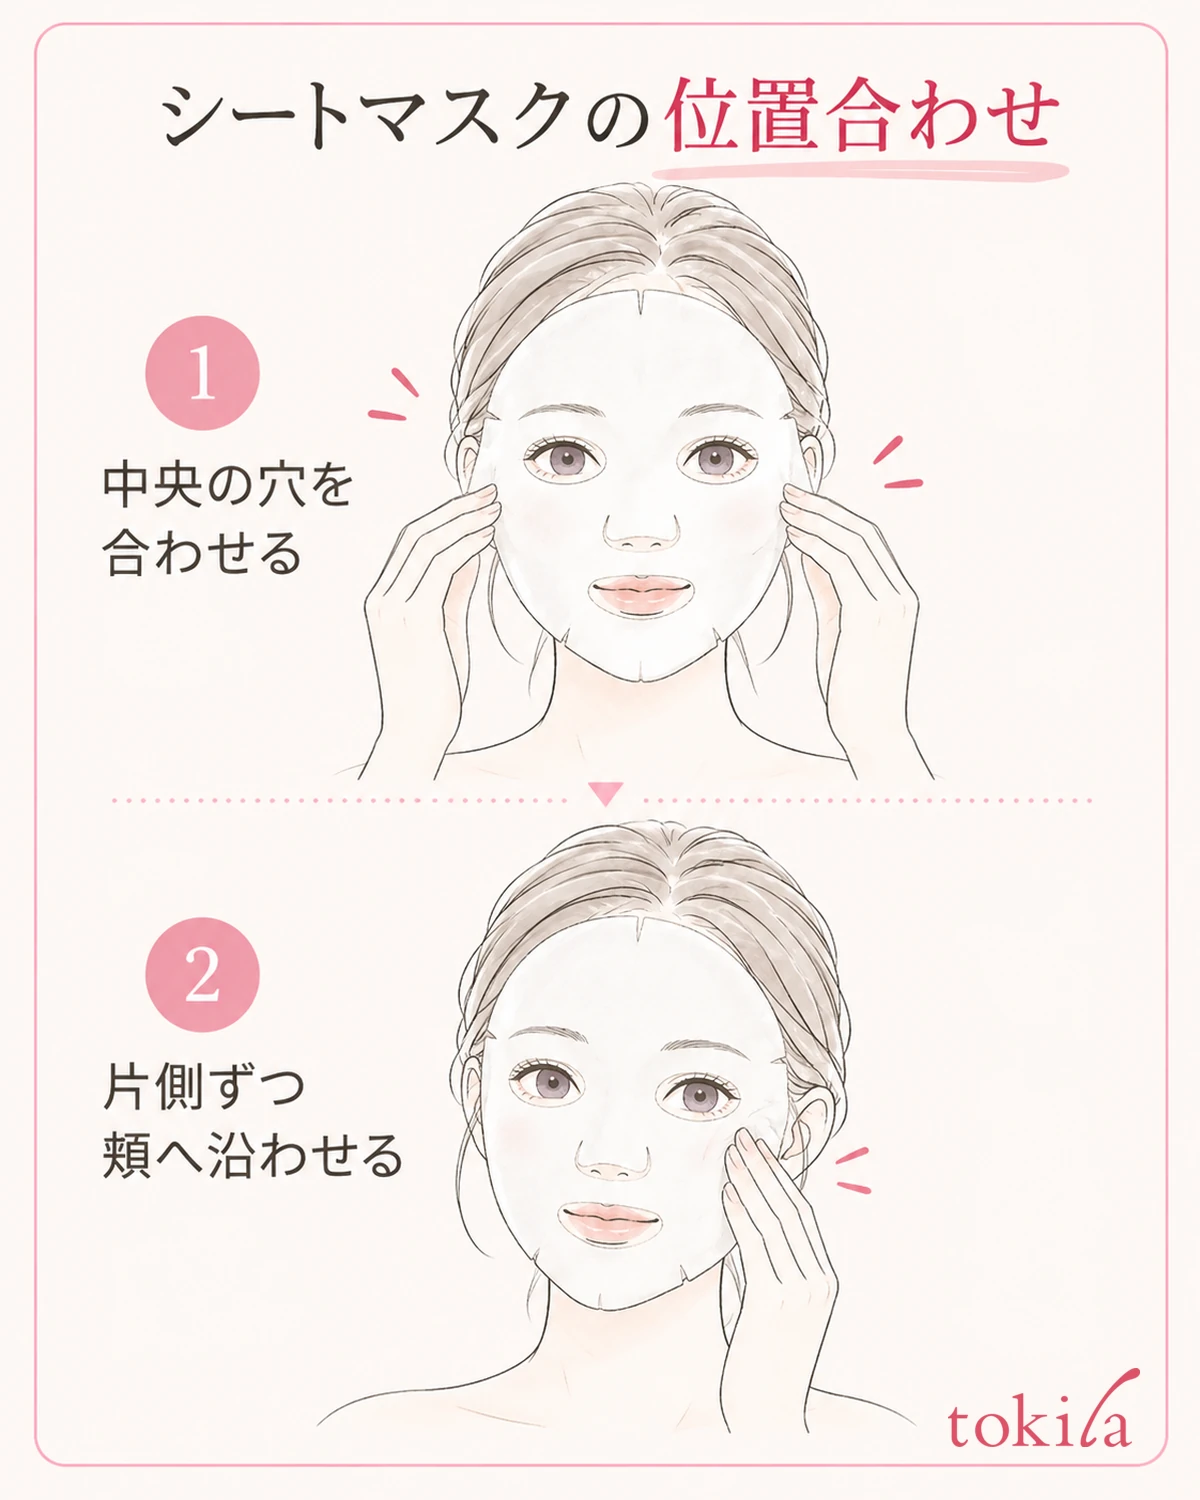
Place a mirror in front of you and bring the sheet toward your face while watching where the eye and mouth openings will land. Follow the product's diagram for the place to line up first. With a typical one-piece mask, lining up a center mark such as the eye position and then laying the sheet along the cheeks makes it easier to spot a shift in the whole sheet than pulling only the edges to fix it.
First check that the openings are not covering your eyes or mouth. If you pull out only one cheek first, the opening on the other side and the position of the nose may also move. If the center is far off, do not stretch the edges to compensate. Gently lift that part and put it back in position. Do not bring the sheet right up to the edge of your eyes, so that the serum does not get in.
Once the center is set, lay the sheet along the shape of your skin, starting from one cheek. Lightly press over the sheet with the pads of your fingers, working from the inside of the cheek to the outside while checking for wrinkles and gaps. This is not a long rubbing motion but a gentle press that moves from place to place. If you look at the other side after one side is settled, you do not end up pulling in two directions at once.
Because the nose has height, the point is not to treat it as the same flat plane as the cheeks. Lay the part that covers the nose along its shape first, and then look at how it connects to the sides and the cheeks. Do not move the sheet so it covers your nostrils or lips, and do not press hard on the bridge of your nose or around your eyes. There is no need to wrap your whole face with force.
For masks that split into upper and lower parts, or that cover down to the chin, check the position of each sheet and how they overlap in the instruction diagram. Do not simply apply the steps for a one-piece mask. What you are aiming for is for the sheet to sit comfortably where it is meant to be, not to pull the skin of your face hard to create a lifted look.
4. For lifting near the nostrils or mouth, recheck folds and position
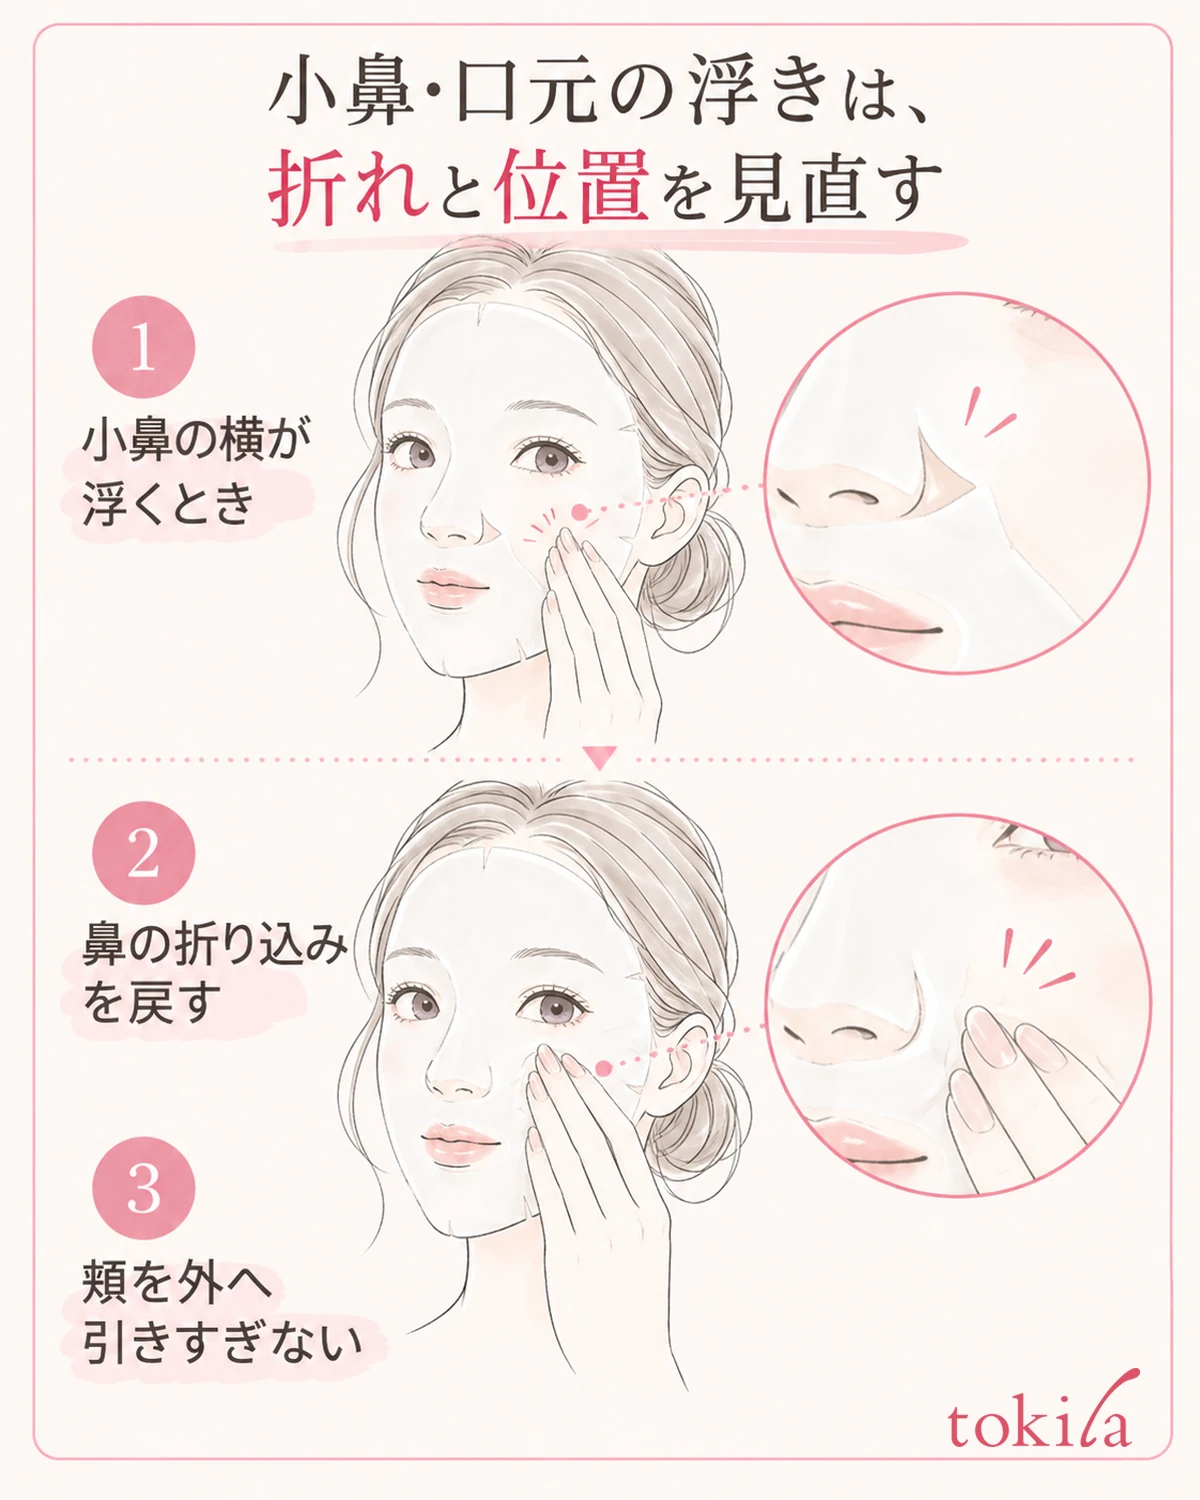
If only one part of the cheek is lifted like a tent, look for a fold or an overlap nearby. When the lifted part springs back as soon as you press it, an edge may be pulled somewhere else. Do not stretch the whole sheet with one hand. Gently re-hold only the area around the lift and lay it down so the excess has somewhere to go.
If the sheet lifts beside your nostrils, check whether the nose section has folded inward and whether you are pulling the cheek sheet outward too far. Lightly realign the nose section and the cheek section to their own contours. Do not try to close the gap by pushing in beside the nose with a fingertip or by pressing on your nose with your finger.
If there is excess around the mouth or chin, first check whether the mouth opening has shifted. If the product has built-in slits, adjust the overlap in the direction indicated. Cutting a mask without slits with scissors in your own way is not a method used here. Before you change the shape, go back and check for unfolded parts and the position of the center of your face.
Adding the liquid left in the package or another toner to make the sheet stick is also not a remedy common to all products. Follow that method only when the product specifies using the leftover liquid. More liquid does not necessarily fix the lifting, and it may run more easily into your eyes or mouth. Do not substitute a method such as wetting the sheet again with water or reusing a dried sheet.
If the shape or size does not fit and light adjustments do not settle it, do not make it your goal to keep pressing it. Next time, use the distance between the openings, the shape of the chin, and whether the mask is a two-piece or one-piece type as clues for choosing, based on the structure. Think of stretching the current sheet by force and considering a shape that fits next time as two separate things.
5. Take it off at the specified time and finish with aftercare
Once it is on, step back a little from the mirror and check the eye and mouth openings and the outer edge. If the area around your mouth shifts when you talk or make big expressions, do not keep working while holding it with your hand. Settle your posture for a moment and recheck the position. Do not let concentrating on keeping the sheet in place make you forget the time you checked at the start.
When the time is up, gently take the sheet off. Do not add time because there is still liquid left or because you want to make up for the time it was lifting. If you notice irritation, redness, itching or any other problem while using it, stop using it even before the time is up and follow the product's warnings. If the problem continues, do not keep using it to get used to it. Consult a medical institution.
Handle the liquid left on your skin after you take the sheet off according to the directions for your product. If it says to work it in, gently press it in with your palm. If it says to rinse off, follow those steps, and do not assume that every mask can also be used for wiping. Whether you need emulsion or cream afterward should also be decided by the label and the condition of your skin, not by your usual routine.
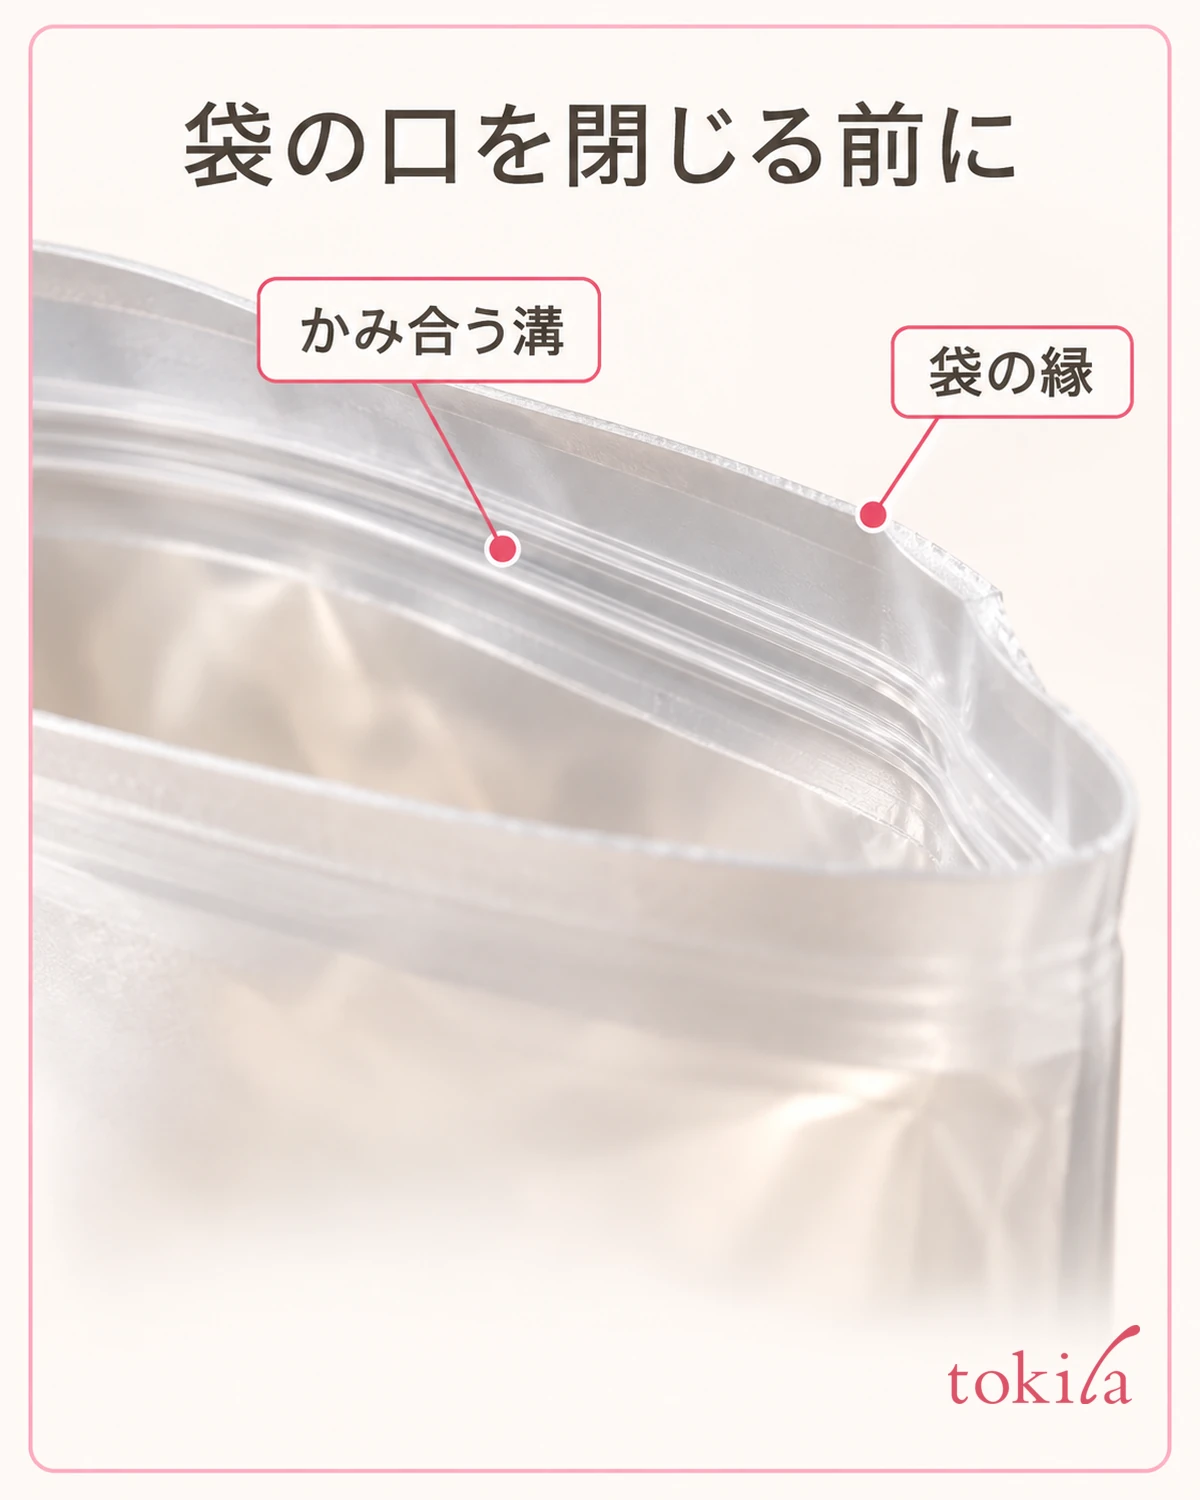
Do not keep the used sheet to put on again or return it to a large container. Close the container properly after use and follow the storage conditions shown. What you need to keep for next time is not the used sheet but a short note such as "it was folded back on the right cheek" or "the mouth opening sat too low."
The next time you use a mask, check just one thing from that note. If there was a fold, go back to the concrete step of unfolding the whole sheet before placing it on your face, and if the mouth shifted, look at the center opening in the mirror. If you want to check how to take water off your face after cleansing, see also how to press a towel on your face without rubbing. With a mask, it is important to look at the shape, the position and the time in order and handle it without strain.



