
You take out the hair tie, and a sideways crease is left at the back of your head. Combing only the ends does not bring the hair back, and you may start to panic before heading out. First, work out whether it is a mark from the height where the hair was tied, or the direction of the roots or tangled ends. If the spot to fix is different, how much you wet the hair and how you dry it will differ too.
This article explains how to smooth out the temporary crease left after removing a hair tie, using tools you already have. How long a mark stays depends on hair type and how long the hair was tied, so we do not promise any method or time that will always remove it. Avoid forceful approaches such as pulling hard or aiming high heat at the hair for a long time, and decide whether to wear your hair down or tie it again today as part of the choice.
1. Check the height of the mark and tell it apart from flattened roots
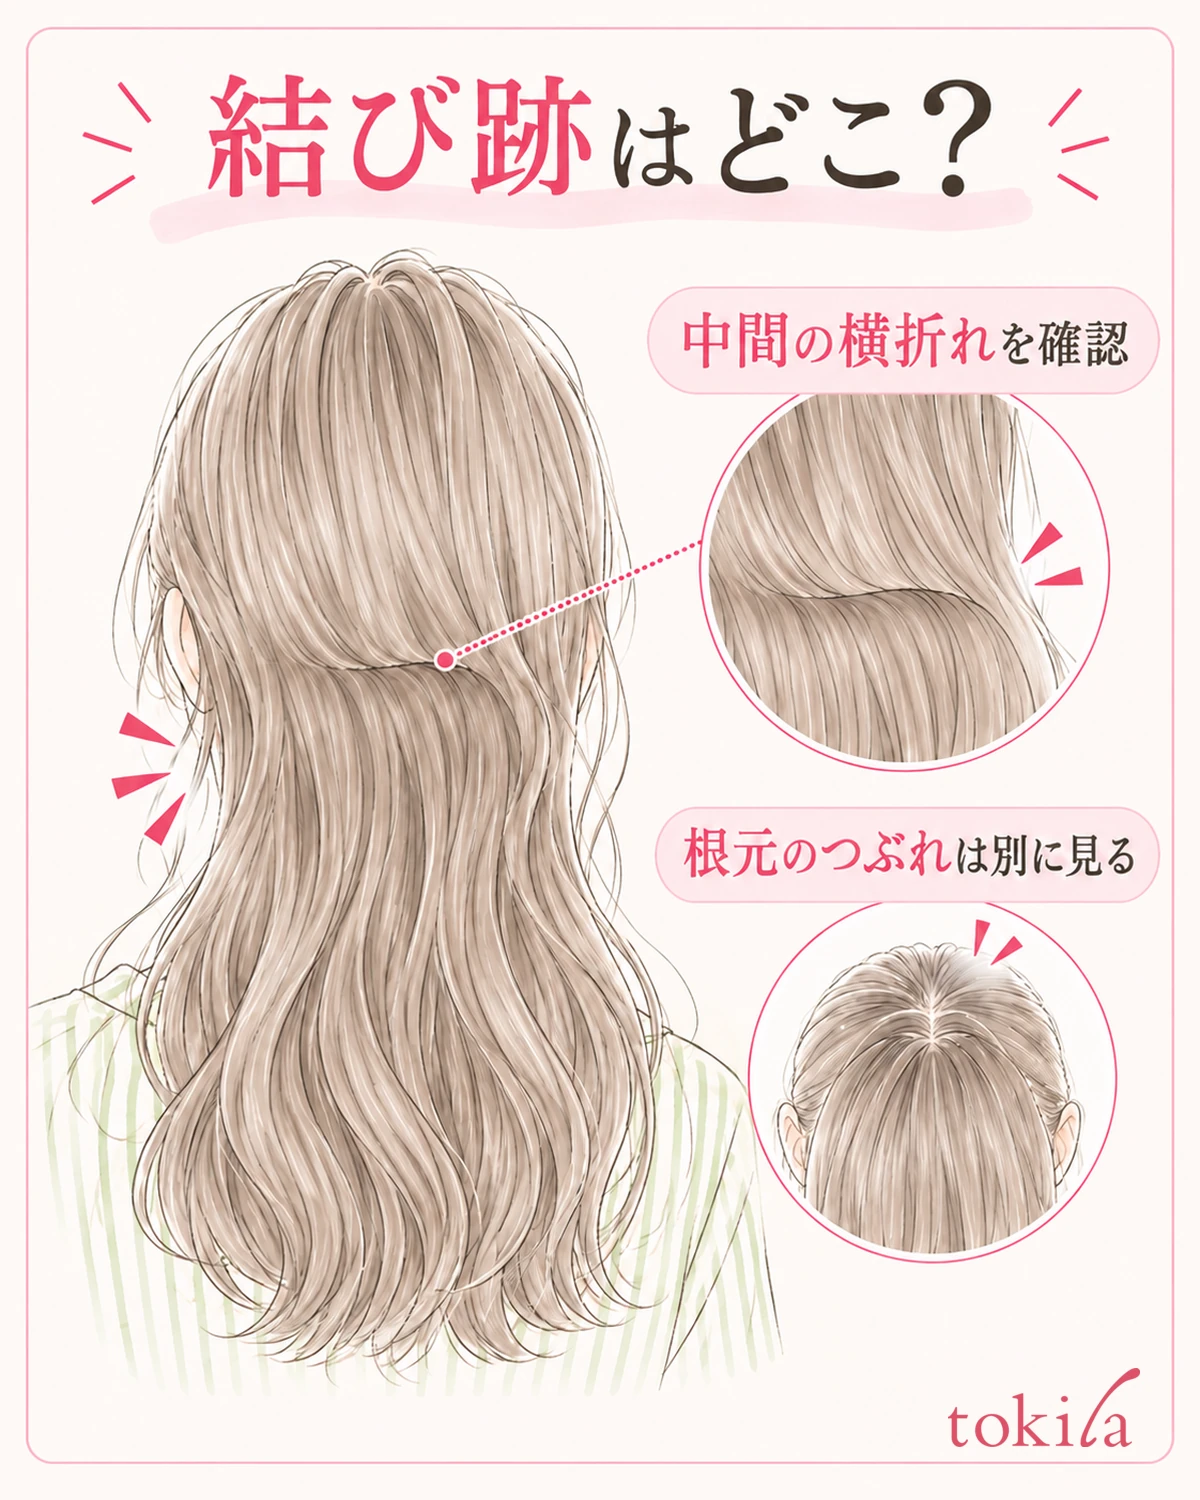
First remove the hair tie and wait for the section of hair to fall naturally. Do not pull the ends to straighten them; look in the mirror from the front, the side and the back, in that order. If the mid-lengths are creased sideways along the spot where the hair was tied, make that area a candidate for smoothing. If only the hair around the crown is lying flat or the part splits, do not treat it together with the tie mark; check the direction of the roots separately.
If the back is hard to see, use a hand mirror together with your main mirror. If you bring only the ends forward to look, the crease can overlap the curve of your shoulders and be hard to see. Let the hair fall away from your shoulders for a moment, and note whether the mark is at ear height or closer to the nape. If you take a photo, compare with the hair hanging naturally, not pulled.
If there are tangles together with the mark, loosen them gradually with your fingers, starting from the ends. Do not run a brush through from the roots in one go to stretch out the crease along with everything else. Support the hair above the snag with one hand and work in small sections, so you do not pull on the scalp. If there is hardened styling product, do not comb it out by force; follow that product's instructions for removing it.
At this point, choose which of these applies: "only a sideways crease in the mid-lengths," "the roots are flattened too," or "the tangles are bad and it is hard to wear the hair down right now." The key is not to try to fix everything at once with the same steps. You do not need to straighten curls or a perm at the ends; keep clear which shape you want to keep and which mark you want to fix.
If your scalp hurts, do not tie your hair tightly again at that spot right away. Do not confuse a crease that only affects how the hair looks with the skin being pulled. Also keep checking during the work that the pulling force is not reaching your scalp.
2. Do not yank out the knot; separate the tie and the hair little by little
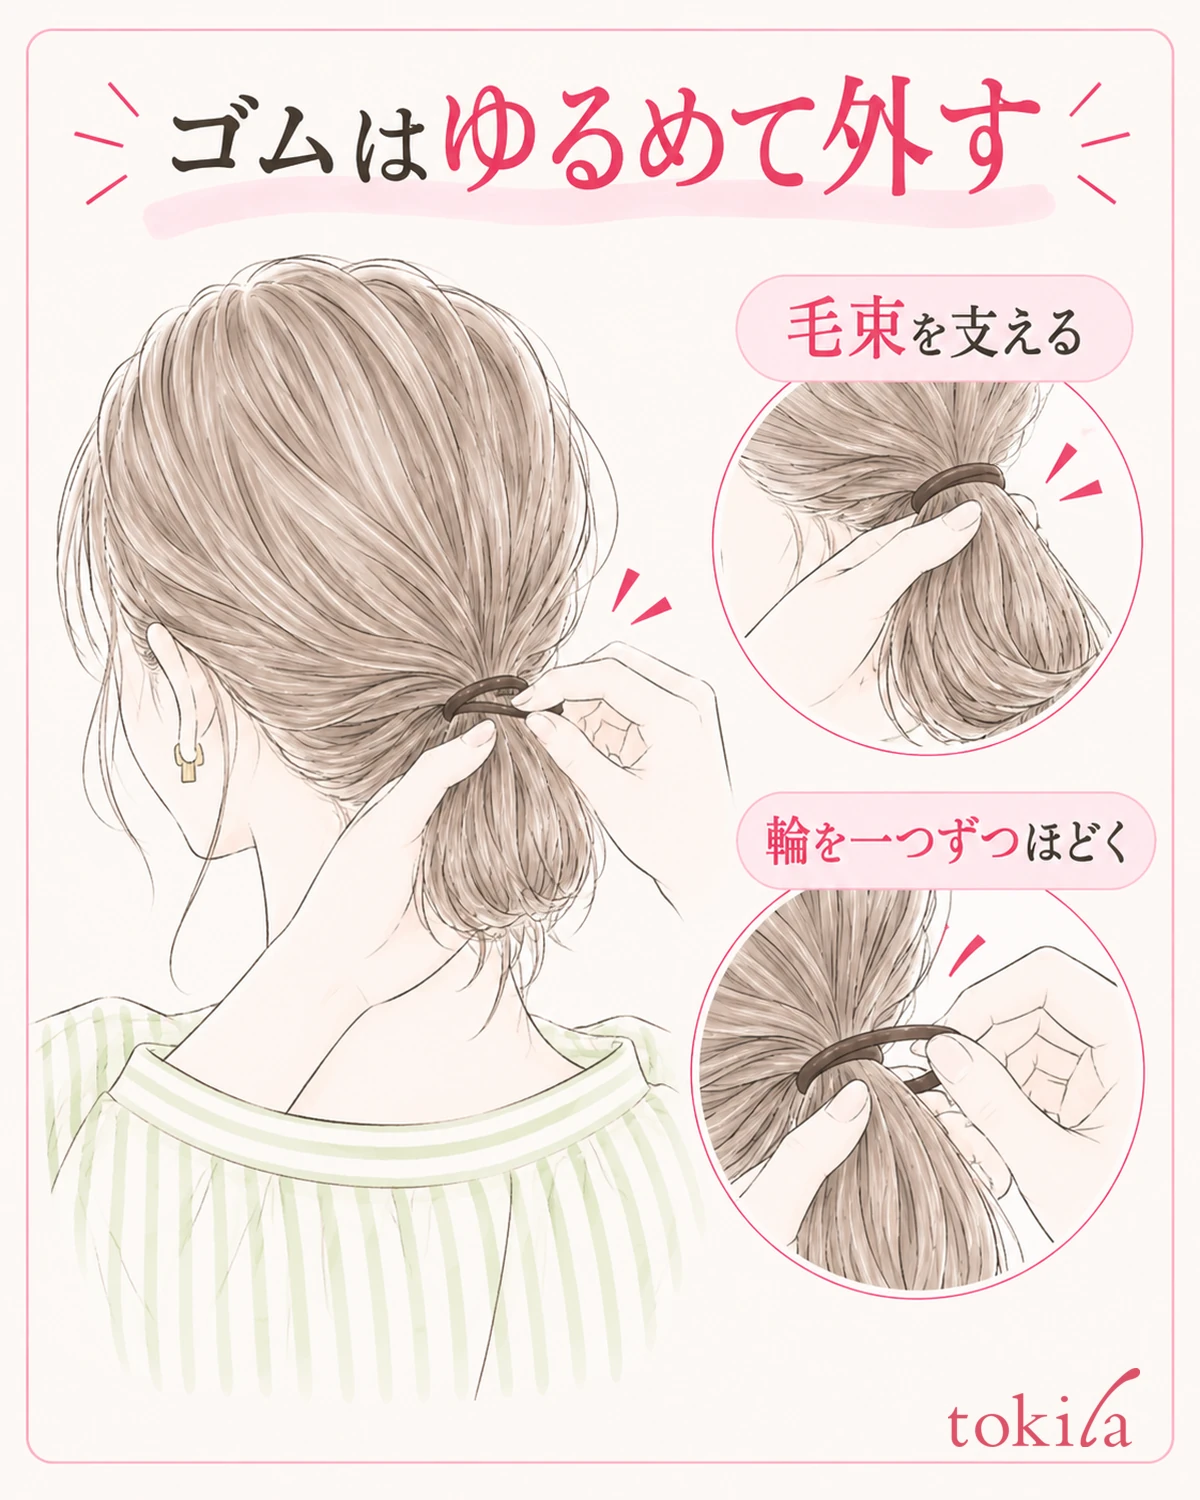
Let us also review how to take it off next time. If you slide the hair tie down the section sharply, hair caught in the knot can be pulled. Support the hair near the knot with one hand, and loosen the loops of the hair tie one at a time with the other. If hair is caught, first free those few strands with your fingers, and move the tie once the loop has some slack.
The structure differs by type of hair tie: you may unwind a loop, or undo a fastener. If hair gets tangled in a decoration or a joint, do not insist on pulling it out to the ends in one go; untangle it slowly where you can see it. Avoid pushing scissors in close to your hair to try to cut only the hair tie you cannot see. If it is hard to take off by yourself, you can also ask someone who can see your hands to help.
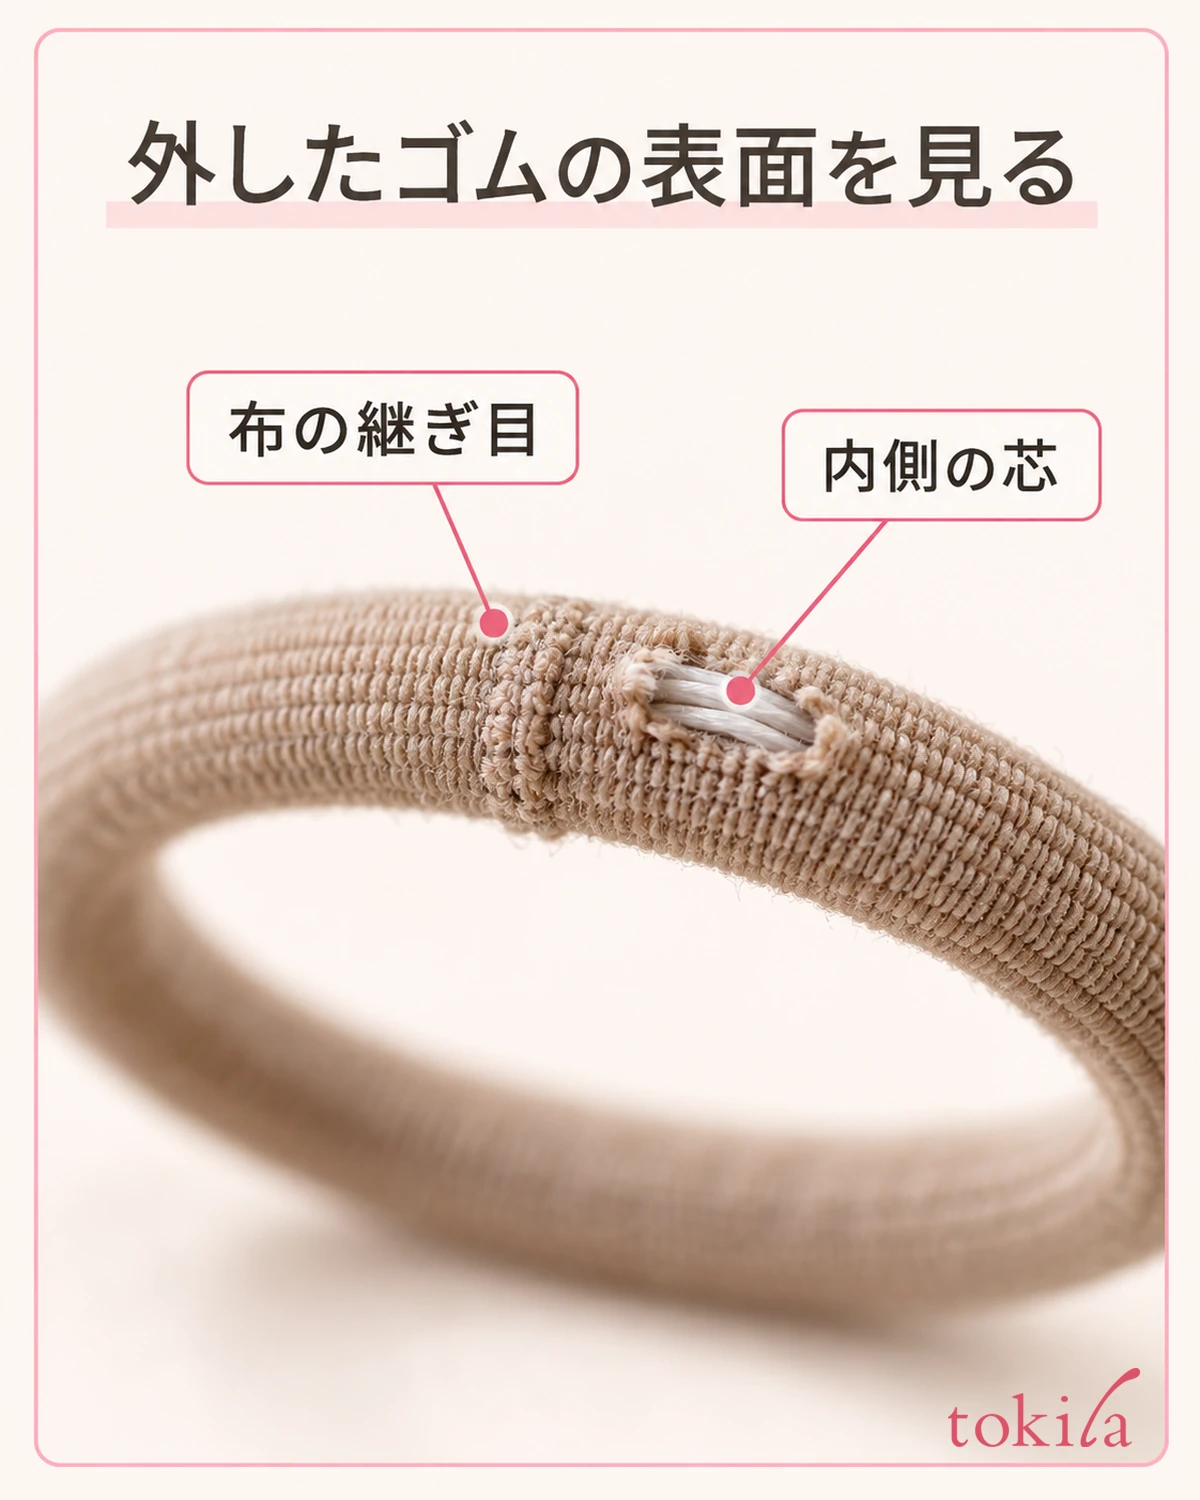
Check the hair tie you took off as well. If the surface is torn and the core inside is showing, the joint catches, or it stays stretched out and does not return, drop it from the candidates for next time. Do not assume that winding it the same number of times is enough; look at how that tie stretches and how much hair is in the section. Switching to a size you can handle comfortably makes it easier to tie again than pushing hair repeatedly into a loop that is too small.
The motion of taking off the tie alone does not necessarily remove a mark that is already there. The aim here is not to add new tangles or strong pulling before you start fixing. After taking it off, let your hair down for a moment and check in the mirror again how far the mark you first found at that height continues.
3. Dampen the crease you want to fix with a little water
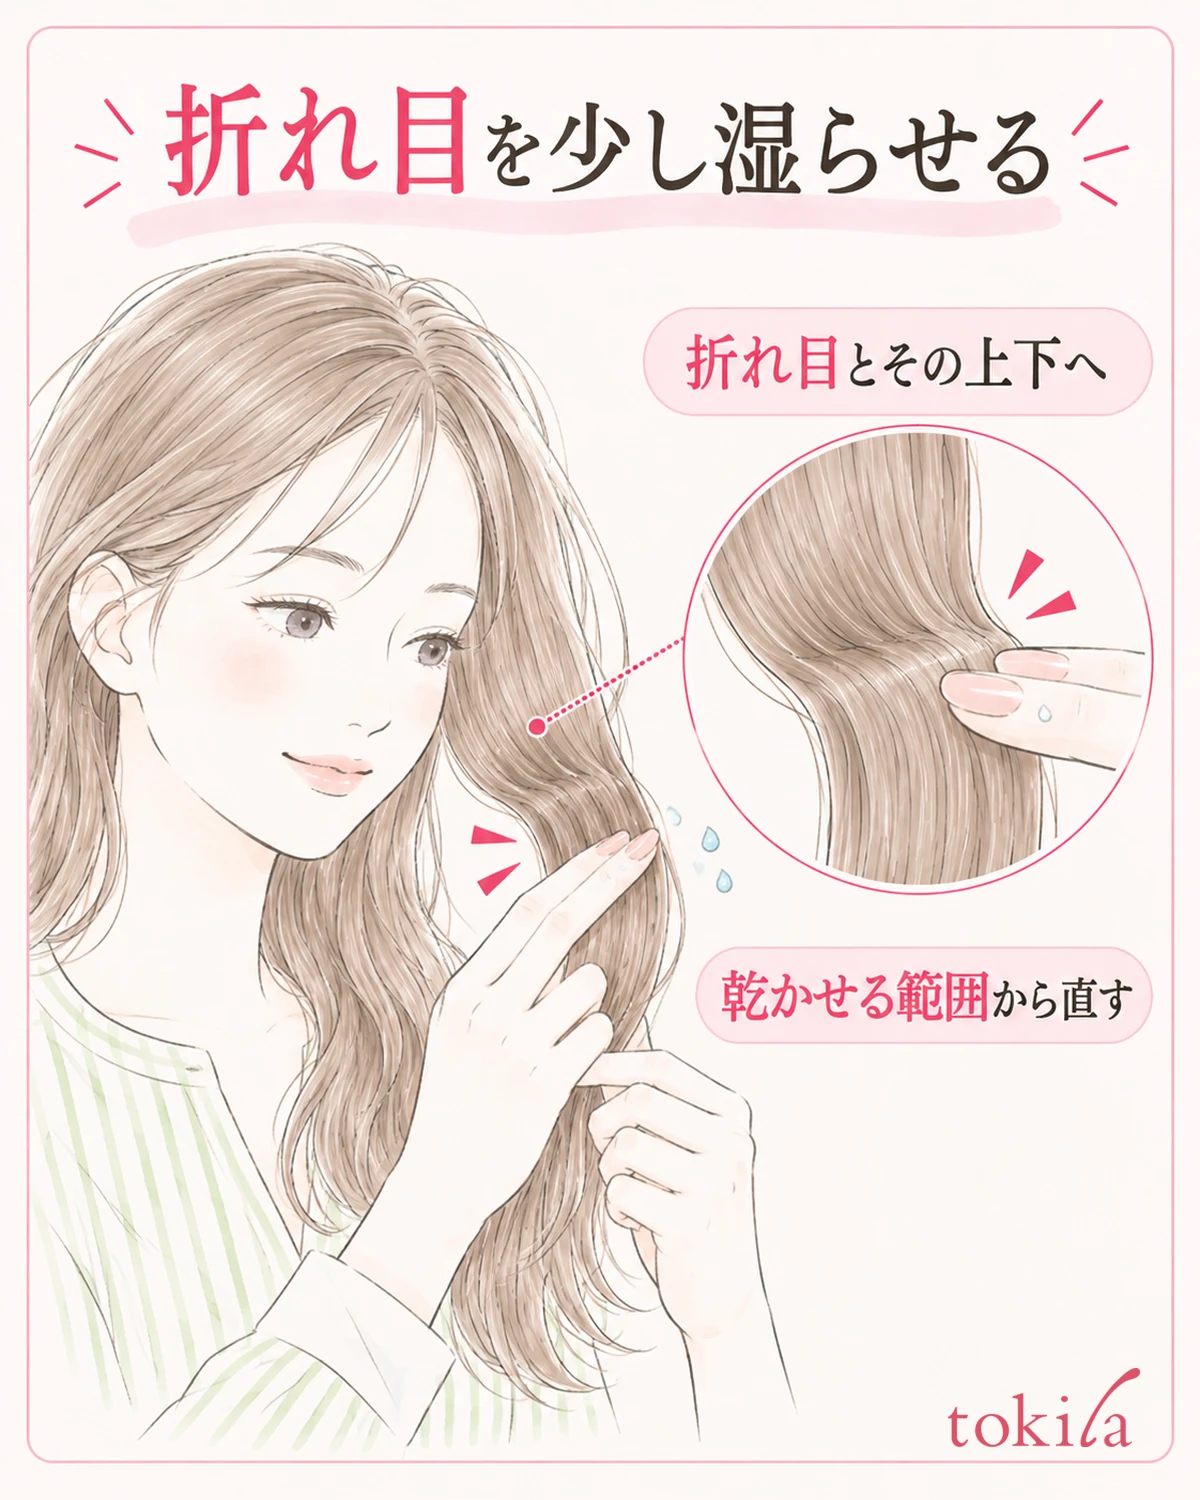
If you are fixing only the mid-length tie mark, take the section with the crease apart from the rest. Dampen your hands with water and work it into the crease and a little above and below it. Do not put water only on one strand at the surface; separate the section thinly and work it in so it touches the inside as well. Do not soak your whole head at once; start with the area you can dry.
If the hair is wet enough that water drips, press it between a towel to take out the water. Do not rub the towel from side to side or twist the hair to wring it out; press lightly. Do not pull wet hair hard, and when untangling, work little by little from the ends. If the crease does not disappear with water alone, you do not need to raise the heat strongly right away.
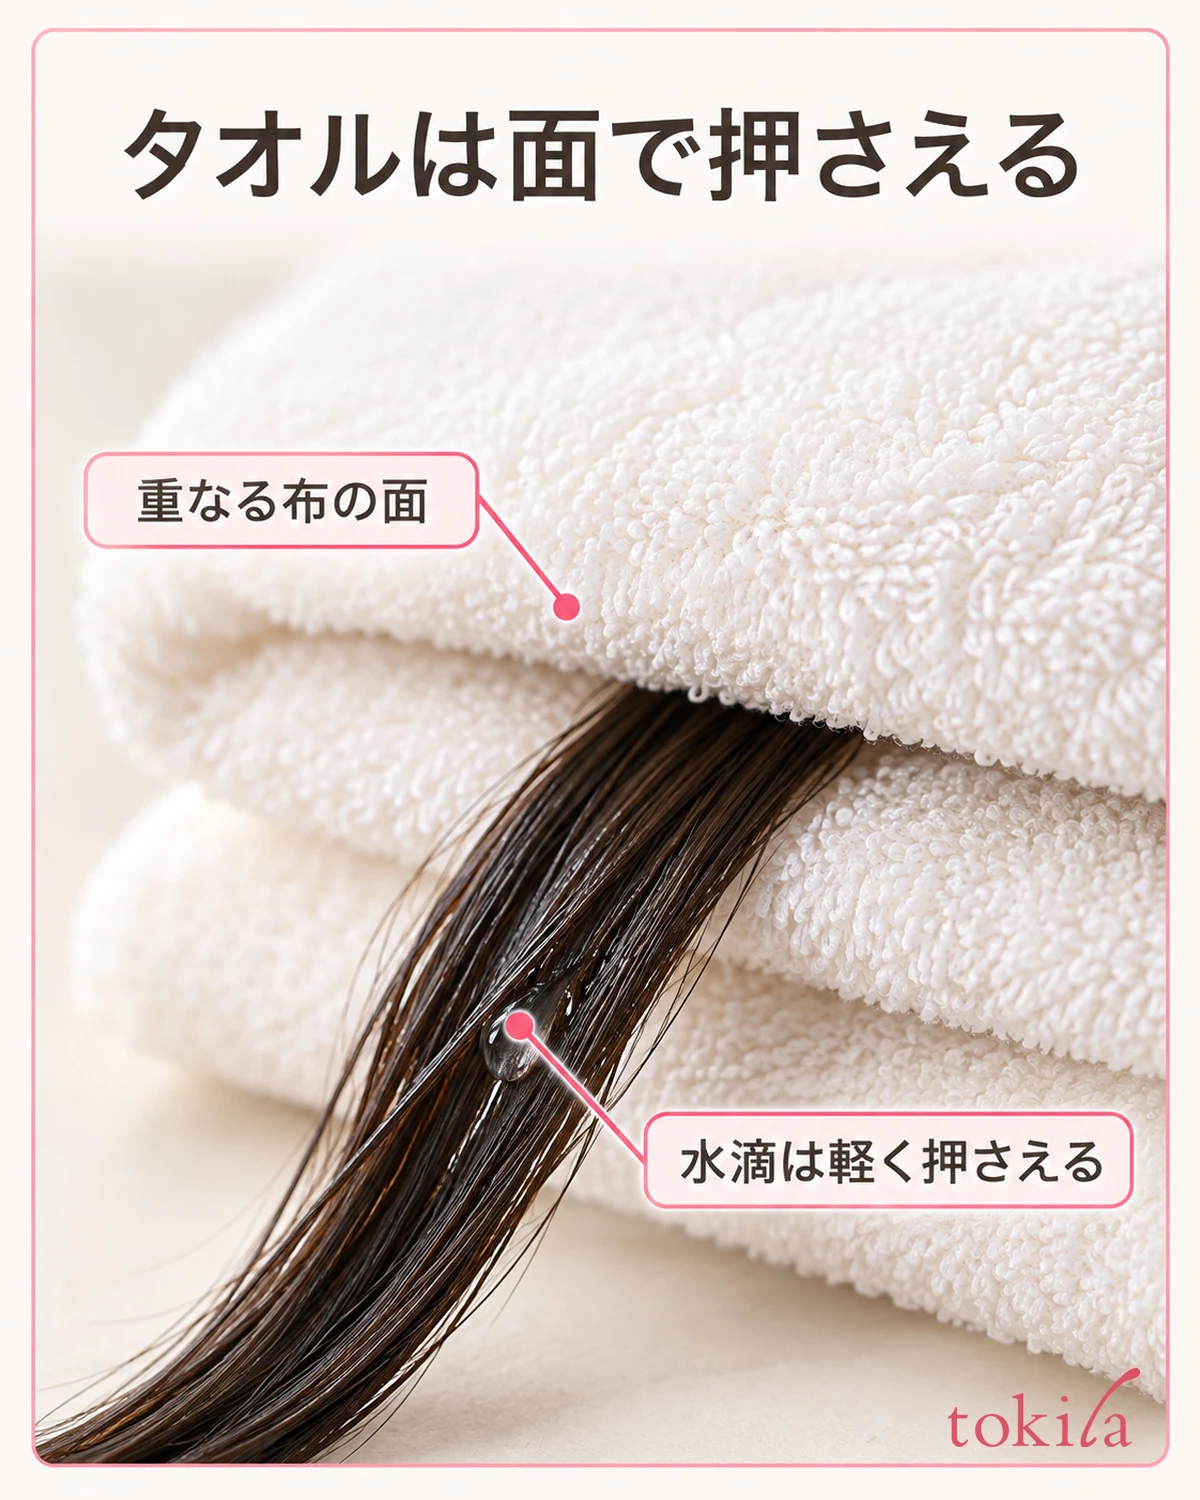
If the roots are also flattened, dampening only the mid-length crease may not make the overall shape neat. Dampen the root side as a separate small area, and divide it so air can reach it when drying. On the other hand, if there is a curl at the ends you want to keep, do not spread the water that far. Separating the part to fix from the part to keep with one hand lets you work while checking the area.
If you use a product such as a bed-head fixer, do not assume the amount or steps are the same as for water; read the amount to use, where to apply it, and the conditions for using it with heat tools for the product you have. If you try to fix the crease only by adding oil, heaviness or stickiness may bother you first. If a lot is already on your hair, rather than layering more, review the condition of your hair and how to remove the product.
In a place where you can use neither water nor a hair dryer, first check that you can get through the next steps, so you are not stuck after wetting your hair. Rather than wetting a wide area that you cannot dry, you can also give up wearing it down for now and switch to an updo where the mark is less noticeable.
4. Dry along the flow of the hair and check after the heat has gone
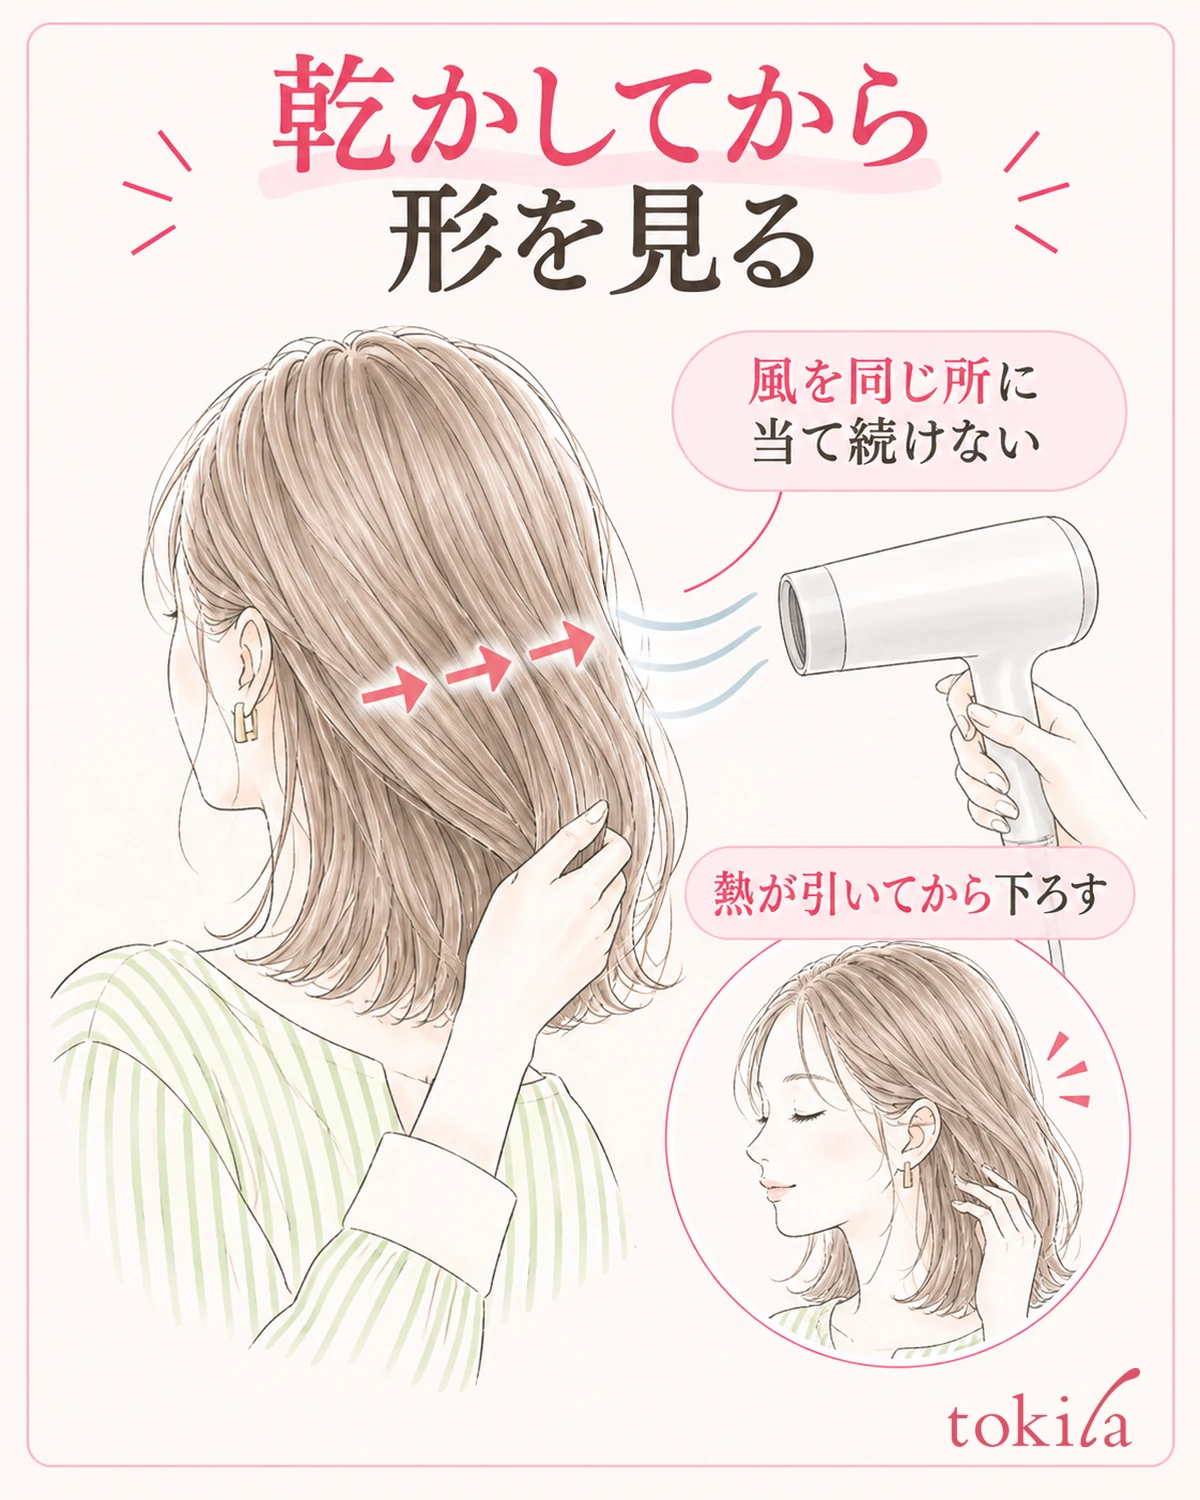
Loosely support the damp section with your fingers and dry it, keeping to the distance and way of use given in the instructions for your hair dryer. Do not press the nozzle against your hair, and move it little by little so the air does not stay on the same spot. Rather than drying while pulling the ends hard to remove the mark, lightly arrange the flow of the hair in the direction you want it to hang.
If you also dampened the roots, first let air reach the roots, then move on from the mid-lengths to the ends. Even if only the surface is dry, it is hard to check the shape while the inside is still damp, so check by separating the section thinly. If the ends scatter in the dryer's air, make the area you handle at one time smaller. Switch airflow and temperature according to the functions of the device, and do not put up with heat.
If the hair catches while you are drying, do not keep applying force with a brush; stop for a moment and look at the tangles. Avoid pulling wet hair hard, and avoid concentrating high heat only on the crease. If you use a hair iron, do not clamp a wet section right away; decide after checking how dry the hair is and the conditions of use for the device and each styling product.
Once dry, do not tie it right away; after the warmth settles, let the hair fall naturally and look at the mark in the same mirror. Also check that it is not straight only while you are pulling it by hand, and that no dampness remains at the back. For the overall picture of drying, you can also read the basics of blow-drying.
If a mark remains in one place only, take that spot out in a small section and review it. You do not need to wet and dry again parts that are already dry. If you get tired after repeating it many times, change your hairstyle for that day. It is fine not to make removing every crease completely a condition for going out.
5. On days you tie it again, check dryness and position
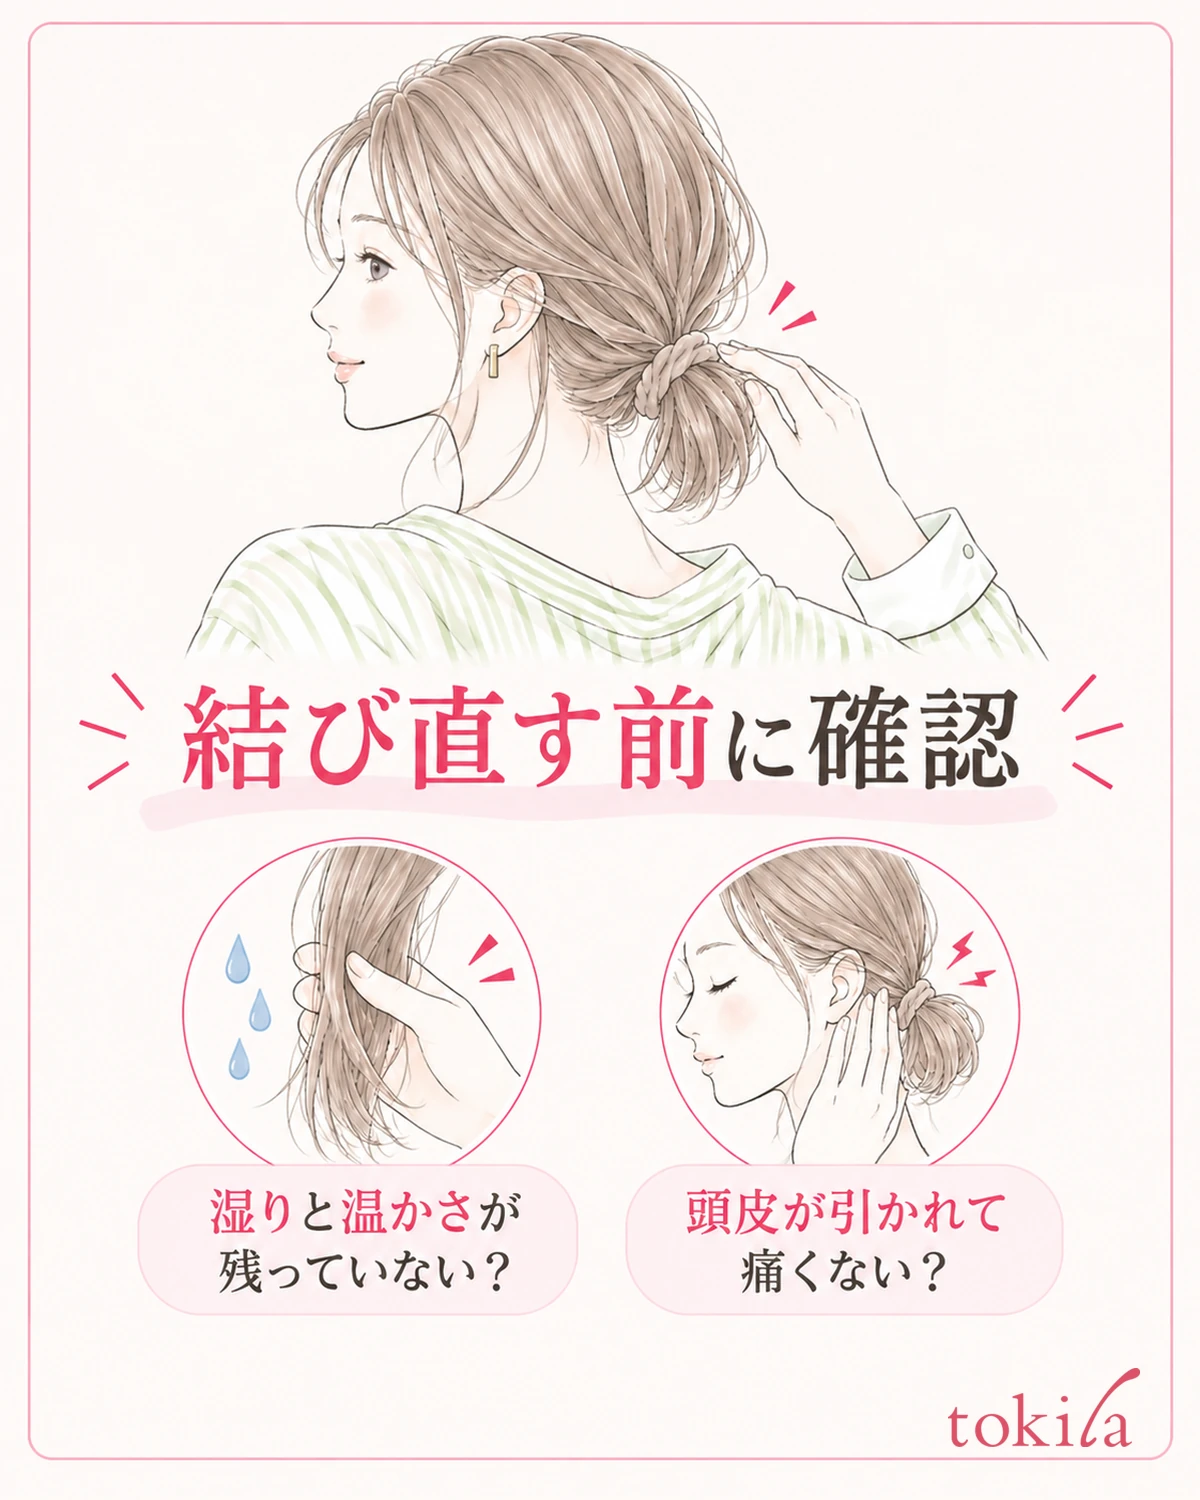
Once your hair is in a shape you can wear down, finish by looking not only from the front but also from the side and the back. Also check that your hair is not bent by being pushed against your collar. Do not decide that a part whose look changes with how it touches your shoulders or collar is a hair tie mark and fix it over and over. If you also look at yourself with the bag you usually carry on your shoulder, it becomes easier to imagine how the hair will look after you go out.
On days you need to tie it again, confirm that the dampened parts have dried and the warmth has settled. Instead of always gathering it tightly at the same height, try changing the position slightly within a range that does not interfere with your work or clothes. However, changing the position does not mean no mark at all will form. If you plan to let it down later, decide with that in mind, including whether you will be able to fix it then.
For tightness, look for a range where the scalp is not pulled painfully and you can still gather your hair for the movements you need. If you tie it too loosely and keep retying it, do not just increase the number of winds; recheck the size of the hair tie and the amount of hair in the section. Even a thick or soft tie does not always avoid leaving a mark, so do not choose a tool by looks alone.
After tying, turn slowly left and right and check that the nape and hairline are not pulled hard. When you finish, take it off as needed, loosening the loops without yanking out the tie. When you use a pin to support a small section, how to review the amount of hair and the pin's hold is also a useful reference.
The next time you compare, do not change the tying position, the hair tie and the tightness all at once; choose one from the points you had trouble with. Keeping notes on your own conditions, such as "it was easier to handle after taking it off when I tied it low after drying," will help next time. Do not expect the mark to fade the same way as for other people; take as a guide that you can take it off without pulling your hair and arrange it into a shape that suits your plans.



