If you see dark spots and pale gaps mixed across your eyelid immediately after applying eyeshadow, check where the color looks different before adding powder all over. Where you touch depends on whether you want to soften the edge of a dark patch or add color only to a pale area.
This article covers patchiness immediately after applying powder eyeshadow to the upper eyelid. You do not need to fill in a natural gradient that fades from the outer corner inward until it is uniform. If color collects in a crease over time, you can also readHow to Review Eyeshadow That Collects in Creases.
1. Distinguish patchy color from light and natural shading
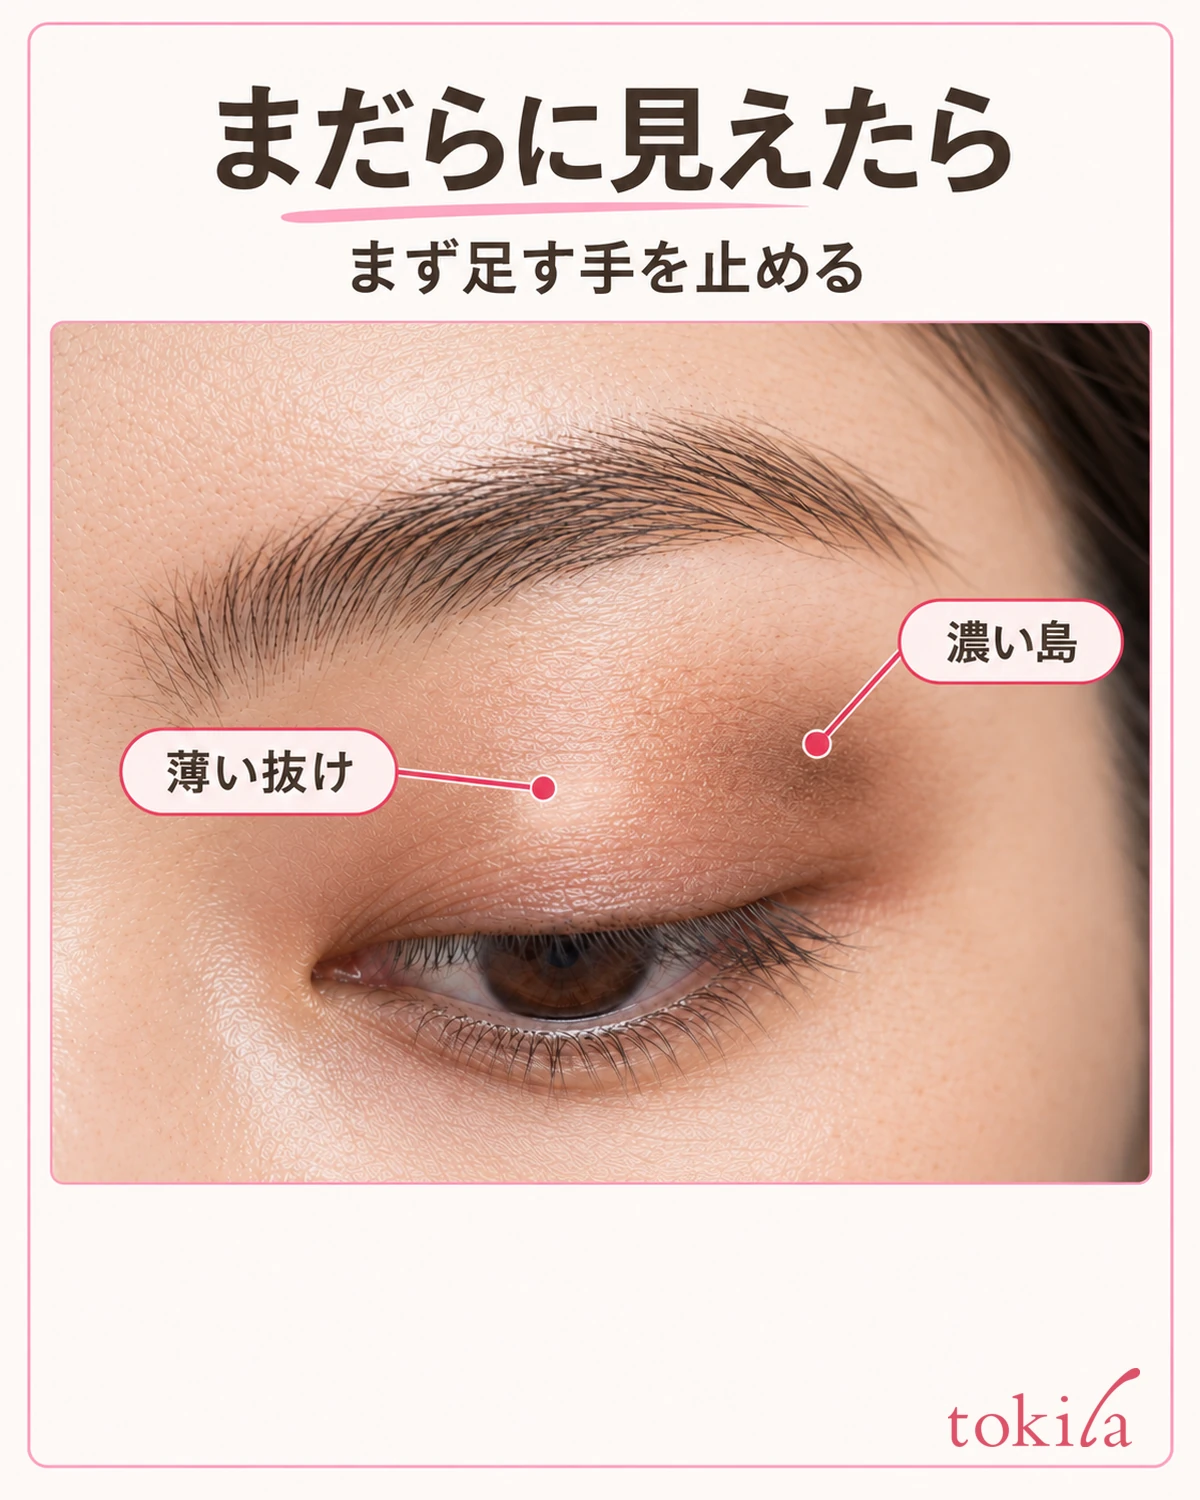
First, stop adding powder, face the mirror straight on, and open your eyes naturally. Then lower your gaze slightly to look at the color across your upper eyelid. Closing your eyes tightly bunches the skin, so check with your face relaxed. Look for dark spots and gaps in color one location at a time.
Using the same mirror and lighting, change your face angle slightly. If the sparkling area moves with the angle, glitter or pearl reflections may be involved. Rather than assuming a bright spot is a clump of powder, return to the original angle and see whether the same place still looks dark. You cannot diagnose your skin's condition from this appearance alone.
If you have placed a darker shade at the outer corner and faded it inward, variation in depth is not itself a mistake. Identify whether there is an abrupt small dark patch within the intended transition, a line at the edge, or a pale gap. Narrowing down the place that bothers you makes it easier to choose a correction than making the entire eyelid equally dark.
On the other hand, if the color is pale overall without dark patches or gaps, treat that separately from the patchiness discussed here. Go toReviewing Tools and Application When Eyeshadow Looks Too Faint. It is also important not to keep adding color until it looks dark enough when dim lighting makes it hard to see.
On a busy morning, deciding on just one place to correct can help organize the task. If you want to soften a dark spot at the outer corner but spread new color from the inner corner toward the center, you may lose track of the original concern. Look in the mirror before picking up your tool again, and put into a few words what you want to correct.
If possible, look at both sides under the same light. You do not need to force the shapes or creases of your eyelids to match. Separate small differences visible only when looking down from color edges that bother you with your eyes open, and decide how far you want to adjust today.
2. Check your eyelids and tools before adding powder
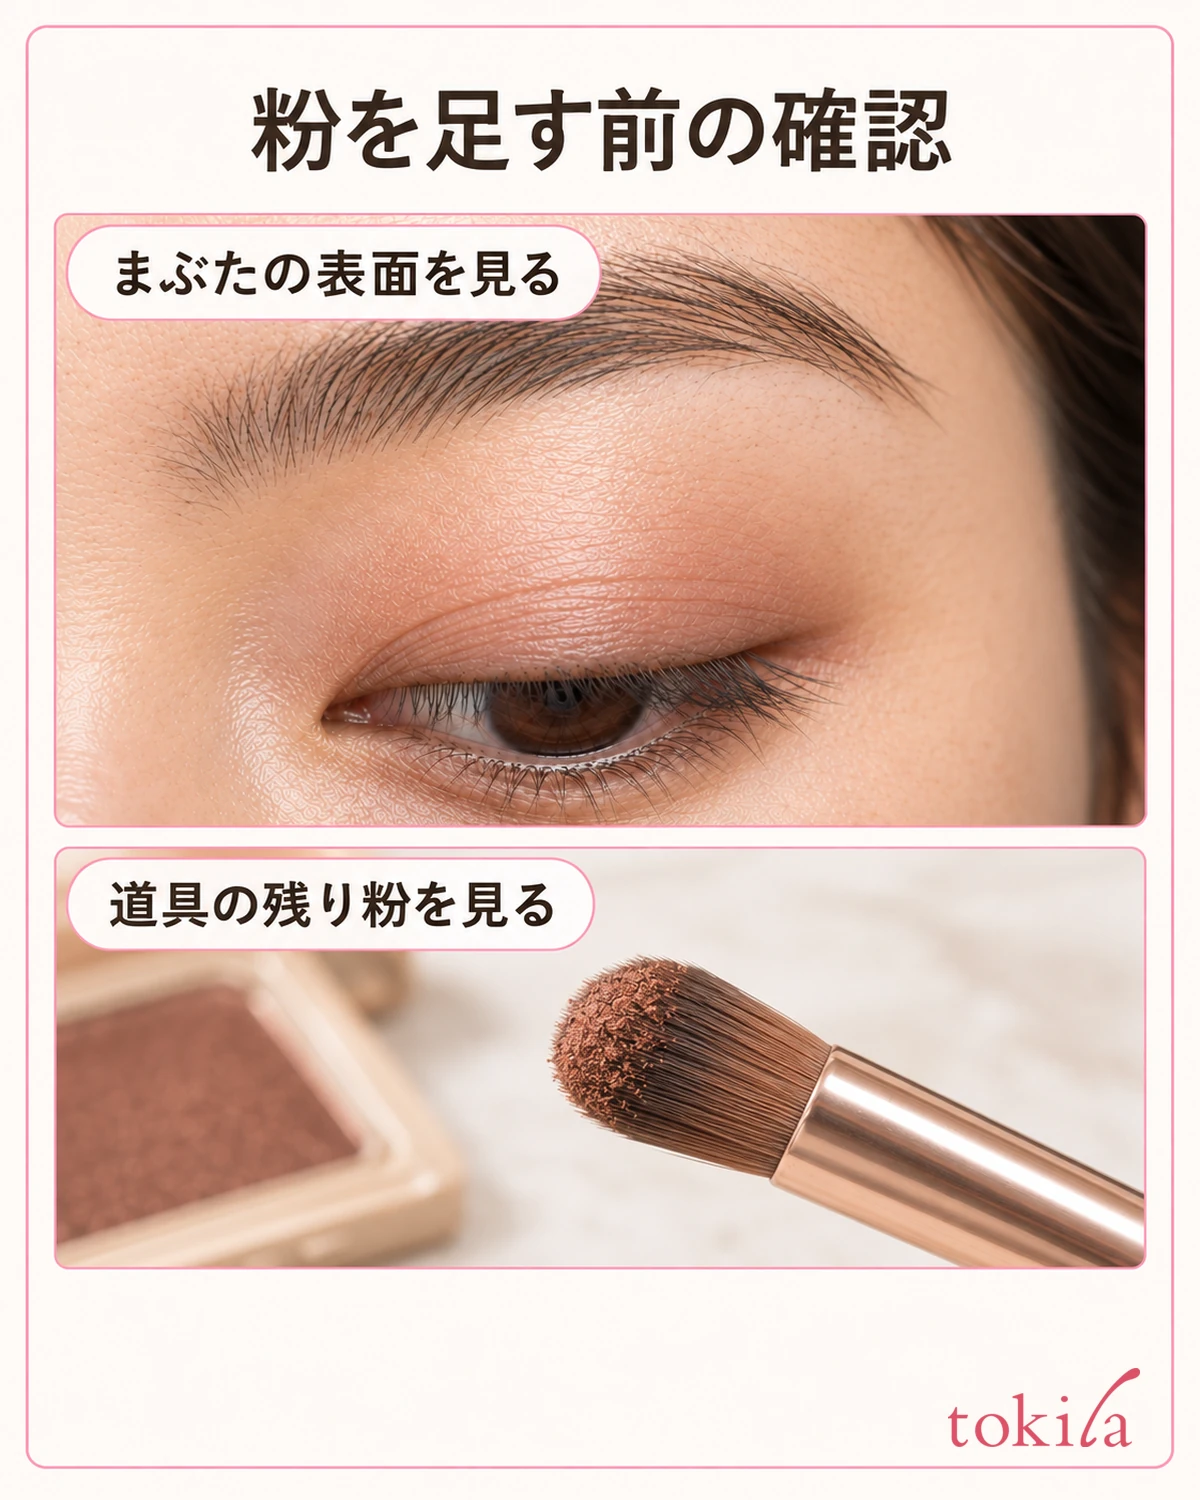
Set your tool down and examine the eyelid's surface. If foundation or an eye base has gathered into lines, or makeup that can move remains on the surface, do not keep adding powder over it. Adjust the base using the instructions for products suitable for the eye area. If needed, redo a small area before returning to the color.
Check the label to confirm whether an eyeshadow base is suitable for the eye area, its application order, and its amount. A thicker layer does not necessarily make color more even. Also avoid reducing sunscreen to adjust the finish; follow each product's directions for the required amount and layering. There is no single waiting time or extra powder step that can be prescribed for everyone.
Next, check whether another color, clumped powder, or makeup remains on your brush or applicator. If an earlier shade is still there, it is harder to tell whether the current color is patchy or another shade is mixing in. Care for the tool according to its instructions, and switch to a clean, dry tool if needed.
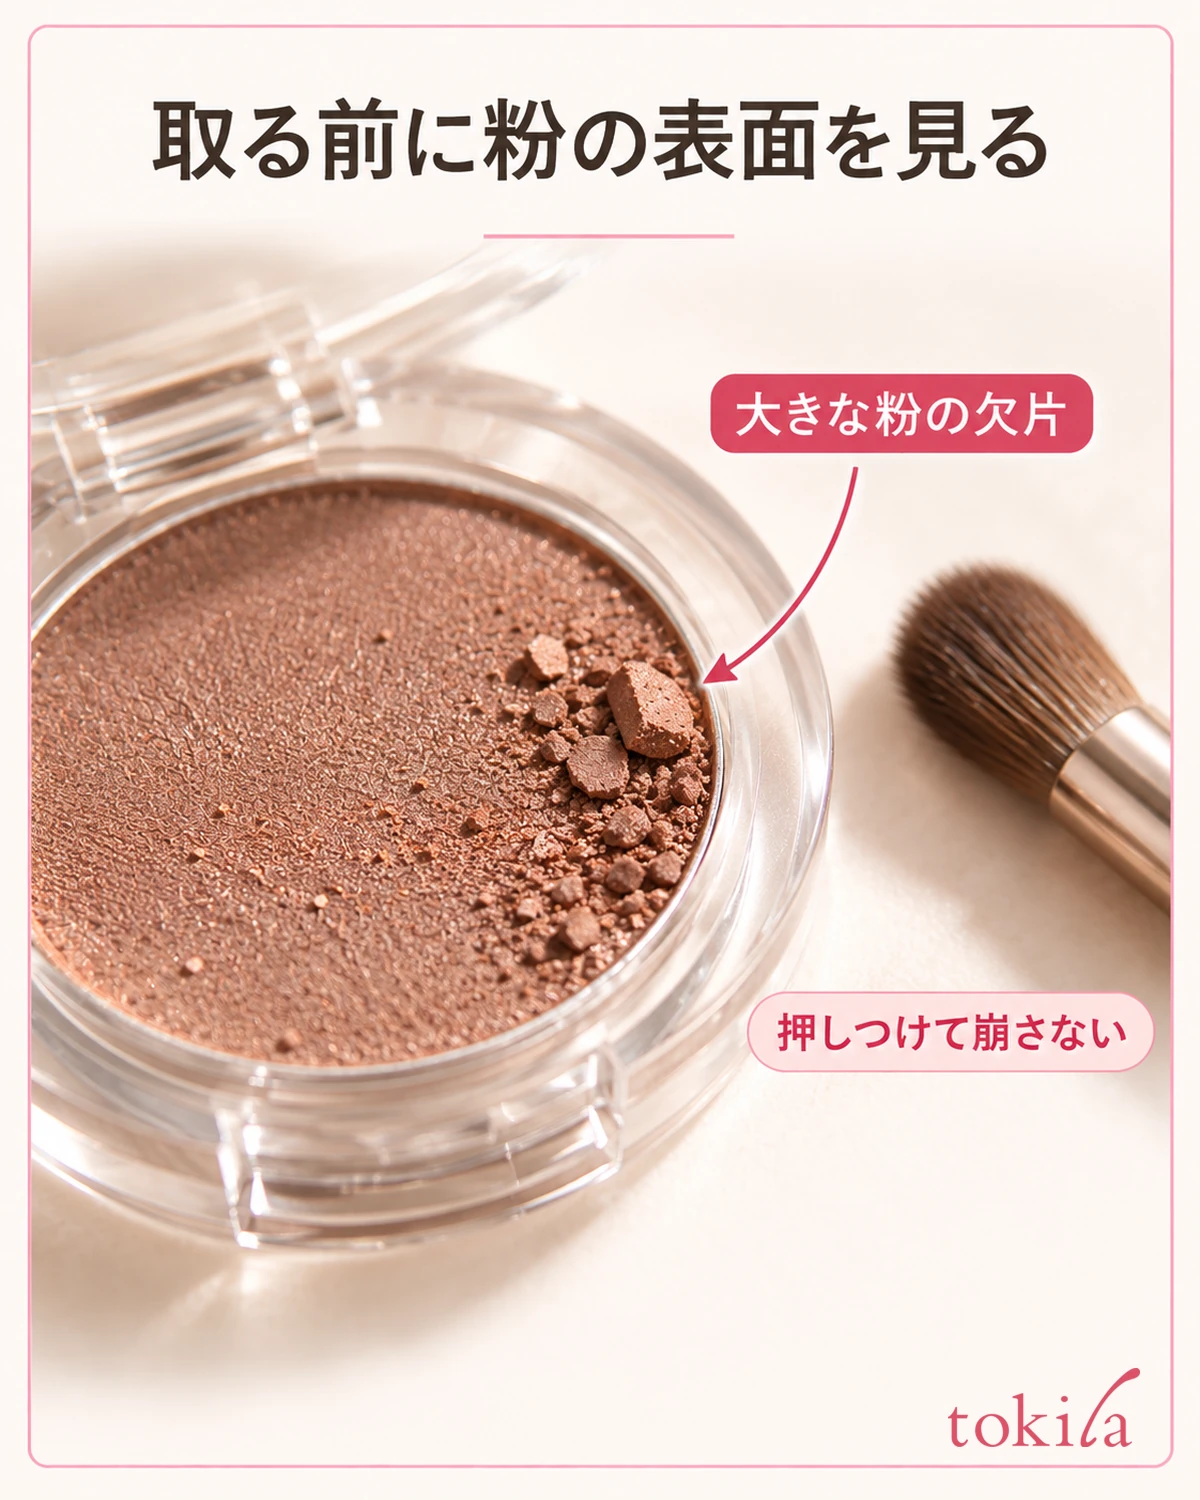
Look at the palette surface, too, to see whether you are picking up large pieces of powder. Do not press pieces against your eyelid to break them down or scrape the surface to make it easier to use. If you notice damage or an unusual condition in the container or tool, check the product's directions rather than forcing yourself to keep using it.
Do not add water or toner on your own to powder intended for dry use. Whether wet use is supported and which tools are suitable vary by product. Do not compare a damp brush just washed with a dry brush as though the conditions were the same. Start by returning to the instructions for your product.
3. Place a small amount in a small area, then lift the tool and check
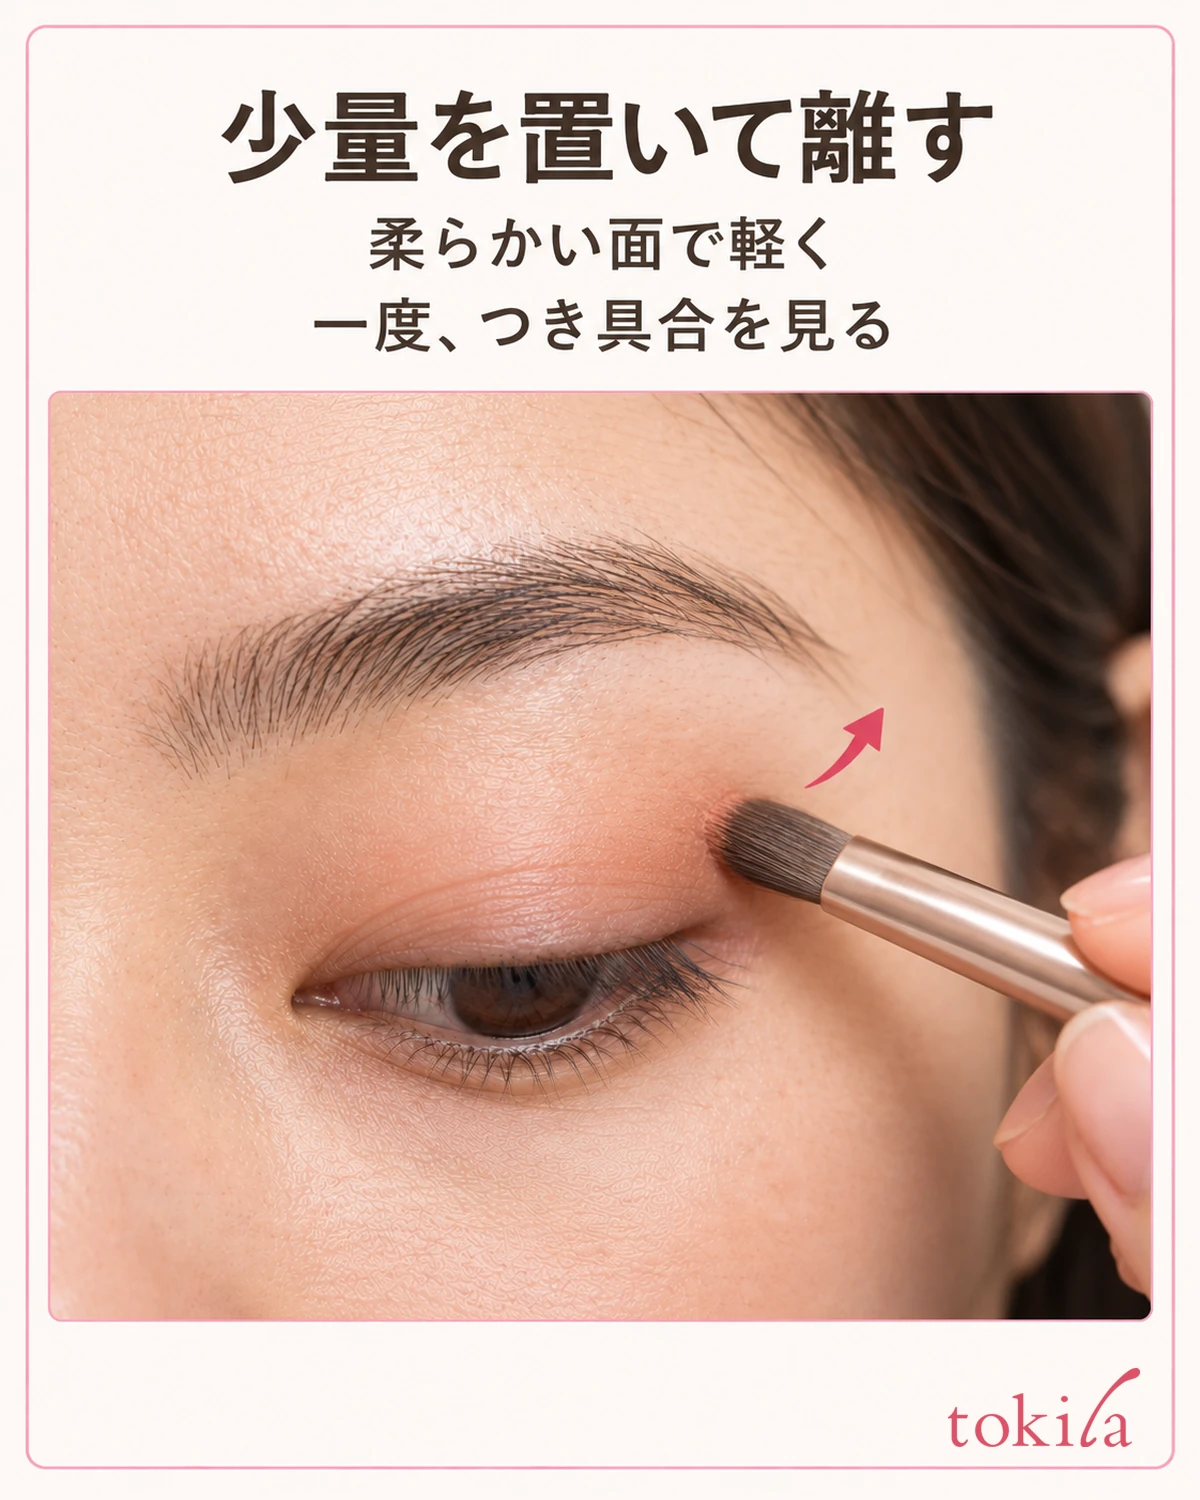
When reapplying, limiting yourself to one shade makes the amount and area easier to follow. Pick up a small amount with the brush or applicator specified by the product, and check the application somewhere appropriate to its instructions, such as the back of your hand. Color on your hand does not guarantee how it will appear on your eyelid; this is preparation to check the amount of powder you will first transfer.
Lower the mirror slightly to a position where your upper eyelid is easy to see, and look down with your face relaxed. Lightly touch the soft surface of the tool to the place where you want color, then lift it away. Do not press the brush until it splays or push in the hard edge of an applicator. Keep it away from the inside of the eye and the mucous membranes.
Dragging color from the first dark spot across a wide area at once can make it harder to see what you want to correct. First examine the application in a small area, then gradually spread it to neighboring areas as needed. Rather than picking up fresh powder from the palette every time, watch both the color left on the tool and the color on your eyelid as you go.
After placing color once, face the mirror straight on again and check with your eyes open. If the patchiness no longer bothers you and the color is as deep as you want, you can stop adding it there. Even if you need more depth, begin with small amounts in the same small area. The basic progression from a lighter shade to a darker one is covered inHow to Apply Two Eyeshadow Colors.
When you want to adjust with one shade, avoid moving among several colors in the palette and check with one color first. Looking at the surface you pick up from also helps you prepare by checking whether a neighboring dark shade has mixed onto the tool. If you want to change colors, adjust the current shading first rather than correcting patchiness and changing the color combination at the same time.
Separating the tool that places color from the one that softens the final edge makes it easier to switch between adding powder and spreading it. If you use one tool, remove the remaining powder according to its care instructions first. The aim is not to own more tools, but to avoid continuing to blend while powder remains on the tool.
4. Adjust dark edges and pale gaps separately
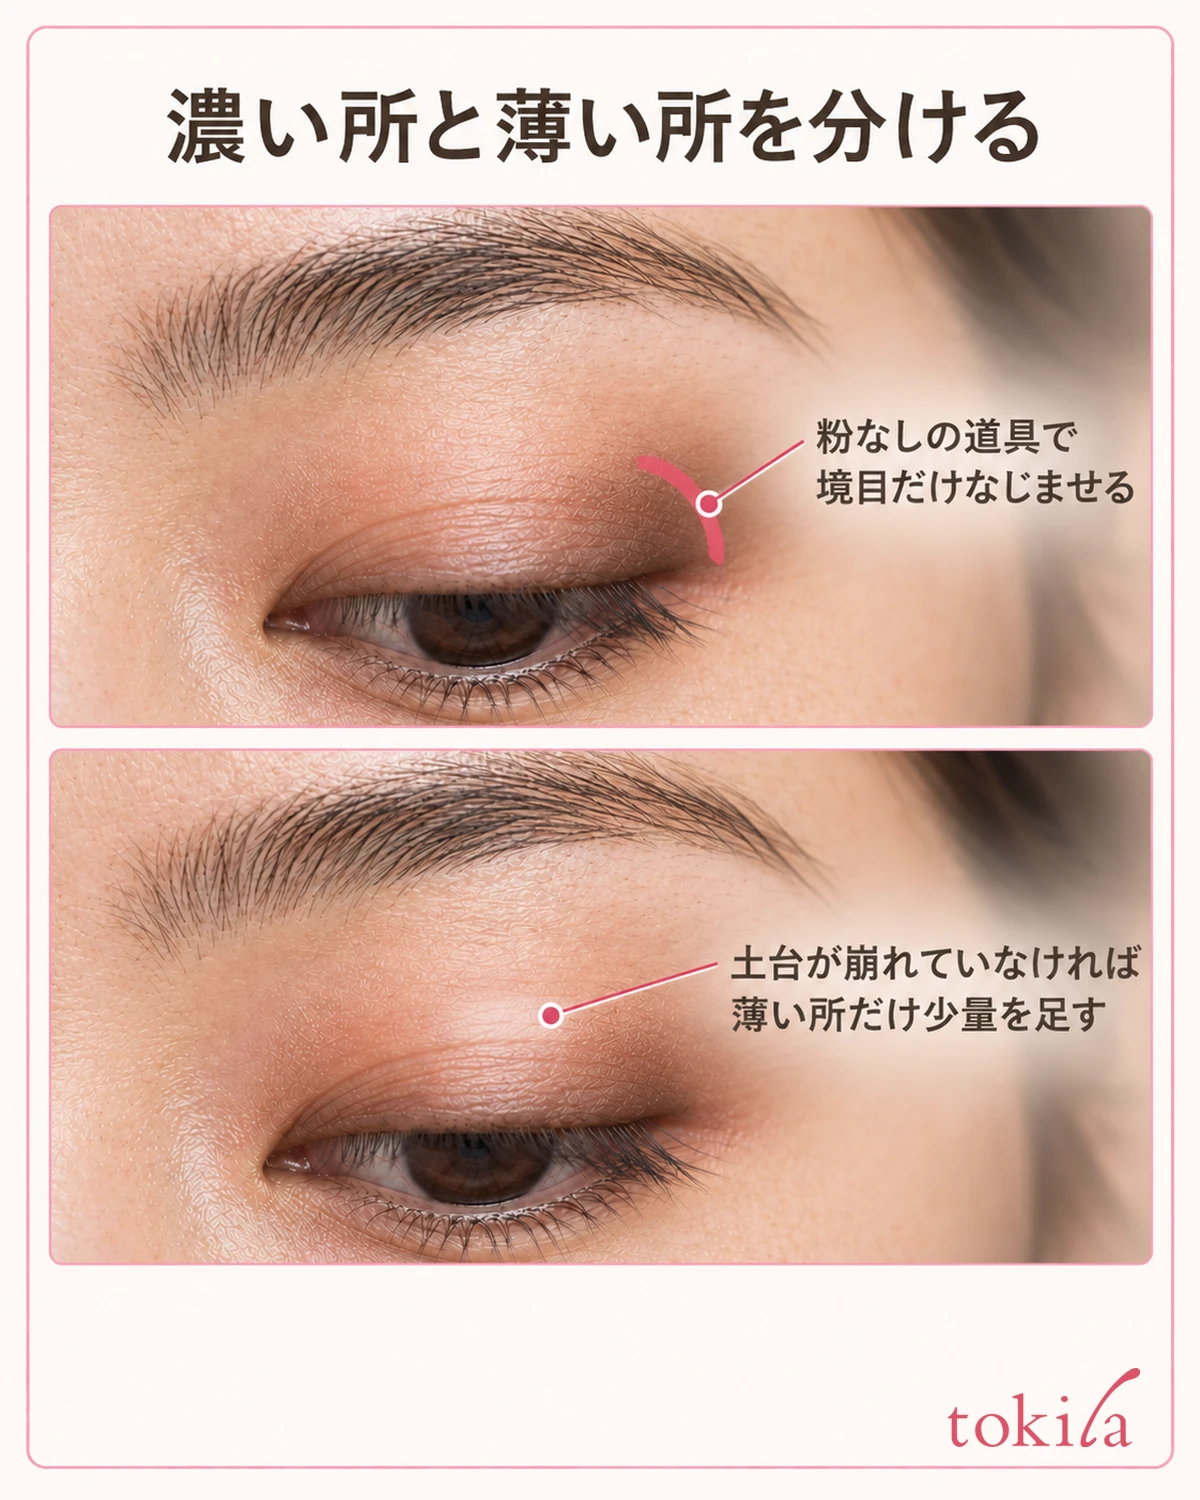
If a small dark patch remains, first check its surrounding edge. Rather than dragging powder out from the patch, lightly touch only around its edge with a clean, dry tool free of powder. After one short blending movement, lift the tool and see how the colored area has changed.
If you want to retain the color at the center, do not sweep repeatedly across the whole eyelid. Blend the narrow area where the darker patch meets its surroundings. Do not press harder or rub longer to move the powder. If a light movement makes no difference, avoid continuing to blend further.
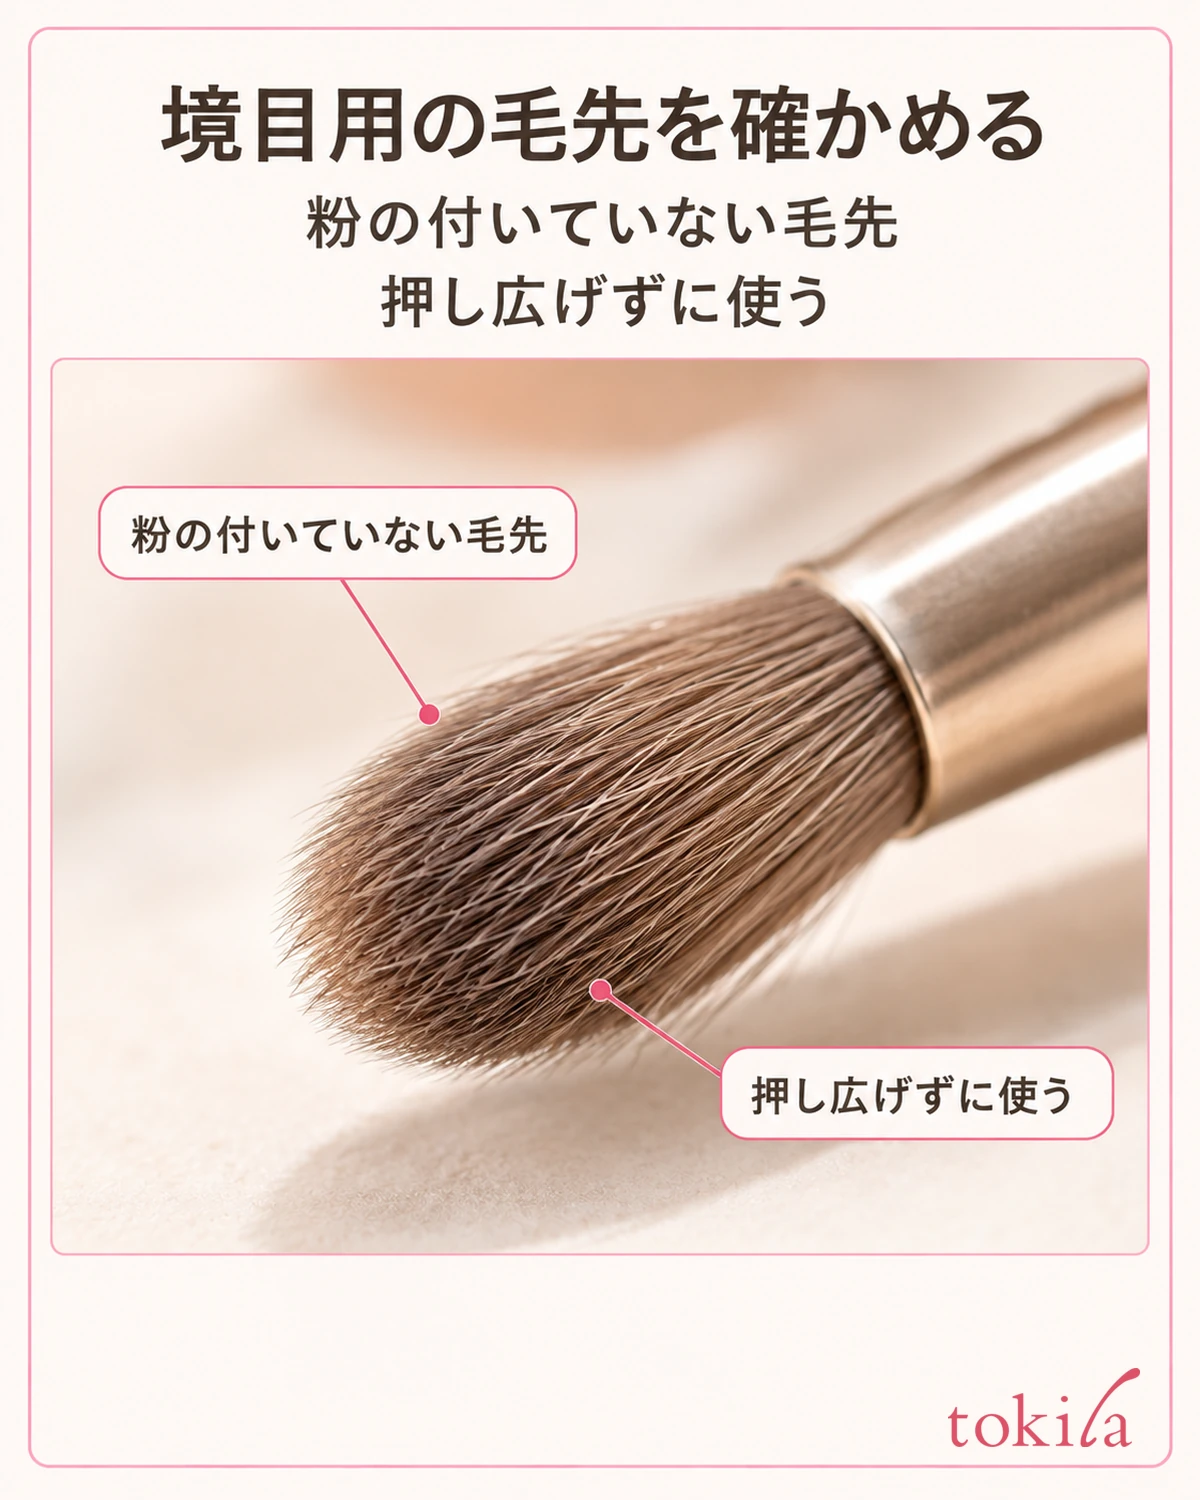
For a pale gap, first check that the base in that spot has not broken down. If the skin looks as usual, there is no gathered makeup or thick layer, and you only want to add color, one option is to place a small amount of the same shade using a tool suited to the product. Do not cover the darker area as well. Decide in the mirror where to add color before touching it.
If powder clumps even when you place it in a pale spot, or the surrounding color moves with it, stop adding more. Continuing to layer new powder simply because a pale area remains can create more correction edges. Rather than repeatedly alternating between adding and blending, take this as a sign to switch to redoing a small area.
With shades containing strong glitter or pearl, reconsider color depth separately from the appearance of sparkle. Instead of trying to erase every bright point, check whether it bothers you when viewing the eyes straight on. Do not aim to reproduce the exact darkness in the image. Finish adjusting at a point that retains the texture of the shade you chose.
5. If layers become thick, redo the area and narrow down what to change next time

If powder has built up and cannot be adjusted with a light touch, do not cover it with a large amount of a lighter shade or base. Check the amount, application, and wiping instructions for a remover suitable for the eye area, and remove and redo only the necessary area. Keep it out of your eyes and avoid pulling the skin strongly.
After removal, deal with remaining remover or moisture according to the product's instructions. Do not place powder while the area is wet or recreate the same thick layer. Check how to use moisturizer and sunscreen for the area you removed and your plans afterward. Restore the necessary care before restarting your makeup.
If redness, itching, irritation, or other abnormalities occur, stop using the product rather than continuing makeup to hide patchiness. Consult a medical professional if symptoms persist or your eyes feel unusual. Do not diagnose the cause from appearance alone or assume that changing powder or base will solve it.
A short note for next time is enough. Choose one step that concerned you, such as picking up less powder initially or keeping a separate dry tool for edges. If you change color, base, tool, and amount all at once, it becomes harder to follow where a difference arose, so narrow down the conditions you review.
When tools are limited away from home, you do not need to expand the area to hide patchiness. If you have no clean tool, cannot wash your hands, or have no remover suitable for the eye area, leaving it alone and adjusting after you get home is an option. Before adding a new color, choose an action you can perform under the current conditions.
Finally, face the mirror straight on and open your eyes naturally to look at your whole face. Rather than pursuing small differences visible only up close, check whether the eye color stays within the intended area and no strong edge remains. If no more is needed, you are finished. Leave room to enjoy shading and texture, too.