Eyebrow concealer is a cosmetic that covers the dark color of your natural brow hairs with makeup, helping you adjust the brow color layered over it and the overall impression of your face. Choose it separately from concealer for spots on the skin and from bleach that changes the color of the hair itself. Even if it comes with a brush, its place in your routine may differ from your usual brow mascara.
This article explains brush-on eyebrow concealer in terms of application order, the amount on the brush, how to touch the hairs, and finishing after it dries. It does not test the color payoff of any particular product. Read your product’s label first, then follow its directions for application areas and layering.
1. Check its purpose: is it designed to cover brow-hair color?
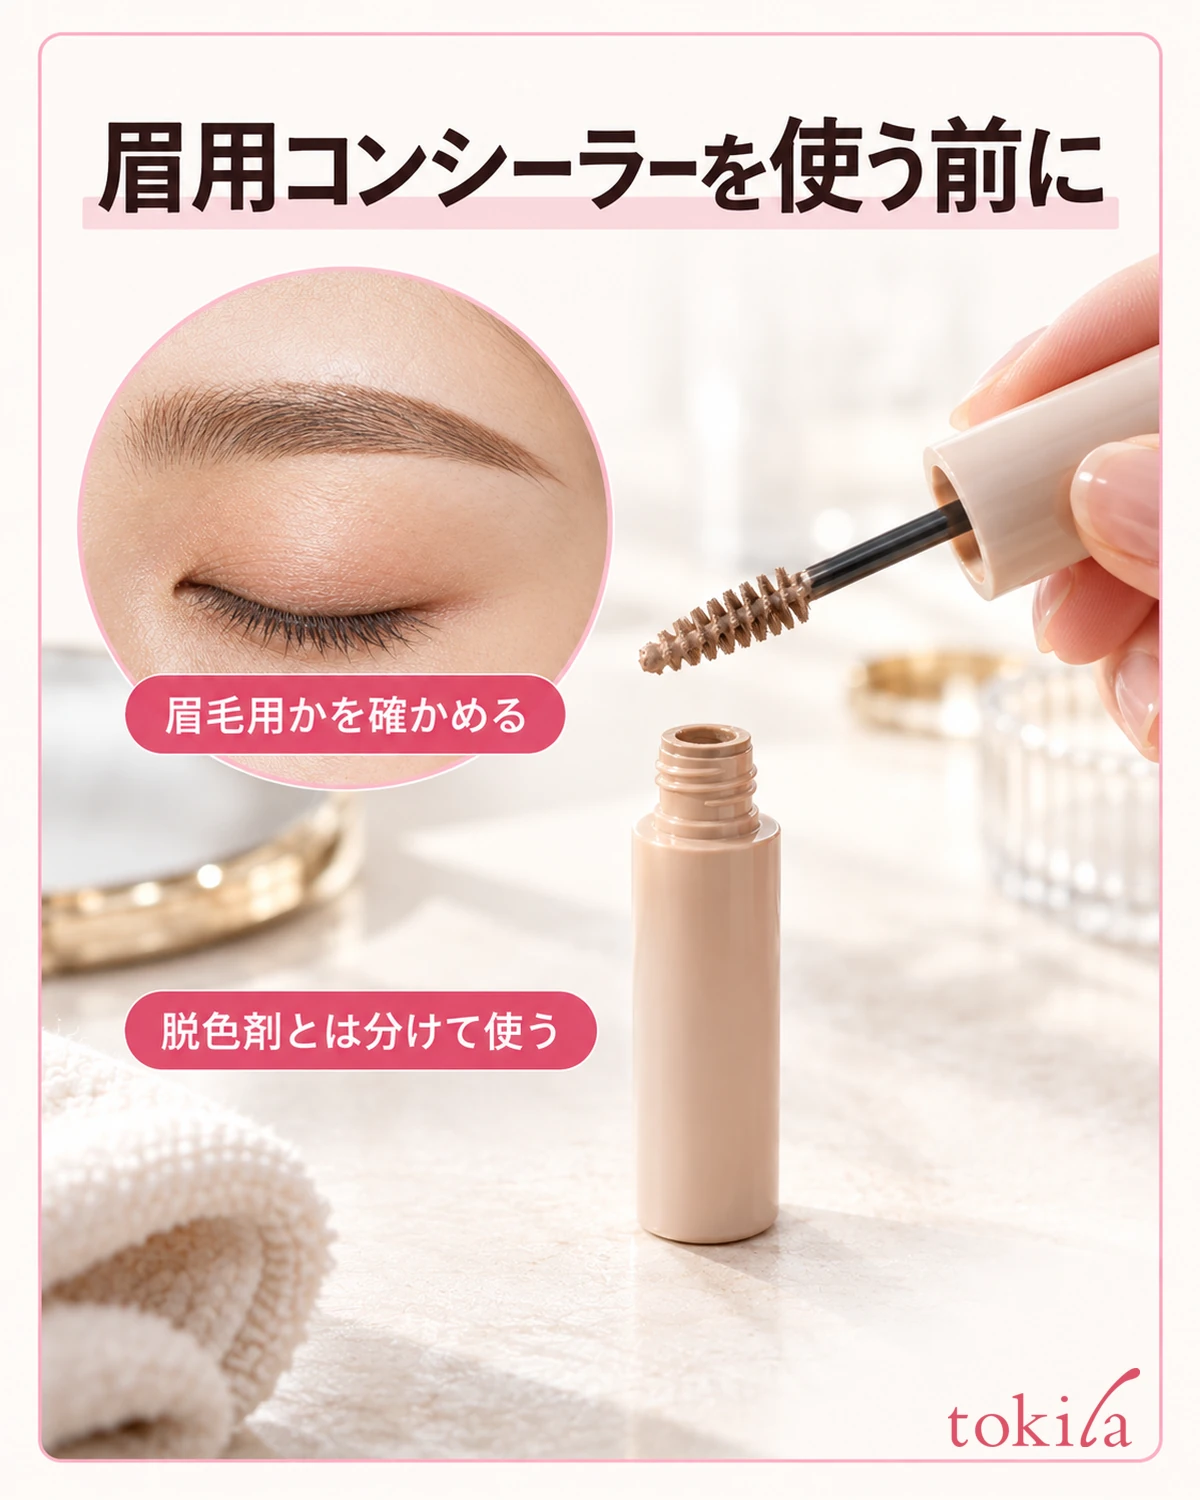
Check the container or outer packaging to confirm that the concealer is intended for eyebrow hairs. A corrector for the skin around the brows and a product that covers dark hairs target different things, even if both are called concealer. Do not begin by putting facial base makeup on a brush you own and substituting it for a brow product.
A lighter-looking brow finish comes from makeup color applied to the hair surface. It does not mean that hairs fall out, become finer, or remain a different color after washing. Do not mix it with bleach or leave it on longer to remove color; follow its use as a cosmetic.
When choosing a color, consider not just how light it looks through the container but also the brow powder or mascara you plan to use afterward. How much would you like to soften the darkness of your brows? Do you want a brown tone or a colorful brow look? Consider today’s eye and lip makeup, and choose one intended impression to clarify your purpose.
You do not have to conceal your natural brows completely. A few dark hairs showing through is different from large clumps of product. Rather than applying a thick layer to make a uniform beige surface from the start, keep the shape of the hairs visible and assess the whole face. Do not treat the color or brightness of a photograph as evidence that your brows will look the same.
Read which areas to avoid and how to remove the product at this stage as well. Do not use a brow product on eyelashes or the mucous membranes of the eyes, and keep it out of your eyes. Avoid areas with redness, itching, or other abnormalities. Treat any abnormality during use separately from makeup appearance, and follow the precautions.
If your main aim is to change brow height or length, consider the shape first. Rather than expecting concealer alone to automatically correct asymmetry, separatehow to draw brows while checking left-right balancefrom the step of covering hair color, so you are less likely to need to backtrack.
2. Decide the layering order and check the amount on the brush
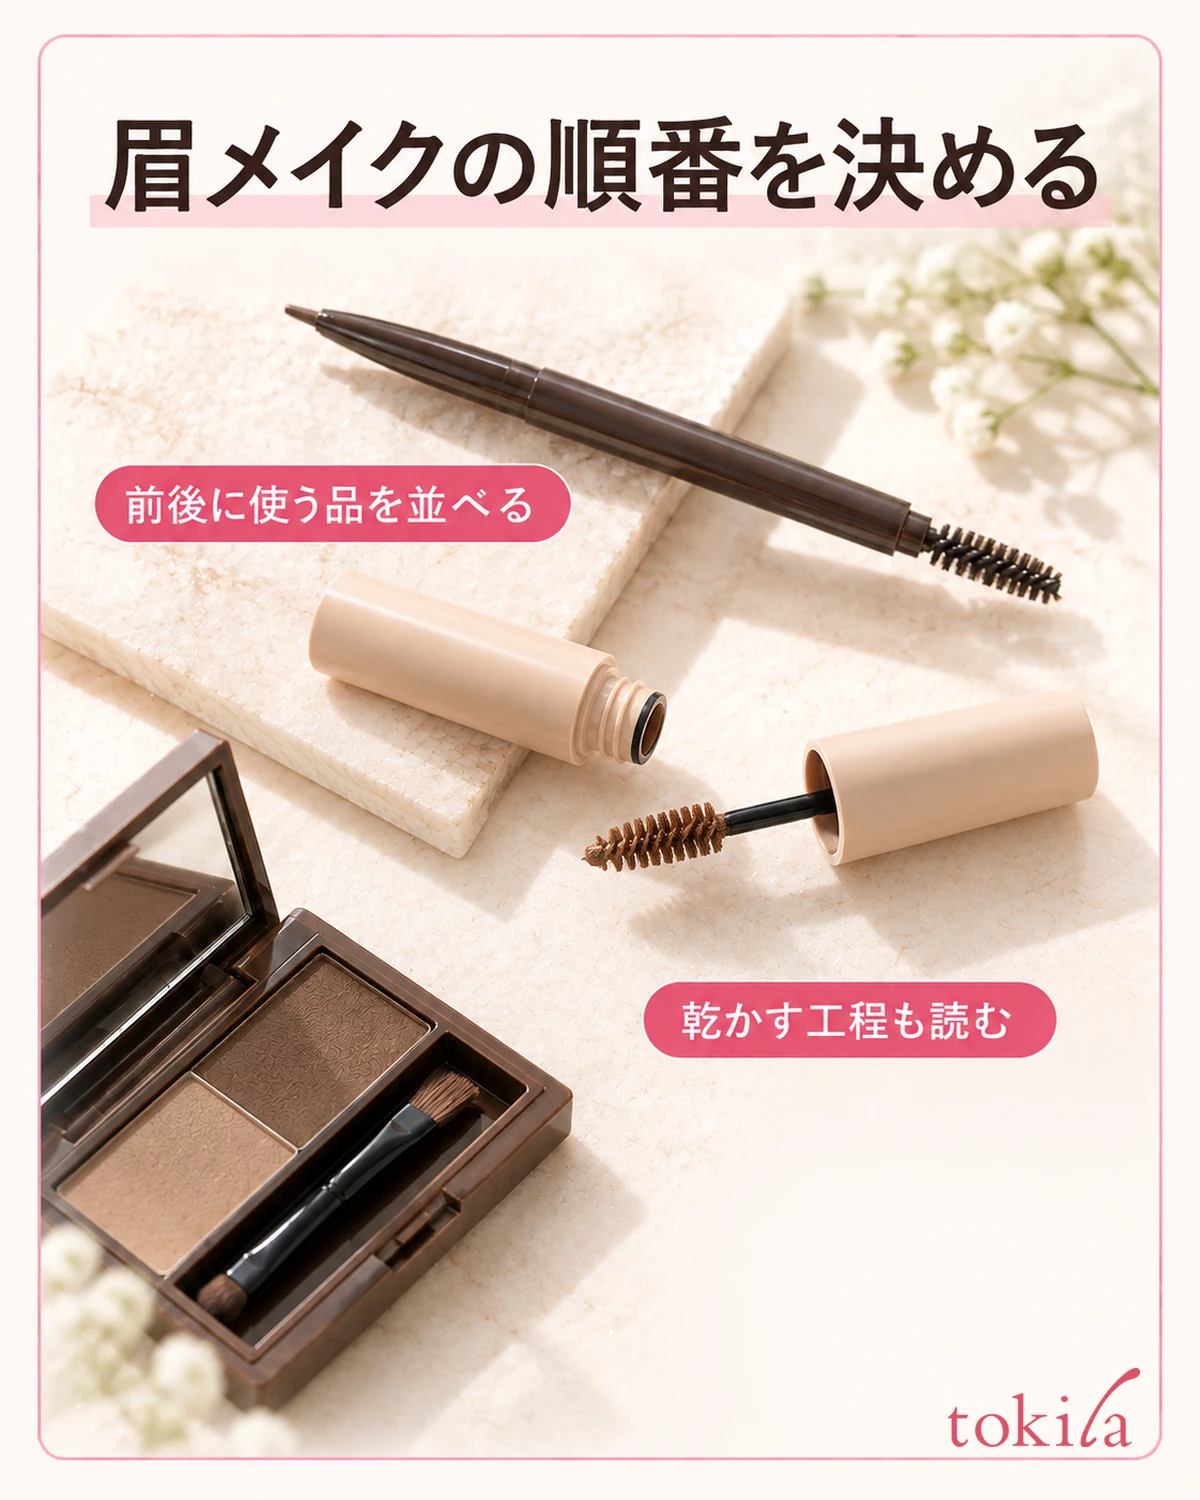
Before you start, arrange your usual brow products. Choose which ones you will use today: pencil, liquid, powder, tinted brow mascara, and eyebrow concealer. You do not need to layer everything you own. If a product’s purpose or order is unclear, set it aside rather than mixing products first to try them.
Some products direct you to draw the shape with pencil or liquid, apply eyebrow concealer, let it dry, and then layer powder. In this case, concealer is not the final step in brow makeup. However, do not apply the same order to every product; check your own product’s instructions for what comes before and after.
Writing the order briefly on paper can make it easier to follow. Match steps such as “draw the shape,” “cover the hair color,” “let dry,” and “layer powder” to your products’ directions. Even on days without powder, or when finishing with tinted brow mascara, first check whether there are directions about the products used together and the brushing direction.
After removing the brush, check whether a large amount of liquid has collected at the tip or on one side. Adjust excess according to the product’s directions, and avoid taking a heavily loaded brush straight to the brows. Do not set universal rules such as scraping the brush against the container opening a fixed number of times or wiping off all the liquid before use.
Even a small brush has different contact surfaces at its tip and side. In the close-up photograph, look for short bristles arranged around a narrow stem, without a large drop of liquid at the tip. Understanding which surface will touch the hairs before bringing it toward the brow tail helps distinguish this from pressing the handle or stem against the skin.
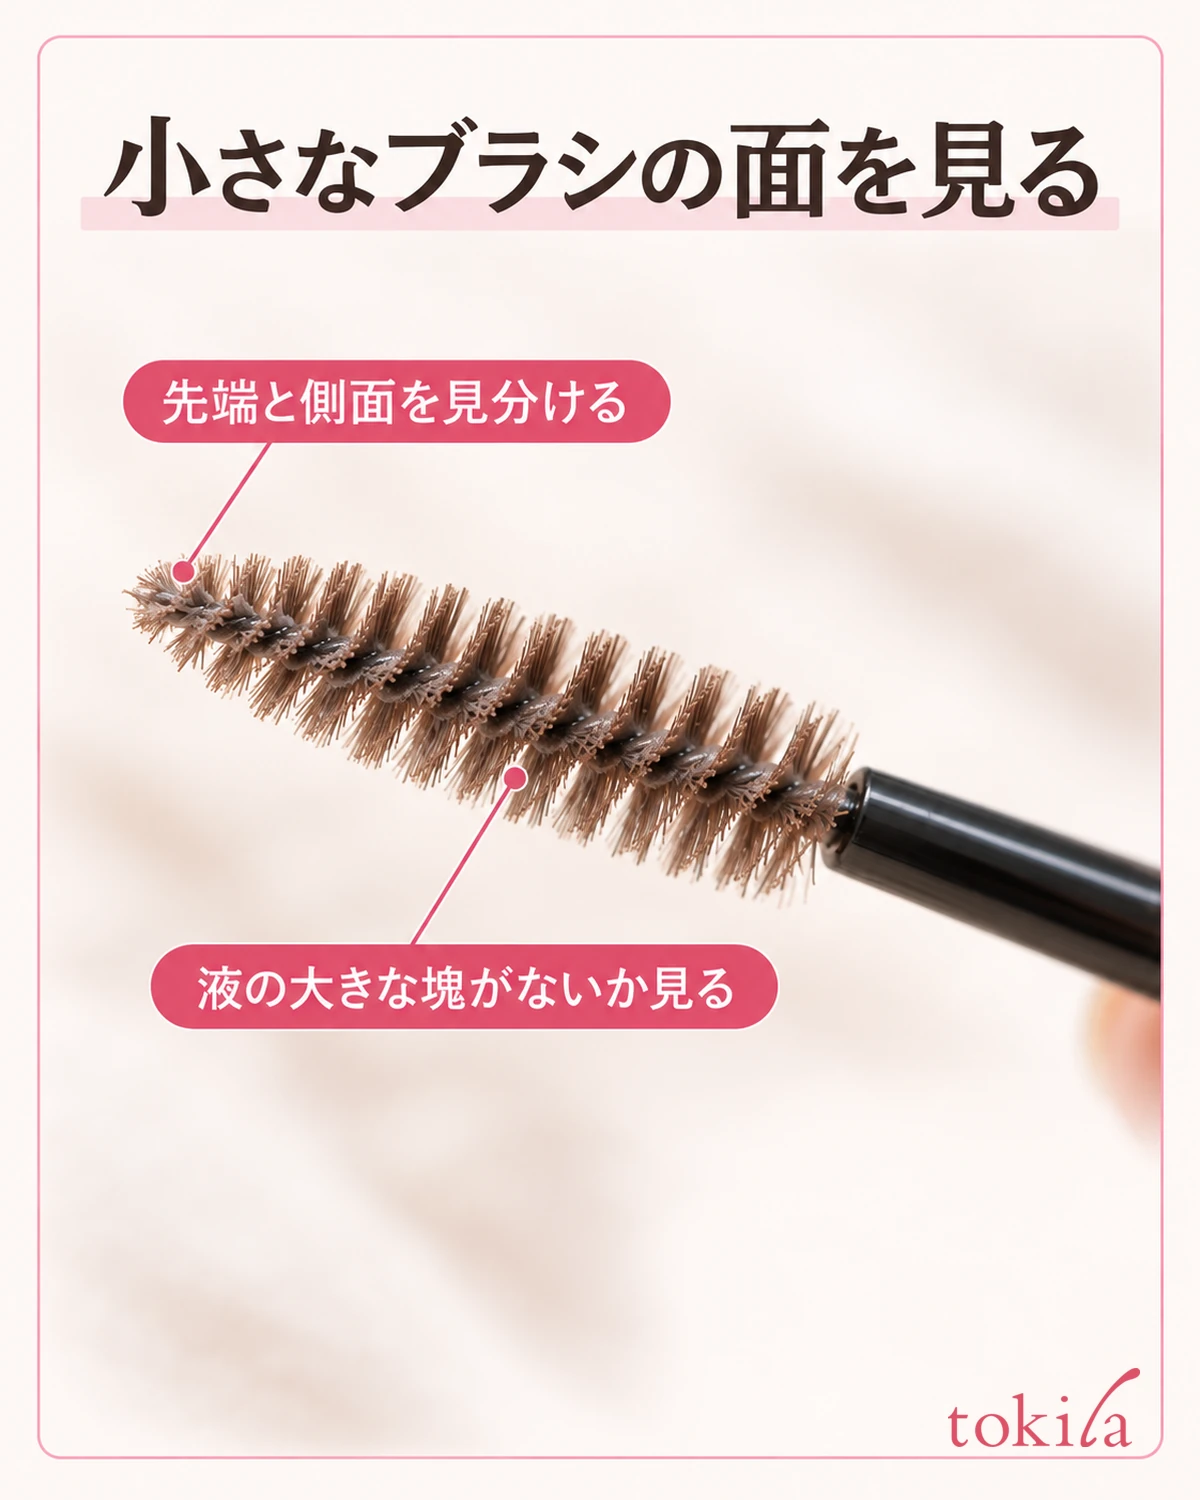
If hardened product has distorted the brush, or its smell or contents seem different from usual, do not keep testing it on your brows. Check care or replacement instructions, and avoid adding water or toner to the container to dilute it. Before applying more force because a small brush ought to be easy to use, check whether it is in usable condition.
3. If directed to brush against the growth, touch lightly from tail to front
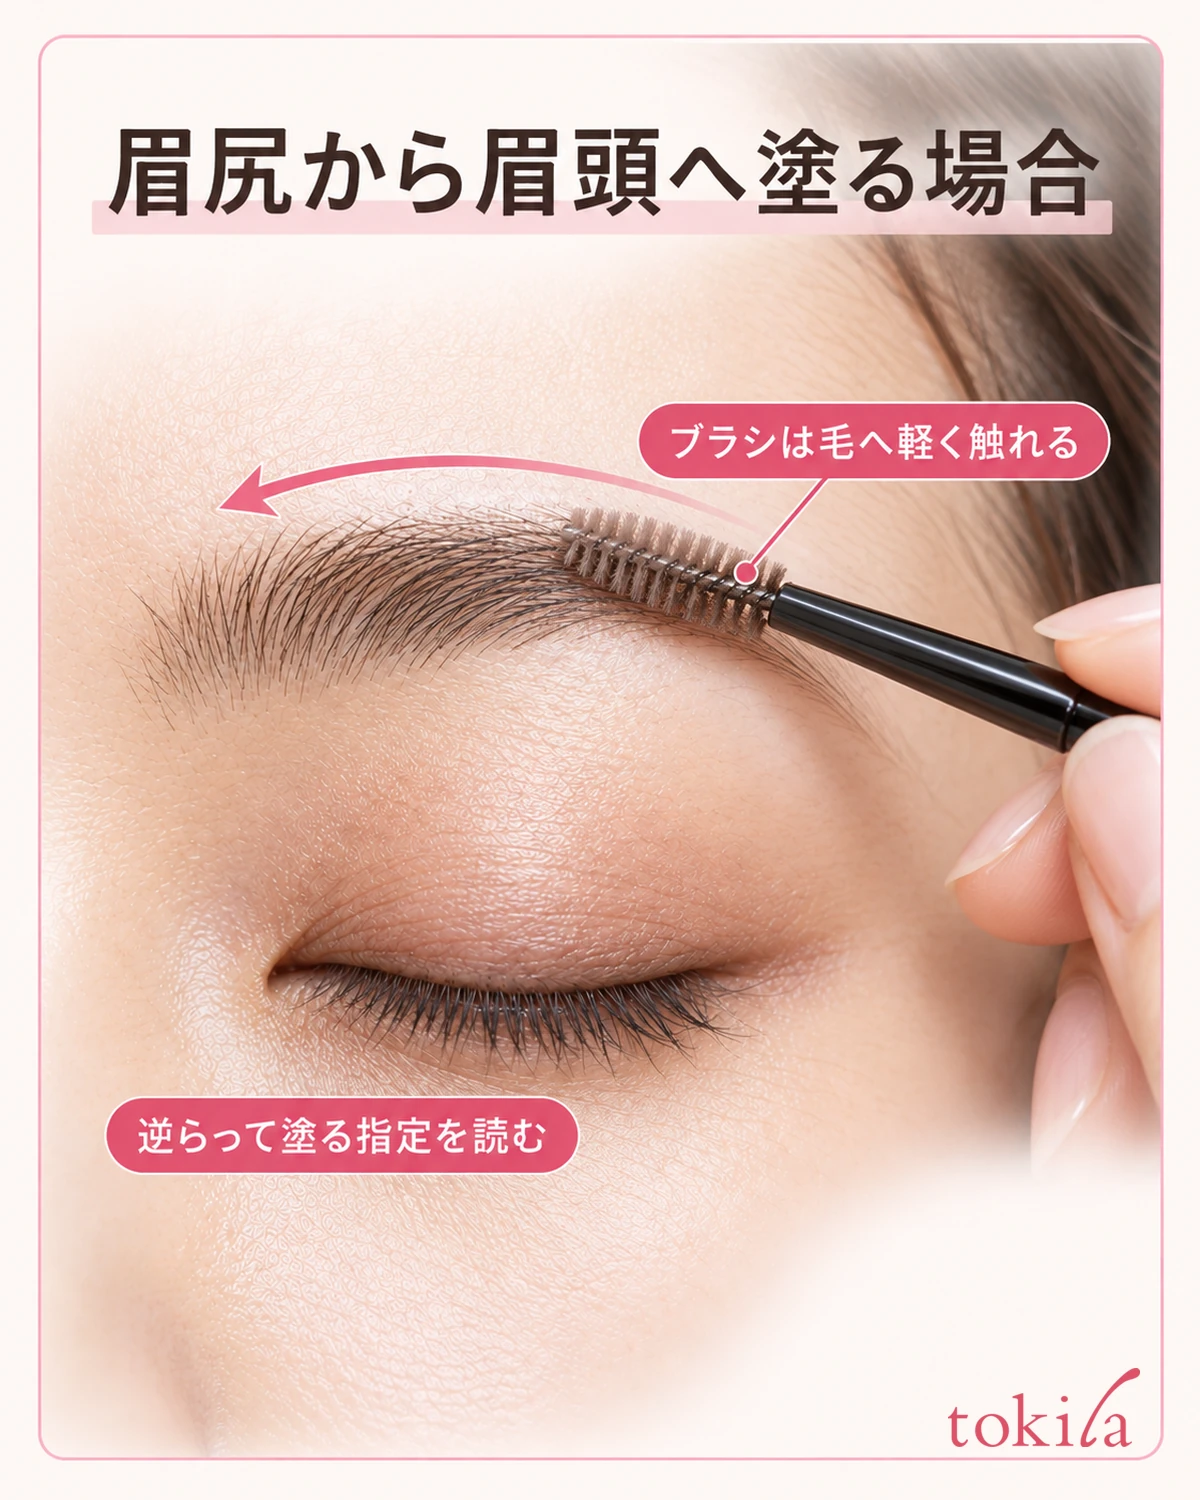
For products that direct you to brush against the hair growth, move the brush from the brow tail toward the front. Even when the directions describe lifting the hairs against their growth, this does not mean rubbing the skin firmly or pulling the hairs. First look in a mirror to check the hair direction, then lightly touch the brush bristles to the brow hairs.
The brow front is toward the nose, and the tail is toward the outside of the face. Your hand moves in opposite directions for the two brows, so do not memorize “always move right”; check which end is the front of your own brow. The arrows in photographs also explain the direction between parts, rather than a single screen direction to copy onto both brows.
If it is difficult to move along the full brow at once, touch lightly within the area you can see, then adjust your grip and continue. Check that the brush is touching hairs rather than pressing deeply to work liquid into the skin at their roots. Do not press firmly on the eyelid below the brow as a support, or point the tip toward an open eye.
Even if dark areas remain visible, do not immediately make many repeated passes. Distinguish shadows from overlapping hairs, hairs without product, and large clumps of liquid. If you need more, follow the conditions for layering that product. You do not need to aim for complete coverage by increasing the amount on your first attempt.
If color gets on the skin during application, pause rather than applying more over the same spot to hide it. If it has spread so much that you cannot tell whether it is on hair or skin, use a removal method suitable for the product before reconsidering. If staining the skin is your main concern, also seea review of brow-mascara amount and skin stainingfor points to check.
It is also important not to add this step to products that do not instruct you to brush against the growth. Similar brush shapes do not necessarily mean identical conditions of use. If you cannot follow the directions comfortably, review your grip and mirror position rather than forcibly lifting the hairs.
4. Arrange the hair direction and let dry before the next brow step
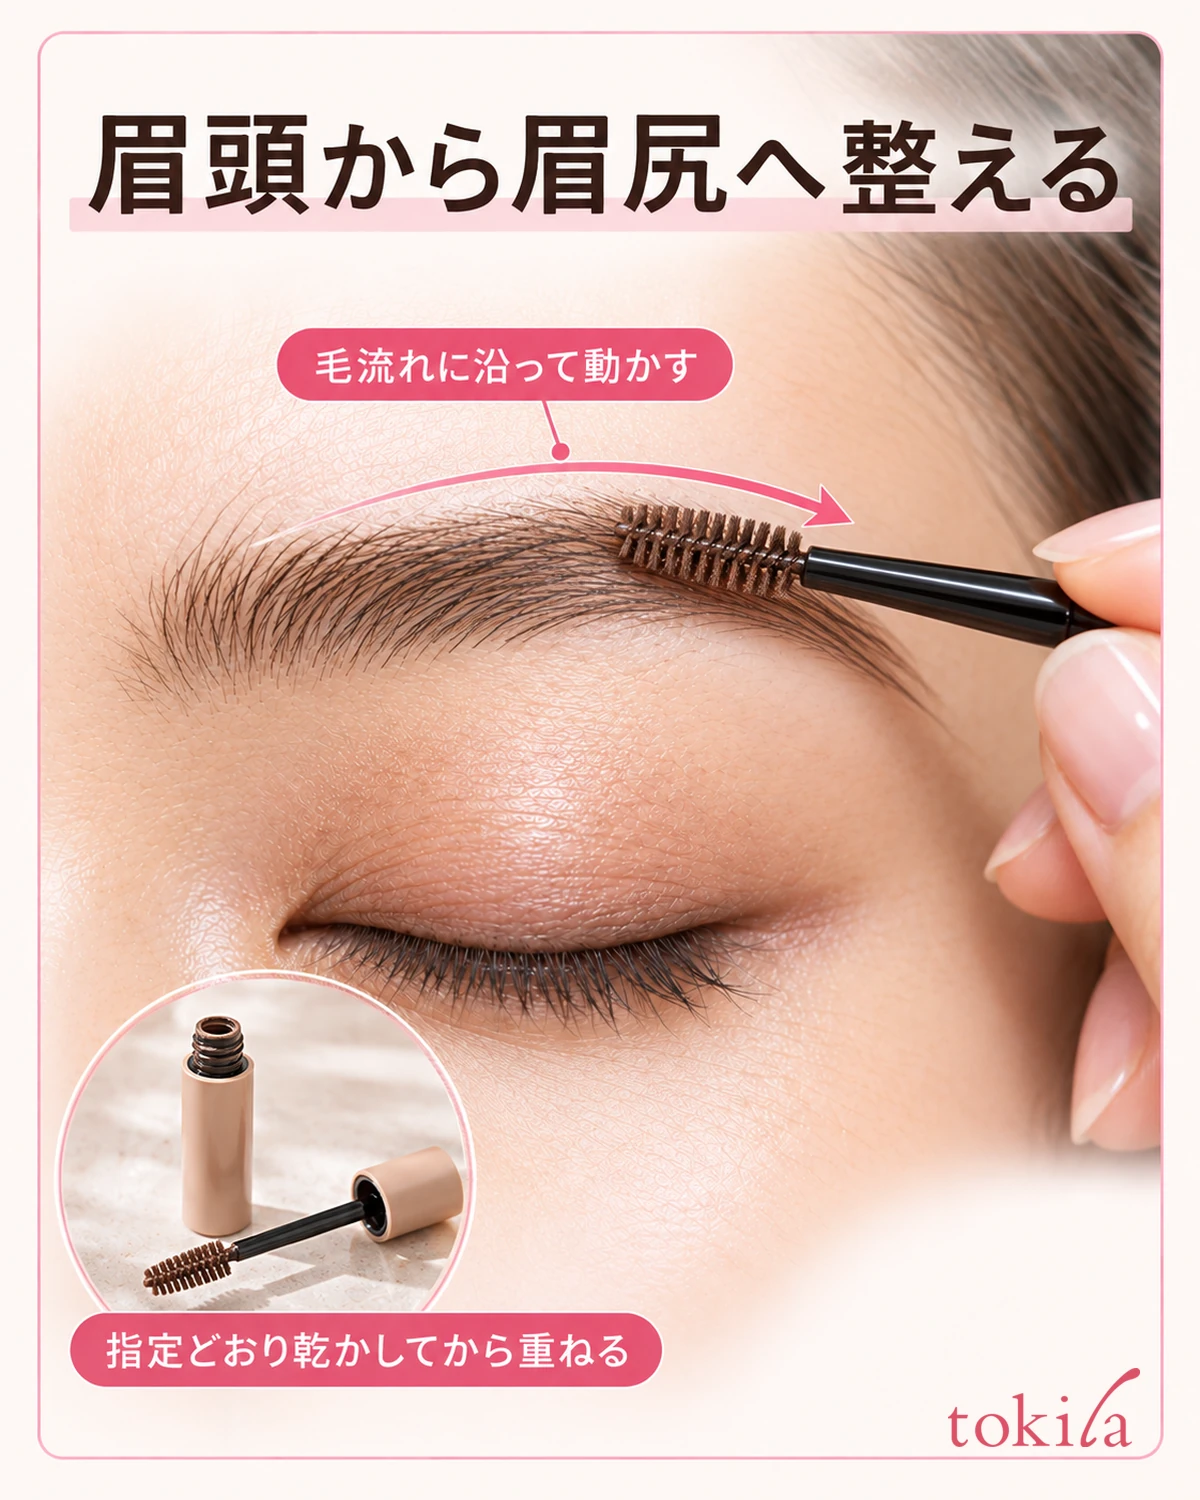
If the next instruction is to follow the hair growth, use the same product’s brush to arrange the hairs from the brow front toward the tail. Rather than leaving them raised against the growth to set, move lightly along your intended shape. Also check that the stem or handle is not touching your skin because the brush is tilted too flat against the brow.
While arranging the hairs, check their direction at the front, middle, and tail. You do not need to flatten every hair into one parallel line. If the liquid has gathered hairs into large clumps, stop before adding more and return to the amount and directions. Do not forcibly peel them apart or scrape product off with your nails after it dries.
Looking closely at the outer edge of the brow lets you distinguish the hair tips from the surrounding skin. In the supplemental photograph, check that the tips of the colored brow hairs remain visible and that the surrounding skin has not been covered with a broad beige surface. This helps separate drawing a contour on skin from covering hairs.
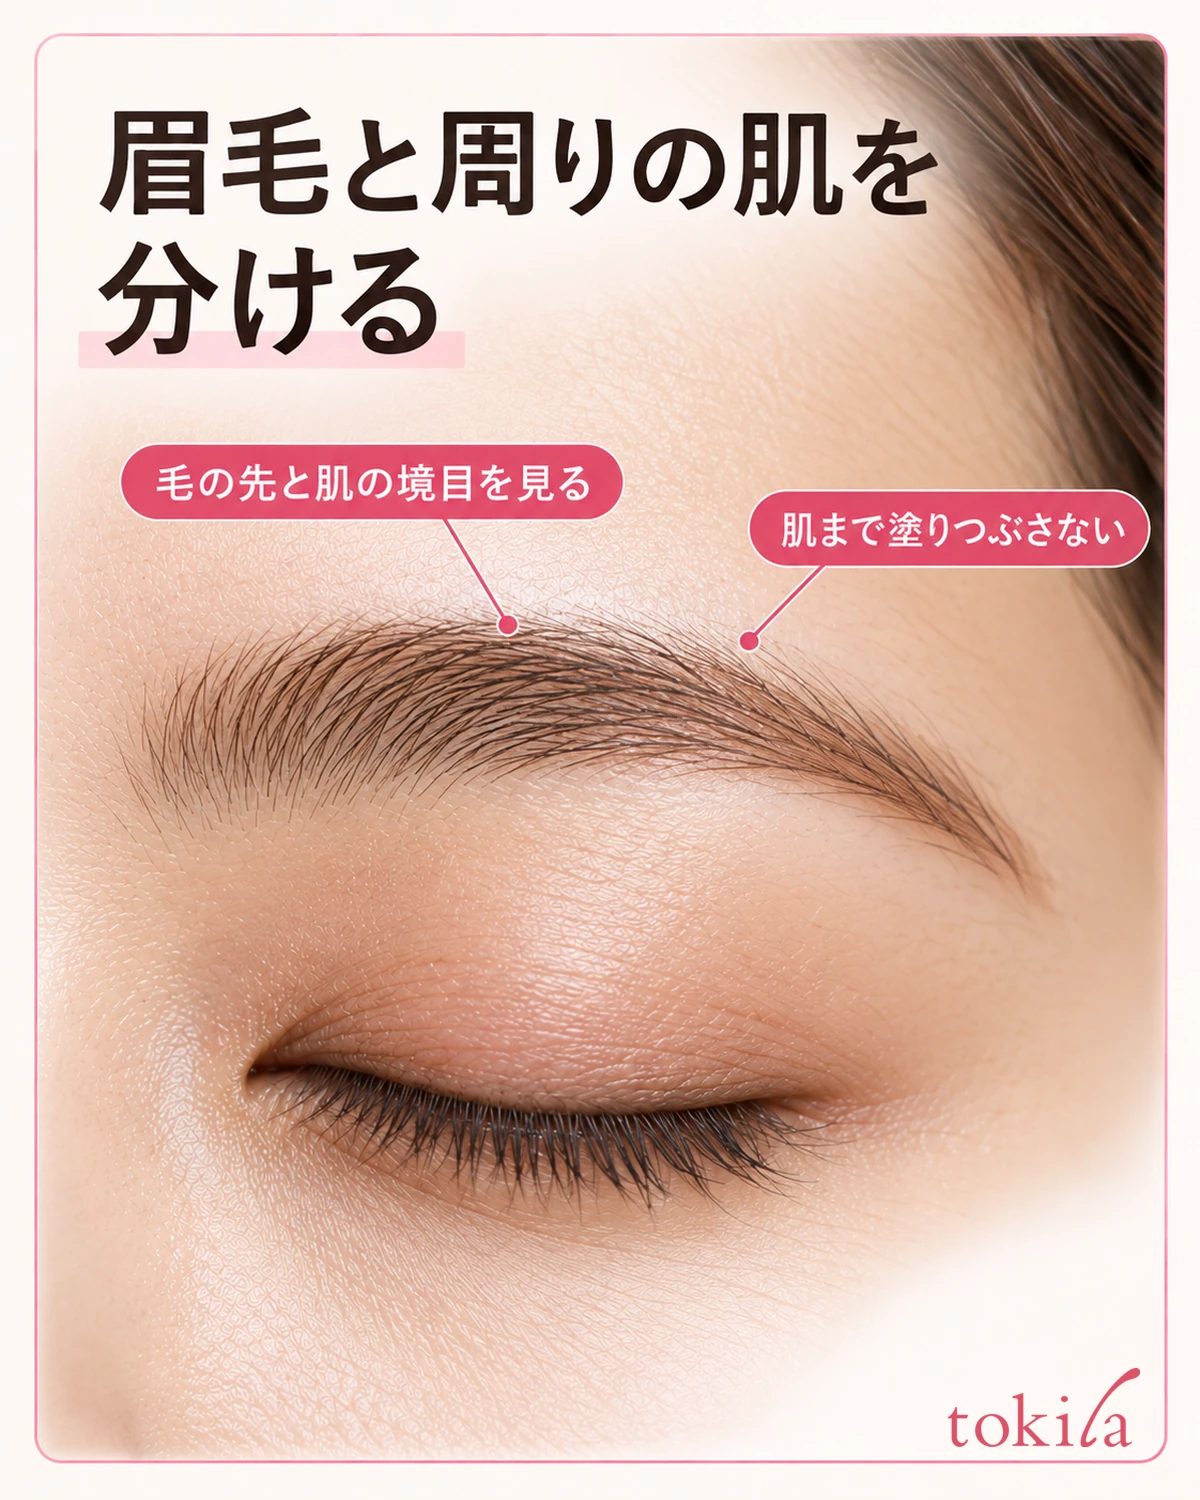
If the directions say to let dry before adding powder, remove the brush and wait. Do not assign a universal number of seconds to every product; follow that product’s guidance. Avoid repeatedly touching with a finger to check or using strong airflow or heat to hurry the finish, and allow time before the next step.
When adding powder, move the brush gently. Firm rubbing can lift the layer underneath. Before adding more lines, identify where color is needed and work gradually. Finishing the drying step is different from being free to rub firmly over and over.
If you add brow mascara as a finishing step, check its instructed direction too. If it calls for following the hair growth, do not lift the hairs against it again as in the concealer’s first step. Do not merge different products’ instructions; connect the stage of covering hair color and the stage of adding finishing color according to their respective conditions.
5. Assess intensity across the whole face and finish with proper care

Once finished, move your hands away and check from a distance where you can see both brows and the eye area together. Looking at just one brow very close to the mirror can make individual dark hairs seem more noticeable and encourage adding more. Face forward, give both sides as even a light as possible, and assess whether the intensity suits today’s makeup.
Even if the brows seem too light, do not immediately apply another dark color over the entire brow. Identify whether the concern is at the front, middle, or tail. If a thick layer has set into clumps, rather than trying to fix it only by adding color, one option is to remove it appropriately and start adjusting again.
For your next attempt, begin by changing just one thing. If liquid collected on the brush, review the amount taken out; if it touched skin, review the angle; if powder moved the layer, review drying and contact. Matching the adjustment to the troublesome moment can help you find something to revisit before buying another color.
After use, read how to handle liquid on the container opening or stem, then close the cap securely for storage. Do not add your own care steps, such as washing the brush, wiping it with alcohol, or transferring the product to another container. If the cap is hard to close, check for product buildup or container issues rather than forcing it shut.
Check nighttime removal for both the eyebrow concealer and the brow makeup layered over it. Using one product that removes with warm water does not mean that every cosmetic applied over it removes the same way. Do not try to remove everything by pulling hairs or rubbing firmly back and forth; choose a method suited to the labels.
Eyebrow concealer is one option for exploring combinations with eye and lip colors without greatly changing the brow shape. Confirm that it is for brows, decide the order, touch lightly to the hairs, and allow it to dry before finishing. Start with the impression you want today, distinguish hairs from skin, and introduce it gradually.