
Every time you scoop cream, the spatula bumps against the rim of the jar. You are not sure where to put the tool once you are done, and end up tucking it into the lid. When that happens, before you change how much you scoop, take another look at how the container is placed and the path the tool travels.
This article covers taking out the contents of a jarred cosmetic with the spatula that comes with it or is made for it. It sorts out where to hold the tool, how to move it out of the container, where to set it down in between, and the order for putting things away. Some products let you store the tool inside the container, but do not apply that design to a different jar; follow the instructions for the product you own.
1. Check that the spatula and container go together
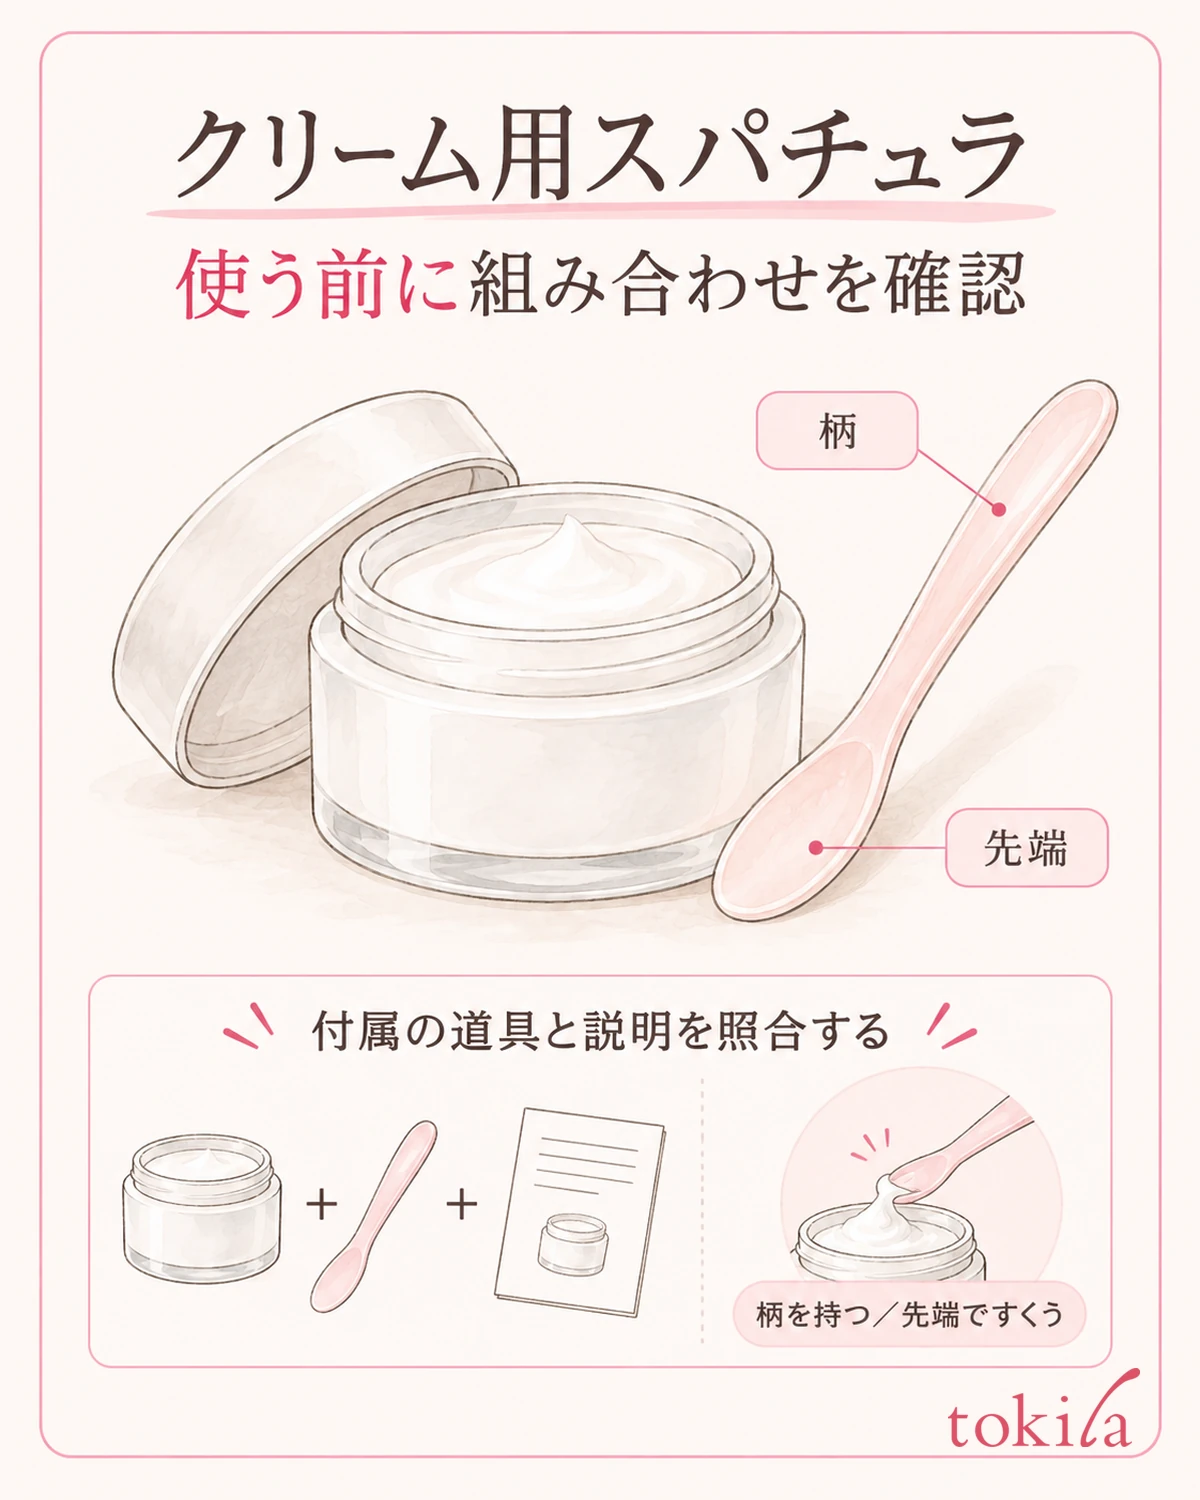
First, check the outer box or instructions of the cosmetic you are using now to see which tool is included and how to take the product out. Spatulas come in many shapes, such as a long, thin one or a short spoon shape, even though they share the same name. Do not assume that a tool that came with a different container, just because it looks similar, can also be used for storage.
Place the container on a level, stable surface. If the lid comes off completely, remove it as directed and turn the container so that you can see the opening where the tool goes in and out. If you tilt a small jar with one hand while scooping, not only your hand but the container moves too. Setting it down again first makes it easier to see where the tool is hitting.
Look at the tip that picks up the product and the handle you hold with your fingers as separate parts. Even if the handle is short, do not pinch the tip to make up the length; hold it at the position the product instructions describe. If cream gets on your fingers or the tool and it feels slippery, put things away for a moment before you tighten your grip, and tidy your hands.
Also check whether the rim of the container, the back of the lid or the inner lid has a groove or hollow for the tool. However, not every recessed spot is a storage place. Check whether the instructions show a storage spot and whether its shape matches that tool, and do not push the tool into a space you are unsure about.
The aim here is not to look for a new tool but to avoid mixing up the combinations you already own. If you still have the outer box, reading how to take out and put away the product in one go will make it easier to know where to set things down after use. It is better to prepare in advance than to start looking for the instructions while you have cream on the tool.
Do not jump to the conclusion that a bend or step in the dedicated handle is a defect. On the other hand, if you see a chip or crack that was not there before, stop using it without bending it back to make the shape fit. If you cannot tell which it is, do not push it back into the container to check; confirm how to handle it and then start again.
2. Take it out by watching its path, without scraping the rim
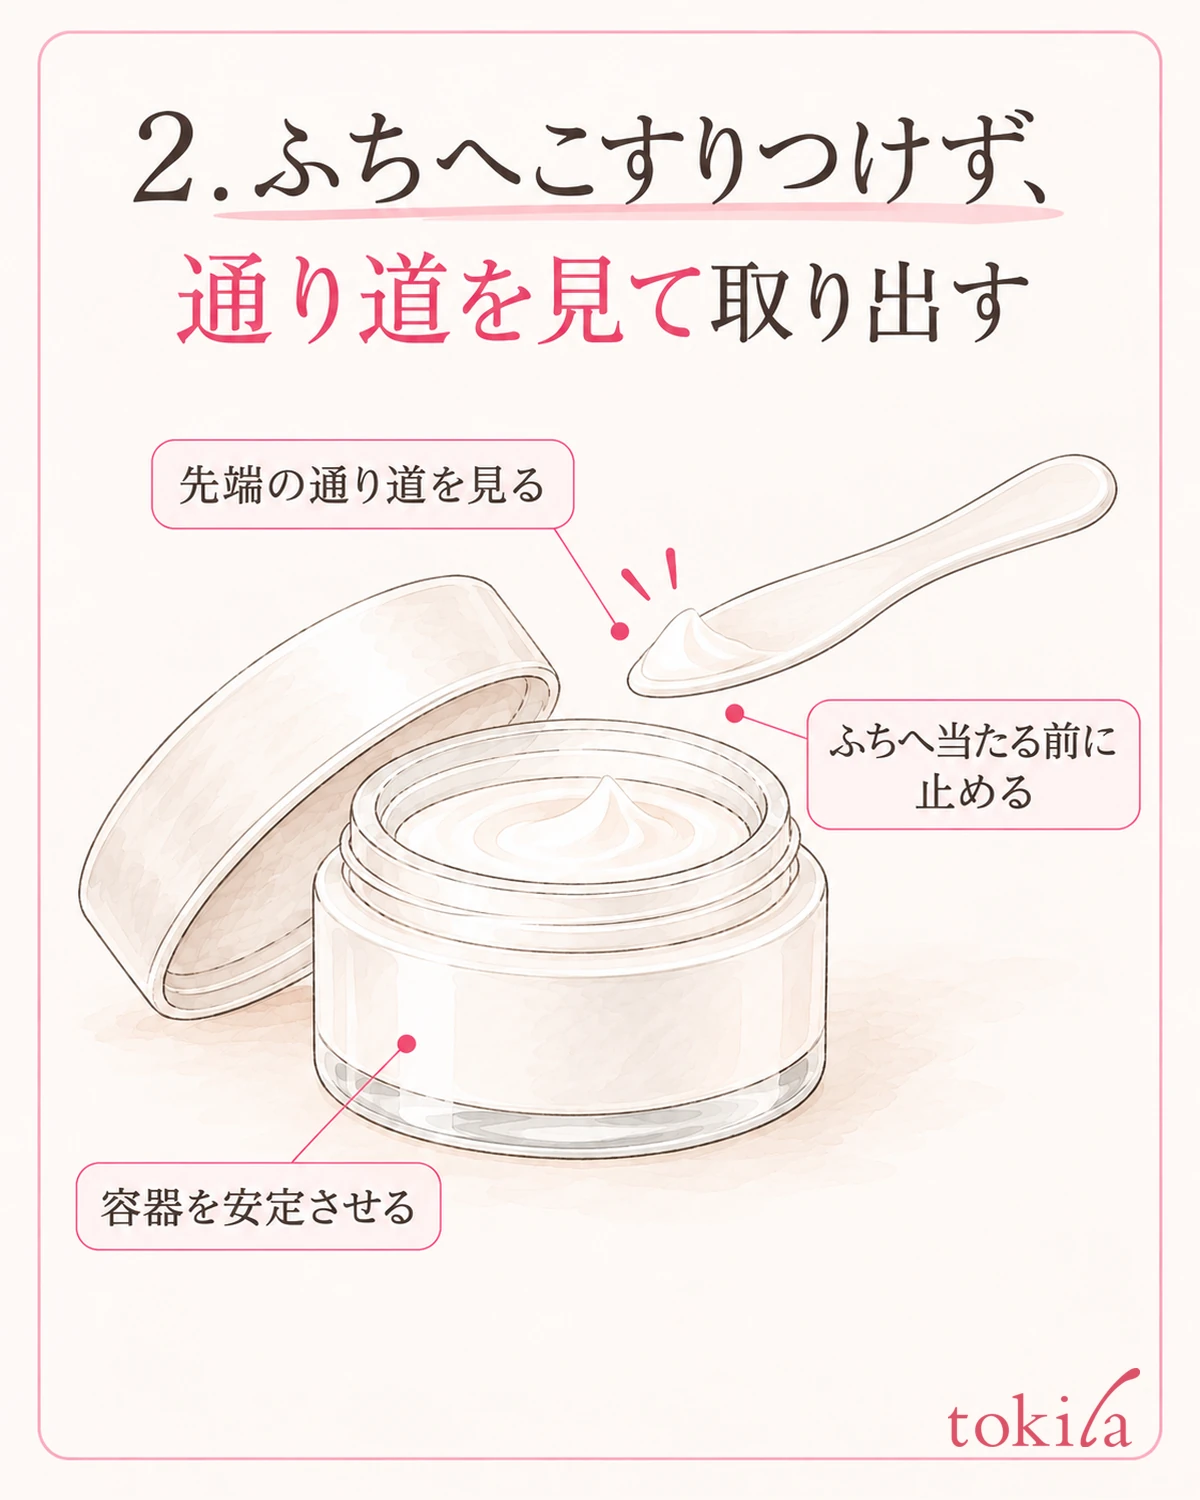
If the tool tends to hit the rim, stop the hand holding the spatula and look at the position of the container opening and the tip. If the handle is already against the opening before you scoop, adjust the direction of the container or the side you reach in from. Do not make it a standard method to use the rim as a pivot and move the tool in a wide arc.
Pick up the amount shown for the product on the tip, and check the space until it clears the opening of the container. If you tilt the tool sideways suddenly, the product on the tip is more likely to touch the rim or the threaded part. Slow down to a speed at which you can follow the part passing through the opening with your eyes, and do not mix the motion of scraping off some of the amount with the motion of taking it out.
Wiping off the excess against the rim of the container will not always give you the same amount every time. If a quantity or method is indicated, follow that guideline. For how to handle a portion you took out too much of, see how to divide up moisturizing cream when you have dispensed too much.
Even if you notice that the tool touched the rim, avoid putting a tool that has traced along the outside of the container back into the product again and again. Look separately at whether the product got on the tip, the handle or the container opening, and tidy up following the care instructions for the tool and the container respectively before you use it. Do not judge cleanliness or the condition of the contents by appearance alone.
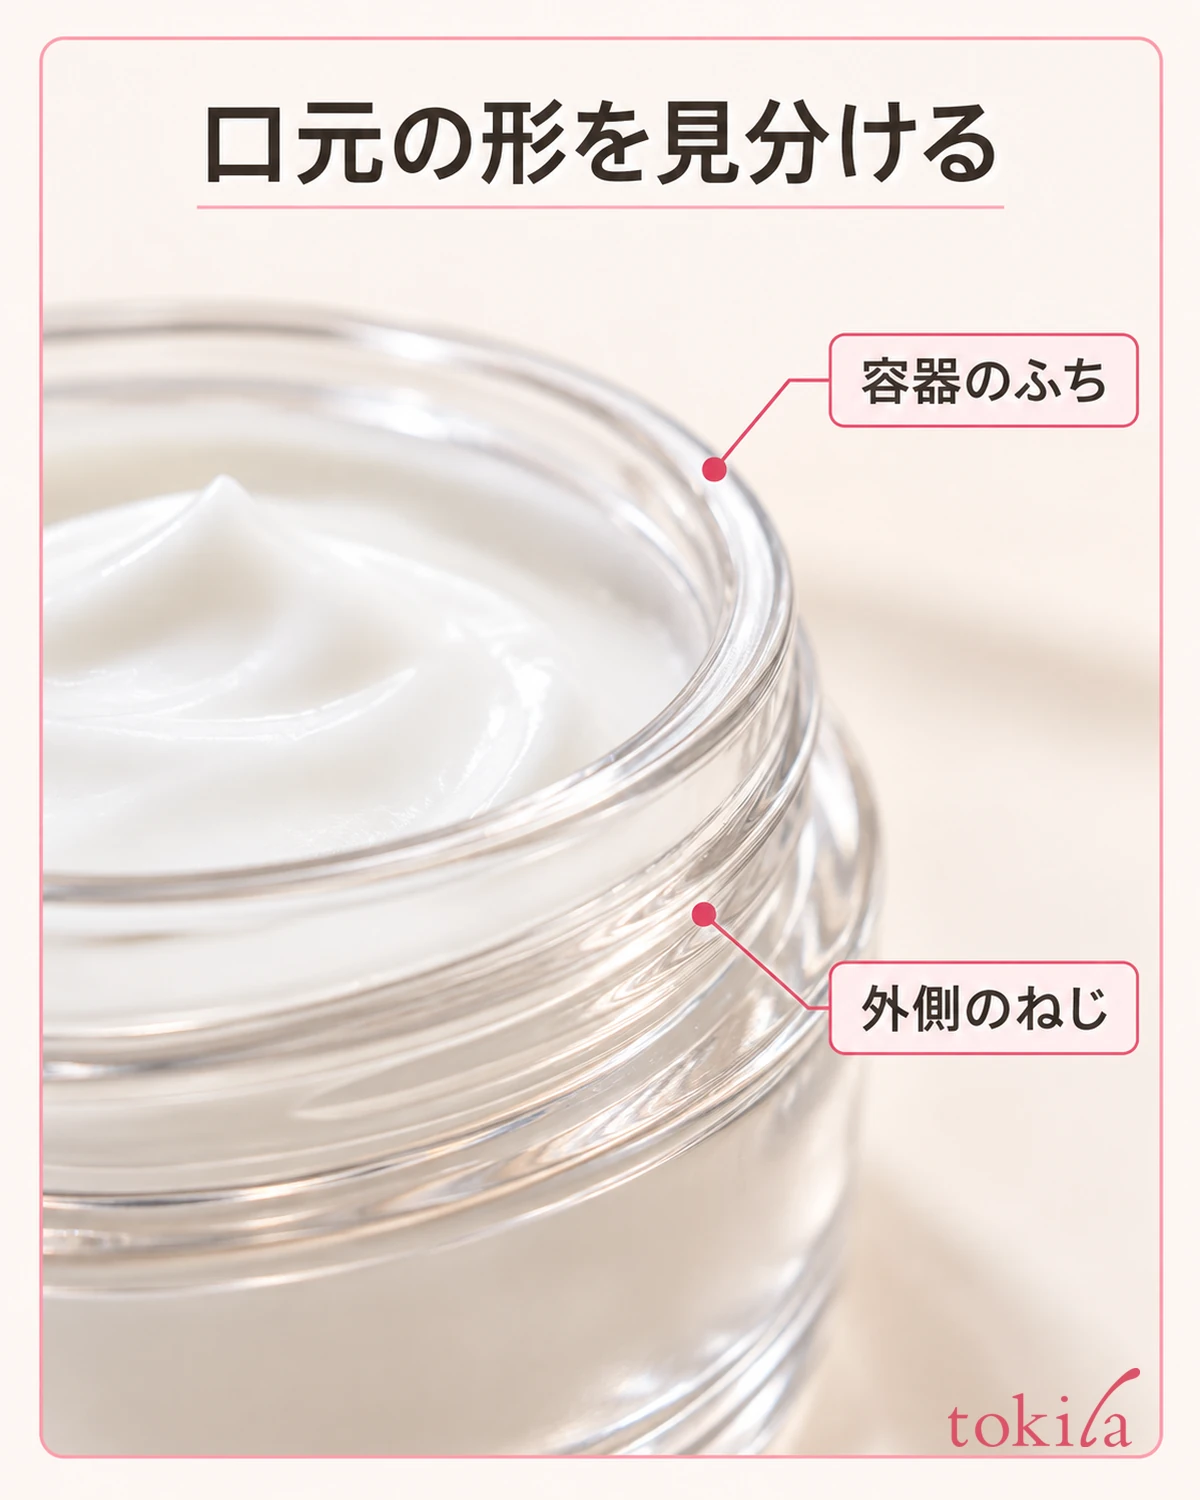
Even when little is left, you do not need to push or bend the tool toward parts it cannot reach, or scrape hard at the rim of the container. If the tip does not reach the bottom or the handle catches on the opening, do not keep forcing it; check how to take the product out and how to handle the container. Do not add water or anything else to collect the product at the bottom either.
If the container slips when you hold it with one hand, set it down on a stable surface again and rest your other hand on the outside of the container to keep it from moving. Choose a position where the tip that picks up the product does not touch the fingers you have placed there. Rather than scooping quickly, taking a posture in which you can see both the opening and the tip is what guides your next move.
3. If you set it down midway, decide where the tip will rest
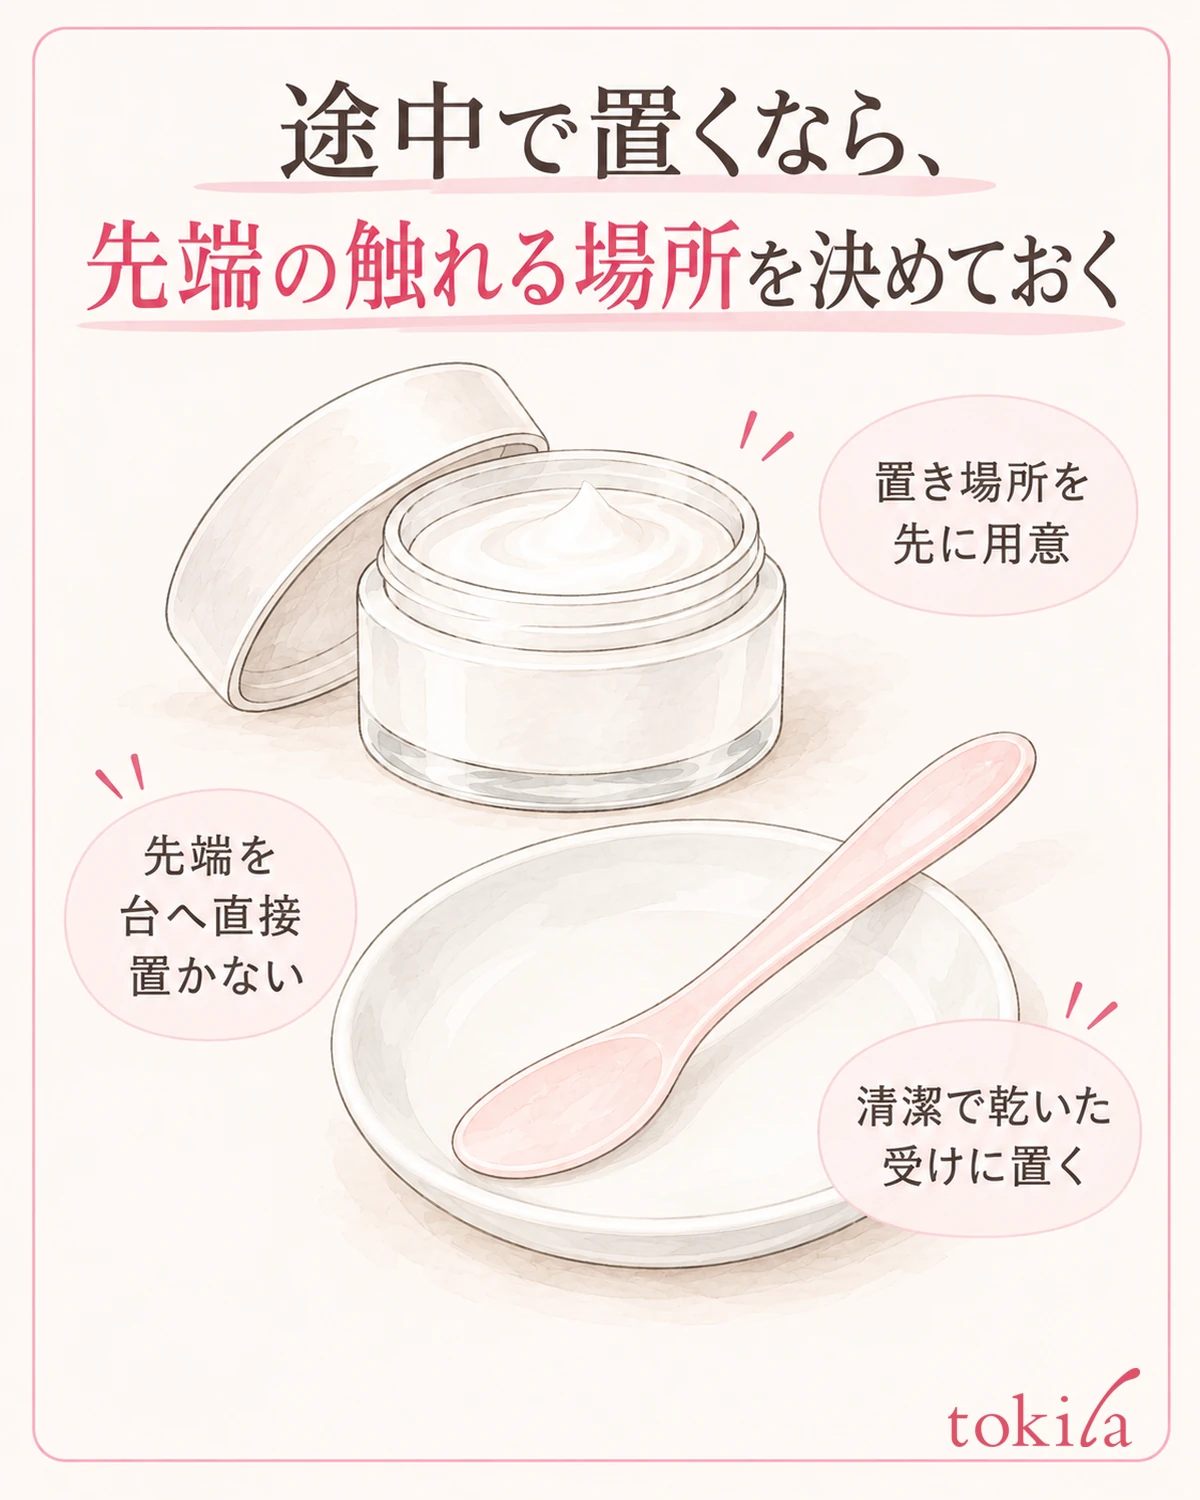
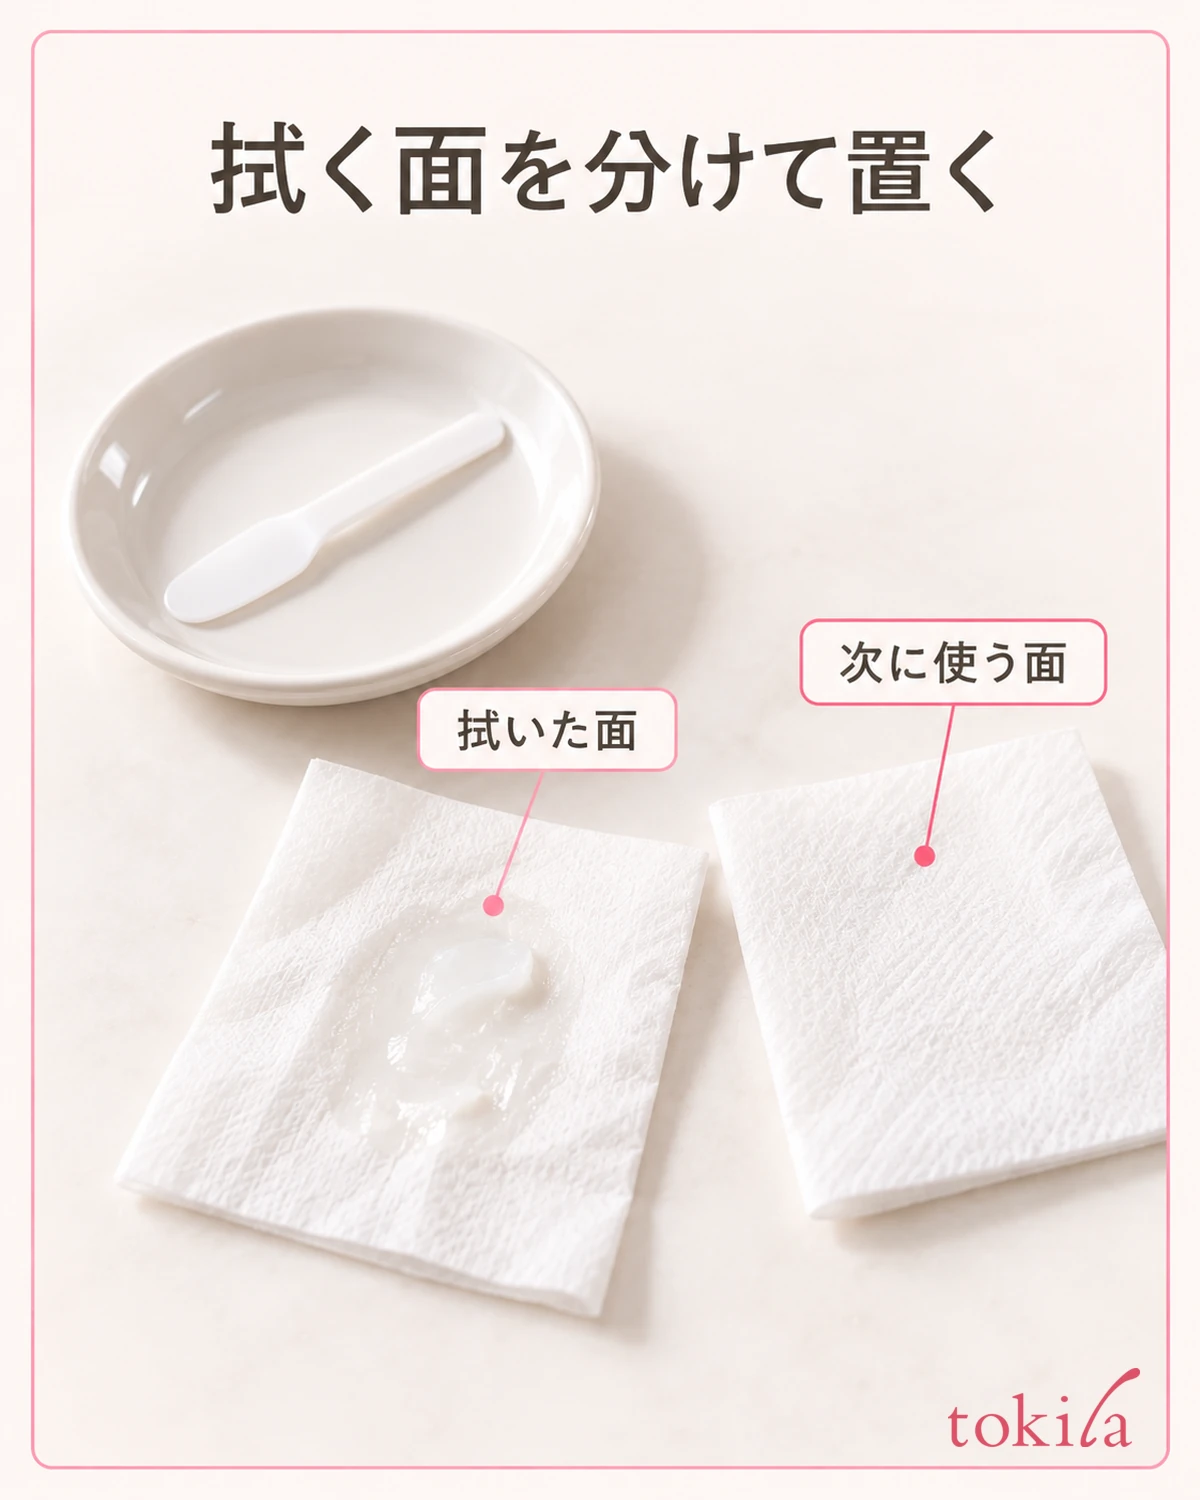
Before you take out the cream, decide where you will put the tool after use. If a dedicated rest or a way of setting it down is specified, follow those instructions. If none is specified, do not put the tip directly on the sink; preparing a clean, dry spot such as a saucer, where it will not mix with other things, makes the steps easier to organize.
When you set it down temporarily, place it in a direction where you can tell the position of the handle you hold and the tip that scoops. If you arrange it so that you can pick it up by looking only at the handle, you will not need to feel for the tip with your fingers the next time you hold it. Even when you use a saucer like the one in the figure, do not pile the used tool and the tool you are about to use in the same place.
Do not assume that the back of the lid can serve as a temporary dish for every product. The inside of the lid may have parts that matter for the seal, and closing it with the tool caught makes it hard to check the original condition. Distinguish between a lid that has a dedicated storage structure and one that merely looks flat.
Also do not decide on your own whether a tip that has touched your hands or face can go straight back into the container. Take the specified amount at one time, and if you need more while applying, treat the tool's care as a separate step. Set things up so that you do not keep going back and forth between the scooping tool and your applying hand.
If you drop the tool midway, or the tip touches a dirty place, do not keep using it as it is; check the corresponding care method. Do not make judgments such as that wiping it once with a tissue puts it back as it was, or that boiling water makes anything usable. Tidy it with a method that suits the material and the product's instructions, and stop the task while you cannot confirm.
4. Care for the used tool as specified, then store it
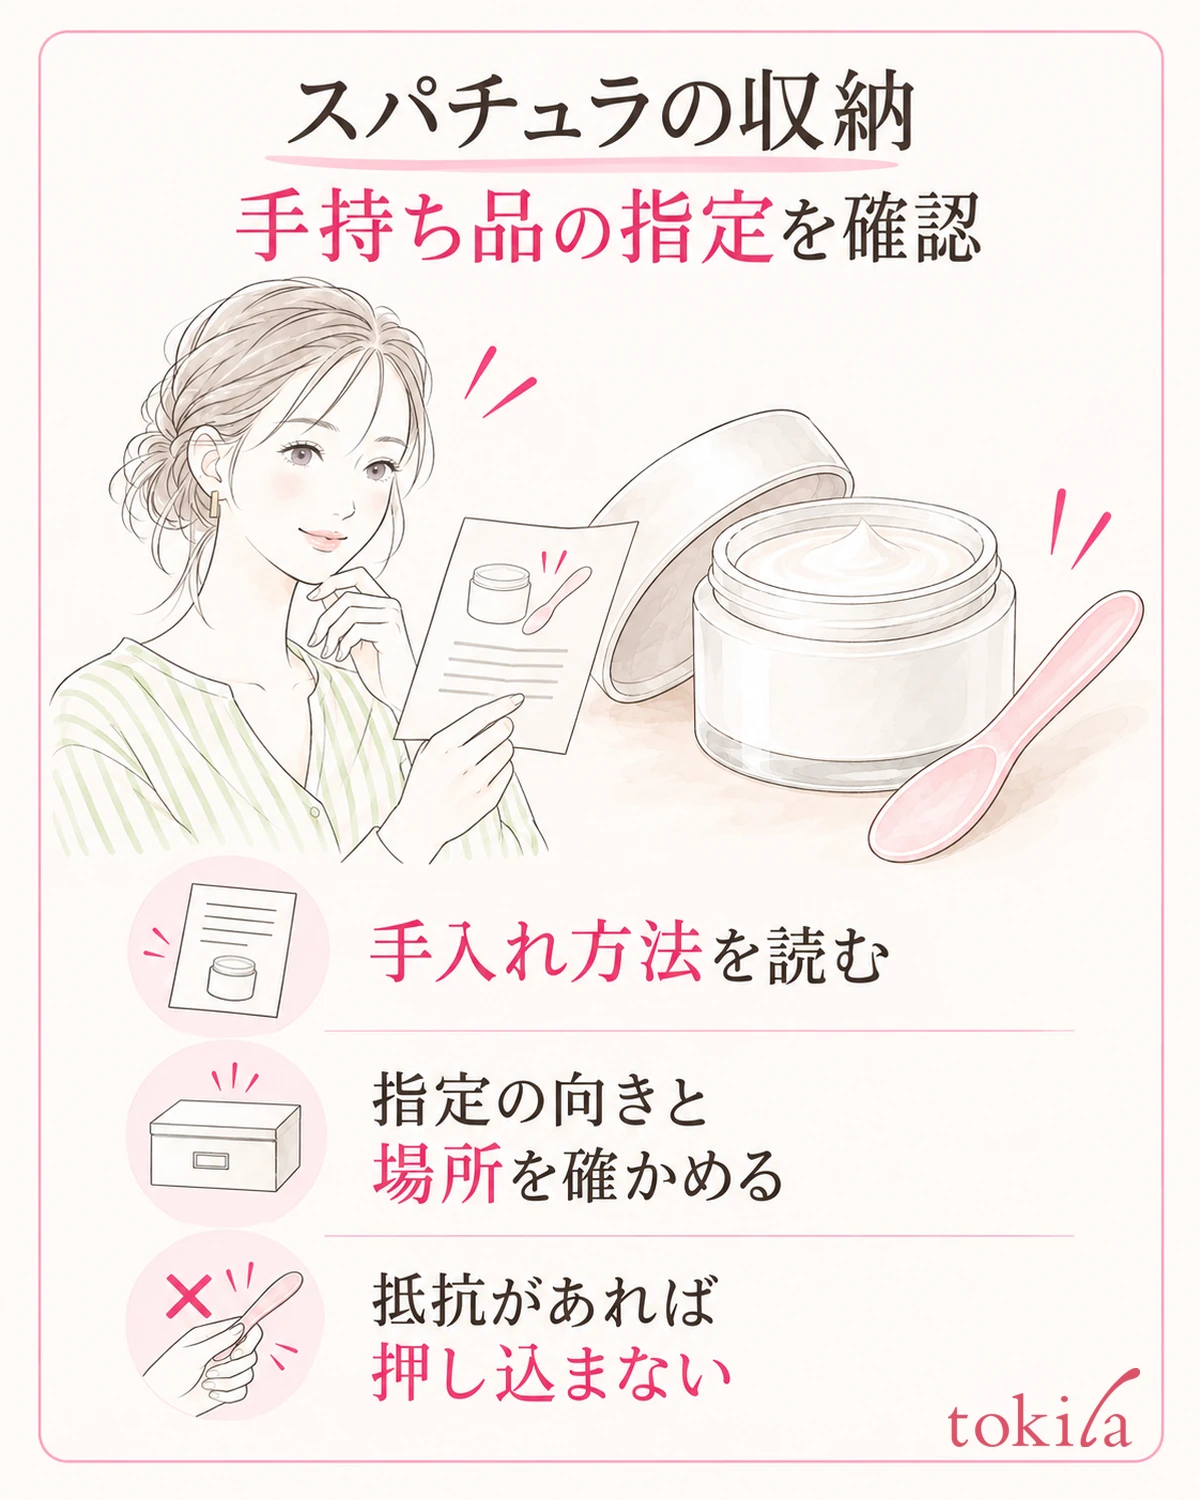
After use, check the cosmetic left on the tip and handle of the spatula. How to wipe it, wash it with water, and remove moisture depends on the tool and the instructions for the cosmetic. Even for an item that can be washed with water, do not make it the standard way of putting things away to return it to the container while it is still wet. Do not confuse the shine of a surface with moisture that is still left.
If wiping is specified, use something that fits the specification, such as a clean tissue, and remove the product that is stuck on. Rather than folding over and reusing a surface that has already wiped off the cosmetic again and again, distinguish between the dirty surface and the surface you will use next. If washing is specified, check the way to wash and the way to dry it too, and secure a place to leave the tool until it is ready to be put away.
If the container has a storage section, check its position, the direction of the tool and the matching size against the instructions. Some designs stand the tool inside the container, while others attach it to the outside. Do not carry over the storage method you saw in one product's instructions to a different jar that merely looks similar. Do not use whether the lid closes as the only criterion for a fit.
If you feel resistance when closing, do not force it by turning hard; check whether the tool is in the specified position. Do not remove the inner lid or other parts on your own judgment to widen the space, or cut the handle to make it fit. If you cannot confirm how to store it, keeping the tool separately and closing the container in its original way makes the steps easier to keep apart.
It cannot be asserted that using a spatula alone keeps the contents clean at all times. Tidy up how you handle your hands, the saucer, the tool and the container one by one. Also read the other precautions for the cosmetic, such as storage place and temperature, and do not fix the storage place just because it is conveniently close to the sink.
5. Next time, work on one of "container, path or resting place"
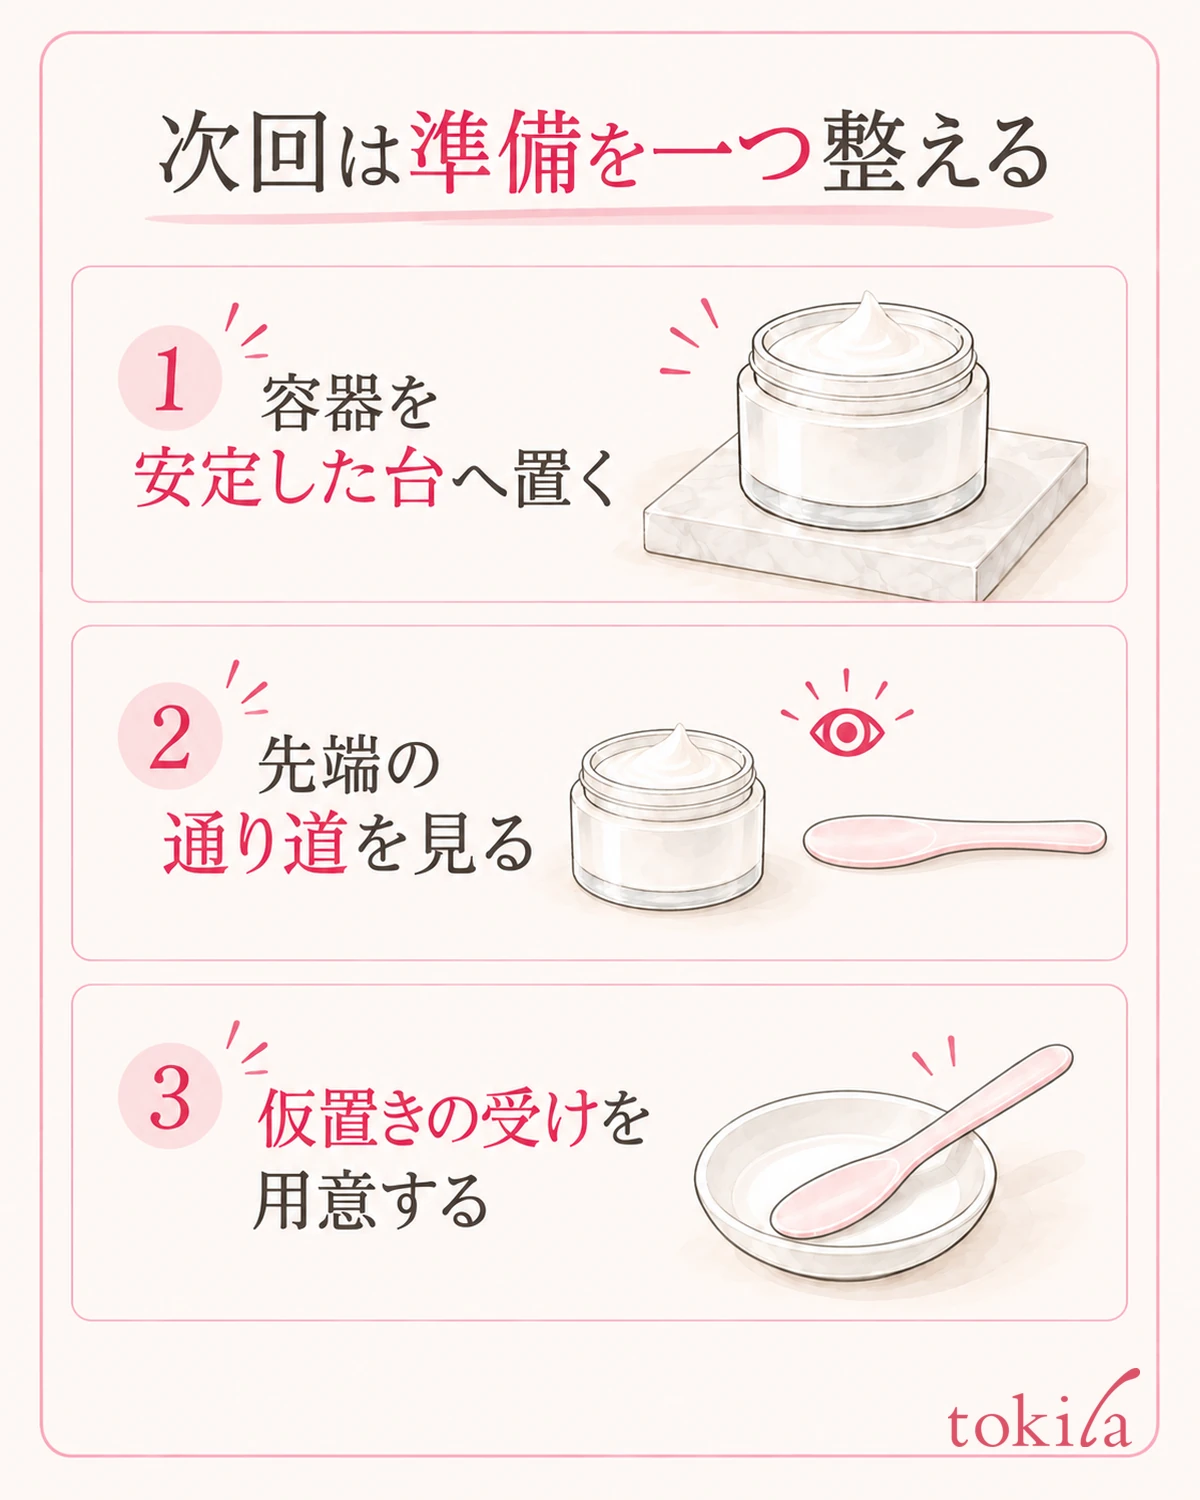
The next time you use it, recall just one moment when it hit the rim. Did the container move, did you tip the handle as you brought the tip out, or did you put the tool back on the lid because you had nowhere to put it? Separating the motion that gave you trouble makes it easier to choose whether to adjust the position where you set it down or how you hold it, before you replace the tool.
If the container moved, first set it on a level surface and then remove the lid. If the tool hit the opening, take time to look at the space between the tip and the container before taking it out. If you were unsure where to set it down, prepare a clean, dry rest first. None of these is to reduce the amount you use on your own; they are preparation for calmly following the product's directions.
On the day you change the shape of the tool or the container, do not move at the angle you learned with the previous product; reread the labeling and the structure. A longer handle is not always easier to handle, and compatibility including storage also matters. If you lose an accessory, do not find something of a similar size and force it to fit; check whether it is a compatible tool.
Make the notes that help you remember the steps into actions you will carry out yourself, such as "look at the opening before bringing the tip out" or "prepare a saucer before use." Do not stop at words like "keep it clean" or "be careful"; if you write down the tool you use and the place you set it, it will be easier to get started on your next care routine.
If you want to start from tidying your hands before touching your skin and removing the water after cleansing, see also how to gently press a towel to your face. Steady the container, watch the path of the tool, and decide in advance where to put things away. Adjust this order to the instructions for the products you own.



