
Every time you wash your face, your sleeves get wet. Even with your sleeves rolled up, the moment your hands come close to your face, water runs down toward your elbows. When that happens, before switching face washes, try checking the path the water takes and where your sleeves sit. The place to adjust is different when you get wet from splashes and when you get wet from water running down from your wrists.
This article explains how to arrange your cuffs, wrists, and posture when rinsing by hand at the sink. Absorbent wristbands are also an option, but wearing one does not guarantee that you will never get wet. Without tightening your sleeves or holding an awkward posture for long, choose a method that is easy to manage with the clothes you have and your own sink.
1. Tell Splashes Apart from Water Running Down Your Arms
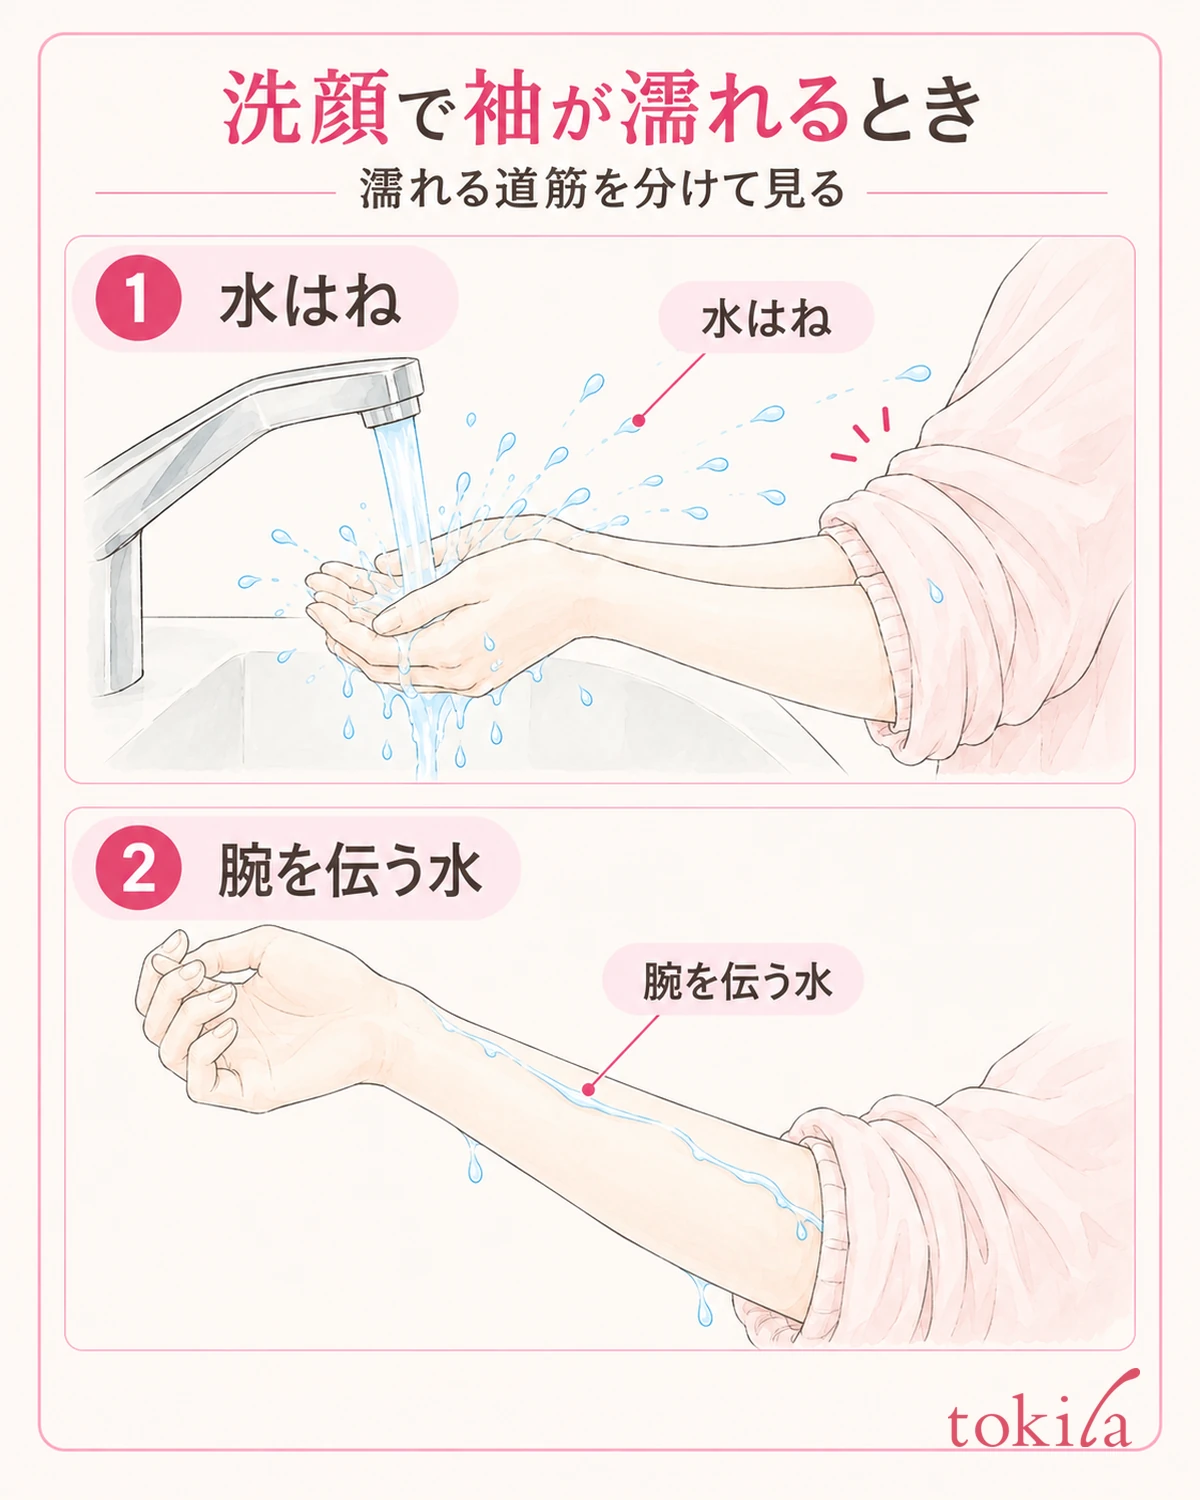
Before you start washing, look at your cuffs and the edge of the sink. Once a sleeve is already wet, it is hard to tell where the water came from. Start with dry clothes, and wipe the water in front of the sink and around the faucet with a cleaning cloth you already have. Keep the towel for your face separate from the one you use to wipe the sink.
If water from the faucet hits your hands or the basin and splashes onto your sleeves, review the splashing first. Check whether the water flow is too strong and whether your sleeves are hanging close to the running water. The way water splashes changes with the shape of the faucet and the depth of the basin, so there is no single rule such as a set number of flow levels or a set number of centimeters from the faucet. Adjust by watching how the water splashes when you put your hands in.
On the other hand, if water cupped in your hands passes along the inside of your wrists and runs from your forearms into your sleeves, the focus is on dealing with water running down your arms. After you lift your face, check whether streaks of water remain from your wrists toward your elbows. You do not need to look at your arms while washing your face; lower your hands first, then check.
If only one side gets wet, also check whether the height of your left and right sleeves or the way you move your hands differs. If you keep pushing your hair aside with one hand and lift only the other hand again and again, tying your hair back first makes it easier to use both hands. For preparing your hair, you can also refer to how to tuck a face-washing headband in place.
If both causes apply, do not add tools from the start; first adjust your sleeves and the water flow. Then check whether water running down your arms still bothers you, and it becomes easier to judge when an absorbent band is needed. You do not need to wash your face many times just to compare how much got wet. Pick one point that has troubled you in your usual face-washing preparation.
2. Push Up Your Cuffs and Check First That They Do Not Slide Back
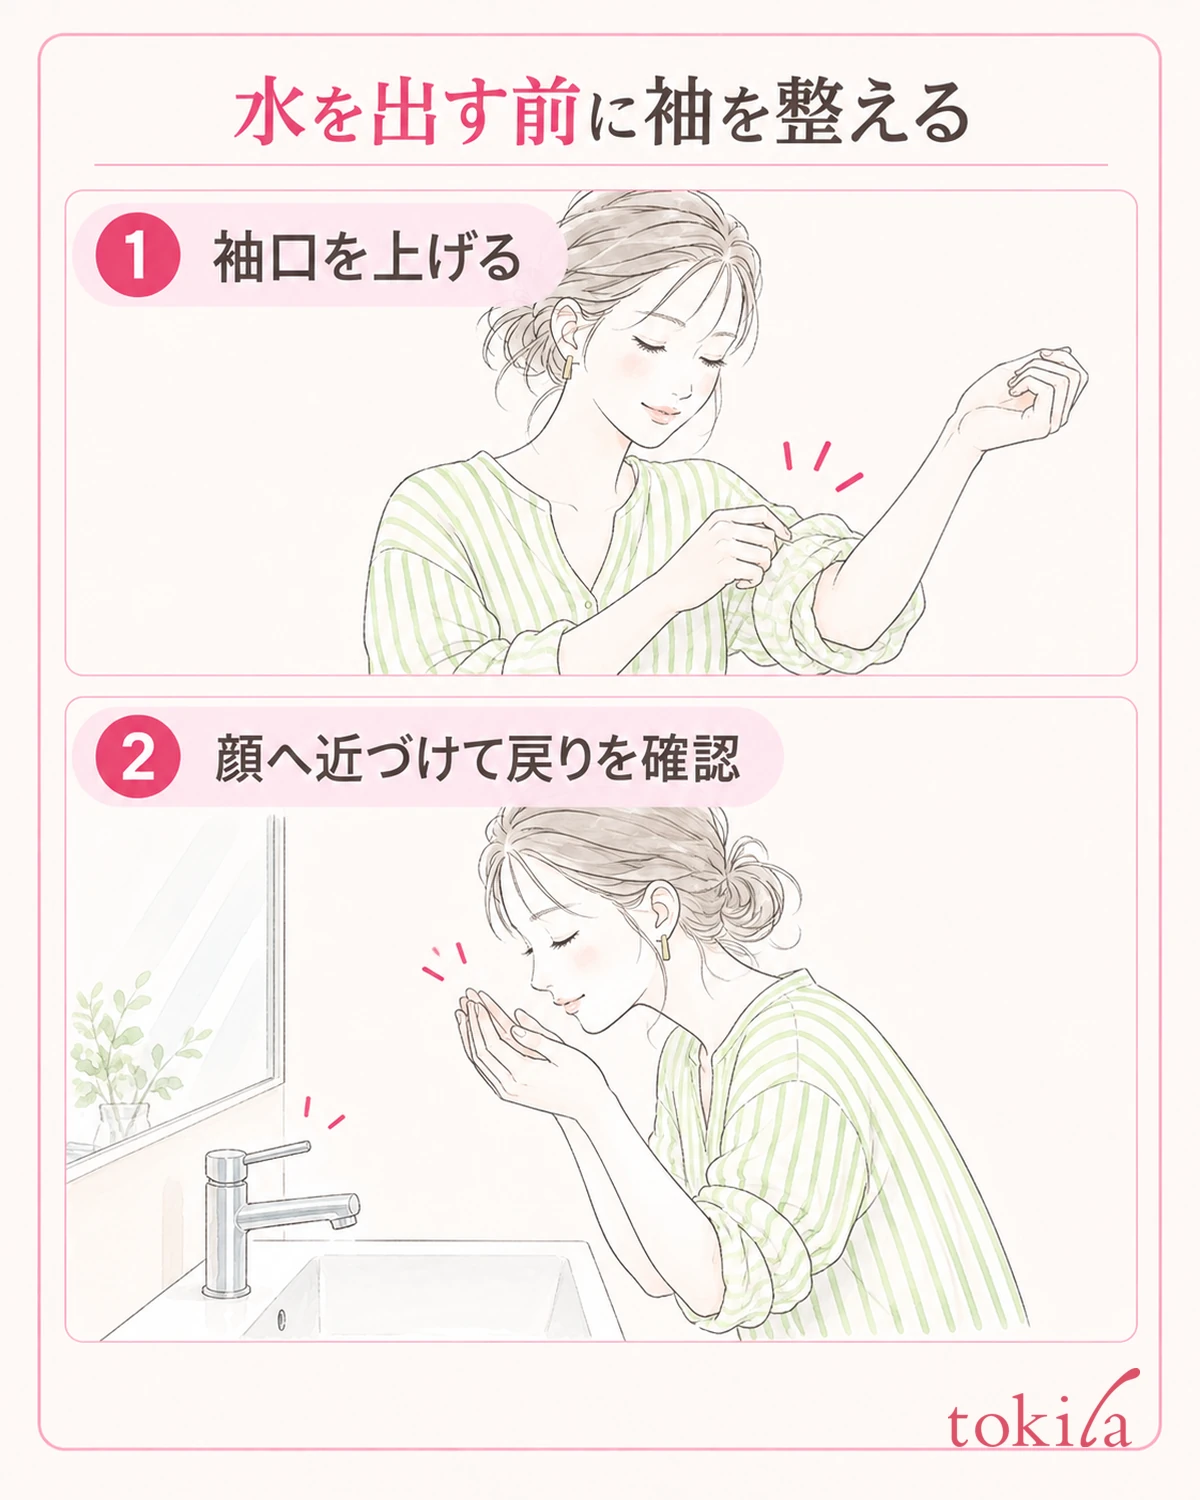
Before turning on the water, push up both sleeves. If only a little of your wrist shows, the cuffs may slide down each time you move your hands. Looking at how stretchy and thick the clothing is, arrange the cuffs in a position where they do not slide back to your wrists while you wash. Avoid fixing them by tying them tightly with a thin elastic or string, and if the clothing is hard to push up, you can also choose to change clothes.
For sleeves that can be folded back, check that the edge of the cuff is not curling inward and that the folds are not different on the left and right. If you stack a thick part into many layers by force, it can become hard to bend your arm. Bend and stretch your arm, and arrange the sleeves within a range where there is no pain or strong pressure. If a sleeve keeps falling, switch to another method that suits the shape of the garment instead of rolling it up even tighter.
If fabric from the cuff remains near your wrist, the fabric may still touch the water even when you wear a band. Even if you plan to use a band, push up your sleeves first. Instead of forcing the sleeve under the band to hold it in place, keep the cuff and the band distinguishable from each other, which makes it easier to check which one got wet.
Once you are ready, without turning on the water, bring both hands close to your face and then lower them. If the sleeves slide back, your arms are hard to bend, or the clothing touches the front edge of the sink, adjust again here. Adjusting while your hands are dry is less likely to transfer water to your clothes than touching your sleeves with wet hands again and again during washing.
If a watch or accessory on your wrist gets in the way of washing your face, remove it beforehand according to its care instructions and put it in a dry, set place. Do not leave small items on the edge of the sink or near the drain. If you finish arranging your sleeves and taking off small items before turning on the water, you can proceed without rushing partway through.
3. Check the Intended Use of an Absorbent Band and How the Inside Sits Against Your Skin
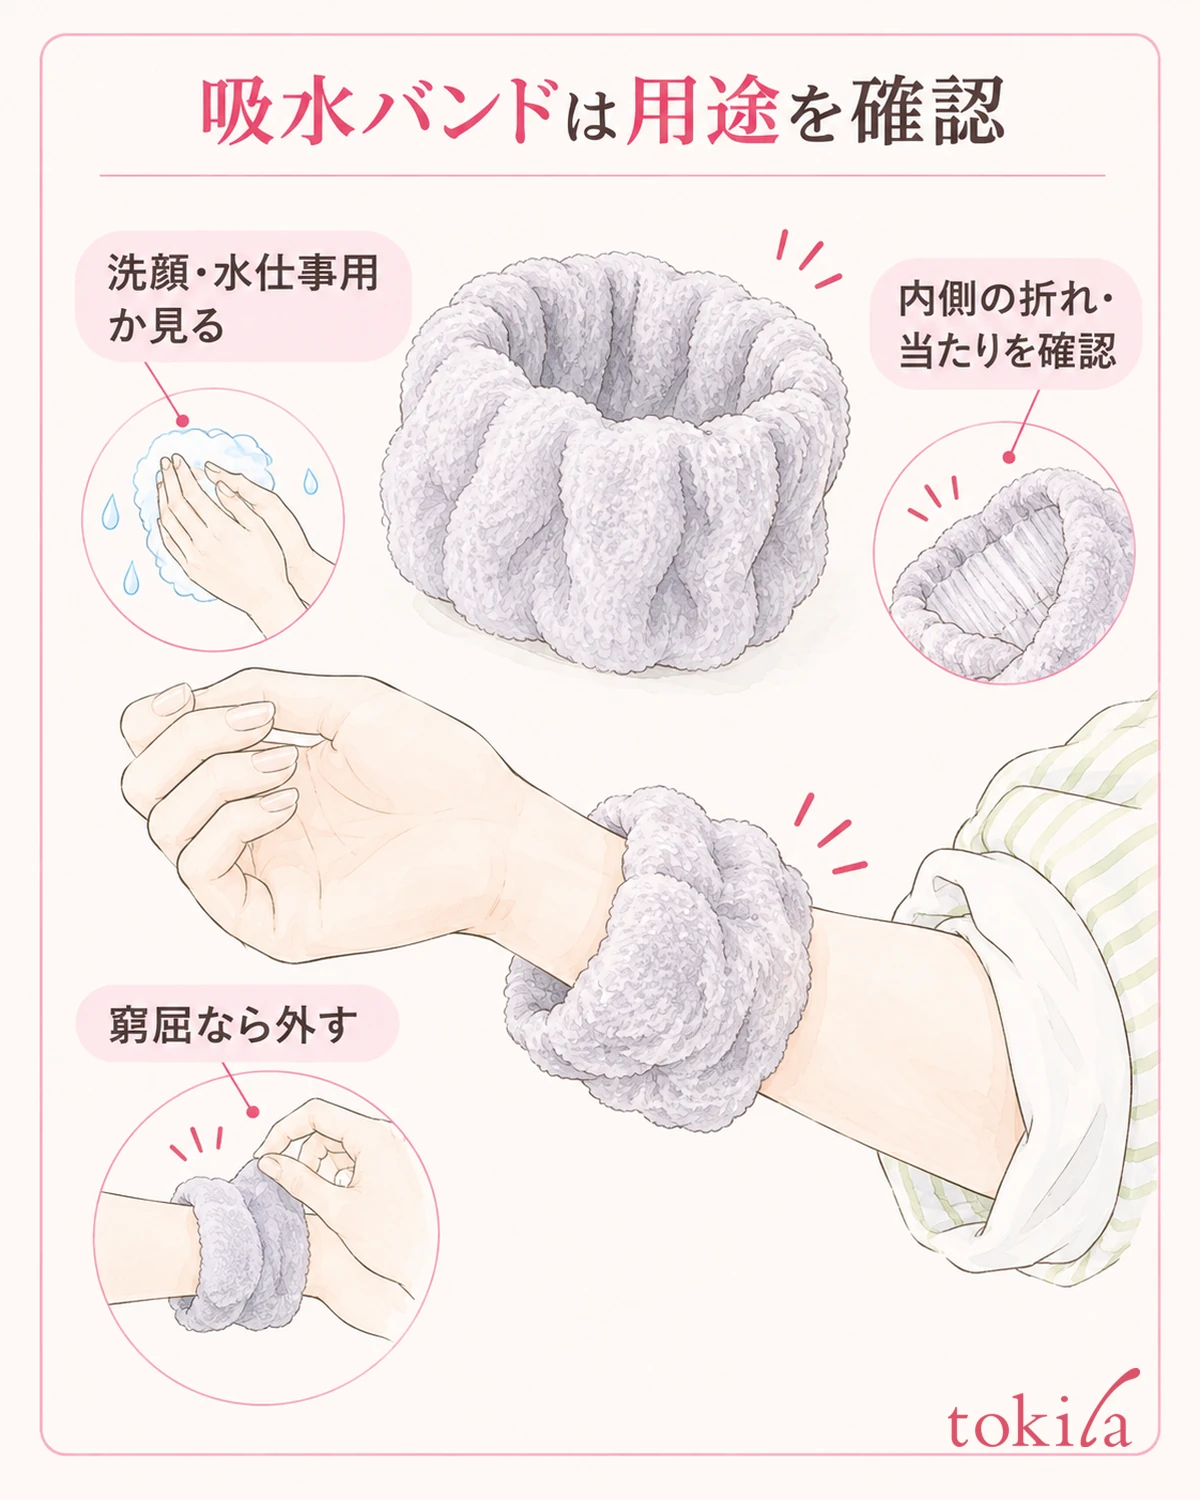
If water running down your arms bothers you, you can consider a wristband intended for absorbing water when washing your face or doing wet chores. Even if they look similar, they have different roles from a scrunchie meant only for tying hair or a band meant for holding up sleeves. Do not choose by the name of the material alone; check the intended purpose, the body part it is made for, and the washing instructions.
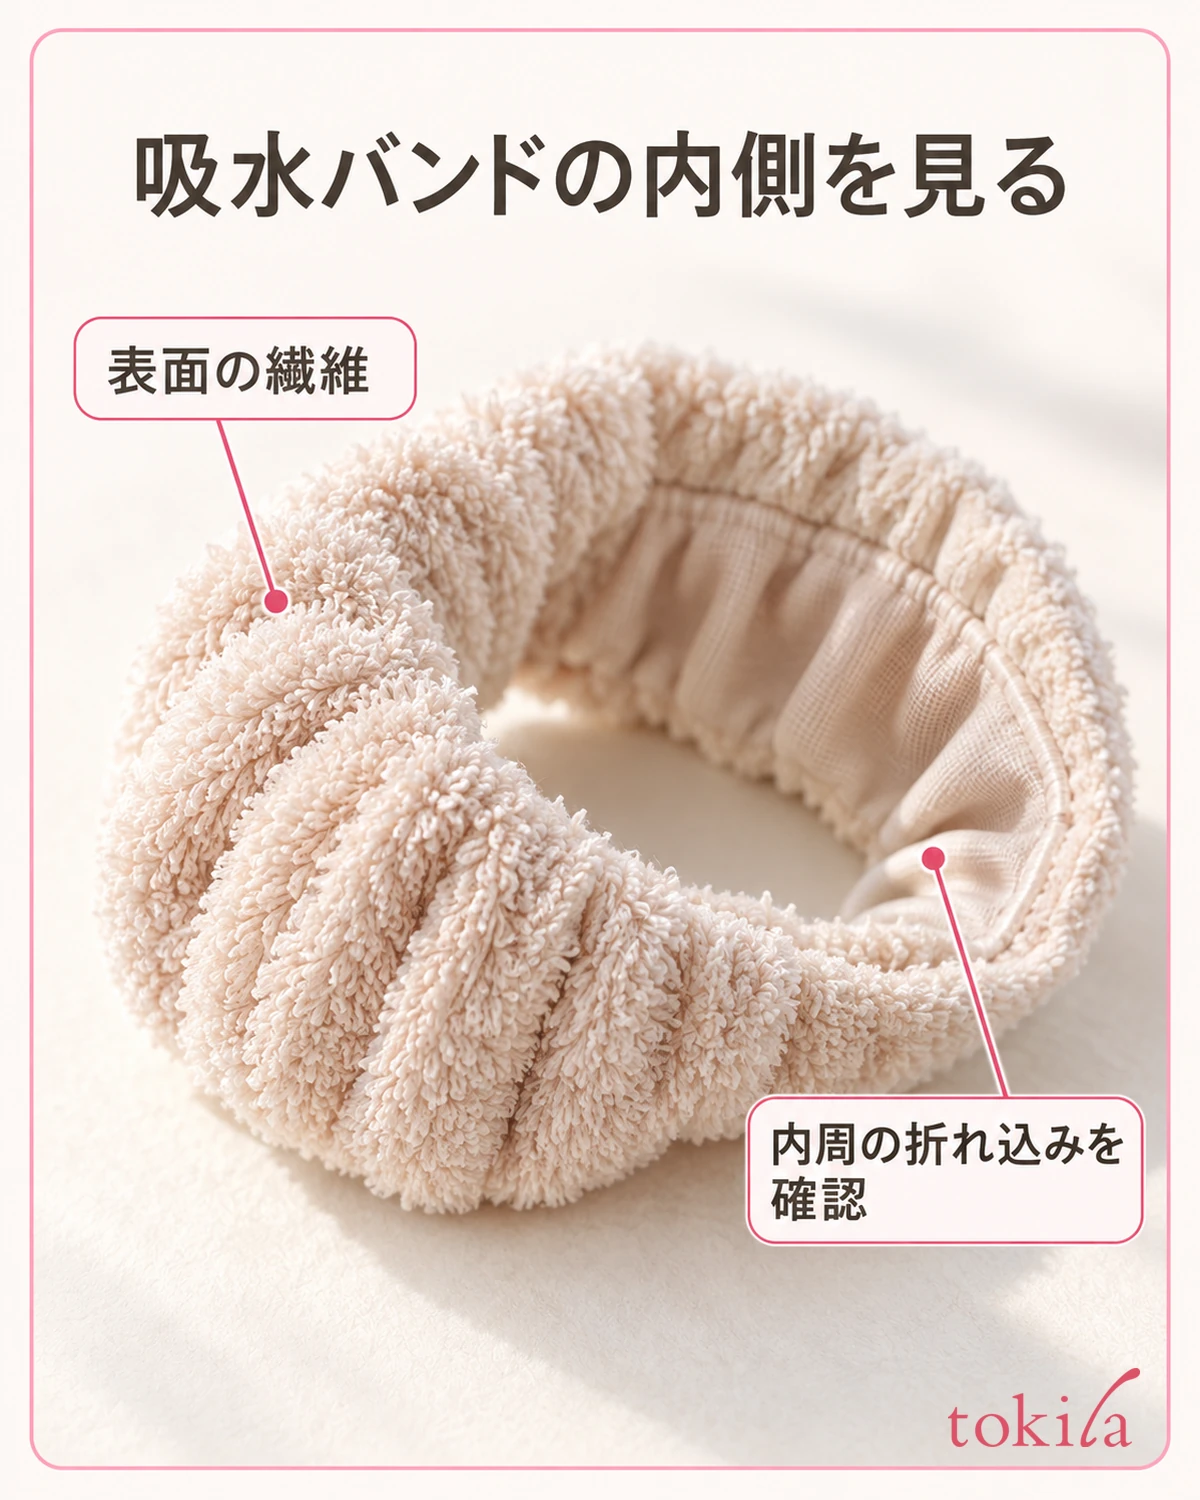
Before putting it on, look at the inside and outside of the band. Check that the inside is not twisted and that no seam or hard part presses against your wrist. Choose one that does not feel tight when you slip your hand through, without forcing the loop wider or adding another elastic inside. If it is loose and slips off, switch to a size that fits rather than winding it several times to tighten it.
Surface fuzz and texture are not meant for comparing how much water a band absorbs just by looking at it. Before use, treat them as clues for checking whether any debris is stuck to the surface and whether the fabric on the inner circumference is folded in. Do not decide from photos or the feel alone that fluffier means more absorbent or that thinner means quicker to dry.
Put one on each wrist in the position the product specifies, then open your palms or move your wrists slowly. If you feel tightness or discomfort, take it off. Also check the position where you pushed up your cuffs, and avoid a state where the band and fabric overlap and stay damp. You do not need to test its performance by pouring water on it after putting it on. If it gets excessively wet during your usual face washing, take it off for now and handle it accordingly.
An absorbent band is neither a tool for lathering face wash nor a tool for rubbing your face clean. Use it for the purpose of catching water at the wrist, and follow the directions of the face wash you already have for how to wash and rinse your face. Keeping it separate from the towel you use on your face also makes each role clear.
4. Before Raising Your Hands, Arrange the Position of Your Face and the Sink
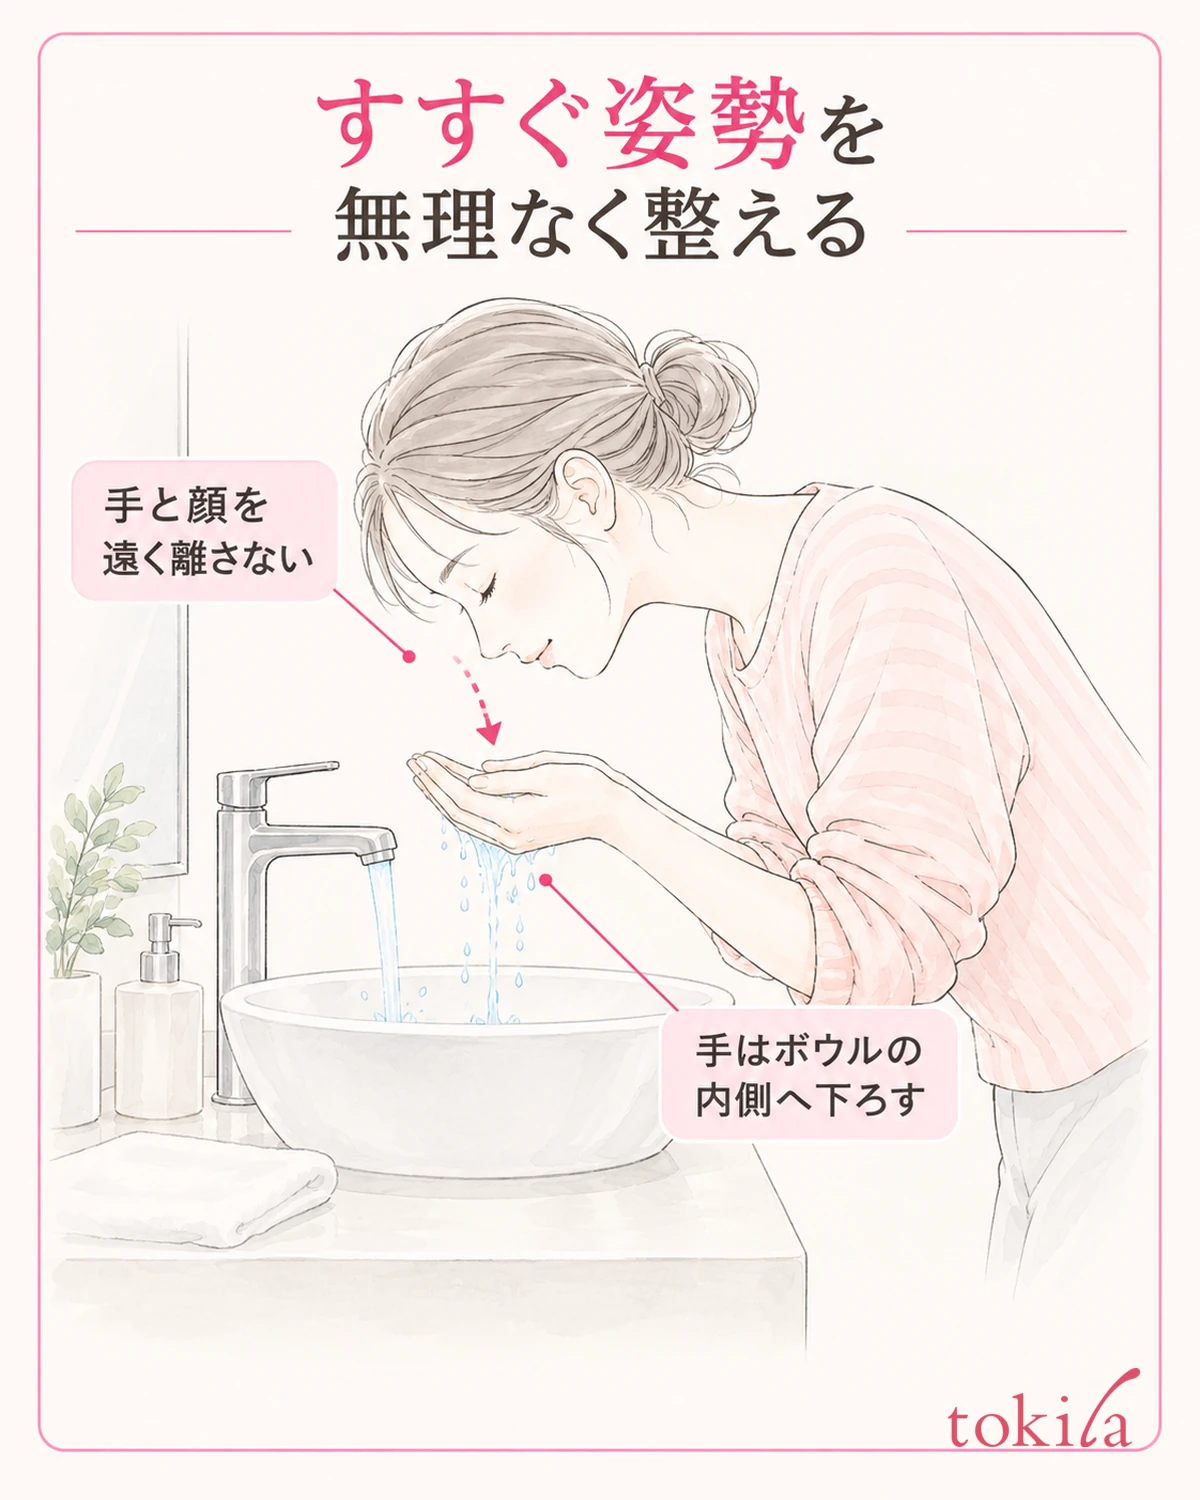
Once your sleeves and band are arranged, look at where you stand in relation to the sink. If you hold only your cupped hands high without bringing your face close to the water, depending on the angle of your arms the water can easily run down toward your elbows. Within a comfortable range, move your body closer to the basin and look for a position where you can rinse without holding your hands far from your face.
Do not aim to bend deeply at the waist or neck. Choose a posture where your footing is stable, your breathing is not restricted, and you can return both hands to the inside of the basin after rinsing your face. If the height does not suit you and it is uncomfortable, review the facilities you can use or your way of washing rather than putting up with the posture. Do not stand on a wet floor or an unstable platform to adjust the height.
After scooping up water, do not immediately swing your hands up widely; bring both hands close to your face. After rinsing, do not shake your hands toward your sleeves or wipe them on your clothes; lower them inside the basin. If water remaining on your wrists bothers you, deal with it after taking your hands away from your face, and do not tug the band to fix its position in the middle of rinsing.
You do not need to scoop a large amount at once to avoid spilling. Choose an amount that is easy to scoop and a water flow you can manage, and proceed without skipping the rinsing you need. Do not change to methods such as keeping water from touching your face or leaving face wash on, just to reduce wet sleeves. To check your hairline, you can also read how to rinse where foam tends to remain.
If your sleeves still get wet after changing how you move, recheck where the water splashes and whether your sleeves have slid back. If you change your body position, water flow, sleeves, and band all at once, it becomes hard to tell what made things easier. Finish washing comfortably for that day, and review one thing at a time in your next preparation.
5. Separate the Used Band from Your Sleeves and Put It Back Where It Can Dry
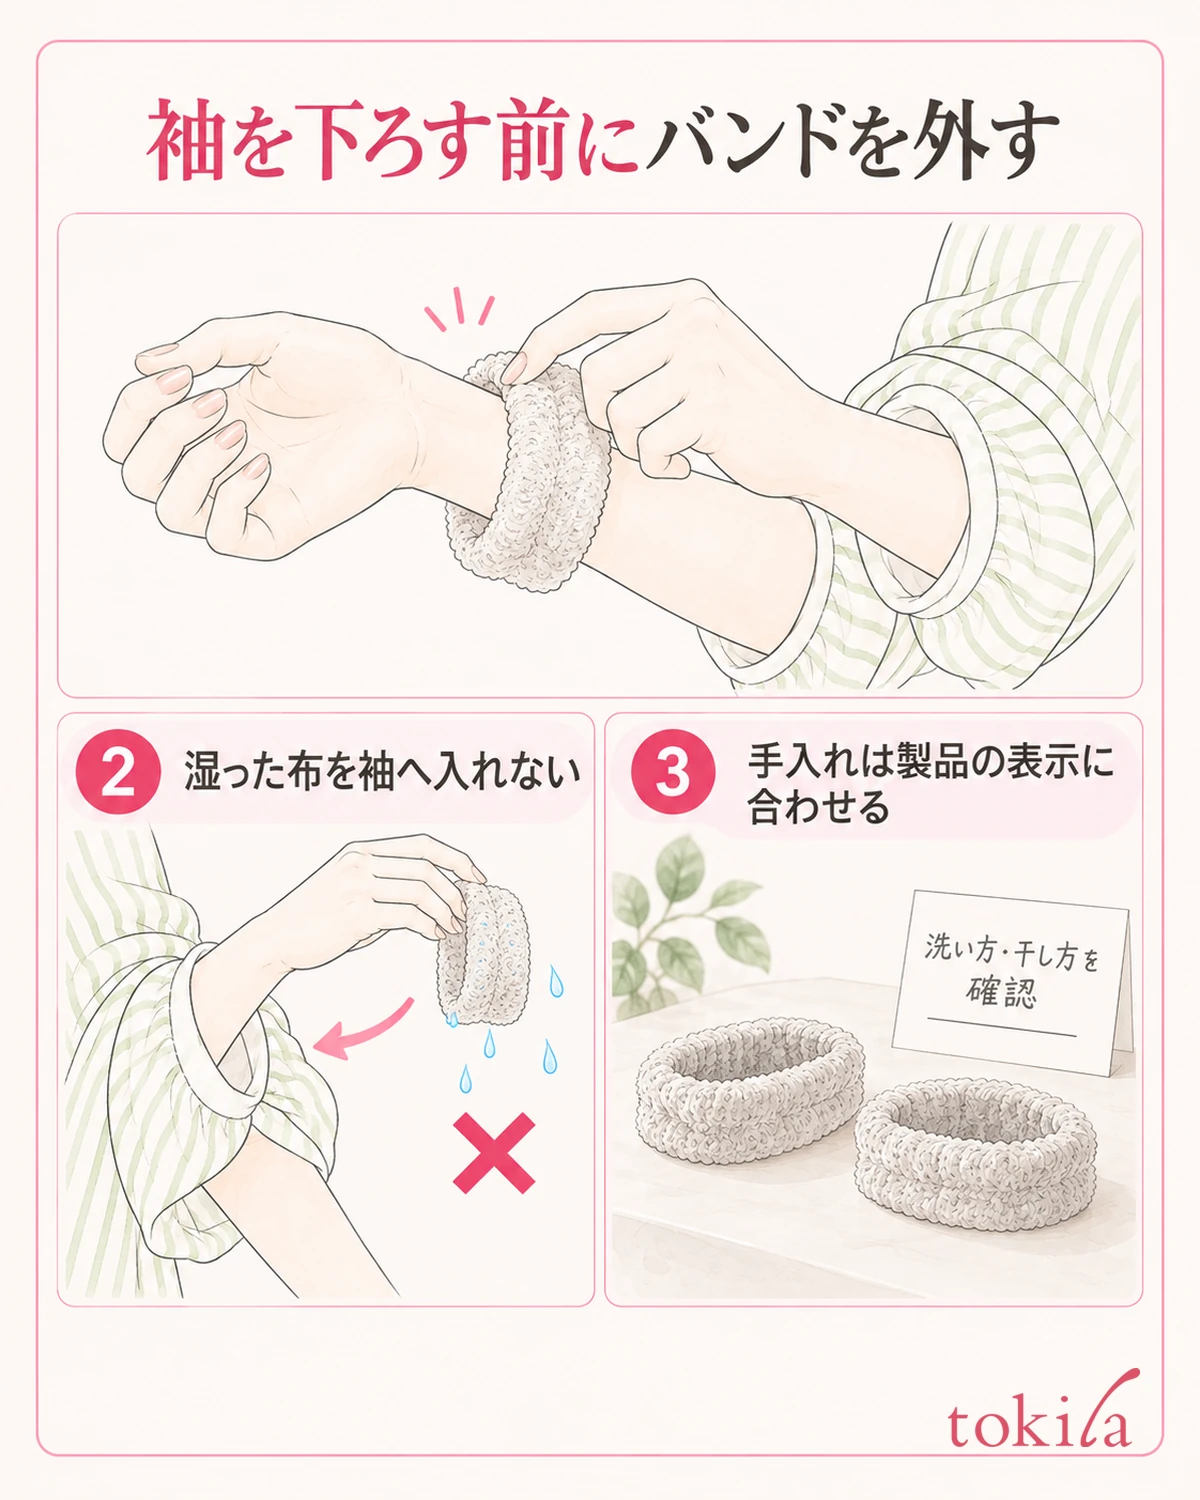
When you finish washing, turn off the water and dry your face and hands each with a clean towel. Do not lower your sleeves with the band still on; take off the band first, then arrange your clothes. Take it off slowly, watching the position of your wrists, so that the damp band does not slip inside your sleeves. When drying your face, you can also refer to how to take water off with a towel without rubbing.
Wash and dry the band you took off according to that product's label. Washing methods differ by material and construction, and being the same shape does not mean bleach or a dryer can be used. When deciding on the tools and detergent for washing, follow the care instructions of the item you own. Even if it says antibacterial, do not assume it is fine to put it away while still damp.
When drying, do not roll the left and right bands up together; place them so that air passes through the inside of the fabric as well. For products with a hanging loop, check its intended use and instructions before using it. Do not forcibly pull a loop without a hanging loop to hang it; choose a drying method that suits the product. Check for dampness not only on the outside but also on the inner circumference and where the fabric overlaps.
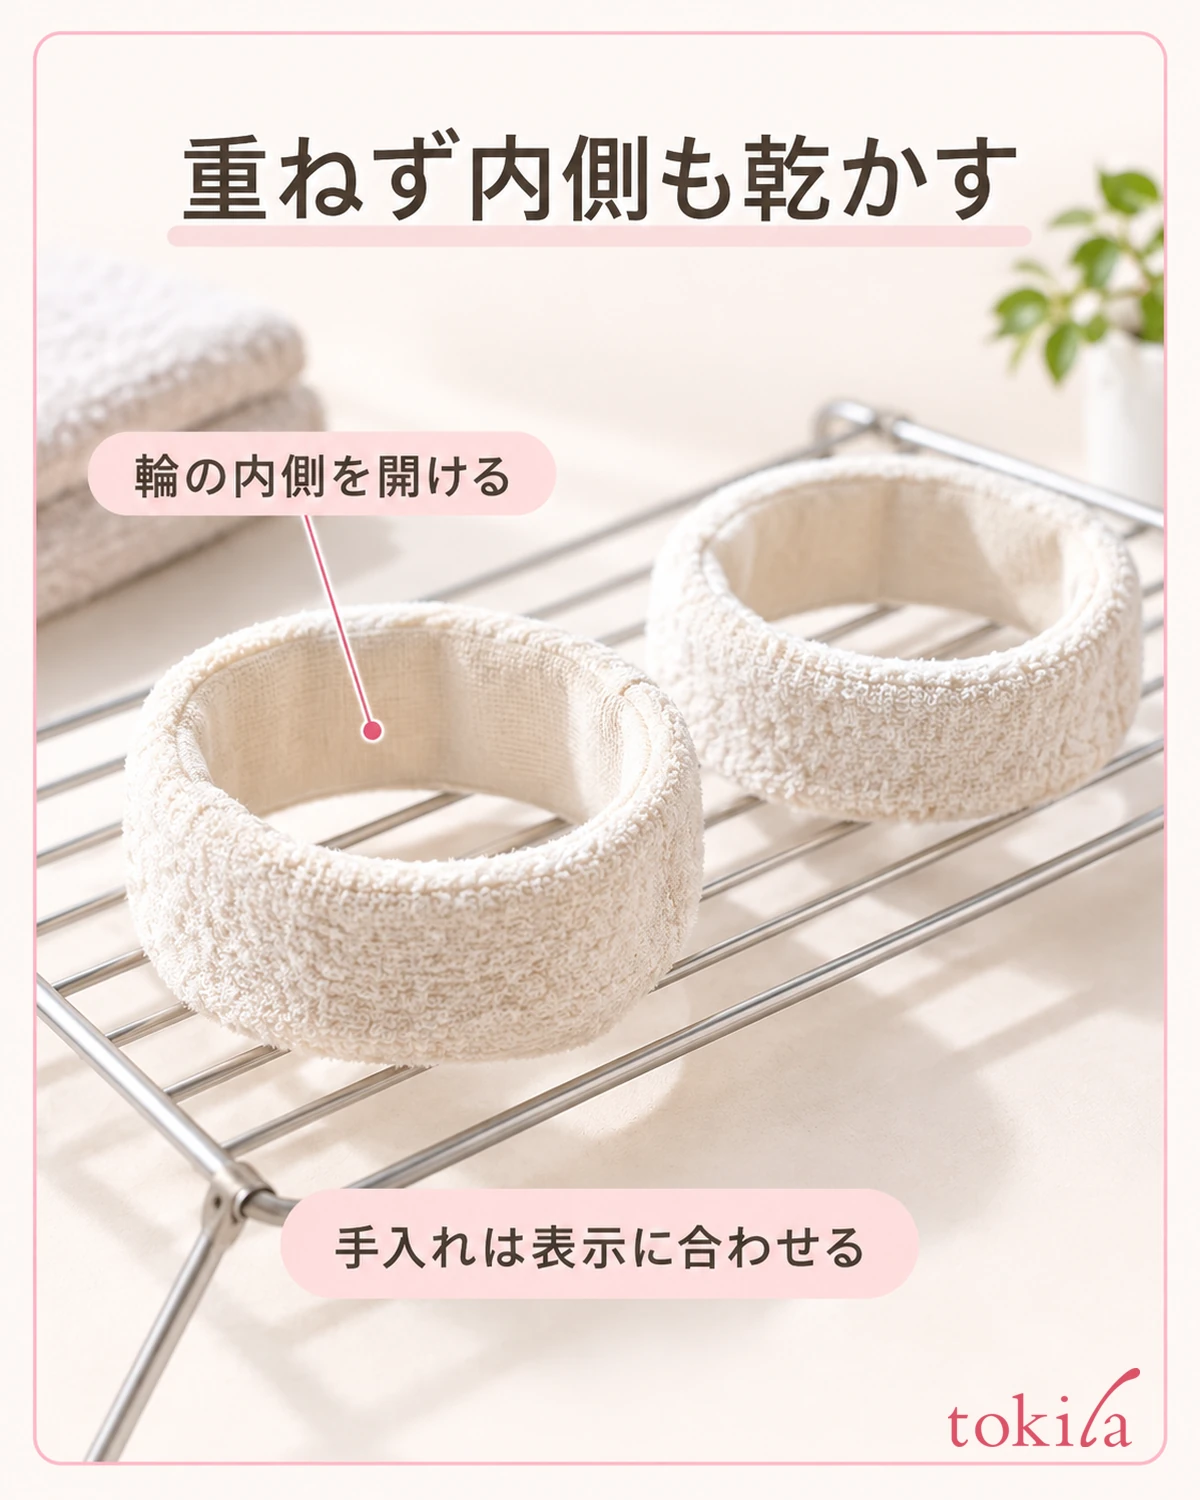
Before the next use, check whether it is dry and clean, and whether it has stretched or frayed. Do not keep using one that is damp, and do not bring a heat appliance close to dry it; on days when it will not be ready in time, switch to another dry one or to the method of pushing up your sleeves. Before buying more, think about where to keep a spare and where you can dry them, which makes things easier to manage.
Finally, recall whether only the tips of your sleeves got wet this time or the water reached your forearms. Next time, choose one trouble spot among where you push up your sleeves, the water flow, and where you lower your hands, and adjust it. Rather than getting rid of every drop of water, aim for preparation that keeps the rinsing you need while reducing the effort of fixing your clothes and awkward postures.
Written by the tokila editorial team. We organized preparation that you can check with the clothes and tools you already have.



