
When you hold the brush in your non-dominant hand, color flows to the sides of the nail or touches nails you have already painted. If you find that only your dominant hand is hard to paint, try looking not just at how nimble your brush hand is, but at where you rest both hands and the order in which you paint.
This article focuses on painting the nails of your dominant hand with ordinary air-drying nail polish. For a right-handed person, that means holding the brush in the left hand and painting the right hand. If you are left-handed, swap left and right. Gel polish that is cured with a light, and peel-off types, each have their own directions for use, so these steps cannot be applied to them as they are.
1. Decide where to rest both the brush hand and the hand being painted
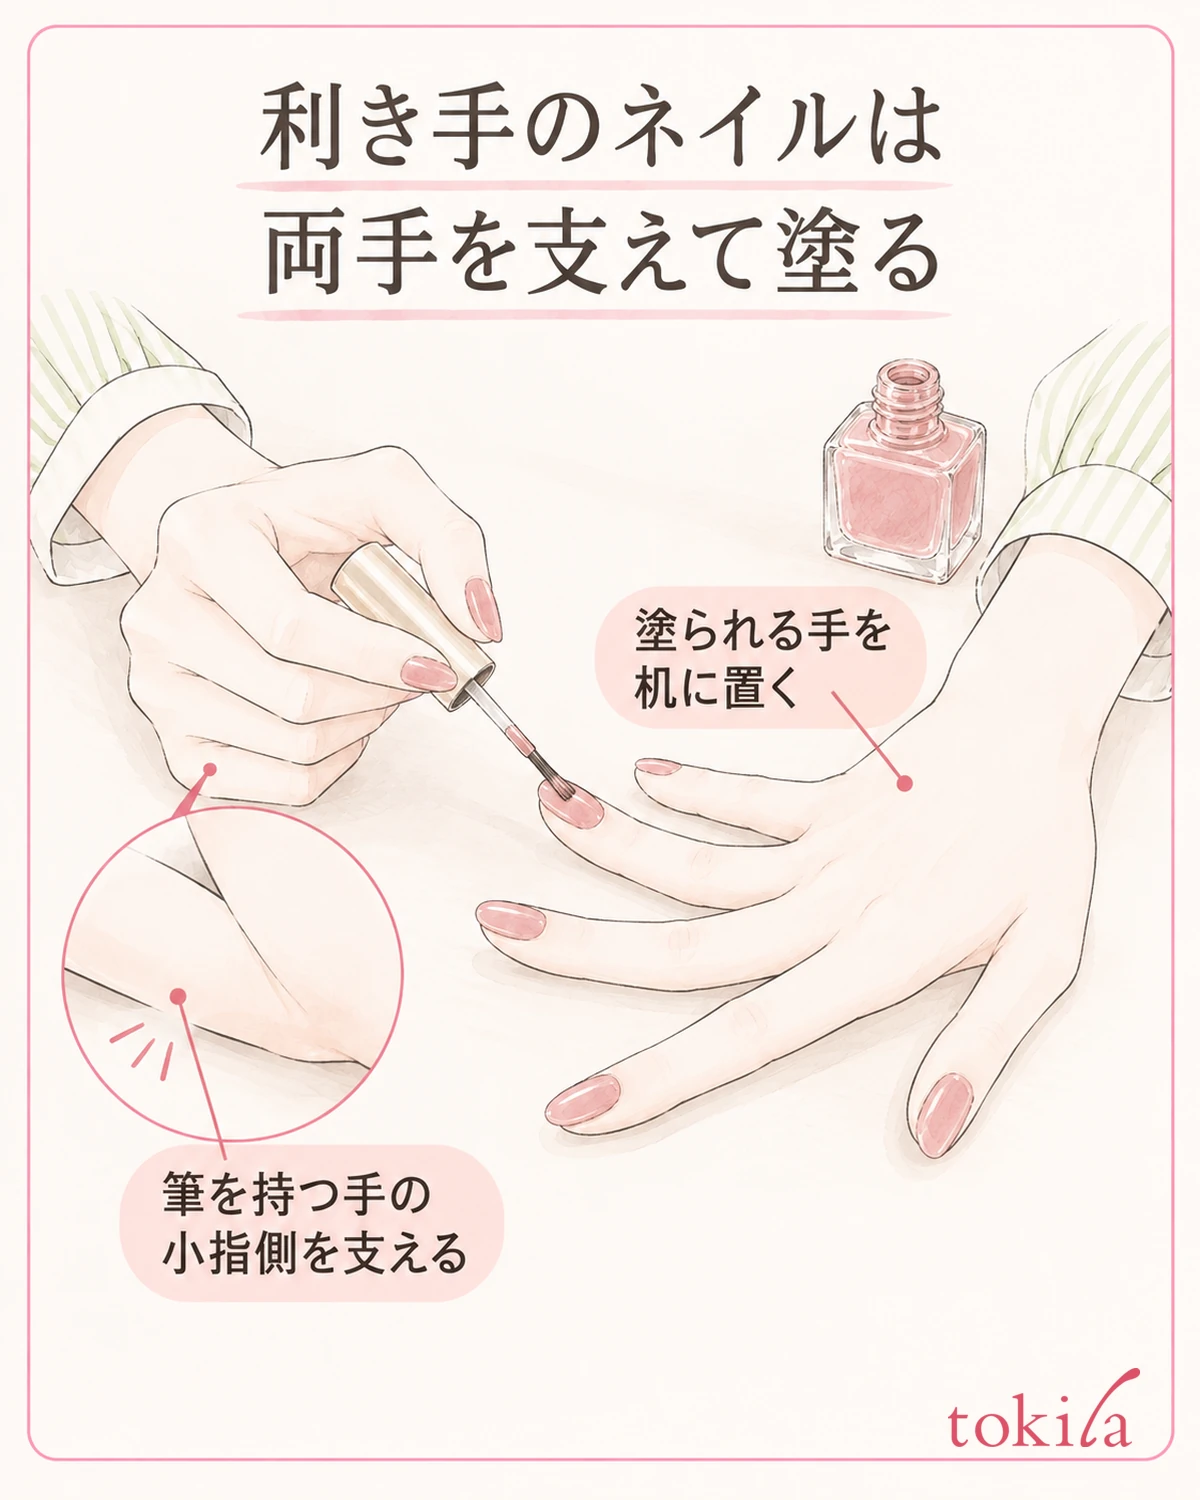
At first, without opening the bottle, sit at a desk and decide where your hands go. Turn the nails of your dominant hand upward and rest it on the desk with the fingers slightly spread. Don't bend your fingers back hard or curl them into a fist to peek at the nails; choose a position where you can see the base and both sides of the nail you want to paint. If your wrists or shoulders feel strained, start by adjusting your posture to one where you can see comfortably, for example by moving your body closer or changing the position of your chair.
Don't leave the brush-holding side floating in the air either. Gently resting the little-finger side of that hand on the desk to support it keeps you from waving the brush around with only your fingertips. What touches the desk is the side of the hand; it does not mean pressing the nail you are about to paint, or freshly painted nails, against the desk. Also check that the spot where you rest your hand is not blocked by the bottle.
Bend your fingers lightly, as if holding the shaft of the brush, and test whether you can reach the nail without strain. Even if you steady only the hand being painted, if the brush arm is far away you will need to reach out at the end. Bring the working area closer in front of you and look for a place where both hands settle at the same time. If the desk shakes every time you move your hands, work on a stable surface.
Stand the bottle where it will not tip over, and prepare the remover, cotton, and a tool for fine detail work beforehand. This preparation reduces the times you have to open a drawer with freshly painted nails to get tools. Protect a desk that you can't afford to stain, and follow the label of the product you use for ventilation and caution around open flames.
If you want to review nail shapes and basic care, see types of nails and the basic steps. Here, we concentrate on steadying the motion of painting your dominant hand.
Lighting is part of preparing your hands too. If your own shadow hides the sides of the nail, adjust your position relative to the light before painting. Rather than just bringing your face closer to see the nail, check whether you can see from the base to the tip while keeping both hands in place.
2. Adjust the amount of polish on the brush at the mouth of the bottle before bringing it to the nail
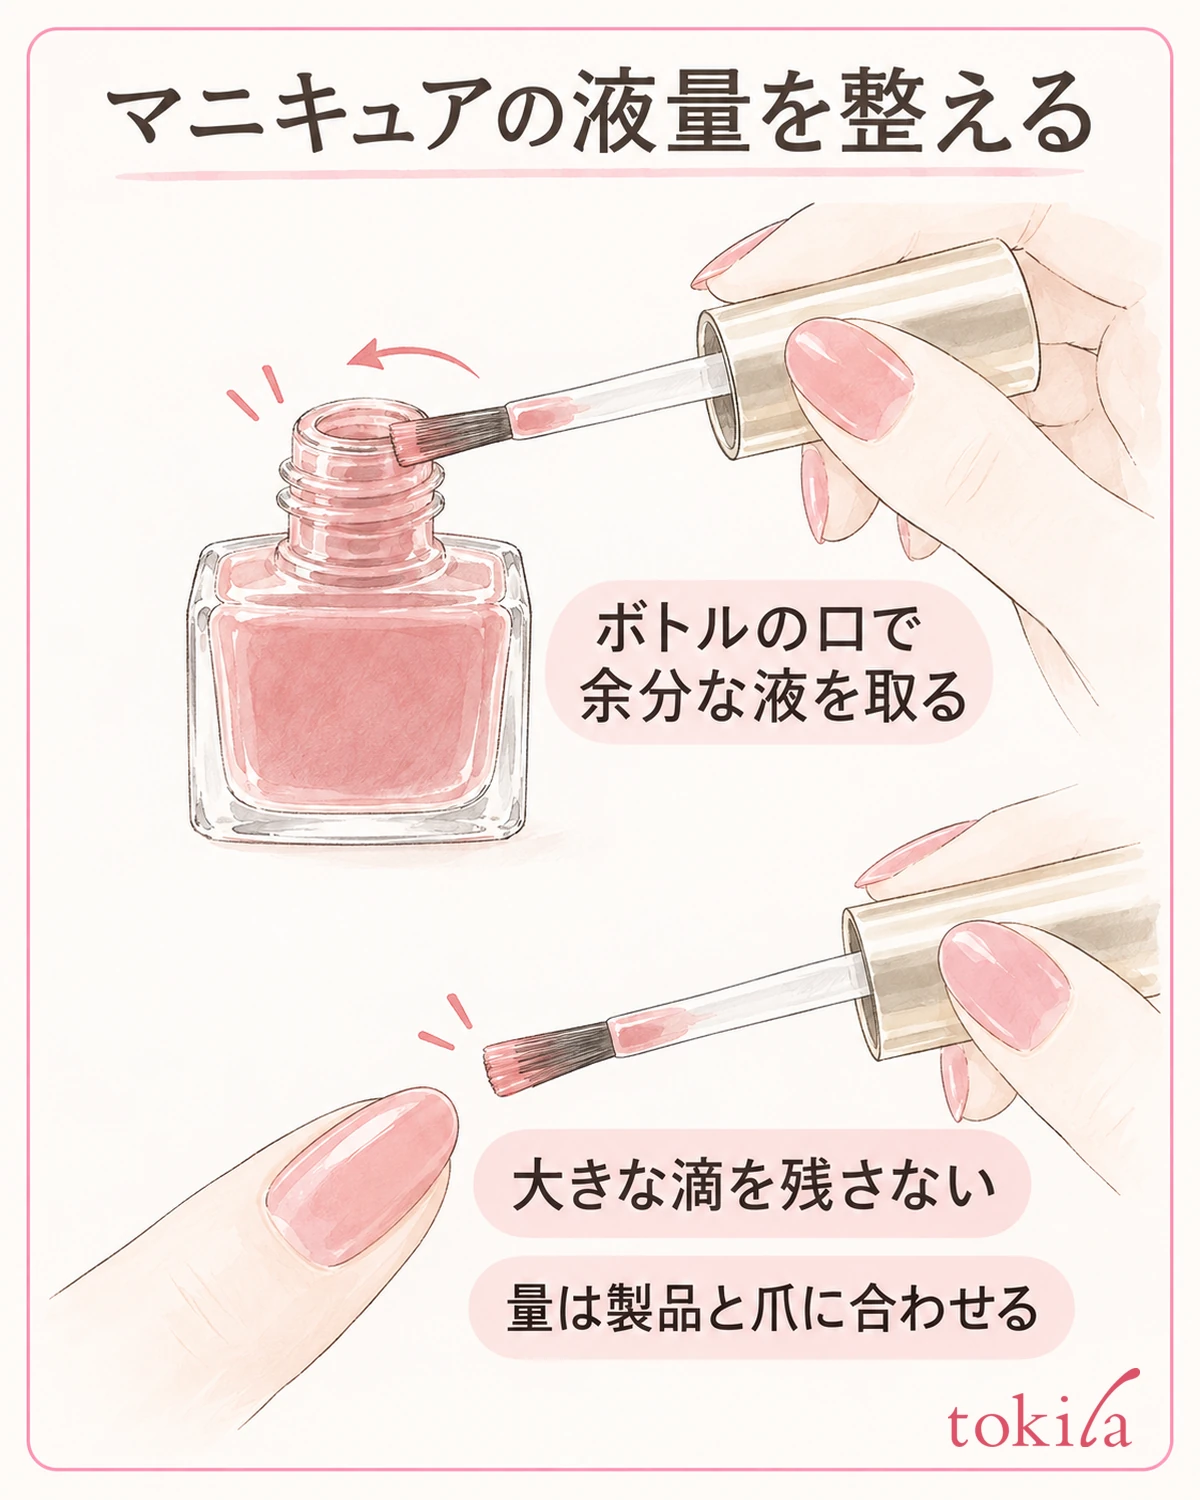
Even if your hands are steady, if there is a large pool of polish at the tip of the brush, it will spread too much the moment it touches the nail. First read the label of the polish you have and check whether it needs to be mixed before use and how. Don't recommend the same way of shaking for every product; follow the instructions for the bottle you are using.
After taking the brush out, lightly wipe off the excess polish at the mouth of the bottle as the label directs. Also look at the polish dripping from the shaft, and don't hurry it to the nail with a drop hanging from the tip. On the other hand, it isn't good to wipe so many times that the bristles dry out. The amount that is easy to handle changes with the brush width, the viscosity of the polish and the size of the nail.
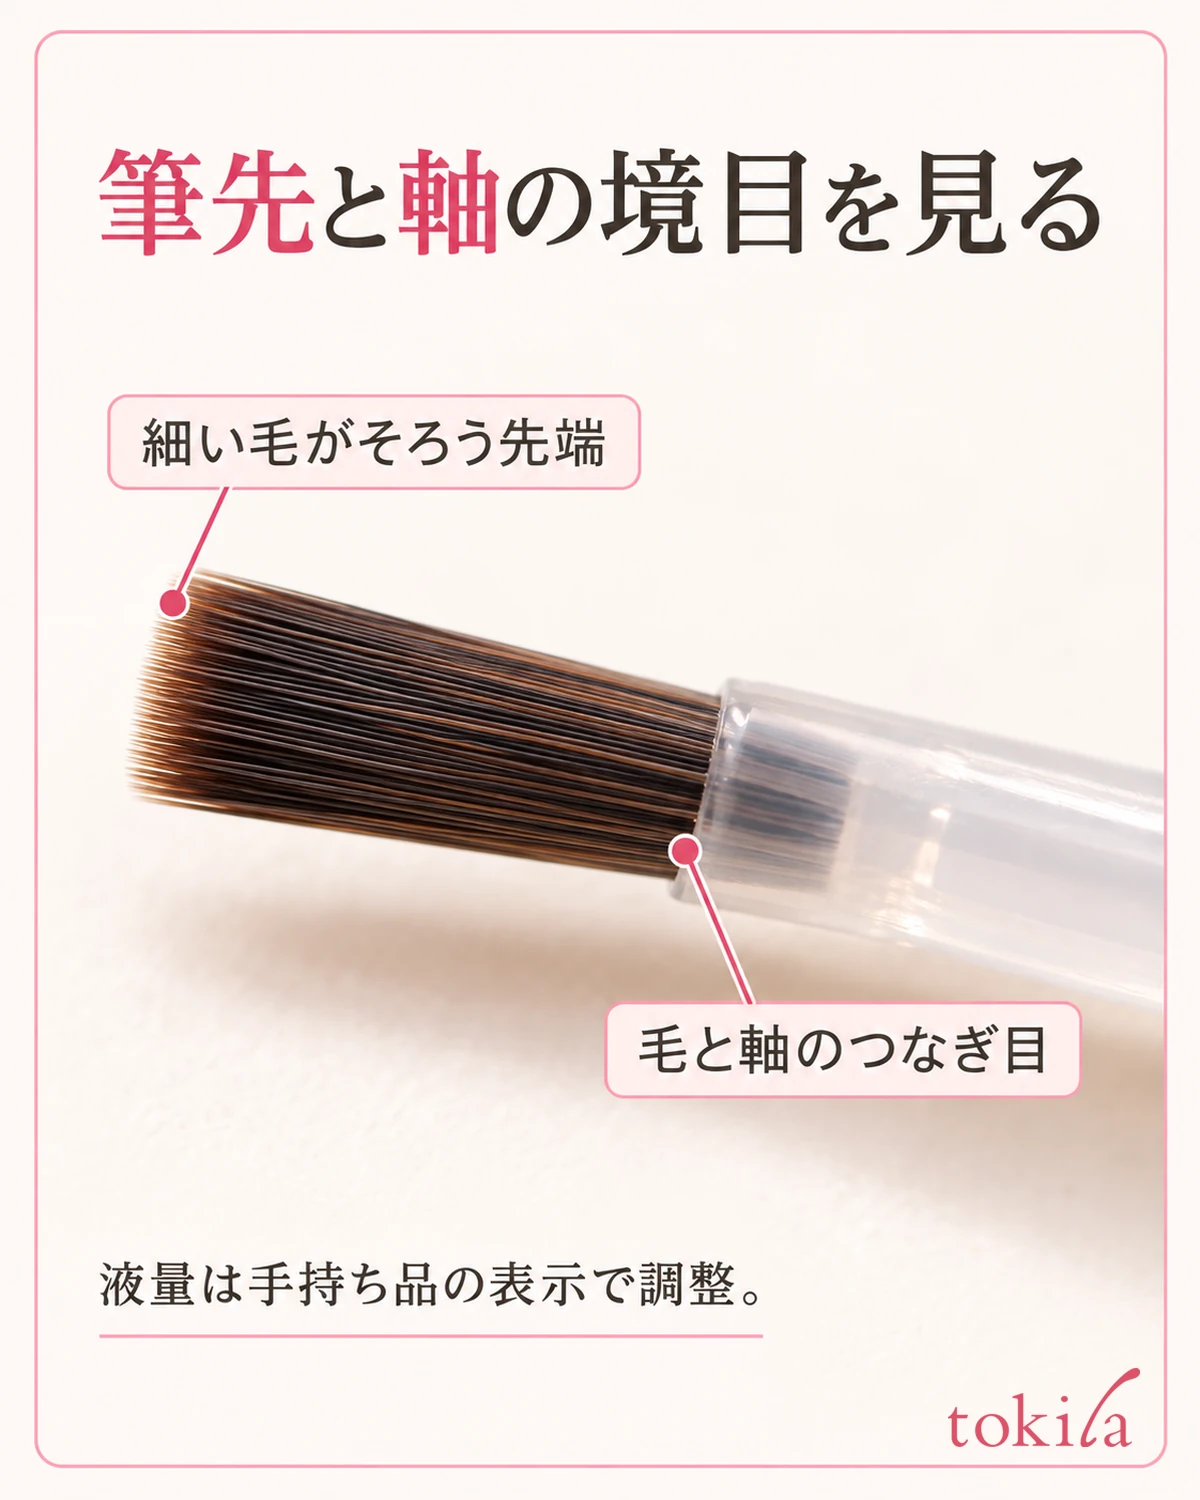
The first time, check how the polish spreads on one small nail of your dominant hand. If it looks like it will run toward the base or sides even before the brush touches down, reload with a different amount; if it goes on thin and you need to go over it many times, load the amount you need onto the brush again. Looking at the brush for each nail and adjusting, rather than loading "enough for one hand at once," lets you tell where the amount changed.
If you feel you are gripping the brush too hard, lift it off the nail once and check again the side of your hand that rests on the desk. You don't need to change to a grip that makes you drop the brush just to relax. Once the position you hold is steady, make only the motion of bringing it close to the nail small.
If the polish is stringy or the brush has hardened, so that it differs from usual, don't force yourself to keep painting. Don't thin it by adding remover or another liquid to the bottle on your own; check how that product says to handle it. Not dismissing a problem with the polish as clumsiness of the hand is also a check that keeps the overflow from happening again.
3. Start with the dominant hand and choose an order that avoids touching painted nails
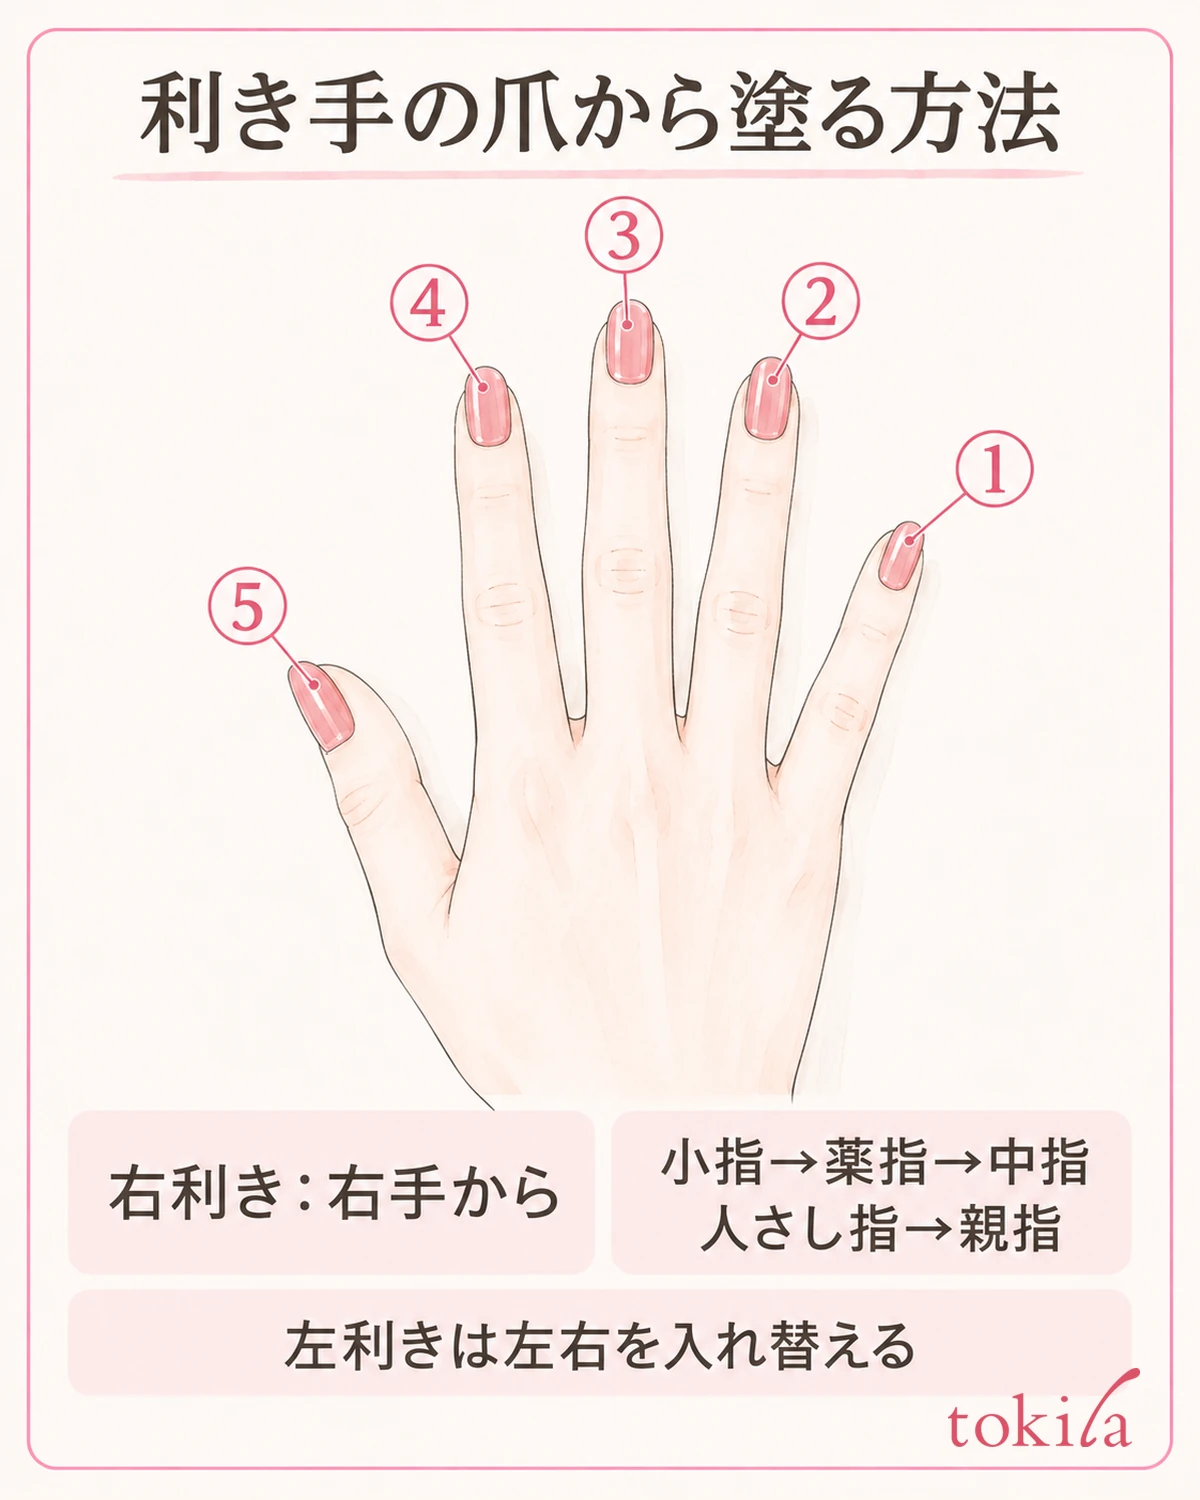
When you move to the other hand after finishing one, if the nails of the hand holding the brush are not yet dry, you tend to hold that hand in the air to avoid touching the cap. So you can try making the dominant hand the one you paint first. For a right-handed person, the flow is to hold the brush in the still-unpainted left hand and finish the right hand first.
Within the dominant hand, one example is the order of little finger, ring finger, middle finger, index finger, then thumb. This is to create a path for the brush that does not cross over fingers you have already painted. Rather than memorizing the order and hurrying, check, with the brush lifted, which way it will pass to the next nail given how you rest your hand.
The thumb's nail faces a different direction from the other four. Don't twist it into the same posture as the other four; at the end, reposition your hand and create an angle from which the surface of the thumbnail is visible. You may also release the support of the brush hand once, so after repositioning, rest it on the desk again before painting.
Follow the directions of the products you combine for using base coat, color and top coat, and for the intervals between layers. Don't make it a common rule such as "apply the next layer immediately after one coat." Also, when you finish the first hand and move to the other side, don't judge that you can grip the cap firmly just because it says "quick-drying"; check the drying instructions given.
If you are already partway through painting one hand, you don't have to remove everything to match the order. Move the bottle to a position where it doesn't touch painted nails, and secure the path for the next finger you will use. Rather than forcing yourself to swap hands midway, changing which hand you do first next time makes the differences easier to see.
The right-handed and left-handed illustrations are not meant to decide who is good or bad at it. Even with the same order, the places your hand passes change with the shape of the brush and how far your fingers are spread. If you notice your hand lifting in an effort to protect nails you have already painted, lift the brush away, set up the place you support the hand again, and then continue.
4. Avoid the skin at the base and sides, and paint thinly from the center of the nail
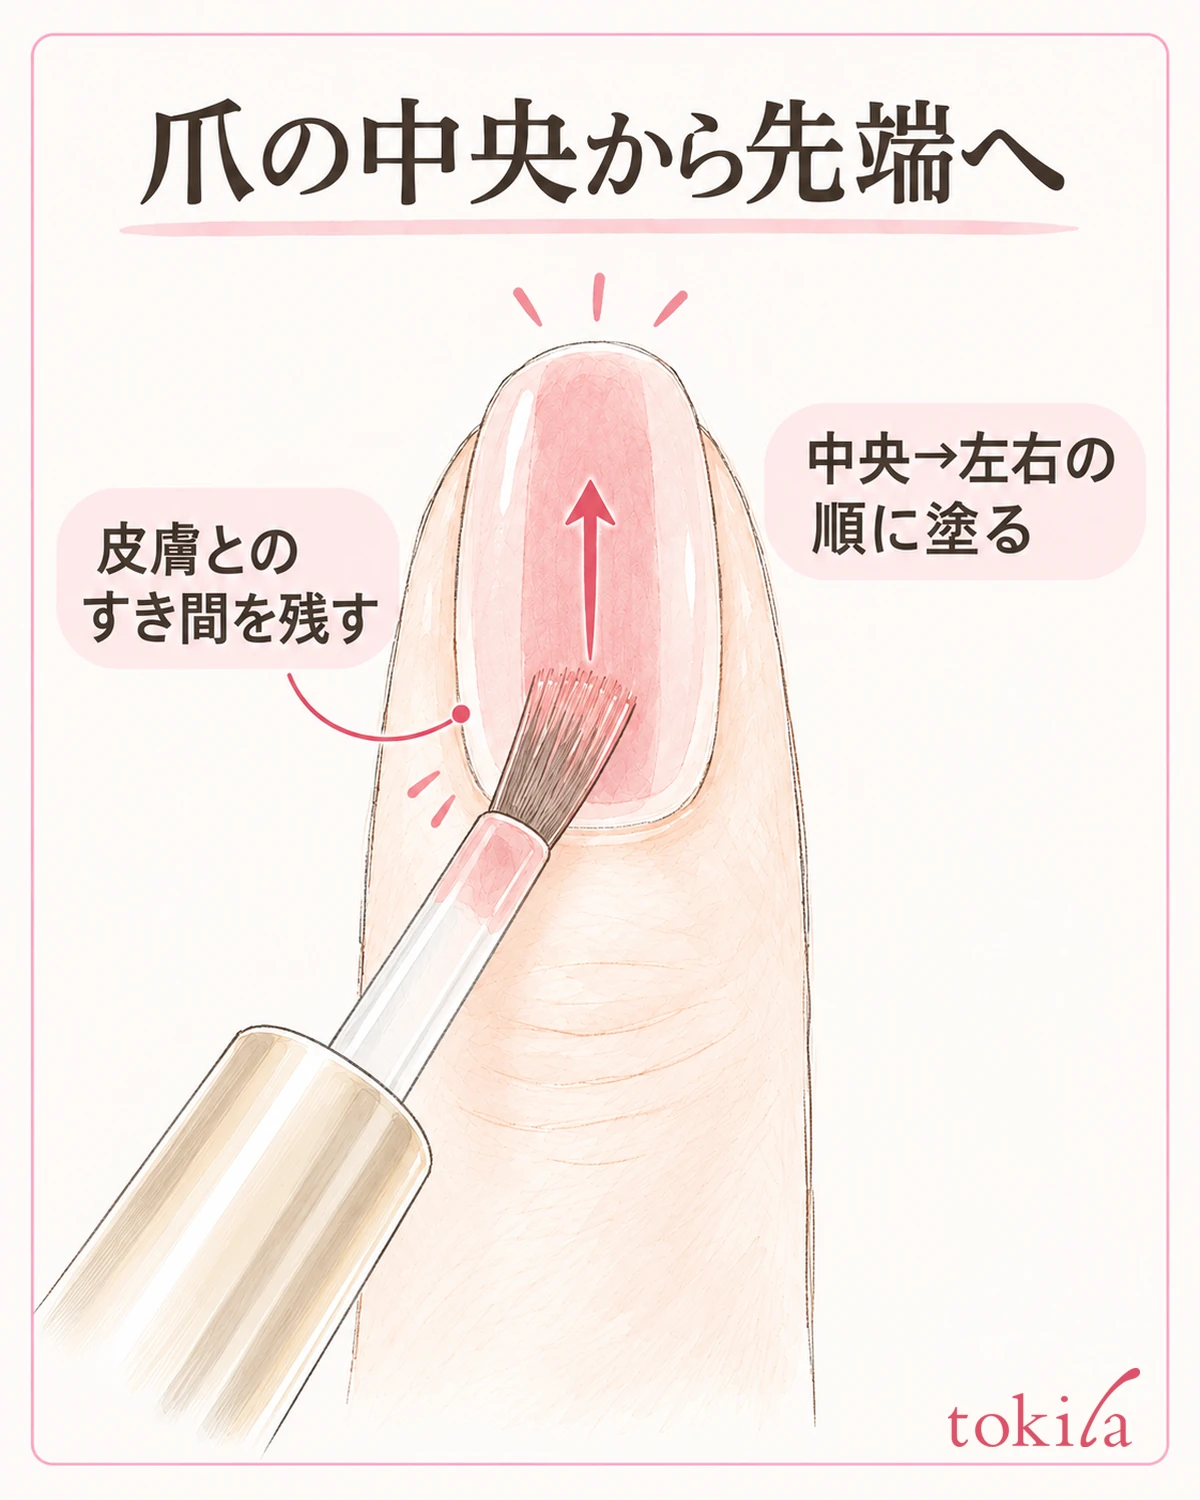
Follow the product you have for how to move the brush, but think of the basic motion as going from the base of the nail toward the tip. With an ordinary flat brush, painting the center band first and then moving to the left and right lets you adjust while watching the remaining width. Don't push the brush out to the full width from the start; watch how far the bristles spread.
Place the brush on the nail. Don't press it into the skin at the base and then pull it back. Leave a thin gap from the skin and carry the brush toward the tip from a position where it won't flow off the nail. Because nail sizes differ, not everyone has to match the same numeric margin. Take priority over not painting over the skin in an effort to fill a thin unpainted edge.
If the sides are hard to see, before twisting the brush hand a lot, you can slightly tilt the finger being painted so the edge of the nail faces a visible direction. When you move it, lift the brush once, reposition the finger, then make contact. Rather than moving the nail and brush at the same time, creating a visible angle first and then painting a short stretch lets you confirm where you are going.
Don't gather polish in the same spot in an attempt to make the color deep in one application. Even if you find a thin area, avoid dragging over a surface that has started to dry as if scratching it, and layer according to the product's directions. For painting the tip of the nail too, give priority to the label, and don't push the brush forcibly into the skin or under the nail.
After painting one nail, lift the brush and look at the base, the left and right sides, and the tip. Separate whether the bristles spread too much, there was too much polish, or the angle of the finger was hard to see. Rather than finishing at exactly the same speed as the other hand, proceed in a way that lets you check one nail at a time for polish on the skin.
When painting the sides of the nail, use the edge of the brush while watching the boundary of the color. Don't slide bristles that have strayed off the nail; lift them once and set them down again. To avoid overflow, don't draw many extremely thin lines; proceed while watching the width that your brush touches naturally.
5. If it overflows, don't add more; fix it in a narrow area
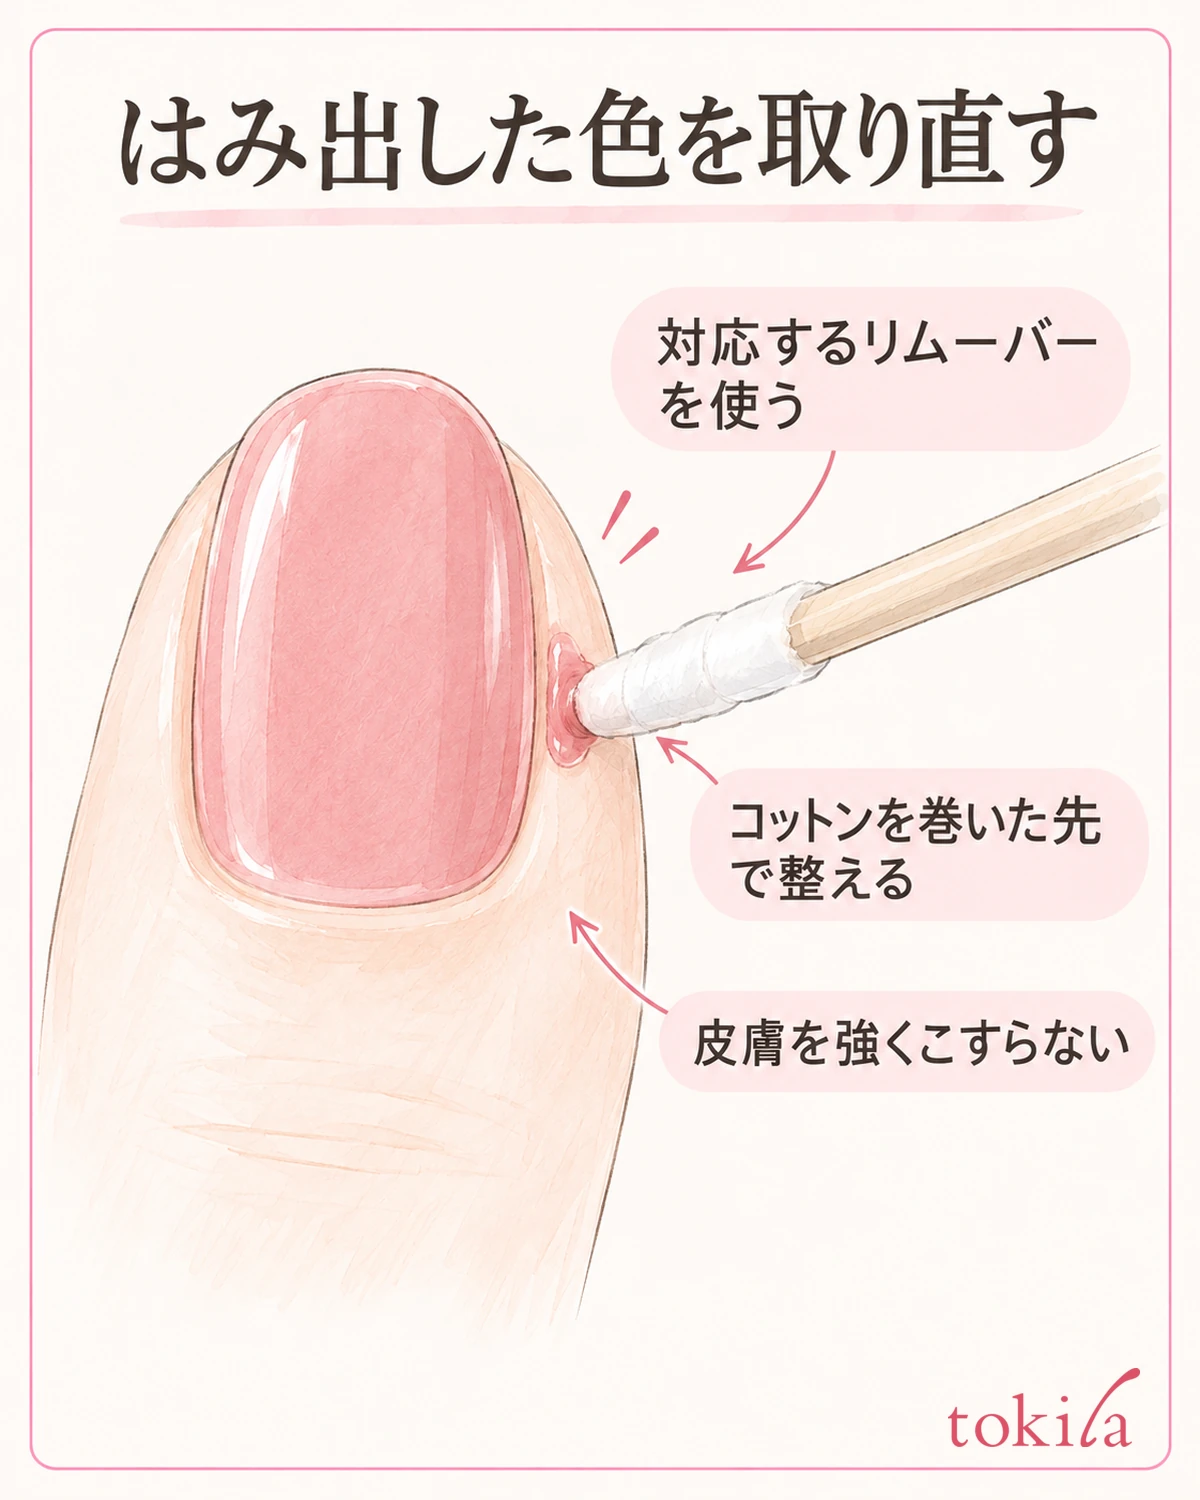
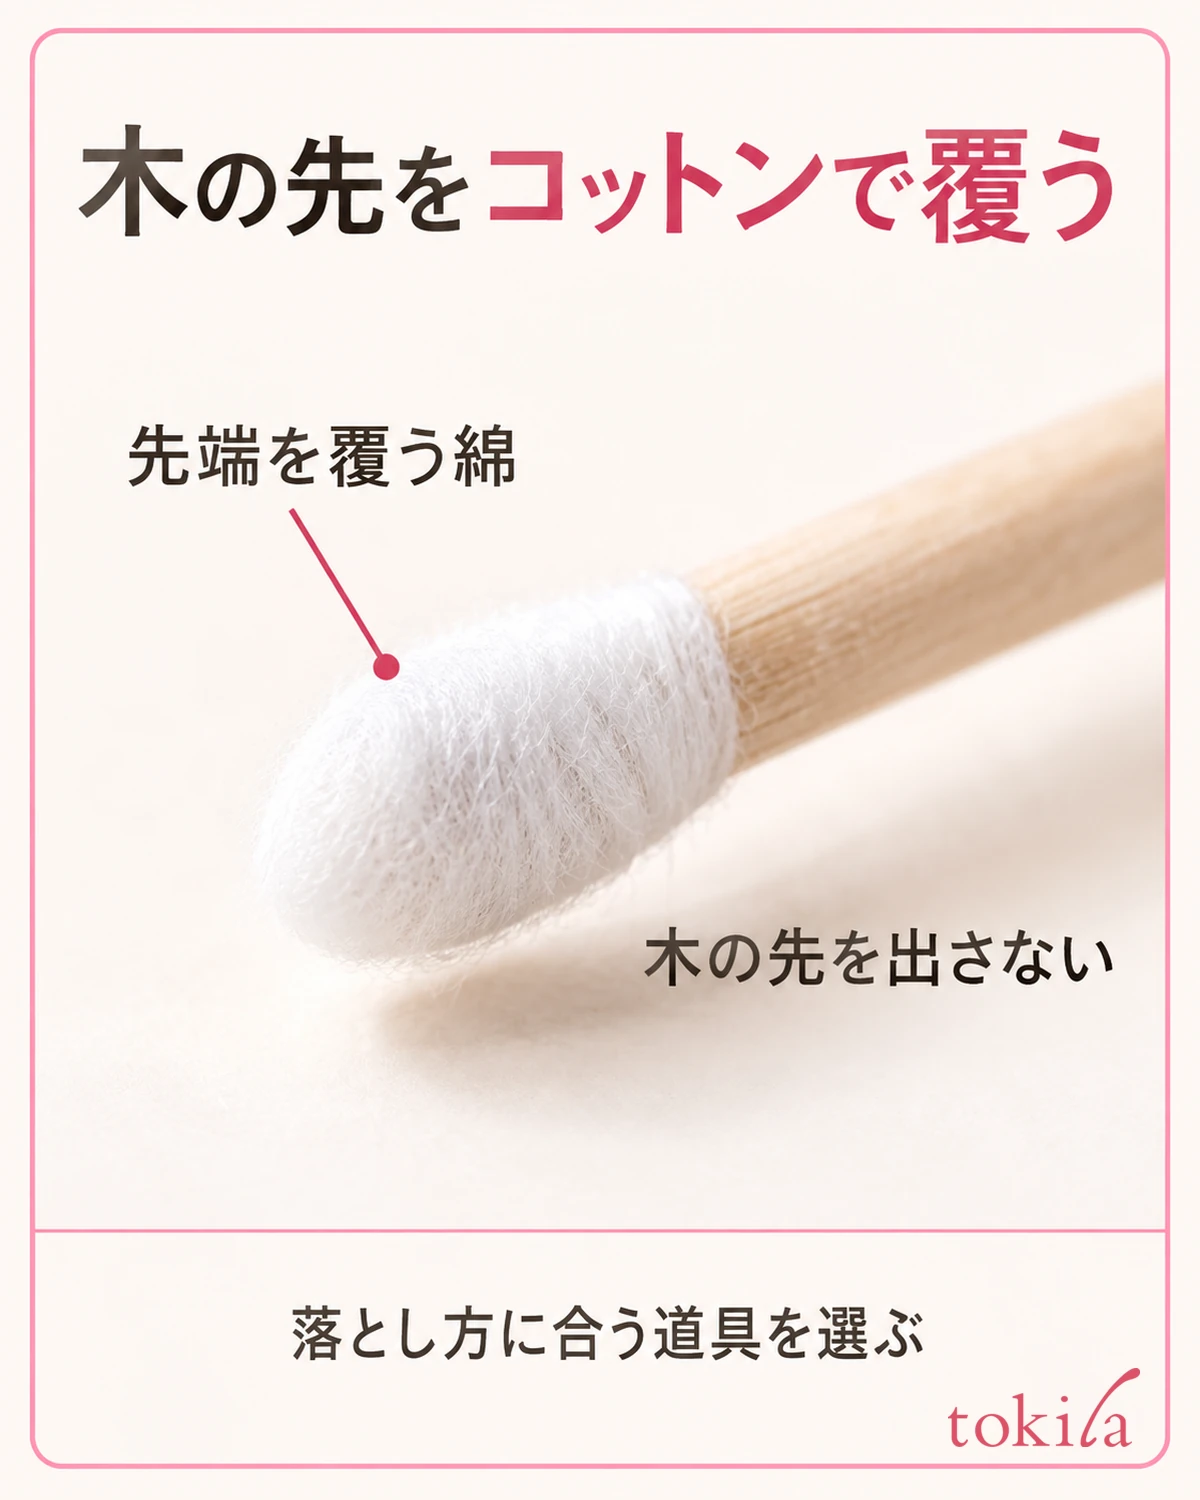
If you notice color on the skin, don't layer top coat over it and finish as it is. For polish that comes off with an ordinary remover, one method is to gently remove the overflowed part with a wooden stick or similar wrapped in cotton and moistened with a little of a compatible remover. Even when you tidy it before it dries, make the contact tip small so you don't rub off a large area of the nail color.
Don't press the bare tip of the wood against the skin or dig along the edge of the nail. Follow the directions of the remover and tool you use, and don't soak it so much that liquid drips from the wet tip. Replace cotton that has picked up color with a new piece, and don't run the dirty tip over a wide area.
If the polish has badly smudged onto the nail and needs repeated partial fixes, taking that one nail off and repainting it makes the process easier to sort out. You don't have to choose between redoing all ten nails or layering thickly over the smudged area. A nail you have redone should not be painted while remover or moisture remains; go back to the product's steps for the next application.
Finally, rest both hands without strain, and check with your eyes, without touching the surface with your fingers, that no polish remains on the skin at the base and sides. Drying time also varies with the type of color, the thickness of the layers and the environment, so we don't set a flat number of minutes for completion. Close the cap and, in a posture where the nails are unlikely to touch anything, follow the drying instructions of the product you used.
Next time, start your review from the one of these that didn't go well this time: "rest the little-finger side of the brush hand on the desk," "paint the dominant hand first," or "check the amount of polish for every nail." Rather than changing the order, the amount and the tools all at once, being able to recall which motion made your hand lift makes the next preparation more concrete. If you have pain, redness or other abnormalities, stop applying and follow the product's precautions.



