
You try to take off a cufflink, and the cuff fabric gets pulled along with it. The small metal part is hard to see, and you can't tell which way to move it. In that case, before pulling the decorative part, check the shape of the fastener on the inside of the cuff.
Here we focus on swivel-type cufflinks, in which a short bar at the tip rotates, and sort out preparation before removing them, the direction of the fitting, and the order for pulling them out of the fabric. Don't apply the same rotating motion to fixed or chain types; follow the structure and handling instructions of what you own.
1. Separate the decoration from the fastener and check whether it is a rotating type
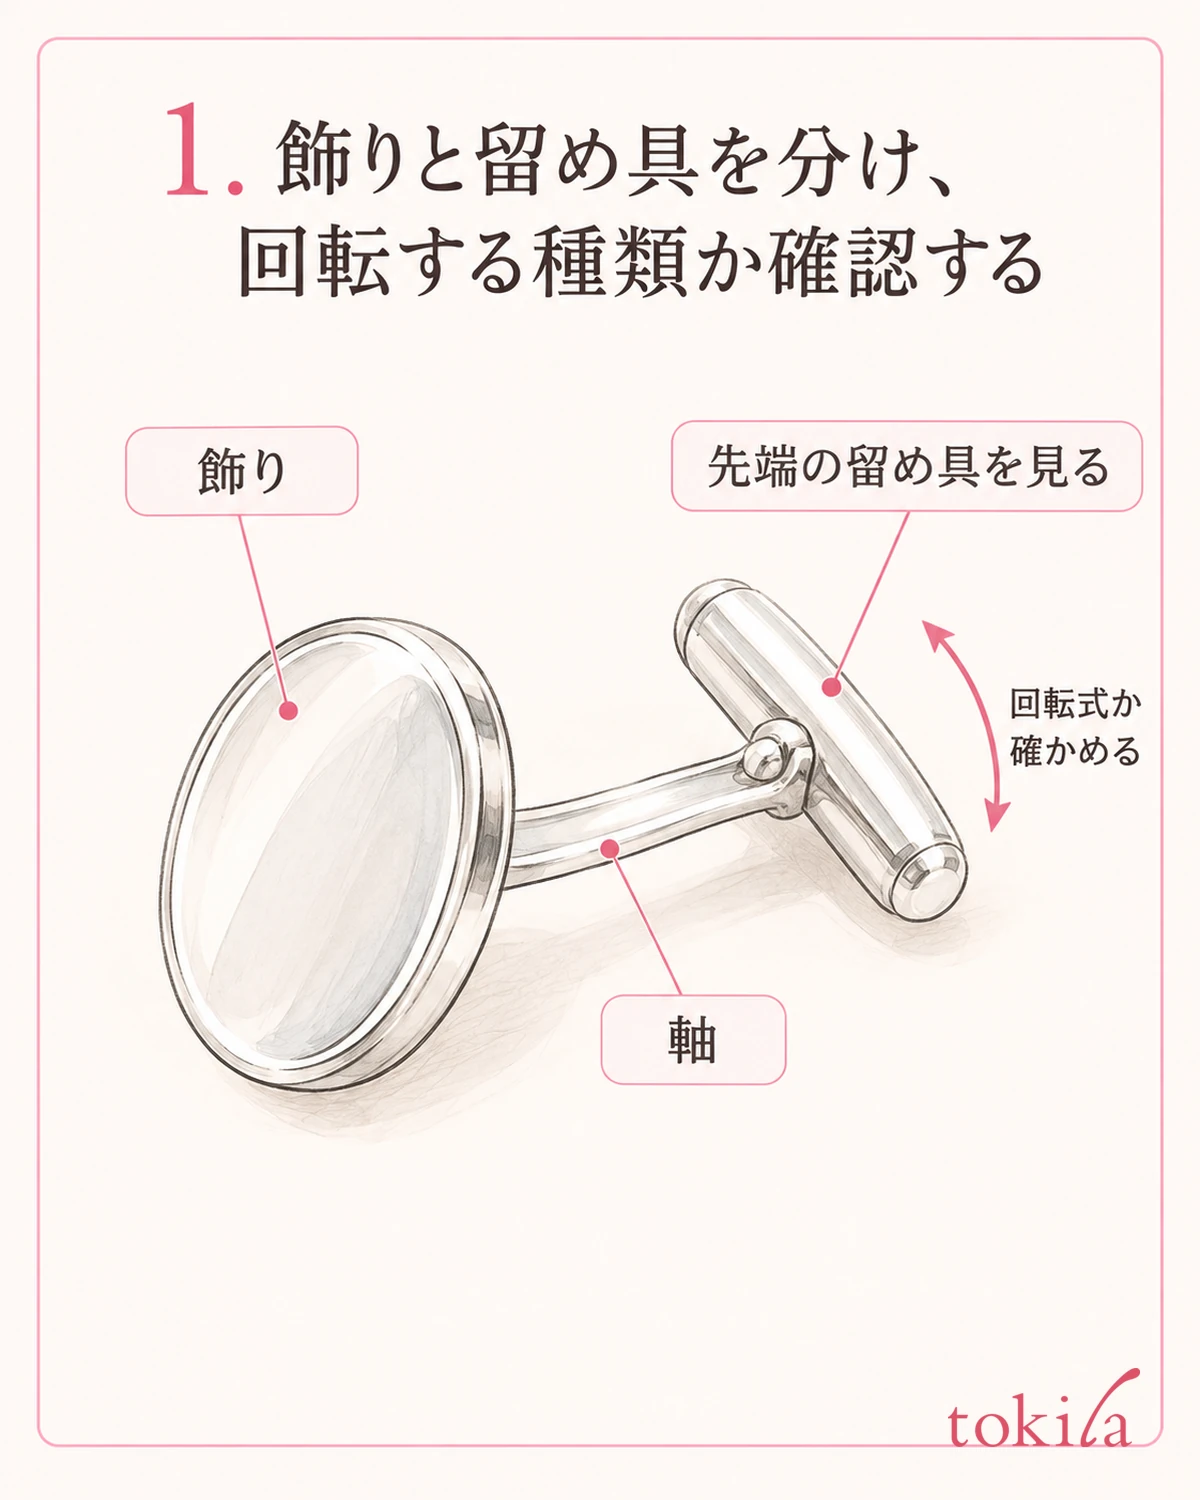
A cufflink is a small accessory that fastens a shirt cuff by connecting its holes. If you look separately at the decoration visible on the outside, the post that passes through the holes in the fabric, and the part on the inside that keeps it from slipping out, it becomes clear which part you are handling. It is a different tool from the ordinary buttons sewn onto a shirt.
At first, look at the inside of the cuff and the fastener at the end of the post. One where you can turn a short bar to lay it along the post is an example of the swivel type handled here. When fastened, that bar crosses the post and makes it hard to pull out of the holes in the fabric.
There are also fixed types where the decoration at both ends doesn't move, chain types connected by a thin chain, and types that combine two parts. Even if they look similar, they don't necessarily come off the same way. Rather than looking for a joint that seems to move and twisting it hard, first check which type it is.
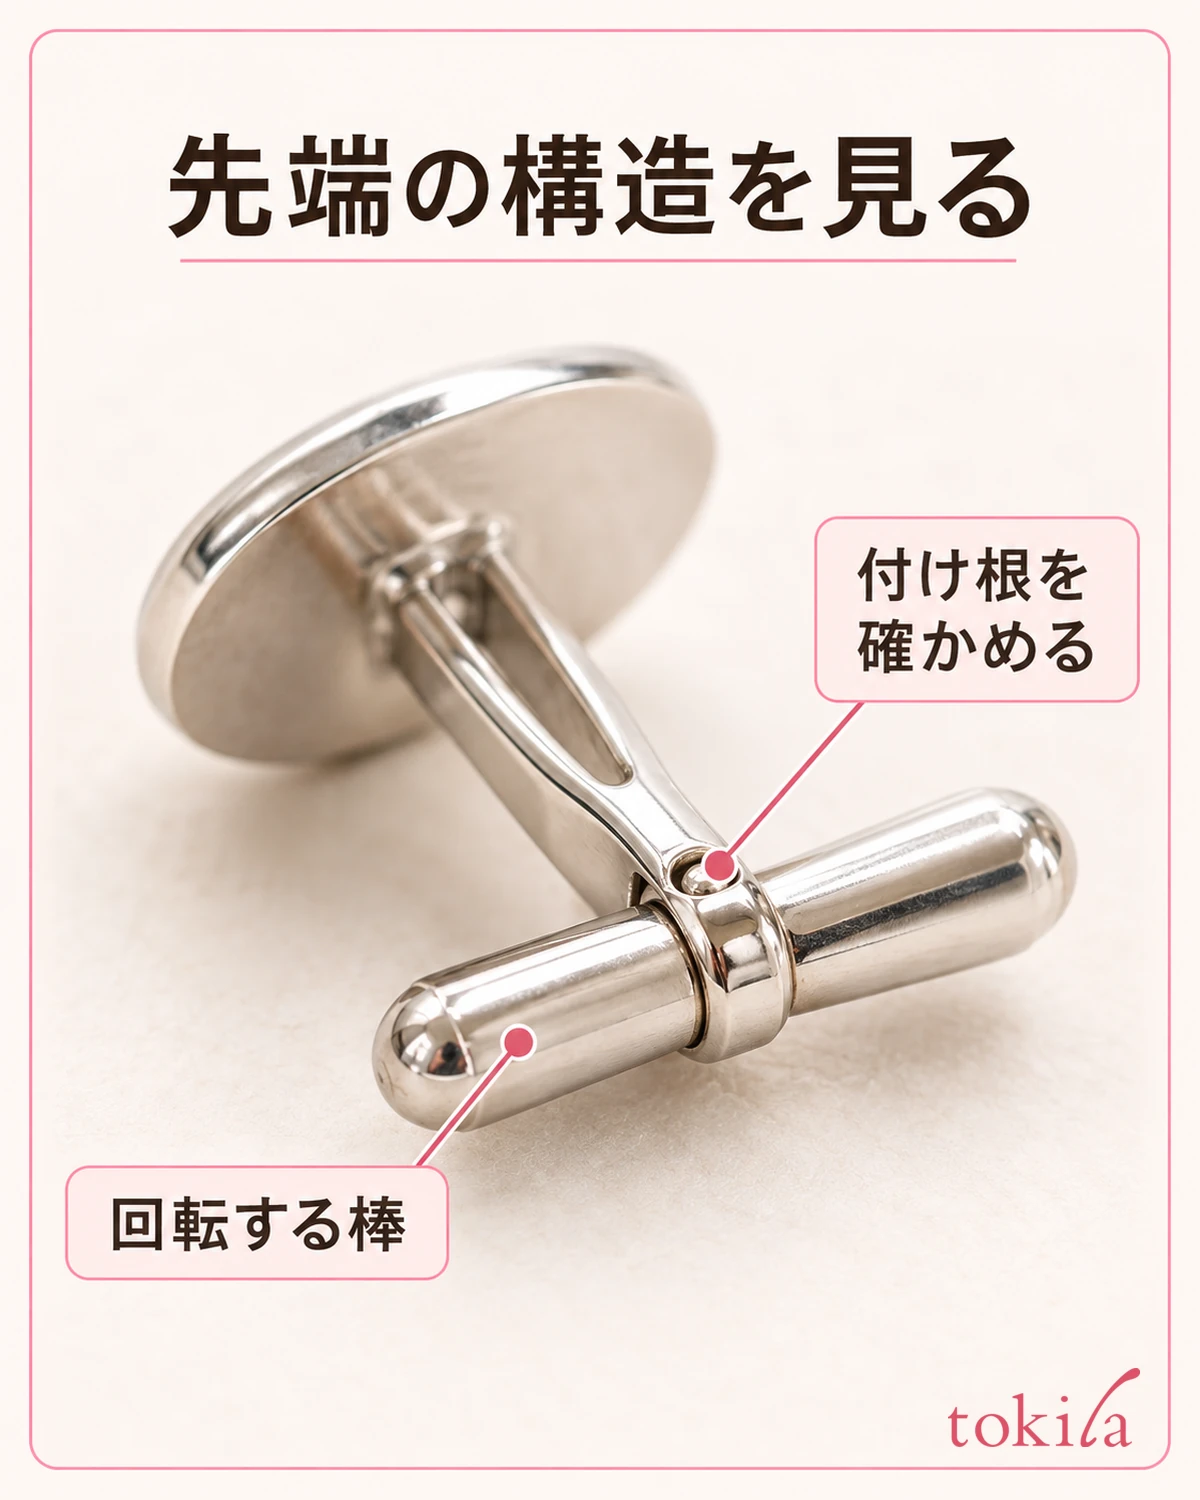
Even once you know it is a swivel type, you are not turning the joint between the decoration and the post. What you move is the fastener at the tip. If the decorative face moves or the post is bent, don't keep going on the assumption that this is a normal moving part.
Once you have taken off one side, always check that the other side has the same shape. If one half of a different pair is mixed in, or the fastener has a different shape, don't simply repeat the same movement as before. Checking that you have a pair is also useful when you put them away.
If it is hard to tell the type, don't proceed by trial and error while pulling the sleeve; move to a bright place. If you still have the handling instructions from when you bought them, match the diagram of the fitting to the shape in your hand. Don't turn it into a procedure of prying open a part you don't understand with a fingernail or tool.
2. Support the cuff at a bright desk and make a place to receive the small parts
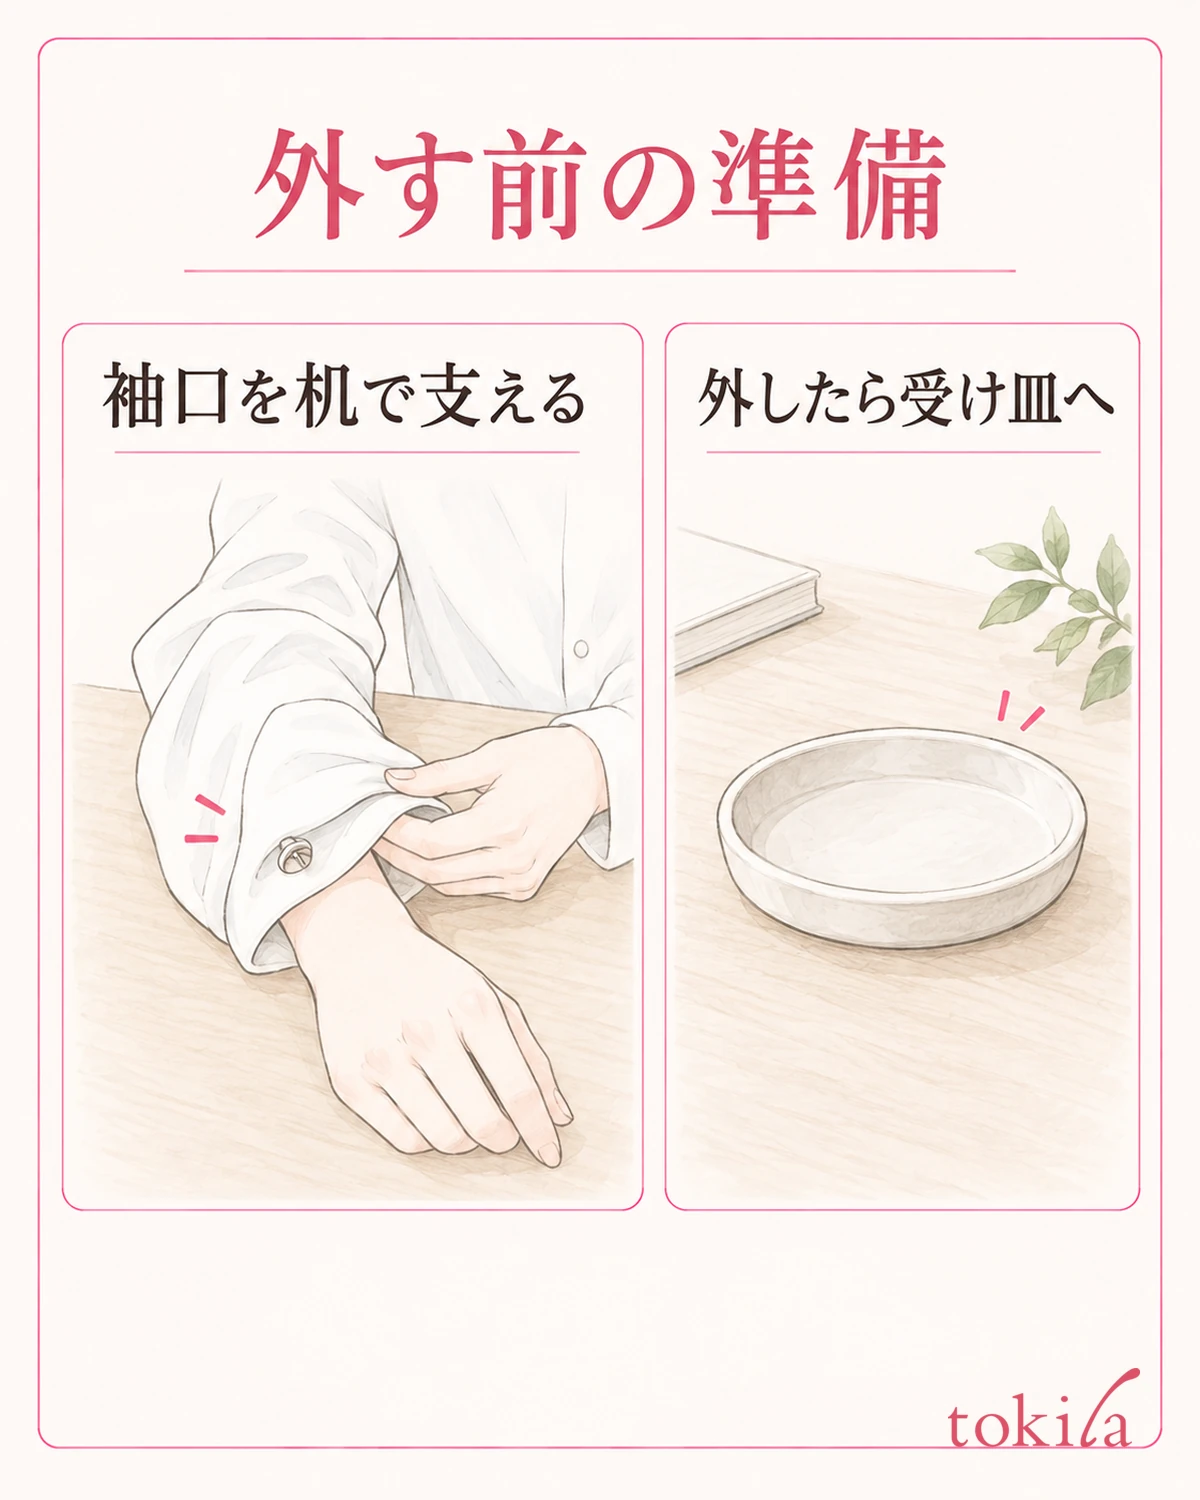
Choose a flat desk as your work area, where you can see the fastener and find any part you drop. Rather than removing them over a sink or a gap in the floor, preparing one place to receive them, such as a small tray, lets you decide where they go right after they come off.
If they get buried in a thick towel or long-pile cloth, the thin post and the fastener are easy to lose sight of. If you lay cloth on the desk, choose something flat where details are visible, and arrange it so the edges don't hang down. Also make sure you don't set the small items on a dirty or damp surface.
Support the cuff with your arm resting on the desk in a comfortable position. If the sleeve of a jacket is covering it, move it aside just enough to see the metal parts. If working would require twisting your shoulder or wrist hard, return to a comfortable posture for now and also consider having someone help.
Before changing the direction of the fastener, check that the fabric isn't being pulled. If you try to open both ends of the cuff wide, the metal part gets pressed against the edge of the hole. Support the cuff by bringing it closer, and make enough slack that you can see the decoration and the fastener.
If you use a small mirror to see your hands, don't hold the mirror and the sleeve at the same time in an awkward posture. Use a mirror that stands stably, and look for an orientation where you can see the fastener itself directly. It is important not to apply force relying only on the rotation direction you see in the mirror.
Before removing them, clear a place for the pair and keep it separate from other accessories. If you look for a place to put them while working, the pair can easily get separated later, for example when one goes into your pocket. The preparation is not to add more tools, but to secure a clear view and a place to put things.
3. With a swivel type, lay the fastener along the post and pull the fabric through one layer at a time
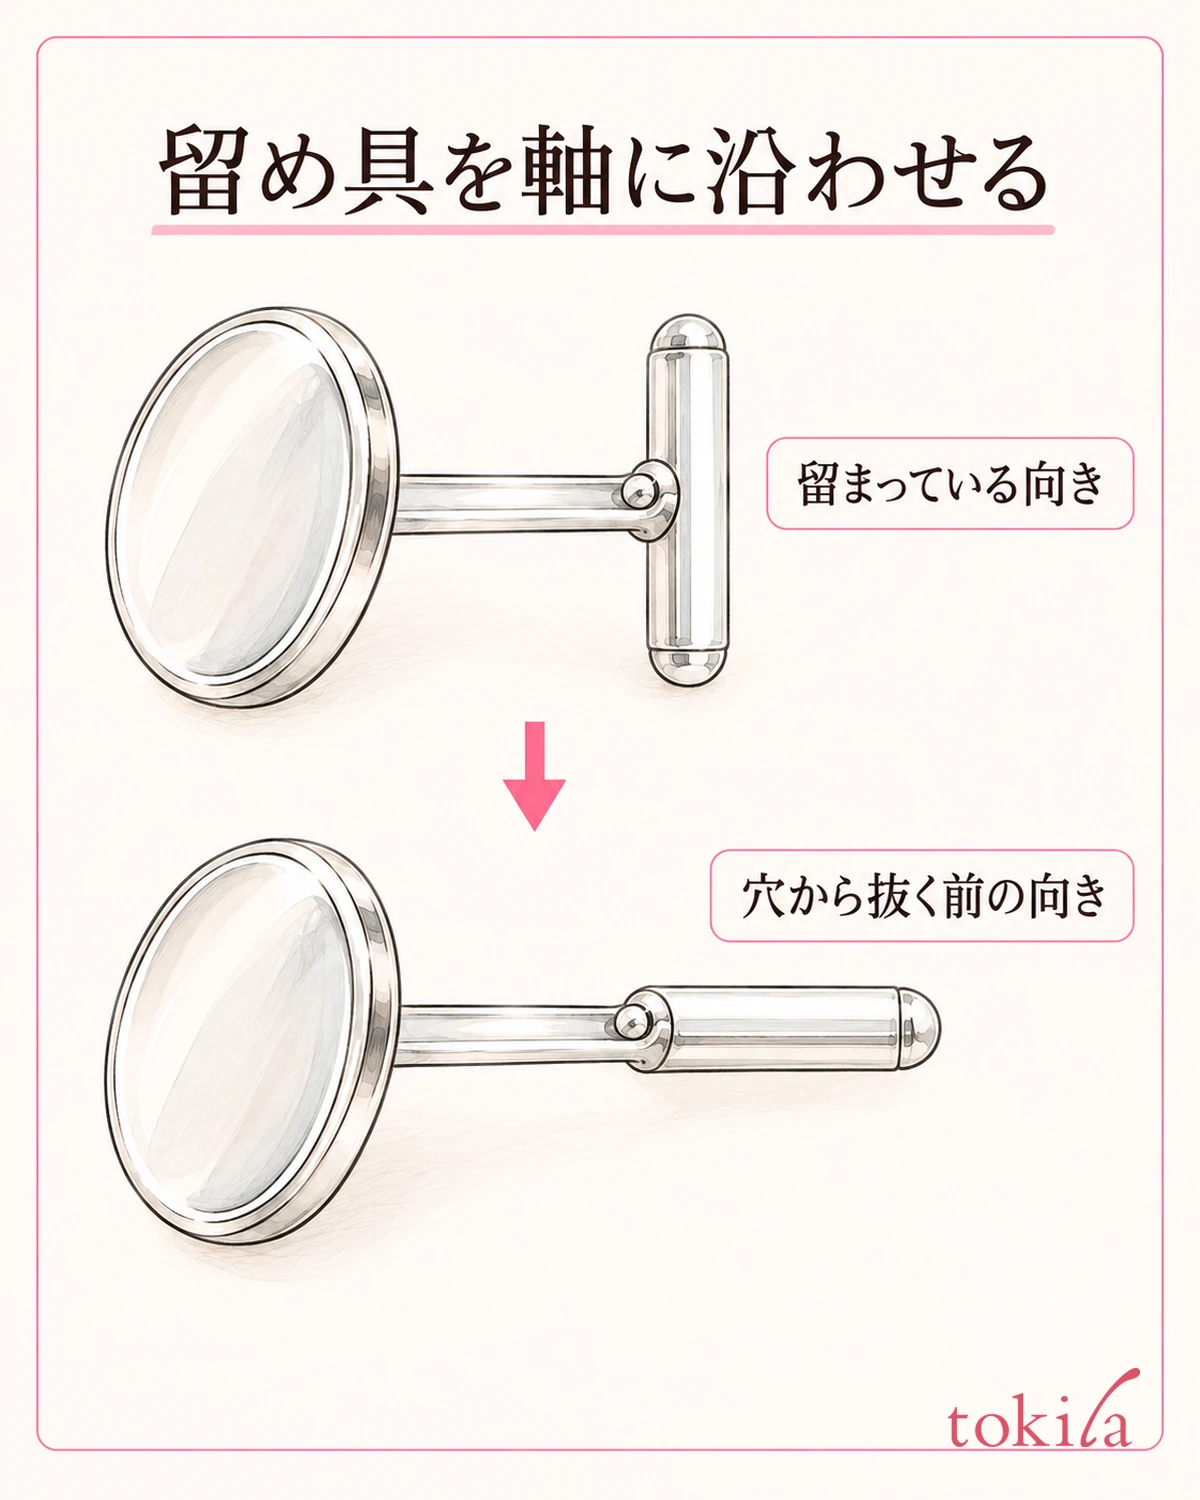
Once you have confirmed it is a swivel type, steady the cuff and the decoration side with one hand and hold the short fastener at the tip with the fingers of the other. Without pulling the sleeve hard, move it with the metal part not pressed against the edge of the fabric.
Turn the fastener within the range in which your item normally moves, and lay its long direction along the post. Picture returning it from sticking out sideways to a thin orientation that can pass through the hole in the fabric. The angle of rotation and the direction of movement differ by structure, so don't force it a full turn in a fixed direction.
Once the orientation is lined up, pull it little by little through the hole in the inner fabric, along the fastener and post. Rather than pulling the decoration far away and stretching the fabric, match the position of the hole to the direction the metal part moves. If the edge of the hole catches on the metal part, stop there once and return the fabric to its proper orientation.
When one cuff layer is free, pull the post out of the remaining hole in the same way, and catch the whole piece in your hand. A folded-back cuff has overlapping layers of fabric, so don't judge that everything is off just because one layer has come through. Check that no fabric remains on the post before placing it in the tray.
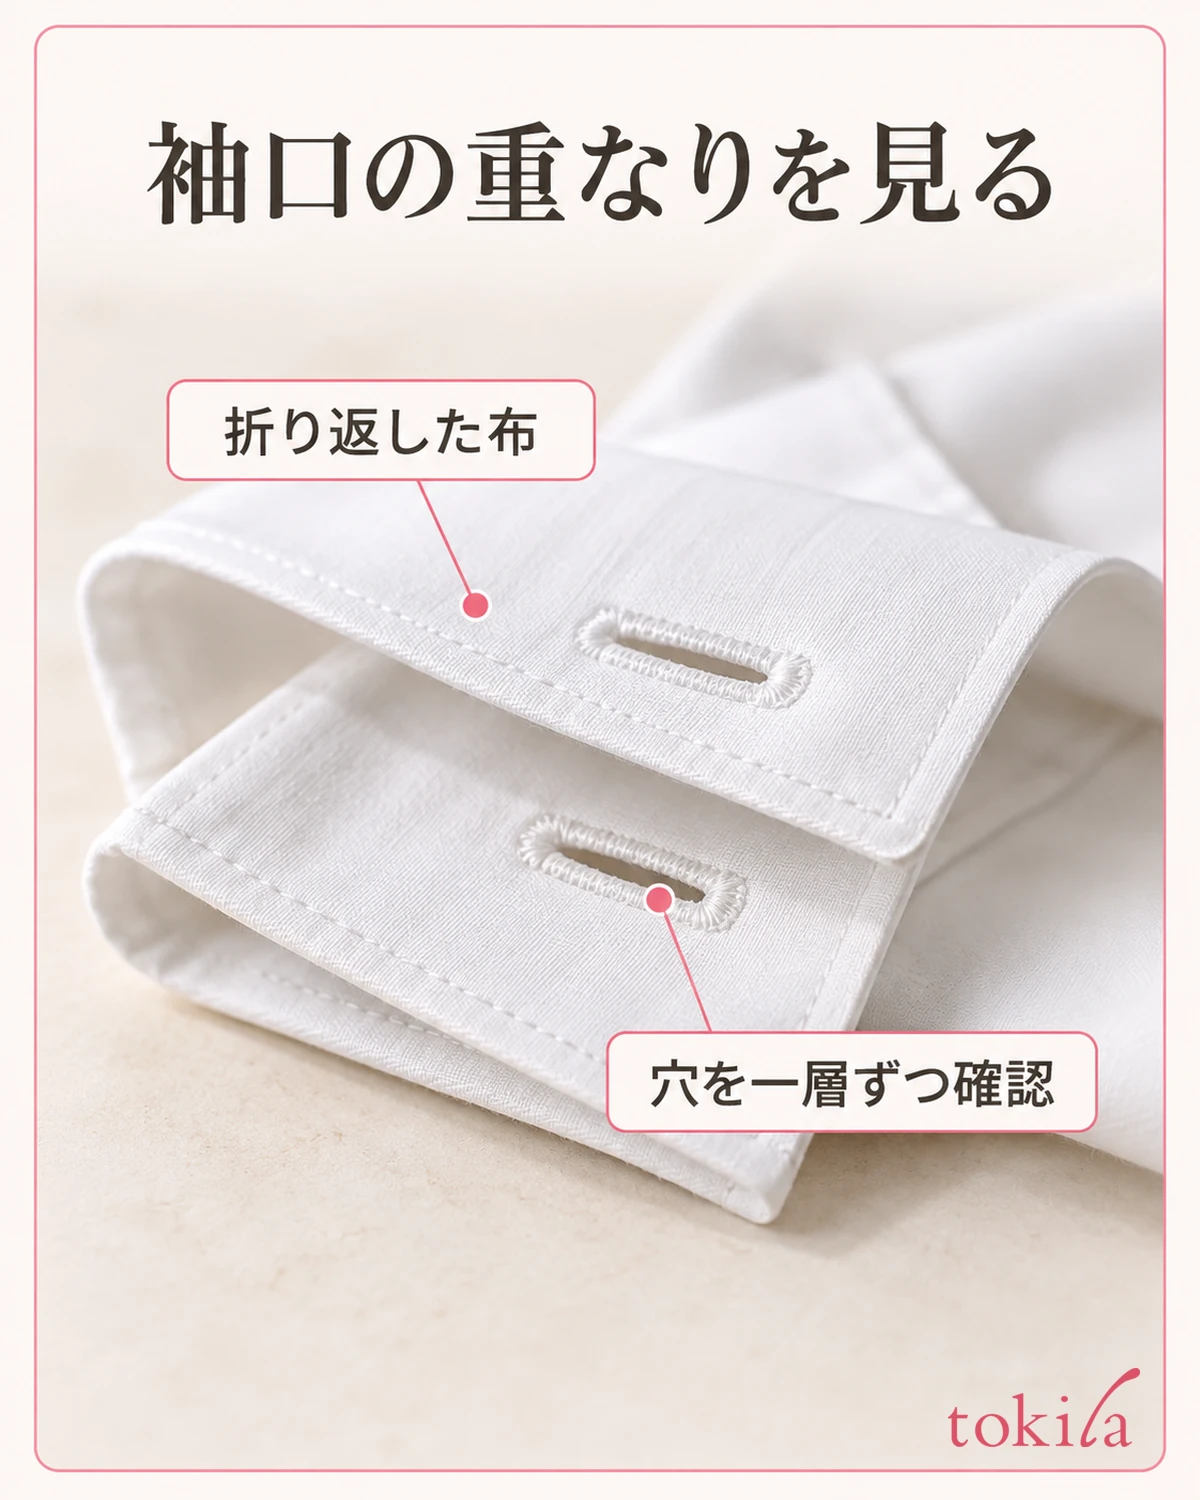
"One layer at a time" here does not mean unpicking the shirt's stitching. It is an operation for checking the overlapping layers of fabric and the holes in order. Don't pull on the seams trying to widen the holes, or crush the fastener.
If it still doesn't pass even after trying the same steps, look again at the position of the metal part and the fabric. Separate the situations: the fastener has returned sideways partway, the holes are misaligned, or the edge of the fold is caught. Before adding force, check where it stopped.
Once you have removed the fastener and opened the cuff, you can see all the way to the back of the folded fabric. Don't follow only the holes visible from the front; check whether any layer remains on the inside. If you move on to rolling up the sleeve, remove all the metal items first and then think about how to fold it to suit the garment.
4. If it catches, review the direction of the metal part and the edge of the hole
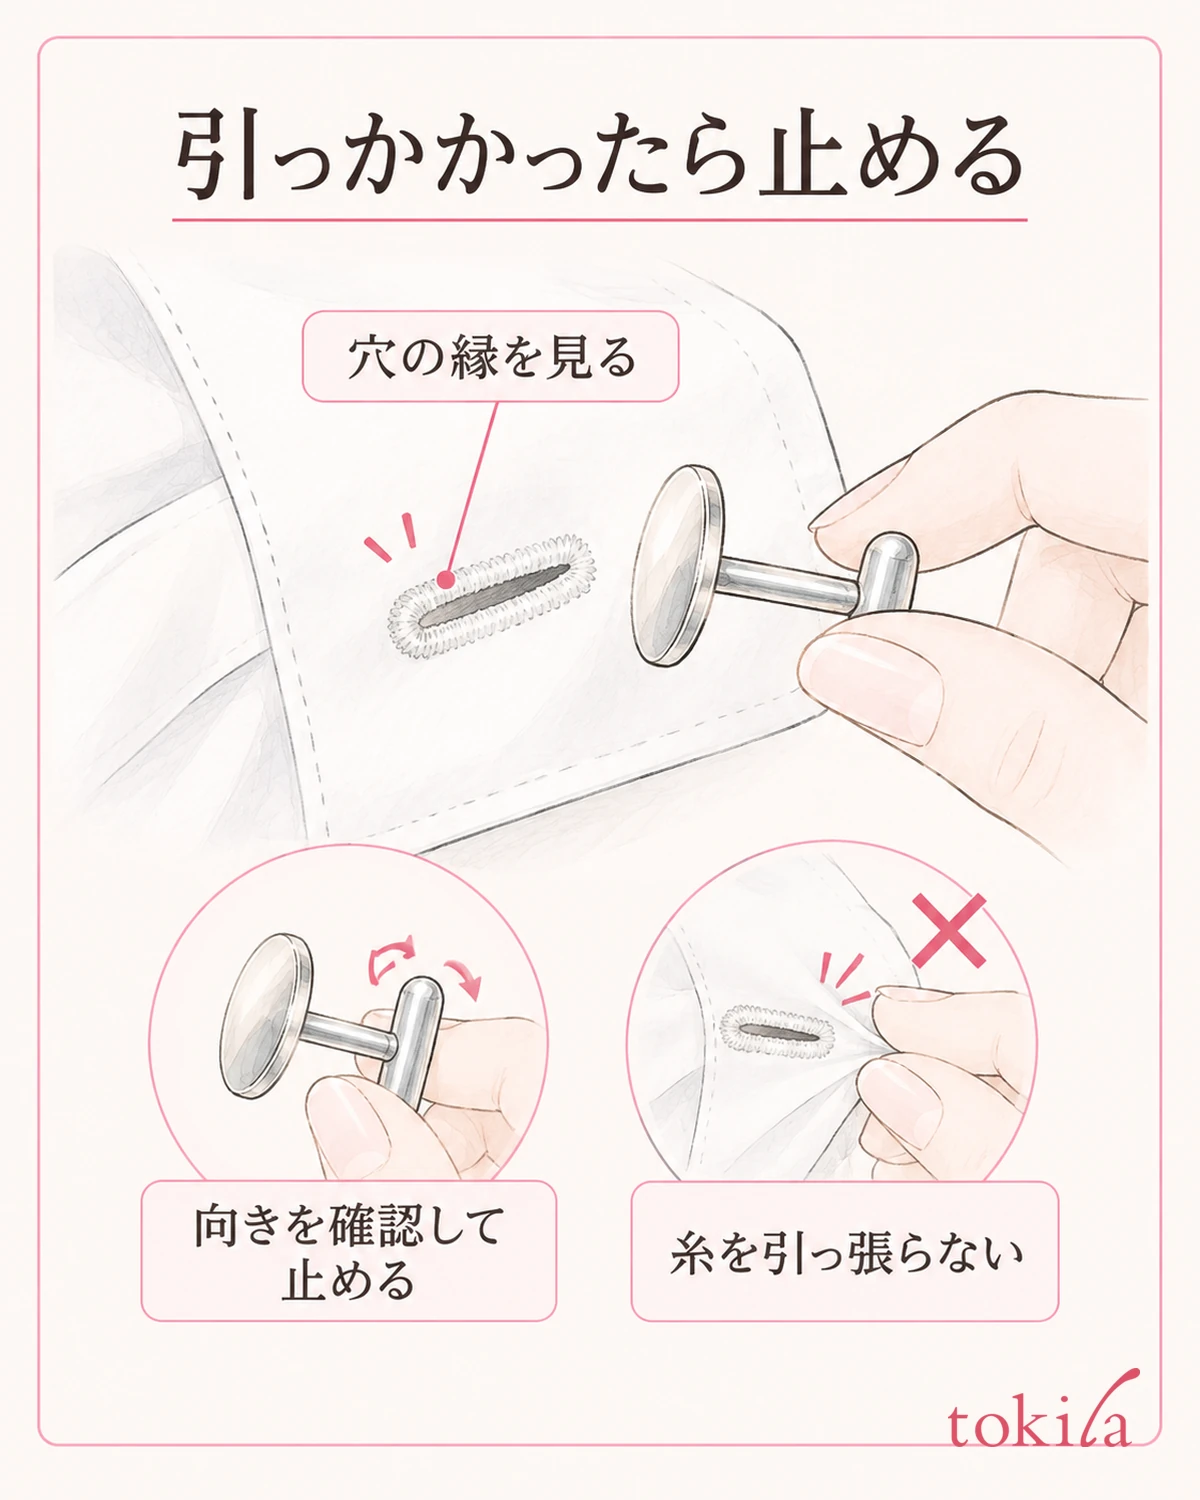
When it is hard to pull out, with your hands stopped, look in this order: the tip of the fastener, the middle of the post, and the edge of the hole in the fabric. If the bar at the tip isn't lying along the post enough, adjust its direction before pulling the fabric. If the fabric is slanted, return it to a position that follows the metal part.
If a thread seems caught on the metal part, don't assume it will come free if you pull; loosen the tension on the fabric. Pulling the thread out with a fingernail or cutting it on the spot may damage the edge of the hole or the stitching. If you can't free the fabric from the metal part, don't keep trying to remove it by force; consider asking for advice on how to handle it.
Even when the fastener itself doesn't move, don't resort to DIY measures such as turning it with pliers or another piece of metal, or applying oil. If it is unconfirmed whether it is a moving part or whether there is dirt or deformation, you may damage the decoration or the fabric as well. One option is to leave it in a state where it cannot come off and check with the place you bought it.
If only one side is hard to pass, compare not only the size of the metal part but also the shape of the cuff hole and the overlap of the fabric. However, don't push the hole wider or force a different fastener through for the comparison. Think of finding a left-right difference and modifying it on the spot to fix it as separate things.
For items such as fixed types where the tip part doesn't rotate, the rotating operation in this section will not solve the problem. If you don't know how to handle it, check the removal method that suits that type. Don't conclude that it is broken because it doesn't rotate and twist the joint with the post.
Even after it has passed through once, if you are concerned about looseness or bending of the metal part, don't refit it as it is. Don't judge that there is no problem for use just because you managed to remove it; check whether there is any change in either the fabric or the accessory, and carry that into your check before the next use.
If you want to shorten the sleeve after removing them, Checking the width and overlap of rolled sleeves may also help. Check it separately from the rotating operation of the cufflinks.
5. Match up the pair, and check before washing and for next time
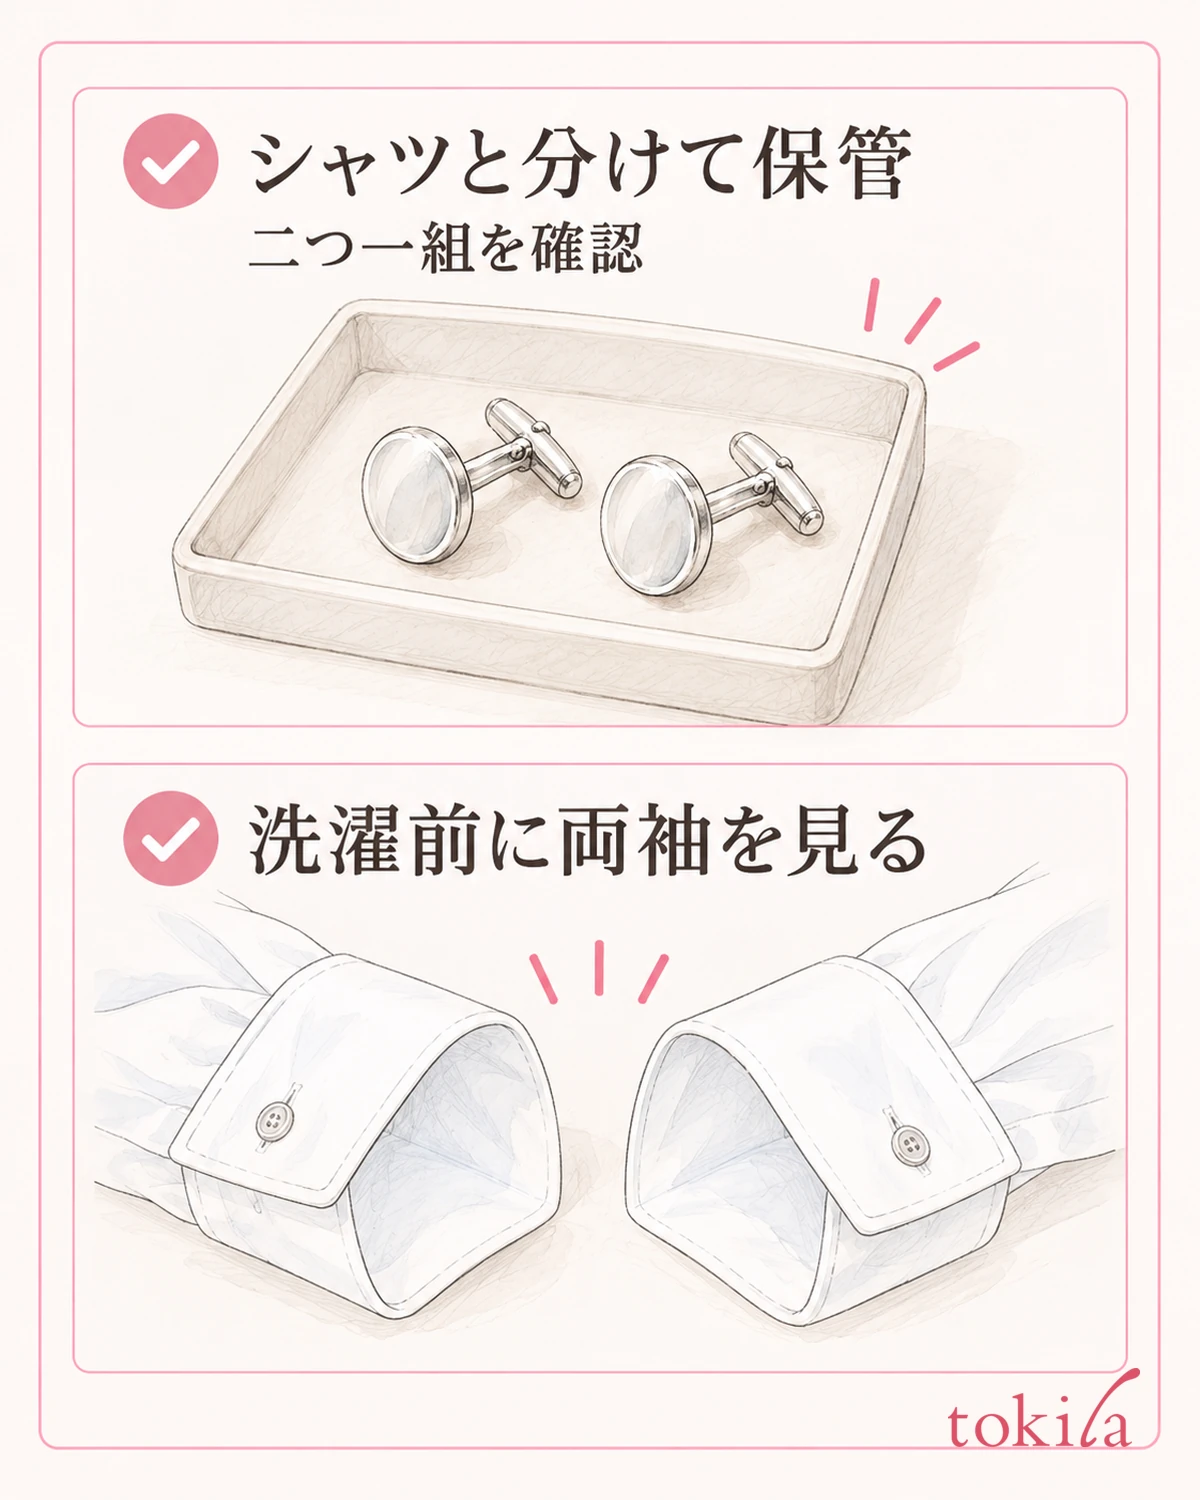
Line up the removed cufflinks on the tray, compare the shape of the decoration and the fastener, and check that you have a pair. Don't leave only one side near the sleeve; once you have removed both, set them apart from the shirt.
Before sending the shirt to the wash, check that nothing is left in either cuff. Also check that no post is hidden inside the fold, and that you haven't temporarily put one in a pocket. Handle the garment's care label and the care of the accessory separately.
When storing them, follow the handling of what you own and keep them separated so they don't rub hard against other metal items. Don't treat washing with water or polishing as a method common to all materials; keeping in mind that there are decorations and joints, do only the care that is permitted.
For the shirt you will wear next, check that both ends of the cuff have holes for cufflinks. A shirt with just ordinary buttons does not necessarily have matching holes. Don't make holes yourself or cut off the buttons; choose a cuff that is compatible.
If you want to leave something for next time, a single step where you got stuck this time is enough, such as "lay the fastener along the post before pulling it out" or "check the holes in the fold one layer at a time." Rather than deciding right away that the item is bad, you can sort it out by the direction of the metal part, the position of the fabric and where you put it.
When taking off cufflinks, start by looking at the fastener before pulling the decoration. With a swivel type, lay the tip along the post, support the fabric and pull it out of the holes in order. If it doesn't move, don't continue by force; checking the structure and the place where it catches makes it easier to choose your next action.
Written by: tokila Editorial Team. We sorted out the steps for checking according to the structure of what you own.



