
The pump on the lotion or serum you just bought won't press down. Turning the head only turns the whole bottle, and you aren't sure how to open it. Before adding more force, take a look at which parts move and which parts stay fixed.
This article covers what to check when you start using a skincare pump bottle. Using five diagrams, it goes through the pump head you press, the clip at the neck, the outer cap, and how to dispense the first time. Not every bottle opens by turning. Follow the direction and number of turns on the label of the product you have, and this article does not go on to methods for taking apart and fixing a clog or breakage that happens partway through use.
1. Tell Apart "Won't Press Down" and "Presses but Nothing Comes Out"
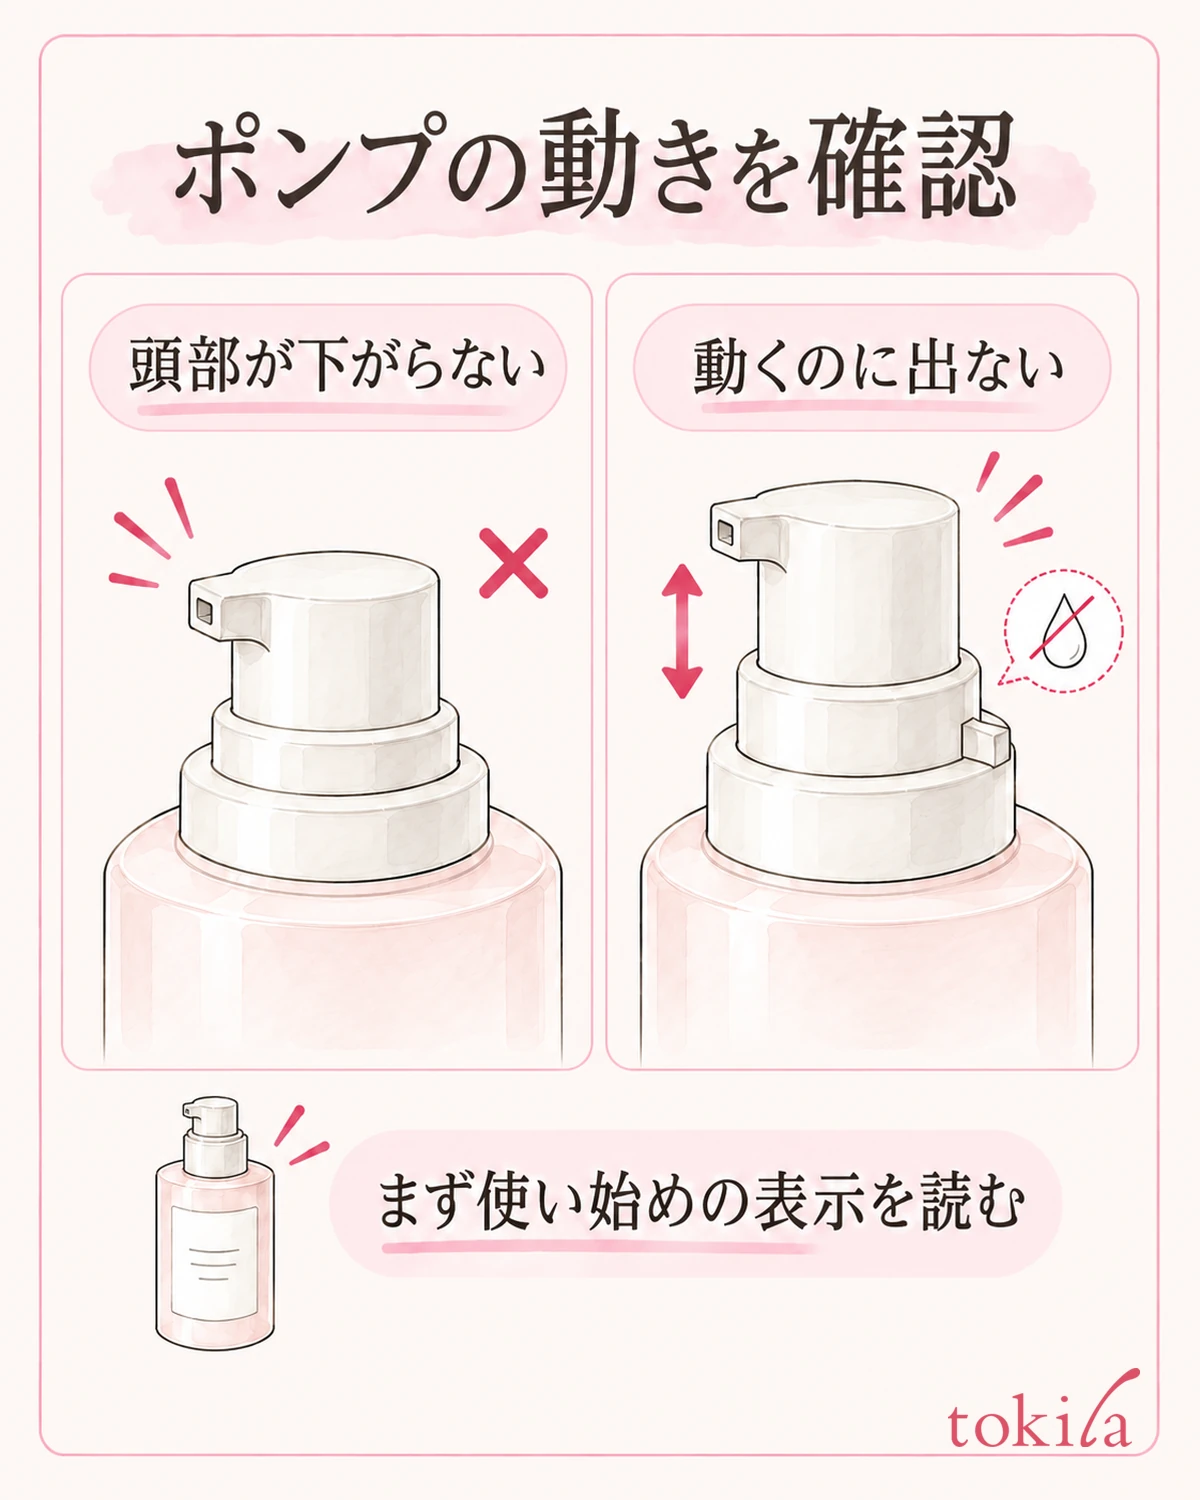
First, set the bottle on a flat, stable surface. Look at whether the head won't go down, whether it is locked in a low position, or whether it moves up and down but no liquid comes out. All of these feel like "the pump doesn't work," but the place to check is different for each. Avoid pushing again and again without looking at the part that isn't moving.
Next, read the instructions for starting to use the product on the bottle or its outer box. Look for the names of the parts you operate and the diagrams, such as "turn the nozzle," "remove the stopper," or "remove the cap." If you check before throwing away the box, you won't mix up the operation with that of a similarly shaped bottle. Also confirm that the diagram matches the position of the parts on your bottle.
The head is the part you press with your finger, the neck is the joint between the body and the pump, and the spout is where the liquid comes out. Distinguish whether the part you are told to turn is the head or the neck. Some bottles open when the neck is loosened, so don't assume you can turn it anywhere.
Also separate a bottle you are opening for the first time from one that worked once and then stopped dispensing. Don't repeat the steps for suspecting a starting lock on a problem that appears partway through use. If liquid has already come out, go back to the product's precautions for continued use and check the remaining amount and the condition of the outlet separately.
Even if you can read the text, if you can't tell which part it refers to, don't go further at that point. Compare the ring below the spout with the boundary of the lid on the body. Rather than looking for a part that isn't in the diagram and pulling it off, check whether the part you are told to remove actually exists on your bottle.
The order of checking is the current movement, the position of the parts, and the operation shown on the label. Don't try it with the spout pointed at your face; keep the whole bottle visible in your hands. A place where you can set the instructions and the bottle side by side may make it easier to compare the parts than in front of a mirror.
2. Tell the Outer Cap from the Clip at the Neck
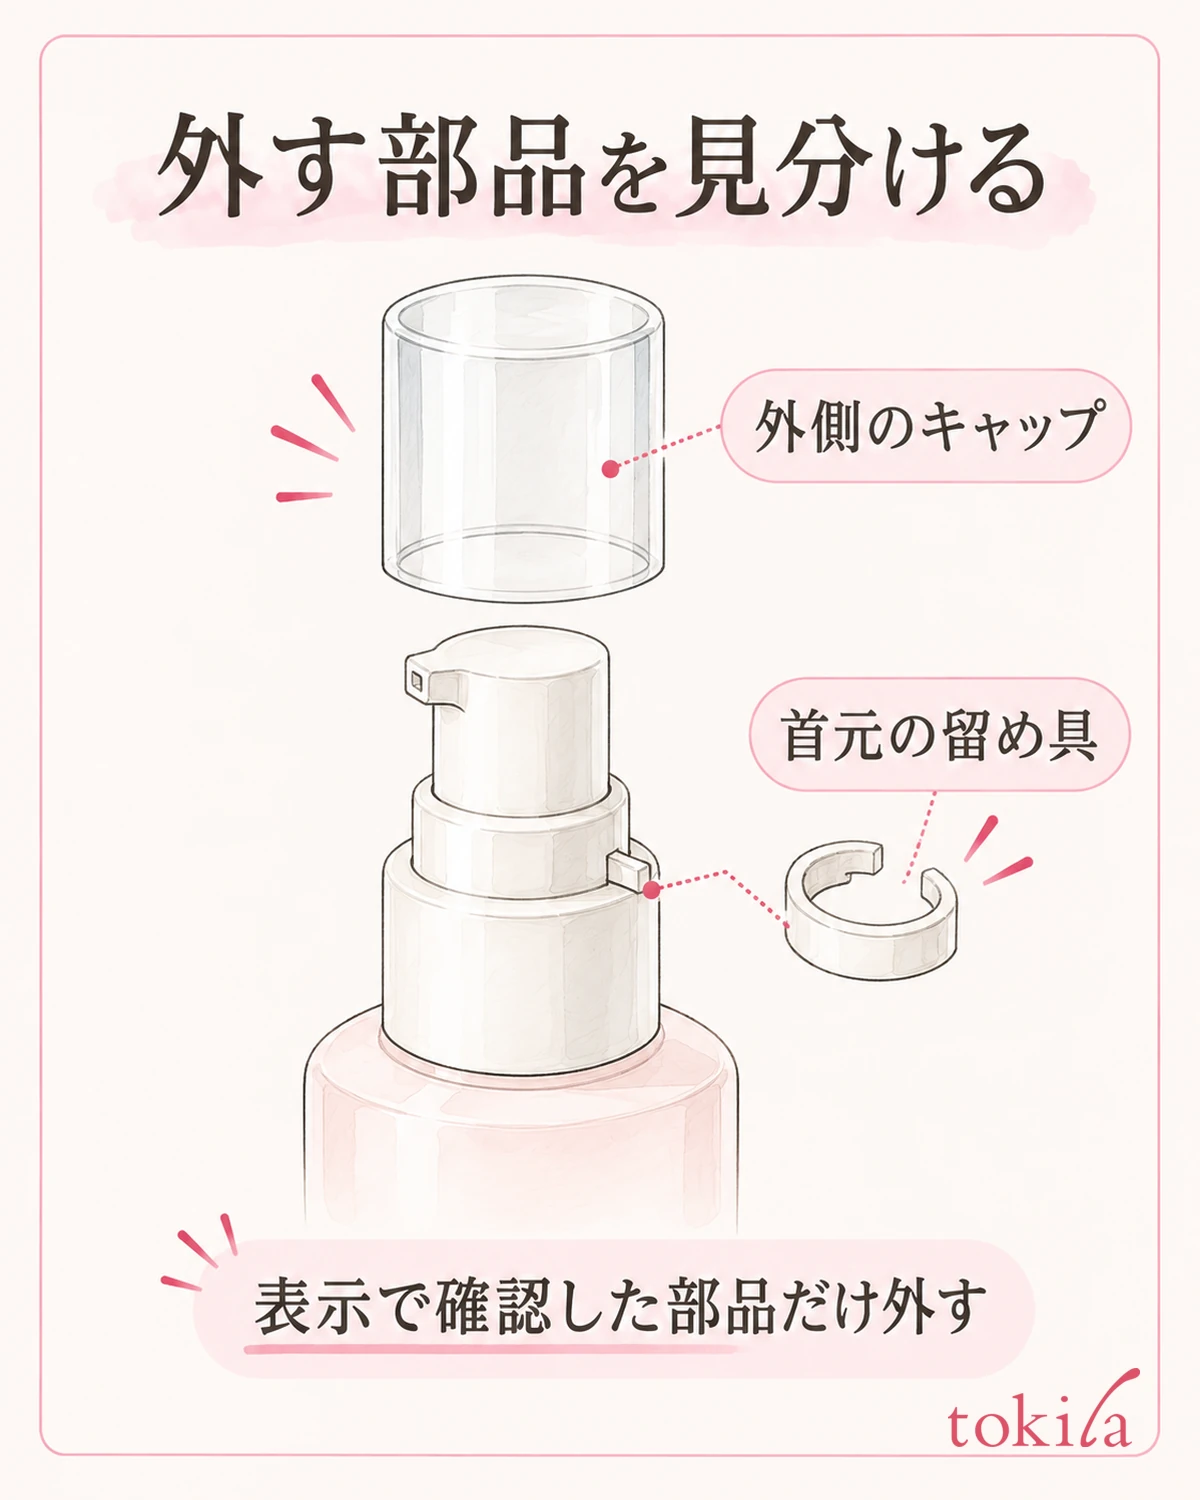
If a transparent cover fits over the whole head, check the label to see whether it is an outer cap. If it is meant to be removed, take it off in the direction shown, and then look at the head. Don't confuse the case where you were pressing the outer cover with the case where the pump itself won't move.
You may also see a small ring or a clip-like part at the neck. However, not every visible ring is a clip meant to be removed. Match its shape and position against the diagram on the label, and remove it by the given steps only when it is specified as a stopper to be taken off. Don't pry at a part that your fingers can't remove with a fingernail or a tool.
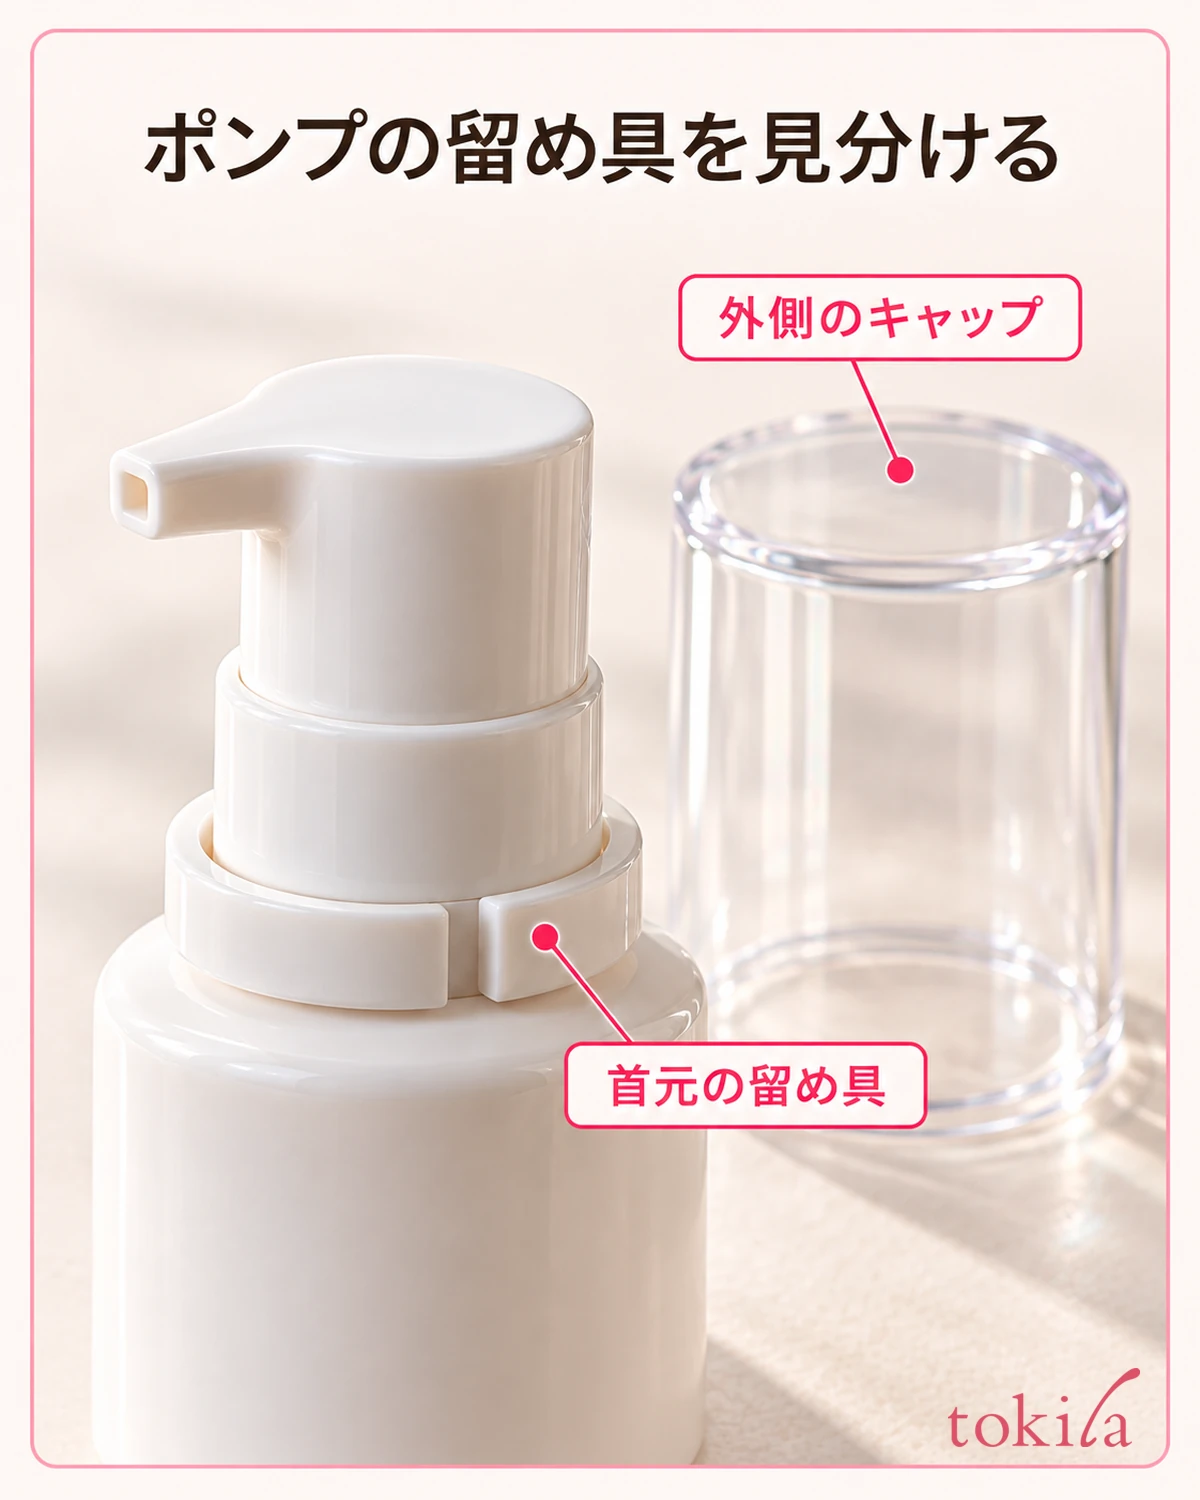
Put the cap or clip you removed somewhere it won't roll off. If you set it on the edge of the sink just before using the bottle, you will have to let go of the bottle while you look for a fallen part. Check on the label whether it is a part you will use again or one that is only for opening, and don't throw away anything you may need.
Once the clip is off and the head has some room to move up and down, let go for a moment and look at its shape. Even if it still won't press, don't go on to cutting off the ring. Go back to checking whether a cap remains or whether the label shows another lock operation.
You don't necessarily have to do both the turning of the head and the removal of the clip. Choose only the steps one bottle needs. Rather than adding a way of opening that worked on another bottle, match the diagram and the actual bottle in front of you one step at a time.
If small text or parts are hard to see, bring the bottle closer and shine a light on it. Rather than regripping hard with wet hands, wipe off the water and check the boundaries of the parts before you work. It is also important not to try to open it one-handed in a posture where you might drop the bottle.
3. For a Bottle That Says to Turn, Match Where You Hold It and the Direction
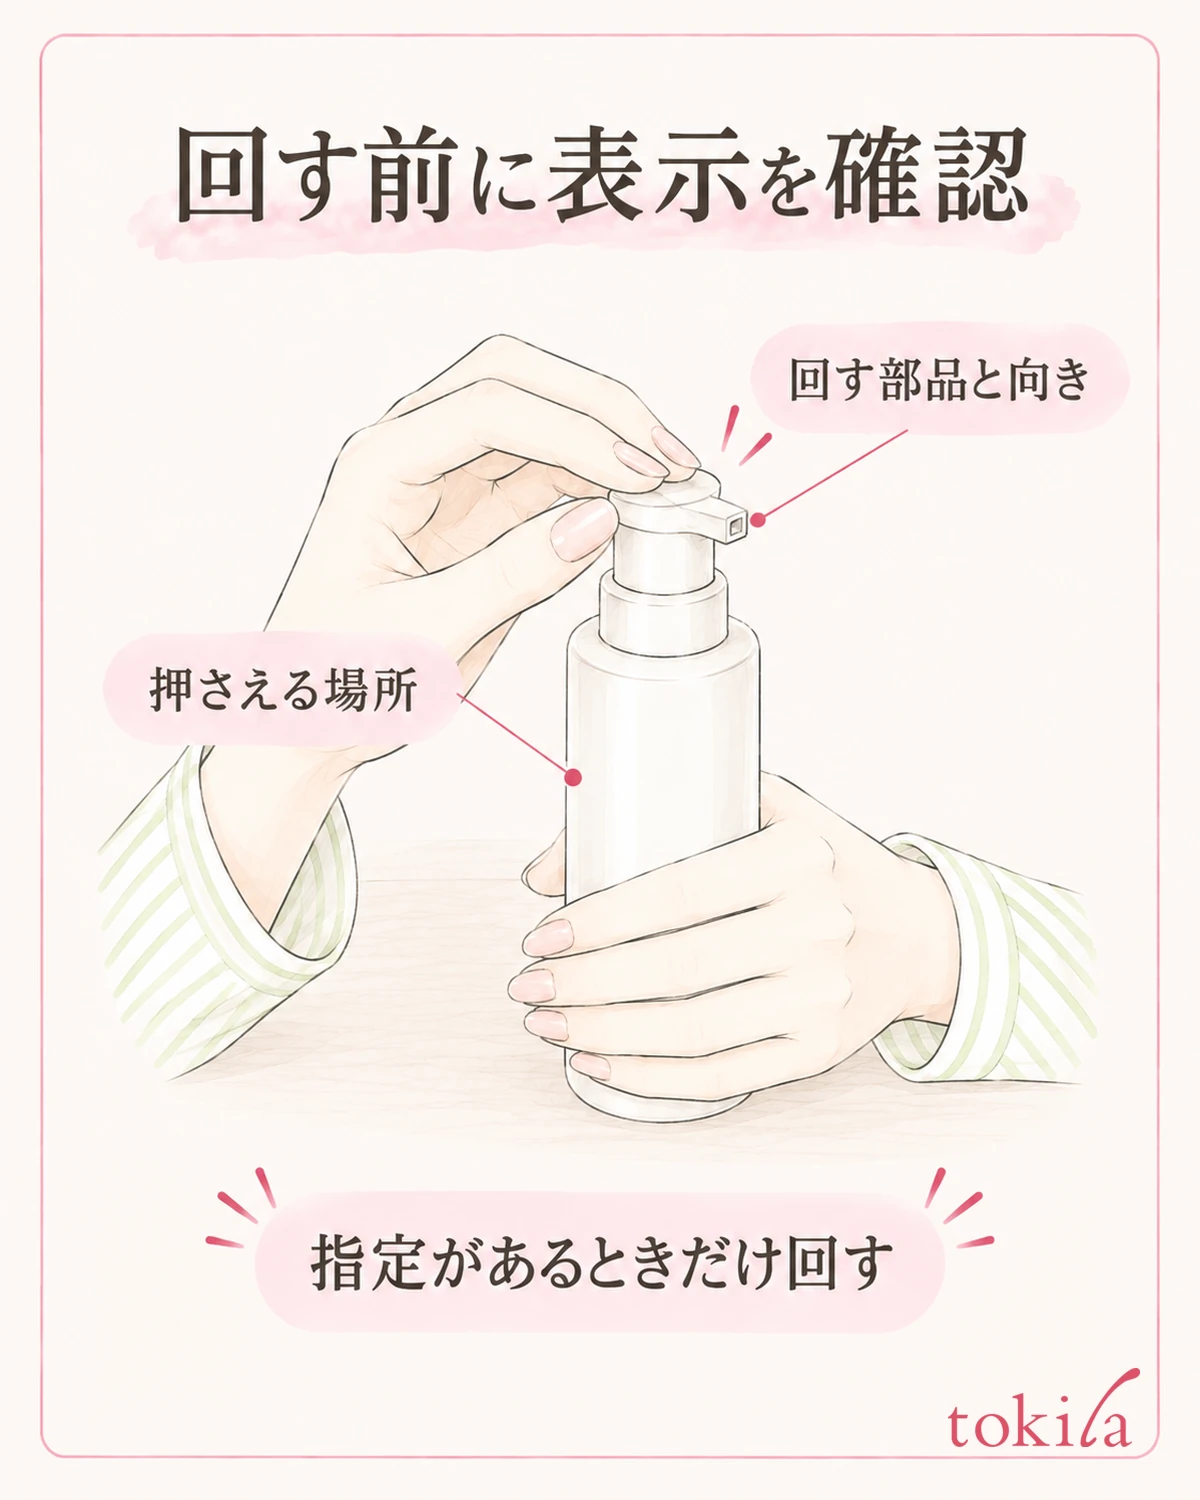
If the instructions say to open by turning the head, first check the arrow showing the direction and the place to hold. Even if some examples appear to turn counterclockwise, don't decide that all of them go the same way. If you can't read the label, don't twist forcefully in both directions; stop until you can confirm how to open that product.
Support the body, set on a flat surface, with one hand, and put the other hand on the specified part. If the neck turns along with it when you turn only the head, review where your hands are and which part you are holding still. Rather than twisting the whole bottle in the air, divide the operation into small steps while watching the moving part.
For a bottle that says to retighten the neck before turning the head, keep to that order. On the other hand, don't add the same retightening or removal to a bottle whose neck is not meant to be opened. Don't judge from similar looks alone whether there is a tube inside or whether it is fine to open.
Judge whether it has opened by whether the head has reached the position shown in the instructions. Don't use the feel of another bottle as the standard, such as waiting for a click or counting a number of turns. Even after it moves, don't keep turning; check whether you can go on to the next step in the instructions.
When you change the position of the body and head, make sure the spout doesn't point at yourself or the people around you. If you press by mistake in the middle of opening, it is easier to handle if you have already looked at where the liquid would go. You can also prepare by keeping things you don't want to get wet away from the bottle.
Stop if it takes so much force that your hands hurt, if the parts tilt, or if the body flexes as if it might crack. Don't try to solve it with something not in the instructions, such as gripping it with pliers or scissors, applying heat, or gluing on something to prevent slipping. Chipped parts or leaking are also not things to fix by pumping it empty the first time.
4. After the Lock Is Off, Check How to Press the First Time
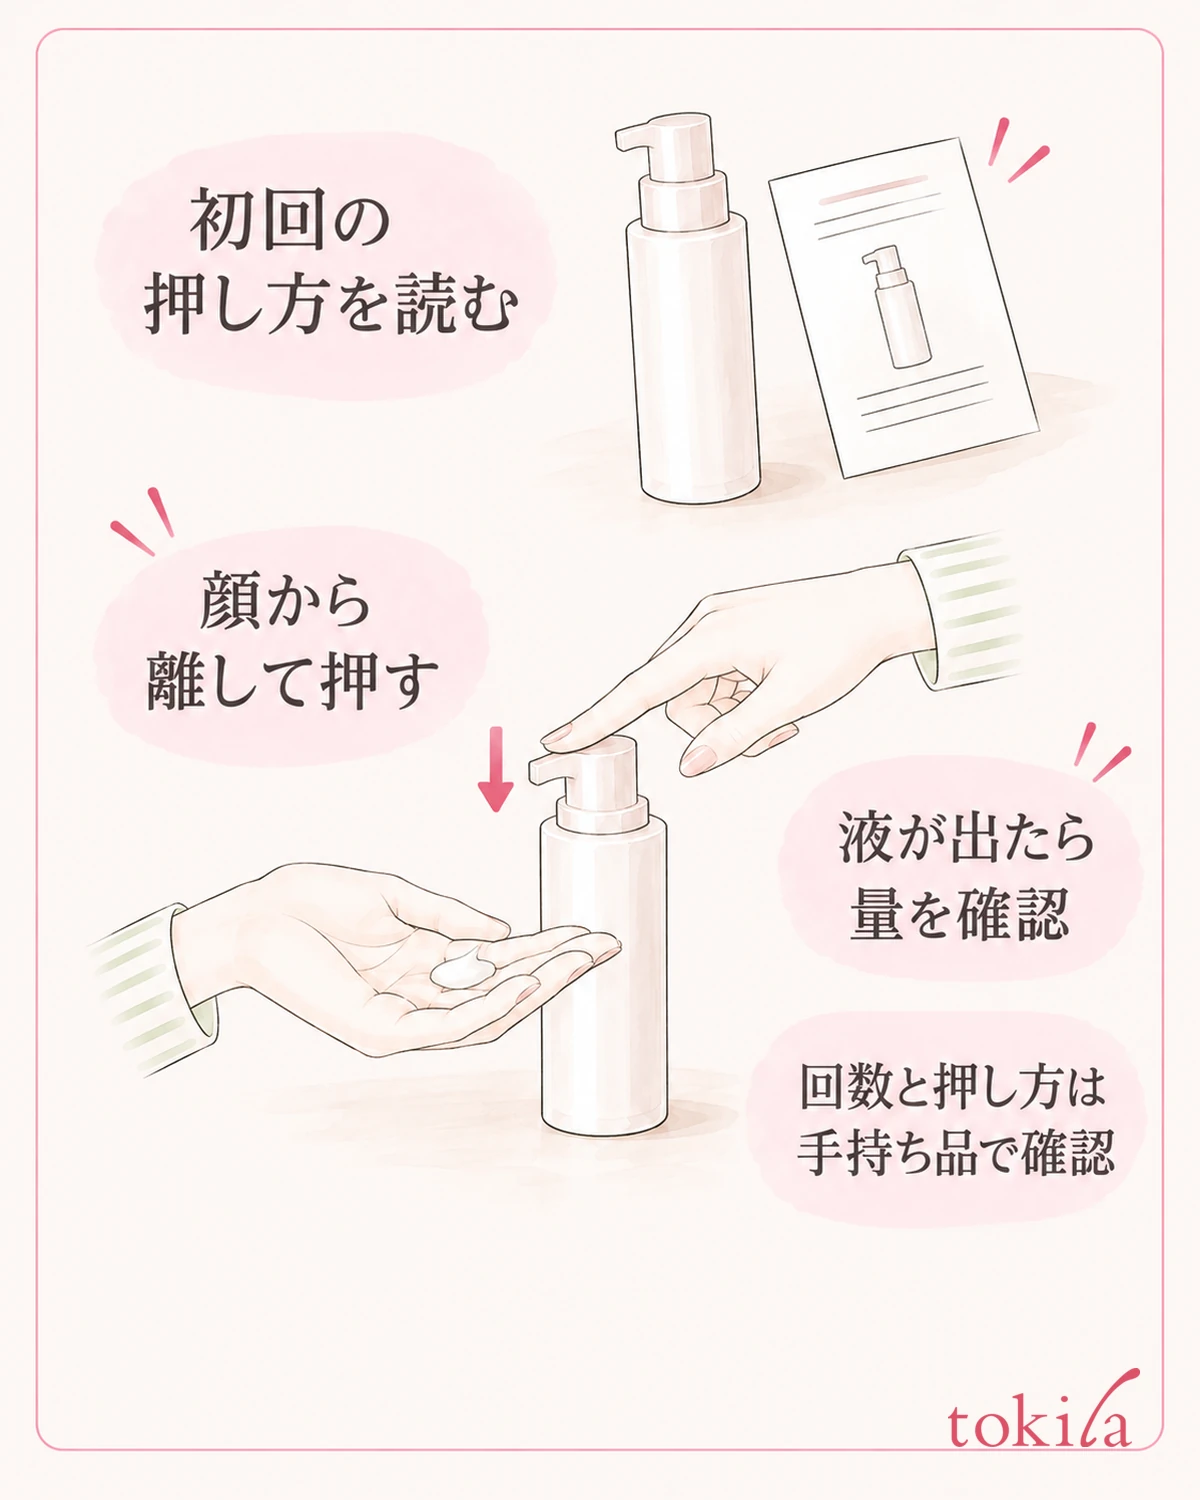
Even when the head starts to move, the first press doesn't always bring out liquid. Check whether the instructions say to press several times at the start, or to press slowly all the way down. The number of presses and the speed depend on the bottle's mechanism, so don't make a common upper limit or guideline such as "ten presses will bring it out."
Do the first operation away from your face, watching where the tip of the spout points. If you have a hand ready to receive it, you won't have to rush to put your hand under it the moment the liquid begins to come out. Don't press the outlet against your hand; keep the body steady and press as the label says, and once liquid comes out, stop for a moment and check the amount.
If you keep pressing quickly while nothing comes out, it becomes hard to follow the amount when it does start. Break the motion into steps: press, watch the head return, look at the outlet, and check how much actually came out. Separate the work of dispensing from the work of applying, so that you don't count the liquid from the test pumps together with the amount you are about to use.
Once liquid has come out, follow the single-use amount for the product you have. Pressing the pump halfway doesn't necessarily give exactly half the amount. If liquid spills when you take it into your hand, you can also see how to shape your hand and place the bottle so toner doesn't spill. Releasing the lock and adjusting the amount you use on your face are separate steps.
If nothing comes out after the first operation described in the instructions, before you open it and look inside, read whether there is a note saying not to take it apart. Don't move on to improvised fixes such as adding water, transferring it to another container, or pushing in a needle. Some mechanisms are used without removing any parts, so don't decide how the structure works just because nothing comes out of the outlet.
5. After It Works, Decide How to Store It and When to Stop
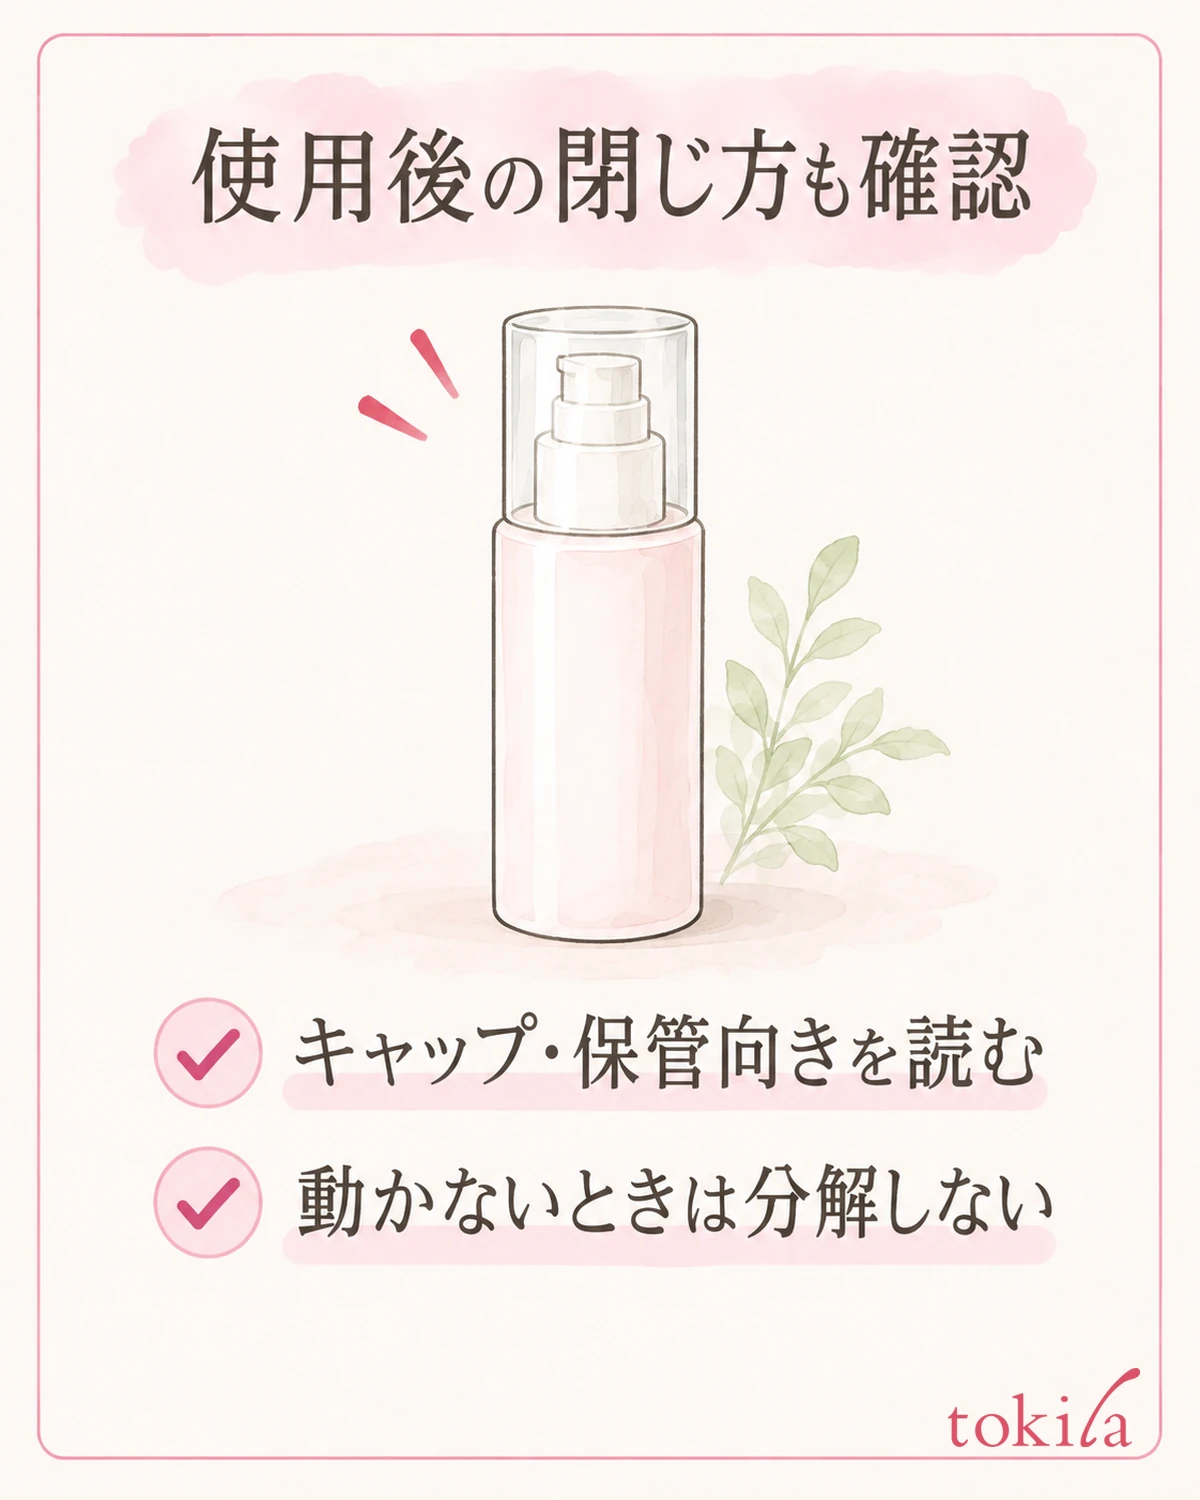
Once liquid comes out and you can start using it, also check how to close it after use. If the instructions say to put the dedicated cap back on, return it, and match the orientation and place for storage to the label. Reversing the motion used to open it won't always close it properly, and you don't necessarily have to press down and turn the head every time.
If liquid gets on the neck or the outside, follow the bottle's care instructions. Don't replace that with methods such as soaking the whole pump in water or pouring alcohol over it from the outside. If you can't tell whether a part may be removed for cleaning, first check how far you can handle it without removing anything.
If liquid still doesn't come out after the starting operation is complete, if the pressed head doesn't return, if a part comes off, or if there is leaking, don't aim to keep using it in that state. Keep the bottle and its outer box, and it is easier to explain the situation if you have organized the product name, whether it is your first use, which part doesn't move, and what you have already tried.
If you want to keep a record to confirm how to open it, keep the name on the body, the explanation on the outer box, and a photo that shows the stuck state. Once the contents have been moved to another container, it is hard to explain the original condition, so keeping the bottle as it was when you ran into trouble is also one option.
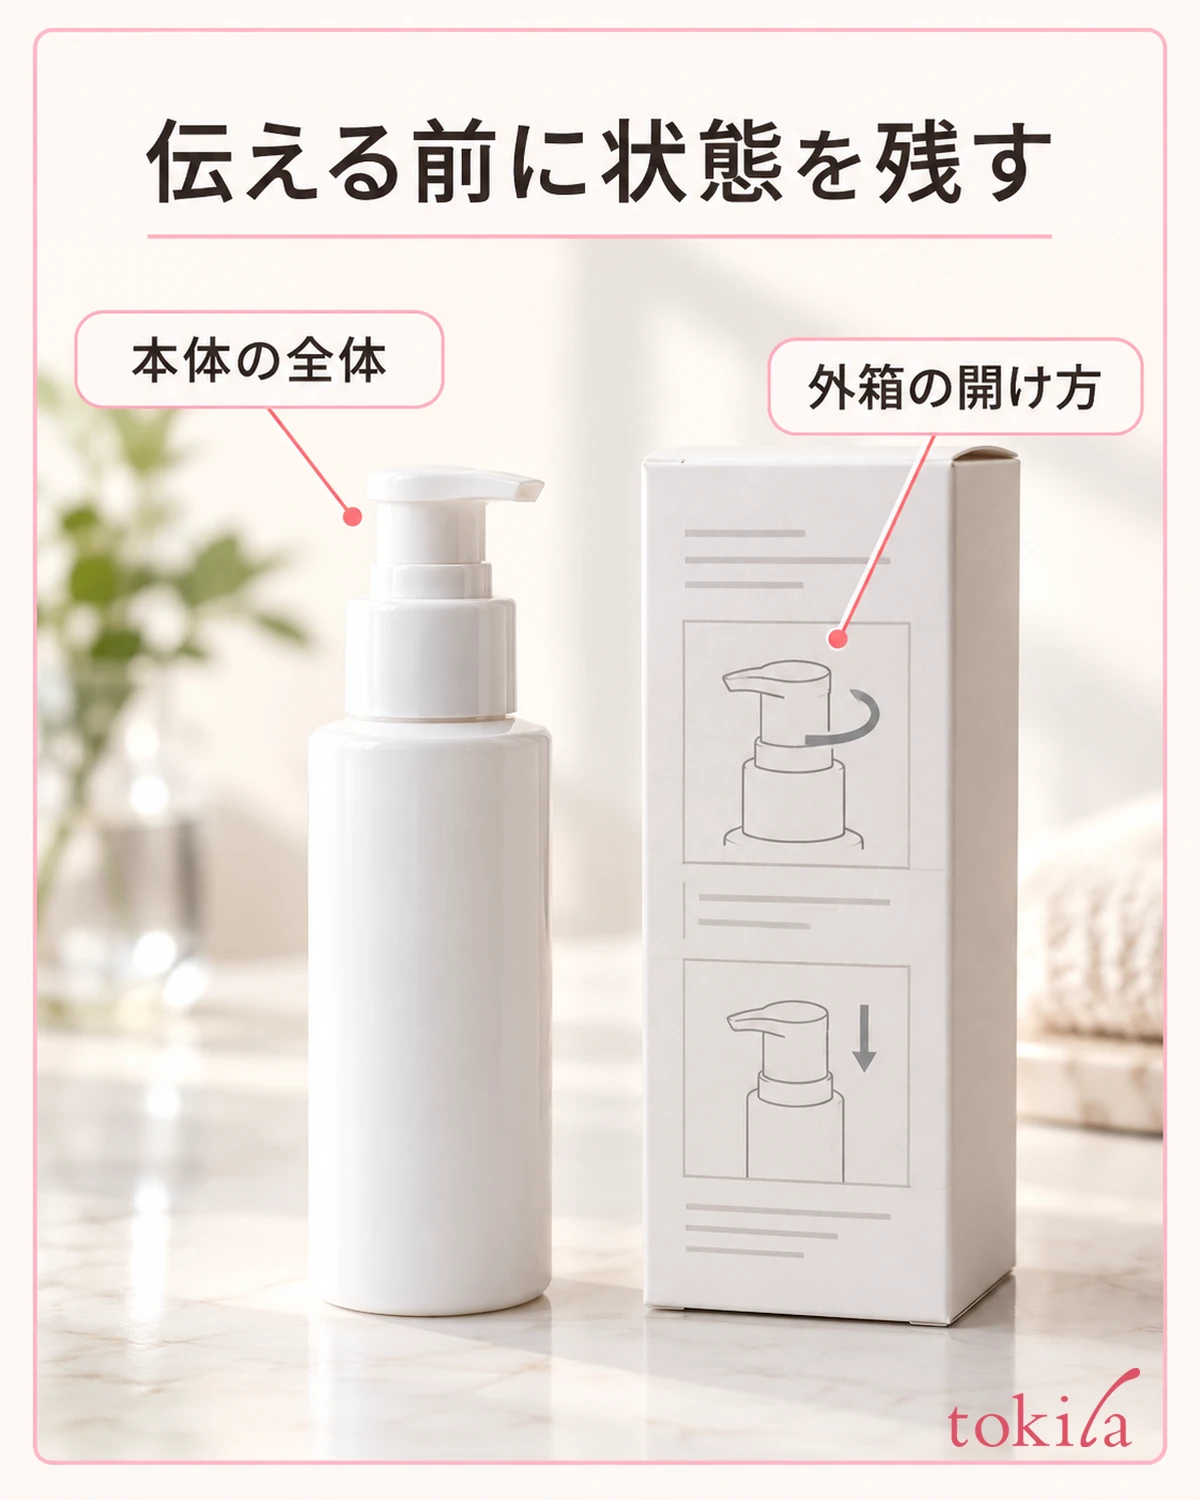
Limit your notes for next time to the operations that were actually needed for that bottle, such as "remove the outer cap" or "check the clip at the neck." If you switch to a different product, don't apply the same notes as they are; check the label against the actual bottle again. Treat difficulty dispensing before the bottle is used up as a different problem from the first-use lock.
If you dispense too much, don't put it back into the bottle to adjust the amount. If you are unsure how to handle it, you can see how to portion out and deal with the leftover after dispensing a lot of moisturizing cream. When it won't press, tell the parts apart before adding force; once it moves, dispense as the label says. Check this order one step at a time.



