You want to try a peel-off brow tint, but are unsure how far to apply the dark liquid or when to peel it off. First, distinguish the color of the freshly applied gel from the appearance of your brows after removal. Rather than rushing to wipe the dark liquid into a thin layer or touching it before it dries, check your product's instructions for the full sequence: apply, wait, and peel.
This guide covers the first use of a product applied as gel in a brow shape and peeled off as a dry film. It covers a peel-off gel, rather than liquid brow makeup left in place after drawing. The process also differs from a coat applied over brow makeup. This article does not measure wear time or color payoff; it organizes the preparation and decisions from before use through cleanup.
1. Check that it is a peel-off product and read the conditions for use
Start by reading the container together with its instructions to confirm whether the film must be peeled off after application. The name “tint” alone does not establish whether peeling is involved. Even with products that appear to belong to the same range, match the product name in your hand to its directions before starting.
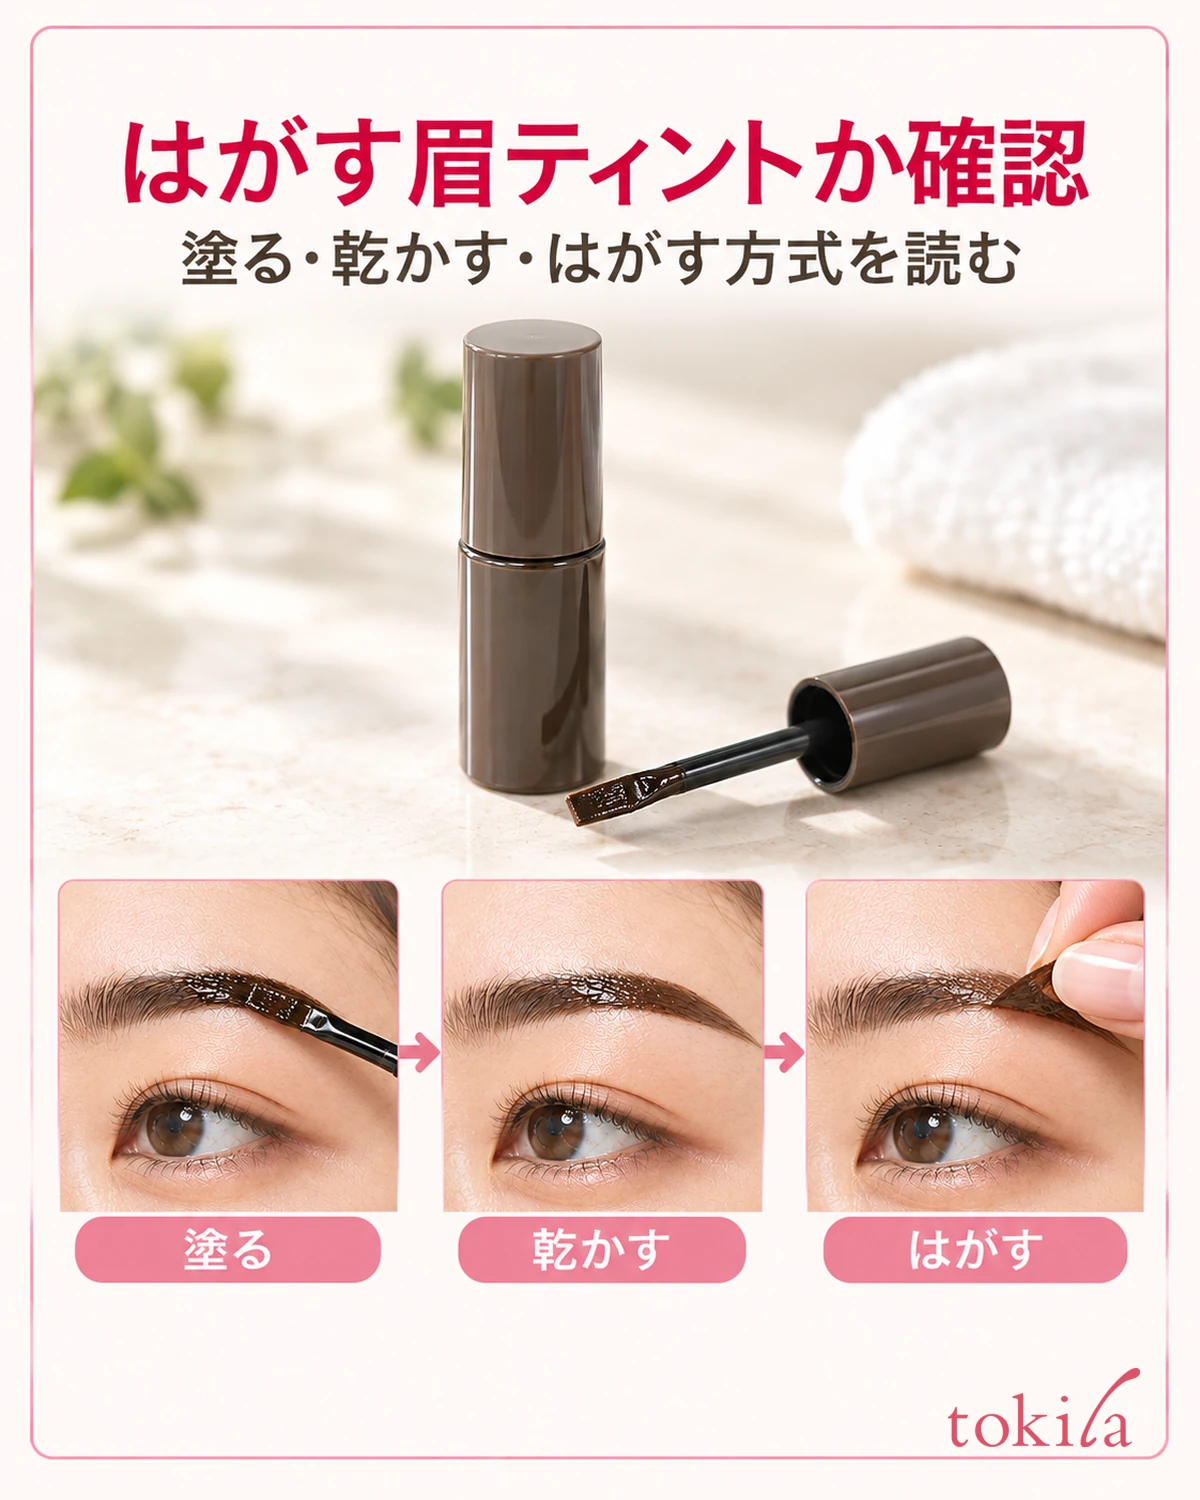
Next, read when to apply it and how to prepare oil and moisture around your brows. If the directions say to blot oil with tissue or a similar item, do so gently within those instructions. There is no need to rub until your skin feels tight or to use alcohol or nail polish remover on your own initiative.
If instructed to remove makeup remaining on your brows, complete your usual cleansing and the steps that follow before preparing. Do not simply transfer the application sequence for an eyebrow coat applied over drawn-on brows to a peel-off tint. Choose the order relative to earlier skincare from the instructions for that same product as well.
Read the skin-condition checks, other pre-use requirements, and areas where the product cannot be used. If there are cuts, swelling, or other abnormalities around your brows that day, do not proceed by covering them with tint. If a check for first-time use is specified, follow its conditions rather than adding the same improvised procedure to every product.
Look ahead beyond the waiting time to whether you should wash afterward and whether you can apply makeup immediately. Instead of opening it for the first time just before going out, choose a time when you can read the instructions and prepare. Match the directions to your schedule, rather than extending the waiting time based on how many days you want the color to remain.
Choose a shade using the product's shade names and finish information, as well as the darkness of the contents. Brow mascara that changes hair color, a pencil for drawing, and a peel-off product involve different steps. Before buying, distinguish whether you want to adjust hair color or add color to define your brow shape.
2. Decide on the shape first and apply evenly within the brow area
Face the mirror and check the inner ends, arches, tails, and the thickness you want to keep. Begin by deciding on the target area instead of substantially building up both brows as you apply. Keep hair away from your brows and leave room between your hand and the mirror to move the brush.
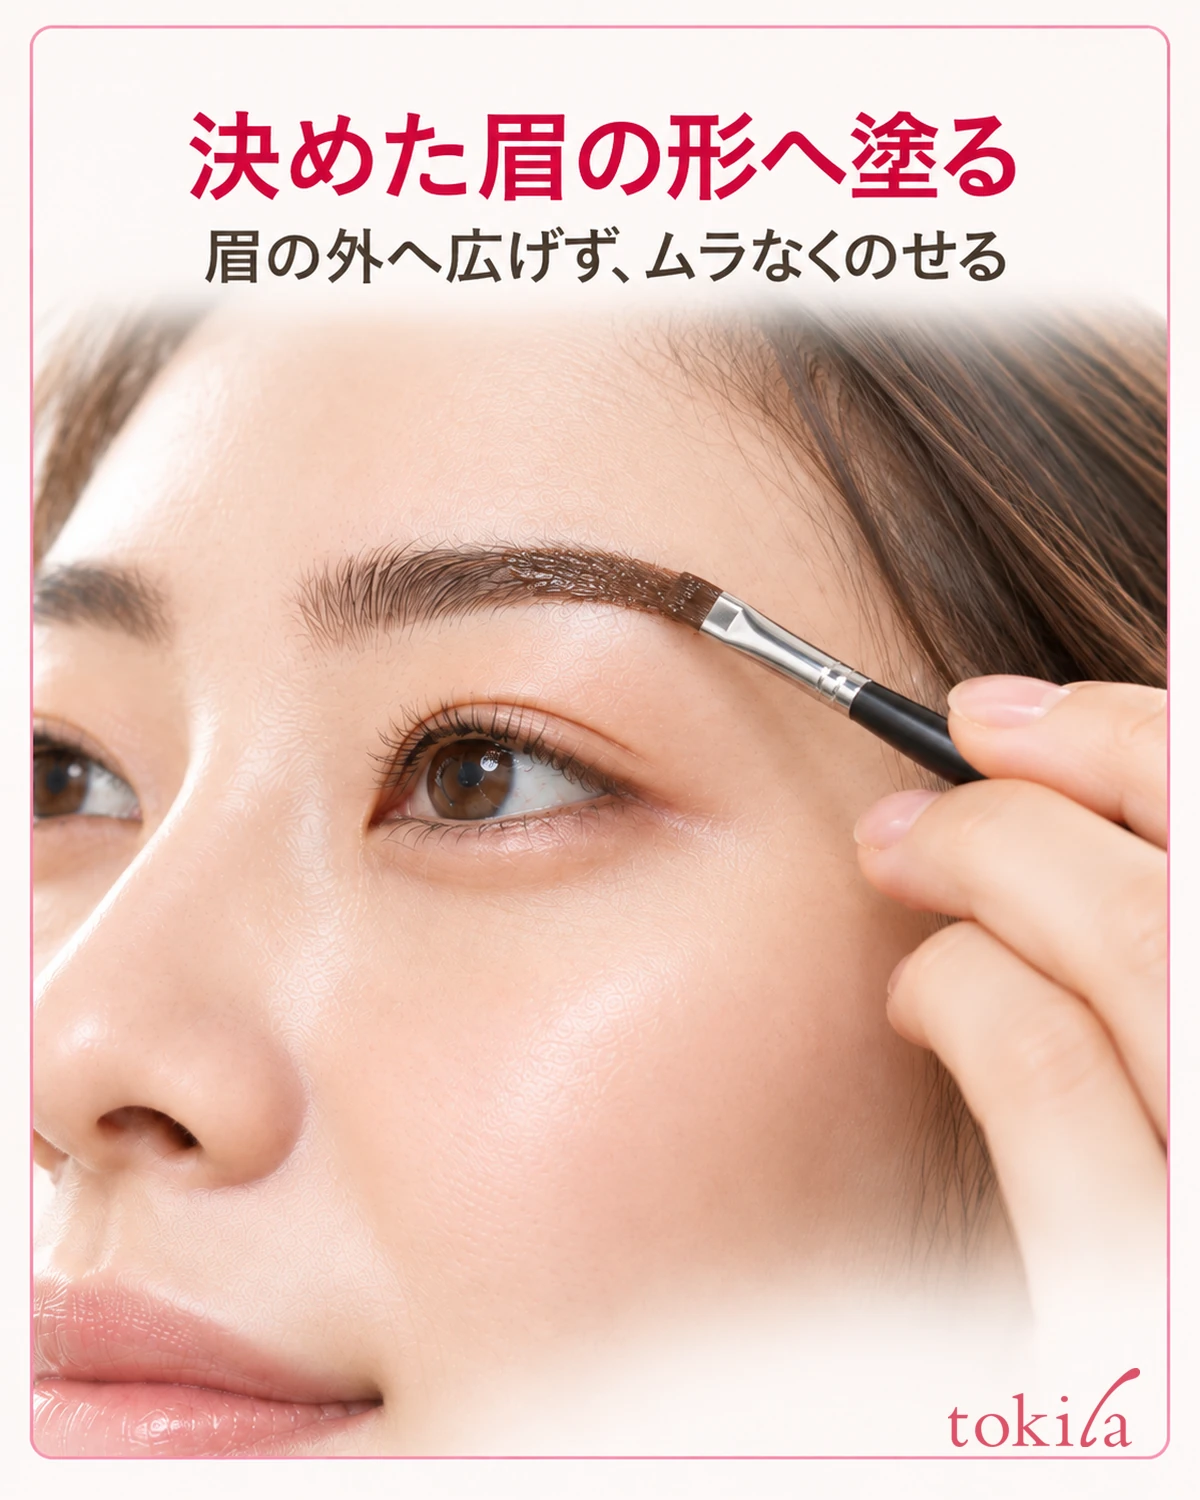
If you like the shape of your usual brow makeup, one option is to observe its width and tail positions before removing it. Check the tint's directions to see whether you may sketch with another pencil first. Do not make a sharply outlined border a mandatory step; prioritize the conditions under which your own product can be used.
Take gel with the tool specified, such as the included brush, and apply evenly in your chosen brow shape. Rather than leaving translucent patches because less seems better or piling it on until it drips in hopes of longer wear, check the stated application method and the area that forms a film. Keep it away from the eyelid and eye margins, and watch the tip on your skin when extending the tail.
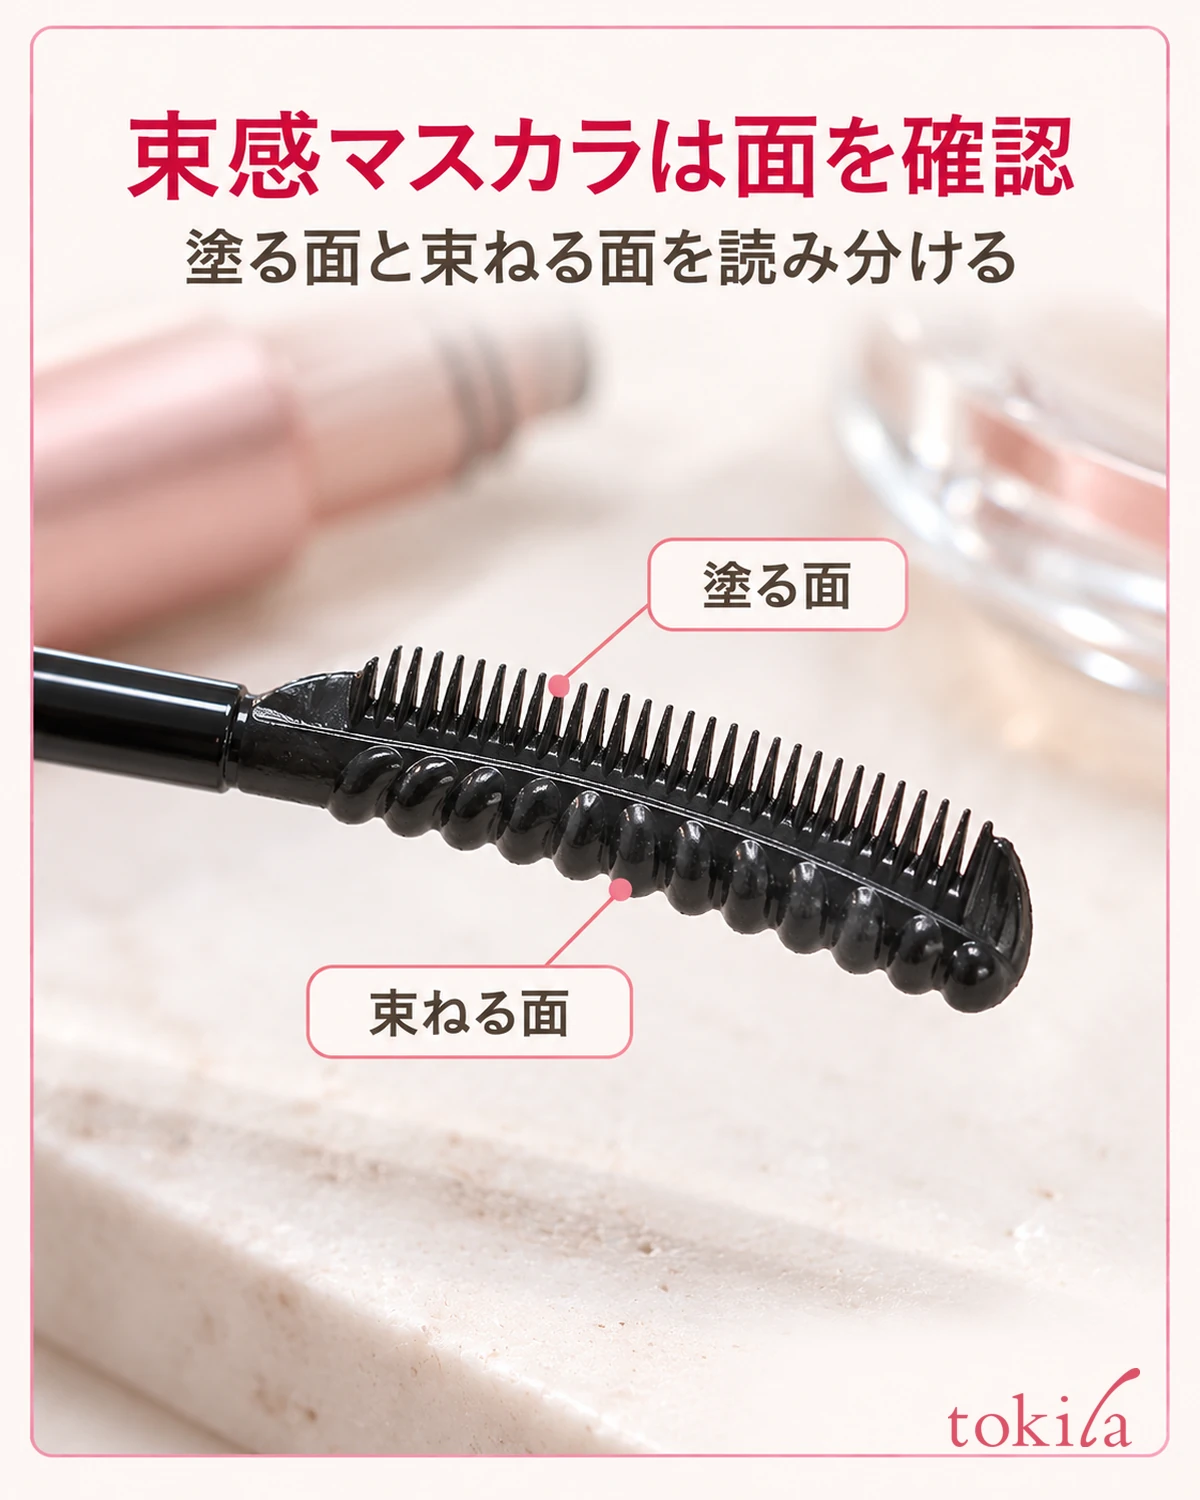
With a flat brush, you can see both the width and corners of the bristles. The supplementary photo is a close-up for examining that tip structure. Checking which way to face the broad side in your hand helps you understand the brush's orientation before moving it to the brow tail. The amount on the brush in the photo is not a universal guide for all tints.
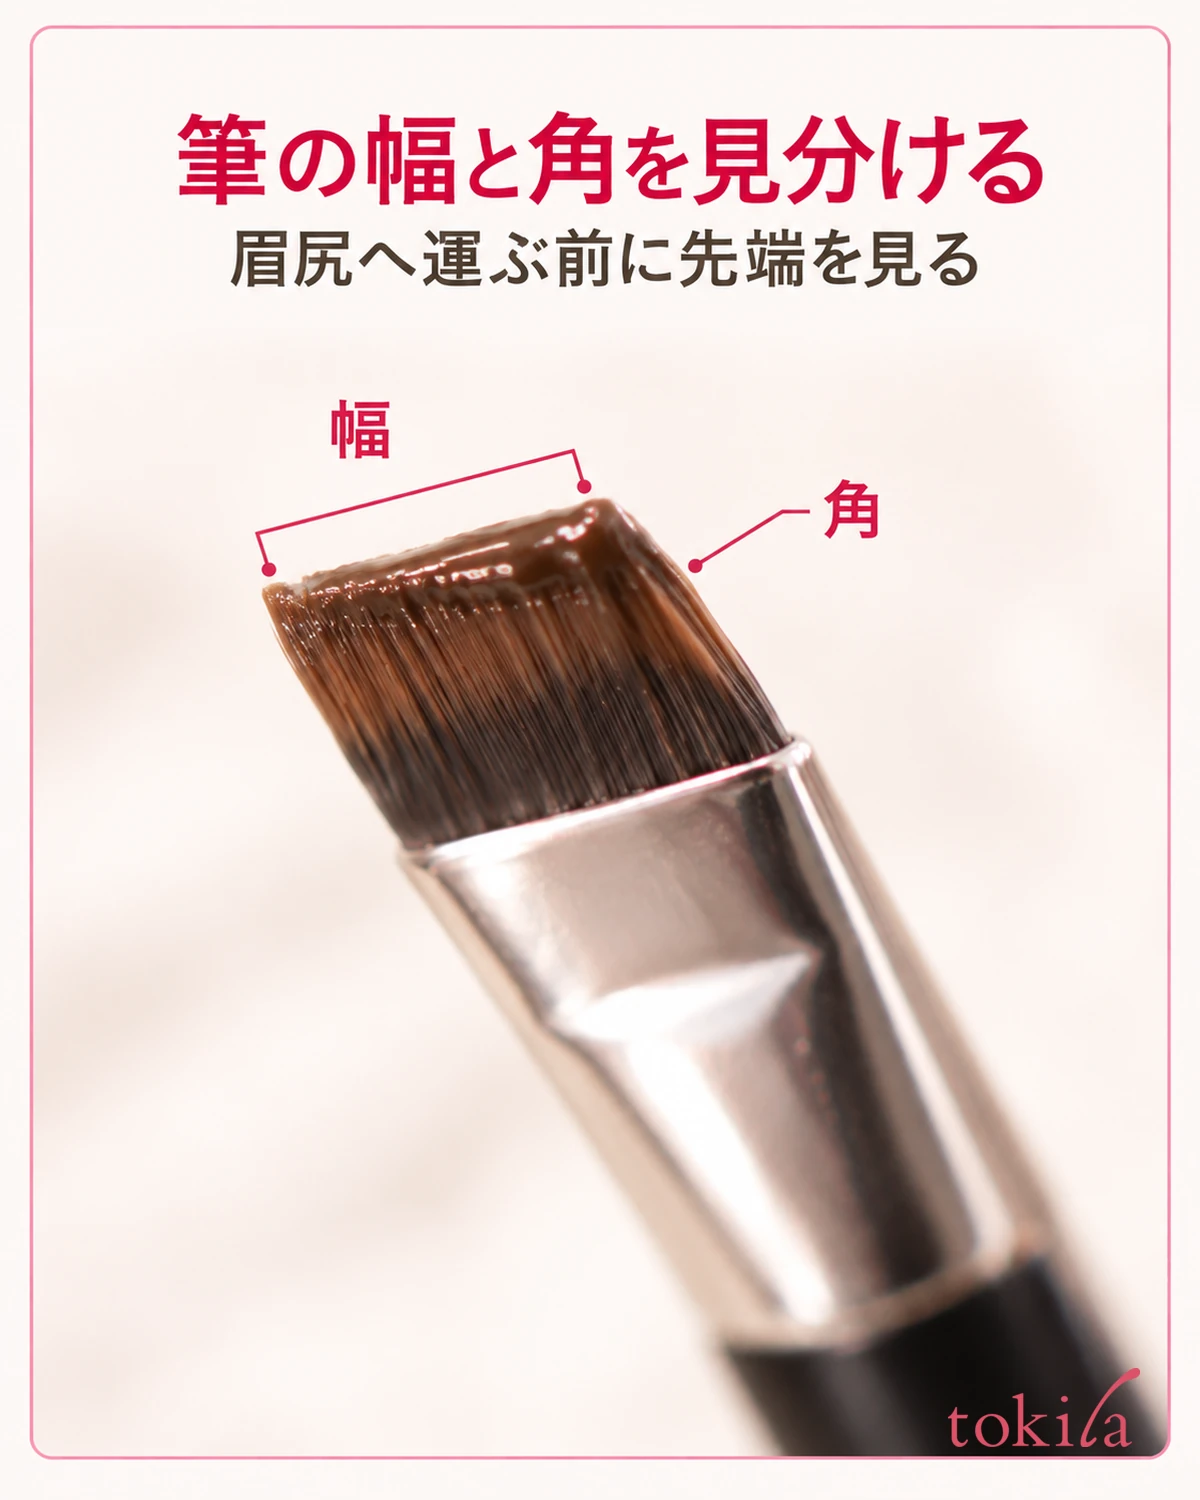
If the tip is hard to see, adjust the mirror and your grip before turning your face sharply. Work in short sections, rather than crushing the brow hairs or brush to change the width. Separating shape planning from even application also makes it easier to notice one side suddenly becoming thicker.
3. Leave it untouched while it dries and wait as directed
After application, check for gel outside the intended area. If the product's directions allow correction before drying with a damp cotton swab or similar tool, remove the unwanted gel that way. Do not assume the same liquid or tools suit every product, and avoid forcibly wiping over a wide area once drying has begun.
In the supplementary photo, look at the small amount of gel outside the tail and where the cotton swab tip touches. It is not an instruction to trace the entire brow with a swab. Check the correction area in the mirror before adjusting it as directed, taking care not to wipe inside the shape you want to keep.
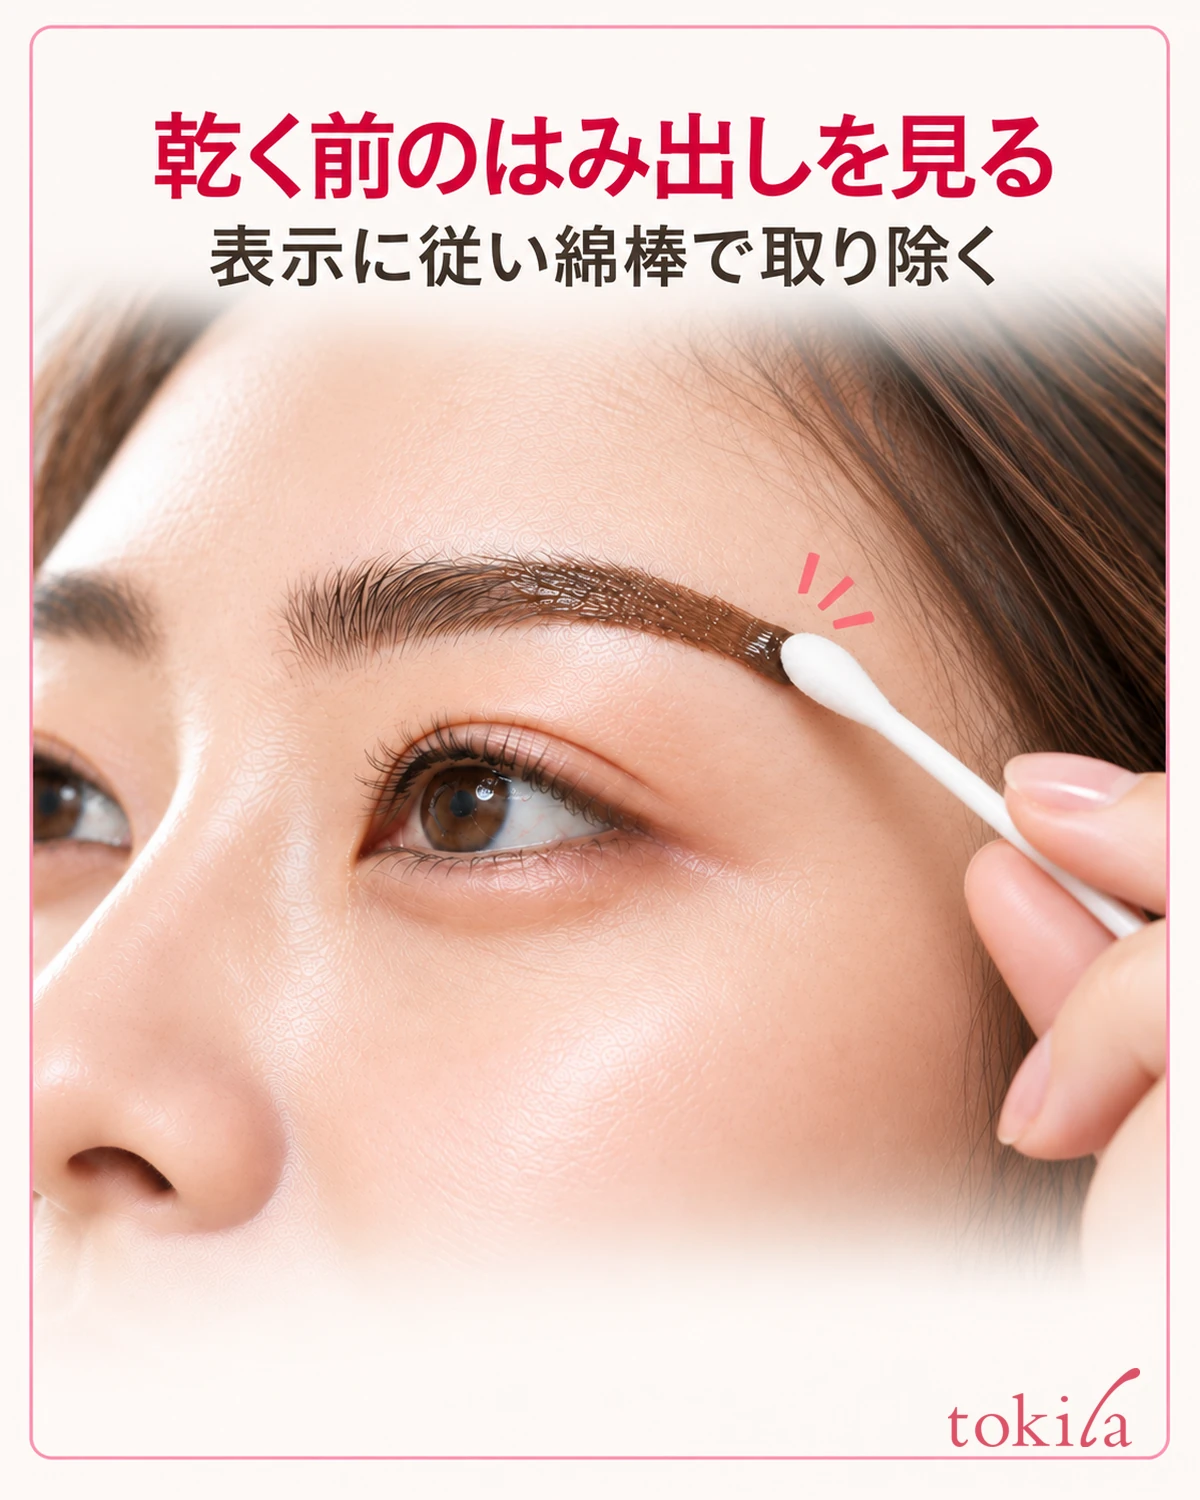
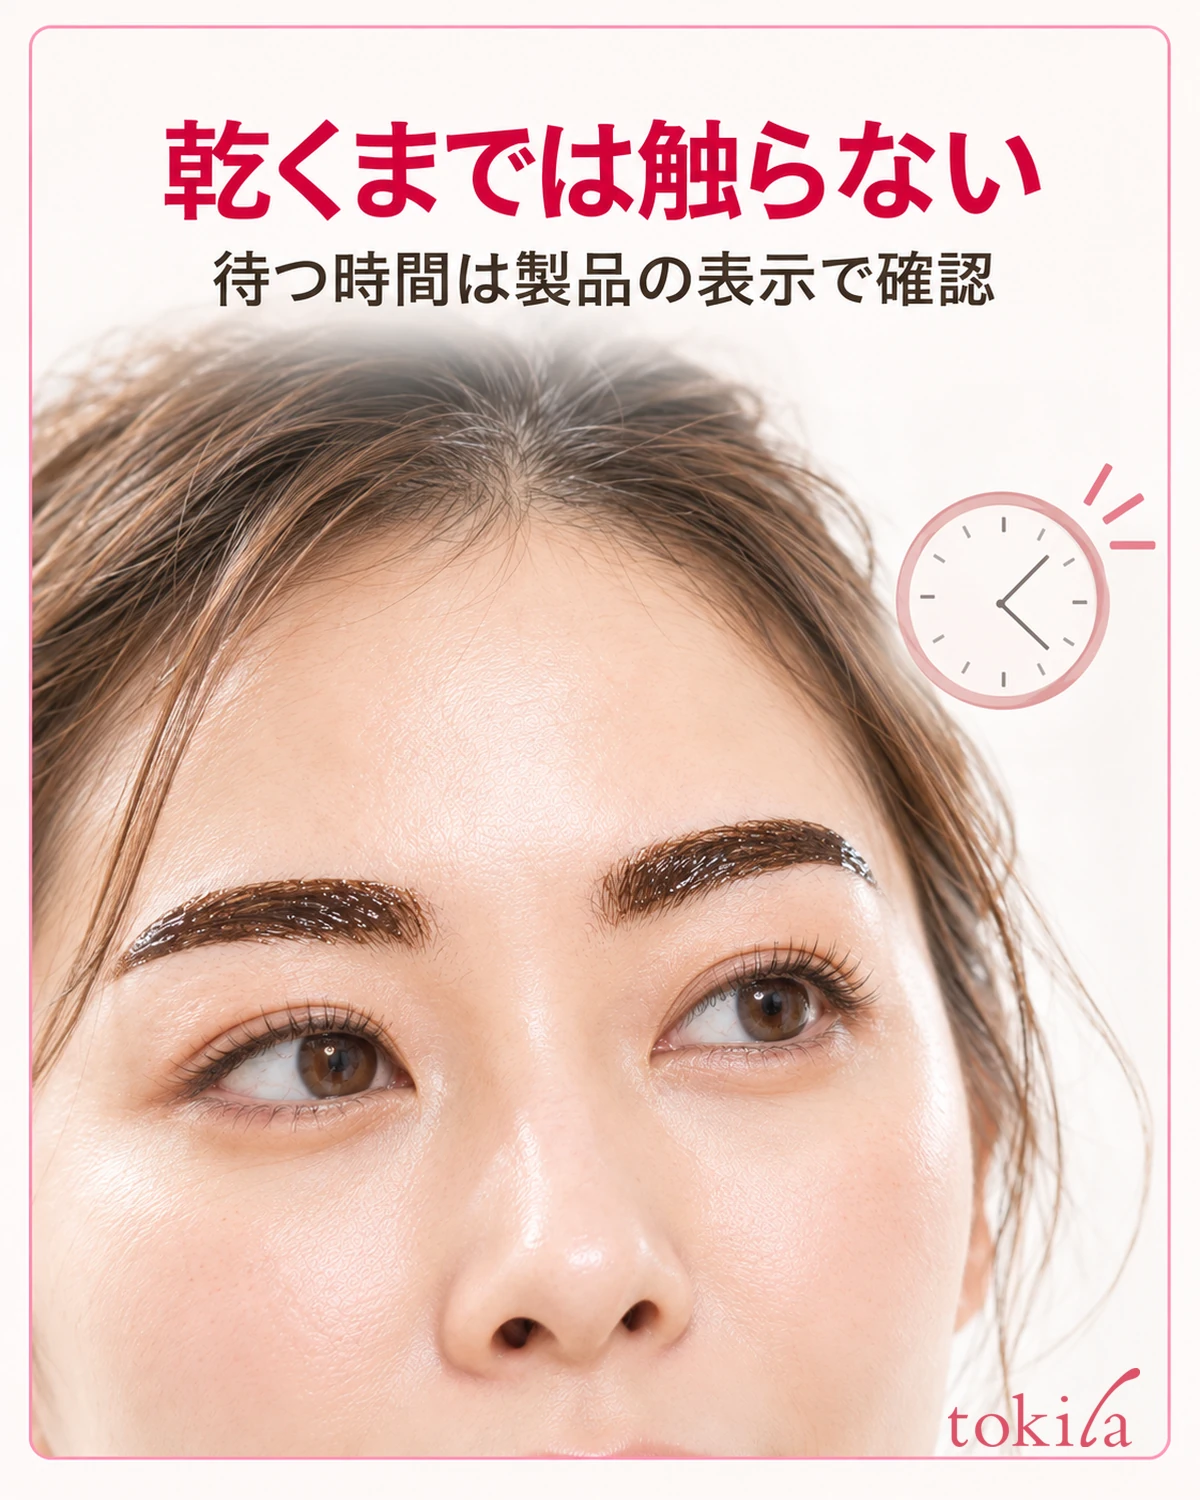
Once the shape is set, follow the stated drying and leave-on conditions. If the time for surface drying and the time left on for coloring are given separately, read them separately. Do not treat a few minutes specified for one product as the signal to peel another.
While waiting, do not repeatedly press the film with a finger to check dryness or rub your brows. Keep hair and clothing away, and put the container down with the cap closed. Also avoid adding unlisted steps to finish faster, such as applying hot air from a dryer or adding moisture to spread the gel.
Whether overnight use is permitted is also product-specific. Do not choose to leave it on overnight simply because you think of it as a nighttime product. Prioritize the labeled waiting conditions rather than assuming longer always gives your preferred color or that it lasts equally long on everyone.
If recording the wait, distinguish when you started applying from when you finished. Read in advance which brow to apply first and from which point the instructions count time, so you do not have to rely only on memory midway through. A clock helps you follow instructions; it is not evidence that leaving the product on longer is better.
4. Peel off the dry film using the specified method
Before peeling, check the required waiting time and drying conditions. If liquid still transfers to your finger, do not pinch and pull it as if it were a dry film. Even if appearance alone makes it hard to judge, return to the stated checking method instead of using more force to finish quickly.
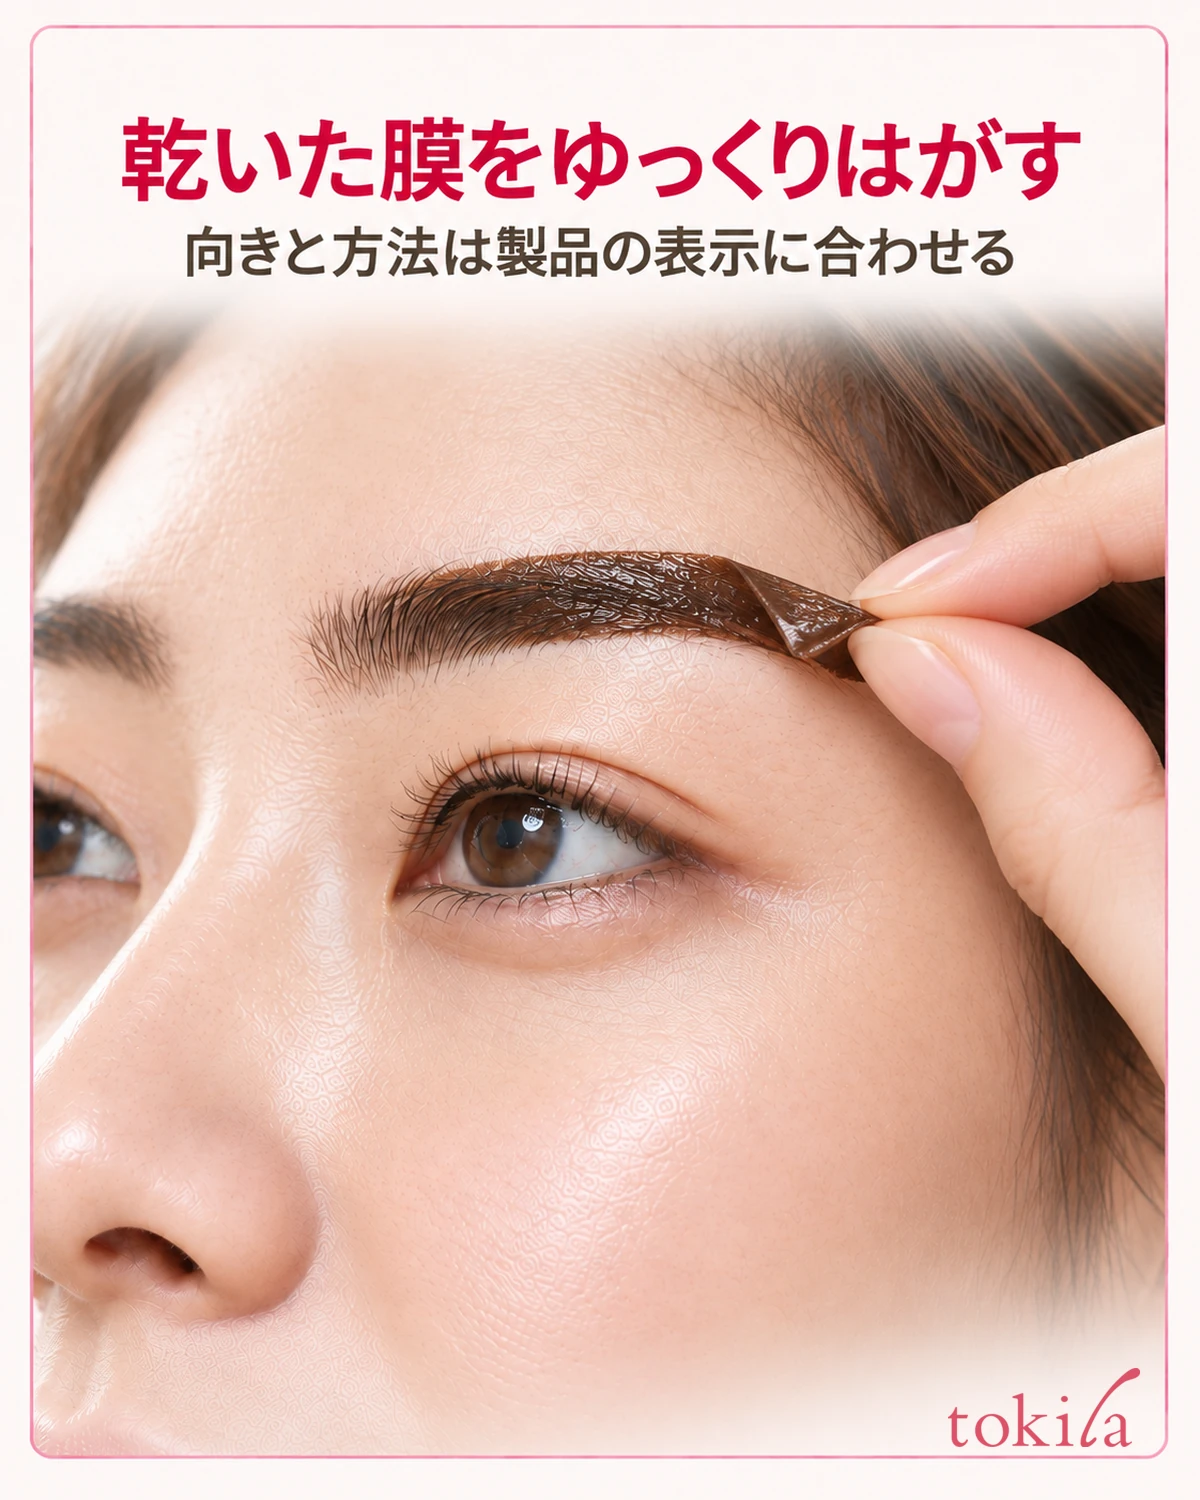
With clean hands, watch in the mirror and slowly peel from the specified edge. Follow any directions for where to start and which direction to move, rather than assuming all products start at the inner brow or all at the tail. Keep your nails off the skin and check that you are gripping the film.
If it catches, pulls strongly on the hair or skin, or hurts, do not switch to ripping it off in one quick movement. Pause and check that product's removal method. Avoid pulling out brow hairs or scraping with a hard tool to remove what remains.
Even if the film breaks into small pieces, do not repeatedly rub the same area with your nails. Follow your product's directions on whether water or cleanser can remove it and how to wash afterward. You do not need to repeatedly apply it to the same brow to compare how easily it peels.
If redness, itching, pain, irritation, or other abnormalities occur, stop use and follow the caution label. Consult a doctor if the problem persists. Repeatedly adjusting the amount or waiting time is not a way to troubleshoot on skin with abnormalities.
5. Check for residue and view the whole brow before the next care step
After peeling, check closely for film residue, then step back slightly to view the whole brow. Distinguish the darkness of the applied gel from the appearance after peeling. When comparing the two sides, keep your face angle and light consistent rather than judging darkness with only one side in shadow.

Read the instructions on when to wash, moisturize, and apply makeup next. Include any restrictions on products used immediately after peeling. Do not immediately layer every liquid just because it moisturizes, or routinely skip necessary washing to avoid losing color.
Even if the color or shape differs from what you expected, reapplying to the same area immediately is not a universal solution. Check the permitted interval before reuse and correction methods. If drawing on additional color is allowed, view the whole brow and consider only the areas needing it, rather than changing both the application area and color dramatically at once.
Care for the brush and container as instructed after use. Do not add water to the container without checking whether washing is allowed, or dilute hardened gel with another liquid. If liquid remains around the opening or on the stem, complete the specified cleaning before closing it securely.
For next time, briefly record the product used, the application area, the waiting conditions followed, and any movements you found difficult. Use this to prepare your brow shape, rather than treating one result as a guarantee of lasting days or color payoff. With a product whose use you understand, try building a routine you can comfortably maintain.